A giant California redwood tree located at the time of this photo near my former home in Forestville California. The gentlemen shown have done a marvelously clean bit of work up to this point using only a two-man saw and their axes. A serious job performed by serious men.
All that is gold does not glitter, Not all those who wander are lost; The old that is strong does not wither, Deep roots are not reached by the frost.
From the ashes a fire shall be woken, A light from the shadows shall spring; Renewed shall be blade that was broken, The crownless again shall be king.
J. R. R. Tolkien, The Fellowship of the Ring
Thank you for visiting our humble website, focused primarily on woodworking tools, especially those made by Japanese craftsmen for Japanese professional carpenters and woodworkers.
Consistent with the educational and contemplative nature of this website, in this article we will examine the nature of wood itself including the trees that produce it, two of their controversial by-products, and a couple of techniques for dealing with wood’s inherent weaknesses of which Gentle Reader may not be aware. It will a useful read without being boring, I swear by Grabthar’s Hammer!
The Miracle of Trees
As a matter of common sense, most people assume that trees, such as the California Redwood shown above which once grew very near my old house in Forestville, grow to such height, diameter and mass by extracting minerals from the ground at their roots. That huge mass must come from somewhere, right?
Of course trees do extract some minerals from the ground, along with many tons of water. But if it’s as simple as that, please consider why trees don’t create correspondingly huge depressions in the soil into which they are rooted, depleting minerals and biomass from the soil. Moreover, please consider how trees add biomass to the soil they’re rooted in instead of making a hole. You’ve heard of conservation of energy, no doubt, but is conservation of mass a thing?
Most people think plants and trees are made of minerals robbed from soil, but the fact about trees and plants so heavily hushed-up nowadays is that they are built almost entirely of carbon extracted directly and entirely from the atmosphere. Yes, from thin air.
Clearly, despite what the doom goblins wail on TV in order to shame and coerce actors and politicians for support, to solicit clicks, and to extort donations, carbon dioxide is a useful substance critical to all plant life; it’s not the poison the smelly, screeching environmentalist orcs claim it is. Consider what would happen to this planet and all creatures who live on it if carbon dioxide went away. Or if oxygen went away.
If you aren’t clear on this point, please spend some time and effort to learn, or risk being an environment cuck. Ah! Could it be there’s no money to be made speaking the simple truth rather than inciting panic?
A climate scientist fleecing the ignorant (and gullible) masses. I wonder if he has any of my favorite Idiotbegone pills in his wagon?
Of course, plants do extract a few minerals from the soil along with great amounts of water. Powered only by sunlight, plants and trees remove carbon from the air and use it to create cellulose, a material very similar to sugar, BTW, and which many insects and animals, but not humans, can digest. Think grass and other plant matter.
Show me a single “scientist” that can replicate this miracle in a lab and I will bow down and kiss his bulging bunions. Good luck in your search for that miracle worker, but in the meantime, I won’t be needing any scientific kneepads.
Plants need free carbon dioxide in the atmosphere to grow, and animals, including me and thee, need both plants and oxygen. Indeed the greater the concentration of CO2 available, the more plants grow, the more CO2 they remove from the atmosphere, and the more oxygen they produce. Indeed, every molecule of oxygen surrounding planet earth was produced by a plant. Hmm, sounds almost like an endless, natural cycle, one that animals and humans rely on unconditionally. Imagine that…
Plants are marvelous sunlight-powered miracles. And don’t forget, except for the salt, every crumb of every ingredient in your peanut butter, humus and boiled mutton sandwich on rye originated with plants produced using sunlight, carbon, and water.
The Importance of Wood
Wood is a wonderful material, used by humankind since well before the archaeological record to produce heat, light, shelter, clothing, tools, weapons, food and water. Even today it remains the supreme catalyst.
Although computers, concrete and carbon fiber get all the attention nowadays, and those who evaluate the complicated “environmental” impacts of materials on this world carefully ignore it, there would simply be no human civilization without wood.
There are those who disagree with this statement, mostly highly edumacated individuals affiliated with supposedly serious organizations, many of whom are short-sighted, financially-conflicted souls with short attention spans that never exceed the news cycle, and who, despite clear evidence to the contrary, choose to equate the use of wood with the destruction and/or pollution of the natural environment for fun and profit.
Of course, they believe, or at least profess, that the carbon released by the combustion and decomposition of wood is wholly poisonous. These nitwit geniuses instead promote the supposedly “ecological” use of steel and concrete and petroleum products instead, all materials that require huge amounts of energy to fabricate, transport and recycle, all while releasing millions of tons of truly (versus imagined) poisonous substances into the natural environment annually. Alas, the medicinal cure for idiocy your humble servant strongly advocates is apparently not yet widely available.
Wood contains a tremendous amount of energy, as Gentle Reader has observed in wood-fueled fires. The immutable laws of thermodynamics state, in essence, that all heat comes at a cost. Oil costs money to pump, transport and refine as well as special machinery to use it, but the heat given off by wood is simply the conversion of sunlight gathered by the plant while it was alive back into heat and light. A complete and pure circle.
Sure, the combustion and decomposition of wood releases carbon back into the ground and atmosphere, but every molecule of carbon released by wood was originally extracted directly from the atmosphere by many, many plants over many many cycles. Therefore, plants remove carbon from the atmosphere, and only release that carbon when they return to the big lumberyard in the sky. This is true “net zero,” without the production of an ounce of pollution, unlike steel, concrete, oil, coal and every other fuel and material used by mankind without exception.
I’m not suggesting the use of petroleum and coal and windpower, within limits, is irresponsible, but if the environment is important to you, as it should be, then using organic materials and fuels instead of oil, coal, steel, concrete and wind turbines should be a high priority.
Furniture Pests
Our Beloved Customers use our tools to make elegant, useful stuff out of wood. This wood is formed of cellulose, the most abundant organic compound on Earth, one very similar to but fundamentally different from the sugars we consume for energy. Many animals, including herbivores such as elephants, cows, rabbits and termites have the built-in ability to convert the cellulose in the plant matter they eat into energy by a process we cannot replicate. Humans can’t do this, nor have we figured out a way to accomplish this apparent magic without the intervention of animals, insects or fungus. Once again, puffed-up prideful science can’t do what every carpenter ant and every mushroom obediently does without even be asked to.
A part of the “carbon cycle” relies on such animals, bugs and micro-organisms. If left to their own devices bugs and fungus quickly recycle wooden objects, including houses, furniture and parts of our tools made from wood. You may not have noticed these pesky critters, but you’ve probably seen the holes they chew and the wood dust they excrete. Check an old tool handle, handplane body, or antique table leg for evidence of death watch beetles of powderpost beetles, two common varieties of bugs commonly called “furniture beetles.”
I don’t know about you, but I hate the very idea of icky bugs eating my furniture, tools and handiwork. But what to do?
There are plenty of chemicals manufactured to make wood taste yucky to bugs and fungus, but most of those are toxic and/or carcinogenic so you wouldn’t want to leave them in contact with your skin or lungs for any period of time. But what’s a safe way to keep bugs and fungus from chewing on your workbench, furniture, tool handles or plane bodies? And what can be done once some of them have taken up residence therein?
Termites are are problem bugs, too of course, but most of them prefer a higher moisture content in the wood they dine on than is typically found in houses and tools. That said, I’ve seen subterranean termites and Formosa termites in Guam swarm and eat interior furniture and wooden doors down to hollowed-out toilet paper tubes in front of my eyes. Scary stuff. This is precisely why people don’t build much of anything from wood on that island but spend lots of money on chemicals to prevent termites from turning cellulose into bug crap.
For example, while living on Guam, I had a neighbor in the US Airforce stationed there who’d imported some beautiful Amish furniture made of American Cherry wood from his home in Pennsylvania. Unfortunately, there was a crack in the concrete slab-on-grade floor underneath his beautiful dining table with a corresponding gap in the ceramic tile on top that allowed the local termites to access a single cabriole leg of that table unseen. The table collapsed into a pile of sticks and red termite crap after a year. I kid thee not. Vicious, voracious, vile bugs.
If Gentle Reader has ever frequented flea markets and antique shops, or even perused photos of antiques, you will have seen the many holes left by furniture beetles. I own several old hammers, axes and planes with their wooden components riddled with bugholes. But how can you prevent bugs from infesting your valuable wooden objects in the first place without using highly-toxic, corrosive, and expensive chemicals containing lead, chromium and/or arsenic? Easy peezy. Borax is the answer.
A Non-toxic and Inexpensive Method of Wood Preservation
There are any number of effective chemicals available for wood preservation against insects and fungus. Borax is what I recommend based on direct workplace experience. Its a naturally-occurring white powder sold everywhere as a laundry detergent additive. But it’s not just for washing Gentle Reader’s socks, oh no. It’s essential in many industrial processes, including blacksmithing, where it’s used as a flux when forge-welding iron and steel. Japanese blacksmiths use it too.
The vast majority of borax is mined in California where there are huge deposits in ancient lake beds. You may have heard of the famous “Twenty Mule Team” wagon trains once used to transport borax from Death Valley.
For this application you don’t need wagons or mules, just water and borax powder, but NOT Borax-brand washing detergent. Both are sold as laundry additives in the supermarket and big-box stores, so don’t confuse them.
2 mule team wagonA borax mine in Boron, California USA
To prepare this wood preservative and insecticide, dissolve borax powder in warm water to make a 7-10% mixture. Then spray it onto wooden objects at-risk, or better yet, soak the wooden objects in this mixture and let dry. Be careful not to spray the cat or the carpet.
Borax messes with the internal functions of bugs and fungus, but it’s harmless to humans and domestic animals to handle, so long as you don’t soak in it and ingest it. Indeed borax and its variants are the only sure way to protect wood against bugs and rot without putting human life and health at risk. No VOC risk. No carcinogens. It won’t pass through skin. No environmental contamination risk (that’s important). It won’t corrode metal fasteners. It has no odor. And it’s cheap. These are all important reasons for woodworkers to use borax.
There are only two downsides to using borax. First, since it’s water soluble, you need to keep wood treated with borax from repeated wetting or the borax will leach out. Second, you need to keep wood treated with borax out of direct contact with soil because moisture in soil will, once again, leach borax out of wood.
I add borax to the water I soak my sharpening stones in to prevent crud from growing. It works for years at a stretch, and doesn’t harm any variety of sharpening stone, synthetic or natural, nor does contact with dissolved borax harm me, or even irritate my skin, so long as I don’t drink it (see the Wood Finisher’s Pledge above). That said, I don’t bathe in it, and I understand that some people have a reaction to it, so don’t go crazy.
Borax also makes the water alkaline preventing rust. I add it to the water I use to clean my blades when sharpening and for cleaning my muzzleloading rifles. Entirely historically correct too.
But before using this mixture for any purpose, please recite the Wood Finisher’s Pledge along with me now: “I will not drink wood preservatives, use CCA impregnated toothpicks, nor wash my face with oven cleaner.”
A Quick, and Cheap But Slightly Toxic Way to Eliminate Bugs from Wood
Borax will kill bugs already in the wood given time, but is there a quicker way to get rid of those voracious beasties?
Here’s a technique to deal with wood-eating bug infestations I learned from woodworkers in Japan. I’m sure its not unique, but I’ve never heard of it being used elsewhere.
Before employ this methodology, please recite the Wood Finisher’s Pledge again, but with more feeling this time.
Simply find the entrance/exit holes bugs chew into and out of an infested wooden object and, using a syringe or pipette, squirt or drip a little gasoline into each of them. You might even soak the wood overall in a bit of gasoline.
But, be warned, because Murphy rules the universe and truly wants to hurt you and yours, so be sure you do this outdoors well away from anything flammable. Also be sure to put out your stogey, give your Puffco Cupsy bong a rest, and dial down your “electrifying personality” because “hair on fire” is not simply a real risk around uncontained gasoline, it’s garan-frikin-teed.
After judiciouly and carefully applying this small amount of gasoline, you can wrap the object in plastic, or place it into some kind of airtight container, to allow the gasoline vapors to permeate the wood. Do this outdoors, once again, and refrain from smoking. The gasoline fumes will promptly send the bugs, their eggs, and all their chilluns to the big lumberyard in the sky. In nomine Patris et Filii et Spiritus Sancti, Amen.
After a few days, unwrap/unseal the wooden object and place it outdoors in the sunlight to remove the smell of gasoline.
This technique works perfectly, every time, and costs almost nothing.
The chemical companies don’t make a penny on either of the highly-effective processes described herein which is why you’ve never heard of them before.
Until we meet again and all your bugs have been purged, I have the singular honor to remain,
YMHOS
I can’t believe those damned bugs ate my favorite bow! If only I’d followed Stan’s advice and treated it with that white powder…
If you have questions or would like to learn more about our tools, please click the “Pricelist” link here or at the top of the page and use the “Contact Us” form located immediately below. You can also reach us at Covingtonandsons@gmail.com
Please share your insights and comments with everyone in the form located further below labeled “Leave a Reply.” We aren’t evil Google, fascist facebook, or the Congressional IT department of the Democrat Party and so won’t sell, share, or profitably “misplace” your information. If I lie may bugs eat all my tool handles, and food taste like charcoal.
Preventive Maintenance: Don’t start today by doing yesterday’s work.
– Deniece Schofield
High-quality handplanes are not cheap, and when you have a good one in good fettle, the time and effort it takes to maintain it ready to rock and roll immediately is never wasted. Indeed, it’s a solid investment that pays higher dividends than General Electric stock ever will, I promise you, on condition that the maintenance is done right, and your handplanes are stored and transported properly. On this subject as in many others, knowledge is power, so let’s get some.
Maintenance
There are several items to consider when maintaining your handplane. We’ve discussed how to set-up and fettle a Japanese hiraganna handplane in previous articles, all listed at the end of this article. In this article we’ll examine how to maintain it while we’re using it, and how to store it when we aren’t.
Sharpening
A dull plane may make excellent firewood, but it’s as useful as a screen door in a submarine, so the first step in keeping it useful is sharpening it. The true value of the high-quality-forged blade in your plane is that it’s easily and quickly made extremely sharp, and it will retain that sharp edge a long time, reducing the time, trouble and cost of maintaining it. Does your time have value?
For detailed directions about sharpening, please read the series of 30 articles linked at the end of this article. They will explain the what and why of the blade of a high-quality plane. And of course, there are supernatural aspects worthy of review (ツ).
Maintaining and Storing a Handplane While In-use
The following is a list of maintenance items you should consider performing and the specific conditions under which I think they’re applicable. These are suggestions not rules, of course, but unlike most of the woodworking gurus on the internet, I didn’t steal them from noobtube, nor suggest them because they’re good clickbait, or fish them out of my fundament because they smell like lilacs, or because I think they’ll sell tools or books to the gullible. They are simple and they work, but it’s important to understand the applicable conditions. Each item assumes that the blade is sharp, but if isn’t, sharpening it should be first priority.
Condition 1 – Overnight Storage: The plane is working fine, its blade is still sharp, and you intend to use the plane in the same place for the same jobs tomorrow, but just need to set aside on your workbench for a few hours, perhaps overnight. You may want to take the following actions:
Don’t remove the blade and chipbreaker, but simply wipe the body with a clean, dry rag and clear dust and shavings out of the blade opening with a clean, dry brush. Purpose: To prevent wood resin from accumulating and gumming things up (depends on the wood), and to prevent corrosion (yes, sawdust can cause rust).
Oil the cutting edge at the sole using your trusty, ever-faithful oilpot.
Condition 2 – Short-term Relocation & Storage: The plane is working fine and the blade is sharp, but you need to relocate it to another location for a short time. In this case, you may want to take the following actions.
Safe the blade by retracting it into the body using your wood, plastic or leather mallet so it doesn’t become damaged, or damage other tools while lounging in your tool box or tool bag during the relocation.
Remove dust and shavings from the plane, especially the mouth opening, because they will make the toolbox or tool bag dirty.
Condition 3 – Short-term Storage: The plane is working fine, the blade is sharp but we need to store it out of the way short-term.
Clean the blade and chipbreaker of sawdust and wood resin. Resin may have accumulated on the blade and chipbreaker which, if not removed in a timely manner, can harden over time increasing friction. Use you oilpot and a clean rag and/or a small stick of wood to scrape-off built-up resin resin. If that doesn’t work, use acetone or lacquer thinner.
Clean dust and shavings from blade opening and mouth with brush/rag.
Wipe down the plane’s body with a clean rag.
If the body is dirty with oil, sharpening stone mud or fingerprints, clean it all over with your oilpot and wipe. If that doesn’t make it clean, dampen a clean rag along with drop or two of dishwashing liquid (neutral PH), then wring it out as hard as you can. Scrub the body clean with this nearly-dry rag. Caution: We need the soap and water to remove oil and dirt, but making the body wet may cause it too warp. When you’re done, make absolutely sure the body is perfectly dry.
Oil the blade and chipbreaker.
Reassemble the plane but leave the blade’s cutting edge retracted up inside the mouth opening. How tight should you fit the blade/chipbreaker? Tight enough to firmly retain blade and chipbreaker so they won’t rattle out, but no more.
Condition 4: Long-term Storage:
Remove the blade and its chipbreaker entirely.
Clean the blade and chipbreaker removing sawdust and all accumulated wood resin as described above.
Apply a protective coating of a paraffin wax-based corrosion prevention product such as CRC 3-36. For longer storage under more difficult conditions, CRC SP-350 or CRC SP-400 are even better.
After the carrier has evaporated to some degree, wrap the blade and chipbreaker in aluminum foil and store them together with the wooden body so they won’t become separated. Don’t assemble the parts!
Clean the wooden body removing all dust, shavings, dirt and fingerprints.
Place a mothball in the body’s mouth and wrap the body, along with the blade and chipbreaker, in newspaper, or place it in a plane bag. This will be good for a number of years in any condition except underwater.
Plane Storage on the Workbench, Atedai or Planing Beam
There is some disagreement about how to set down one’s handplanes when they aren’t being used. I won’t consider all the possible options, but will simply present the one that I was taught and use.
The old boys who trained me insisted that it is improper set down a plane with its sole touching the workbench, atedai, tatami mat, carpet or ground for any length of time, but one must instead rest it on its side. After many years of using handplanes, I feel this is a good habit to develop for both Japanese and Western handplanes.
Since I’m right handed, this results in the plane resting on its right side with the cutting edge oriented towards towards the left side as shown in the photo below. This position takes up less space on the workbench, and protects the cutting edge and sole of my plane from contacting anything but air.
80mm and 60mm hiragann handplanes at rest but just wiggling in anticipation of yummy shavings.Resting on its side, even a larger plane like this 80mm hiraganna plane can be picked up and put to use quickly and deftly.
This position is also makes it quick and easy to pick the plane up and get it back into battery without fumbling.
Is it rude to rest the plane sole-down, or will it damage it? Probably not, but seeing a handplane with it’s cutting edge oriented up or down instead of to the side bothers me like a bug crawling on my neck. OCD?
I also rest my planes on their sides when placing them in boxes, toolboxes or toolbags even for long-term storage.
A Japanese carpenter back in the day with his hair done up in the traditional”chonmage” haircut, wearing his employer’s “happi” jacket, and carrying his open-topped wooden toolbox on this shoulder
One can place a plane on any stable surface it’s willing to sit on, and where it won’t be kicked or fall from, even a chair, bench, board, carpet, floor tile, or other flooring material, but never directly on gritty surfaces such as bricks, paving, concrete, or heaven forfend, the naked ground. You see, carelessly allowing hard grit to become embedded in the sole of one’s wooden-bodied handplane is an act that will surely invite harsh judgement in the Great Lumberyard in the Sky.
Place the plane resting mouth-down only when the plane is actively being used or it’s wrapped in cloth or newspaper.
Do all Japanese craftsmen follow this rule? Heck no. Why do I recommend these habits? Well, first of all, because this habit shows proper respect to my tools, to the craftsmen that made my tools, and to those who taught me how to use them. Second, because these habits help my tools last longer with less damage. Thirdly, because it helps to keep my workplace better organized. And don’t forget judgement day!
The Surgeon or The Village Surgeon by Jan Sanders van Hemessen (c.1550-1555 oil on panel). The village sawbones is shown applying a medical cure for foolishness by removing the “stone of idiocy.” If anyone knows who Meister van Hessen used for a model, please let me know. In our time this is an operation that could possibly change the lives of many in the media and politics, as well as their credulous audience and constituency of course, for the better.
There has been much discussion recently about the potential impacts of President Trump’s hasty retaliatory tariffs on international trade in general and various economies around the world in particular.
Our little venture here at C&S Tools relies entirely on exports, so of course some Beloved Customers have expressed concern regarding the effects of tariffs on our prices moving forward. At this point in time all I can really do is twirl my elegant white mustache and sagely mutter “Iduno,” but to keep things interesting, in this article I will be so bold as to share some hard-won insight on the subject that doubtless will be worth every penny it costs Gentle Reader.
The Quiver of Diplomacy
Tariffs and import taxes are ancient tools for profit and coercion, veritable arrows in the quiver of diplomacy, so Gentle Reader would be wise to understand that, while Trump may be erratic and unpredictable, he’s not the first nor will he be the last leader of a nation to string his bow and loose these darts.
But it’s also important to realize that in every case where tariffs have been manipulated for fun and profit, there have always been those who ran around screaming “the sky is falling!!”
Case in point, Japan’s economy relies heavily on exports of its products overseas, especially cars (21% of total exports), machinery (18% of total exports), and electronic equipment (14% of total exports). At one time, each of these industries was heavily subsidized by the Japanese government resulting in targeted putative tariffs being pushed through by American politicians over many decades. This is nothing new.
It has long been the habit among the wealthy business owners of all nations to blame others for their lazy planning and poor execution, while twisting the tails of their trained monkeys holding public office to cover for their feckless incompetence and the resulting financial and reputational damage through imposition of taxes and tariffs. A concrete example of the results of this de-incentivization through taxation is the wounded US automobile industry and the sad state of Detroit, MI.
But your humble servant is old enough to recall how, instead of complaining, the Japanese government negotiated mutually-acceptable tariffs while Japanese manufacturers ignored the Chicken Little crowd and proactively worked to develop mutually-beneficial work-arounds. You see, unlike the feckless perverts that run the television, movie, and news industries, the Japanese understood that pissed-off customers on the scale of nations are not good for long-term profitability. As evidence of this, please compare the worldwide, or even just the US domestic market share of American versus Japanese automobiles and compare it with 30 years ago. Such waste!
My point is that taxes are never fair (and often backfire), today’s winners are tomorrow’s losers, and complaining solves nothing, but with good will and diligence most problems can be solved. Except for Ford and GM, that is, huge corporations that foolishly discarded both good will and diligence in favor of politics and economic war, flushing their market share down the tubes never to recover. Sadly, it’s far too late to cut the “stone of madness” from the brains of many overly-comfortable American corporate executives.
Compared to Japan, the Europeans and Chinese, being especially adept at manipulating corrupt and shiftless American politicians, have had it easy and are spoiled, but amazingly they have the “stones” to call Trump “unpredictable” and “unreasonable” because he refuses to be bought, an unforgivable failing in a politician, it seems.
Much of the rattling we hear lately are the sounds of chickens coming home to roost, while the whining emanates from media bought and paid for by foreign entities, lobbyists in government jobs and short-sighted, and hypocritical executives of companies that brag of their righteousness in “supporting their community” and their “environmental awareness” while moving production to countries with cheaper labor, quite frequently child labor, and sometimes even slave labor in fact, and no environmental regulations.
This talk of tariffs has put them all into a spastic panic fearing their carefully-laid plans for reaping humungous profits and big bonuses through betrayal of their customers will soon be knocked into an even bigger cocked hat. Oh dear….
The Power of Gubmint
If there is one thing I know for certain, people in government have two rock-solid powers: (1) to fill their pockets and those of their buddies, and (2) to impoverish everyone else through taxes and regulation. And that’s all they can do. Since the time of the ancient Greek democracies, these two truths have consistently been the driving factors in government policy in times of peace in those communities where more-or-less public elections decided policy. It’s just as true today. Remember President Reagan’s famous but bitter joke “I’m from the government and I’m here to help.”
Will these tariffs be fair? Those silly enough to pose this question should never leave their mommy’s house.
Will these tariffs impact prices here at our humble little shop of horrors? Of course.
Most consumers never directly experience tariffs and import taxes, so the subject doesn’t quite come into focus for them.
In a previous life I spent a lot of time dealing with import taxes and tariffs in various countries related to procuring and shipping building materials and equipment to construction projects I was planning, so I learned the dirty truths of import taxes and tariffs long ago. But instead of boring Gentle Reader into a drooling coma with my war stories, allow me to share a true and illustrative story many thousands of years old.
The Tale of Butfuk and Bacon
Long ago and far away in a place Gentle Reader will never visit, there was a smelly fellow your humble servant will call Butfuk (names have been changed to protect the incontinent) who had a stony farm located next to a heavily-traveled dirt road winding over hills, across fords and through wolf-infested primeval forests. At one location this track passed through a narrow restriction, or pass, tight against a stony mountain.
One day, tired of eating beetles and worms delicately seasoned with mud for every meal, Butfuk put on his thunkin hat and got a great idea. Together with his cousin Bacon, who lived nearby and was hell and Jesus with a bow, they cut down a medium-sized birch tree laying it smack dab across this narrow spot in the road. Not a large outlay of effort or capital, but without a doubt the most profitable effort they could have possibly made.
Their business model worked like this. Bacon would station himself to the side of the road next to a large concealing rock where he had a good view and a clear shot. When travelers approached the downed tree blocking the road, cousin Butfuk would be found standing in the middle of the road in front of the obstruction, and bold as Obama, he would demand travelers pay either cash or a portion of their goods as a “gate tax.”
Those who refused this friendly invitation were not invited to share a drop of tea and some tasty wood grubs with B&B, but immediately found themselves feathered with arrows, for Bacon was not just accurate with a bow, he was quick. Those who continued to argue had a mace-to-face meeting with Butfuk’s axe, whereupon the cousins dragged the corpses into their pig pen, confiscated all the traveler’s possessions in the name of “fairness,” and sold any surviving women and children in the party into bondage. Business is business, after all, and pigs have to eat too.
Cooperative travelers, on the other hand, passed the impromptu gate safely, and while they disliked this new form of banditry, the cousins didn’t steal everything nor kill everyone, after all, and the amount they demanded was not so much travelers couldn’t pay it without being ruined, and because arrows hurt like the dickens, and pigs are messy eaters, few bothered to resist too hard. Soon, the relationship between B&B and travelers became much like that between the European kingdoms and the Barbary pirates before the king of Tripoli pissed on President Jefferson’s shoes, so to speak.
Indeed knowing the amount they would need to pay in advance, travelers could even include these gate taxes in their budget. Yea verily, the golden goose principle was key to the sustainability of Butfuk’s cunning plan.
Over the years, B&B assembled a small army of guards from among the locals to support their “gate tax” business. A town with an inn, a stable, a small store, an alehouse, a knocking shop and a money-changer’s booth sprouted up beside the mudhole in the narrow place by the mountain. Guess who was the mayor.
Over many generations, the cousin’s little venture metastasized into a country of sorts. Guess who was the king.
Thus was the first tariff imposed, the first customs house created and staffed, the concept of cash flow without risk, labor, capital investment, or the bother of production was established, extortion, slavery, and murder were justified by, and codified in, law, and eventually a town, a nation, and royalty were born. Progress, right?
‘Tis a true story, one that has played out thousands of times over thousands of years in every corner of the frikin world. If you doubt it, please check into the famous “robber barons” on the rivers Rhine and Danube with their long chains, or the bandits of Hakone mountain in Japan, or the Barbary Corsairs. Lots of documentation.
For contemporary examples of the “old way,” look to the still-operating tax franchises of Spain and Thailand.
An action between an English ship and vessels of the Barbary Corsairs, Workshop of Willem van de Velde the Younger. The Brits like to take the credit, but it was the young US Navy and the budding US Marine Corps that actually fought most of these battles while the Europeans, who didn’t particularly care about their citizens being killed and enslaved, squealed for a “halt to hostilities.” Things haven’t changed that much.
Tariffs, Taxes and Profits
Ever since this humble, bloody beginning, customs and tariffs have been the most profitable source of revenue for all governments with very few exceptions (measured by cost vs. income). The only more profitable, more reliable, easier source of income for governments, short of pillaging one’s neighbors, is the old confidence game of minting/printing/circulating currency. Government fees, income taxes and property taxes don’t even come close.
In modern times with the explosion of international trade, tariffs are exponentially more profitable for governments and their buddies, but what has changed is the scale of their use as a tool to coerce markets, to retaliate against entities with competing tax/subsidy schemes, and to placate the disgruntled rich.
Conclusion
Will the pending tariff war yield improvements or devastation? I dunno, but I’m confident of one thing. Being based on banditry, slavery and murder justified by unjust laws, it would be shortsighted for little people like me and thee to expect these new tariffs to expand our peace and prosperity.
I think I need an operation for this bump on my head.
Rokuza the carpenter adjusting his plane close by old Edo’s Nihonbashi while thinking wistfully of his lover, no doubt a great beauty and dab hand with a sharpening stone. Mount Fuji can be seen in the background.
Whether made into a wooden pillow or table,wood with excellent fine grain is a guarantee of splendid poems,and the composition of perfect documents.
~Liú Shèng (d. 113 BC), “Ode to Fine-Grained Wood,”
s Gentle Reader is no doubt aware, quality Japanese handplanes, like those we are deeply honored to share with our Beloved Customers, are simple tools with excellent blades but relatively few parts compared to its Western counterpart, the Bailey-style metal-bodied handplane, and therefore present fewer opportunities for dull blades and misadventures.
Sadly, there is much confusion on the subject of how to setup and maintain such tools. Indeed, the path to enlightenment in this regard is blocked by mist-bound mountain passes of ignorance and hedged about with bottomless pits of boiling BS that prevent many noble woodworkers around the globe from gaining a true understanding of their tools.
In this article, your humble servant will attempt to untangle some of that confusion, dispel some of those dark mists, and using pump and shovel, fill in a few of those roiling pits. So please don your headlamp, put on your rubber mud boots, shoulder your shovel and join me as we travel a little further along the path.
The Two (problematic) Methods
In Part 4 of this series we briefly discussed how to fit the plane’s wooden body to its blade. Such a happy wedding it was! I dance like a gleeful baby goat in new pajamas whenever I view the photo album.
While the explanation in Part 4 was not meant to be comprehensive or exhaustive, just today a Gentle Reader posed some perspicacious questions the answers to which may benefit others, and so with fear and trembling I make this addition to the series. Your noble indulgence is requested.
The Gentle Reader’s question was as follows:
“I have encountered two schools of thought about fitting blades. The first is that the blade should be bedded more or less uniformly to the dai (i.e.: with heavy contact, ideally across all points ). The second, which I have seen more experienced practitioners espouse and teach in classes, is to maintain contact across a U-shaped area of the bed, under the side grooves and along the mouth, and removing significant material from the rest.”
Your humble servant is aware of and has even tested these two hit-and-miss methods, and while general befuddlement is the rule in all human endeavors, I was simply shocked, shocked to learn there are lost souls who boldly brag in their befuddlement and actively promote either. Call the gestapo and round them all up!
Casablanca jokes aside, please humor your dimwitted unworthy servant as I attempt to perform a brief, summary, comparative analysis beginning with the conclusion thereof because I was trained to begin any analysis that way, and I find it most helpful.
As mentioned in Part 3 and Part 4, when setup and maintained properly, the forces that secure the blade in the wooden body (dai) are solely friction acting on the top and bottom faces of the right and left portion of the blade contained inside the two retention grooves cut into the sidewalls of the blade opening, NOT friction between the back of the blade in general and the bed of the dai. Ergo, neither of the two methods listed above are useful IMHO.
This is the essence of the matter, but since many still struggle to understand, a deeper analysis is called for.
How did this worm of confusion gnaw its way into the brains of woodworkers to take up squatter’s rights? Some dark malfeasance by Murphy? Perhaps, but dollars to donuts I’d wager it springs from a difference in traditions.
But this begs the question: what traditions or knowledge or experience regarding Western planes could engender such misapprehension about Japanese planes? Hmmmm.
Perhaps it’s the knowledge of and experience dealing with the potato-chip thin blades of Western planes that rely on screws, complicated linkage mechanisms and high pressure between the blade and its cast-iron or ductile iron bed in order to retain and adjust, and to prevent them from vibrating/chattering in-use?
Oh oh oh! Could it be that those accustomed to Bailey-style planes feel compelled to deploy similar chatter-prevention measures in their Japanese planes?
Or could it be brain worms, maybe?? Don’t sneeze on me, pleeze.
I’m clueless about the source of these repugnant brain worms and the reasons behind this widespread befuddlement, but what is not fuddled is that the Japanese plane has an entirely different blade and body that relies on entirely different retention and adjustment systems, and experiences entirely different forces acting in entirely different vectors, and so requires entirely different solutions.
Realization of these facts is necessary and wonderous, but even the blessed defuddled few will experience grief if they attempt to indiscriminately apply setup and maintenance solutions effective for Western planes on Japanese planes. In fact, I’ll go one step further: the misapplication and/or co-mingling of Japanese and Western setup and maintenance techniques causes many entirely avoidable problems.
These points are worthy of further consideration, but to ensure we are singing from the same sheet music, let’s take a quick side-trip in our comparative analysis to examine the Bailey-style plane.
The Bailey-style Handplane
The Bailey design includes an arched cap iron (aka “chipbreaker”) and a flat cutting iron (aka “blade”) attached to each other by a screw “springing” the blade slightly, and forming a single unit. This is good and necessary considering how thin and prone to vibrate the flimsy blade is.
The lever cap, using a clever cam mechanism, applies forces to the cap iron acting through the lever cap screw flowing into the frog, thereby clamping the assembly comprised of blade, cap iron (aka chipbreaker) and lever cap to the frog. Lots of caps…
The frog, in turn, is attached to the body via two machine screws, in the case of standard Stanley planes as shown in the illustration above, or a more complicated arrangement of hold-down pins and locking screws in the case of the old Stanley Bedrock planes and the modern Lie-Nielson reproductions.
A lateral adjustment lever attached to the frog is used to shift the blade to left or right to correct the angle of the blade through the mouth.
A lot of parts providing many opportunities for Murphy to twerk his spotty bottom with glee and swill celebratory tequila shots with cocaine chasers.
Please note that it is the frog, not the plane’s metallic body, which supports the blade, and that tolerances between the blade and its froggy bed must be fairly tight and apply fairly uniform pressure to keep the potato chip cutting without twisting and vibrating.
Too make matters worse, despite shiny surfaces and pretty paint jobs, the manufacturing tolerances of complicated Bailey-style planes are often sloppy to the point that achieving precise work without a lot of tuning is difficult.
But despite these failings and their poor-quality blades nowadays, Bailey planes will often still take shavings, and so, to the amateur, they appear to be working well. Who was it who said “ignorance is bliss?”
By comparison the Japanese plane is the essence of simplicity, and much less likely to misbehave, but on the other hand, it is comparatively less tolerant of improper set-up and shoddy maintenance. If the blacksmith has done well, these are primarily woodworking tasks and therefore the job of the craftsman that owns the plane.
The Japanese Handplane
The blade of the Japanese plane is no sea salt and vinegar snack but a comparatively thick blade which includes a lamination of dead-soft iron that is highly effective at preventing chatter. Please, don’t take my word, just try and make it vibrate.
I suggest you study the metallurgy, shape, tapers and curves of the high-quality Japanese plane blade as described inPart 3 of this series to better understand the details of this deceptively simple but highly sophisticated part to confirm the truth of my babbling. After a careful review of the information provided in Part 3, if you imagine any of these details to be less than carefully planned and entirely functional, then I prescribe immediate, thorough and frequent applications of massive quantities of Idiot-be-Gone salve sufficient to gag Beldar and Prymaat. Sorry we’re entirely out-of-stock right now, but a squirt or two of Windex may be somewhat efficacious and improve symptoms of halitosis at the same time.
The blade, therefore, doesn’t need to be clamped, damped or supported by a cast-steel frog, nor does it need pressure on its back, much less near the cutting edge, to function perfectly, despite what some befuddled folk imagine.
In the case of the Japanese plane it’s useful to have more-or-less uniform contact between the blade’s back and bed to help keep the blade aligned in the dai and to aid adjustment, but unlike the Bailey plane, more than just a tiny bit of pressure serves no useful purpose at all, while high pressure is definitely detrimental.
Allow me to restate. The blade does not need pressure between its back and the dai to prevent chatter or to make it work. Period. Anyone who says otherwise has their engineering mind and scientific eyes stuck in Bailey land, a common ailment. Another bucketful of ointment may be called for.
Accordingly, there is no need for either pattern of pressure between bed and blade outlined in the two questions above.
In fact, if you pay attention to the shape of the bed of a quality Japanese plane, you will observe that the cross-sectional area of the wedge-shaped volume of wood that forms the bed decreases, indeed thins, moving from the top surface of the body towards the mouth, making it progressively weaker and less-resistant to deflection when pressure is applied by the wedge-shaped iron and steel blade to the bed.
The weakest point of the wooden ramp that forms the bed and supports the blade, therefore, is located near the mouth where it is thinnest, so pressure here can be especially problematic. This blows the “U” method of fitting the dai to the blade entirely out of the water.
The indisputable result of this geometry, combined with the engineering properties of wood, ensures that any high-pressure forces occurring anywhere between the blade’s back and the bed will distort the dai downwards away from the blade creating a protruding sole. But how much is too much?
No pressure = no problem.
A little pressure = little deflection = little or no problem.
A lot of pressure = large deflection = large problem.
Please grasp this concept with all your might with both horned heels, both clawed hands, both thorny arms and all your needle-like teeth because excessive pressure and the resulting excessive deflection of the sole will cause a plane to cut erratically and even stop cutting entirely, depending on the depth of the blade’s projection through the mouth and the body’s fettle.
If you ignore this warning and your planes fail to function consistently, which they will, please check this area carefully to save your tool and maybe even your sanity.
Concluding the analysis, what we need are nice pinching forces acting uniformly on ONLY the back and face surfaces of the blade (not the side edges) contained INSIDE the retention grooves, usually a strip about 4~5mm wide. And we need only the lightest contact and practically no pressure between the blade’s back and the bed. Anything more is pointless and often counterproductive.
Teachers, Tubers and Trolls
I don’t care how much you paid for the book, video or class, or how famous your teacher or PoopTuber may be, anyone who argues with these obvious facts is simply bragging of their ignorance of engineering principles and/or lack of practical experience with Japanese handplanes.
Personal opinion and preference is fine, and like fundaments, we all have at least one, but not all warrant a sniff.
I’m confident these last few paragraphs will offend some self-taught teachers and all self-designated geniuses. Any Gentle Readers among that gaggle of silly geese need not send an invitation to your birthday party. All others are welcome to attend mine.
As always, RSVP + PWP (please wear pants).
YMHOS
If you have questions or would like to learn more about the tools we sell, please click the “Pricelist” link here or at the top of the page and use the “Contact Us” form located immediately below.
Please share your insights and comments with everyone in the form located further below labeled “Leave a Reply.” We aren’t evil Google, fascist facebook, or the CCP’s IT manager for Hillary’s bathroom server farm and so won’t sell, share, or profitably “misplace” your information. If I lie, may I fall face-first into a bottomless pit of boiling BS.
Never discourage anyone who continually makes progress, no matter how slow. – Plato
In this article your humble servant would like to introduce a Japanese version of a most mundane tool, one especially useful to the woodworker: the Little Turtle scrub brush.
Your slovenly servant is not a neat freak, nor do I have a cleaning fetish, much as my long-suffering mother tried to stop me eating leftover dog food off the floor as a toddler. But there is one area of human endeavor where maintaining cleanliness in an otherwise dirty world is important to me, namely sharpening woodworking tools.
This is the story of a lowly brush, not a tool we typically sell at C&S Tools, but one we often provide as a service to Beloved Customers who purchase sharpening products from us. I don’t believe it can be purchased outside Japan, but the purpose of this article is to help Beloved Customer better understand an indispensible accoutrement for sharpening your woodworking tools. So with your kind indulgence I’ll try to present this subject in a sanitary manner.
Why a Scrub Brush?
As described in our previously published series about sharpening, a basic, effective set of stones for sharpening chisels and plane blades should include a rough stone or diamond stone of 400~800 grit, a medium stone 1000~2000 grit, and a finish stone 6,000~8,000 grit. The list can be found at this link.
A nagura stone is also extremely useful IMO for cleaning and flattening sharpening stones and reducing the time required to get them operating effectively.
As mentioned above, these stones are almost always used in series, with the nagura dressing them all.
A couple of extremely common problems we face when sharpening is dust and other hard particles, many of which are airborne, contaminating our precious stones and reducing their effective grit. For instance, an 8,000 grit stone contaminated with a bit of silica-based dust will be unable to produce scratches finer than, let’s say, a 1,000 grit stone, resulting in poor results, wasted time, money and steel, and dashed expectations. I’ve written on this subject elsewhere. Link
There are few tools mankind uses that are routinely made as sharp or sharpened as often as high-quality woodworking tools, a process that, when done efficiently requires 2-4 sharpening stones to accomplish, usually used in series. And high-quality sharpening stones, be they synthetic or natural, are pricey, so the wise woodworker who needs excellent results will seek maximum performance at minimum cost and time expenditure.
How do we prevent nature from effectively turning our expensive stones to bricks? Four ways.
First, when not in use keep stones covered to reduce the dirt and dust that falls on them. Wrapping them in a clean rags or clean, ordinary newspaper works fine. I like newspaper best.
Second, before using a stone and/or nagura, scrub its faces, sides and ends with a clean bristle brush and rinse to remove contaminating grit.
Third, before using your fine-grit stones, especially if there is any doubt about their being free of embedded contaminants, work their faces with a nagura stone to dig out contaminants, then rinse off the mud produced along with any contaminants thus exorcised with clean water.
Fourth, before sharpening, use a brush and clean water to remove dust and grit from the tools that will spend time frolicking on the stones.
And finally, during sharpening use a dedicated source of absolutely clean, chlorine-free water to wash tools and stones and to re-wet them. What’s wrong with tap water? Depends. I use distilled water to eliminate chlorine with a bit of borax powder added to adjust the PH to reduce the potential for corrosion. In my workshop I store this water in a plastic laboratory wash bottle with a bent tube. In the field I carry a smaller volume in a plastic mustard or ketchup bottle. Whatever floats your boat, as the saying goes.
So exactly why do I say you need a scrub brush in your sharpening kit? Because if they do their job, the bristles of a quality brush are more effective at digging dirt and contaminating grit out of sharpening stones and the nooks and crannies of plane blades and chisels than any other tool including water faucets, hoses, chemical sprays, micro-fiber cloths or even kitten tongues (シ). Or did you imagine a simple wash in water or a wipe with a wet rag had stripped away all those nasty particles away just because you didn’t notice them anymore? Please restrict your optimism to reasonable limits.
The Scrub Brush
This is the smallest of the kamenoko brushes. A handy size for a field sharpening kit.
But isn’t one scrub brush much the same as any other? Nay, Beloved Customer, nay.
In the case of sharpening stones, we need to thoroughly clean our stones and tools without transferring contaminating dirt and grit from one stone to the next. I have found that the hard grit of sharpening stones becomes permanently embedded in the plastic and nylon bristles of every such brush I have examined, and even if I thought I had cleaned the brush thoroughly, hard grit particles remained and were transferred to the next stone by the brush.
How to avoid this? The solution is simply to avoid scrub brushes with nylon or plastic bristles. In my experience natural bristle brushes, and especially the Kamenoko (Little Turtle) brand brushes, simply last much longer than plastic and nylon bristle brushes, are more easily cleaned of sharpening stone grit, and tend to transfer less of it from one sharpening stone to another. These three points are the crux of this article.
Japanese tawashi brushes are made from the fibers of coconut husks. As Beloved Customer is no doubt aware, in his eternal wisdom the design team the Good Lord assigned to coconut palms provided them fibrous husks to protect and float their seeds long distances over wide, soggy oceans for years at a time. To accomplish this Homeric feat, the fibers of these husks are caused to grow tough but resilient and resistant to degradation from long-term exposure to water, microbes and even detergents.
It’s a traditional product that’s been around a long time in Japan with one company producing them for over 100 years. Here’s a video of tawashi brushes being made in Japan, and another video of production in Sri Lanka.
These brushes are also good for cleaning dirty, greasy hands, scrubbing pots and pans, cleaning car tires and wheels, and getting mud off boots with very little scratching.
If they have one downside, it’s that, being made of natural and recyclable fibers, and despite not becoming mushy when wetted for long periods of time and drying quicker than plastic brushes, they still take a bit of time time to dry and can develop mold if neglected. There’s a stainless steel wire binding the fibers together with a loop on one end that can used with a string to hang them for drying. Problem solved.
I’ve been using one Kamenoko Tawashi brush for cleaning tools and sharpening stones for over 20 years. I don’t say they’ll last that many years in the kitchen or garage, but they still last 5 times longer than plastic or nylon brushes and are therefore much more cost effective.
Most importantly, they help me keep my stones cleaner and ensure they sharpen to spec.
YMHOS
A museum-quality antique sumitsubo ink-pot depicting a snake hunting a frog around the ink pond. Mr. snake’s tail wraps around the wheel.
If you have questions or would like to learn more about our tools, please click the “Pricelist” link here or at the top of the page and use the “Contact Us” form located immediately below.
Please share your insights and comments with everyone in the form located further below labeled “Leave a Reply.” We aren’t evil Google, fascist Facebook, or thuggish Twitter and so won’t sell, share, or profitably “misplace” your information. If I lie may all my little turtles sunbathe on the freeway.
A 70mm finish plane. Blade by Mr. Takeo Nakano, body by Mr. Isao Inomoto
The way of the carpenter is to become proficient in the use of his tools, first to lay his plans with true measure and then perform his work according to plan. Thus he passes through life.
– Miyamoto Musashi, The Book of Five Rings
his is the sixth article in our series about Japanese handplanes. In previous installments we compared Western and Japanese planes and discussed how to tune and adjust the Japanese hiraganna plane. In this article your humble servant will be so bold as to explain how to setup and maintain the sole of the Japanese handplane.
The sole of a handplane is critical because it positions the blade’s cutting edge in relation to the board being worked making it possible to cut useful shavings of the desired thickness and length. Sometimes we want to cut thick shavings to quickly remove material from a board when flattening and/or dimensioning it, the job of the arashiko plane (荒仕子鉋). Sometimes we want to take ultra-thin shavings to create a flat, smooth, even shiny surface, the job of the finish, or shiage plane (仕上げ鉋). One plane cannot do it all, nor can a single type of sole setup.
In this article we will consider ways to setup the sole of a Japanese plane for Beloved Customer’s specific purpose. We will also examine ways to maintain the sole and the necessary tools.
Miyamoto Musashi, the famous swordsman, duelist, artist, philosopher and author. 1584 – 1645. Well-known for appreciating the work of carpenters and for slicing and dicing using two swords simultaneously.
Soleful Profiles
Besides keeping the cutting edge properly positioned to take shavings the handplane’s sole has another important role many overlook. We examined this in Part 5 of this series. In summary, to cut efficiently and minimize wasteful tearout on the surface of a board being planed, a contact strip approximately 3-6mm wide located directly in front of the mouth opening must apply uniform pressure on the surface of the board. This important principle is effective in the case of all handplanes of all countries made of all materials be they organic or metallic.
Indeed, depending on one’s skill with a handplane (there’s more than just pushing and pulling involved, after all), so long as this strip on the sole is applying even pressure to the board right up to the mouth opening, the rest of the sole can be pretty wonky and still yield good results with little or no tearout. And while this level of skill comes of experience, it all begins with understanding the aforementioned principle.
Beloved Customer is not doubt aware that the basic, standard sole configuration for handplanes is a simple flat surface free of wind. A little different from the adjustable bed of an electrical jointer, of course. While all handplanes wear and require constant maintenance regardless of their construction, wooden-bodied planes are softer than metal-bodied planes and tend to wear and warp more in use, the price we must pay for the advantages of the wooden body.
The wise man, therefore, will strive to discover ways to make the necessary task of truing the sole of his planes as easy as possible, a mindset clearly reflected in the Japanese version of the wooden bodied handplane giving it a huge advantage over its Western counterparts, at least in the hands of the thoughtful and diligent craftsman. Sadly, many newbies and all wood butchers poorly understand how the sole of the handplane works, or fail to set it up properly, or fail to maintain it properly blaming the plane when it stops working instead of themselves. So sad. So self-defeating.
Well-made Western planes ideally have a uniformly-flat sole. But is it really necessary to have the entire area of the sole in contact with the surface of the board being planed? Please consider this question in light of my earlier statement about the most important part of the sole being the contact strip directly in front of the mouth.
Japanese craftsmen decided long ago that it’s most efficient to relieve (remove) areas of the sole located between two or three critical contact points on the sole thereby making it much easier and quicker to true the soles of their planes, while at the same time significantly reducing friction, both significant advantages springing from a simple modification. This is much the same principle as the hollow-ground ura in the blades of Japanese planes, chisels and knives. The application of this principle results in two basic profiles to plane soles described below.
While lots of graphics would be nice, I beg Beloved Customer’s indulgence with the one I have available.
The Sole of the Arashiko Plane
The first and most common profile, illustrated below, is applicable to all planes intended for creating straight, flat surfaces, including the arashiko plane as well as the various types of jointer (nagadai) and shooting (suridai) planes. Finishing planes have a different sole profile described in the next section.
Upside-down cross-sectional illustration of a standard plane intended for producing flat surfaces. Length of the full-width contact strips A, C, D = approximately 6-10mm. Relief a = b = approximately 0.2~0.5mm
Contact area “C” is a strip of the sole located directly in front of the mouth and the full-width of the sole, and is the single most important detail of the sole. Contact area D is also a full-width contact strip located at the leading edge of the sole. And contact area A is located at the trailing edge of the sole. It’s very much a matter of personal preference, but a length of 6-10mm is typical for these contact areas.
The crosshatched areas in the drawing indicate where the sole has been scraped away leaving it hollow or “swamped.” These areas do not contact the surface of the board being planed. The precise shape of these swamped areas between A and B and C and D is unimportant, but it’s best if they are relatively uniform and approximately 0.2-0.5mm deep. Once again, personal preference.
Please note that point B, and the portion of the sole immediately behind the blade, is always relieved and never contacts the board being planed. This is important because if it does contact the board, vexing problems often result. Most people get this wrong at least once, or fail to perform proper maintenance allowing this swamped area to bottom-out whereupon the usual undignified weeping, wailing etc. ensues. You’ve been warned.
This arrangement gives the plane three supporting strips, and because the front and rear contact strips are located at the extreme ends of the plane, the full-length of the plane’s body will act as a jig so the plane will tend to shave off the tops of high spots and skip over low spots producing a straight/flat surface quicker and more precisely than a simple flat, planer (meaning “lying in a single plane”) sole typically will. You will notice the difference if you pay attention.
This arrangement also makes it very easy to adjust the sole to keep the critical contact strip in front of the mouth in tight contact with the board being planed.
Some people like to add another contact strip, or even two, between C and D. This works well tending to slow down wear on the sole, but it is a fiddly detail most people don’t bother with.
But as so much in life, not all is not blue bunnies and fairy farts for this arrangement of three or more contact strips tends to lift the cutting edge up and away from the surface being planed when they pass over even tiny irregularities on the board’s surface. This is hunky-dory in most cases, but once the board is as flat as we need it to be, this porpoising movement over every tiny irregularity, especially if the blade is set to take a fine shaving, can become counterproductive to producing a smooth, shiny surface. So how best to setup the sole when we need our plane to do more smoothing and finishing than truing and flattening?
The Sole of the Finishing Plane
I apologize for not having a pretty illustration, but Beloved Customers are, without exception, highly intelligent and intuitive souls (no pun intended) so I’m confident a simple written description of the difference between the sole of a finishing plane and the one described above will suffice.
That difference in the soles of these two types of plane is simply that the sole is entirely swamped from the heel of the plane (contact strip A) to the mouth opening. In other words, contact strips C & D remain unchanged but contract strip A is completely shaved away. That simple.
For example, the overall length of the dai (body) of the finishing plane body cut by Mr. Inomoto I have in my hand as I write this (gotta be careful to not drop it on my inkpot!) is 280mm. If setup as an arashiko or flattening plane, the effective planing distance would be the entire length of the plane’s sole. In this case, however, Mr. Inomoto has it set it up as a finishing plane so he has swamped/relieved the entire sole from the mouth opening to the heel (Point A to Point B), approximately 108mm. The effective length of the sole for purposes of flattening measured from toe to mouth therefore is 173mm, a 38% reduction.
Why bother with a measly 173mm you ask? Ah, Beloved Customer is especially perspicacious today!
Since the effective jig length of the sole is reduced 38%, and the cutting edge is located at the extreme tail end of that area, the cutting edge will tend to more closely follow irregularities in the board’s surface riding them up and down and in and out instead of bridging and porpoising over them allowing the blade to cut long, uniform shavings without the interruptions that would otherwise result from the sole riding the tops of residual irregularities in the board’s surface lifting the cutting edge up and out of contact with the board when we need it to more closely follow the contours of the board. It’s a genius concept that works well in application.
But of course that malevolent monster Murphy always insists on probing with his pointy purple pecker to defeat all good things, so if this arrangement stops working for you, be sure to check the following three details in your plane:
Your blade is sharp;
The 2 or three contact strips you have provided (more if you like multiple swamps) are truly planar (in the same plane);
And most importantly, the contact strip in front of the mouth is flat and in uniform contact with the board being planed. I can’t stress too heavily the importance of this little patch of wood.
Here is Wisdom: When setting-up and maintaining the sole of a Japanese plane always always always give the contact strip in front of the mouth highest priority, while at the same time minimizing any shaving/scraping you do to it.
Why is your humble servant so irritatingly picky about minimizing shaving/scraping at this contact strip? More of that bloody, demon-chewed, hard-earned wisdom: While wear is inevitable, any scraping/shaving you do to this contact strip will open up the mouth further reducing the plane’s useful effectiveness at taking fine shavings (think about it). This isn’t so much a problem for an arashiko, truing, or jointer plane but it imposes a significant detriment to the quality of a finish plane’s work. So don’t diddle with the mouth contact strip more than is necessary unless you enjoy inletting replacement mouths.
Tools and Techniques for Sole Setup and Maintenance
You’ll need the following tools, at minimum, for initial setup and periodic maintenance of your Japanese hiraganna handplane:
A sharp handplane that can cut a smooth, flat surface. For a 70mm handplane, you really need an 80mm handplane, but with care narrower planes can also do the job. Don’t let it become a chicken and egg problem.
A scraper tool of sorts. I prefer a simple card scraper, an ancient and uniquely Western tool that the Kezuroukai has borrowed and made popular in Japan recently. You’ll need a burnishing tool of sorts to turn the burr. A wide chisel can also be used as a scraper, although it’s hard on the tool’s edge. I was taught to maintain a plane’s sole using either a chisels or the traditional “dainaoshi” plane, aka “tachiganna,” essentially a small scraper plane. These tools work well enough, but the card scraper works better IMHO. Over the years I’ve learned several tricks to improve the performance of these little planes from advanced Japanese joiners, but even then, the downside to the scraper plane compared to the card scraper or even a chisel is that the sides of the plane, and the koppagaeshi for that matter, obstruct the the view of the blade sometimes making me unsure exactly where the blade is shaving in relation to the critical mouth and the other contract areas. Also, it does not work as well when scraping the swamped areas with the grain because the longer body tends to create a flat surface which I don’t necessarily need. The result is that these scraper planes are used mostly to shave cross-grain across the width of the sole leaving a rougher surface. With a card scraper, on the other hand, I can always see the exact position of the blade at all times, and it shaves wood reliably both with the grain and cross-grain while leaving a smoother surface behind. It’s just a superior solution.
A straightedge. The classic Japanese tool for this job is the wooden “shitaba awase jougi” 下端合定規. More on it below. A better more modern tool is the hardened, stainless steel, beveled-edged, notched precision straightedge made by Matsui Precision. This tool has the huge advantage of being able to check the sole for straight, flat and wind with the blade installed and its cutting edge projecting through the mouth the appropriate distance.
Glass plate. A piece of minimum 3/8″ (10mm) thick float glass longer than the sole of your plane.
A pencil.
A small square.
A dainaoshi scraper plane, also called the “tachiganna.”
Procedures
Check the Sole: The first step is to use your straightedge to check that the sole is straight, flat and free of wind. Install the blade and chipbreaker with the cutting edge projecting through the mouth just as it will be when the plane is used. This is important because the wedging action of the blade can cause the body to warp slightly. If you don’t have a notched straightedge and don’t want to make one yourself, insert the blade so the cutting edge remains recessed in the mouth without projecting. 0.001″ is probably OK. Check the sole lengthwise, crosswise, and multiple diagonals.
True the Sole: When initially setting-up or drastically redoing the sole of a wooden handplane, after making the checks listed in No. 1 above, you must make the sole absolutely flat and free of wind (twist) using your handplane and/or scraper and your precision straightedge. You may need to remove and reinstall the blade and chipbreaker several times to get this right. An alternate, but disgusting, technique is to use sandpaper and the float glass mentioned above supported on a stable, flat surface like the bed of a electric jointer or tablesaw to flatten the sole. Be sure to recess the cutting edge slightly. Don’t remove more wood than is absolutely necessary. Check for flatness and wind frequently.
Layout the Contact Strips & Swamps: Use your pencil and square to layout the locations of the contact strips. Then use your pencil to crosshatch the areas to be swamped.
Relieve the Swamp/Crosshatched Areas: With the blade and chipbreaker installed, use your scraper, chisel, or dainaoshi plane to scrape away the appropriate amount of wood from the hollow, swamped areas. Be careful to not let your metal tools touch the blade of your plane.
Check the Sole: With the blade and chipbreaker installed but slightly recessed into the mouth, check how it feels on the supported plate glass. The plane should not rock or roll when you push down on its ends or corners, depending of course on the sole setup you chose and where you push. If it does rock rub a itsy bitsy teeny weeny bit of oil on the glass, place the plane sole-down on it, and move it around a few millimeters. Then check the oil transferred to the sole to determine areas of contact. It may help to add a little graphite from your pencil to the oil to make the contact areas show up better. The most important goal is uniform contact at the strip in front of the mouth.
Refine the Sole: Use your scraper tool to carefully remove material preventing uniform, full-width contact at the mouth. If at all possible, accomplish this by removing material from the other contact strips first. Make only tiny adjustments while sneaking up on the final surface like a tiny, needle-clawed, big-eyed kitten stalking a grasshopper. This is important. During this process recheck the sole with your straightedge and glass plate frequently.
The Shitaba Awase Jogi 下端合わせ定規
The shitaba awase jougi is the first tool I was required to make for myself during training in Japan. This was once standard procedure in all woodworking trades.
It’s simply two sticks of wood, usually cut bookmatch from a single piece of stable, quartersawn soft wood, connected face to face with two dowels or dovetail tenons. If you shoot one edge of this tool with a jointer plane when the two halves are joined, then separate them and hold them up to a light source with their edges butted together, the gap between the two edges will reveal double the error. By rejoining the halves, carefully planing/scraping their edges, and frequently rechecking the gap, one can consistently create two high-precision straightedges that won’t damage your plane blade. The webpage at this link shows how to make one version. It’s a lifetime tool.
When using your plane, sure as eggses is eggses the time will come when you will discover it’s stopped working, usually right at the the most inconvenient time for Murphy will have his way. At that juncture weeping, wailing and gnashing of teethses may ensue! When this happens remain calm and consider the experience for what it is: another step on the path to mastery. Then gird up your loins, really tight so the boys start to complain, and simply follow the three steps listed above. All will be well, I promise.
In the next installment in this series of inklings about stealthy kittens and Murphy’s pointy purple poisonous pecker we will discuss how to use the Japanese handplane, a task many people unwittingly get wrong. Y’all come back know y’hear!
YMHOS
Two 18′ tall Nio wood carvings. Serious woodworking!Guess which one’s Mutt and which is Jeff.
If you have questions or would like to learn more about our tools, please click the “Pricelist” link here or at the top of the page and use the “Contact Us” form located immediately below.
Please share your insights and comments with everyone in the form located further below labeled “Leave a Reply.” We aren’t evil Google, fascist facebook, or or the IT manager for HRC’s bathroom server farm, and so won’t sell, share, or profitably “misplace” your information. If I lie may all my swamps be infested with toxic, arrogant, bellowing, wart-covered bullfrogs, as is the US Congress.
Perfection is a necessary goal, precisely because it is unattainable. If you don’t aim for perfection you cannot make anything great, and yet perfection is impossible.
Leonard (the cutter, not tailor) – The Outfit (2022)
We occasionally hear of people (not Beloved Customers, of course) complaining about Japanese chisels. Like much idle opinion expressed on the internet, this squirts and bubbles forth from a few vocal amateurs lacking real experience or skills, but it’s undeniable that, compared to the sharpened screwdrivers sold as chisels in Western countries nowadays, a little special knowledge, extra diligence and some actual hand skills are necessary to meet the challenges of professional-grade Japanese chisels.
In this article your humble servant will list some challenges one may face when first learning how to use and maintain Japanese chisels, and will suggest straightforward solutions for he who has ears to hear. But, because nothing except a movie studio executive’s reserves of morality exist in a vacuum, allow me to first provide some background about the way our hand-forged chisels are made, as well as the division of labor between the craftsmen involved, and explain how this influences modern attitudes among professional craftsmen.
Terminology & Relevant Links
The terminology used in this article may be unfamiliar to some, so to avoid confusion, allow me to immediately clarify four of them. In addition, the articles at the links below contain relevant information you may find useful.
“Ura” refers to the entire side of a Japanese chisel’s blade opposite the surface with the brand, not including the neck, of course.
“Uratsuki” is the hollow-ground depression at this same surface. This surface is tastefully black in our chisels. Others prefer this area to be polished.
“Lands” refers to the planar, polished surfaces at the ura surrounding the hollow-ground uratsuki on four sides.
“Itoura” is the most important of the four polished lands (itoura, side lands, and neck land) surrounding the uratsuki, being located immediately adjacent the cutting edge and forming one half of it. It’s important because, without it, the blade won’t cut.
The articles at the following links may prove informative, or at least amusing.
Beloved Customer has probably visited neither a modern tool factory nor a traditional chisel smithy, so a brief summary of the steps our blacksmiths employ in producing a hand-forged, high-quality, professional-grade chisels may provide useful insight.
Please note that the hardware store-grade Japanese chisels mass-produced for export that Westerners are accustomed to are not produced this way, and their performance suffers accordingly.
The Smithy
Our chisels are handmade by either single blacksmiths, or master & apprentice blacksmith shops, or father & son smithies using mostly old equipment, except for Mr. Usui of Sukemaru brand pictured below who works alone nowadays, has an engineering degree, and loves precision equipment.
Mr. Usui Forging an atsunomi chisel
Nakaya Takijiro (sawsmith) at his forge
Nakaya Takijiro’s forge, originally made for forging swords
Mr. Nakajima’s workshopMr. Nakajima, chisel blacksmith (ret.) in his workshop
Materials
The process begins with materials.
Nowadays, the blacksmith purchases processed iron and steel from wholesalers in ready-to-use strips. In the case of C&S Tools’ chisels, our blacksmiths use Hitachi Metal’s Shirogami No.1 steel exclusively along with a variety of low-carbon steel/iron called “gokunantetsu” 極軟鉄 meaning “extremely soft iron.” Neither of these products are currently being produced.
With materials in hand, the blacksmith will use his forge fired by gas and charcoal and fed forced air by an electric blower to help create the necessary atmosphere and high temperatures.
Just in case you are interested, the traditional Japanese hand-operated blacksmith’s bellows is a rectangular wooden box with a horizontal wooden rod penetrating one end attached to a flat wooden piston inside the box sealed with leather or cloth gaskets as shown in the photos below. Sometimes the box is lined with glass for smoother operation and a better air seal. The blacksmith, usually sitting on a cushion on the floor of his smithy, or on a stool in a pit near the forge, operates this contraption with his left hand or left foot (yes foot) while manipulating hot metal with hammers and tongs with his other hand(s). Several of our blacksmiths still have these old bellows gathering dust in their workshops, but none use them anymore.
Forging & Laminating
Quality Japanese woodworking chisels are hand-forged and of laminated construction.
On the other hand, low to medium-quality hardware store-grade chisels, which have replaced all but a very few of the quality chisels made in Japan nowadays, and comprise all the chisels produced for the export market, are not hand-forged by trained and experienced master blacksmith but are mass-produced by factory workers in cookie-cutter fashion with dies and presses using a lower-grade pre-laminated steel (aka “rikizai” or “fukugozai”) produced by steel mills, a commercial product originally developed for stamping out supermarket-grade kitchen knifes by the thousands. The steel used is Blue Label steel at best, but ordinarily a cheaper equivalent material such as common SK is used. This mass-production technique typically involves only a single “heat,” and is over in just two, at most three, stamps of large presses. BTW, you may want to consider this fact next time you pay hundreds of dollars for a mass-produced Japanese kitchen knife.
The resulting products look good in their colorfully printed plastic and cardboard containers, are inexpensive to make, and quite profitable, but the crystalline structure of their steel, an essential physical detail invisible to the naked eye, and one that determines a tool’s cutting and sharpening performance, is greatly inferior to the results the more traditional, labor-intensive techniques and highest-quality materials our blacksmiths employ routinely yield.
In the traditional method, the blacksmith heats, cuts, and shapes strips of iron and steel into the necessary components using the heat of his forge, an anvil, various tongs, chisels and shears.
He then forge-welds a slip of high-carbon steel to the low/ no carbon iron strip which will become the body of the chisel using his forge, an electric motor- powered spring hammer (or hydraulic hammer in one case), his anvil, tongs and hand hammers as shown in the photos below. No presses.
Heating the iron strip (gokunanatestu) which will form the body of a chiselPlacing the high-carbon piece of steel on the iron strip for forge-laminating
With the lamination work done, he then uses these same tools combined with a few open-faced hand-dies to shape the chisel.
This process of forge-welding and shaping involves at least three “heats” (heating and cooling cycles) combined with hundreds of hammer blows. The purpose of all this dramatic fire, violence and unholy racket is to not only (i) shape the chisel blade, but to also (ii) reduce the size of the carbide crystals in the steel and (iii) distribute them evenly, preparing the “fine-grained” crystalline structure of the steel so important to quality cutting tools and indeed modern civilization.
Modern mass-produced and low-quality chisels do not go through this process to the same degree and their crystalline structure suffers greatly in comparison, a difference visually indiscernible without destructive testing or the aid of a scanning electron microscope, but one that craftsmen and warriors have highly valued since steel replaced stone, copper and iron in their tools, a difference once considered supernatural.
Annealing/Normalizing the Blade
The blacksmith will then anneal the blade by heating the steel to a specific “recrystallization” temperature”(about 750˚C or 1380˚F for Shirogami No. 2), and allowing it to “soak” at that temperature for a specific amount of time. He will then place the blade overnight in a loosely-sealed container filled with rice-straw ashes, a high-carbon/low oxygen atmosphere which will “relax” the steel removing internal stresses and making it dead soft and more uniform, chemically speaking. While not sexy, this step is critical to making a high-quality blade, and while it has been used for by the best swordsmiths for thousands of years, it’s absolutely scientific.
The blacksmith will then refine the shape of the blade using hammers and electric grinders.
Quenching the Blade
Quenching is the magic at the heart of The Mystery of Steel. This process begins with the blacksmith applying his own special “medicine” to the blade, an unappetizing, gloppy brew made from various secret materials, usually including sharpening stone mud, clay, rice straw ashes, steel filings, dragon dandruff & etc., that serves to control differential cooling.
When this medicine is thoroughly dry and everything is just right, he will heat the blade in a gas/charcoal fire to 800˚C (1470˚F) for a very specific time period , after which he will plunge it into water “quenching” and quickly cooling it. He may repeat this step one or two more times.
This sudden cooling creates drastic changes in the organization of the iron and carbon molecules in the steel portion of the blade. On the other hand, the iron “jigane” body of the blade lacks the essential carbon ingredient and so its hardness does not change significantly.
Extremely hard particles called “carbides” are instantaneously created during this process. These become locked into a particular crystalline structure in the steel with a greater volume than before quenching. That’s right, the steel swells as it’s suddenly cooled.
As you would expect, this produces high differential stresses in the blade causing the steel to warp, movement the blacksmith must compensate for when shaping the blade before quenching, and while less sexy and more vexing, sometimes by corrective measures after quenching.
Naturally, the chemical nature of the steel selected combined with the blacksmith’s mastery of his craft, and of course the whims of the Gods of Handsaws, greatly influence the resulting warpage, demanding great skill and some luck if disastrous failures and expensive wastage are to be minimized.
A Japanese swordsmith quenching a long sword in the photo above. Before quenching the blade is straight, but it will warp during this step. This warpage often becomes an intentional design feature in many swords including the one shown in this photo. Please note that the “grain” pattern visible between the white hamon and “hi” groove is not a defect in the steel, but a highly-prized design feature in this art form.
Tempering the Blade
After quenching, the high-carbon steel portion of the blade is excessively hard and brittle, too brittle for practical use in fact, so the blacksmith will next “temper” the blade by reheating it to 300 °C (570˚F) ~ 400˚C (750˚F), a temperature lower than that used for forging, for a very specific time period. His precise control of time and temperature in this process will make the difference between a fine blade and a lump of costly scrap.
Tempering reduces the amount of hard carbides in the steel, producing a less-rigid crystalline matrix, reducing hardness, and most importantly, increasing toughness.
Every blacksmith has his own techniques, but his selection of steel and his skill in using it are critical. Some steels are easier to forge and heat treat than others producing fewer failures and rejects greatly impacting productivity.
At this point in the process either the blacksmith, his apprentice, or a subcontractor will grind and sand the blade to final shape and finish. He will also grind and finish the hollow “uratsuki” to form the “ura.”
Finishing the Blade
The next few steps are where things can go crazy if the blacksmith decides to refine the shape and finish of the tool by investing extra time, effort and tools such as fine-grit grinders and sanders, and hand files, for it takes a careful eye, an artistic sense of line and proportion, a steady hand, and many hours to achieve the perfect surfaces found in the best chisels as represented by the products of the Yamazaki brothers under the “Ichihiro” (or “Hidari no Ichihiro,” or “Tsuki Ichihiro”) brand.
The chisel in the photo at the top of this page shows the blade of a beautifully shaped and finished large fishtail shinogi ootsukinomi by Nora.
Indeed, this extra cosmetic work, which does not influence performance in any way, will increase the cost of producing a single chisel of the same performance 5~10 times. Would Beloved Customer be willing to expend that much additional money for improved cosmetic appearance in a working tool? Your humble servant has scratched that sculptural itch many times (too many times, says She Who Must Be Obeyed), but most craftsmen are not willing to lay out the additional hard cashy money.
Mr. Yamazaki
In fact, many Japanese craftsmen, even those who have a fetish for beautiful tools and are willing to pay the necessary funds to procure them, will usually leave such tools safely at home or in the workshop to save them from Darwinian adventures, and take a less valuable set of chisels to the jobsite instead, another layer of expense. Ah, the sacrifices we make for art! (ツ)
A 42mm Oiirenomi by Hidari no Ichihiro, the Yamazaki Brothers (RIP). Far from new, but beautifully shaped and finished, none better in all Japan.A kotenomi in the Chiyozuru Korehide style by Kiyotada. A serious cutter that has seen lots of use, it’s beautifully shaped, but the filework is not quite as nice as the Yamazaki brother’s work, IMHO.
The Sharpener
At this point, the blacksmith’s job is done and the blade is handed off to a sharpener. Please note that some blacksmiths, including Mr. Nakano, our master plane blade blacksmith, prefer to sharpen their blades themselves, and for good reason.
Sharpeners typically do piecework and so strive to do as many chisels as they can as quickly as they can. The problem we face lately is that the number of skilled sharpeners in Japan has drastically decreased leaving us few choices. Sometimes the quality of the sharpening job is less than perfect, something that is also reflected in the low cost and less-than-perfect precision of the ura lands. We think it’s a fair trade. Please note that these are all conscious decisions agreed to in face-to-face discussions with the craftsmen, not default specifications.
Mr. Takagi (adze smith & sharpener RIP) at his sharpening stones
The Handle Maker
Mr. Hasegawa, handlemaker, in his workshop
The sharpened chisel blade next goes to a handle maker. He has an important job because the handle is the interface between Beloved Customer and the tool, and through which tons and tons of impact forces are transferred to the cutting edge.
Mass-produced chisel handles often have poor tolerances that don’t accommodate the steel hoop and ferrule well, or that don’t transfer the hammer’s energy properly producing tiring harmonic vibrations in the tool. We don’t use inexpensive, mass-produced handles but have Mr. Hasegawa custom make them himself from select wood to match our blades and the selected metal furniture. Even then, it is wise for each end-user to perform a final setup themselves for a more perfect fit.
To conclude the discussion about production methods, it is important to understand that our tools are produced more in keeping with traditional methodologies and division of labor by specialist craftsmen, rather than automated mass-production methods using unskilled factory workers, cheap materials, and higgledy-piggledy techniques.
The Chisel Owner’s Role
Why is all the stuff discussed above relevant, you ask? Good question. It matters because until recently in Japan, and in even Europe, it was standard practice for a craftsman to commission a chisel blade directly from a blacksmith who would provide a shaped, ground and filed but unsharpened piece of metal with a squared-off end cut at more-or-less 90˚.
It was the end-user’s responsibility to grind and sharpen the blade’s blunt cutting edge himself. Ergo no sharpener.
He would purchase the iron furniture (hoop or katsura and kuchigane or ferrule) from another specialist blacksmith shop, and make his own handle with his own tools from his own wood. Ergo no handle maker.
It’s only been recently with the rise of large cities and cheap distribution networks made possible by rail and roads that finished products have become commonly available as retail products.
Please remember that, despite what the movies present, for many thousands of years prior to the Meiji period and the Westernization of Japan, it was a not a single, united country, but a collection of desperately poor medieval fiefs ruled by ruthless despots in which hundreds of thousands of common people, including woodworkers, died every year due to internal wars, illness and famine. Craftsmen too were poor and had little disposable funds.
My point is that self-respecting craftsmen worldwide disdained paying others to either sharpen their blades or make any components for their tools that they could make themself. The remnant of this historical fact seen nowadays is that the experienced craftsman in Japan does not expect a perfect tool, but expects to perfect his tools himself to his own taste.
Let us next get to the heart of the subject and consider the typical challenges one must deal with in the case of hand-forged chisels, beginning with the most common one.
Challenge No. 1: The Ura Is Not Planar
Ideally, the polished lands surrounding the four sides of the hollow-ground uratsuki are all perfectly planar, but as the erstwhile cutter quoted at the top of this article said, “Perfection is Impossible.” And your humble servant would add that it ain’t even necessary.
Despite this obvious truth, some inexperienced Gentle Readers expect the lands of the ura surrounding the hollow-ground “uratsuki,” the area corresponding to what is called the “flat” in the case of Western chisels, to be perfectly planar, even though Western chisels seldom have perfectly planar “flats,” but only what look like flat surfaces. Your humble servant agrees that perfection is nice, but it is not a reasonable expectation in the case of medium-priced professional-grade tools.
Gentle Readers who expect the appearance of CNC precision in their tools should either stick with the sharpened screwdrivers China produces in such abundance and which are sold in the West as “chisels,” or plan on spending 5~10 times the cost of mass-produced chisels, assuming you are able to find anyone that makes such quality nowadays.
In any case, an ura that is not perfectly planar is not a defect. The article at this link can help you understand how to deal with ura problems in an efficient and professional manner.
Challenge No. 2 – The Blade Chips
Our blades are intentionally made harder than most Japanese chisels produced nowadays because hardness is essential in a professional-grade chisel. As explained at great length in the article linked to above about “Professional-grade Chisels,” on condition the crystalline structure of the steel is what it should be, a hard blade will usually become sharper, will cut more wood, and will stay sharper longer than a relatively softer blade thereby reducing the frequency of sharpening, consequently increasing the professional’s productivity. This is an essential performance criteria in a professional-grade chisel.
But hardness is not all blue bunnies and fairy farts because a harder blade is less tough than a softer blade and can be damaged if abused. Warranty claims from amateurs and fools who use their chisels as if they are screwdrivers or scrapers instead of finely-made cutting instruments and then blame the blacksmith for the damage their ham-handed abuse wreaks are exactly why nearly all Japanese chisels produced nowadays are intentionally made softer and less efficient. Most are still harder than Western chisels, make no mistake, but they are too soft for professional use.
Our chisels, on the other hand, are forged and heat-treated to maximum practical hardness as required by top-tier professional Japanese woodworkers.
Beloved Customer should adopt the four solutions described below so as to not abuse your chisels thereby preventing chipping and keeping your eager blades cutting as long as possible.
Solution 1 – Maintain a Proper Bevel Angle: Please pay careful attention to maintaining a proper bevel angle, one that will adequately support the extreme cutting edge against chipping. 27.5~30˚ is standard. Why is this important? Improper bevel angles are the primary cause of cutting-edge chipping. The solution? Procure a bevel angle gauge, use it frequently and correctly, and pay attention because the construction of Japanese chisels is conducive to the bevel angle gradually decreasing over many sharpening sessions. Please read about Supernatural Bevel Angles for more details. Silver crosses and garlic necklaces are optional.
Solution 2 – Cease and Desist Tool Abuse: Your chisel is a highly-refined tool specialized for cutting wood and must not be to be used for anything else. Period. Don’t use the cutting edge of your chisel to open paint cans, turn screws, scrape gaskets, or even pry wood chips out of mortise holes because such abuse will place forces on the cutting edge in directions it is not designed to handle dulling the blade quickly, and maybe even causing it to chip. Seriously.
Solution 3: Shun The Chisel Wiggle: Don’t make your tools perform the lewd “chisel wiggle” when cutting mortises, for such unseemly gyrations will damage their cutting edge. Just don’t do it. For a more detailed explanation, please see the article at this link.
Solution 4: Cut Only Clean Wood: Don’t use your precious chisels, planes or saws to cut nails, screws, concrete, rocks, sand or dirt. What? None of the wood you use is infested with such evil substances? How do you know unless you check? Please see the article linked to here to better understand The Mystery of the Scratched Blade.
Challenge 3 – Blades are Difficult to Sharpen
As mentioned above, the blades of our chisels are especially hard by design to become sharper and stay sharper longer than standard chisels thereby improving the craftsman’s productivity. But given the same area of steel, measured in square inches or square millimeters, harder steel takes more time and/or abrasive effort to sharpen, as I’m sure you’ll agree. So how can one sharpen this harder steel efficiently?
Solution 1 – Use Diamonds: Use quality, flat diamond stones/plates instead of regular stones (although regular stones are almost as quick if used properly and a lot cheaper).
Solution 2 – Use Skill: Learn how to sharpen your chisels in a professional manner. We have a series of 30 articles beginning at this LINK about sharpening Japanese blades that may prove helpful.
Solution 3 – Reduce the Frequency of Sharpening: There seems to be two or three mindsets about sharpening in the world. One is what I call the Teutonic Solution, which is to make the chisel’s blade soft and easy to sharpen. This also makes the chisel tougher and less likely to chip, while at the same time obviating the need for quality steel, advanced blacksmithing techniques, or the exercise of rigorous quality control, protecting the manufacturer and retailer against warranty claims. On the other hand it means the blade will never cut very well, and it will dull quickly. For those who don’t need sharp blades and/or lack sharpening skills, this is a good solution, I suppose, but the poor-quality work such blades can accomplish, the excessive time and sharpening stone they waste, and their decreased useful lifespan is unacceptable to professional Japanese woodworkers.
The other mindset I call the British Solution, which means a medium-hard blade; A compromise yielding more efficient, but nonetheless compromised results.
The third mindset is the Japanese one, which is to make the blade as hard as practical. It was once the same mindset in Europe and America too, but no longer. Please see the article at this link for details.
This solution is to use your blades in accordance with the principles detailed in Challenge 2 above, and maintain them properly thereby reducing the frequency of sharpening.
Solution 4 – Reduce the Amount of Sharpening: The essence of this solution is to sharpen your blades efficiently, so that less metal must be abraded/polished and turned to mud during each sharpening session. For this solution to be effective Beloved Customer must develop an essential skill, namely a sense of when your tool has dulled to the point where it is best to stop work and resharpen the blade while it can still be quickly and efficiently resharpened thereby saving time, steel and stone, instead of banging away with the chisel until the edge deteriorates to the degree it will take major effort and excessive time on rough stones to resharpen. This is a vague skill that takes time to obtain and self-control to implement, but nonetheless it’s an important professional skill and one worth developing.
Challenge 4 – Handle Setup is a Pain in the Assets
Your humble servant has performed setup procedures on hundreds of chisels, and while it can be pleasantly meditative at times, indeed the perfect opportunity to bond with a new tool, I acknowledge it’s sometimes a burden. We recommend Beloved Customers perform a full “setup” on the chisels they purchase from us in accordance with the instructions in the article at this link. Why? Because it will help the chisel’s handle last longer and sometimes will make the chisel perform better. That said, while not doing all the setup steps described in the article will not make your chisel self-destruct, it may cause you to inadvertently damage its handle over years of hard use.
Compromise Solution – Setup Only The Hoop: If you can only do one step in the setup procedures for your chisels, chamfering and fitting the hoop is the most important. All else can wait if it must.
Setting up the katsura hoop is the single critical task in chisel setup. Failure to do so can lead to the damage seen in these photos over years of service, especially if a hammer with a domed face is employed.
Challenge 5 – The Mystery of the Disappearing Itoura
As mentioned above, the itoura is the land at the ura located immediately adjacent the cutting edge. In fact, it forms one-half of the cutting edge. Sharpening the blade’s cutting edge makes the blade gradually shorter and the itoura gradually narrower, eventually making it disappear entirely, unless proper technique is employed. Please note, however, that a narrow itoura is not a bad thing up to the instant it ceases to exist. So, how best to deal with the Mystery of the Disappearing Itoura?
Solution 1 – Balance the Abrasion of the Itoura and Other 3 Lands of the Ura: Besides making the blade sharper, abrading the ura uniformly during sharpening produces the following two consequences: (1) All four of the lands surrounding the uratsuki (hollow-ground depression at the ura), especially the itoura and side lands (ashi), gradually become wider, each to varying degrees; and (2) The uratsuki gradually becomes shallower. The solution your humble servant presents here is to pay attention to the itoura’s width, and to abrade the ura at a pace and in a focused manner that maintains a useful itoura even as the blade becomes shorter, but without excessively wearing out the uratsuki. A balancing act of sorts.
To do this, besides having an attentive eyeball, and while it may seem counterintuitive, you must not focus abrasion evenly over all four lands of the ura, but instead focus finger pressure and therefore abrasion primarily at the itoura instead, while at the same time keeping the 4 lands at the ura more-or-less planar. This is counterintuitive to people accustomed to the uninterrupted slab of apparently (but seldom actually) flat steel on Western chisels, but it requires the sharpener to apply focused, fingertip, point control instead of just chugging a beer, plopping the blade’s ura on the stones, leaning in and grinding away like a badger digging a juicy gopher out of its hole. This hand/eye skill is one the woodworking gurus selling books and classes either don’t know or overlook, shame on them, and the goobers on NoobTube never even consider.
Solution 2 – Restore the Itoura Through Uradashi and Uraoshi: The Mystery of the Disappearing Itoura is typically more of a problem for plane blades than chisels, but the same techniques used for plane blades can be used to restore the itoura of a chisel through a couple of processes called “Uradashi” and “Uraoshi” described in great detail at the article linked to here. However, please note that, while these techniques work well on plane blades and carving chisels, they do not work as well (or at all) on narrow chisels due to the extra-rigid construction of their blades. Consider yourself duly warned.
Solution 3 – Sharpen the Ura Using Ultra-fine Stones Only: Here in Japan the sight of chisel and plane blades owned by professional woodworkers, especially carpenters, with the ura worn away entirely is common. These craftsmen work in the field under great pressure, with limited access to tools, and often lacking adequate time to sharpen their tools gently. Consequently, to save time, instead of switching to a fine-grit stone, they will sharpen both the bevel and ura of their blades using only a single rough or medium grit stone. The problem is that, once the ura is in good shape, it seldom needs to be worked on anything but fine finishing stones, so working it on rough or medium stones during each sharpening session wears away the ura’s lands quickly and consequently prematurely wears away the ura. If you value your tools, and expect them to serve you a long time, I encourage you to use only fine-grit stones on the ura of your blades for routine sharpening, and save the rougher stones for occasionally remediating chips and other defects. Your tools will thank you.
The beautiful ura of a new Hidari no Ichihiro chisel. Please note that should the itoura on this chisel evaporate some day, uradashi cannot be used to restore it because the “U-shaped” steel lamination in the blade is just too narrow and too darn stiff.
Challenge 6 – The Uratsuki Dissapears
As mentioned in Challenge 5 above, sharpening the ura’s 4 lands abrades them making them wider, and at the same time, the hollow-ground uratsuki they surround, shallower. Appearance aside, a shallow uratsuki is no big deal except that the resulting wider lands take more time and stone to polish with each sharpening session, a problem because time is money and good stones ain’t free.
Solution 1 – Employ Balanced Sharpening: This solution is similar to Solution 1 in Challenge 5 above, but somewhat the inverse. As described in our series of articles about sharpening Japanese tools, unless there has been major damage done to the cutting edge, such as a chip or busted corner, it is seldom necessary to use anything but your finest grit sharpening stone to polish the ura. What typically causes the uratsuki to mysteriously disappear, however, is a craftsman using only a single grit of stone, usually a rougher one like 800 or 1000 grit, to frequently sharpen both bevel and ura in the interest of saving time. Don’t get me wrong: this is an absolutely valid sharpening strategy, one frequently employed by professionals under pressure, but it’s hard on chisels and wasteful long-term. Even if you are in a hurry, the time spent working the ura on a finer 6,000 grit stone instead of quicker-acting rough stones is a good investment in your chisel, IMHO. But on the other hand, time is money….
Solution 2 – Accept the Dictates of Fate: No one is getting younger except me and thee, but chisels have a useful lifespan, usually defined as the quantity of sharpening sessions it endures rather than simple time. When, after many sharpenings, the uratsuki of Beloved Customer’s chisel bottoms-out despite your best efforts to preserve it, I recommend you smile at it warmly when you are alone together, call it a good and faithful servant, and keep using it until nothing is left but the handle and the neck, for even then, it will be a better friend than any chisel-shaped Chinese screwdriver, even if the label says “Made in Germany.”
YMHOS
The diminished ura of a still-useful oiirenomi chisel. A good and faithful servant indeed.
A few relevant articles can be found at the following links:
If you have questions or would like to learn more about our tools, please click the “Pricelist” link here or at the top of the page to find our products and use the “Contact Us” form located immediately below.
Please share your insights and comments with everyone in the form located further below labeled “Leave a Reply.” We aren’t evil Google or fascist facebook and so won’t sell, share, or profitably “misplace” your information. May all my ura perpetually overflow with effluent if I lie.
This is how your humble servant often feels at the end of the day. I need my chisels, I need my planes!
To achieve great things, two things are needed: a plan and not quite enough time.
Leonard Bernstein
Does Gentle Reader ever feel tired, restless, or achy after a difficult experience? Do these symptoms ever progress to insomnia, headache, neck pain, backache, chest pain or even (heaven forfend, I need a fire extinguisher) untimely spontaneous human combustion? And do any of these symptoms persist even after the pressures that precipitated them are gone? If so, you may be a human, perhaps even one of those with a brain and a soul connected to your body.
In this article, your most humble and obedient servant will, as Tim the Toolman Taylor often did, dare to diverge just a step or two from the beaten path of tool talk to consider how tools and woodworking may help us mitigate the dangerous stress most modern humans experience daily. So hi ho neighbor, let’s have a conversation over the fence.
A Tale of Stupidity
I promise you nothing is as chaotic as it seems. Nothing is worth diminishing your health. Nothing is worth poisoning yourself into stress, anxiety, and fear.”
Steve Maraboli
Allow me to begin with a true story, one of stupidity and toxic stress, just another fun day at the office.
Many years ago when the world was bubbling with promise, my head was fuzzier, my beard was darker and my waist was slimmer I was employed by a mid-sized Midwest construction company doing a design/ build factory for a Japanese precision parts manufacturer. Besides the construction of the factory expansion, the work included installing foundations for carburizing ovens used to create a hard skin on the steel parts they manufactured. I was tasked with marking out a concrete slab for core-drilling a series of pier foundations to support these ovens.
Everything went well, my layout drawing was approved, the slab was cored and piers were cast on-time. But when the equipment supplier’s salesman came to inspect the foundations he informed my boss they were spaced incorrectly. A disaster!
BTW, I was never told why my layout was wrong, but once the ovens arrived it was as obvious as the bill on a duck’s face that the manufacturer’s drawings didn’t match. In any case, at the time I was certain the foundations would need to be reworked, delaying installation of the ovens, and consequently the Owner’s production start, so I was sick with embarrassment at probably having delayed the project, and felt obligated to repay my employer the cost of remediating my apparent mistake. So between personal shame, the fear of potential schedule delays, and the thought of paying thousands of dollars out of my own pocket to make things right I was seriously stressed for about a week. Headaches, stomach aches and chest pains ensued forthwith.
My boss was a steady guy named Jim who heard out my profound apology while squinting at me like Blondie frequently did at Tuco the Rat, then snorted and called me an “ijit.”
Jim explained that if everyone who worked on a construction project were to be held personally financially responsible for minor unintentional mistakes, no one would do anything. And even if they were held responsible for their screwups, the construction company would then be obligated to pay them for everything they did right as a percentage of the project’s profits. And that wasn’t the arrangement.
Although Jim was gruff, even insulting, the results of his impromptu jobsite trailer therapy session were undeniable, providing me with necessary perspective, quickly dissolving the emotional stress that was crushing me, even relieving the physical symptoms I was suffering. And all without a couch! We all need someone like Jim.
When the crew that came to install the carburizing ovens entirely ignored the footings we had installed, but bolted steel “I ” beams to the slab instead, and then mounted the ovens on them I was shocked, even a little angry! They explained that’s how they always installed their equipment. And yes, all my self-recrimination and stress had been silly.
No doubt many Gentle Readers have learned similar lessons, but there’s a quote I’m fond of by Winston Churchill, the Prime Minister of England during WWII, a former soldier and fearless leader who bravely persevered as bombs and missiles rained down around him, the nation’s cowardly bureaucrats and politicians hid like rats in rubbish piles, civilian women and children were being murdered, and his nation was about to be invaded by a brutal enemy, to be apropos to most (but not all) stressful situations:
When I look back on all these worries, I remember the story of the old man who said on his deathbed that he had had a lot trouble in his life, most of which had never happened.
Winston S. Churchill
An iconic photo by Yousuf Karsh of Winston Churchill taken at the Hotel Château Laurier in Ottawa, Canada. Known as The Roaring Lion, it was stolen from the hotel’s Reading Room sometime after 2019, but it still has wide circulation as the image on the Bank of England’s £5 note. The story goes that Churchill did not want to be photographed, but permitted Karsh a single shot. To make the photograph more interesting, Karsh suddenly plucked Churchill’s ever-present lit cigar from his lips just before triggering the shutter prompting the glowering visage.
Herding Cats
Since those halcyon days my philosophy towards life and work has changed.
I once vainly believed I could control the people around me, or at least those I was responsible for, but with experience came the realization that attempting to control people is like pushing cats towards a goal with a small broom while demanding they knit sweaters along the way. The truth is that I have never been in control, that I can never successfully make anyone do anything, and that whenever I try to, all semblance of goodwill and cooperation is lost as everyone scatters and stress levels skyrocket.
One can never successfully “herd” cats, but at best only “lead” them (and sometimes even people) to go where you want them to go, or to do what you want them to do, with fish in hand, an even tone of voice and frequent ear rubbing, if you know what I mean.
While I don’t push people nowadays, I frequently have Clients, mostly inexperienced, egotistical, mid-management types who don’t have a clue but are frantic to climb the corporate ladder, consequences be damned, who expect such counter-productive foolishness of me on their employer’s behalf. Without appearing to refuse or contradict, of course, I always try to find other solutions, but when this is not possible and the Client stubbornly insists on Marxist measures, I separate myself from such projects because I know they will not only fail, but will yield unpleasant consequences for everybody involved, including tons of shame and crushing stress for me.
Don’t get me wrong, construction projects involve coordinating the efforts of a lot people, and sometimes stern measures are necessary, but nowadays while I still plan, lead, encourage, monitor, track and report progress, remind, sound alarms, send warnings, chide, reward, and even contractually penalize when necessary, I don’t push.
So here’s your unworthy servant’s current philosophy about life and stress in a nutshell:
Thoroughly understand your goals, objectives and responsibilities, plan how to accomplish them, be diligent in achieving them, and never blame others for your mistakes;
Without exception, everyone makes mistakes, constantly, so be as kind and understanding as reasonably possible. If you’re lucky, they might just return the favor, but even if they don’t, it will help to decrease stress levels all around. They’re just cats after all;
Don’t accept responsibility for anything for which you are not truly responsible;
Although senior executives in both the private and public sectors frequently secure their high pay and lofty station by abusing the goodwill of others, no matter how cleverly or coercively they present it, don’t allow anyone to foist either their responsibilities, or their mistakes, off onto you (unless you agree to it in advance and they pay you oodles of money for the resulting stress);
As taught by those Great Philosophers Lord Buddha of India and Red Green of Possum Lodge, always remember that life is suffering, all the time, and accept that Murphy will carnally poke you with his pointy purple pecker often and painfully, so don’t expect an easy time, and prepare Vaseline and bandages accordingly.
One last philosophical concept that I have found useful. In the West there’s the saying that goes “water off a duck’s back,” meaning “nothing bothers you.” In Japan they have a more colorful saying, one that many small boys have enacted, that goes “piss in a frog’s face.” To the duck it’s just another wet day in a wet place. To the frog, it’s just a warm shower. Since killing stress originates in the mind, the expectations of the duck and the frog are worth emulating. Seriously.
I believe that internalizing the 5 points listed above, perhaps urinating on frogs 𓆏 occasionally, and employing small remedies frequently rather than making big corrections too late, can minimize the need for Dr. Alonzo’s Pretty Purple Pills, those dreadfully unfashionable and scratchy canvas jackets with straps and buckles that chafe the crotch something fierce, and/or heart surgery.
Setting amphibian abuse, chest incisions and uncomfortable fashion aside for now, let us next consider one such small remedy.
Stress Reduction Measures
The criminal pharmaceutical companies and their well-paid “scientists” (aka “shills”) in the medical profession will happily sell you heaping pallets of pills to cure what ails you, but honest doctors frequently recommend less profitable, but no doubt more effective measures, including exercise, more sleep, vacations, music, reading, spending time with friends and family (even though they are frequently a cause of high stress), and hobbies. Some of these may work for you. I’ll touch on hobbies more below.
Many people like to imbibe a drop of grog at times to relieve accumulated stress. This is certainly the case here in Japan where people generally love demon rum but become inebriated easily due to a common genetic enzyme deficiency. But as someone who is frequently forced to spend time in the company of drinkers in business situations, I’ve concluded adult beverages don’t actually relieve stress but only make the drinker forget his problems for a few minutes as they worsen, turn him into a useless fool for a few hours, and destroy his liver forever. And don’t forget the injuries, traffic deaths, fights, jail time, divorce, poverty, suicides and murders cork-pulling always produces. Such an uplifting beverage.
One of the disadvantages of wine is that it makes a man mistake words for thoughts.
Samuel Johnson
A less addictive and more reliable method I have found effective for relieving the stress that originates inside my head and heart is to do selfless service for others, service that I will not be rewarded for, and ideally, service I will not receive recognition for. Are there lonely, stranded, hungry, poor, sick, handicapped or damaged people in the neighborhood? Can I help by picking up stuff for them up at the grocery store or pharmacy? Can I give them a ride to a doctor’s appointment? Are their doors, windows, locks, cabinets, furniture, water heater, car brakes or roof giving them grief? Do they need help paying a bill? Do they just need someone to talk with? To share a burden is to halve it. To carry a friend or neighbor’s burden is to lighten my own narcissistic burdens (everyone has them), at least partially. Serving others without expectation of reward or recognition is powerful medicine in so many ways.
Another method I know that works is meditation, as in spending time alone in a quiet setting, without distractions, pondering simple questions internally without seeking actual answers. No, you don’t need to be a navel-gazing monk or smelly swami to do it, but you do need privacy and quiet, conditions often difficult to secure at home, especially since, regardless of her age, the female of the human species congenitally cannot tolerate the sight of a man being content while doing nothing, and upon seeing such a pitiful fellow, cannot stop herself from insisting he get busy following her orders. Thus it has always been.
But there’s another form of meditation your humble servant has found to reliably relieve stress, performed not in a hidden Shaolin temple or in a secluded grove, but still in a private, if perhaps dusty, environment.
The Holy Workshop
A beautiful 54mm Otsukinomi Paring Chisel by Nora.
Although I once worked wood professionally, it’s only my hobby now. But I find that, when done correctly, even meditatively, it can be highly effective at relieving stress. To do it correctly, however, a simple workshop is necessary, one without email, telephones or other distractions.
Big or small, light or dark, warm or cold, the design doesn’t matter so long as it has a door, even if it’s an imaginary one like that of the renowned radio News Director and anchorman Les Nessman (5 time winner of the coveted Buckey News Hawk Award, donchano). Once I close this door, no one but me is allowed to enter its sacred precincts or fiddle with the sanity retention implements (tools) housed therein. And that includes bench dogs and cats. But for it to be a serene, meditative, healing space, She Who Must be Obeyed and “The Spawn” must be ruthlessly conditioned to quiver at the very thought of removing my tools, and dread the consequences of chucking junk into or storing stuff in the holy workshop.
When I am in my workshop, I accept no demands to do this or do that. I don’t respond to email or the telephone, unannounced visitors ringing the doorbell, calls to dinner, much less demands to take out the garbage. It’s not that the holy workshop makes me rude and/or unresponsive, it’s simply that these distractions are lower priority than my health for a short time, and the restorative balm must be allowed to soak in, you see.
In this private space I work on my projects, usually simple woodworking or tool maintenance, using the woods I love in the company of the undemanding, sharp friends that reside, play dice and drink beer in the evenings in my toolchest. No schedules. No one to criticize or complain, no one to seek approval or payment from, and no one to please but myself. And while the fruits of my time here mostly go to others, in this bubble environment I only make what I want to make, when I want to make it, using the materials I want to use and tools that willingly link my mind and soul to the wood I am shaping.
But lo, one more thing is essential to the effectiveness of the holy workshop: When people ask me what I make in there, I always answer “wood shavings and sawdust,” for you see almost any other answer invites prying questions and ultimately stirs up invasions by curious people with too much time on their hands who will invariably request woodworking-related “favors,” responding to which will induce more stress into my ragged life. Oh, and when children ask me what I plan to give them for birthdays or Christmas, I pretend to sort through my tattered memory and then respond in a serious tone: “Do you prefer wood shavings or sawdust?”
In past years, this temple to woodworking has been a piece of old carpet laid for a few hours on a concrete slab in front of a dingy apartment for my shorty sawhorses and atedai to cavort upon. At other times, it has been a reed mat spread under quaking aspen or pine trees in a mountain glade. Most often it has been half or all of a garage with a workbench. Lately it has been a spare bedroom on the second floor of a small single-family house in Tokyo. Whatever shape it takes or amenities it may have, my workshop is for just me, my wood, and my tools.
Conclusion
Although it’s hardly worth the effort, perhaps Gentle Reader now understands the method to my madness when I call my beautiful, faithful, hand-forged tools “sanity retention implements.” I am convinced the time we spend together has, like water from a duck’s back, shed much deadly stress from my life, making my little workshop and simple handtools cheaper than therapy, tastier than Dr. Alonzo’s Pretty Purple Pills, and certainly more pleasant than heart surgery. I no longer use my tools to feed my family, but I’m convinced they “cure what ails me.” Cheap at twice the price, say I!
Let’s conclude this merry tale of mental illness with a final quote about Winston that Gentle Reader may find inspirational.
He was one of the finest orators of all time. And some of the phrases he used still resonate with us today, such as “Finest hour,” “Never surrender,’ and of course, “We shall fight them bitches.”
Philomena Cunk para-quoting Winston Churchill
YMHOS
Master carpenter Rokuza in Olde Edo with his plane and gennou hammer in hand, thinking about his lady instead of work. Some things never change.
To learn more about and to peruse our tools, please click the “Pricelist” link here or at the top of the page. To ask questions, please the “Contact Us” form located immediately below. You won’t be ignored.
Please share your insights and comments with everyone in the form located further below labeled “Leave a Reply.” We aren’t evil Google, fascist facebook or treacherous TikTok and so won’t sell, share, or profitably “misplace” your information. If I lie may frogs pee in my face.
I made myself a snowball As perfect as could be. I thought I’d keep it as a pet And let it sleep with me. I made it some pajamas And a pillow for its head. Then last night it ran away, But first it wet the bed.
Shel Silverstein
In this article your humble servant will introduce a Japanese plane called the Kiwaganna, meaning “skewed rabbet plane.”
This is an important handplane in common use in Japan, and one we sell, although it’s not well known in the West. So for the benefit our Beloved Customers, I will explain of some of the solutions learned over the years from senior Japanese craftsmen, and acquired during many decades of brutal study at the University of Stoopid, School of Hard Knocks (Lower Outhouse Campus), which may prove useful.
What is the Kiwaganna Handplane?
The Japanese Kiwaganna is written 際鉋 in Chinese characters, and pronounced kee/wha/gah/nah. “Kiwa” means “edge” or “verge,” and “ganna” means handplane.
While the design of the Japanese version of this handplane is unique, as far as your humble servant is aware many other versions exist around the globe. The Japanese version has a wooden body, a laminated blade, and is significantly lighter in weight and smaller in volume than its counterparts. It is a superior tool, IMHO, but it can be quirky.
This plane can handle a number of tasks, but it specializes in planing a straight-sided groove or rabbet right up to an edge or line with a clean 90˚ inside corner. A few common applications include planing the tongue around the perimeter of a board to make the bottom of a drawer, and raising a panel in frame and panel construction. In construction work it is frequently used to pare and clean tenons in timbers, especially those cut with circular saws which tend to leave a step, and to fit finish woodwork, among many other tasks.
This plane is of course used by joiners, cabinetmakers, sashimonoshi, and furniture makers but you would be surprised at how popular it is with carpenters and timber framers for cleaning the 90˚ inside corners of joints such as tenons.
Craftsmen who use kiwaganna typically own a two-piece set comprised of a right-hand and left-hand version to deal with tight access and changing grain direction. But the right-hand version is the most popular by far.
Advantages of the Kiwaganna Plane
In general, a skewed blade in a rabbet plane provides two benefits. The first is that the reaction forces pushing back on the blade include a vector that tends to push the plane towards the line, edge, inside corner or verge being planed to, making the plane more stable in the cut, an important factor where precision is necessary.
The second and perhaps most important benefit of the skewed blade, however, is the smoother cut and reduced tearout it makes possible, especially important when planing cross-grain.
Another benefit the skewed blade provides in the case of the Japanese kiwaganna is the point of the skewed blade penetrating the body of the plane and ending flush with the side of the body, making possible a zero-clearance cut to a line without the extra weight and cost of complicated mechanisms and reinforcing plates. It’s a deceptively simple but clever design.
Points to Keep In Mind
While a simple tool, the kiwaganna often proves frustrating to first-timers. Indeed, your humble servant struggled with kiwaganna for far too long before he figured them out. To avoid similar damage to brain and ego, Beloved Customers that wish to become proficient in using this elegant tool will find it useful to understand the following nine points. The articles linked to below, while not written specifically about the kiwaganna, are nonetheless relevant and may prove helpful
1. First, a brief inspection of the body and the cuts made to receive the blade will make it clear that kiwaganna dai (body) are more fragile than that of regular hiraganna planes, so when adjusting the blade, please use a wooden, plastic or rawhide mallet, not a steel hammer.
2. When removing the blade, strike the dai at the same angle as the blade is inlet into the dai to reduce unnecessary stresses. This means you will hit the top corner of the dai on the side opposite where the blade’s point exits. Clip off and round over this corner of the dai with a knife or chisel to prevent your mallet from chipping the dai. Striking the opposite corner can have bad results.
3. The first step in truing/adjusting the blade of a kiwaganna plane is to sharpen and polish the blade and uragane (chipbreaker) well, make sure they fit each other tightly without a gap near the cutting edge, and check that there is adequate and uniform clearance at the mouth so that shavings flow smoothly without clogging. The skewed nature of the blade and chipbreaker make this difficult to judge, so exercise caution. In many cases, the plane will work just fine, and maybe even better, without its uragane. The uragane has a bevel ground into its pointy corner. Make sure this is not touching the dai when inserted properly. Keep in mind that you will need to periodically grind this bevel down after sharpening the blade every few times or it will touch the dai creating a restriction where shavings will become jammed. When you sharpen the blade, you will also need to resharpen the uragane too to ensure they match each other tightly. Not every time, but once in a while. A lot of people fail to maintain the uragane and then suffer emotional anguish when their plane mysteriously stops working. Mystery solved.
4. The right and left side edges of the blade must fit the retention grooves tightly where they exit the top surface of the dai. If the fit is too loose, the blade will be difficult to keep in alignment, but if the fit is too tight the blade may crack the dai during seasonal shrinkage. Older dai are usually safe, but a plane shipped from a wet Tokyo summer to a hellishly dry Arizona may experience problems. This articleprovides more details about fitting the body to the blade.
If it becomes necessary to shave the grooves, work very slowly and carefully. Color the blade’s side edges with pencil lead, marking pen ink or Dykem. Insert it into the grooves and note the high colored areas. Shave these down just a tiny tiny bit with a very sharp chisel, or a metal file, then insert the blade and check. Repeat as necessary. Don’t create a big gap between the walls of the groove and the sides of the blade (versus face and underside of the blade which must be tightly pinched in the grooves), just make sure the width of the blade is not wedged tightly between the grooves.
5. Check that the “ear” of the blade (the chamfered corner at the cutting edge opposite the pointy corner) is ground back enough so it does not terminate inside the groove, because if it does, shavings will become jammed. Don’t forget that, with each sharpening, the sharp portion of the blade will become a little wider and this chamfer a little smaller. If it becomes too small, shavings will become jammed between the blade and retention groove, I promise you, so please grind this chamfer back after every few sharpenings.
6. Here is wisdom: Contact between the back of the blade and the block should not be too high-pressure, otherwise the area on the sole behind the mouth may be pushed out making the plane misbehave, an extremely common problem with this plane. You want uniform pressure where possible to ensure the blade is stable, but remember that it is the grooves pinching the blade that keep it in place, not pressure on its back. This is important: If you find your plane stops cutting, it may be because the portion of the dai at the sole behind the mouth is being pushed out as the blade becomes shorter/thicker. The surest way to check this is to use a notched straightedge like the 400mm Matsui Precision product we carry. If the sole behind the mouth is pushed out such that it contacts the straightedge, use a scraper or whatever to pare/shave/scrape excess material away. Indeed, a gap at this area is better than contact. As the blade becomes gradually shorter after much use, its wedging action on the dai may increase pushing the sole behind the mouth out, lifting the cutting edge away from the surface of the wood you need to plane thereby preventing it from cutting consistently, if at all, so check for proper clearance occasionally.
7. With the blade fitted to the grooves and most of the pressure relieved from its back, insert the blade. Check that it projects evenly from the mouth its full width. This is very important. If it projects further on one side than the other, resharpen/reshape the cutting edge so it projects perfectly uniformly. Uneven projection is almost always the result of the user unintentionally and gradually changing the angle of the skew over multiple sharpening sessions, and it always causes problems. Besides projecting uniformly from the mouth (when the sole directly in front of the mouth is perfectly flat), the point of the blade must penetrate the dai (body) and be flush with the outside surface of the sidewall. Heed these words: Failure to get these two subtle details right is the most common cause of failure to perform in the Kiwaganna plane.
8. The mouth opening, in other words the gap between the blade and the sole of the dai where it exits the dai, must be narrow, and even in width, but not closed or skewed, otherwise shavings will jamb in the mouth, another common problem with kiwaganna. If the mouth is not even, use an adjustable steel protractor to match the angle of the blade measured from the side of the dai where the point of the blade exits. Remove the blade and mark the mouth with a sharp marking knife so the mouth is exactly the same angle as the blade. When doing this layout, be extremely careful to make the mouth opening of uniform width to match the cutting edge, but keep the mouth as narrow as possible. Use a sharp chisel to cut to this line making the mouth perfectly uniform. Insert a thin knife blade (or sharpened utility knife blade) into the mouth to shave and clean it after chiseling.
9. There is nothing wrong with leaving the sole perfectly flat instead of having the hollowed-out areas typically added to standard hiraganna planes. Just make sure it is truly perfectly flat. I have no problem with using sandpaper on float glass to true the sole of a kiwaganna, but a card scraper is a better tool for the job.
Juggling Blades
Although we addressed them above, let’s review the two critical factors you must juggle to keep a kiwaganna working well. I’m repeating these points not because I doubt Beloved Customer’s intelligence, but only because repetition improves understanding.
First, maintain the angle of the blade’s cutting edge so that it projects a uniform distance from the mouth (with the mouth/sole flat and true). To do this you must pay more attention when sharpening the blade than is normally necessary. If you get this wrong, nothing will go right.
Second, as mentioned above, to cut into the corner of the rabbet cleanly, the point of the sharpened blade must penetrate the sidewall of the dai and be perfectly flush with the sidewall but without projecting out past the sidewall when the blade is projecting the right amount from the mouth and uniformly across its width. If the skew of the blade is wrong, or the dai is warped or worn, this point will end up being either recessed inside the sidewall or projecting outside it. It needs to be flush with the sidewall. If it’s recessed, the plane can’t possibly cut a clean step in a rabbet because the step in the rabbet will push the plane away from the inside corner with each cut.
On the other hand, if the blade’s point projects out through the side wall of the plane and is not flush with it, the rabbet will be raggedy and a 90˚ inside corner will be difficult to produce. Either of these problems will eventually occur if Gentle Reader uses kiwaganna, sure as Murphy loves optimists.
If the point of the blade is not flush with the outside wall of the dai, you may need to either shave material from the side of the plane (not recommended) or grind down the side of the blade near the point, a drastic measure. This is seldom necessary, and when it is, the reason is almost always a badly warped dai.
As you can see, this is a juggling act, but so long as you focus on these two points, and maintain the proper skew angle, all the blades will remain gleefully spinning in the air as you grin from ear to ear (knock on wood).
YMHOS
If you have questions or would like to learn more about our tools, please click the “Pricelist” link here or at the top of the page and use the “Contact Us” form located immediately below.
Please share your insights and comments with everyone in the form located further below labeled “Leave a Reply.” We aren’t evil Google, fascist facebook, thuggish Twitter or a US government IT consultant and so won’t sell, share, or profitably “misplace” your information. If I lie may my kiwaganna planes all warp to resemble mushy bananas.
In this article your humble servant will introduce a standard woodworking tool which I believe to be unique to Japan, although I have no doubt individual craftsmen around the world have produced versions of it for their own use for thousands of years.
I will explain the jobs this tool is used for, how it is used, how to fettle it, and how to sharpen it. I will also share some first-hand business insight regarding why Japanese women make this tool essential to the joiner in both performing traditional joinery in Japan, as well as the sometimes challenging task of getting paid for his work.
Mr. Spock will also make a brief contribution to the discussion.
Definition & Pronunciation
The Sokozarai Nomi (pronounced Soh/koh/zah/rahi noh/me and written 底浚い鑿 ) translates to “bottom-cleaning chisel.”
It is a simple tool consisting of a differentially-hardened steel shaft, with a small, short, sharp foot formed at the end, attached via a tang to a wooden handle, and secured by a conical ferrule.
The Sokozarai chisel is one of three specialized chisels used specifically for joinery work. Cabinetmakers and furniture makers use it too. Two other specialty joiner chisels are the “Mori Nomi,” which translates to “harpoon chisel,” and “Kama nomi,” which translates to “sickle chisel.” Perhaps we will discuss these in a future article.
A larger version of the sokozarai chisel is used for cleaning the bottom of the larger mortises commonly cut in timber frames.
The Role of the Sokozarai Chisel
The sokozarai chisel is used for two purposes. The first is loosening and removing chips from inside mortises. One simply hooks the offending waste with the chisel’s toe and flips it out.
The second role of the sokozarai chisel is to flatten and even plane mortise bottoms. When set up correctly, it will cut shavings from the bottom of mortises cut in softwood planing them flat and clean.
Indeed, in advanced joinery work, a skillful joiner will plan and execute his joints such that the material left remaining at the bottom of a mortise cut into a stile intended to receive the tenon from a rail is less than 1mm thick, thin enough to allow light to pass through. The ability to routinely cut joints like this, without cutting all the way through, is a mandatory skill of the professional joiner.
I suspect that about now Gentle Reader is forming his elegant eyebrow into an artistic and skeptical arc as he ponders why one would go to the trouble of making clean and pretty the bottom of a hole upon which no one will ever gaze, leaving a paper-thin wall of uniform thickness at the bottom admitting light into a space no one will ever see. Can there possibly be method to this madness? Welcome to traditional Japanese joinery.
Consider that a rough, bumpy floor in a mortise prevents the tenon from seating the last few millimeters, but by planing it flat with a sokozarai chisel, those last few millimeters can be converted to useful space to house maximum-length tenons ensuring maximum resistance to withdrawal and bending forces resulting in strong, slender but durable joinery without adding extra weight. This is a big deal in the case of the slim, flexible frame members found in operable traditional Japanese joinery such as shoji, itado and tsuitate screens, joinery that must satisfy the severe eye and meet the high standards of fit and finish expected by many Japanese women, the most unforgiving consumers in the world.
I don’t know when this detail entered common use, but as Gentle Reader is no doubt aware, the older and more common type of mortise and tenon joint found in joinery worldwide is the through single or double tenon with the tenon’s end exposed at the rail where it is often wedged, a technique that is undoubtedly stronger.
On the other hand, the fully-housed tenon made easier to fabricate using the sokozarai chisel has two advantages over its older, less-refined brother the through-wedged tenon. First, it simply looks better and more elegant when new, and is therefore better able to survive the strict final inspection by the lady of the house thereby more reliably earning the reward of final payment. Hallelujah, pass the bottle brother!
Second, it simply looks better to the eye and feels better in the hand as time goes by because, as the stile shrinks during drier months, the once flush end of the through-tenon won’t project past the surface of the stile creating an unslightly, uncomfortable bump, and during the wetter months it won’t recede back into the mortise leaving an indentation in the stile and an uneven appearance.
These details are not based on esoteric imaginings about quality, but are make or break business decisions essential to avoiding complaints from the same unforgiving Japanese women. And of course, in a country where advertising and representations are routinely and intentionally false (sad but true), word of mouth among sharp-eyed quick-tongued women is critical to a craftsman’s success. Please note that I say this as someone who has has been married to a Japanese woman for 45 years, has lived and worked in Japan for over 32 years, and during those years has had plenty of direct commercial experience working with Japanese women as both customers and team members.
Next time we are sharing a cup of hot cocoa around the evening fire, remind me to tell you the story about two stressful days spent inspecting Thassos marble slabs for a new building’s lobby walls in the company of three Japanese women: an Architect, a Quantity Surveyor, and a Project Manager. All the story lacks is a Rabbi and a Priest to make a gut-splitting joke (ツ)。
A 4.5mm differentially-hardened sokozarai chisel with red oak handle
Using the Sokozarai Chisel
To use the Sokozarai chisel, and assuming you are right-handed, hold the handle in a fist in your right hand with the blade projecting from the bottom of the fist. Lay the back of the fingers of your left hand on top of and crosswise to the long direction of the mortise. Insert the blade of the chisel into the previously cut mortise hole and press the back of the blade’s neck (opposite the cutting edge of the foot) against the outside edge of your forefinger. Then pinch the blade’s neck between your thumb and forefinger. This is the grip.
To remove loose waste, insert the sokozarai chisel into the mortise hole and move it around gathering chips on the chisel’s toe. Then pull the chisel up and out of the mortise quickly to pop chips out.
To cut loose chips still attached in the mortise hole, press the chisel’s foot to the bottom, move it forward until it snags on irregularities, then rotate the handle towards your body using the forefinger of your left hand as a fulcrum to lever waste out.
To shave the bottom, simply move both hands forward with the bottom of the foot parallel with the intended bottom of the mortise. Developing a sense of the chisel’s action will take practice. Shining a flashlight into the mortise frequently at first will help develop these senses.
To check the depth of the mortise, a specialist kamakebiki, essentially a small router plane, is ideal. But you can make a simple depth gauge by sharpening the edges of the head of a nail or drywall screw, driving or screwing it into a small block of wood, then cutting off and filing the point to avoid ouchies. Using this, you will be able to detect bumps and irregularities remaining on the bottom. Indeed, it too can be used to shave the bottom, but it won’t clean all the way into corners unless you grind the head square or rectangular.
For advanced work, make a slightly undersized test stub tenon with shoulders from hardwood the depth of the finished mortise, and anoint the end with cheap dark lipstick or Vaseline with black oil pigment mixed in. High spots remaining at the bottom of the mortise will be highlighted. With practice, you won’t need this test tenon, but you will still definitely need a sokozarai that is sharp enough to plane the bottom.
Next, let’s consider how to prepare a new sokozarai chisel.
Fettling the Sokozarai Chisel
Unlike most other Japanese chisels, the Sokozari chisel is not laminated construction, but is formed of one piece of differentially-hardened high-carbon steel. Differentially-hardened in this case means that the foot and lower 1/4 of the leg’s length are hardest, becoming progressively softer going up the leg until it is dead soft at the tang. This means the cutting blade, (what your humble servant calls the “foot”) of this chisel will become sharp and stay sharp, but the neck is left softer so it will not snap off, and can even be bent a little to adjust the angle of the foot if necessary.
Low-quality sokozarai have both soft shafts and feet.
Flatten and Polish the Foot’s Bottom
The bottom of the foot needs to be flat and polished, but because of this surface’s narrow width and short length, it can be challenging to accomplish without rounding it over or skewing it.
It often helps to grind a hollow into the foot’s bottom the thickness of a nat’s eyebrow to help speed up the flattening and polishing process. If you use a grinder, be very careful to avoid overheating. It should take no more than one or two brief touches to the wheel.
When flattening and polishing the foot’s bottom surface on diamond plates and stones, it also helps to make a guide block. Cut a slot in the side of a small block of hardwood to house the bent shaft with the bottom of the foot located flush with the block’s bottom surface. Lock the shaft into the guide block with a wedge or a clamp to stabilize it.
The jig in the photos above was made by a Most Beloved Customer who does exceptional high-quality joinery work.
An alternate sharpening jig can made by cutting a crosswise groove, similar to the one shown in the photo below, into the top surface of a stick of scrap wood, perhaps 50mm wide, 200mm long and 20mm thick. The bottom surface of the foot should be almost, but not quite flush with the stick’s edge, projecting the thickness of a piece of paper. Secure this jig to your workbench with a clamp or in a vise, press down on the blade with one hand, and move a sharpening stone along the side of the jig over the foot.
This guide block rides directly on the stone as you flatten and polish the foot’s bottom. Don’t let the foot’s bottom get skewed or rounded over. Work slowly and check constantly. This is a one-time operation.
Once the bottom is flat and polished, you should only need to polish the bottom of the foot on your finishing stone.
Adjust and Polish the Cutting Edge’s Bevel
The bottom of the foot is now flat and pretty, but the angle of the cutting edge is usually still far too steep, and the bevel’s surface is rough. This must be corrected.
Modify the cutting edge’s angle by grinding the bevel on a diamond plate. The final angle you chose for the cutting edge will depend on your preferences and the wood you will be cutting. Steeper angles are more durable. Shallower angles cut better, but dull quicker. 20~24 degrees is usually OK. When I was a young man, I knew professionals who took the bevel angle down to 15 degrees.
You may want to make another narrower guide-block clamping 90 degrees across the the shaft to help hold/stabilize the blade during this operation. When you have adjusted the angle to where you want it to be, then polish it on your sharpening stones. Be careful to avoid skewing it or rounding it over. You want sharp, clean corners.
To routinely sharpen/polish the bevel, hold the chisel in one hand with the bevel face-down on the long side of your sharpening stone. While stabilizing the blade and applying pressure on the bottom of the foot with a fingertip, move the sokozarai chisel back and forth in small strokes being careful to avoid rocking it and rounding it over.
Adjust the Foot’s Length
This step is unnecessary for most applications, but I will touch on it just to be thorough.
The length of the foot is fine as-is for most furniture mortises, but for very tiny mortises as in screens, light fixtures, and small casework, the foot may need to be made shorter. It is not unusual for a tategushi or sashimonoshi to own multiple sokozarai nomi with feet and shafts of different widths and lengths and bevel angles to clean the mortises he makes the most.
Please note that the mortise holes for kumiko members installed in shoji screen and most other types of latticework are shallow and do not require the strength of long tenons, so the mortises are usually cut using mori nomi (harpoon chisels) with a hook on the end to pull out waste quickly, and the bottoms are left rougher.
Conclusion
Beloved Customers that have purchased our chisels, and diligent Gentle Readers that have read this blog, are aware that your humble servant insists our chisels not be used to scrape or lever waste out of joints. The reasons for this are my desire for Beloved Customer’s most excellent chisels to remain as sharp as possible as long as possible, and to avoid chipping the cutting edge. They are, after all, refined cutting tools with sensitive feelings, neither thuggish prybars nor pot-metal screwdrivers.
The Sokozarai chisel was invented specifically as a partner to chisels used for cutting the clean mortises essential to Japanese joinery, and to protect the super-sharp cutting edges of those chisels from damage resulting from barbaric treatment. I encourage you to level-up your joinery skills by procuring and using one. You will be glad you did.
And so I wave farewell until the evening we share a cup of hot cocoa around the irori fire. In the meantime, I am humbly grateful for the honor to remain,
YMHOS
Adieu for now, Gentle Reader!
If you have questions or would like to learn more about our tools, please click the “Pricelist” link here or at the top of the page and use the “Contact Us” form located immediately below.
Please share your insights and comments with everyone by using the form located further below labeled “Leave a Reply.” We aren’t evil Google, fascist facebook, or thuggish Twitter and so won’t sell, share, or profitably “misplace” your information. If I lie may my sokozarai chisels get athletes feet!


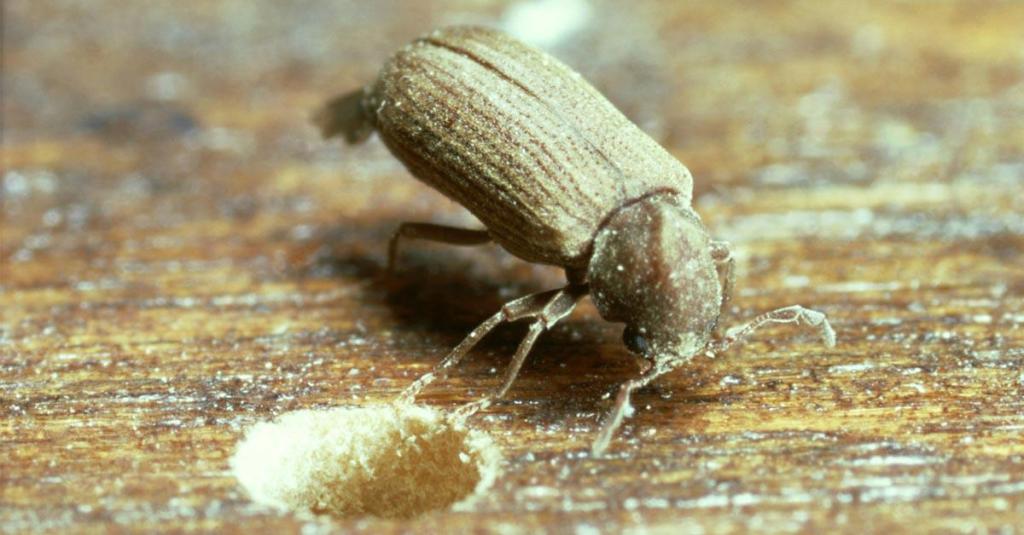

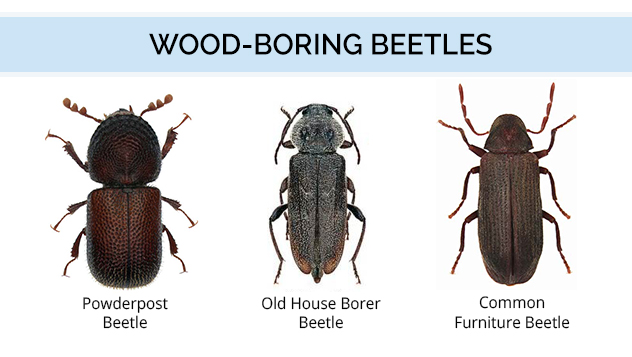

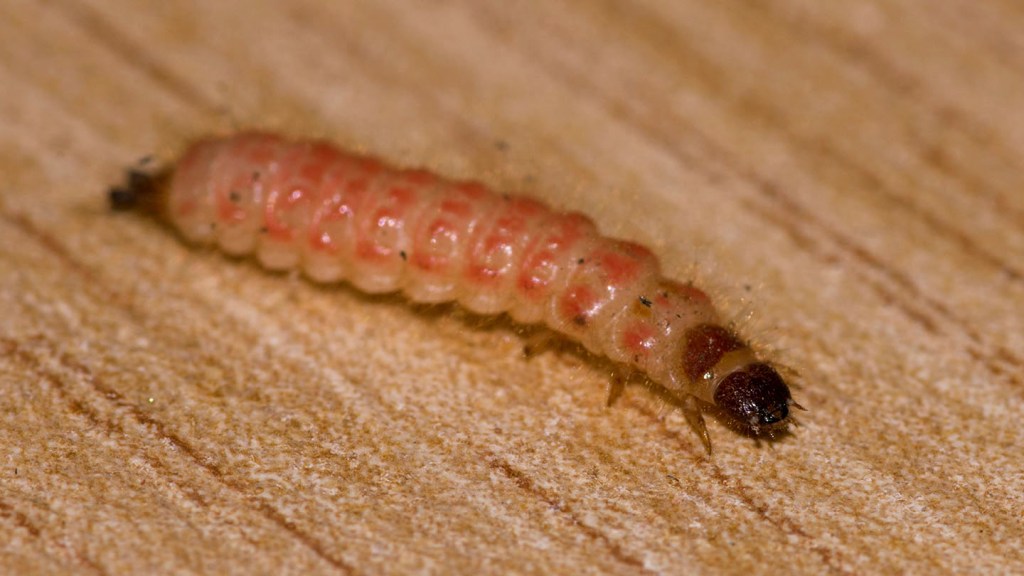
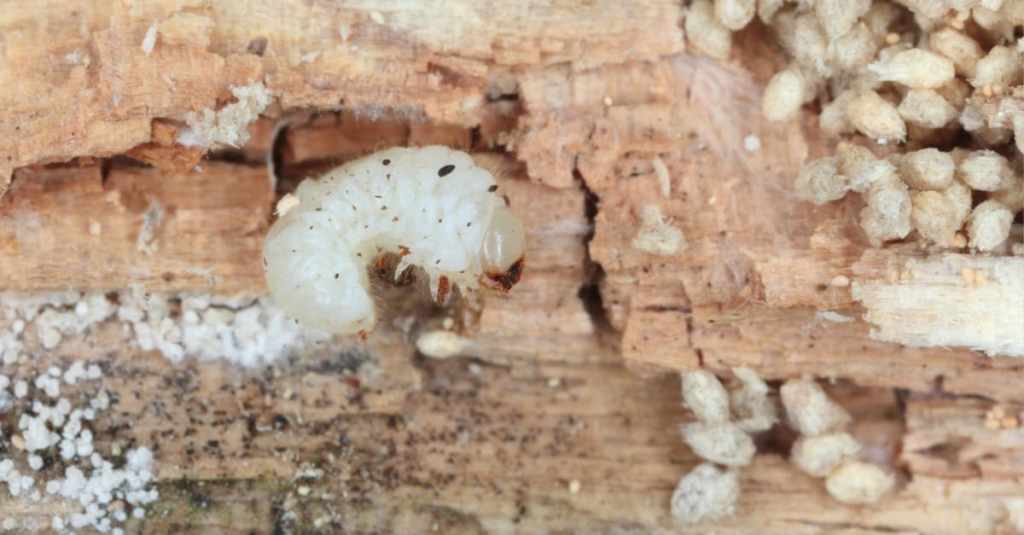

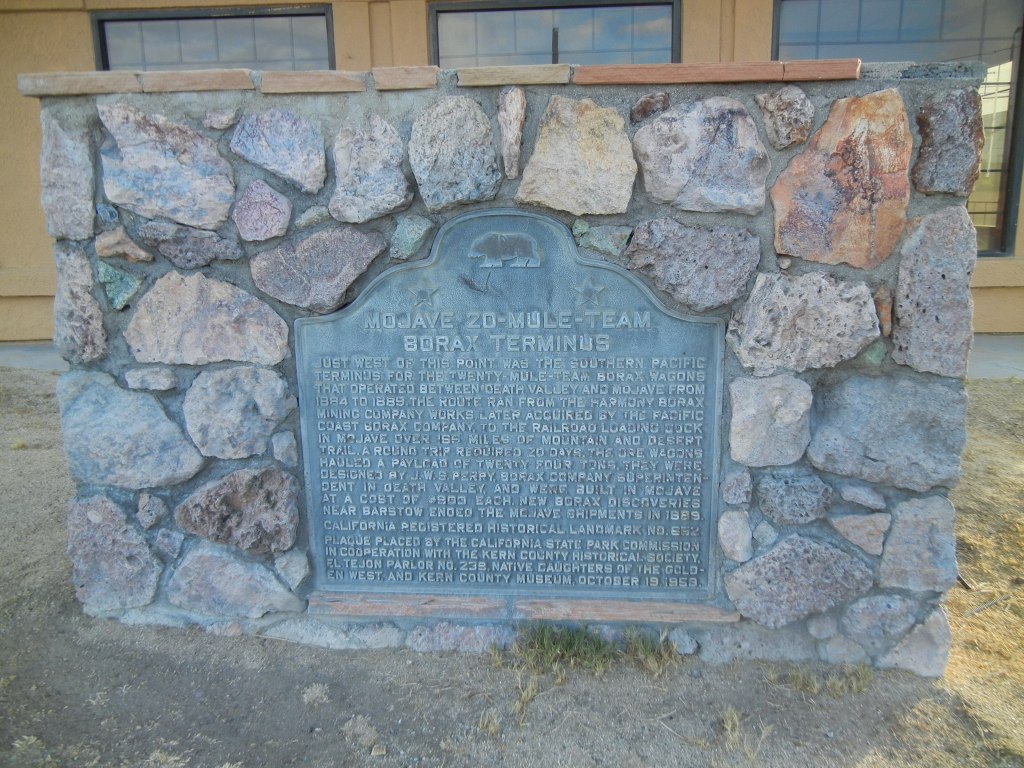
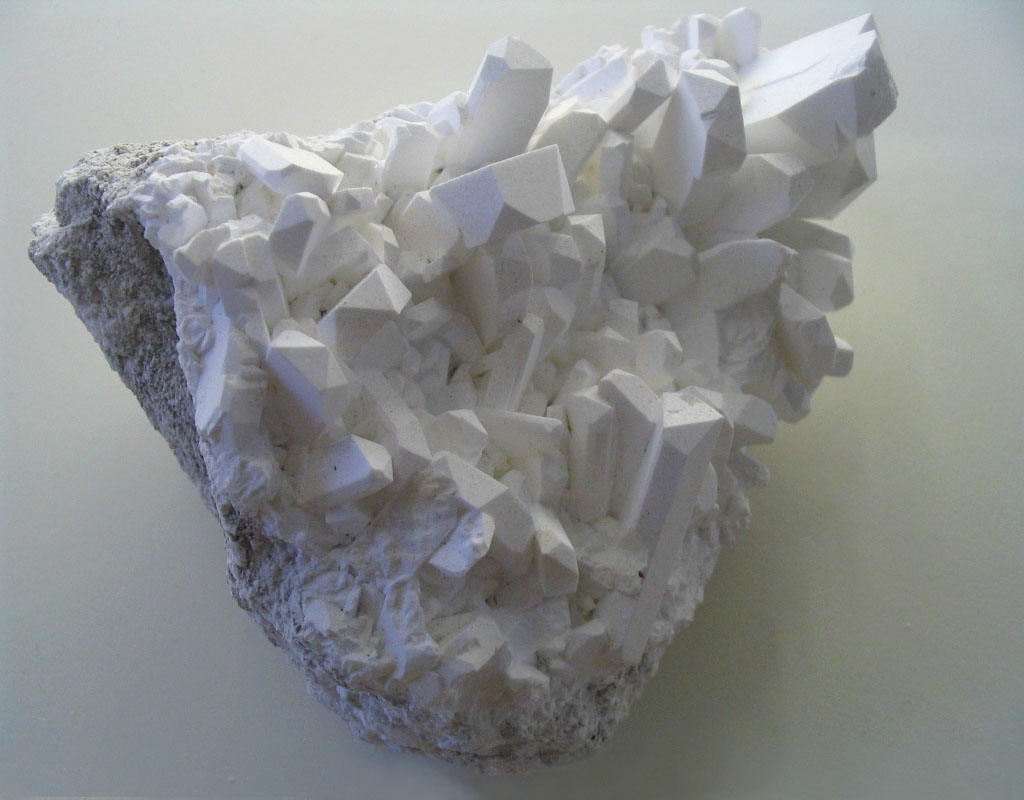


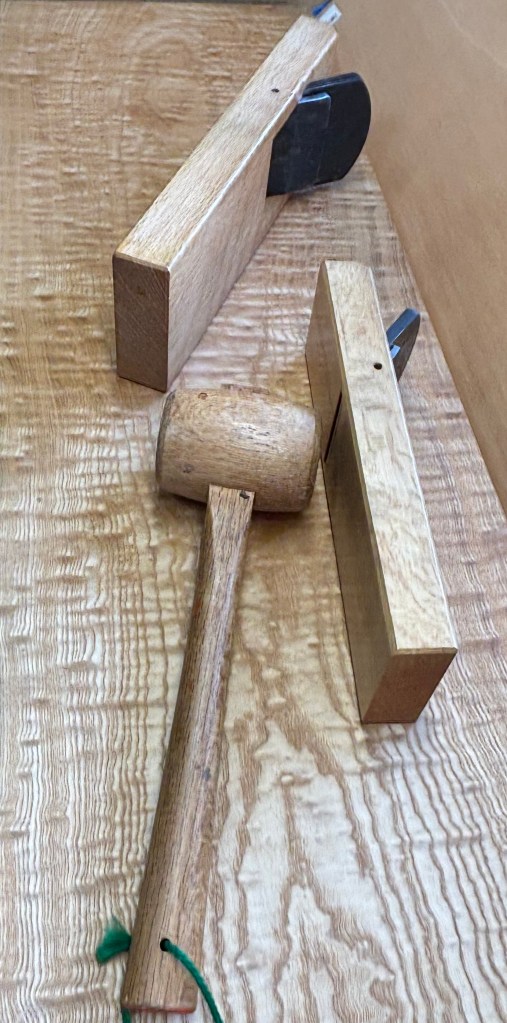
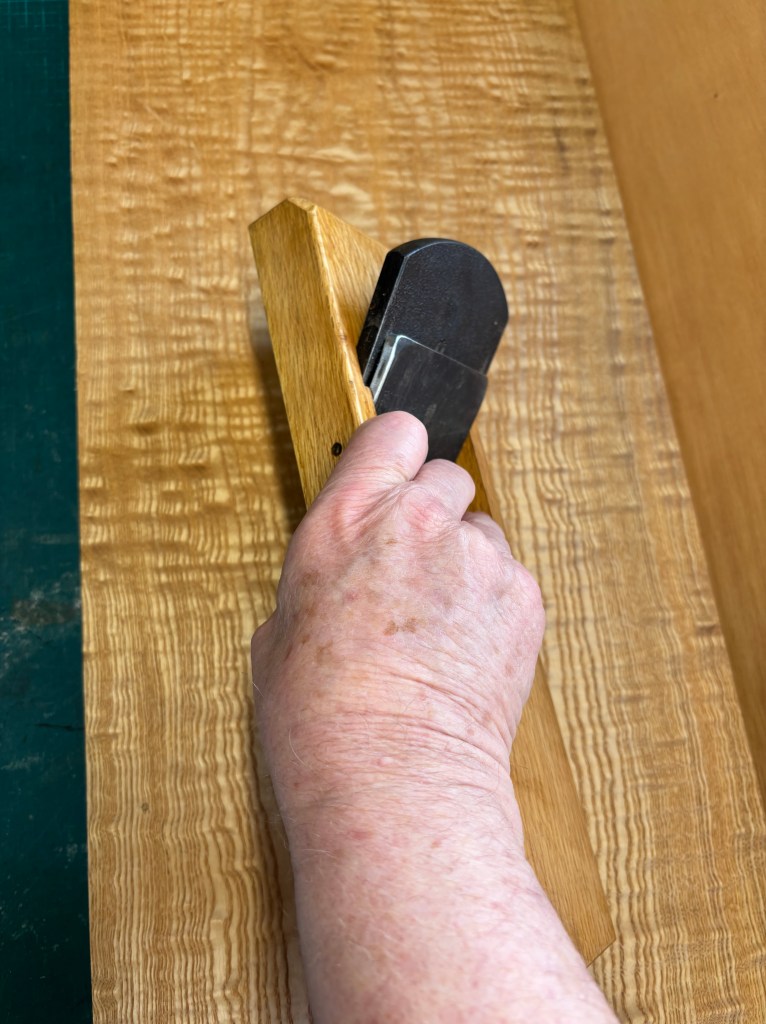


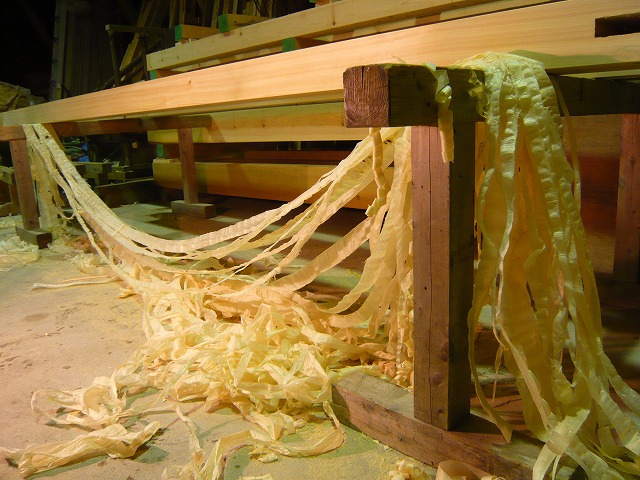


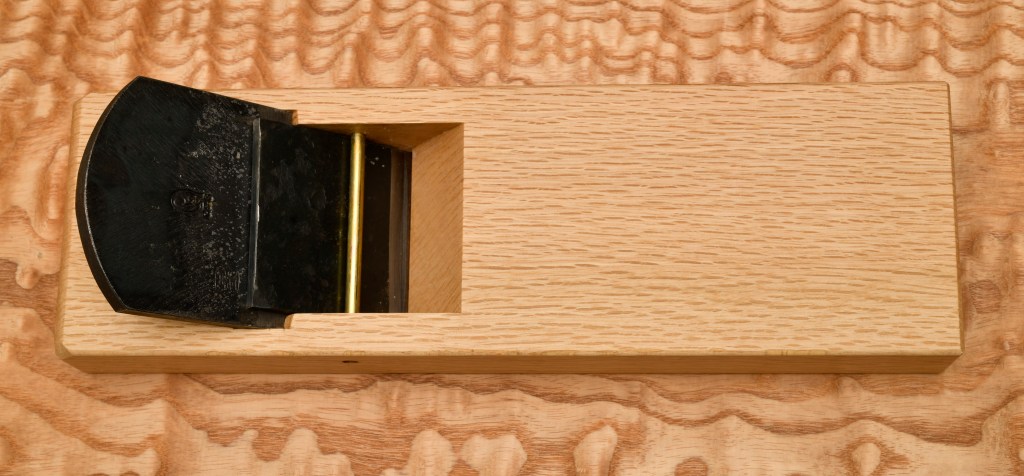
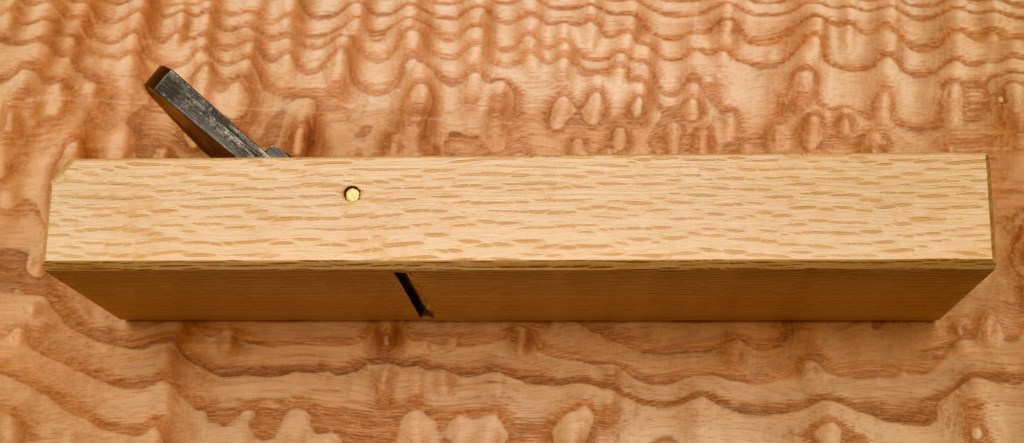

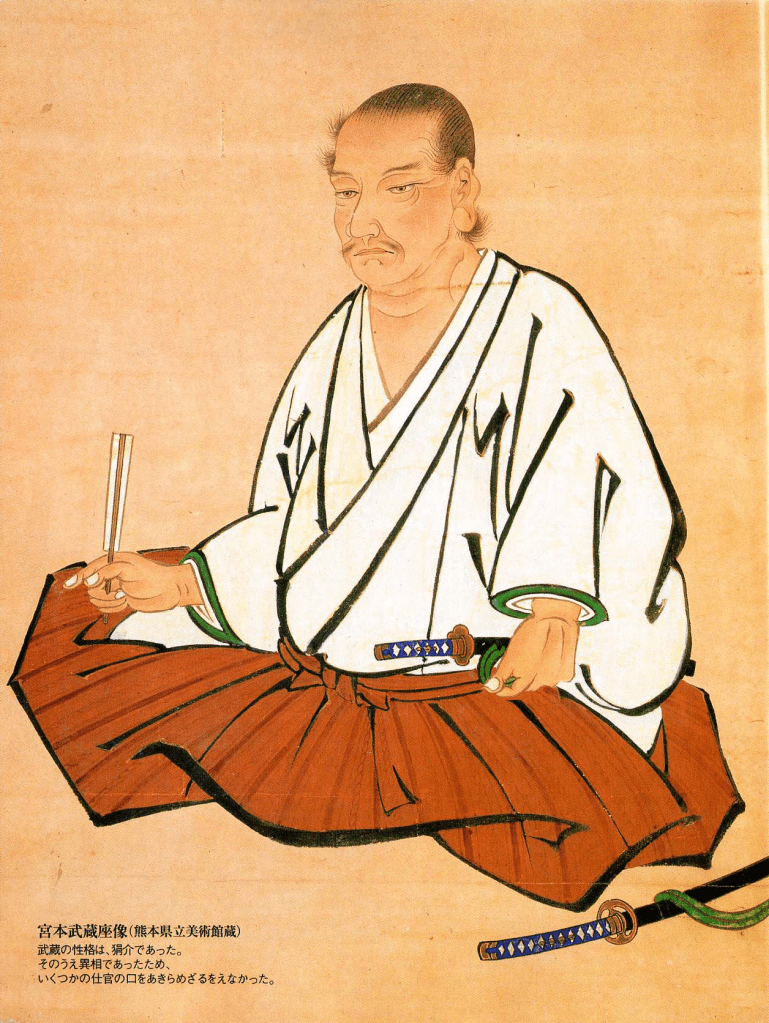

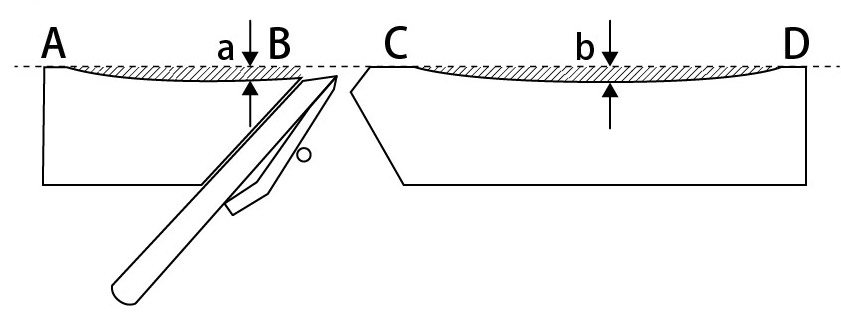


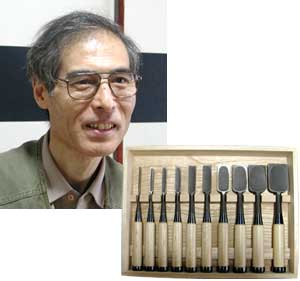


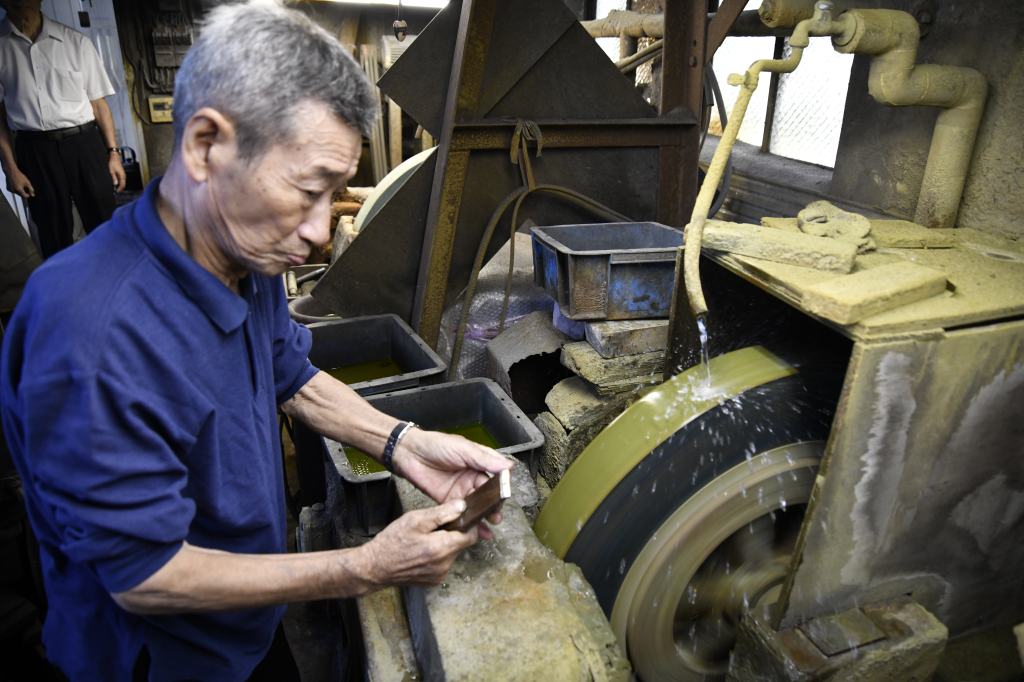


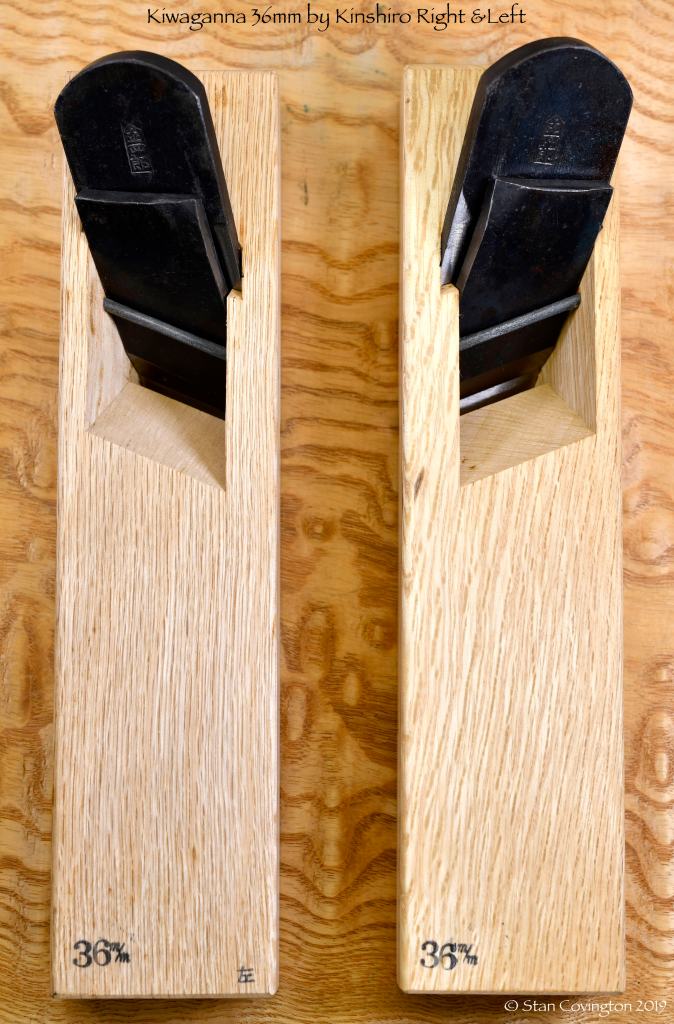


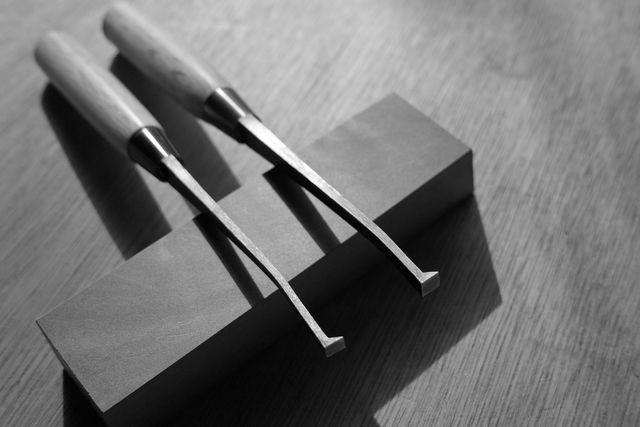


Please Leave a Reply