The Japanese Gennou & Handle Part 5 – Kigoroshi

A Japanese shipwright using a hammer to perform “kigoroshi” on the edges of planks for a traditional boat. The planks are joined using long nails “toenailed” from the upper plank into the lower plank. The pilot holes for these nails are made using a “tsubanomi.” When the boat’s hull is later wetted the fibers crushed during kigoroshi will swell back to near their original size filling gaps and tightly locking the planks together, even when the planks are once again dry.

The difference between something good and something great is attention to detail.

Charles R. Swindoll

In previous articles in this series about the Japanese hammer known as the gennou, we examined the background, history and general varieties commonly available nowadays. In this article, we will expand our analysis of the gennou to include a function not well known outside Japan. We hope Beloved Customers and Gentle Readers find it diverting.

Kigoroshi 木殺し

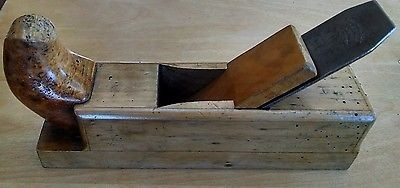
As mentioned in Part 4 of this series, the standard ryoguchi gennou hammer has a flat striking face on one end and a domed striking face on the opposite end. The flat face is well suited to striking chisels, driving nails and the ceremonial wacking of thumbs, while the domed striking face excels at setting nails below the surface of a wooden board, just as Western hammers are. It can also be used for a task called “kigoroshi” pronounced kee/goh/roh/shee. Indeed, this is a technique that can be employed with any hammer having a domed face, although the domed face on many Western claw hammers may be too drastic in some cases. It is a technique worth knowing.

The term Kigoroshi (木殺し)translates to “wood killing” meaning to use a hammer to temporarily crush wood cells. It is achieved by judiciously striking the wood with the hammer or gennou’s domed face. Easy peezy.

When a piece of wood is subjected to successful kigoroshi, the walls of the wood’s cells are deformed and/or partially collapsed reducing the internal volume of the impacted cells, but if the pressure is later relieved and some moisture added, over time the cells of many (but not all) species of wood will swell back to near their original volume.

So how is kigoroshi used? For instance, in the case of a mortise and tenon joint, the tenon is cut oversized, and then struck with the convex face of a gennou to deform the wood cells to the point the tenon will fit into the mortise. With time, the tenon absorbs moisture from its surroundings and naturally tries to swell back close to its original size locking it tightly into the mortise. I’m sure you can see the possibilities.

In this short video, the carpenter is performing kigoroshi with the convex face of his gennou to the shoulders of an Akita Sugi (Cryptomeria japonica) beam to enable it to fit inside a housed dovetail mortise. The shoulders will later swell back to close their original dimension closing any minor gaps, hopefully locking the beam tightly into the mortise hole.

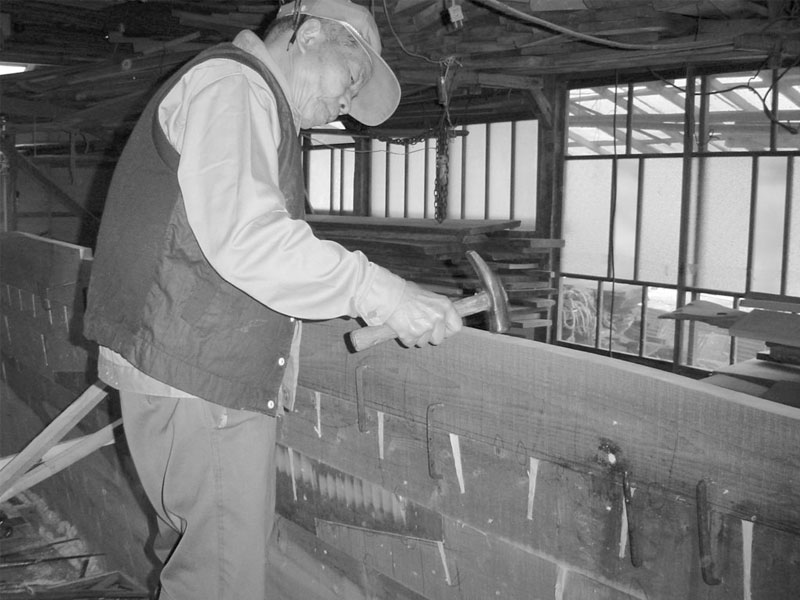
Another application of kigoroshi is seen in traditional Japanese boat building where the edge joints between planks forming the hull are hammered, effectively making the planks narrower. After the planks are attached to the ship’s ribs, their crushed cells gradually swell and attempt to return to their original volume, tightly pressing the planks against each other and closing any gaps to create a waterproof joint. In this way, a joint that might otherwise loosen with time and changes in moisture content can be made to remain tight and waterproof, even after the hull dries. This boat building technique is not unique to Japan, of course.

A Japanese shipwright performing kigoroshi on the edges of planking prior to joining them together.

One more example. When making a rectangular wooden cask or bathtub from hinoki-wood boards (not staves) in the Japanese style, grooves are cut in the bottom board to receive tongues from the vertical side boards. If these tongues are planed oversize and then their sides are pounded judiciously with a hammer with a slightly rounded face like that of a ryouguchi gennou to reduce their thickness to fit into the groove, when assembled and then wet with water the crushed wood cells in the tongue will rebound and will expand to close its original thickness not only locking the tongue and groove tightly together, but also creating a watertight connection. If done properly, the joint will remain tight even after all the boards have dried, same as the ship’s planking mentioned above.

Many people’s understanding of kigoroshi is too shallow to use the technique effectively and consistently without some practical experience. The opinions of inexperienced people therefore should be scrupulously ignored, but the Beloved Customers of C&S Tools are expected to meet a higher standard of woodworking, so I share this advanced technique with you.

There are a few points you should be aware of before attempting kigoroshi in a professional situation, in other words, a situation where cost, schedule, or reputation are at risk.

First, make no mistake: kigoroshi works reliably only on long-grain, not end-grain.

Second, please remember that if the flat face of the genno is used for kigoroshi, or the domed face is cocked so its corners dig in too far, or is used with too much force, the striking face’s perimeter edges may crush cells and sever fibers permanently so that they cannot return to anywhere near their original volume thereby defeating the purpose of kigoroshi and simply weakening the wood. No bueno Bubba.

Third, be aware that if used in fine cabinetry and joinery work, kigoroshi can create unpredictable tolerance shifts at joints, making, for instance what should be a flush joint offset, so caution and experimentation may be necessary to avoid embarrassing snafus.

And fourth, kigorishi does not work well with some woods, especially hard, stiff woods, and can cause permanent cell damage in some cases. We will discuss this further below. But first, let’s examine the mechanics of kigoroshi.

Nuts and Bolts

Most commercial varieties of wood grow in climates with seasonal changes of winter and summer. A tree is essentially a big water pump that pulls (not pushes) water and some nutrients up from the ground through the pressure differential created by water evaporation at stomata openings in its leaves. The highest volume of water is pumped, and cellular growth occurs, when the weather is warm, water is moving, and the sun is shining. Without liquid water, sunlight, and functioning leaves, the pump stops. In the case of freezing weather, evergreen trees stop pumping water to prevent freezing and the resulting expansion that would destroy the tree.

During the colder months, beginning when leaves fall and the sun fades in Autumn, the pump as well as the tree’s growth slows and then stops. The pump starts up again during the spring thaw when water moves, the sun again shines, and leaves bud.

The stained cross-section of oak below is an excellent illustration of this point. The photo is bifurcated by a a nearly solid band of tight fibers bordered above and below by larger cells, some are rather large white voids. This nearly solid band of cells forms during late Autumn and early spring and is called “late wood” or “Autumn wood.” The areas of less density and larger voids is formed during warmer months of high-growth and is called “early Wood or “Spring wood.” These voids form branching and merging tubes leading from the tree’s roots to the tiny holes in the leaves where the water they carry evaporates powering the pump.

The difference in appearance between these bands of cells (aka growth rings”) can be seen on the surface of a board as its “grain.”

Every type of wood, indeed every piece of wood, is different and will react differently to kigoroshi attempts. Let’s review the physical properties of wood relevant to kigoroshi by examining a cross-section of a tree. For instance summer wood is carefully designed to transmit large amounts of water and nutrients, and so is comprised of large cells with thin walls. After the tree is felled and as the moisture content of the wood decreases, the cells shrink, the cell walls become thinner, harder, stronger and wrinkled and crinkled.

A cross-sectional slice of White Oak dyed red for clarity.

Winter wood in most commercial varieties is designed to resist freezing weather and winter storms. It is comprised of much smaller cells with thicker, stronger walls.

Effective kigoroshi temporarily deforms the cell walls of summer wood in what is called “elastic deformation,” meaning the deformation is temporary so that the cells rebound to near their original volume when the pressure is removed, depending on the nature of the wood and the elapsed time.

The cell walls of winter wood, on the other hand, are less flexible and so instead of squashing and then rebounding, are often shattered by kigoroshi and can rebound little. This permanent damage is due to “plastic deformation.”

Why does this matter? Consider a cube of quartersawn Douglas fir, a wood with soft summer wood, and strong winter wood. If we strike this cube perpendicular to the parallel rings, the larger, weaker cells of summer wood will squash down while the harder lines of winter wood will just be pressed closer together as the layer of summer wood squashes. An application of moisture to this block of wood will cause the summer wood to return to near its original volume and the cube of wood may retain any apparent damage.

https://i0.wp.com/www.microlabgallery.com/gallery/images/Pseudotsuga%20MenziesiiCS40X.jpg
Doug Fir

Now what happens when we wack an identical cube in-line with the layer of harder winter wood? Some of the winter wood cells are squashed elastically and will rebound. But the rebound will be less and some of deformation will be permanent.

Oak wood, on the other hand is more dense and the cell walls are stiffer than a softwood like pine, so crushing the cells in kigoroshi will result in even less rebound, and may greatly weaken the wood permanently.

The point is to be aware of the nature of the wood you plan to do kigoroshi to beforehand.

Kigoroshi for Gennou Tenons, and Chisel Handles

There are those who advocate using a hammer to perform kigoroshi on the tenon of gennou handles, the idea being that an oversized tenon can then be crushed a little allowing it to fit into the eye, and that the wood will rebound later locking it into the eye tightly. This sounds like a great idea, but it has problems that stem from the fact that gennou handles are typically made of dense hardwoods like white oak, and not softwoods like cedar.

We need the extra toughness and density that hardwoods provide when making a gennou handle because tenons cut in softer woods will loosen over time. Hard woods like white oak, for instance, do not submit well to kigoroshi because the more rigid cell walls are broken in plastic deformation instead of elastic deformation and won’t rebound enough. In other words, kigoroshi on hardwoods like oak, hickory or persimmon may decrease the cellular volume, but it will also physically weaken the wood. Why would you want to do that?

Instead of kigoroshi, a better solution is to use a good dense hardwood and to precisely cut the tenon just enough oversize so that a lot of force is required to overcome friction driving it into the eye under high pressure. In this way the wood’s cells will be tightly compressed creating a tight tenon without compromising it’s cellular strength, a better long-term solution and a more craftsman-like technique.

Another option especially effective when making a gennou handle in humid months is to cut the tenon oversized and shrink it by removing water from the cells using gradual heat. Placing the handle in a more-or-less sealed container with a dry heat source such as an incandescent light bulb will do the job. Silica gel desiccant is another method, but slower. I do not recommend putting the handle in an oven of any kind to accomplish this, however. You have been warned.

Still others advocate performing kigoroshi on the ends of chisel handles to make the crown (hoop) fit better. They then insist one must soak the end of the handle in water to make it swell back to shape and lock the crown in place. While popular, this is poppycock that wastes your time and weakens a properly-sized handle. Please do not do this to C&S Tool’s chisels.

If the handle is in fact too big to accept the crown (unlikely if you purchased the chisel with a handle and crown already attached), first deburr the inside of the crown and chamfer the inside edges. If that is not enough, please shave or file the end of the handle down to a dimension where it takes a number of hard hammer blows from a steel hammer to drive the crown onto the handle. The crown will thereby automatically perform all the kigoroshi necessary. This method is more professional and will provide better service.

Kigoroshi is a useful technique in some applications and with some types of wood. You may not need it but it’s worth understanding, especially if you have a gennou.

In the next post in this series we will examine the ancient ergonomic roots of the gennou handle we advocate and the unusual Japanese carpentry guild that codified them.

YMHOS

The following link is to a folder containing pricelists and photos of most of our products. If you have questions or would like to learn more, please use the form located immediately below titled “Contact Us.”

Please share your insights and comments with everyone by using the form located further below labeled “Leave a Reply.” We aren’t evil Google, facist facebook, thuggish Twitter, or the US Democrat Senate’s Pakistani IT manager and so won’t sell, share, or profitably “misplace” your information. May worms drip from my eyes if I lie.

Leave a comment

Previous Articles in The Japanese Gennou & Handle Series

What Are Professional-Grade Tools?

Shibamata Taishakuten Temple, Katsushika, Tokyo est.1629

I met a traveler from an antique land,
Who said—“Two vast and trunkless legs of stone
Stand in the desert. . . . Near them, on the sand,
Half sunk a shattered visage lies, whose frown,
And wrinkled lip, and sneer of cold command,
Tell that its sculptor well those passions read
Which yet survive, stamped on these lifeless things,
The hand that mocked them, and the heart that fed;
And on the pedestal, these words appear:
My name is Ozymandias, King of Kings;
Look on my Works, ye Mighty, and despair!
Nothing beside remains. Round the decay
Of that colossal Wreck, boundless and bare
The lone and level sands stretch far away.”

Percy Bysshe Shelley (1792–1822), “Ozymandias,” 1818

Here at C&S Tools we frequently use the term “Professional-grade” to describe our products. This is not a “term of art” sculpted from soggy newspaper for marketing purposes, but has an important meaning your humble and obedient servant will break down in this article so there is no confusion among our Beloved Customers and Gentle Readers.

To begin with let’s consider the term “professional.” The dictionary definition of a professional, and the one I intend, is a person recognized by his peers as having received a certain amount of intensive, prolonged training and education in his chosen occupation, has achieved some minimum satisfactory level of skill in the performance of that occupation, and is paid for his work and work product. That’s five factors including education, training, skill, occupation, and financial compensation.

We humbly accept as valid the premise that many individuals develop professional-level skills through their diligence and OJT without formal education or training especially in light of the current decrepit state of apprenticeship and training programs in most countries. If they then go on to make a living performing competent work for pay, they certainly qualify as professionals in my opinion. However, I do not accept the self-aggrandizing theory some put forth that anyone with skill and an artistic flair is a professional even if they aren’t paid for their efforts. Money talks and BS walks.

Woodworking professionals are committed to their trade long-term, and use their skills, time and tools to earn a living by making things for clients, customers or employers in accordance with an agreed-to design, specifications, cost, and schedule, normally formalized in a written contract. Therefore, unlike the talented amateur or hobbyist, the financial, schedule and contractual aspects of his job place a professional under constant pressure; If he fails to deliver the promised products consistent with the Client’s requirements and budget on-time he will suffer serious financial and reputational consequences.

By contrast, an amateur woodworker may be skilled and even routinely do museum-quality work, but since he faces little financial or reputational risk, tool inefficiency and failure to deliver on-time can only make things unpleasant, not catastrophic.

So what does this have to do with woodworking tools you say? Glad you asked.

While the professional woodworker too must resharpen his chisel and plane blades periodically, the sharper he can make them, the more wood he can cut between sharpenings, and the less time he must spend sharpening his tools, the more time and energy will be available to him to expend each day toward meeting his commitments and getting paid.

However, if the blade of a plane, chisel, knife or adze can’t be made very sharp, dulls quickly, is easily damaged, or takes a long time to sharpen, then it effectively impedes the professional’s work thereby reducing his income and potentially harming his reputation. It’s a simple calculation, but one most people, especially amateurs and scribblers who do not face the same pressures as the professional woodworker, neglect to perform, partly because they are never called upon to assign a monetary value to the time expended sharpening tools, something professionals do everyday when preparing binding bids (tenders) and cost estimates.

These are by no means new expectations, but in a time when amperage is more important than sharpness, dull blades go into the garbage to be replaced by factory-sharpened new ones, and precision is built-into the machinery used, many professional craftsmen have forgotten them.

The Japanese professional woodworkers I have worked with during my career spanning 45 years have been uncompromising regarding quality and schedule. And they are obsessed with sharpness. It’s in their DNA. This is the same DNA that for millennia has motivated Japanese blacksmiths to strive to forge better, sharper tools.

These blacksmiths and their professional woodworker customers have always been focused on real-world performance above all else. Not reputation or fancy names. Not appearance. Certainly not “mystery.” So what sort of performance should we look for in a “Professional-grade” tool? Very perceptive of you to ask.

Performance Criteria 1: Sharpness

The primary performance criteria one should demand a professional-grade plane, chisel, or handsaw satisfy is not how it looks or how much it costs but that it cut extraordinarily well. This high degree of sharpness depends on the following three factors:

1.1 Crystalline Structure of the Steel: The crystalline structure of the blade’s steel is the primary determining factor in sharpness since a blade cannot be made sharper than the carbide crystals exposed at the cutting edge will permit. If the crystals are large, loose and isolated, instead of small, well-supported and evenly distributed, sharpness will suffer. Excessive amounts of impurities such as sulfur, phosphorus and silica harm crystal formation. Chemicals such as chrome and molybdenum are added to most tool steels nowadays to overcome the negative effects of these impurities, decrease manufacturing costs, and to eliminate the need for advanced blacksmithing skills, but an unfortunate side effect of these alloys is their tendency to develop relatively isolated, large clumps of carbide crystals which reduce sharpness. Consequently, a professional-grade Japanese blade will be made from a pure high-carbon steel like Hitachi Metal’s Shirogami (White-label steel) No.1 and No.2, Aogami (Blue-label steel) No.1 and No.2, or Sweden’s Assab K120 steel. See this post and this post for further explanation.

1.2 Skills of the Blacksmith: The manufacturer of a chisel or plane blade can use the best steel in the world but if he doesn’t have the skills and dogged perseverance to work it properly, the crystalline structure of the finished blade and the degree of sharpness it can achieve will suffer, even if it survives forging and heat treatment. All our blacksmiths, without exception, are masters at using Shirogami No.1 steel, an unusually pure, plain high-carbon steel. Indeed, they have used it every working day over their entire 40~60 year careers. All of them are self-employed and work in their own one-man smithies. Their skills are not suited to mass-production, nor can they be learned in a few weeks or even a few years by factory workers in China, Mexico or Ohio. Feeding materials into a production line won’t cut it.

Mr. Nakajima (1936), blacksmith for our Nagamitsu brand chisels (retired).
Mr. Nakajima’s smithy, as simple, unassuming and compact as they come. The sinister-looking black machine in the center of the frame is called a “spring hammer.” It uses no hydraulics or pneumatics at all. An electric motor makes the linkage attached to the arched leaf spring assembly front and center move rapidly up and down. This in turn causes the square-faced hammer connected to the leaf springs by two arms to move up and down impacting the anvil below it where Mr. Nakajima uses it to beat the holy heck out of the yellow-hot steel he heats in the gas-fired charcoal forge to the immediate right of the spring hammer. His quenching tank filled with water is buried in the floor in front of the spring hammer covered by a wooden lid which he uses as a seat. The gap between the lid and the tank’s edge is where he inserts tools to quench them. There is a pit located in front of the spring hammer to accommodate his legs when forging. A larger rectangular anvil is located to the right of the pit. Mr. Nakajima has been making chisels here since he was 14 years old. He knows a thing or two about forging and heat treating chisel blades.
Mr Nakano, blacksmith for our Sukezane brand chisels (retired).
Mr. Nakano’s Smithy

1.3 Skills of the Sharpener: The finest blade forged by the world’s best blacksmith will become no sharper than the physical skills and diligence of the person who maintains and sharpens it. There are no shortcuts, tricks, books, videos or classes that can transfer those skills through osmosis. I have shared information through the series of 30 articles on this blog that will help, but the end-user must develop the necessary skills in their own eye and hands through their own efforts. Fortunately, anyone with at least 1.5 hands, one eye and some determination can obtain professional-level sharpening skills. Please do it.

Mr. Takagi Junichi (1937~2019), sharpener and Japan’s last adze blacksmith (RIP).
Mr. Nakano Takeo (1941), plane blade blacksmith extraordinaire, expounding on the Mystery of Steel from his living room

Performance Criteria 2: Cutting Longevity

A professional-grade tool must remain usefully sharp a relatively long time in order to precisely cut more wood between sharpening sessions. A blade that dulls quickly is inefficient, irritating and makes the workman look lazy. A professional in Japan can’t allow such poor-quality tools a home in his toolbox. This is the most significant difference between Western and Japanese woodworking tools. Two factors govern cutting edge longevity:

2.1 Excellent Crystalline Structure: This factor is directly influenced by Nos 1.1 and 1.2 listed above. A blade with poor crystalline structure will dull quickly and may even fail.

2.2 Hardness: Be not deceived: a blade may have excellent crystalline structure, but if it is soft, it will dull quickly, regardless of marketing claims. The hardness of professional-grade Japanese planes, chisels, kiridashi kogatana knives, and carving chisels should measure in the neighborhood of 65~66 on the Rockwell C scale, as do all our tools. The hardness of Western chisel and plane blades nowadays is typically Rc55~60, with a few going as high as Rc63, the nature of their relatively unsophisticated design making greater hardness likely fatal to the blade. At an average hardness of Rc60~63, consumer-grade Japanese chisels and planes are harder than their Western counterparts, but are still softer than our professional-grade tools. Indeed, the laminated construction and hollow-ground ura of Japanese chisels and planes are features essential to ensure a hard blade will perform reliably even if motivated with a steel hammer.

This extraordinary hardness does however require the user to employ a few professional-grade skills, which is why tools targeting amateurs and for export to markets where consumers typically lack these skills are intentionally made softer. Indeed, as the number of professional users of planes and chisels has decreased in recent decades, what were once well-respected Japanese tool brands have strategically reduced the hardness of their blades to avoid warranty issues and appeal to an inexperienced amateur market. These are not bad tools, but neither are they “professional-grade.” What is most concerning is the the way they are marketed, however.

Shibamata Taishakuten Temple: Beam-end carving in zelkova wood of a mythical creature called a Baku

Performance Criteria 3: Easily & Quickly Sharpened

If used, eventually all blades must either be resharpened or replaced. But if a woodworking blade takes a long time to sharpen, if it takes special equipment to sharpen, or if it is unpleasant to sharpen, not only is it uneconomical but it will not be loved. Professional-grade Japanese chisels and planes are easily and quickly sharpened despite the hardness of the steel. Indeed, they are a pleasure to sharpen. There are reasons for this:

3.1 Chemical Makeup of the Steel: Steels that contain alloys such as chrome, molybdenum, vanadium and/ or tungsten are ideal for mass-production by untrained factory workers and are constantly praised in marketing sprays as “ tough” and “abrasion resistant,” but experienced professionals know the real meaning of these phrases is: “a time-wasting pain in the neck to sharpen.” Our blacksmiths do not use such adulterated, uncooperative steels. The blades of professional-grade planes, chisels and knives will ride sharpening stones gladly, can be quickly sharpened, and indeed are a pleasure to sharpen.

3.2 Blade Design – The Ura: The blades of quality Japanese chisels and planes have a surface that corresponds to the “flat” on Western chisels, but is called the “ura.” The ura in turn has relatively large hollow-ground area called the “uratsuki.” This detail makes it easy to quickly sharpen the extra-hard steel used in our plane and chisel blades while maintaining the ura in a flat plane. The importance of a properly made ura cannot be overstated.

3.3 Blade Design – Laminated Construction: While extra-hard steel cuts a long time, it can be brittle making a blade fragile, which is why Western chisels, with their homogeneous construction, must be made softer to prevent them from breaking. In professional-grade Japanese chisels, the hard steel cutting layer is skillfully forge-weld laminated by hand to the blade’s body comprised of a softer low-carbon steel or iron called “jigane” that protects the extra-hard steel cutting layer from snapping in half while still being easy to sharpen.

Our blacksmiths do not use inferior pre-laminated steel, despite its convenience and economical advantages.

There are other design and fabrication details characteristic of professional-grade tools which your humble servant will not delve into here.

The Amateur and the Professional-grade Tool

Don’t let the discussion above discourage Gentle Reader from using our tools even if you aren’t a professional woodworker because, while tools are terribly vain and frequently gossips, so long as you let them cut wood, they are happy regardless of their Master’s profession. And for those who use chisels, planes and knives for the joy it brings, as I do now, the extra sharpness and edge-retention capability, and the satisfying feeling found sharpening them will increase the pleasure you enjoy when woodworking.

When using professional-grade Japanese woodworking tools, there are few things you should keep in mind. The first thing is that, since their steel is harder than that found in tools intended for amateur use, you mustn’t use them to pry wood, pull nails, chip concrete, or open paint cans. They are not sharpened screwdrivers stamped out in lots of thousands by peasant farmers in Guangzhou, but elite tools born to cut wood. They simply won’t tolerate such amateurish abuse.

The second thing to understand is that you need to learn how to sharpen and maintain them properly. This includes using flat sharpening stones and maintaining a proper bevel angle. More details are available in our Sharpening Series of posts.

If you can show the tools the same respect the craftsmen that forged them did, then you are well on your way to becoming professional-grade yourself, regardless of your day job. We see it as our duty to help you along that path.

The Future of Professional-Grade Tools

As we look to the future, please note that it is common practice by some manufacturers in Japan to mass-produce chisels and plane blades from inferior materials with mediocre crystalline structure and lesser hardness, but identical in appearance to professional-grade tools, and sell them at high prices to uninformed consumers who are none the wiser. These modern corporations cleverly use dubious marketing techniques that invoke “mystery” and “ancient traditions” when in truth they have replaced traditional materials and techniques with modern mass-production materials and techniques developed during the last 3 decades specifically for mass-producing mediocre-quality, consumer-grade kitchen knives. After all, one can’t tell the quality of a steel blade’s crystalline structure by looking at photographs.

While lower-quality tools purveyed using deceptive marketing strategies will no doubt continue to be profitable for some, our Beloved Customers know how to sharpen and how to properly evaluate a blade. They appreciate honest value more than artful marketing, so we refuse to insult the intelligence of the professionals that are the majority of our clientele through such shabby nonsense.

The demand for professional-grade chisels and planes has decreased dramatically among modern consumers in Japan at the same time those master blacksmiths with the skills and determination to make them are either retiring or moving on to the big lumberyard in the sky. And with the decreased demand for such tools, Hitachi Metals has practically ceased production of Shirogami and Aogami steels. Truly, the strongmen holding up the veranda (縁の下の力持ち)are gradually disappearing.

The future supply off these excellent tools looks bleak, but we hope to continue to be able to provide them to our Beloved Customers for a few more years, God willing and the creek don’t rise.

YMHOS

If you have questions or would like to learn more about our tools, please click the “Pricelist” link here or at the top of the page and use the “Contact Us” form located immediately below.

Please share your insights and comments with everyone in the form located further below labeled “Leave a Reply.” We aren’t evil Google, fascist facebook, or treacherous TikTok and so won’t sell, share, or profitably “misplace” your information.

Just ask the next baku you meet if it ain’t so. They eat nightmares, comfort small children in the dark, and simply can’t tell a lie, you know.

Leave a comment

Relevant Posts

The Story of a Few Steels

Toolchests Part 4 – Goals & Objectives

It is not our part to master all the tides of the world, but to do what is in us for the succour of those years wherein we are set, uprooting the evil in the fields that we know, so that those who live after may have clean earth to till. What weather they shall have is not ours to rule.

J.R.R. Tolkien, The Return of the King

More than just keeping tools together in one place, the challenge facing the toolchest designer is how to protect those tools while also keeping them organized and easy to access. So let’s examine some of the things we need a toolchest to accomplish.

Tool Organization

Obviously, the first and most important objective of a tool storage system must be to efficiently house and organize tools. A cardboard box is lightweight and does these tasks inexpensively, but not well. If you have ever worked out of a cardboard box you know how frustrating they can be. These are not easy tasks to accomplish especially when space is as limited as it is in a toolchest. We’ll examine this important subject more in future posts.

Tool Protection

A tool storage system should protect the tools inside from dings, moisture, dirt, corrosion, vermin, insects, and in some cases unauthorized borrowers, thieves and, of course, pernicious pixies during its useful lifetime, in this case 200 years.

Let’s examine the types and causes of tool degradation an effective tool chest must protect against, as well as the miracle of tool evolution.

Dings

Ding damage occurs when things strike or grind against tools, especially when they fall, rattle, scrape or bang against each other. Tools stored in a jumble in cardboard boxes are likely to be damaged every time the box is touched. A good toolchest must prevent this.

Moisture

Assuming the toolchest is not left out in the rain for days at a time or subjected to flooding, what sort of moisture damage is most likely to occur? The answer is condensation corrosion.

When relatively warm humid air contacts relatively colder metal, such as carbon-steel tool blades, condensation will occur and rust will develop, especially if the place where the tools reside is not constantly heated/air-conditioned and has controlled humidity. This is not my opinion, but simple physics, and although it may take years before the corrosion becomes noticeable to the naked eye, it will happen sure as eggses is eggses. 

An example of condensation corrosion in a barn.

To prevent condensation corrosion, an effective toolchest will accomplish two things. First, it will insulate tools from sudden temperature swings due to convection (heat transfer through the toolchest’s walls, floor and lid) and second, it will seal well thereby minimizing temperature swings due to infiltration of colder/warmer humid air that might produce condensation. 

Remember, it is not temperature itself that causes condensation, rather it is the differential temperature between rust-prone metal and airborne moisture. Also worth remembering is the fact that large temperature changes occur in most locations of the world twice a day as the sun rises and sets. If there is moisture in the air, and temperatures are allowed to change, condensation will eventually occur. A good tool chest will satisfy these two performance criteria to effectively reduce long-term corrosion. 

Corrosion aside, moisture and temperature changes can create problems with some tools, especially wooden-bodied planes, which can warp when subjected to sudden swings in humidity causing them to misbehave in frustrating ways. Even a little warpage can make a wooden-bodied plane stop functioning. 

Most people understand that changes in humidity can cause their wooden-bodied planes to warp sometimes to the degree that they will no longer take a shaving, but why is this? The simple answer is twofold. First, wood fibers in a plane body exposed to increased environmental humidity will absorb moisture and try to expand, but if later exposed to decreased environmental humidity the same fibers will release moisture and try to shrink.

The second factor in the equation is that wood absorbs or loses moisture much quicker through end-grain than side grain.

The result is that the exposed end-grain at both ends and the plane’s mouth opening absorb or discharge moisture quicker than the interior portion, and therefore expand or contract quicker, so that when exposed to rapidly changing humidity, the ends of a stick of wood such as a plane body are constantly fighting with its middle, creating differential stresses which cause warping. It is this same phenomenon that causes green logs to split from the ends first. Once the moisture content in a wooden plane body reaches equilibrium, it will usually calm down, and return to functioning normally. 

A tightly sealed wooden toolchest will smooth out the mountains and valleys in the moisture content curve inside itself, and likewise in the wooden plane bodies it houses, helping them reach equilibrium quickly, thereby reducing internal stresses in the plane bodies contained in the toolchest and the resulting warpage. 

Cardboard boxes provide some insulation against temperature and humidity fluctuations, but unless all the seams are tightly taped closed, those changes still occur rapidly. 

Aside from airtight containers, most commercially available metal and plastic toolboxes do not moderate temperature or humidity fluctuations well at all.

Dust & Dirt

Why is dust a problem, you may ask? I have supervised the design and construction of many laboratories and high-level cleanrooms during my career, and know well the damage dirt can cause, and how difficult it is to keep out. Of course, I am not suggesting you should make your tool container from insulated clean-panels and connect expensive and bulky AHU systems with environmental controls and HEPA filters to it. I am only stating that dust and dirt will eventually become a serious problem if not controlled.

Dust consists of particles of whatnot made airborne and blown hither and yon by winds and storms, vehicular traffic, construction, mining, farming, landscaping, industrial activities, forest/mountain fires (California), wood fires, and diesel engines, just to name a few sources. This dust fills the atmosphere and streets and finds it ways into our homes and workplaces. Indeed it rises and billows around us with every footstep, and will infiltrate a toolchest through every opening, crack or gap. Given enough time and neglect, airborne dust literally buries civilizations. You can sweep it, vacuum it and even curse at it but you can’t stop it entirely.

Airborne dust is not just ungodly. When it settles on tools it absorbs and contaminates protective oils and wicks moisture into contact with the tool’s metal surfaces promoting rust. Sawdust has the same effect, by the way. This is compounded by the fact that dust often contains salts and other chemicals that actively accelerate corrosion. Salt in dust, you say? Yes indeedy. If there is salt in the air, as is often the case in locales near the seashore, or where salt or chlorides are used to melt ice and snow on roads, there will be corrosive chemicals in the air and in the dust.

The damage caused by dust and dirt is not limited to corrosion: Dust from outdoor sources always contain particles that are harder than the steel of your tool blades and will dull them. Never forget this fact. So a toolchest that seals out dust and dirt is indispensable, at least if you want your tools to last.

Insects

Woodworm Larvae. BTW, this what the EU demands we eat in place of meat. Anyone up for a worm burger with a side of fleas?
Deathwatch Beetle

I mentioned insects above, but bugs don’t eat tools, do they? Well, as a matter of fact they do eat some tool parts, and what they don’t eat they can ruin.

Beetles and termites are fond of wood, and given a moist environment, a miniature bottle of Tabasco Sauce and enough time they will eat most woods including tool handles and wooden plane bodies, not to mention the tool storage system itself if made of wood or cardboard. If you doubt this, go examine some antique wooden furniture, plane bodies, and tool handles.

Termites will march into a toolchest through gaps they find or holes they chew as bold as a Shat Francisco politician lying on CNN. Moths and other bugs fly in and lay eggs, which hatch into caterpillars or beetles, some of which eat natural fabrics, while others eat wood. No doubt you have seen these critters, or at least the holes and sawdust they leave behind.

Termites at Table. Pass me the hot sauce please.

While they can ruin a nice soup, you wouldn’t think of flies as being harmful to tools. But the fact is the little buggers constantly excrete wet corrosive globs everywhere they alight, and these specks make rust. Best avoided.

And then of course there are those tough little cockroaches that may not eat your tools but will lay eggs among them and use them as la cucaracha outhouses. A good toolchest therefore must resist being eaten or infested by creepy critters.

Rodents

And let’s not forget rodents. Mice and rats are fond of making nests in warm, dry, enclosed spaces, and don’t mind chewing a hole into a box or a baseboard to upgrade their living conditions. Cardboard is especially susceptible to the ravages of rodents, but experience and history shows us that wooden casework is by no means invincible. If you have seen the corrosion rodent feces and urine can wreak, you know why they must be kept far from your valuable tools.

Sticky Fingers

Perhaps you use and store your tools where there are no pilferers, thieves, or eight-fingered pixies, but even then, your tools may be at risk. Have you ever found one of your valuable saws laying rusting in your backyard after being used by a mysterious stranger to prune a tree? Ever have a nice but forgetful neighbor borrow an expensive chisel to open a paint can without telling you? Did he forget to return it, accidentally drop it on the concrete floor of his garage chipping the cutting edge? Did it then roll underneath the broken lawn-mower in the corner rusting silently for months or years? If you have, there were probably other tools that suffered even worse fates that will never be ransomed.

Are you aware of the darwinian evolution of tools, a curious but common phenomenon whereby tools sprout legs and beetle away when you aren’t looking? Between children, helpful spouses, conveniently forgetful neighbors, pernicious pilfering pixies and Darwin’s legacy it’s a miracle any of our tools survive.

A lock won’t even slow down a thief with a crowbar, but it may keep honest people honest. Wooden chests have traditionally incorporated a locking mechanism of some sort. I think this is a traditional feature worth retaining, and one we will consider elsewhere in this series.

Exposed Storage Solutions

While a cardboard box placed under a downspout may be worse, the pegboard or open shelf is a dismal way of storing tools long-term. Ditto for the wall-mounted open sawtills all the woodworking publications cyclically regurgitate like a cat with a hairball fetish.

Many people love to arrange their tools hanging on the wall in full view like a movie film set. Tools are beautiful things, and I understand the attraction of tool porn, but unless you work in a well-maintained, dust-free, environmentally-controlled film studio, or the tools are daily cleaned and re-oiled, tools hung on the wall or placed naked on open shelves are exposed to dirt, dust, sawdust, temperature and humidity swings, and even banging against other tools. They are especially susceptible to damage from corrosive flyspecks in a garage or other workshop with a big roll-up door. Don’t laugh, it happens billions of times every second of every day, and degrades exposed steel like Hollywood movie producers do foolish lasses and laddies.

These tools are handy, but does “patina” improve their performance or add to their longevity?

Case in point (about pegboards and shelves, that is, not flexible virtue): My father was a carpenter and cabinetmaker born in 1930. After retirement he stored his tools in his garage in central Utah hanging on pegboards, stacked on open shelves, and in a jumble under his workbench for several decades. For the last 25 years or so of his life they were entirely neglected. The dust, condensation rust, dings, fly specs, road salt, and rodent doodoo that accumulated during those years turned all of his planes, chisels, and saws to rubbish. Such a waste. The only tools of his that survive in a useful condition today are the ones he gave me when he retired.

A durable, tightly sealed, insulated container that keeps out dust, bugs, vermin and pesky pixies, and keeps your tools from sprouting legs and beetling away to Darwinian adventures when you are not looking is just the ticket.

In the next post in this series we will consider the design process. The anticipation is killing me!

YMHOS

Steel-bound seaman’s chest

If you have questions or would like to learn more about our tools, please click the “Pricelist” link here or at the top of the page and use the “Contact Us” form located immediately below.

Please share your insights and comments with everyone in the form located further below labeled “Leave a Reply.” We aren’t evil Google, fascist facebook, or thuggish Twitter and so won’t sell, share, or profitably “misplace” your information. If I lie may cockroaches use my toolchest for a bathtub.

Leave a comment

Other Posts in this Series

Toolchests Part 3 – Pros & Cons of Wooden Toolchests

An antique “Steamer Trunk” with a domed lid to add strength and to keep people from stacking cargo on top of it.

Short cuts make long delays.

J.R.R. Tolkien, The Fellowship of the Ring

In the previous two posts in this series about toolchests, we examined a few aspects of their history, as well as a few of the goals and objectives your humble servant applied.

In this post we will consider the pros and cons of the chest as a tool container and a few methods to maximize the pros and minimize the cons. The ultimate purpose of this article is simply to provide examples Gentle Reader may find useful to consider when planning and designing a toolchest.

As stated previously, this article is not intended to suggest the toolchest presented here is superior to any other. I, your most humble and obedient servant, am neither a Time Lord nor Holy Arbiter of Everything Traditional, so my efforts are unworthy of emulation. I respectfully present this series of articles merely as an example of one planning process and the lowly toolchest it produced.

Points in Favor of Wooden Toolchests

Wood as a material has some advantages over metal and plastic for making toolchests. Namely, it is often relatively inexpensive, can be easily worked, and has relatively high thermal insulative value. And wood is more appealing to many people than plastic, steel and aluminum. I think it’s safe to say that human attraction to wood is deeply rooted in our DNA. I don’t want to anthropomorphize, but I understand that robots feel the same way about brushed aluminum, at least that’s what they tell me (ツ).

A steel gangbox typically used for tool storage on commercial construction jobsites. A padlock inserted into the square hole at the upper left-hand corner protects the chest from theft.

If you have ever used a steel or aluminum gangbox, basically a bent and welded sheet-metal toolbox used on construction jobsites, often with huge locks housed in bolt cutter-proof recesses to prevent theft, or kept your tools stored in a metal toolbox mounted in your truck’s bed, you know what I mean. Gaps permit airflow while the metal transmits the heat or cold into the chest and the tools it contains very quickly resulting in condensation on metal surfaces and eventually rust. And the metal box itself dings and grinds the tools. But wood cushions tools and moderates these temperature swings providing the contents additional protection from wear and condensation corrosion especially if the container seals tightly.

As a structural system the wooden chest is easy to make stronger and more durable than modern front-loading cabinetry of the same volume, is much more portable, and can easily be sealed much tighter.

And finally, given the same amount of volume, there are many instances where the chest is a more economical storage system than modern cabinets, depending of course on the design and how the chest is used. That’s ten points in favor of wooden toolchests.

Points Against Wooden Toolchests

Wooden chests have fallen out of favor in modern times for valid reasons. Perhaps the biggest disadvantage of traditional chests in general is that items stored inside tend to get stacked one on top of the other in a jumble, and that darn Murphy (may he suffer the exquisite torment of eternal languishment in a liberal big-city Department of Motor Vehicle line without the necessary documents) has often hidden the item we need in the last place we could possibly look, at the very bottom.

Well-designed toolchests, on the other hand, have traditionally and quite successfully overcome this organizational challenge by using sliding trays and mounting tools to the lid’s underside and elsewhere. But of course, the effectiveness of this organization depends on the user.

Toolchests are not a viable solution for people who lack adequate organizational self-control. Indeed, for the person that lacks basic housekeeping skills and does not value their tools enough to care for them properly, a rusting pile on the floor may be a superior solution.

I am not like Adrian Monk when it comes to tool organization, but more than any other tool storage system, the toolchest is easiest for me to keep organized simply because, perhaps like some millionaire American politicians who only remember to wear pants in public because they need someplace to tuck-in their shirt-tail, I must.

Another disadvantage of the traditional chest is its low height compared to modern cabinetry. Space and weight practicalities typically limited the volume and height of traditional chests, resulting in a low profile. Mounting them on bases or adding legs made access easier. This transition from chests resting on the floor to cabinets supported on legs is well-documented in the historical record.

Compared to modern cabinetry which can be built as high as the ceiling permits and attached to walls, the chest may occupy more floor space per square meter of internal storage volume. Whether that is a practical disadvantage or not depends on the user’s requirements for portability, which the chest excels at, and if storage space inside fixed cabinets located at a height above the user’s line of sight is considered useful or not.

While typically far superior to modern cabinetry, perhaps the most difficult long-term challenge of the toolchest is the lid. Traditional Western wooden chests frequently had a poor seal at the lid. To make things worse, their lids routinely warped over time and with changes in humidity and due to design defects creating gaps and cracks which became the primary avenue of humidity, dust, insect and pixie infiltration. But fixing this detail is not rocket surgery.

Gaskets are one solution, I suppose, but an effective design, combined with skillful execution that lacks gaps to begin with and won’t develop cracks over time, is the most effective solution IMO.

Convenience, including kinky backs and creaky joints, is another shortcoming common to traditional chests. Chests often served double-duty as benches, tables and even beds positioned along the wall of the longhouse, at the foot of the bed or under a window, and so tended to be low, stable boxes. Digging stuff out of a traditional low chest requires contortions such as bending over, squatting, and even kneeling, motions hard on old backs and rickety knee joints (tu fui ego eris).

But I don’t sleep on top of my toolchest, or use it as a seating bench, or strap it to a mule when transporting it so a low height is not necessary. Therefore I see no need to make a toolchest squat or lightweight in order follow an inconvenient and even painful tradition that conflicts with function, especially when there are superior traditions to draw on, as we saw in Part 2 of this series.

Another disadvantage of the traditional chest configuration is that, when closed, it’s tempting to stack stuff on the closed lid or use the lid as a work surface, making it difficult to open the lid without removing the accumulated stuff. This is a workflow management problem and not insurmountable, but does require self-control. The historical record gives us several solutions to the “stacking” problem.

Travelers and traders in past centuries often had their chests made with arched and even peaked lids to prevent shippers and stevedores from stacking stuff, especially other chests, on top of theirs in wagons, trains or ship’s holds. Please see the photo of the steamer trunk at the top of this post or the seachest below. While bulbous lids may work well for storage and shipping of clothing, linen and bedding, I doubt they make a toolchest more efficient. For instance, a chest with an arched lid stored against a wall cannot be opened without pulling it away from the wall at least the thickness of the lid wasting precious floor space.

Another disadvantage of the wooden toolchest, at least compared to high-impact plastic and steel or aluminum toolboxes, is that it is less resistant to impact forces when dropped, possibly resulting in catastrophic failure. This damage is a real possibility, so a wise man will design and construct his toolchest to mitigate this risk. In my case, besides drops due to careless movers, I needed to plan for rude truck bumpers and vengeful forklift blades. Thank goodness I did.

And finally, wood can be weakened and destroyed by fungus, plenty of bugs love to eat it, and rodents can easily chew holes through it to build their dream home. That makes eight or nine points against the wooden chest, so if you are considering making a toolchest of your own you should plan appropriate solutions.

Allow me to state an important related point I’ve learned over many years of work in the construction industry: A bad design constructed perfectly is a still a failure; A good design executed poorly will eventually fail. Your tools deserve better than good-looking, short-term sucky failure, so proper planning and skillful execution should be your goals.

So far we’ve discussed some pros and cons of the wooden chest without delving deeply into solutions. I could of course have dived right into a discussion of the solutions I employed, but in the words of Professor Tolkien quoted above: “Short cuts make long delays.” But never fear, Gentle Reader, in the next post in this raucous tale of swashbuckling high-adventure, we will point our spyglass at some planning techniques and design criteria you may want to consider to overcome these shortcomings. Hoist the mainsail, me hearties!

YMHOS

A seaman’s chest with an arched top. At first glance the thick walls, plentiful dovetails, and elevated bottom appear to have held up well. But notice what happened when the cross-grain construction at the ends of the lid and the steel straps constricted the wood’s expansion and contraction. Notice also how shrinkage has caused the long escutcheon plate (at the keyhole) to bow outwards. This is a direct result of the wood shrinking more over time and with changes in humidity than the maker anticipated. Some may say the steel straps are holding the chest together, and that may be true now, but only because those same straps caused the wood to crack and fail over many years. Beware of unintended consequences of restraining wood movement.

If you have questions or would like to learn more about our tools, please click the “Pricelist” link here or at the top of the page and use the “Contact Us” form located immediately below.

Please share your insights and comments with everyone in the form located further below labeled “Leave a Reply.” We aren’t evil Google, fascist facebook, or thuggish Twitter and so won’t sell, share, or profitably “misplace” your information. If I lie may my toolchest be glued to the floor when a conflagration threatens.

Leave a comment

Other Posts in this Series: