

Perfection is a necessary goal, precisely because it is unattainable. If you don’t aim for perfection you cannot make anything great, and yet, true perfection is impossible.
Leonard, The Outfit
Cutting joints connecting one piece of wood to another, such as mortise and tenon joints, bridle joints, dovetails, etc. using only handtools is not difficult, but most people find, at least initially, that executing them to fit together tightly without slop or unsightly gaps can be challenging.
The ability to routinely and quickly cut tight, workman-like joints with a handsaw is a critical skill for the professional that specializes in making limited runs of custom furniture and casework containing exposed joints because such joints not only set his products apart from mass-produced dreck, but the apparent precision of those joints is a direct, long-term reflection of his standards of quality. And while it may not be a critical skill for the amateur who produces high-quality woodwork, it is nonetheless extremely satisfying, especially if the cabinets, furniture or casework he makes will remain in his house or with family where any poorly-fitting joints will silently laugh at him with “open mouths,” as the Japanese saying goes, over many years. Your humble servant loathes and fears such mocking whispers!
So, how does one go about improving one’s skill with handsaws thereby avoiding the sidelong glances and silent, but nonetheless snide, remarks of gaping joints? In this article your most humble and obedient servant will be so bold as to provide some guidelines I have shared with friends and Beloved Customers over the years, but which I have never before compiled into a single document. Please let me know in the comments below if these techniques prove useful.
The Saw
Of course, hand-cut joinery is accomplished using handsaws, tools that vary widely in quality and performance, so it is appropriate to begin this discussion with an explanation of the features a high-performance handsaw should incorporate.
In your humble servant’s well-informed opinion, the handsaw is by far the most difficult woodworking tool for the blacksmith to produce. Sadly, there are few skilled blacksmiths producing handmade saws nowadays, and while new companies producing pimped-out high-priced backsaws targeting amateurs have sprouted up, many of those exhibit performance inconsistent with the high prices their manufacturers demand. Imagine that….
But never fear, for below is a list of key things Gentle Reader should look for in a high-performance, professional-grade handsaw to be used for precision joinery.
The Plate
Whether Western or Japanese, the “plate” of a saw (the piece of sheet steel that comprises the blade) is its most important component. It must be adequately hard to resist bending and buckling, and so the teeth cut into it can be made sharp and stay sharp a long time, but not so hard the blade will crack or the teeth break off. This is a delicate balance. Sadly, most manufacturers err on the side of softer and duller. Sigh…
The best handsaws are made from plain high-carbon steel with a fine crystalline grain structure. Thus it has always been, and for good reason. Sadly, high-quality steel of this sort is difficult to procure nowadays.
Most of the new American and European manufacturers of backsaws, as well as all the Japanese manufacturers of replaceable-blade handsaws, make their saw plates from pre-hardened, thickness-sanded steel purchased in sheets or rolls, metal never touched by a blacksmith. This is a consistent and cost-efficient material that eliminates the need for blacksmithing skills, but it has a few serious limitations that negatively impact a saw’s performance.

In the case of mass-produced Japanese blades with the discolored, hardened teeth, after the plate has been stamped out with dies and a press, or cut to shape with a laser, the teeth are shaped by grinders, set is applied by machine, and the blade is passed quickly through an induction coil formed by two copper blocks charged with high voltage electricity, suddenly heating the teeth in a technique called “shock hardening.” The plate never slows down, and as the red-hot teeth exit the copper-alloy blocks charged by an induction coil, they pass through a coolant spray which instantly quenches them creating a hard, crystalline structure in the metal.
Most Western backsaws are made using similar materials and processes but without the induction hardening step.

Taper Grinding
A high-performance saw’s plate will be taper-ground in at least one direction, with the plate made thinner at the back than at the teeth, providing extra clearance in the cut, increasing as the blade cuts deeper into the wood, reducing friction between wood and plate for a smoother cut with less effort, and reducing the risk of buckling.
Handmade Japanese handsaw blades are of course double-taper-ground, as once were all quality Western handsaws too, but sadly neither replaceable-blade Japanese handsaws nor modern Western backsaws are taper-ground to any degree. John Disston would puke.
Unfortunately, too many modern users of handsaws, wandering in an Instagram world, have become entirely inured to terminal Chinese Logic, such that most are incapable of even considering qualities they can’t instantly infer (correctly or not) from a photograph on the internet. These confused souls deserve prayers to Buddah.
Gentle Reader would be wise to place his priorities regarding performance above outward appearance, because a prettily-finished exotic hardwood handle, a beautifully sanded/polished finish on a sawplate, and even an eye-catching etched brand contribute neither diddly nor squat to a handsaw’s job of making precision cuts.
Hammer Tensioning
Hammer tensioning is an ancient technique whereby the sawsmith or saw sharpener rests the plate on an anvil and taps the plate with his hammer creating small dents in specific areas. Each tiny dent deforms the metal making the plate slightly thinner at the point of impact while at the same time displacing a corresponding amount of metal away from the point of impact. Being constrained from expanding as much as it wants to by surrounding metal, the accumulated strain of many dents creates internal stresses that tend to make the saw blade wider and longer. Taken too far, these stresses will make the sawplate buckle or oilcan, but if done just right, for all practical purposes the sawplate will remain flat and stable.
Why bother with all this noisy hammer tapping? Clearly Gentle Reader is exceptionally perceptive to pose this question, and accordingly your humble servant quivers with joy at the prospect of clarifying an elegant and ancient mystery, one that is still employed to good effect in high-quality modern circular saw blades as I learned during recent meetings in Nagoya with three of Japan’s largest circular saw blade manufacturers.
So here’s the reason: As a sawblade heats up due to friction in the cut, the metal of course expands, but not uniformly over the blade’s entire surface. This differential heating and resulting differential expansion causes a sawplate that has not been hammer tensioned to temporarily warp, increasing friction in the cut even further, and making the cut wander thereby ruining the precision of the cut, and in the worst case, causing the saw to bind and even buckle betimes kinking the poor unfortunate blade.
The residual stresses produced in a saw’s plate through proper hammer tensioning counteract and cancel out stresses produced in the sawblade through friction heat thereby preventing the plate from buckling, excessively warping, or oil-canning, with the result that the saw will cut straighter and cleaner with less effort even as it heats up.
I don’t know who invented this subtle technique far back in the mists of time, or where, but it is genius-level materials engineering.
The better-quality Japanese replaceable-blade handsaw makers have taken a page from the circular sawblade manufactures and run their sawblades through a pair of opposed steel rollers which induce stresses in the steel similar to hammer-tensioning by hand. I may be wrong, but I am unaware of any modern Western backsaw makers that either hammer-tension or roller-tension their sawplates, but instead rely solely on the stiffness of the applied back to prevent buckling. Once again, JD would hurl chunky chunks.
Another benefit of hammer-tensioning, and one Gentle Reader can ascertain easily by examining a saw blade in person (but without the back installed) is that the internal stresses resulting from hammer-tensioning make the sawblade much stiffer than it would normally be without adding metal or weight. You can observe this phenomenon yourself by holding a panel saw’s blade by the narrow end with one hand extended out at arm’s length and examining the blade’s sag. A hammer-tensioned blade will sag significantly less than one that has not been hammer-tensioned.
Another easy test for hammer tensioning applicable to panel handsaws is that of bending the sawplate and tapping it with a fingertip producing a musical note that can be varied by changing the degree of bend in the sawplate. In fact, believe it or not, the handsaw was once a popular musical instrument in some quarters in the USA, with all the major saw manufacturers producing specialty musical saws (sans teeth).
In summary, a properly hammer-tensioned saw will be stiffer, will cut straighter, can be made thinner and lighter, and will require less force to operate for the amount of sawdust generated.

Teeth
Tooth types and preferences in handsaws vary so widely that little can be said that applies to all. However, Gentle Reader should consider the following when evaluating a handsaw to be used to cut precision joints.
First, assuming the teeth are the desired shape and size and progression, they should be uniformly and extremely sharp, indeed, sharp enough to cut you if touched carelessly. If you place the palm of your hand gently on the line of teeth, you should feel the little buggers trying to grab your skin. Not just one or two of the vicious little teeth should frantically try to eat you, but all of them in contact with your hand should seem eager to nibble because each tooth is either a row of frightfully-sharp, pointy little knives, in the case of a well-made and expertly sharpened crosscut saw, or a row of razor-sharp little chisels, in the case of a rip saw. And of course, a well-made and sharp saw is always eager to cut anything and everything it can get its teeth into. Just ask it.
Unfortunately, the teeth of most of the new crop of Western saws made nowadays are, in my experience, poorly sharpened and in need of TLC before they are useable. I say this as someone that prefers Western handsaws for some tasks, sharpens his own saws by hand, has purchased, collected and tested both new and antique Western handsaws over the years, and continues to use the better of them regularly.
In the case of most woodworking tasks, sawteeth need to have some degree of “set” to make the sawkerf wider than the thickness of the plate to reduce friction, binding, and buckling. Indeed, to compensate for a missing taper-grind and hammer tensioning, most modern Western saws are made with excessive amounts of set. This matters because all the extra wood the sawblade must cut to accommodate this extra set is wasted effort turned into sawdust that does nothing to improve speed or accuracy. A good handsaw will have no more set than absolutely necessary to get the job done.
This means, of course, that one needs different saws with different set and different tooth styles for different types of cuts in different types of wood. It makes a difference.
On the other hand, if Gentle Reader uses handsaws solely to burn calories, the aforementioned points should all be studiously ignored. (ツ)。

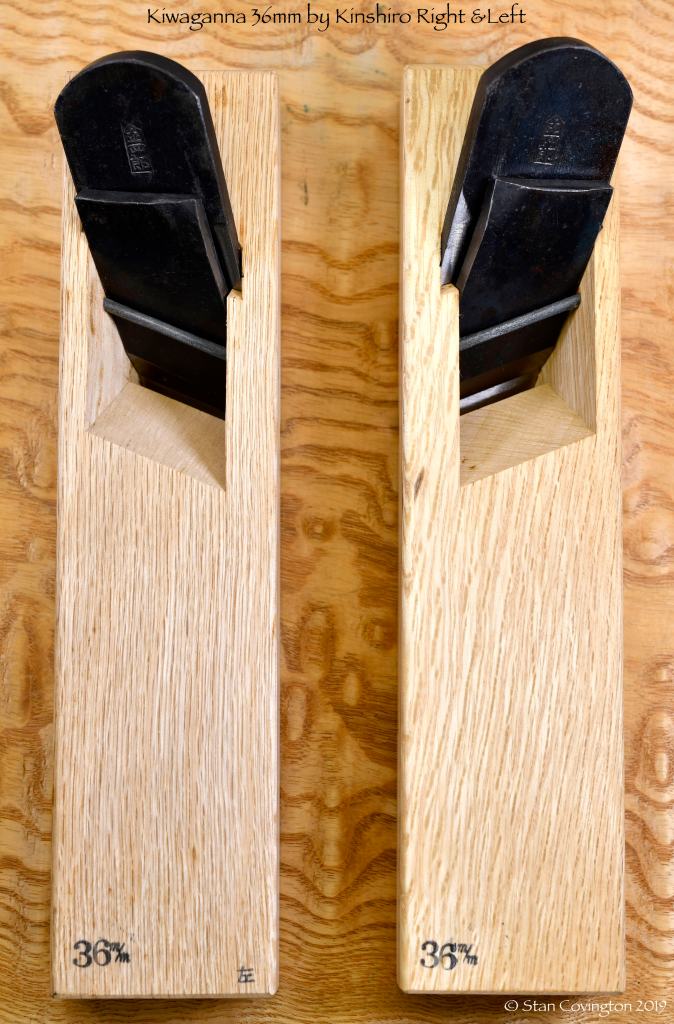
If Gentle Reader is in need of a high-quality hand-forged saw, you may want to consider those made to C&S Tools’s specifications by one of Japan’s last remaining master sawsmiths, Nakaya Takijiro. You can see some of his products at this link.

Using a Handsaw to Make Precision Cuts
The overarching guiding principles in using handsaws to make precision cuts are the following:
- The Saw: Use a high-quality saw with the features described above. If you don’t yet own such a saw or can’t afford one, and even if you do, educate yourself in blade sharpening, applying set, and in the techniques of straightening sawplates so your saw will achieve its maximum potential performance;
- Layout: Layout the cut so there is no confusion about where it starts, where it continues, where it ends, and the angle of the cut. Whenever possible mark cuts in such a way that the sawblade can positively index itself. This means that the sawteeth will index into the layout line without you having to guess or use a magnifying glass. Marking knives and marking gauges with sharp cutters can produce such layout lines better than pencils and pens. If there is any chance of confusion, include marks in your layout indicating, for example, the side of the line to cut to and where to stop;
- Arrangement: Arrange, support and align the workpiece, your body, and your eye to produce only straight cuts with every single stroke. This point is relevant to item 4 below;
- Make of Thyself a Machine: More details below;
- Attention: Pay attention to make every single stroke accurate;
- Stop & Correct: The instant a stroke goes astray or the cut wanders even a little, stop sawing, figure out why, and make corrections, dammit. Not ten strokes or even two strokes later, but instantly. This requires concentration and iron-handed control of your inner badger.
Layout
Spend the time to do layout and marking properly, because confusion and uncertainty during the cut will result in reduced mental focus, an eye not watching what it should, and too often, poor precision. A solid, well thought-out plan combined with a sharp marking knife, a sharp marking gauge, and an accurate, hardened steel square help to make good lines yielding good cuts.
Arrangement
In order to achieve No.4 in the list above, “Make of Thyself a Machine,” you should spend the time and develop the habit of securing the workpiece at a height and angle that will aid the imperfect human body to make perfect cuts. In my case, this means checking the angle of the dangle and using a vise, C-clamp or a butt-clamp to hold the wood down. It also means stopping work to rearrange the workpiece when necessary. I recommend you try various methods to find which one works best for you when making each type of cut.
In most cases, I like to make gravity my friend by positioning and securing the workpiece so the plane of the cut is vertical. My workbench is level, so either Mark-1 Eyeball or a square usually suffice to confirm alignment, but a torpedo spirit level is sometimes helpful too.
For example, when cutting the tails of dovetail joints, I secure the board in a leg vise, and tilt it so the cuts for half the tails are plumb. When done making those cuts, I next rearrange the board in the vise so the opposite sides of the tails are in the vertical plane, and cut them. Perhaps this is overkill, but it’s a habit that helps me to consistently make precise cuts with less damage to brain and eye.
The body must be aligned with the cut to avoid stresses and strains from misaligning “The Machine.” A comfortable position is therefore necessary.
If at all possible the eyeball must be positioned so it can see both sides of the cut to not only guide the cut, but quickly detect a wandering cut, because we all tend to get lazy partway through a cut and stop looking, allowing our inner badger to chase after ground squirrel burgers with predictable results.

Make of Thyself a Machine

The title of this section is not intended to suggest Gentle Reader should surgically install bionic parts or change their racial and gender pronouns listed in social media to “Synthetic Person.” (シ) No indeed, nothing so “progressive” is necessary (BTW, what is the politically-correct pronoun for a cyborg: Clank/clunk?). Rather, this phrase refers to a combination of techniques that will help even non-cyborgs overcome the erratic tendencies of flesh, sinew and bone in order to produce more consistent, precise results with a handsaw.
To make a straight cut, the sawblade must travel within a single vertical plane during both the cutting and return strokes. While obvious, this is where nearly all people screw up, always when learning how to use a saw, and in most cases, forever. But we can do better.
If Gentle Reader will pay close attention when making a cut with a handsaw, you will notice that the hand, and consequently the saw handle, tend to move in an arc right and left in a horizontal plane as seen from above. This movement is a result of the naturally flexible linkage between hand, arm and shoulder that transmits the force generated by the muscles to the tool handle. We must control the limits of this “flexibility” if we are to make a straight cut. We can do this by making of ourselves a “machine.” It’s almost as easy as the “tricky part” of the Big Fig Newton dance.

How to do this? Let’s take it step by step. First, grip the saw firmly but not too firmly. The old swordmaster’s instructions apply: Hold the handle like a small bird: Too loose and it will fly away; Too tight and the little bird will be crushed. This grip is important because if you hold either sword or saw too tightly, the muscles and tendons in hand and arm will lock up, your strokes will resemble an old, busted folding aluminum lawnchair, and you will be unable to form the consistent machine necessary to accurately control the tool’s movement.
The second point to understand about grip is that, while all of the fingers of the hand may touch the saw’s handle, apply your gripping force through the index finger and thumb only (in the case of straight-handled Japanese saws), such that the saw can almost freely pivot around a line drawn between these two fingers and through the handle.
Next we need to align the sawplate with the cut. To do this, arrange the workpiece securely, and assume a relaxed stance facing the layout line you will be cutting to on the workpiece with eyeball centered on the layout line. Then, with saw held in the relaxed swordsman’s grip you intend to use during the cut, hang it loosely down alongside your leg. Stand back from the line and adjust your stance so the plate of the hanging saw is in the same plane as the intended cut line, but when fine tuning your stance (this next part is important) don’t move your hands, arms, shoulders or hips to align the sawblade with the plane of the cut, but rather move your feet. This is approximately the ideal angle between your body and the intended cut.
Next, without changing position, center your dominant eye on this plane again.
Then, being careful to avoid hitting anything (especially stray bench dogs or kitties), gently but freely swing the saw forward and back 90˚inside this same plane. If your hand or your saw touches your leg, or your elbow hits your side, then adjust your stance so they don’t. The saw must swing freely with the sawblade in the same plane as the cut, with your shoulder joint, elbow, wrist and eye all centered in the same vertical plane.
Next, swing the saw up into the cutting position, and move it back and forth as if cutting wood. Your grip should still be loose (remember the little bird), and the saw should continue to move in an invisible plane centered through your shoulder, elbow, wrist, sawblade, and the layout line. Now pay close attention to the movement of your hand as it goes forward and back; Is it still traveling a little right and left in a horizontal arc? It probably is, my cyborg friend.
Now, while maintaining the stance established earlier, step forward enough to actually make a test cut. Start with a few itsy bitsy teeny weeny little cuts in a test piece to establish a stable beginning for the kerf. Then begin cutting in earnest, but while doing so, pay attention to the movement of your hand. Is it still scribing right and left horizontal arcs in the air? If it is, then on the cutting stroke, in the case of a Japanese pull saw, or the return stroke in the case of a Western push saw, reposition your stance so the inside of your elbow lightly brushes your side. Then adjust your head and eye to match. This contact between elbow and side is an important target point that will help position one end of each stroke, essentially creating rails for the machine to operate within. Remember the feeling of this contact.
When you make the cut, you will notice the sawblade is still scribing small arcs right or left. This fine movement persists because the wrist joint is too stiff preventing it from rotating slightly to keep the sawblade moving in a straight line, with the result that the saw’s handle is either rotating too much or too little, too soon or too late, causing the sawblade to deviate from the plane of the cut. It is impossible to reduce this out-of-plane deviation to zero, but you can cancel out most of it by maintaining your swordsman’s grip, loosening your wrist and actively rotating it in anticipation of this right-left arc. Yes, you can do it.
Your shoulder, elbow, flexible wrist and hand, supported by the rest of your stone-stable body, and watched over by your unrelenting Sauron-like eye, now form a machine with invisible rails that will move the saw in a vertical plane almost perfectly aligned with the plane of the line to be cut (perfection is unattainable and unnecessary).
One last point. It is essential to realize that the saw cuts because it is sharp and wants to make sawdust, not because of thy mighty arm, Oh Lord Cyborg. This is another phrase worthy of a forehead tattoo if you have any room left (ツ)。When we actively apply much force to a saw, especially if the teeth are dull, it will resist our boorish behavior, stumble over the woodgrain, clog with the sawdust, and almost always wander out of the plane we want to cut in. To avoid giving offense, please ensure your saw has a true plate and sharp teeth, do your layout, make the machine, start the cut, then get out of the saw’s way, dammit, and patiently and carefully watch it make sawdust. Don’t be too proud, Lord Cyborg, because, after all, you are the weak link.
Making the machine takes practice and time, but once you have figured it out, and know how it should feel, you will develop muscle memory. It’s like driving a car: Every modern car is different, but every modern car is the same.
BTW, there are various saw jigs one can make and use to enhance one’s cybernetic capabilities which we will consider in future articles.
Pay Attention
Until the necessary muscle memory has permeated all the way to your bones, don’t forget to pay attention to every single stroke you make with your saw. This is exactly the opposite of human nature that wants to keep on cutting like a honey badger going after the fixins for a barbecue gopher sandwich until the cut is finished. But when training oneself to make highly precise sawcuts, it is best to concentrate on each stroke, making sure it doesn’t wander. After all, it is the accumulation of many accurate small cuts that results in an accurate final cut. Likewise, it only takes a few inaccurate cuts to result in a sloppy final cut, so please pay attention to avoid developing monstrously misaligned muscle memory.
Once you have become the machine and developed the necessary muscle memory the process will go very quickly indeed. Sadly, this fine muscle memory is not a permanent thing, and often degrades when unused, but once learned it can be quickly remembered.
Stop & Correct
While sawing away, if you notice your cuts are going astray, stop and figure out why. Is your position good? Is your eyeball where it should be? Is the sawblade aligned with the plane of the cut? Is tension released from your wrist? Is your elbow brushing the same place on your side with each stroke? Is the machine operating faithfully or are the invisible rails bent? Are the teeth dull? Are you applying too much pressure? If things aren’t right, stop the cut, figure out why, and make corrections NOW. Don’t wait.
This self-control is possibly the most difficult task in making accurate cuts with a handsaw, but also the most critical to gaining skill. Failure to do it will result in either learning bad habits, or in delays in correcting the ones you already have. BTW, everyone has bad habits they need to work on, including YMHOS.
The Essential Oilpot
Unlike quadruple-distilled, unicorn wewe aged in bog-oak casks, wood is not a friction-less material. To make things worse, a saw kerf usually becomes “hairy” with loose wood fibers sticking out into the kerf increasing friction in unpredictable ways. And the cherry on top is sap and resin residue found in all wood and which increases friction further.
This friction not only heats the sawblade, possibly warping it and wasting our energy and time, but more importantly it makes it more difficult to control the sawblade in the cut, often making our precision suck big donkey donuts. How to counteract this friction? The classical Japanese solution is the Oilpot.
This tool has long had counterparts throughout the world, and it’s as valuable now as it was six thousand years ago. If you want to use handsaws with high precision, you need to make yourself one. You will be impressed with the difference. Nuff said.
The Two-handed Pistol Grip
When I was a young carpenter working commercial construction, I had a foreman named (I kid thee not) Jack Frost who was offended that God did not give him a tail, especially when working on high scaffolding. Gentle Reader may agree that a fifth appendage could often be handy, despite the fashion compromises it would “entail.” However, consistent with human physical limitations, the fact remains that most joinery saws are operated using either one hand or two, but not by tails.
The discussion above is relevant to all saw grips, but is focused mostly on the single-handed grip. However, just to be thorough, your humble servant would like to describe another style of grip used by some Japanese craftsmen, one your humble servant calls the “Two-handed Pistol Grip.” As the name suggest, instead of gripping the saw in one hand off to the side of the body, the saw’s handle is gripped first by the dominant hand in a pistol grip with the index finger extended along the handle’s side. The index finger of the off-hand is then extended alongside the grip parallel to and opposite that of the dominant hand, and the remaining fingers wrapped over those of the dominant hand.
The sawblade is then operated inside a plane going through the chest and centered on the user’s nose, often quite effectively counteracting the right-left arc tendency. The “swordsman’s grip” is essential to using this technique effectively.
This technique is not good for powerful cuts, but works well for shallow, precise cuts.
I apologize that, despite popular demand, this article lacks clean diagrams and pretty pictures of your humble servant exhibiting these techniques while wearing his sexy blue sequin bikini and famous aluminum-foil alien mind-ray dispersal cap (with curly copper wires and red fringe). But, as the saying goes, “Life is a bowl of cherries, mostly pits.”
Until we meet again, I have the singular honor to remain,
YMHOS

If you have questions or would like to learn more about our tools, please click the “Pricelist” link here or at the top of the page and use the “Contact Us” form located immediately below.
Please share your insights and comments with everyone in the form located further below labeled “Leave a Reply.” We aren’t evil Google, fascist facebook, or thuggish Twitter and so won’t sell, share, or profitably “misplace” your information. If I lie may all my sawteeth shatter.


Please Leave a Reply