

The things that will destroy America are prosperity-at-any-price, peace-at-any-price, safety-first instead of duty-first, the love of soft living, and the get-rich-quick theory of life.
Theodore Roosevelt
The terms White Steel and Blue Steel frequently pop up in discussions about Japanese woodworking tools and kitchen knives. The usual misunderstandings abound in those discussions and BS takes majestic wing.
In this article your humble unworthy servant will try to share some accurate information sourced directly from the steel manufacturer, ancient blacksmiths that actually work these steels, and Japanese professional craftsmen paid to make sawdust and shavings using these steels instead of the usual soft-handed shopkeepers and self-proclaimed experts pontificating from their Mom’s basement.
We will begin by studying some etymology of two of Japan’s most famous modern tool steels. We will then transition through space and time to discuss ancient domestic Japanese steel, and then shift our attention to why these modern steels came into being. After that, we will go to metallurgy class, sans most of the technical jargon, to understand what chemicals these steels contain and why. We will also outline several performance characteristics particular to these two steels in the case of woodworking tools.
For those who enjoy more technical details combined with pretty pictures, we have concluded with the results of a brief but very informative materials engineering study.
There’s much work to be done, so please stretch your back and shoulders and ready your BS shovel.
Product Designations: Yellow, Blue and White Label Steels
These terms refer to tool steels manufactured by Hitachi Metals, Ltd. (HML) in their plant located in Yasugi City in Shimane Prefecture, Japan. If you are into woodworking tools or Japanese cutlery you have probably heard of them.
Hitachi, Ltd., founded in 1910, is one of Japan’s largest and most prestigious manufacturers. Its subsidiary, Hitachi Metals, Ltd., was established in 1956 through acquisition.
“White Steel” is an abbreviated translation of HML’s nomenclature of “Shirogamiko” 白紙鋼, which directly translates to “White Paper Steel.” Likewise, “Blue Steel” is an abbreviation of “Blue Paper Steel,” the translation of “Aogamiko” 青紙鋼.
Regarding the color terminology in these product designations, just as “Johnnie Walker Blue Label” is the product name of a Scottish whiskey with a blue paper label pasted onto the bottle, Aogami is the designation of a particular formulation of high-carbon tool steel with a blue paper label pasted onto it by the steel mill. It’s that simple.
While Johnny Walker may be kinda sorta yellow in hue, it’s no more tinted blue than JW Red Label is sangre. Likewise, the actual color of Hitachi Metal’s tool steels do not vary in color, only their labels do. BTW, if someone tells you they can tell the difference between these steels by simply looking at them, tell them to give you a nickle and pull your toe for some fragrant, musical entertainment.
Surprisingly, some folks insist they can tell the difference between steels by licking them. Our feline masters see this as further evidence human mothers lack not only retractable claws, but have butter fingers (ツ)。
Since your humble servant can read and write Japanese, I feel foolish calling these materials White Steel or Blue Steel as many in English-speaking countries do, so I prefer to use the more correct names of Kigami, Aogami, or Shirogami steel, or the English translations of Yellow Label Steel, White Label Steel or Blue Label Steel. Please excuse this accurate affectation.
Now that adult beverage nomenclature, greenhouse gases and feline viewpoints are out of the way, let’s go back in time a few hundred years. My tardis is that green box just over there. Yes, the one with the doohickey on top.
A change into period-correct wardrobe will not be necessary, but please put away your smartphone and kindly don’t embarrass me in front of the locals by holding it over your head and wailing “There’s no signal!!”
Traditional Domestic Japanese Steel: Tamahagane
Tamahagane, written 玉鋼 in Chinese characters, which translates to “Jewel Steel” and is pronounced tah/mah/hah/gah/neh, is famous as the domestic steel traditionally used to forge Japanese swords prior to the importation of bulk steel from overseas beginning with products of the Andrews Steel mill in England. Indeed, at one time tamahagane was at the center of all steel production in Japan.
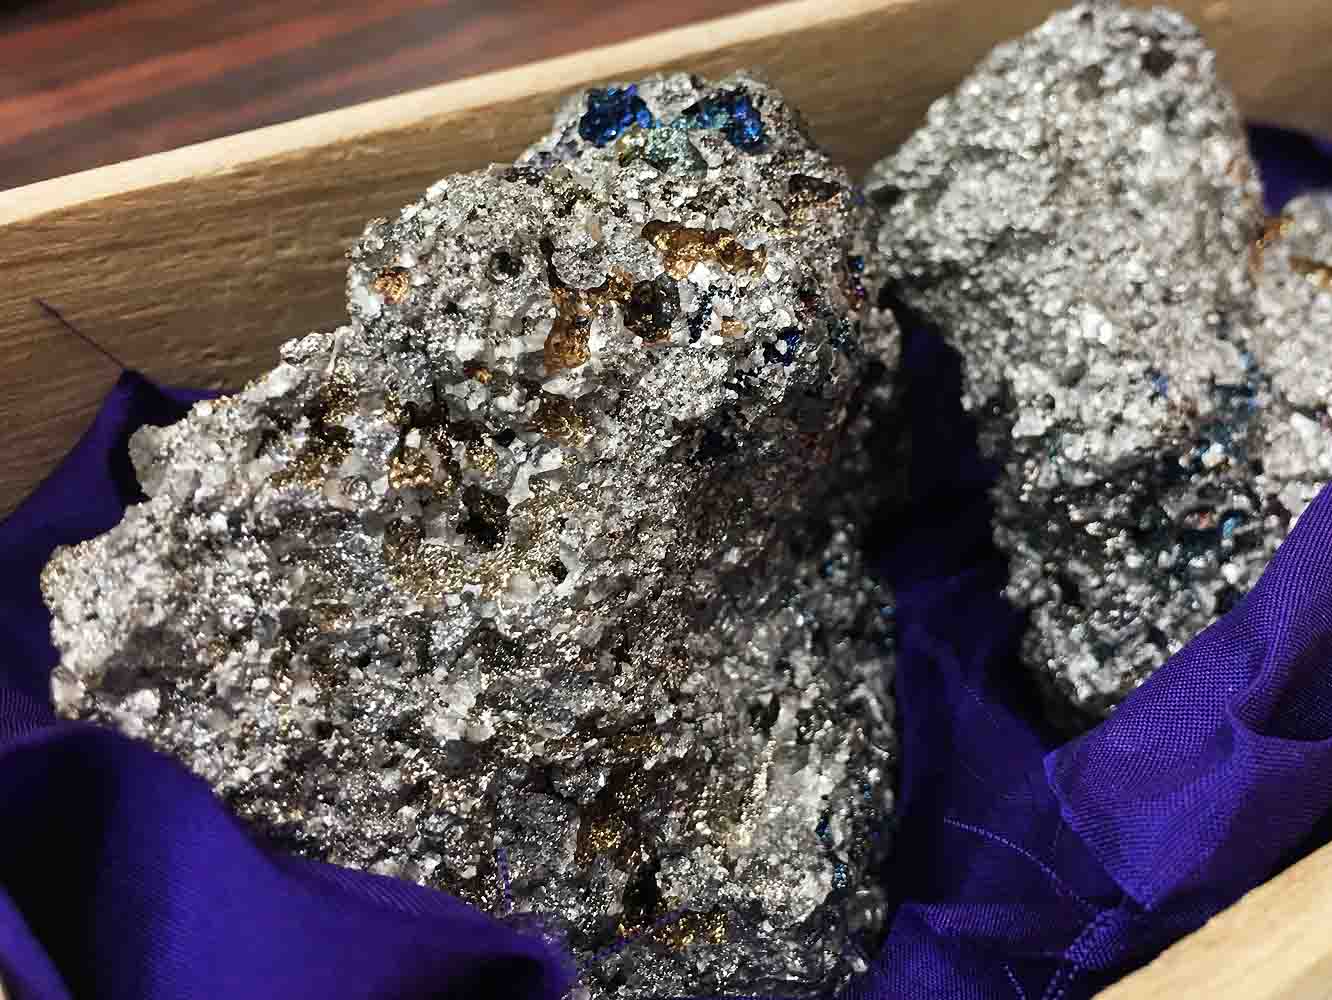
But tamahagane does not grow on trees. Indeed, before Admiral Perry’s black ships re-opened the many kingdoms and fiefdoms scattered across the islands that now comprise modern Japan, the only significant local source of iron was a material called satetsu, a loose surface particulate iron written 砂鉄 in Chinese characters, meaning ”sand iron,” and pronounced sah/teh/tsu. Satetsu looks exactly like black sand. It’s quite common throughout the world, as you may discover if you drag a magnet through a dark sandy riverbed or over a black beach.
Typically found in rivers and estuaries, for many centuries the area around Yasugi City in Shimane Prefecture was a prime source.


Satetsu was historically harvested in Japan using dredges and sluices creating horrendous environmental damage. Fortunately, the days of wholesale estuary destruction are in Japan’s past.
Although Aluminum is the most abundant metal found on the third rock from the sun, people who must have huge scales say that iron makes up 34% of the earth’s mass. Japanese satetsu as harvested is a fairly pure form of iron lacking nearly all of the problematic impurities found in commercial iron ore nowadays.
Historically, satetsu was refined in rather crude furnaces called ” tatara” yielding clumps of brittle steel containing excessive amounts of carbon and other impurities, but few of the inconvenient impurities common to iron ore extracted by mining. This “bloomery” technique is not unique to Japan, although many Japanese people who should know better mistakenly believe it is.


Steel produced this way in the West is called “bloom steel.”
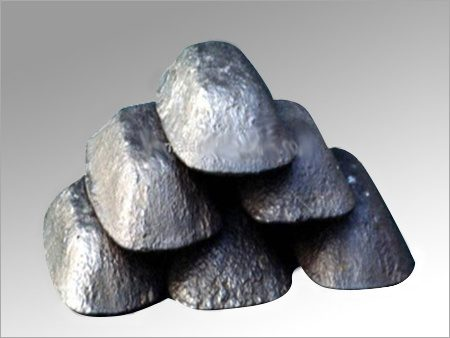
Blacksmiths hammer, fold, and re-hammer these crumbly lumps to remove impurities and reduce/distribute carbon forming the more homogeneous Tamahagane steel. This webpage has some interesting photos of tamahagane.


Tatara furnaces are still operated on a limited basis today producing Tamahagane in limited quantities for use by licensed swordsmiths. Tool blacksmiths use Tamahagane occasionally too out of interest in traditional materials and methods. It’s expensive and difficult to work, with lots of waste.
A sawsmith on the island of Shikoku in Japan who was active both before and after the availability of British steel is recorded as saying that imported Western steel increased saw production efficiency in his area tenfold. Clearly, Tamahagane was a very labor intensive material.
Mr. Kosuke Iwasaki, a famous modern Japanese metallurgist and blacksmith, described forging Tamahagane as being like “hammering butter” because it flattened and spread too quickly and unpredictably, at least compared to modern steels.
Besides its peculiar forging characteristics, compared to modern tool steels Tamahagane is a difficult material infamous for being overly sensitive to temperature and easily ruined during all phases of forging and heat treatment. These traits have created a historical sensitivity among Japanese blacksmiths regarding precise temperature control, a beneficial habit when working the tool steels discussed herein.
In use, tools made from Tamahagane behave differently from modern commercial steel, or so I am told. I own and use a straight razor custom forged from Tamahagane for me many years ago by Mr. Iwasaki. I also own antique Scheffield and German razors, but my hand-forged Iwasaki razor puts them all to shame in terms of sharpness, edge retention, and ease of sharpening. I also own a couple of antique Tamahagane saws, but I have not used them much, nor have I used Tamahagane chisels, planes or knives, so my experience is limited to this one wickedly sharp little blade.

Why do I bother Gentle Reader with these tales of ancient smelting techniques and obscure products no longer viable? Simply because Tamahagane and the cutting tools and weapons it was once used to produce profoundly influenced both Japan’s history and the Japanese people’s attitude towards edged weapons and cutting tools, in your humble servant’s opinion.
Although imported Western steel served Japan well during its ramp-up to modernity, the memory of the performance of cutting tools made from Tamahagane has remained alive in the national memory. Indeed, I am convinced the Japanese people’s love and fear of sharp things is not only psychological but genetic, although I have not seen any studies on the “sharpness gene.” But that’s a story we should save for the next time we are enjoying a mug of hot coco together around the iori fire on a moonlit Autumn night. May that evening come soon.

Modern Japanese Tool Steels
Enough ancient history. Let’s jump back into the tardis and travel to the late 1950’s to consider a few modern steels before returning home.
Yes, you can turn your mobile phone back on once inside, but reception may be poor for a few centuries. No you can’t bring back souvenirs. I don’t care what Doctor Whatsit did with his tardis, we are responsible time travelers and will avoid creating causal conundrums. Besides, the import taxes are pure murder. And please, do be careful no little children slip inside with you.
When Japan began to mass-produce commercial steel from imported pig iron using modern techniques, the first standard tool steel produced was identical to Western steels, including the impurities. These are still produced today as the “SK” series of steels as defined by Japan Industrial Standards (JIS).
Eventually, to satisfy the irrepressible sharpness gene of their domestic customers, Japanese blacksmiths and cutlery manufacturers pressured Japanese steel companies to develop products with fewer impurities and with performance characteristics approaching traditional Tamahagane.
Rising to the challenge, Hitachi Metals endeavored to replicate the performance of Tamagane using modern smelting techniques and imported pig iron and scrap metal instead of expensive and environmentally unsustainable satetsu.
To this end Hitachi purchased and modernized an old steel plant in Yasugi City, Shimane Prefecture for this purpose. They formulated the best steel they could make using the best pig iron they could find, sourced mostly from Sweden, an area famous for hundreds of years for producing especially pure iron ore. The results were Shirogami Steel (pronounced she/roh/gah/mee/koh 白紙鋼), Aogami Steel (pronounced aoh/gah/mee/koh 青紙鋼), and Kigami Steel (pronounced kee/gah/me/koh and written黄紙鋼) meaning “Yellow Label Steel.” Later, they developed Aogami Super steel (青紙スパー ) (a mediocre high-speed steel) and Silver Label Steel (stainless steel). Each of these products are available in various subgroups, each having a unique chemical formulation.
For a time, Hitachi marketed some of these steels with the “Tamahagane” designation. Problematic, that. Indeed, many saws and knives were deceptively stamped “Tamahagane” when these steels were first introduced.
With the explosive popularity of Japanese knives overseas, several Japanese manufacturers have once again made the decision to body surf smelly waves of BS deceptively labeling their products as being made from “Tamahagane” despite being made of common SK steels and even stainless steels. Because these spurious representations were and continue to be made for the purpose of increasing profits for companies that clearly know better, in your humble servant’s opinion even the stinky label of BS is too good for them.
Caveat emptor, booby.
Chemistry
We tend to think of steel as a hard metallic thing, but lo and behold, ’tis a chemical compound!
Few chemicals humans dabble with are absolutely pure, and while White Label, Blue Label, and Yellow Label steels contain exceptionally low amounts of undesirable contaminants, they do exist. Dealing with the negative impacts of these impurities has been the bane of blacksmiths since before Vulcan was chopping charcoal in hairy goatskin nappies.
The most common undesirable impurities found in commercial iron include Phosphorus (reduces ductility, increases brittleness, and messes with heat treating), Silicon (a useful chemical that increases strength, but too much decreases impact resistance), and Sulfur (a demonic chemical that reduces strength, increases brittleness and gleefully promotes warping). Obviously, something must be done about these bad boys.
Some people imagine that, through the alchemy of “Science” (a word that’s lost nearly all of its positive value nowadays through adulteration and profiteering by corrupt, credentialed scam artists both public and private and narcissistic publicity hounds pretending to be “scientists”), impurities are simply “disappeared” from steel during smelting. While some impurities can in fact be eliminated through heat and chemical reactions, it is not possible to significantly reduce the content of those listed above through smelting and forging alone.
Undesirable chemicals can be tolerated in steel to some degree because, like arsenic in drinking water and carbon monoxide in air, below certain levels they cause no significant harm. The best solution we have discovered is to reduce the concentration of impurities to acceptable levels by using ore and scrap material that contain low levels of impurities to begin with, and constantly testing, and either rejecting or diluting the ”pot” as necessary to keep impurities below acceptable levels. This practice is known as “Solution by Dilution.”
White Label steel is plain high-carbon steel without other additives, while Blue Label, Silver Label, and Aogami Super steels have various chemical additives to achieve specific performance criteria. Please see the flowchart below.
Production Flowchart of Yellow Label, White Label, Blue Label, and Super Aogami Steels

Another technique used to mitigate the negative effects of impurities found in iron ore is to add chemicals such as chrome, molybdenum, vanadium, tungsten, etc. to the pot producing so-called “high-alloy” steels that can be more predictably forged and heat-treated, are less likely to crack and warp, and will reliably develop useful crystalline structures despite containing high levels of detrimental impurities. Such high-alloy steels can reliably produce useful tools in mass-production situations by unskilled labor and with minimal manpower spent on quality control while greatly improving productivity and decreasing costs. But regardless of the hype, such chemicals do not improve sharpness or make sharpening easier, important considerations in the case of woodworking tools. Indeed, the exact opposite is true.
The pages in Hitachi’s Japanese-language catalog regarding their relevant cutlery steels can be found immediately below.
The table below is a summary of a few relevant tool steels listed in Hitachi Metal’s catalogue.
Gentle Reader will notice that White Label and Blue Label steels both have the same minute allowable amounts of impurities such as Silicon, Phosphorus, and Sulfur.
Chemical Table of White Label, Blue Label and Aogami Super Steels
| Product Designation | Shirogami 1 (White Label 1) | Shirogami 2 (White Label 2) | Aogami 1 (Blue Label 1) | Aogami 2 (Blue Label 2) | Aogami Super |
| Carbon | 1.3~1.4% | 1.20~1.30% | 1.30~1.40% | 1.10~1.20% | 1.40~1.50% |
| Silicon | 0.10~0.20 | 0.10~0.20 | 0.10~0.20 | 0.10~0.20 | 0.10~0.20 |
| Manganese | 0.20~0.30 | 0.20~0.30 | 0.20~0.30 | 0.20~0.30 | 0.20~0.30 |
| Phosphorus | <0.025 | <0.025 | <0.025 | <0.025 | <0.025 |
| Sulfur | <0.004 | <0.004 | <0.004 | <0.004 | <0.004 |
| Chrome | 0.3~0.05 | 0.20~0.05 | 0.30~0.05 | ||
| Tungsten | 1.50~2.00 | 1.00~1.50 | 2.00~2.50 | ||
| Molybdenum | 0.3~0.5 | ||||
| Vanadium | |||||
| Cobalt | |||||
| Annealing Temp °C | 740~770°cooled slowly | 740~770°cooled slowly | 750~780°cooled slowly | 750~780°cooled slowly | 750~780°cooled slowly |
| Quench Temp°C | 760~800°water | 760~800°water | 760~830°water or oil | 760~830°water or oil | 760~830°water or oil |
| Tempering Temp°C | 180~220°air | 180~220°air | 160~230°air | 160~230°air | 160~230°air |
| Hardness HRC | >60 | >60 | >60 | >60 | >60 |
| Primary Usages | Highest-quality cutlery, chisels, planes | High-quality cutlery, chisels, saws, axes, sickles | Highest-quality cutlery, planes, knives | High-quality cutlery, planes, knives,saws, sickles | High-quality cutlery, planes, knives |
Carbon of course is the element that changes soft iron into hardenable steel, so all five steels listed in the table above contain carbon, but you will notice that White Label No.1 has more carbon than White Label No.2. Likewise, Blue Label No.1 has more carbon than Blue Label No.2.
The greater the carbon content, the harder the steel can be made, but with increased hardness comes increased brittleness, so White Label No.1 is likely to produce a chisel with a harder, more brittle blade than one made of White Label No.2.
With impurities and carbon content the same, the chemical difference between White Label No.1 and Blue Label No. 1 then is the addition of chrome and tungsten, elements which make the steel much easier to heat treat, and reduce warping and cracking, thereby yielding fewer defects with less work. Chrome, and especially tungsten, are expensive chemicals that make Blue Label steel costlier than White Label steel, but with easier quality control and fewer rejects, overall production costs are reduced.
White Label No.2 steel makes a wonderful saw, but the plates and teeth of saws forged from White Label No.1 tend to be fragile unless the blacksmith removes excess carbon during forging to improve toughness. This is entirely within the skillset of an experienced blacksmith, and can even occur by accident.
My point is that an experienced and conscientious blacksmith will use the steel most likely to achieve his customer’s expectations for performance, not just the most profitable or more easily-worked material.
In the case of chisels, plane blades, and kitchen knives intended for professional use, White Label No.1 is the first choice of Japanese professionals followed by Blue Label No.1 steel.
Where high performance at less cost is required, Blue Label No.1 is often preferred.
All things considered, and this is a critical point to understand, compared to White Label steel, Blue Label steel is easier to forge and heat-treat, with fewer rejects, making it a more cost-effective material despite being a more expensive material. Indeed, many blacksmiths and all mass-producers prefer Blue Label steel over White Label steel, when given a choice, because it is easier to use and more profitable, not because it makes a superior blade.

Many wholesalers and retailers insist that Blue Label steel is superior to White Label steel simply because, as a material, it’s costlier and contains elements that make it more resistant to wear and so-called “abrasion,” intimating that it will stay sharper longer. Those poor derelict souls who are easily deceived, have less than professional sharpening skills, or do not follow this blog may accept this convenient marketing ploy, but when wise Gentle Readers hear this sort of nonsense they will know to quickly put on their flippers and floaties in time to keep their heads above the stinky, brown flood of BS about to engulf them.
Wise Beloved Customers who choose blades forged from Blue Label steel will do so because they know that Blue Label steel makes a fine blade at less cost than White Label steel, not because Blue Label steel blades are superior in performance. Moreover, regardless of the steel used, they will always purchase blades forged by blacksmiths that possess the requisite dedication and have mastered the skills and QC procedures necessary to routinely produce high-quality blades from the more temperamental White Label steel. The reasons are made clear in the Technical Example below.
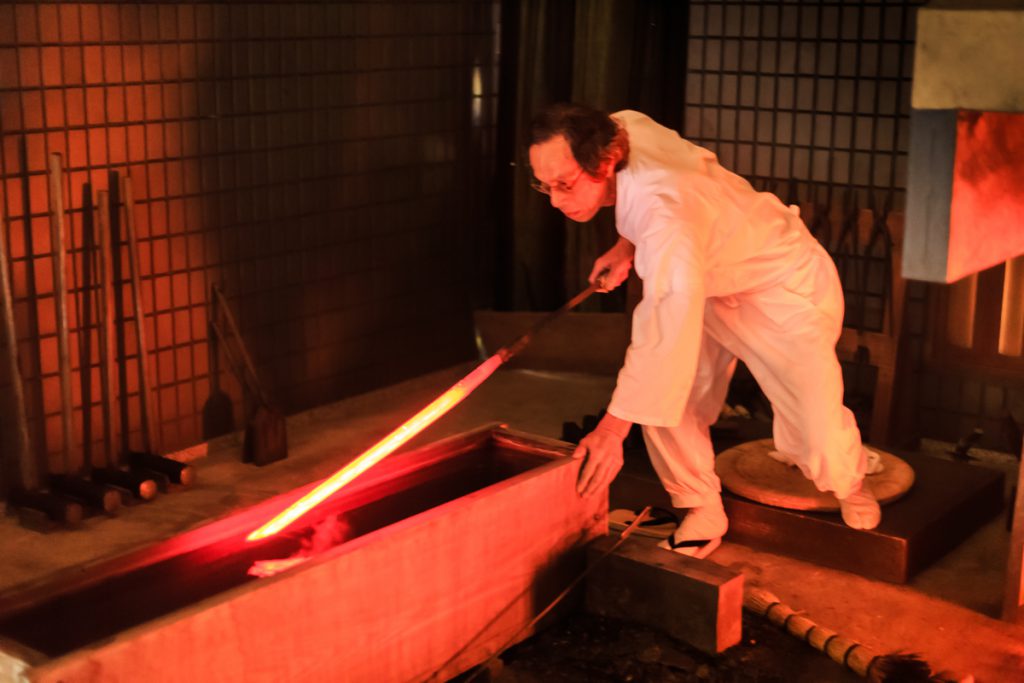
Quenching & Tempering
Let us next consider the process of hardening steel, called “heat treatment,” (in Japanese “netsu shori” 熱処理) the key to making useful tools.
High-alloy steels vary in this regard, but in the case of plain high-carbon steels, the two primary stages (with various intermediate steps we won’t touch on) of heat treatment are called “quenching” and “tempering.”
Quenching
Despite what many, including Supreme Court Justice Jackson, imagine, both men and women are fundamentally different and at the same time essential to making hoomans. Iron and carbon too are fundamentally different elements, and both are essential to making steel. And like men and women, these two elements sometimes make nice, but sometimes don’t get along well at all.
Indeed, prior to heat treating, the carbon molecules in steel tend to isolate themselves from the larger mass of iron forming isolated clumps, an organization that makes steel weak and/or brittle. When the steel is heated above a specific temperature, however, the carbon clumps tend to dissolve, become mobile, and meld with the iron molecules in a very friendly manner, if Gentle Reader will forgive me for anthropomorphizing chemistry. If the steel is then allowed time to cool naturally the carbon molecules will once again separate themselves into useless clumps creating a soft or brittle material.
But if the yellow-hot steel is instead suddenly quenched in oil or water it will cool rapidly such that carbon molecules lack the time needed to reform the weak clumps it naturally prefers leaving it stranded and mixed with the iron, forming extremely hard “carbide” particles, locked into a rigid crystalline matrix. This transformation is the first part of what your humble servant and others call The Mystery of Steel.
After quenching, the steel is brittle enough to shatter if dropped onto a concrete floor, for instance, and not suitable for tools, so further measures are necessary.
Tempering
The next step in the heat-treatment process is called “tempering,” a process that adjusts the rigid crystalline structures created during the quench, losing some carbides and loosening the rigid crystalline structure somewhat, but making the steel less brittle and much tougher.
This is achieved by reheating the steel to a set temperature for a set period of time and then cooling it in a specific way. This heating and cooling process can happen in air (e.g. oven), oil, or even molten lead. All that really matters is the temperature/time curve applied. Every blacksmith has their own preferences and procedures.
With that ridiculously overly-simplified explanation out of the way, let’s next take a gander at the “Quench Temp” row in the table above which indicates the acceptable range of temperatures within which each steel can be quenched to successfully achieve proper hardness. These ranges are important because if quenching is attempted outside these ranges, hardening will fail and the blade may be ruined.
In the case of White Label steel, Gentle Reader will observe that the quenching temperature range is listed as 760~800°C, or 40°C. Please note that this is a very narrow range to both judge and maintain in the case of yellow-hot steel, demanding a sharp, well-trained eye, a good thermometer, proper preparation, and speedy, decisive action, not to mention a thorough purging of iron pixies and malevolent spirits from the workplace.
Just to make things worse, even within this allowable range, a shift of temperature too far one way or the other will significantly impact the quality of the resulting crystalline structure, so the actual temperature variation within the recommended quench temp range an excellent blacksmith will aim for is more like ± 10˚C.
In the modern world with easily-controlled gas fires, consistent electric blowers, and reliable infrared thermometers, this target can be hit through training and diligent attention, but not that long ago it was seen as a supernatural achievement performed in the dark of night by powerful wizards. I kid thee not.
Compare this range of quenching temps to those for Blue Label steel with an acceptable quenching temperature range of 760~830°C, or 70°C of range, a 75% increase over White Label steel. That’s huge.
Let’s next consider the recommended tempering temperatures.
For White Label steel, Hitachi’s recommended tempering temperatures are 180~220°C, or 40°C of range. Blue Label steel’s temperatures are 160~230°C, or 70°C of range, once again, a 75% greater safety margin.
The practical temperature range for quenching and tempering Blue Label steel is still quite narrow, but this increase in the allowable margin of error makes the job a lot easier, such that Blue Label Steel is much less risky to heat-treat successfully than White Label steel.
Judging and maintaining proper temperatures during forging, quenching and tempering operations is where all blacksmiths, without exception, fail when they first begin working plain high-carbon steel. The guidance of a patient master, time and perseverance are necessary to develop the knack. Experience matters.
I hope the discussion this far at least partially brings into focus the challenges these two steels present to the blacksmith.
If you seek greater light and knowledge, please look online to find similar data for many of the popular high-alloy tool steels. Comparing those numbers to White Label steel and Blue Label steel will help you understand why mass-producers of tools, with their lowest-possible-cost mindset, minimal quality control efforts, and virtually untrained workforce of peasant farmers, former lawn-care professionals, and aspiring fast-food restaurant workers prefer them for making the sharpened screwdrivers foisted off by the boatload on uninformed consumers as chisels nowadays.
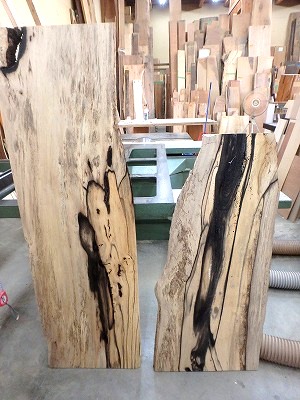
Warping & Cracking
A huge advantage of chrome and tungsten additives is that they reduce warping and cracking significantly. This matters because a blacksmith using a plain high-carbon steel like White Label steel must anticipate the amount of warpage that will occur during quenching, and then shape the chisel, knife, or plane blade in the opposite direction so that the blade straightens out when quenched. This exercise requires a lot of experience to get right consistently, making White Label steel totally unsuitable for mass-production.

Steel is a magical material. When yellow hot, the carbon dissolves and disperses relatively freely within the iron matrix. Anneal the steel by heating it and then slowly cooling it and the carbon molecules will migrate and gather into relatively isolated clumps with little crystalline structure leaving the steel soft.
But if the steel is heated to the right temperature and suddenly cooled by quenching, the carbon is denied the time and freedom available to it during the slower annealing process, instead becoming locked into the iron matrix forming a hard, rigid crystalline structure. This rigid iron/carbon crystalline structure has a significantly greater volume than pure iron, which is why the blade wants to warp when quenched.
Adding chrome and tungsten and other chemicals reduces this tendency to warp.
Sword blades are an interesting example. A Japanese sword blade is typically shaped either straight or curved towards the cutting edge before quenching, but during quenching the blade warps and curves without encouragement from, and despite the efforts of, the blacksmith. The skill and experience required to accurately anticipate the degree of warpage generated and the resulting curvature of the blade, and then compensate while shaping the blade before quenching to achieve the desired curvature post-quench is not something one learns in just a few months or even years.


High-alloy Steels
Unlike Tamahagane, however, modern high-alloy commercial steels contain large amounts of chemicals such as chrome, tungsten, molybdenum, vanadium, etc., with the result that tools made from these steels warp less, and exhibit far fewer shrinkage cracks.
Aogami Super is another HML product listed in the table and flowchart above. It’s an interesting steel, containing more carbon than both White Label steel and Blue Label steel and a lot more tungsten than regular Blue Label steel. Consequently, it is even more expensive. Aogami Super was originally developed as a high-speed tool steel especially resistant to wear. There are much better steels available for this role now, but Aogami Super is still hanging in there.
But all is not blue bunnies and fairy farts because high-alloy steels have some disadvantages too.
Those who hype high-alloy steels always praise to the heavens the “wear-resistant” properties chrome and tungsten additives afford. When the subject is woodworking handtool blades, however, please understand the meaning of “wear resistant” to include “not very sharp,” and “a bitch to sharpen by hand.”
Tungsten makes the steel warp less and expands the heat-treat and tempering temperature ranges significantly leading to fewer defects during production. But the addition of tungsten also produces larger, tougher crystals that simply can’t be made as sharp as White Label No.1, and that makes the blade much more difficult, unpleasant, and time consuming to sharpen, all while wasting more expensive sharpening stone material in the process.
White Label steel has no additives other than carbon. It does not need additives to compensate for or to dilute impurities because its production begins with exceptionally pure pig iron, and carefully tested and sorted scrap metal. Both White Label and Blue Label steels, if properly hand-forged and heat treated by an experienced blacksmith with high quality standards, will have many more and much smaller carbide clumps distributed more evenly throughout the iron crystalline matrix producing a ” fine-grained” steel of the sort coveted since ancient times.
On the subject of scrap metal, this is not necessarily a negative thing. In fact, nearly all tool steels available nowadays contain high percentages of scrap metal content because, environmental and sustainability matters aside, it’s simply too cost-effective to ignore. Careful sourcing and testing are the keys to using scrap metal advantageously.
Performance Differences
I hope Gentle Reader found our little excursion back in time in the tardis, and the chemical information presented above, interesting, but it may not have clearly answered your questions about the performance differences between these steels, and when presented a choice, which one you should purchase. Your humble galley slave has been asked and answered these questions hundreds of times, and while only you can decide which steel is best for you, I will be so bold as to share with you the viewpoint of the Japanese blacksmith and woodworking professional.
Long story short, in the case of planes and chisels, the typical choices of steel are still White Label No.1, White Label No.2 or Blue Label No.1. BTW, I have been informed that Hitachi is no longer producing these steels and consequently they will not be available much longer.
If you are dealing with honest blacksmiths and honest/knowledgeable retailers with experience actually using, not just talking about and selling, tools, you will have observed that a specific plane blade, for instance one made from Blue Label steel, will cost less than the same blade made from White Label steel, despite Blue Label steel being a more costly material.
At C&S Tools a 70mm White Label No.1 steel plane blade cost 77% more than one made from Blue Label No.1. This means that the blacksmith’s average cost in terms of his labor (overhead, forging and shaping costs being equal) is also around 77% greater than Blue Label steel, a direct reflection of his potential additional time expenditure and material wastage due to defects such as cracking or excessive warping. This a constant risk for the blacksmith making professional-grade blades, so he must include the expense of mitigation in his production costs if he is to continue to keep a roof over his family’s heads.
So the dishonesty of charging more for products forged from Blue Label or Aogami Super steel is repugnant to your humble servant and should be to Beloved Customers too. But I digress.
White Label steel simply warps and cracks more, but when failure occurs it only becomes apparent after all the work of laminating, forging, shaping and quenching are complete. Ruined steel cannot be reliably re-forged or re-used, so all the material and labor costs up to the point of failure are simply wasted like an expectation of honest news from CNN. It is not a material for careless people or newbies.
So if White Label steel blades are riskier to make, with more wastage, and therefore more expensive, what are the performance characteristics that make White Label steel blades a favorite with professional Japanese craftsmen?
First, properly made White Label steel blades can be made sharper. This makes the craftsman’s work go quicker and more precisely. But don’t forget that this additional sharpness is entirely dependent on the user’s sharpening skills and his willingness to maintain his blades at that higher level.
Second, properly forged White Label steel blades are quicker and more pleasant to sharpen, making it easier to routinely obtain the extra sharpness mentioned in the previous paragraph. That sums it up.
To some people, especially those that use edged tools professionally all day long, these differences matter a great deal; To others, not so much.
Is White Label steel worth the extra cost? I think so, but the performance differential is not huge, and only someone with advanced sharpening skills will be able to take full advantage of the difference. For most people on a tight budget, or in the case of woodworking situations where sharpness is not critical, and sharpening speed and pleasure are not driving factors, then a less-expensive Blue Label steel blade is perhaps a better choice. It absolutely makes a fine tool that does a great job of cutting wood.
The Wise Man’s Q&A
Let’s shovel some more BS out of the way by performing the mandatory experiment of taking a hypothetical high-quality White Label steel blade and a hypothetical high-quality Blue Label steel blade, sharpening them identically using the best stones and advanced techniques, test them to cut some wood, and then consider the answers to the following two important questions:
Question 1: Will the additional sharpness obtainable from a White Label steel plane blade, properly sharpened and installed in a perfect body, create a smoother, shinier finish surface on wood than a Blue Label steel blade?
Answer 1: Definitely no; But since the blade started out a little sharper, it will cut wood a little better, a little longer. These results will depend on the skills of the user, of course.
Question 2: In the case where edge-retention, cutting speed, and cutting precision are more important than a shiny finish, which absolutely applies to chisels and knives, will the additional sharpness of a properly made and proficiently sharpened White Label steel blade improve a woodworking tool’s cutting speed, edge-retention, precision and control?
Answer 2: Absolutely yes; On condition that the user possesses and exercises the skills necessary to achieve and maintain that extra degree of sharpness. There is a reason sharpening has always been the first essential skill in woodworking.
These are the reasons why we don’t even offer chisels made from Blue Label steel, or even White Label No.2 with its lower-carbon content, and resulting reduced hardness.
But whether plane blade, chisel or knife, a key point to understand is that a properly forged and heat-treated blade made by an experienced professional blacksmith from simple White Label steel will always be quicker and more pleasant to sharpen than one made of Blue Label steel with its added sticky chrome and hard tungsten. To the professional that has the need for the additional sharpness, possesses the skills necessary to produce and maintain it, and counts the cost of his time and sharpening stones, that’s a difference many find fully justifies the extra cost.
I daresay many of our Beloved Customers agree.
A Technical Example
You may find the metallurgical technical terms below difficult to follow, but perhaps an example with pretty pictures will help bring things into focus. Please see this informative article by Niigata Prefecture’s Prefectural Central Technical Support Center. If you input the URL into Google and use the translate feature a decent English-language version may magically appear. Or not. Some of the key results are copied below.
The steel being tested in the study outlined below is White Label No.2 steel (row 2 on page 4 of the Hitachi catalogue pdf). They heat-treated seven samples, tested their hardness, and listed the results. In each case, the quench temp varied from 750˚~900˚C (1382˚~1652˚F) in water, but the tempering temp was kept constant at 180˚C (356˚F).
The best results can be seen in Figure 4 below at a tempering temperature of 775˚C (1427˚F) producing the finest, most uniform crystalline (Austentite) structure. Lower temps are not as good. Higher temps are worse. A 25˚ variation one way or the other made a big difference.
So let’s examine how the crystalline structure changes with different temperatures as seen in the photos below.
The white stuff visible in the photographs is Ferrite (iron), while the black stuff is spherical carbide (Cementite). When Ferrite and Cementite meld, a desirable hard crystalline structure called Martensite is formed, although there are several steps in between we will not touch on. This subtle molecular change is the essence of the ancient Mystery of Steel, and the keystone to modern civilization.
Fig.1 shows the steel before heat treatment begins. Notice how the soft iron Ferrite and spherical carbon Cementite are isolated from each other indicative of little crystalline structure and a soft metal. No significant Martensite is visible.

The graph in Fig.2 below shows Vickers Hardness on the vertical axis and quench temperature (with a 20 minute soak) on the horizontal axis. Notice how hardness makes a big jump between 750˚C and 775˚C. This 25˚ range is the sweet spot.

Fig. 3 below shows the crystalline structure at a quench temp in water of 750˚C, after a 20 min. soak, followed by tempering at 180˚C for one hour, followed by air cooling. This is 10˚C below the manufacturer’s recommended quench temp. Notice how the iron Ferrite and spherical carbon Cementite are mixing, forming some gray-colored Martensite, but there are still big lakes of Ferrite visible. Better, but not yet good.

Fig. 4 below shows the crystalline structure at a quench temp in water of 775˚C, after a 20 min. soak, followed by tempering at 180˚C for one hour, followed by air cooling. Notice how the iron Ferrite and spherical carbon Cementite are well-mixed forming pretty grey Martensite, indicating that this is close to the ideal quench and tempering protocol; The sweet spot. The crystalline structure shows few lakes of iron Ferrite or islands of spherical carbon. This organization is typical of durable, hard, fine-grained steel. A mere 25˚C increase in quench temp has yielded a large improvement.

Fig. 5 below shows the crystalline structure at a quench temp in water of 800˚C, after a 20 min. soak, followed by tempering at 180˚C for one hour, followed by air cooling. This is still within the quench temp range recommended by Hitachi. Notice how the Ferrite and spherical carbon Cementite are still fairly well-mixed, but the dark spherical carbon is becoming a bit more isolated from the Ferrite forming more, darker groupings. While the Martensite formed is still quite adequate, the performance of this steel may not be as ideal as that in Fig. 4. Notice also that the hardness of the steel has dropped slightly.

Fig. 6 below shows the crystalline structure at a quench temp in water of 825˚C, after a 20 min. soak, followed by tempering at 180˚C for one hour, followed by air cooling. Notice how the crystalline structure has become less uniform than in Fig 5 after only a 25˚ increase in quenching temp.

Fig. 7 below shows the crystalline structure at a quench temp in water of 850˚C, after a 20 min. soak, followed by tempering at 180˚C for one hour, followed by air cooling. This time, a mere 25˚ increase in quenching temp has resulted in significant degradation in the uniformity of the crystalline structure as well as reduced hardness.

Fig. 8 below shows the crystalline structure at a quench temp in water of 875˚C, after a 20 min. soak, followed by tempering at 180˚C for one hour, followed by air cooling. Once again, significant degradation in the uniformity of the crystalline structure and loss of Martensite is apparent.

Fig. 9 below shows the crystalline structure at a quench temp in water of 900˚C, after a 20 min. soak, followed by tempering at 180˚C for one hour, followed by air cooling. Gentle Reader will notice the many white “tissues” that have developed in addition to tempered martensite. The fibrous-appearing white stuff is considered retained Austenite, a formation that can later be converted into hard Martensite with some effort. Once again, just a 25˚ increase in quenching temp has resulted in significant degradation in the uniformity of the crystalline structure as well as reduced hardness.

Clearly, Shirogami No.2 steel is a very good tool steel, but it’s sensitivity to heat-treatment technique, and the necessity for knowledge, experience and care in working it are also clear.
Takeaway
What should Gentle Reader glean from this technical presentation?
The first thing to understand is that plain, high-purity, high-carbon steel that has been skillfully forged, quenched and tempered will exhibit the finest, most evenly-distributed hard carbides in a uniform crystalline steel structure mankind can economically produce. Such steel will become sharper than any other metal from which a practical chisel or plane blade can be forged.
This fact has not changed since ancient times, regardless of the hype and marketing of the mass-producers who can at best achieve comparatively mediocre results using modern high-alloy steels.
The second thing to understand is that, while it is not difficult to make high-carbon steel hard, nor to temper it to make a durable product, producing a uniform, durable crystalline structure that will become very sharp, will be especially resistant to dulling, and can be sharpened quickly requires serious skills of the sort that only result from many years of study under a master, and dogged commitment to quality control, especially temperature control and timing. In your humble servant’s opinion this makes chisels, plane blades and handsaws hand-forged from the high-quality high-carbon steels discussed in this article worthy of consideration by professional woodworkers who need sharp blades and have the skills necessary to maintain them properly.
If steel is the lock, then the crystalline structure the blacksmith creates in high-carbon steel through his skill, diligence and dedication is the key to the Mystery of Steel. It’s a lock and key mankind has been using since ancient times, a combination that is the foundation of our modern, extremely wealthy civilization. But it’s only been a handful of decades since we developed the technology that made it possible to really understand why the key opens the lock. Rejoice, Gentle Reader, for you live in technologically enlightened times!
I hope this discussion has been more helpful than confusing.
YMHOS

Relevant Posts
If you have questions or would like to learn more about our tools, please click the “Pricelist” link here or at the top of the page and use the “Contact Us” form located immediately below.
Please share your insights and comments with everyone in the form located further below labeled “Leave a Reply.” We aren’t evil Google, fascist facebook, or thuggish Twitter and so won’t sell, share, or profitably “misplace” your information. If I lie may my all my Martensite turn to mush.


Please Leave a Reply