The Three Options

https://uploads6.wikiart.org/images/ito-jakuchu/plum-blossoms-and-cranes.jpg
Plum Blossoms and Three Cranes, by Ito Jakuchu (1716~1800). The Japanese crane is a beautiful bird with a red cap. Apparently the birds illustrated in this example of classical Japanese art are looking in three different locations for a mislaid tool, probably a tape measure. No pockets or belts to clip anything to, you know, so they are forever mislaying things!

The bitterness of poor quality remains long after the sweetness of low price is forgotten.

Well done is better than well said.

Benjamin Franklin (1706-1790)

Purchasing woodworking cutting tools long-distance based only on pictures, what you read online, and retailer’s vague descriptions can be confusing and frustrating. And squawking BS meters are not reassuring.

In this post, with Gentle Reader’s kind indulgence, your most humble and obedient servant will share some insight to help Gentle Reader avoid the most common mistakes.

If the following is obvious please do not be offended. I am confident our discerning and intelligent Gentle Readers will discover somewhere in this post what is called in Japan a “stork in a rubbish dump 掃き溜めに鶴,” which perhaps translates better to a “Jewel in a garbage pile.” I trust there are more jewels than rubbish to be found in this article.

Risks & Psychology

At C&S Tools we understand the risks and stresses inherent in long-distant purchases. After all, not much can be discerned about a cutting-tool’s quality or performance from online photos and retailer’s product descriptions alone. We believe the best way to reduce uncertainty, alleviate customer’s concerns and calm BS alarms is to treat customers the way we want to be treated.

The difficulty faced by the consumer in assessing the quality of woodworking blades based on photos and generic descriptions alone, combined with the curiously short-sighted tendency of many consumers nowadays to demand lowest possible price without considering the consequences to quality and performance, has created a strange psychological syndrome we call “Chinese Logic.”

The mental mathematics those inflicted with this disease feverishly and endlessly reiterate goes something like this: “Product A looks identical to Product B in the photos, but B is 1/3 the price, so B must be better.” Makes perfect sense, right?

In our professional experience, most corporate procurement processes, as well as those of many private individuals, wallow ass-up in this shallow logic, but whether corporate or private, construction or real estate, the results are almost always stinky and embarrassing.

But wait a minute, as Lieutenant Columbo always mumbles, could Chinese Logic be valid? After all, we live in a Wally World where most products readily available to the consumer are labeled “Made in China,” so let’s follow the math a little further. Given a choice between Turd A, sorry, I mean Product A, made in an unnamed automotive bumper factory located in Southern Guangzhou by untrained farmers (not blacksmiths), and Product B, made in a mystery manufactory located just outside Shanghai where untrained farmer’s wives (not blacksmiths) normally sew decorative cushions with embroidered images of darling kittens, puppies, and ducklings, the only discernible differences between the two products will be their outward appearance in photos, and price. Tragically, real physical quality is seldom included in these calculations, leaving the consumer with only perceived quality rattling around noisily inside his head, cushioned by smelly patties of marketing BS, of course.

If the consumer doesn’t care about performance and intends to use, toss and replace said turd, sorry, I mean “product,” in a short time anyway, no big deal. But given time and enough repetition could this experience have a Pavlovian doggie drool effect on consumer’s buying habits and maybe even their psychology? You bet your sweet bippy it could.

Of course I’m safe from such mind conditioning because of my most excellent tinfoil cap with its projecting curly copper wires and red fringe (I’ve added a groovy red ball fringe recently to confuse those pesky alien drones that follow me everywhere), but I worry about thee. >~(ツ)~<

When, however, the desired product is not a pretty polyester pillow embroidered with adorable yellow ducklings, but a decidedly un-cuddly cutting tool such as a chisel or plane blade, the wise man will immediately realize that, if the choice before him is either Turd A or Turd B, he needs to find better options, none of which will involve car bumpers, embroidered pillows or Chicom ordure. The fact that Gentle Reader is bothering to read this article is clear evidence of his superior intelligence and grasp of these principles (ツ)。

BTW, none of our products or their component parts are made in China. Indeed, everything from the steel in the blades to the wood in the handles and blocks, and even the hoops are made in Japan by Japanese craftsmen. Everything. No exceptions.

Assess the Retailer

Sorry to digress. I almost fell off my soapbox and kinked some wires on my most excellent hat! (ツ)

The real-world performance of a woodworking blade depends little on outward appearance, and not at all on cheap talk or even pretty pictures, but almost entirely on the crystalline properties of the steel that makes up the blade, properties resulting directly from the skill of the blacksmith (or factory in the case of most other retailers) in forging the blade and heat-treating the steel, properties that can be confirmed only through actual use. So it’s no wonder people have a hard time telling jewels from rubbish.

A few of the practical difficulties we must overcome when attempting to buy quality woodworking cutting tools long-distance include the following:

  1. It is impossible to judge the crystalline quality of steel and the quality of a blade lamination in tools from photos on websites or in catalogs alone;
  2. It is impossible to judge the crystalline quality of steel by simply holding a tool; One must actually use it hard and sharpen it a few times;
  3. Many marketing claims are unreliable because, even if they are not fantastically optimistic misrepresentations spun to increase profits, they are written by shopkeepers and/or people in marketing departments that have never used a blade except to maybe cut a sandwich or open a box of printer paper. They couldn’t accurately discern the quality of steel in a chisel even if they sat on it… For a long time… And wiggled around. So as a wise consumer we must assess the veracity of the retailer’s claims for ourselves.
  4. Most online retailers offer no real warranty, and even if they do, the customer ends up paying all the costs required to benefit from it, an expensive proposition internationally. When considering any purchase, much less a long-distance one, wisdom urges us to select a retailer willing to repair or replace defective tools. And we need him to pay the shipping costs should his tool prove to be at-fault.

If we can’t reliably assess the quality and/or value of woodworking tools long-distance, the next-best option is to assess the seller and his warranty. Here’s a few common-sense suggestions:

Read the retailer’s product description and information carefully and ask questions. Beware of retailers who provide only sketchy information lacking details and who won’t or can’t answer your pertinent questions, for there’s usually a reason they can’t or won’t beyond being too busy making money to provide proper customer service.

Understand the source of the information being provided. There are exceptions, of course, but most websites selling tools take a blurb from the wholesaler’s or distributor’s marketing people, dress it in a short skirt and high heels, and trot it out curbside. Sometimes they trip on those heels exposing their spotty unmentionables. How embarrassing! Often the information they put out has a peculiar odor you can detect if you pay attention. We recommend you look for first-hand, accurate information from knowledgeable, experienced, responsible people without hairy legs wobbling on high heels, spotted undies, or BO, instead of the clickbait guys on BoobTube bragging in their ignorance.

Understand the retailer’s practical experience with the tools, because this will help you assess the veracity of his claims. Does the fella selling the tools or the person recommending a particular tool or brand of tool to you have personal experience with that tool or brand, or are they just an e-commerce puke parroting claims by a wholesaler or distributor who, like him, has no direct experience beyond marketing, and maybe sitting on, chisels or planes?

Here are some questions you might ask: Have they cut mortises with the chisels they sell? Have they planed beams with the handplanes they sell? Have they cut kumiko panels with the saws they sell? How many times have they sharpened, by hand, the tools they sell? What angle did they sharpen the blade to? How did the tool perform when it struck a knot? What steel was used? Is the blacksmith an individual craftsman or group of craftsmen with direct responsibility for quality, or just a factory? Most stories cobbled together by marketing czars or e-commerce pukes will begin to rattle apart at this point.

Be Knowledgable. If you don’t have it already, you will need to gain some knowledge on the subject yourself to enable you to ask relevant questions, ascertain the retailer’s level of knowledge and experience, the truth of his claims, and the suitability of his tools to your needs. This means finding and studying valid sources of information.

At C&S Tools we provide reliable information, without smoke and mirrors, to help buyers make wise decisions. For free. We reveal who we are and what our experience is. We have used similar tools as a woodworking professional for many years, purchase and physically stock the tools we carry with our own money (no gifts or freebies) and have personally tested them to destruction, so we can share valid, useful opinions. We will provide details and helpful guidance instead of the usual corporate silence or marketing department tripe.

Seek relevant recommendations from experienced people who know what they are talking about. Whenever possible seek the advice and recommendations of friends or people you trust who have direct, hands-on experience with the tools sold by the retailer in question, not just some guy sitting in his Mom’s basement trying to justify his own tool purchase and desperate for company in his misery.

Beware of advice from the guy who claims to have decades of experience, but actually bought his first Japanese tool only 3 years ago and has never been paid a dime for using it. Yes, there are too many of those “experts” out there.

Beware the trolls and orcs on the forums. The amount of truly useful information and advice to be found in those roiling, flyblown cesspits is too little to measure.

The experiences and opinions of our customers recorded in our “Testimonials” page may be helpful.

Make sure the retailer provides a valid guarantee, one that won’t cost you money to benefit from. More on that below.

The Warranty

We do our best to follow the ancient principle Benny Franklin puts forth in his saying quoted above: “Well done is better than well said.”

Before you lay down your money, make sure the seller has a real guarantee, not just hot air, for defective materials and workmanship just in case the tool turns out to be more rubbish than jewel. Honoring a warranty of this type internationally can be expensive, in fact ruinous, if the tools are routinely defective, but a responsible retailer selling quality tools should be able to handle it. We believe it’s only fair that most of the expense of making good on the warranty be borne by the retailer, not the customer, a principle that has been called having “skin in the game.” What do you think?

At C&S Tools we offer a full warranty on materials and labor. If the tool is either defective in materials or workmanship, or not what we represented it to be, and on condition that (i) your expectations for hand-forged tools are realistic (perfection is unattainable); and (ii) you have done your job correctly and not abused the tool or failed to maintain it properly, we will either replace or repair the tool or refund the purchase price. If indeed we or the tool are at fault, we will also refund all pre-approved shipping costs. That’s truly the best international warranty in the business, one we put in writing in all our invoices without weasel words, and one we honor.

If you have a problem, simply let us know by email and we will respond. You will not be told to “take a number” from a dispenser that looks like a hand grenade. You will not be ignored.

Free, Useful Information Without Strings

Knowledge is power.

There’s a lot written in plain, mystery-free language in the many pages in this blog to help you learn what you need to know to make wise decisions about Japanese handtools. We encourage you to plug-in to this power; Batteries are not required.

While we’re on the subject of cords, you may have noticed that this blog is unusual in that it has no advertising, and no sponsors, not even promos for video games, home-security systems, or pickle enhancement cream. It produces zero income by itself. Foolish as it seems, we have no SEO strategy. Patreon is a brand of non-stick frying pan, right?

Please also notice the lack of banners and links to e-commerce pages; We most definitely do not have an “internet platform.” We only sell tools to people who want them enough to directly ask for them instead of just clicking virtual buttons because keeping product in-stock is not easy with the dramatic decrease in active blacksmiths nowadays.

If you ask a question, make a comment, or purchase something from us we will never share or sell your information. We hate data miners for they are greasy sneak-thieves.

The Three Options

Let us next directly address the title of this article.

There is an ancient, venerable saying, a version of which goes like this: “You have three options: (1) Beautiful Appearance; (2) High Quality (cutting performance in the case of chisels, planes and saws); and (3) Low Cost. Choose any two.”

The corollary to this saying goes something like this:

  • A wise man may obtain a maximum of two of these three options;
  • Many do well to get one out of three;
  • The careless often get none out of three;
  • The fool believes he got them all.

What are Gentle Reader’ priorities with regard to these three options ?

C&S Tools’ Priorities

Being deeply aware of the importance of these three options in the physical world, we have established priorities and strictly follow measurable standards and specifications for our products, as follows.

We place highest priority on highest-quality materials, skilled hand-forging, and rigorous heat-treatment to ensure the ideal crystalline structures are formed in the blades of our cutting tools and maximum possible performance is always achieved because they are working tools for professional woodworkers. This is absolute.

Reasonable price is a close second priority because they are working tools for professional woodworkers.

Appearance is third because they are working tools for professional woodworkers, not “safe queens” for collectors.

Perfection in anything is unattainable, but the pursuit of it is extremely expensive, I assure you. Indeed, beautiful appearance in a hand-forged tools is an attribute your humble servant dearly loves and has spent oodles of cashy money over the years pursuing, but it is a difficult thing to achieve, requiring a well-polished eye, advanced skills, and many hours of expensive handwork with scrapers, files and sandpaper, efforts that contribute nothing to a working tool’s performance and are therefore not critical to the professional woodworker, so we assigned it lowest priority.

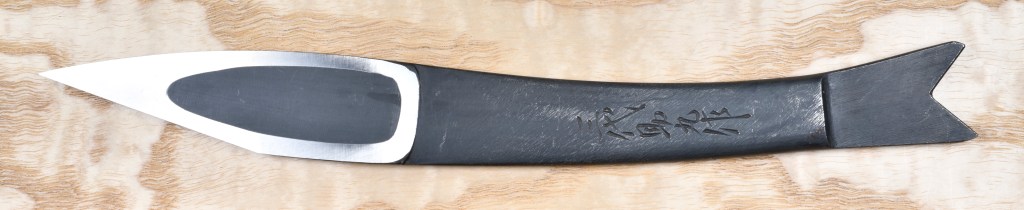
To achieve both the target appearance and price, our blacksmiths shape with fire, hammer and grinder and finish with sanders, not scrapers or files. The results look pretty good, but are not up to Ichihiro’s standards of beauty (the chisel at the top of this page is an authentic atsunomi by Ichihiro). Fortunately, the prices are not up to Ichihiro’s standards either, thank goodness.

The wise man will say “two outa three ain’t bad,” but what about the fool?

Let’s next examine a real-world example of someone who thought they were oh so frikin clever.

A Real-world Example

An extremely famous foreign luxury automobile manufacturer built a maintenance facility in Japan 30+ years ago, which they subsequently converted to another, lighter usage.

This building was constructed under the company’s immovable corporate procurement policy of always putting construction projects out to competitive bid, and after bids are formally submitted, but before awarding a contract, relentlessly playing bidder against bidder in negotiations to reduce their bid prices, sometimes even rebidding the project online, effectively negating the concept of competitive bidding, a practice that is patently unfair in the private sector and absolutely illegal in public bidding. As a direct result of this policy, and because producing a bid in Japan can easily cost a bidder $100,000, quality general contractors in Japan now absolutely refuse to bid this company’s projects, leaving only small, 3rd rate contractors with poor capabilities and minimal quality control left as potential bidders.

This automotive company later decided to remodel and modernize their old building, changes placing additional loads on the structural system. Since the building was supposedly originally designed to handle the heavy loads of many moving vehicles on all floors in an area with weak soils and high earthquake forces, it should have had plenty of structural strength in reserve, at least enough to accommodate these minor additional loads, right? Shockingly, a structural check revealed that the building not only had zero reserve strength, but that the original structural design (performed by another lowest bidder) was clearly inadequate. Consequently, what should have been a strong building was actually shockingly weak.

Foolish policies established in Europe to unfairly reduce costs forced the company in Japan to hire an incompetent architect and engineer, and a careless contractor 30+ years ago, one with a poor reputation even now, one focused like a laser on getting the job done and receiving final payment with the least possible expenditure of manpower, consequences past the statute of limitations be damned.

The result? Not only were the company’s minor renovation plans frustrated, but the safety of their building in earthquake-prone Japan was revealed to be insufficient, necessitating an expensive and time-consuming structural retrofit ultimately wasting time and money all while placing employees and customers at risk for 30+ years. Talk about unintended consequences.

When originally completed, the building looked beautiful, it seemed high-quality, and the design/construction cost was extremely low, easily satisfying all three of the “options” listed above, or so it seemed.

The moral of the story can be found in the answer to this question: “Was the building’s owner the wise man, the lucky man, or the fool?”

What are your priorities?

YMHOS

https://blogimg.goo.ne.jp/user_image/05/a9/a278958c0a4fa7d43e5efe2de64f37c7.jpg
Monkeys and Peach Tree by Ito Jakuchu (1716~1800). In our interpretation, this painting illustrates three potential options: Will sharp-eyed Mother Monkey be able to pull some yummy peaches to within her grasp? Will Father Monkey risk going further out on the limb to help extend her reach? Will hungry Junior Monkey lose patience and leap for the peaches possibly tumbling all three monkeys down the cliff? The “suspense” is killing me. (ツ)

If you have questions or would like to learn more about our tools, please click the “Pricelist” link here or at the top of the page and use the “Contact Us” form located immediately below.

Please share your insights and comments with everyone in the form located further below labeled “Leave a Reply.” We aren’t evil Google, fascist facebook, or thuggish Twitter and so won’t sell, share, or profitably “misplace” your information. If I lie, may there be no graceful storks in my life, only Chinese excreta.

Leave a comment

The Carpenter and the Angel

For a change of pace, I would like to share this charming folktale from Kagoshima Prefecture, Japan, of a sort traditionally told to small children.

We originally posted this little story about a year ago, but subsequently some pesky pixies seem to have pulled it down, so we are re-publishing it today for Japan’s Labor Thanksgiving Day holiday and because Tengo was such a great workman (or at least labor producer).

I have included photo extracts from the Kasuga Gongen Genki E (春日権現験記絵) scrolls painted in 1309 on silk using silver and gold paints, showing carpenters working on the Kasuga Shrine jobsite in Nara back in the day.

My children and I enjoyed this story. Perhaps you and yours will too.

The Tale of Tengo and Tenjin

Once upon a time there was a very good carpenter. But he was sad because he lived alone, so he asked the prettiest girl in the village to be his bride.

She did not want to marry, but to put him off without hurting his feelings, she decided to charge him with an impossible task. 

“If you will build me a big house with 60 tatami mats in a single day, then I will marry you.” (60 tatami mats = approx 99 square meters = 1065 sqft based on the standard modern tatami mat) 

The carpenter was shocked by this demand, but because he wanted her for his bride, he boldly accepted the challenge saying: “I will build you this house in one day.” 

His voice rang with confidence as he said this, but he despaired in his heart knowing he could not build such a large and beautiful house in one day. He thought to himself  “ What shall I do, what shall I do?”

But never fear, because as you have probably guessed, our carpenter was no ordinary fellow to give up easily. Before long he came up with a plan.

He made 2,000 dolls out of straw and breathed on each while casting a magical spell transforming them all into human carpenters. 

The carpenter and his 2,000 man crew then went to work.

Images from the “Kasuga Gongen Genki E,” completed in 1309. At the top of this image, the Master Carpenter and his helper use a water trough as a water level for layout. He uses a vertical string of a fixed length with a plumb bob attached to check the high stringline’s height above the water’s surface to adjust the line to be approximately level. At the center-right, A crew of 3 workmen excavate a hole and compact the soil at the intersection of two low stringlines installed by the Master Carpenter in preparation for placing a natural foundation stone, probably intended to support a main post. Notice the shovel: a wooden blade and handle fitted with a joined “T” handle and with a steel or iron cutting edge affixed. Bleeding-edge technology at the time.
The carpenter and his young helper in the drawing’s upper half use a sumitsubo (inkpot) to snap a straight line on a timber in preparation for splitting it into boards. At the lower right, the master carpenter uses his sumitsubo inkline as a plumbline to orient his steel square to vertical against the log’s end. At the same time, he directs his mellow-looking partner at the opposite end to make a matching vertical line using a steel square with a bamboo pen wet with ink from the reservoir of his classic split-tail sumitsubo. Notice how he used an adze to keep the log from rolling away as they fiddle with their squares and inkpots.
The carpenters in the upper right use chisels to split timbers, while the other workers use adzes to dimension and clean split boards. Unusual for ancient Japan, this appears to be an ethnically-diverse crew with one workman apparently being of African persuasion (ツ). Notice the classic carpenter’s toolbox at the far left with a leaf-blade saw secured to the lid and a wooden mallet laying next to it on the ground
At the top of this image you can see two carpenters, one shaping the end of a round column with a spear-plane (yariganna) and another sawing what appears to be a kumimono bracket with a leaf-shaped saw as he jabbers at his buddy a hundred miles an hour. In the center, more carpenters use spear planes to smooth adzed boards and a round column. Notice the wood shavings curling from the curved blades, some being pushed and others pulled. Spear planes were used in Japan long before blade-in-block planes became common. The guy working on the board’s right hand end appears to have his thumb stuck in his eye. I hate it when that happens!
Carpenters erecting a building’s structure in a later century. No ginpoles, hardhats, shoes, or tie-offs are in sight. Probably no hardhats either. And the scaffolding is a death trap! Tisk, tisk! What would OSHA say?
A diagonal view of the coved & coffered ceiling at the family room.
A corner view of the family room coved & coffered ceiling. Notice the coped joints. This work is typically performed by joiners, not carpenters.
Related image
The living room has an even more elegant coved & coffered ceiling with “kumimono” brackets.
The living room’s coved & coffered ceiling in hinoki wood with a carved “rainbow beam” in the foreground. Nice work!

With the assistance of his 2,000 helpers, the the carpenter completed building his bride-to-be’s house before the sun went down that day,

Overjoyed, the carpenter flew to his bride-to-be’s house to tell her of his success. “I have finished the house you asked for. Please marry me now!”

“Truly?” she asked. Upon inspecting the work she found a big, beautiful house with 60 tatami mats, just as she had stipulated. “I will marry you.” she said.

And thus the prettiest girl in the village became the carpenter’s bride.

The carpenter and his bride then moved into their happy new home.

Afterwards, the 2,000 magically-created workers scattered throughout Japan to build houses, temples and bridges and teach many other carpenters how to build beautiful things for many years.

After several happy years had passed, the bride said to her husband “I have been silent up to now, but the time has come to tell you the whole truth. I am not really a human being, but an angel named Tenjin. I came down to earth from the kingdom of heaven. But the time has now come for me to return to heaven.”

The carpenter replied: “Ah, well, now that you mention it, I’m not actually a regular being either, but a carpenter god named Tengo. Let’s both return to heaven together.”

So Tengo and Tenjin rose high into heaven where they still live happily ever after.

The End

YMHOS

If you have questions or would like to learn more about our tools, please use the “Contact Us” form located immediately below. Please share your insights and comments with all Gentle Readers by using the form located further below labeled “Leave a Reply.” We aren’t evil Google, incompetent facebook, or twitchy Twitter and so won’t sell, share, or profitably “misplace” your information.

The Matsui Precision Notched Straightedge

Matsui Precision Bevel-edged Straightedge with notch

You cannot teach a crab to walk straight.

Aristophanes

This post is about a tool that looks quite ordinary but is in fact extraordinary in subtle ways.

Why Do Woodworkers Need a Good Straightedge?

When woodworking we need to be able to mark and measure straight lines and examine the precision of edges and surfaces. There are several ways and tools available to accomplish these tasks, but the steel straightedge is efficient and the quickest tool in the case of shorter distances, assuming one’s straightedge is up to the job.

For most woodworking tasks we don’t need a precision straightedge. But for those few activities where it is necessary, nothing can take its place. So what are some of those activities? I can suggest a few from my experience:

  1. I use a precision straightedge as a “Standard” to check that my working straightedges and squares (the ones that are used and abused daily) are truly straight and square. This is necessary because, during use, Murphy governs all operations, while pernicious Iron Pixies dance among the piles of dandruff on his shoulders. Due to their malicious ministrations, measuring and marking tools are easily damaged, wear-out, and lose tolerance so I need a reliable “Standard” to check them against regularly. Of course, you can’t check for straight or square unless you have a truly straight line/surface to index from. It would be silly to imagine that the edge of one’s tablesaw top or jointer table are perfectly straight without first checking it against a reliable standard;
  2. I use a precision straightedge to examine the soles of my handplanes to help me keep them straight, flat and free of wind because it’s very difficult to plane a flat surface with a screwy plane. No matter how much time I invest in truing my planes, I’ve found the results are never better than the straightedge used.
  3. Check that lapping plates and the float-glass plate I use for truing stones and plane soles remain within tolerances. Yes, they wear out too.
  4. Check that the tables of stationary equipment such as tablesaws, bandsaws, jointers, and planers are true, and that infeed/outfeed soles of handheld electrical planers are properly aligned;
  5. Check that surfaces of wooden components of special projects requiring extra precision are true.

Do you ever need to accomplish any of these tasks?

Tasks for Which the Matsui Precision Straightedge is Not Ideally Suited

The Matsui Precision Straightedge is not an expensive tool, but since it is one I rely on, it is most cost-effective to protect it from premature wear and damage, so the following are tasks for which I use a less-expensive and less-protected “working straightedge” instead of my Matsui precision straightedge:

  1. I don’t use it for checking sharpening stones. The Matsui straightedge can do this job with style, but after a few years of being pressed against (and dragged over) abrasive stones, the tool’s precision would be degraded. Better to use a less-expensive straightedge for this job, and check it occasionally against the Matsui Precision Straightedge to confirm it’s still straight. If it isn’t, fix or replace it.
  2. I don’t use it for daily general woodworking tasks. Once again, the Matsui straightedge can do general jobs with style, but after a few years of being pressed against (and dragged over) wooden surfaces, the tool’s precision would become degraded prematurely. Instead I use a “working straightedge” that has been checked against my “Standard” Matsui Precision straightedge;

How To Use a Precision Straightedge for Checking Tools and Surfaces

Neither the human hand nor eye can measure a straight line or a true plane with any precision unaided, but there is one technique older than the pyramids all woodworkers must be proficient at, namely to place a truly straight, simple straightedge on-edge on a surface to be checked, be it a board, a jointer outfeed table, or the sole of a plane, and shine a light source at the gap between the straightedge and the surface being examined. If gaps exist, light will pass between the edge of the thin straightedge and the surface being checked confirming the surface is not straight and/or flat. The human eye can detect even a small amount of light this way and both quickly and effectively judge how flat the surface being checked is with a surprising degree of accuracy.

Feeler Gauge

Another technique that yields more precise values without relying on Mark1 Eyeball is to place the straightedge’s beveled edge against the surface to be checked, and insert feeler gauges into gaps between the straightedge and the surface. If the feeler gauge selected won’t fit, then one replaces it with thinner gauges until one that just fits is found.

Once you know the value of the gap between your straightedge and the area of the board you need to true, for instance, you can divide the measured thickness of the shaving your planes takes in a single pass (easily checked with a caliper) to calculate how many passes it will take to true the high-spots on a board. eliminating a lot of the guesswork that makes precise woodworking difficult at times.

To reliably perform these checks, we need a truly straight straightedge. Straight is a relative thing, but straightedges sold for woodworking are seldom straight because purveyors rely on purchasers to not bother, or even know how, to check the quality and precision of the straightedges they sell.

Another reason honest, precision straightedges are relatively rare among woodworking tools is that making a high-tolerance piece of hardened steel that is straight, and will stay that way, is hard work that most woodworkers are neither inclined to appreciate nor bother to check, much less pay for. Is ignorance bliss? I believe it is in the natures of our Gentle Readers to always strive to improve the quality and efficiency of their work. A high-quality precision straightedge is an essential tool in accomplishing that blissful quest.

Challenges & Solutions

The dilemma of the straightedge is that it must be thick and rigid enough to prevent warping and flopping around in-use, but reasonably lightweight and not too bulky or it will be clumsy. At the same time, it must not be too thick, or it will block out most of the light passing between its edge and work-piece making it useless.

Another challenge the straightedge faces is the constant threat of damage. If the delicate edge is too soft, it will become dinged and deformed instantly becoming inaccurate. And if the straightedge rusts (the bane of all steel), precision will suffer.

What are the viable solutions? They are obvious and proven, but seldom implemented well. Here is how Matsui Precision does it.

Stainless Steel Construction

First, they use high-quality stainless steel to prevent corrosion. If you work in humid conditions or if you will admit to perspiring salt-laden moisture at times, then this is important, but not rare.

Properly-sized, Precision-ground & Polished

This straightedge is not an insignificant piece of stainless steel. It is available in various lengths, but in the case of the Matsui’s 400mm straightedge (a handy, reasonably-priced length), the blade is 34mm wide and 3mm thick, enough to keep the blade rigid in use and prevent warping, but not so wide or thick as to feel heavy or clumsy. It weighs 320gm (11 ounces), a nice balance of rigidity and weight.

Compact, lightweight tools made using quality materials efficiently have a deep genetic attraction to the Japanese people.

What is more rare is the fact that Matsui then precision-grinds and precision polishes the stainless steel (not the same thing) so the tool is as straight and flat as machinists require, because this is a tool designed to the higher standards of machinists, not just woodworkers.

Hardened & Trued

Matsui also hardens the stainless steel to ensure the tool is rigid and will resist wear and damage over its long useful lifespan.

During heat treating and grinding the metal warps slightly. After stress-relieving the tool, Matsui inspects each tool one-by-one and corrects irregularities or rejects those that cannot be sufficiently corrected. It’s called quality control, something that never happens in China or India in the case of tools intended for woodworkers.

Beveled Edge

To make it easy to see light passing between the straightedge and surface being checked, one edge is beveled. The importance of this detail cannot be overstated.

The Notch

The Matsui Precision Straightedge being used to check the sole of a 70mm finish handplane with a blade by Sekikawa-san. The notch fits over the cutting edge so one can check the sole with the blade protruding as it will be in-use. In this photo the blade has been extended waaay too far out of the mouth to make it easy to see the cutting edge. Please notice the light showing between the straightedge and the sole indicating that something is not right. The wedging pressure of forcing the blade to project this ridiculous amount has warped the block so that the most important part of the sole, the area directly in front of the mouth, is not touching. The point is that the notch makes it possible to check the sole with the blade projecting the intended distance, a job simply not possible with an ordinary straightedge.

In the case of the tool we are introducing here, Matsui cuts a small semi-circular notch in the beveled edge of the blade to provide clearance for irregularities in the surface being checked, such as welds, or in the case of woodworking tools the cutting edges of the blades of handplanes, electrical planers and electrical jointers. This is an important and unique feature.

Why is this notch so useful? The problem with using a metal straightedge to check/true the sole of a handplane has always been that, in order to correctly check for flatness/wind, the blade must be set to project from the plane’s mouth the same amount it will when the plane is being used, because in the case of Japanese planes the wedge-shaped blade applies slightly different pressures on the wooden block at different depths in the block, producing variable degrees of deflection.

But if the blade is projecting from the mouth from the same amount it will when in use, then the straightedge will ride on top of the blade preventing a proper examination, and at the same time, possibly dull the blade and gouge the straightedge. The solution has always been to adjust the blade to not actually project, but to be just in-line with the sole, a fiddly process that has resulted in many dulled blades, scratched straightedges, and inaccurate examinations.

With the elegant Matsui Precision straightedge, however, the notch fits directly over the projecting blade avoiding the irritating and time-wasting fiddling normally required to get the blade in the exact position, one that ultimately yields an imperfect reading.

If you need to maintain handplanes, electrical woodworking tools, or do precision woodworking and need an accurate, reliable, lightweight, durable, reasonably-priced straightedge to help take the guesswork out of these jobs, this product is just what you need. I have been using one for years and couldn’t get by without it.

If you are interested, send us a message using the form below.

YMHOS

Links to Articles About Other Matsui Precision Tools:

If you have questions or would like to learn more about our tools, please click the “Pricelist” link here or at the top of the page and use the “Contact Us” form located immediately below.

Please share your insights and comments with everyone by using the form located further below labeled “Leave a Reply.” We aren’t evil Google, fascist facebook, or thuggish Twitter and so won’t sell, share, or profitably “misplace” your information. If I lie may I never be see a straight line again.

Leave a comment

Toolchests Part 14 – Repairability

https://freaktography.com/wp-content/uploads/2020/04/abandoned-indigenous-church-2020-19.jpg
A wet grand piano. Dave, Freaktography.com

The time to repair the roof is when the sun is shining.

John F. Kennedy

This article is based primarily on an online discussion with Gary, a truly Beloved Customer, regarding his wise observation about the need to make a toolchest easily repairable, especially if one intends it to be useful for 200 years. I preached about durability, longevity and the joys of bubble-wrap in previous articles in this series but failed to address the subject of repairability, so in this article I will try to clarify a few points relevant to this subject.

Categories of Repairability

There are several types of repairs that a faithful toolchest may require during it’s lifetime if it is to remain useful, but I think the two main categories are (1) cosmetic and (2) mechanical.

So what did your humble servant do to facilitate Moby Dick’s “repairability,” and what would I change to improve it in this regard? Perhaps you may learn from, or at least giggle at, my mistakes. Soft giggles only, please.

Planning Repairability

It’s just a wooden box, but it would be wasteful to make it quickly and cheaply, get it out the door, receive payment, and hope cheap materials, crappy hinges, sloppy tolerances and loose joints won’t matter because, with a target useful lifespan of 200 years, “Poor Quality Equals Miserable Failure.”

In my experienced professional opinion the most effective way to ensure quality is to actively plan for it during the design phase, but I admit I did not give this subject special consideration at the time.

Cosmetic Repairability

This is one aspect of my toolchest that caused the pooch to walk funny for a few days because I screwed it good. But wait, there’s more to this tale of shame. When I realized my mistake and tried to remediate it some years later, I only compounded it. Poor sore Poochie!

You, Gentle Reader, have of course never suffered this sort of humiliation, but in the interest of sad and abused toolchests everywhere, I bow my shiny bald head, place my hand over my heart (it’s rattling around here in my chest somewhere, although my wife frequently disagrees) and humbly confess all. One or two teardrops fall, …

When new, my toolchest was striking in appearance, with highly figured solid mahogany wood panels (not veneer) exposed on the lid surfaces and a clear, high-gloss, rubbed-out catalyzed varnish finish. It was a thing of beauty, but not a joy forever because, after several years of use in drafty, dusty, pixie-infested garage shops combined with several long-distance moves and more than a few months of exposure to wind and sun it was scratched, dinged and crazed.

In my foolish vanity I repaired it using what I thought were sound techniques and quality materials, but which eventually proved to be inadequate.

I’m a highly-edumacated fella, you know, and during my studies at the University of Stoopid, School of Hard Knocks (Lower Outhouse Campus) where I earned an MD degree (Master Dipstick, Summa Cum Loudly) I learned that catalyzed varnish was not tough enough. Out of an abundance of well-earned humility I don’t display my UoS graduation certificate on my “I Love Me Wall,” so please don’t ask to see it.

Drawing upon my training at UoS, I next refinished the toolchest with a brushed-on spar-varnish finish. Not as pretty, but it was more flexible and more resistant to scratches and UV rays. But ultimately, it too failed. Poochie wept!

As the wise Nigerian Prince Musa Adebayo once told me (in exchange for a small wire transfer to his bank in Abuja, of course), “ Time destroys all things.” This eternal truth definitely applies to woodwork finishes, but I didn’t realize at the time the Prince was talking about credit ratings!

A decade or so later the toolchest (aka “Moby Dick”) was as scratched and gouged on the outside as its fishy-smelling namesake such that no translucent finish could conceal the repairs, forcing me to seek a more practical solution, one that would spare long-suffering Poochie further indignity.

On that bright day I said to myself: “Self,” (of course, I don’t address myself as “Mr. Covington” when deliberating with myself, because that would be insane), “Would you wear a bespoke tuxedo with handmade alligator skin dress-shoes to a muddy jobsite to perform a foundation rebar inspection?” I had to think about it for a while because, as you know, fashion is my life, but with a sigh of resignation I eventually answered myself, because that’s the only polite thing to do. The response was a resounding “No.”

In my supervisory role, I’m obligated to perform periodic construction jobsite inspections as part of quality control measures to ensure compliance with plans and regulations, but I wouldn’t wear a black tuxedo and delicate loafers to a jobsite any more than I would wear board-shorts and flip-flops. Instead I dress in tougher clothes that protect my legs and don’t instantly tear if they get hung-up on a rebar cage, and that won’t look filthy if they get a little muddy. And when the paparazzi’s cameras aren’t rolling (they seem to follow me everywhere, donchano (ツ)) I prefer sturdy leather boots that actually protect the tasteful glitter-varnish finish decorating my fuzzy pink toes.

With greater age and experience I finally concluded that, in the vanity of youth, I had erred by trying to make a toolbox look like pretty furniture. Feel free to mock the fool if you must but no tossing of rotten eggs, please!

So, determined to not make the same mistake a third time, I conducted more research on finishes that might get the job done. In the end I rejected the extremely tough but expensive and difficult-to-repair industrial solutions such as Imron and Polane and settled on a cheaper, friendlier and easier-to-repair solution; I sanded my toolchest down to bare wood and refinished the exterior with distressed milkpaint per Mr. Dunbar’s recommendations, as discussed in a previous post, and shellac on the inside.

When cured, milkpaint contains oodles of hard mineral solids with few volatiles to evaporate over the years to cause shrinkage and cracking (unless you want it to craze). It is not as flexible as latex paint but much tougher long-term than any clear finish. UV protection is absolute.

Like a Tabasco Sauce stain on camo pants, repairs are nearly invisible, indeed they even improve the chest’s character. With a bit of primer, milkpaint completely concealed the bondo I used to repair the cuts, scratches, and dings incurred during international moves, the ravages of rabid forklift attacks, and even injuries received from the slings and arrows of outrageous fortune (yes, here at C&S Tools we quote literary giants such as Shakespeare and Red Green). Latex paint works too, but milkpaint looks better and it’s far tougher.

But Gentle Reader you are no doubt wondering what this rambling has to do with “repairability.” The point is that repairs to a distressed milkpaint finish are easily accomplished and don’t look like repairs even when made to localized spots, they just give the overall finish more “character” making it look more interesting. No other finish I am aware of looks better with age and wear. Now that’s true repairability.

I only regret it took so long to stumble upon this excellent solution. So does Poochie.

Mechanical Repairability: Hinges & Screws

Hinges always wear out. The historical record shows that artistic iron hinges secured with small steel screws, while inexpensive and “historically correct,” always fail, usually sooner than later, as Murphy dictates. And when they fail, Murphy also ensures that they cause interference and maximize secondary damage.

Would you use flimsy sheet-metal cabinet hinges to attach the tailgate of your pickup truck knowing that one day you may see that same tailgate in your rear-view mirror scattering festive sparks as it skates over the highway behind you? Why, then, would you put them on your toolchest?

Being in the construction industry I know the solution to hinge durability is to use more, bigger, corrosion-proof hinges because larger internal bearing/wear surfaces free of abrasive iron oxide wear slower and keep things tighter. Think stainless-steel or brass door hinges. Commercial ball bearing door hinges are good too, but the thrust bearings are oriented for an axial load, not a side load, so the cost-benefit analysis of bearings in this application is weak.

But I digress. How does one plan for repairability in the case of hinges? The answer is simple: “R&R,” as in “remove and replace.” Let’s look at “replacement” first.

Unless you or your descendants (assuming the chest stays in the family, which it should) intend to have replacement hinges custom-made when the original set wears out (funded by the generous cash inheritance you will no doubt bequeath them and the voracious tax maggots will graciously leave un-spoiled) I recommend you plan for the original hinges to be quality products matching industry-standard specifications that will be easy to procure even in a century or so. Consider the wisdom of using custom-forged hinges that look “antiquey” but that aren’t a standard dimension for which replacements are easily purchased. I double-dog dare you. A toolchest ain’t a little jewelry box, after all.

I recommend you use door hinges in standard sizes so they can be easily replaced without hiring a blacksmith when the time comes, a day that certainly will not fall within your lifetime if you heed the advice in the previous paragraphs. This is the essence of the “replace” aspect of “R&R” as it applies to hinges, IMO.

Moving on to the “remove” aspect of R&R, what else can go wrong with hinges? That’s right, those pesky screws.

If you use the skinny, short screws that are packaged with store-bought hinges, sure as eggses is eggses they will begin to dance the reverse macarena after a decade or four. I promise you that when that inevitable day comes, replacing them and their worn-out holes will be a pain in the shorts. And what happens to the wobbly lid before you or your great-grandkids get around to fixing those idiot screws?

But wait, it gets worse (stay away Poochie, stay far away!). What happens when the hinges wear-out or fail but you can’t remove the blasted screws to replace them because they have broken-off in their screwholes during the removal attempt? That’s right, weeping, wailing and gnashing of teeth will ensue because a clean replacement will be difficult, and perhaps never happen, turning a measly two-hinge chest into a lop-sided one-hinge chest. Why would you give Murphy the satisfaction?

The best way to improve the “remove” factor in R&R therefore is to use oversized, extra-long, stainless steel grade 18-8 screws actually made in American, Europe, or Japan.

“Oversized” because strength improves durability.

“Extra-long” because the deeper a strong screw is embedded in the wood, the more resistant to the reverse macarena it will be.

“Grade 18-8” because this is an industrial specification that tells you something about the screw’s quality, reducing doubt. They cost more, but are worth it when you consider what would happen if a cheaper screw, one made to no quality specifications, breaks off in the hole when it comes time to remove/replace it.

“Stainless steel” because brass is too weak and a rusty carbon-steel screw will become a loose screw every frickin time.

Made in America, Europe or Japan because, while Chinese-made screws are cheap (often sold under false pretenses as “quality fasteners”) one must assume they are ALWAYS defective and will SURELY break. Indeed, it’s not a matter of “ if” they’ll break but only “when.“ Murphy won’t need to lift a finger.

If an inexpensive stainless-steel screw is sold at a big-box retailer, even if it’s represented to be Grade 18-8, assume it’s made by Godless, bait-n-switch commies. No, not the gangsters that burned down Portland, Seattle, Kenosha and Minneapolis, nor the ones that govern the coastal hell holes between Mexico and Oregon, but those in Beijing.

Reputable marine supply stores may be the best source for quality stainless steel screws.

I also encourage you to prep the screw holes in the hinge plates by countersinking them to the right depth and angle for solid, maximum contact between screwheads and plates.

Prep the screw holes in the wood too. Drill pilot holes the right size and right depth, and put epoxy or glue in the holes just before inserting the screws to penetrate the wood and reinforce the threads the screws cut into the wood.

And if a screw becomes loose, figure out why and repair it instead of just screwing it in tighter and tighter until it strips out.

Remember: History always calls an optimist who didn’t prepare for the worst eventuality a careless nitwit.

Mechanical Repairs: Tray Sliding Surfaces

Besides hinges the other things in a toolchest that always wear out and need repair are the surfaces that support the trays and on which they slide. This normal wear is easily remedied by planing the old, worn surfaces flat and gluing in durable hardwood wear strips. The lower the coefficient of friction the better. I have installed six replacement sliding surfaces to the ledges of my toolchest. In retrospect, it would have been better to rabbet and glue these strips in-place when new so they would be easier to remove & replace when necessary.

Knowing these surfaces would wear and need replacement, however, your humble servant had the foresight to use screws to fasten the ledges that support the trays to the chest’s sides so they could be removed and easily worked on with handplanes instead of gluing/doweling them in-place. I highly recommend this design detail.

Adhesives

The subject of “reversible adhesives” such as hide glue or starch glue is interesting, and relevant to repairability because such adhesives make non-destructive disassembly of wood joints possible. Unfortunately I have no experience with hide glue and so cannot comment.

A renowned master joiner taught me his philosophy on the subject of glue, however, and it has stuck with me (pun intended). He held that it’s the craftsman’s job to make his work as precise and durable as possible when new, therefore obligating him to use the strongest, most durable glue available to him and reasonably practicable to ensure that, if repairs are necessary, it won’t be because the glue failed.

He learned the trade when the only available woodworking adhesives were “nikawa” hide glue, or starch glues made from rice, so he knew all about reversible adhesives. But when I knew him, he used PVA glue.

When I once mentioned I had read that rice glue should be used for fine joinery work to make repairs easier, he looked at me like there was a wriggling cockroach’s leg hanging out of my mouth, and turned away in disgust. Nuff said.

Conclusion

Thank you for reading this series of posts about toolchests. I hope you found it interesting, or at least amusing.

I would like to conclude with a Japanese saying relevant to the subject of this article: 「石橋を叩いて渡る」pronounced “ishibash wo tataite, wataru.” A direct translation of this idiom is “Strike a stone bridge before crossing,” meaning to “take every precaution.” I have a similar saying that goes “Belt, suspenders, safety harness.” I encourage Gentle Readers to consider this principle when designing and constructing toolchests for their personal use.

YMHOS

A sturdy old stone bridge. Best to wack it a few time to makes sure it won’t fall down while crossing. After all, you never know…

If you have questions or would like to learn more about our tools, please click the “Pricelist” link here or at the top of the page and use the “Contact Us” form located immediately below.

Please share your insights and comments with everyone in the form located further below labeled “Leave a Reply.” We aren’t evil Google, fascist facebook, thuggish Twitter or the Congressional IT department of the Democrat Party and so won’t sell, share, or profitably “misplace” your information. If I lie may my belt break, my suspenders snap, and my safety harness become wrapped around my stupid neck as I dangle from a stone bridge.

Leave a comment

The Varieties of Japanese Chisels Part 16 – High-speed Steel Atsunomi

I am past scorching; not easily can’st thou scorch a scar.”

Herman Melville, Moby-Dick or, the Whale

Your humble servant has previously presented 15 varieties of Japanese chisels for Gentle Reader’s kind consideration in this series so far. In this article we will examine a specialized version of the Atsunomi previously presented in Part 8 of this series, one made from high-speed steel.

The C&S Tools High-speed Steel Atsunomi

The chisel in question is made by Mr. Usui Yoshio of Yoita-cho, Nagaoka City, Niigata Prefecture, under his brand name of Sukemaru. The shape of this tool is identical to his standard atsunomi, the only significant differences being the type of steel used and the bright appearance of the blade.

This is not a small chisel but a professional-grade, rugged tool with an overall length of approximately 300mm (12″). It is an indispensable tool in some situations.

If you need a smaller, handier, and more economical HSS chisel, please take a look at our HSS Oiirenomi also by Sukemaru.

What is High-speed Steel?

So just what is high-speed steel (HSS)?

HSS is a tool steel developed for manufacturing commercial cutters, dies, etc. In this case, Usui-san uses a high-speed steel designated SKH51 in Japan, the equivalent to M2 in the USA, BM2 in the UK, HS6-5-2 in Germany, and Z85WDCV06-05-04-02 in France. This is the most popular HSS formula in the world. If you own router bits without carbide cutters, and not made in China, you own this steel.

This variety of HSS contains buckets-full of tungsten, molybdenum and chrome, with a stout vanadium chaser.

After oven heat-treat, these chemicals make the steel tougher, more abrasion-resistant, and more resistant to softening (aka “temper-loss”) when subjected to high-temperatures than regular high-carbon steel. Its nickname of high-speed steel comes from the tendency of cutters made from this steel to retain their hardness even when worked so hard blade temperatures become hot enough to draw the temper of standard steel cutters, softening and making them useless.

The chemical composition is listed below, just in case you are interested. You can see what I mean about “buckets.”

CMNSiCrWMoV
0.85%0.28%0.30%4.15%6.15%5.00%1.85%
Chemical composition of SKH51/M2 HSS Steel

Why Use High-speed Steel?

No doubt a question jumping up and down and screaming in Gentle Reader’s mind at this point is “what are the properties of high-speed steel and what difficulties can a chisel made from this special steel help me overcome?”

Toughness and Shock Resistance

Perhaps the most significant property of high-speed steel is its toughness. SKH51 (M2) steel is the most shock-resistant of the high-speed steels, making it especially suitable for use in a chisel that may impact hard objects in daily use but must survive without chipping or breaking. This toughness provides huge benefits in the situations described further below.

Abrasion Resistance

Abrasion resistance goes hand-in-hand with toughness, but it is a different characteristic many misunderstand. It does not mean a cutting edge will be sharper than a cutter made of high-carbon steel, only that it won’t wear and become dramatically rounded-over as quickly. In the case of chisels, a blade made from highly abrasion-resistant tool steel will reach a certain level of sharpness (or dullness) and remain at that level a relatively longer time allowing a cutter to keep on cutting without becoming useless. But the quality of the cut will decrease, and energy necessary to motivate the blade will of course increase as the blade dulls. No free lunch, sorry to say.

Abrasion resistance is not typically considered overly important in blades where great sharpness is high-priority, but it is extremely important when the blade is used to cut materials such as exotic hardwoods that contain silica crystals, or Engineered Wood Products that contain hard adhesives and/or highly-abrasive particles such as silicon carbide deposited by sandpaper, or dirty wood contaminated with sand, grit and other contaminants that will literally destroy the cutting edge of a plain high-carbon steel blade making it useless.

Just as a low-revving high-torque truck would be at a hopeless disadvantage in a Formula One race, a screaming McLaren MP4/6 with all its speed, power and agility couldn’t tow a heavy trailer 100 yards through the mountains. Horses for courses.

Engineered Wood Products

One major challenge the HSS atsunomi excels at overcoming is modern wood products called Engineered Wood Products (EWP)

Commercial carpenters and cabinet makers nowadays have no choice but to use modern EWP such as plywood, MDF, HDF, OSB, LVL, glulams, etc.. Unlike new, clean, solid lumber cut with saws and planed with knives to final dimensions, engineered wood products are comprised of wood veneer, chipped wood and/or sawdust glued together by hard adhesives that will harm standard steel tool blades. HSS handles these difficult adhesives easily.

A bigger problem associated with EWP is the extremely hard abrasive particles left embedded in them by the sanding belts used to dimension and smooth them, particles much harder than any heat-treated steel, and that will quickly destroy a good high-carbon steel chisel. Being much tougher and more abrasion resistant than high-carbon steel, HSS can handle this abrasive residue without being destroyed. That does not mean abrasive particles do not scratch and dull HSS atsunomi cutting edges; After all, silica carbide particles are harder than high-speed steel. It just means HSS blades won’t chip or break and will keep on cutting longer than HC steel blades.

Restoration & Remodeling Work

Another type of work this HSS atsunomi excels at is restoration work, remodeling work, and chisel work around concrete and masonry.

In the case of restoration work, the job usually involves cutting wooden structural members and finish materials that are old and dirty and contain hard abrasive dirt, sand, small stones and of course hidden nails and screws that will not only dull a chisel blade but may badly chip it. 

For instance, a Beloved Customer who is a timber-frame carpenter in the Czech Republic was tasked with splicing segments of new timber to replace rotted-out sections of a large number of 300 year-old rafters during the ongoing restoration of the Grand Priory Palace located in Prague (constructed from 1726 to 1731), an ancient city with many beautiful, old structures.

Grand Priory Prague
Grand Priory Prague
Grand Priory Prague Roof Frame Restoration

The wood was dirty and full of gravel and broken-off nails that chowed down on standard chisels without even pausing for a drop o’ Tabasco Sauce. But our HSS atsunomi chisel made it possible for him to cut and fit the timber splices while working on the steeply-slanted roof far above cobble-stone streets without chipping the blade and without stopping the work for frequent resharpenings beyond an occasional touchup with a belt sander.

In the case of remodeling work, one must routinely cut precise holes through existing wood contaminated with abrasive dirt and hiding screws and nails, as well as lathe, plaster and drywall containing abrasive sand, and in close proximity to mortar and concrete which contains sand and gravel aggregates that will dull, chip and even destroy a standard chisel in two shakes of a lamb’s tail. 

If you have ever done remodeling work or an installation requiring chiselwork, you know the despair one feels when gazing upon the damage done to a beloved tool.

Likewise, during installations, cabinetmakers must make precision cuts in abrasive engineered wood products such as plywood, OSB and MDF. Our HSS atsunomi chisel, as well as our HSS oiirenomi chisel excel at this job being far more durable than standard chisels with high-carbon steel blades.

Jigane

The jigane Usui-san uses for his HSS Atsunomi is a harder version of the standard low-carbon steel he uses for his standard atsunomi. It is not stainless steel, however, and can corrode.

Likewise, the furniture (katsura (hoop) and kuchigane (ferrule)) are made from mild steel, not stainless steel, despite the bright appearance, and will exhibit corrosion over time. As an option, these two parts can be ordered blackened creating a two-toned chisel some people find attractive.

Heat-treat and Hardness

To prevent chipping, the HSS blade is heat-treated in a special computer-controlled oven following a specific temp/time curve to achieve a hardness of Rc63, intentionally a little softer than the maximum hardness of Rc64 listed for this steel. Even then, this is harder than nearly all currently-produced Western chisels we are aware of. 

The blade’s bevel angle is 30°, the standard angle for Japanese woodworking chisels. To reduce denting you may want to increase the angle to 35° if you will be cutting through hard materials.

Resharpening in the Field

Another huge advantage of Sukemaru’s HSS chisels is that they can be quickly resharpened to a usable cutting edge in the field using angle grinders and belt sanders without losing temper and softening so long as one is careful to keep temperatures below 650°C (1200°F), not difficult to do if one pays attention. Don’t underestimate the efficiency this feature will bring to your work some days.

The compromise with HSS chisels is that, while they can be made extremely sharp using stones and proper technique, they will never become as sharp as our hand-forged high-carbon steel chisels. Moreover, they will take twice as long to sharpen by hand using conventional wetstones and waterstones.

Sharpening time can be reduced dramatically by using aggressive diamond plates or diamond stones.

We have personally tested these chisels to failure and resharpened them. We are confident of their quality and performance.

If you need an exceptionally tough chisel that can “take a lickin and keep on tickin” even in conditions that would utterly destroy a regular chisel, then the HSS Atsunomi, or where a smaller tool is required, its tough little sister the HSS Oiirenomi, will get the job done for you.

If you would like to know more about these chisels, please drop a note in the form below titled “Contact Us.”

YMHOS

If you have questions or would like to learn more about our tools, please click the see the “Pricelist” link here or at the top of the page and use the “Contact Us” form located immediately below.

Please share your insights and comments with everyone in the form located further below labeled “Leave a Reply.” We aren’t evil Google, fascist facebook, or thuggish Twitter and so won’t sell, share, or profitably “misplace” your information. May a thousand bot flies make a home in my eyebrows if I lie.

The Kiridashi Kogatana Knife

A kiridashi in the shape of, and actually named for, a small, tasty fish much beloved by Japanese fishermen called the “Ayu,” or “Sweet Fish.” Often copied, this design was first developed by the father of Mr. Yoshiro Usui, the current “Sukemaru” blacksmith. Sadly, those who stole his design never give him credit for this beautiful little knife.

Only the knife knows the heart of the pumpkin.

Simone Schwarz-Bart

In this post I would like to introduce a uniquely Japanese tool, a handy and extremely sharp little knife called the Kiridashi Kogatana.

Introduction

Taketombo helicopter toys made with a kiridashi knife.

The Kiridashi Kogatana is a handy, general-purpose knife traditionally used by craftsmen in many trades in Japan. It was once a standard tool in every Japanese child’s school bag for sharpening pencils and carving toys such as taketombo before willfully-ignorant nanny-state paranoia equated small useful tools in the hands of children with machine-guns wielded by mentally-deranged murderers.

Your humble servant won’t presume to speak for others, but it may be that, like me, Gentle Reader frequently needs a sharp knife not just for opening boxes, sharpening pencils and occasionally fending of hordes of snaggle-toothed zombie lawyers (an especially smelly variety of ambulance-chaser), but for serious woodworking tasks such as carving gennou handles, carrying molding details around the inside corners of casework and joinery, carving Buddhist statuary, and whittling toys for children. For refined woodworking nothing beats a super-sharp kiridashi kogatana knife.

In this article we will examine this traditional and uniquely Japanese tool.

Definitions

This tool’s name is pronounced kee/ree/dah/shee koh/gah/tah/nah, often shortened to “kiridashi,” and written 切り出し小刀 in Kanji. It translates directly as “small cutout sword.”

This simple but sophisticated tool is used, without exception, by all woodworkers in Japan including carpenters, joiners, wood carvers, cabinetmakers, sashimonoshi, bamboo workers, umbrella makers, printers, glazers and many other trades.

A kiridashi kogatana made to C&S Tools’ specifications by Hidari no Konobu, a famous Tokyo blacksmith, from Swedish Steel. An excellent tool well-suited to serious work.

Performance Criteria

Gentle Reader may wonder why Japanese professional craftsmen insist on using a tool made from expensive and difficult materials requiring advanced blacksmithing techniques instead of an inexpensive, disposable, Chinese-made utility knife. The short answer is that they have strict performance criteria that tool-shaped landfill-stuffing simply can’t satisfy. Let’s examine some of those criteria, shall we?

One characteristic a useful woodworking knife needs is rigidity without bulk. Flexible, floppy blades cannot easily be directed by our minds. Their cuts tend to wander. This is typical of utility knives, box cutters, and knives with replaceable blades. Utility knives are especially hopeless in this regard, having floppy blades and fat handles, not to mention garbage steel.

Another important characteristic needed in a woodworking knife is the ability to get one’s fingers close to the cutting edge and point without leaking red sticky stuff; You need your fingers.

In the case of the kiridashi, while it lacks a long cutting edge for slicing and dicing veggies, it also lacks a long cutting edge that would prevent the craftsman from choking up on the knife to maximize control. That’s because it’s a woodworking knife, not a kitchen or skinning knife.

The kiridashi lacks the fat, fancy handles that are so popular nowadays. Handles look cool and may feel comfortable when making a cob salad, but are bulky and get in the way when woodworking, preventing the craftsman from getting his fingers close to the cutting edge for maximum control. I don’t know about you, Gentle Reader, but as for your humble servant and thousands of Japanese craftsmen, we prefer to spend our money on an excellent blade capable of hard work and precision cuts without a handle rather than a bulky, pretty handle with a sucky blade attached. Do you share these priorities?

But of all the performance criteria the professional woodworker needs to consider when evaluating a woodworking knife, absolute sharpness is the most important, followed by ease of sharpening, two things at which the kiridashi is superior to every other small knife or cutter ever invented.

If you suppose your humble servant is exaggerating, remember that I have used kiridashi to shape wood for 40+ years, and at times they were critical to feeding the wife and babies. Of course, sharpness ultimately depends on the quality of the knife’s blade, and the skills of the sharpener, but the fact that the kiridashi can be made sharper quicker than any type of woodworking knife ever made is a big advantage for those who need a sharp blade for their work.

Let’s next examine those troublesome materials and blacksmithing techniques and consider what benefits they provide to the woodworker.

Materials & Forge-welded Lamination

Let’s begin with an explanation of the materials and techniques involved in making the traditional hand-forged kiridashi. We will look at cheap consumer-grade kiridashi in a separate section below.

Quality kiridashi are made using a traditional blacksmithing technique called “forge-welding” to laminate a layer of high-carbon steel called “Hagane” in Japan (mostly either Hitachi Yaguki Shirogami No.1 (White Label Steel), Aogami No.1 (Blue Label steel), or Swedish Steel (Asaab SK120) to an iron or low/no-carbon iron body called “Jigane” similar to that used for blades of Japanese planes, chisels, scythes, and even many styles of traditional kitchen knives. C&S Tools’ kiridashi are hand-forged in the traditional manner to maximize the performance required by our Beloved Customers that work wood professionally.

Inexpensive kiridashi knives are made from SK steel, another variety of Japanese high-carbon steel but of lower purity used for many commercial and agricultural products. This is an inexpensive and useful tool steel, but due to the additional impurities it contains, unavoidably produces an inferior-quality crystalline structure negatively impacting cutting and edge-retention performance.

Because kiridashi kogatana are relatively narrow, thin knives, Aogami steel is often preferred by blacksmiths over Shirogami or Swedish Steel because it tends to warp and crack less during heat treatment yielding fewer rejects.

C&S Tools’ kiridashi are made from Shirogami No.1 steel.

Let’s briefly examine why this lamination is necessary below. For more details, please read the longer articles on this subject linked to above and below.

The C&S Tools’ Kiridashi Kogatana, hand-forged to our specs from Hitachi’s White Label No. 1 Steel
The C&S Tools’ Kiridashi Kogatana with tsuchime (hammered) finish. Identical in materials and construction to our standard knife shown above, except for the hand-textured finish on the face for a better grip and interesting appearance. This is a fully-functional finish, not an applied, plated or chemical finish that will discolor or deteriorate over time and with use. To the contrary, hard use will only improve its appearance.

The Hollow-ground Ura

Most kiridashi kogatana have a hollow-ground Ura, just like Japanese chisel and plane blades. The advantage of the Ura is that it makes it easy to quickly sharpen the exceptionally hard steel that forms the blade’s cutting edge. There are some inexperienced people who mistakenly imagine the ura is unnecessary, so allow me to clarify why it is critical.

To begin with, the layer of cutting steel in the kiridashi, or at least C&S Tools’ kiridashi, is hardened to Rc65~66, substantially harder than woodworking blades in the West. This hardness, combined with the excellent crystalline structure made possible through proper hand-forging and heat-treating by an experienced blacksmith produces a blade that meets the following essential requirements of a professional woodworking tool:

  1. The cutting edge can be made extremely sharp;
  2. The cutting edge will stay sharp a relatively long time;
  3. The cutting edge won’t easily chip, crumble, roll or break; and
  4. The knife is easily and quickly sharpened.

Items 1~3 above are normally satisfied when an experienced blacksmith skillfully forges and properly heat-treats high-quality high-carbon steel, but because the steel in the finished product is so hard, satisfying the fourth criteria focused on sharpening becomes difficult without some innovation.

The conundrum the blacksmith must resolve is that, in accordance with materials science, given a fixed area of steel (measured in square millimeters, for instance), the harder the steel is, the more difficult and time consuming it will be to sharpen. The solution is to hollow-grind the hardened steel lamination to effectively reduce the square millimeters of hard steel touching the sharpening stone and that must be abraded thereby reducing the time, elbow grease and sharpening stone mud expended in maintaining the blade. This detail is called the “Ura” in Japanese and is explained in more detail in the article at this link. If your time is worth anything, then this feature is worth every penny.

Another problem one faces when trying to sharpen a large area of flat, hard steel is that, over many sharpening sessions the perimeter of the flat area always wears faster than the center, eventually resulting in a high spot at the center of what was once a flat area. This too is a fact some inexperienced folk dispute; We wish them many joyful hours popping their pink bubble wrap while drinking Sunny Delight from sippy cups.

This unintentional high spot matters because it makes it more difficult to keep the flat at the cutting edge in tight contact with the sharpening stone, which in turn makes it more difficult to cleanly and quickly polish away the burr. Clearly the flat side of the blade needs to be reasonably flat if we are to quickly and consistently achieve a sharp edge. The Ura solves this problem.

And finally, since it would be time consuming and financially inefficient to abrade a bevel of uniformly hardened steel, the lamination replaces most of the hard steel exposed at the bevel with soft, easily abraded iron.

Despite this knife’s simple appearance, it’s a very clever and sophisticated design.

An inexpensive Yoshitaka brand kiridashi, a hand-forged but thin knife I have used for many years. It’s a minimalist tool never intended for heavy cutting, but a sharper, handier little knife you will never find. I only wish I could get more of them.
Another knife by Sukemaru. This is perhaps my favorite kiridashi and one I use every time I work wood. Notice the sharp point and long cutting edge that, while more fragile than the knives pictured above, and less suited to making powerful cuts, is better suited to finer, detailed work. The shape is unusual because Sukemaru made it in imitation of a knife made from the tang of a recycled wakizashi sword with its double-angle tail terminus and a fuller groove cut into the right hand side. The idea of recycling the last remnant of a sword is appealing to me

Pre-laminated Steel & Mass Production

Except for those sold by C&S Tools, most kiridashi kogatana sold nowadays are made from pre-laminated steel called “rikizai,” (利機材) or “fukugozai” (複合材) a material invented for mass-producing consumer-grade kitchen knives inexpensively and in high-volume. Dies and presses in factories are used to cut blanks from strips and sheets of this laminated steel/iron which are then ground and sanded by automated machines and heat-treated in large lots in ovens. The result is a knife that is cheap to produce (despite the high price often charged to unaware consumers) and quite usable, but since the blade has not been forged through multiple heats, or been normalized and subjected to multiple quenches, the crystalline structure of the cutting edge is inferior such that the knife cannot be made as sharp, it will dull quicker, and may be harder to sharpen. Such kiridashi kogatana also tend to be thinner, like kitchen knives, and are not as comfortable in the hand for hard work over long hours.

We prefer the performance and ease of use of hand-forged traditional kiridashi, so this is the only type we sell. Along with most professional woodworkers in Japan, we feel they are worth the extra cost. But if you decide to try a cheaper mass-produced kiridashi, please be careful you are not sold a pimped-out mass-produced blade at the price of a more labor-intensive, skill-intensive hand-forged traditional knife. Caveat emptor baby.

Another Sukemaru kiridashi kogatana in my collection. He named this one “Tomoshobi” meaning “ light,” as in “lamp.” I’m not sure why he selected this name, but I like to imagine it was because the blade looks like a lit candle. This knife too has a raised Hagane lamination for ease of sharpening. An elegant, scholarly little knife with a beautifully-shaped black ura I have owned for many years but never used. I can imagine an author setting down his hand-written draft manuscript and taking up this little knife to sharpen his pencil or quill as he seeks his muse.

Right & Left

Kiridashi kogatana come in right-hand and left-hand configurations, with the right-hand variety being most common. To differentiate a right-handed knife from a left-handed one simply hold the knife with the cutting edge facing downward. The bevel of a right-handed knife will be on the right side as seen from above.

Craftsmen in many trades, especially cabinetmakers, shashimonoshi, joiners and woodcarvers will often own both left and right-hand versions because the type of work they do requires a different bevel orientation for some jobs particularly when shaving wood contrary to the grain, for example when shaping the inside corners of curved wooden components.

A left-handed kiridashi by Kiyotada I have owned and used for many years, an essential tool for high-end joinery work in the Japanese tradition because it can shave wood in directions a right-handed knife cannot without digging into the wood and creating tear-out. The hole in the handle is not original but one I added to facilitate securing the knife in its handle/scabbard (pictured below) with a tapered bamboo peg. The angle of the cutting edge and shape of the point is intentionally somewhere between the hard-working Konobu blade, and my favorite, pointier, more delicate wakizashi knife pictured above. Horses for courses.

Blade Width & Thickness

The width and thickness of the blade and the angle of the cutting edge to the centerline of the blade are matters of individual preference. Generally speaking, a wider blade is easier to grip than a narrower blade, and is also easier to power through cuts. On the other hand, if too wide, it will feel clumsy in the hand, it will not rotate as dexterously when making inside-corner cuts, and may not fit into tight spaces as well.

Likewise a thicker blade is easier to grip and easier on the hand when making high-pressure cuts for long periods of time than a thin blade. On the other hand, a thicker, wider blade weighs more and may take longer to sharpen.

It’s worth figuring out which style works best for you.

The Point

The angle of the cutting edge (not the bevel angle) is easily adjusted to personal preference within limits. In general, a steep angle forming a relatively oblique tip is better suited to making deep, powerful cuts, while a shallower angle provides a more slender, pointer tip that is preferred by many for finer cuts, especially long diagonal slices, in narrow spaces. 

The downside to the slender pointy knife is that the point tends to be more fragile, it’s more difficult to apply heavy pressure to, and it’s more difficult to sharpen. The C&S Tools kiridashi has a cutting edge at a medium angle suited to a wide range of cuts.

Shapes

Despite its simple appearance, the kiridashi kogatana is a sophisticated and unusually effective knife. There are, however, many examples of kiridashi with artistic and even anthropomorphic shapes such as vegetables, and even fish in the knife pictured at the top and end of this article. 

A large, thick, presentation-style kiridashi by Kunihide (“Hon Kunihide.”) A littler flashier than I prefer, but excellent work nonetheless. Notice the raised and bright ura.

Handles and Scabbards

The Kiyotada kiridashi pictured above encased in its handle/scabbard. This style of handle/scabbard is simple, convenient, and clever.

Some people prefer a kiridashi with a handle of sorts, although most professional craftsmen, in our experience, prefer the bare metal.

A wise craftsman will have some means to protect the blade from becoming damaged when not in use, and to protect other tools and fingers from its frightfully-sharp cutting edge. A no-cost, thin scabbard or sheath can easily be made from cardboard or plastic, but the wooden combination handle/scabbard pictured above is a clever solution taught to me many years ago by a master joiner of great renown.

In a future post we will discuss how to make a convenient combination handle and scabbard for the kiridashi kogatana.

Why Should You Use a Kiridashi Kogatana?

I can’t tell you why you need a kiridashi, but I can tell you why I and many others use them. Perhaps some of these reasons apply to you.

One can get by with disposable-blade utility knives for low-quality and rough work such as opening boxes, cutting gypboard, or discouraging icky deadish members of the legal profession, but such knives are not up to most serious woodworking jobs for several reasons.

First, while utility knives are sometimes called razor knives and may even use razor blades for cutting edges, they are nowhere near as sharp as a good kiridashi. The fact is that surgical scalpels are not as sharp as a good kiridashi sharpened by someone with skill. And utility knives dull quickly because the steel is soft and of miserable quality. You’ve not doubt noticed this poor performance.

Second, while your approach to life may be different, in my decrepitude I have come to despise stuffing landfills with throw-away tools, especially those made in the increasingly-despotic and bloody-handed kingdom of China. It doesn’t make sense environmentally or morally. I prefer a faithful, high-quality kiridashi knife that can easily be made sharper than any commercial razor and will serve faithfully for decades without complaining.

Third, a good kiridashi is a compact tool with a stiff blade to which one can apply heavy pressure for serious cutting, and a single-bevel that provides exceptional control for detailed carving and trimming tasks. It’s a tool that becomes an extension of my mind when it is in my hand. Can’t do any of that with a flimsy, clumsy utility knife.

And finally, while conventional double beveled knives are useful, because they lack the lamination of fine-grained exceptionally hard steel and the clever ura, they take longer to make as sharp as a good kiridashi and dull quicker.

As they say in Japan: “The difference between the moon and a mud turtle.”

If you use knives in your work and you need them to be literally sharper than a razor and stay that way a long time without spending tons of time and attention, then nothing beats a good hand-forged kiridashi kogatana knife. All those generations of Japanese craftsmen can’t be wrong.

The other side of Sukemaru’s Ayu kiridashi knife shown at the top of this article. If you look carefully you can see the Chinese character for the Japanese sweet fish hand-engraved where the fin on a wetter fish would be. Obviously it wants to swim and frolic in wood.

YMHOS

A block print of Empress Jingu, a legendary figure in Japan said to have reigned after her husband’s death in 200 AD, and Takenouchi no Sukune having a good old time fishing for Ayu on the coast of Chikuzen, the old name for a country once located in Northern Kyushu island. The Ayu fish has an unusually bitter taste much appreciated in Japan, apparently for thousands of years.

If you have questions or would like to learn more about our tools, please click the “Pricelist” link here or at the top of the page and use the “Contact Us” form located immediately below.

Please share your insights and comments with other Gentle Readers by using the form located further below labeled “Leave a Reply.” We aren’t evil Google, fascist facebook, or thuggish Twitter and so won’t sell, share, or profitably “misplace” your information. If I lie may my sweetfish knife swim away.

Leave a comment

Related Posts: