

It is the accuracy and detail inherent in crafted goods that endows them with lasting value. It is the time and attention paid by the carpenter, the seamstress and the tailor that makes this detail possible.
Tim Jackson
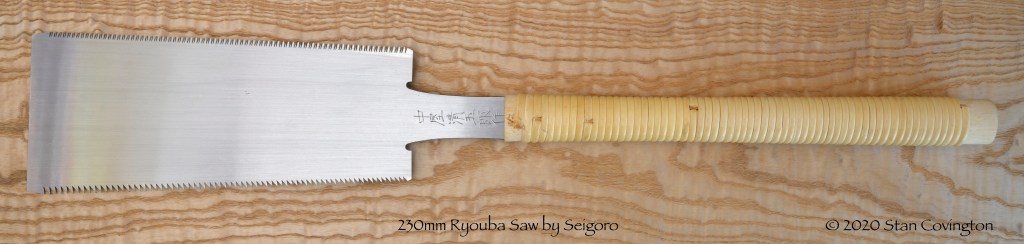
This post is about a variety of handsaw unique to Japan called the “Dozuki Nokogiri.”
Description

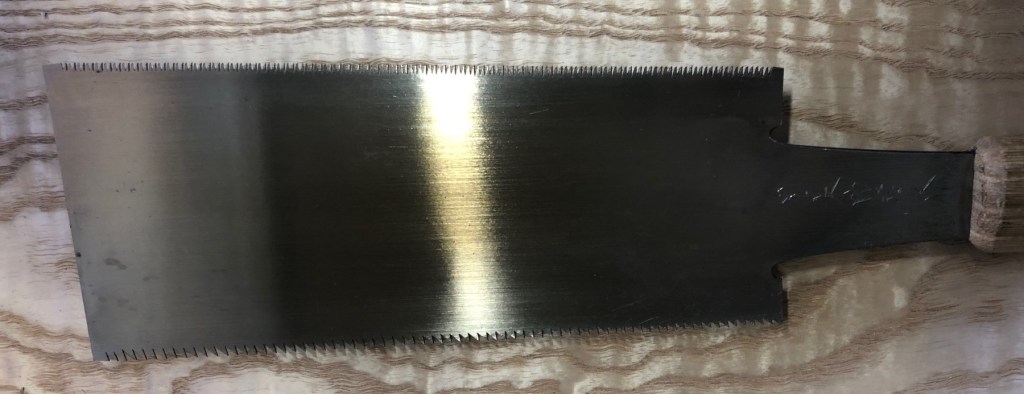
The name of this saw is pronounced doh/zoo/kee – noh/koh/gee/ri and is written 胴付鋸 in Chinese characters. The first character means “trunk,” or “torso.” The second character means to “attach” something. The third character means “saw.” It’s a thin-bladed, fine-toothed, single-edged crosscut saw with a folded steel back specialized for making precise, shallow cuts in wood, especially tenon shoulders. Dozuki are not intended for ripping tenons or cutting dovetails, although they can do both fairly well.
Along with the Hozohiki saw, this is the thinnest and most precise variety of Japanese saw, and some, including your humble servant, would say it is the most precise type of saw made anywhere in the world. Certainly, it is the most difficult to make properly.
The Dozuki was the first Japanese saw that became well-known outside of Japan. As many thousands of woodworkers around the world can attest, if you need to make clean, precise, shallow crosscuts, then the Dozuki is a must-have tool.
A variant of the Dozuki is the “Handozuki” meaning “half dozuki.” Handozuki do not have a back steel, but have a slightly thicker and stiffer blade than a normal dozuki, but even then, they are flimsy and more difficult to use than a standard Dozuki. The lack of a back steel, however, allows them to make very precise crosscuts in material where the back steel of a standard dozuki would get in the way. Handozuki were once in common use by joiners, but are seldom seen nowadays.
I have previously written about another variety of Japanese saw with a back steel called the “hozohiki” or “tenon cutter saw.” This type of saw is nearly identical to a Dozuki, although sometimes the blade is shaped slightly different. In any case, it always has rip teeth and excels at cutting precision joints with the grain.
If the Dozuki has a shortcoming, it is the delicate nature of their teeth, which can break when used to cut harder woods in a ham-handed manner. Bigger teeth have a larger cross section of steel and are more resistant to breaking than smaller teeth, of course, so it is wise to match the thickness of the Dozuki’s plate and size of its teeth to the hardness and thickness of the wood and the user’s sawing skills. In this regard, Western saws with their thicker plates and relatively blunter teeth are much tougher, and in many cases, better suited to cutting harder woods. It’s too bad their precision is often terribly poor.
Using the Dozuki Saw
The proper technique for using a dozuki is to mark the cut with a sharp marking knife and to cut to the line. Goes without saying, right? Perhaps not, because many woodworking gurus in the West advocate first making sawcuts offset from the layout lines and then paring to the layout line using a chisel or a shoulder plane.
While such obviously inefficient techniques may be necessary when using Western backsaws with their thick plates, dull teeth, and excessive set, they are seen by Japanese woodworkers, accustomed to using Dozuki saws, as slow and amateurish.
I strongly encourage Gentle Readers to tune and sharpen their saws and train themselves to cut precisely to the layout line first time, every time.
There are easily-made, simple wooden guides one can use to make this process quicker, but the ultimate guide is a good saw combined with eyes and hands working together confidently. Perhaps I can address the subject of cutting guides and jigs in another article.
As your humble servant mentioned above, the tiny teeth of Dozuki saws are fragile and do not endure ham-handed abuse well. It is recommended that Gentle readers new to the Dozuki saw become accustomed to using it in soft woods such as White Pine before attempting to use one to make a piano from ebony.
Sawteeth are too often damaged by inadvertently banging them against hard objects like a chisel, another saw, or a concrete floor. Dirt and grit embedded in the wood being cut will also dull the teeth terribly. Please be careful.
Other common causes of damaged sawteeth are forcing the saw too hard, a brutish habit the gods of handsaws frown upon mightily, or swinging the saw left and right in the cut causing the small teeth to snag on the entrance and exit to the kerf, bending and even breaking them. This last cause of damage is perhaps understandable but still about as intelligent as eating boogers. If you are afflicted with any of these unfortunate habits (especially gnoshing on “nose ‘taters”), please make a conscious effort to train them out of your life.
The first bad habit of using excessive force can be easily remedied by simply not pressing down on the saw. Back saws, including both the Dozuki and Western varieties have a steel back that applies downward pressure automatically. You cannot improve on this, so don’t even try.
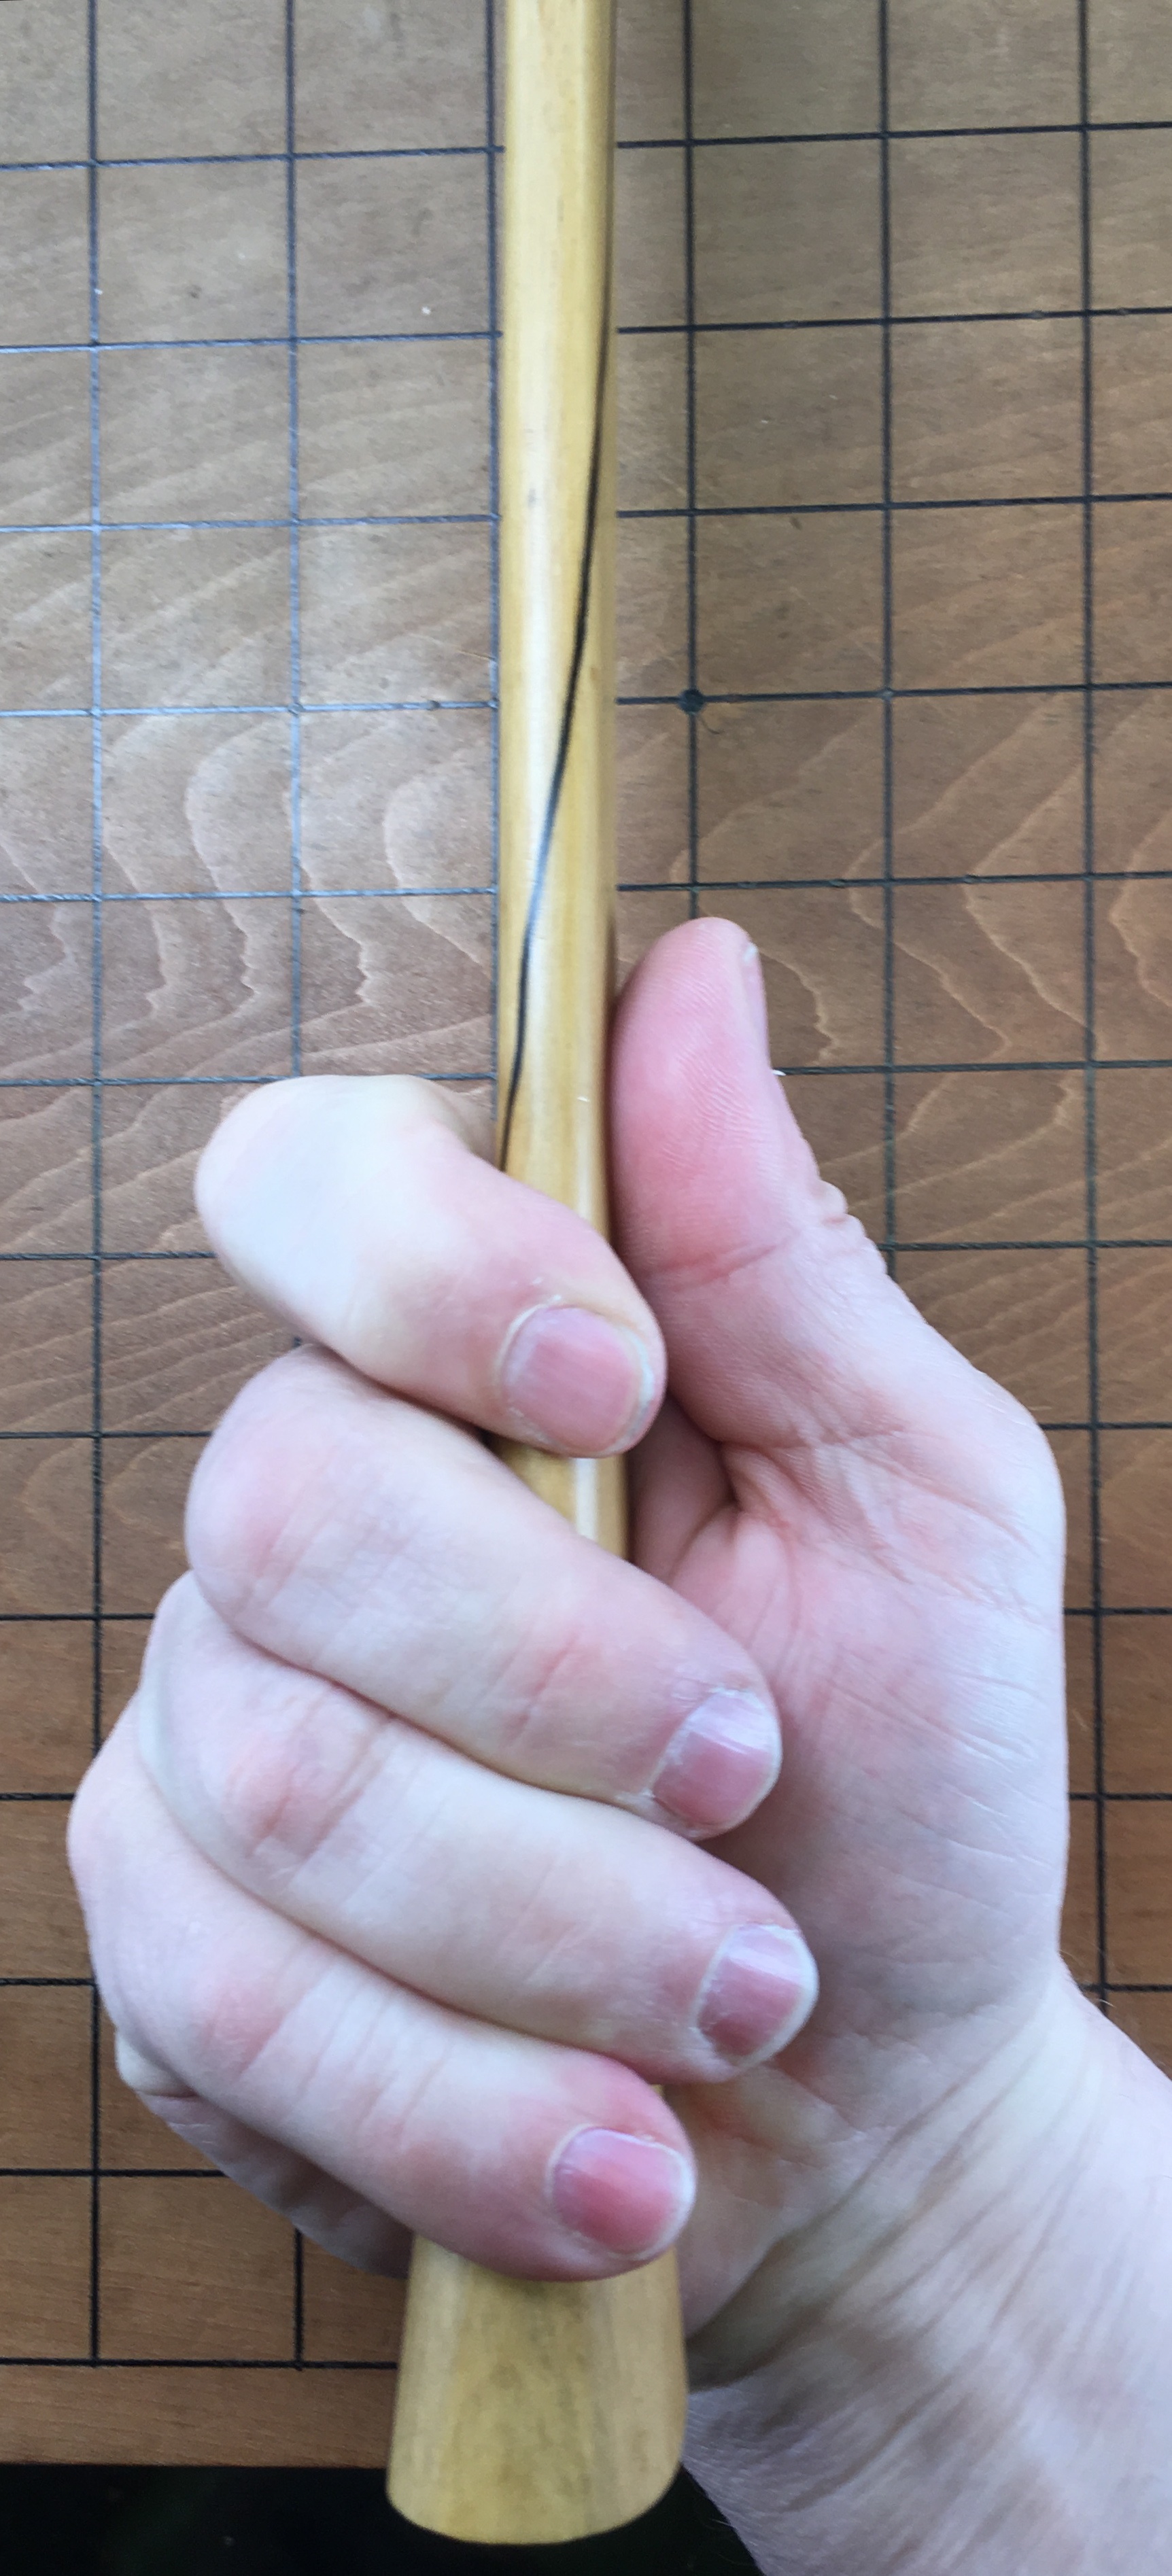
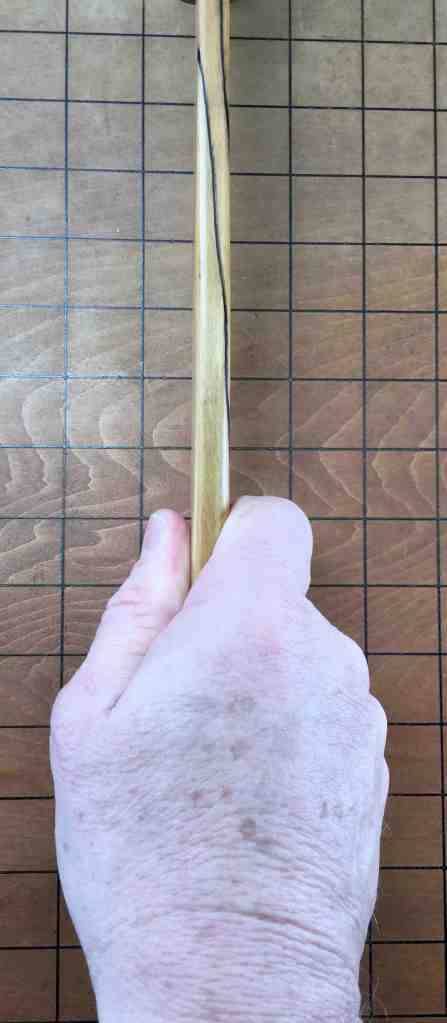
Using the proper grip can help too. A good rule when using a Dozuki or Hozohiki saws to make precise cuts is to extend the pinkie finger so it’s not touching the handle. This makes it much easier to control the downward force your hand puts into the saw. Don’t worry, this grip will not cause anyone mistake you for a lady of refinement, unless you are wearing a pretty pink woodworking apron with Chantilly lace accents, that is. (ツ)
I like to extend my index finger along the top of the handle because I find this helps me feel the direction of the cut. Different strokes for different folks.
I also like to pinch the saw lightly between the first knuckle of my middle finger and the pad of the thumb forming a single pivot point which helps to keep the saw in proper alignment.
While perhaps a tad anthropomorphic, understanding the following two points about handsaw psychology is absolutely helpful when making precise cuts with any handsaw, or at least that’s what my saws tell me:
- A saw cuts well because it’s plate is true, its teeth sharp, and it wants to cut (not because you are strong or clever);
- It will cut most precisely if you get out if it’s way (because you’re neither as strong nor as clever as you imagine).
The first point is a simple acknowledgment of the nature of the saw, it’s motivations, and your relationship with it. Perfection is unattainable.
The second is a conscious acknowledgement of one’s human limitations, a step towards developing proportional humility, and to forging a relationship with the handsaw.
Most problems with handsaws can be resolved by truing the plate (an extremely common problem among neglected and/or abused handsaws) and sharpening the teeth. If you fail in this basic duty, your saw will neither be happy nor will it serve you well. Would that humans were as easy to fix.
It all comes together in the second point because, once we understand the nature and truth of the handsaw, and have dutifully made it’s bright blade true and its vicious little teeth sharp, then we must forget how strong and clever we are, get out of its way, and let our skinny little buddy do its job.
And just how do we get out of a saw’s way? I just knew you were going to ask:
- Keep the saw moving in the right direction. Not as easy as it sounds. But remember, a well-made handsaw is a simple-minded beastie that wants to move in a straight line, so if it doesn’t, it’s your fault;
- Rely on the weight of the blade and its back alone to apply adequate pressure (not thy mighty arm, Oh God of Thunder);
- Keep your wrist loose and actively rotate it (this is important) so the sawblade moves to and fro only, not side to side. If you lock your wrist, the blade will unavoidably swing right and left and up and down in the cut, hindering the faithful saw, and buggering the precision of the cut it wants to make. This technique requires practice to learn. Do it.
- Focus on the sawkerf; Encourage your sharp little buddy to cut true. Banish all distractions, including that bench cat swanning around demanding its lazy servant (that’s you) provide it savory snacks and ear rubs. Using a Dozuki saw is a meditative process. Indeed, an occasional prayer to the gods of handsaws can never go amiss.
The C&S Dozuki Saw


We have a special Dozuki hand-made to meet the severe demands of our professional Beloved Customers. Like our Hozohiki saws, it too is hand-forged from Hitachi Metal’s Yasugi Shirogami No.2 high-carbon steel by Nakaya Takijiro, an extremely skilled craftsman, and one of the very few traditional sawsmiths left in Japan.
Takijiro hand-scrapes the plate to the proper double-taper to prevent binding, hammer tensions the blade to stiffen it and to prevent it from warping and binding as it heats up in-use, and hand-cuts, hand-files and hammer-sets the teeth.
Very few saws are still being produced to this level of quality and with these performance characteristics.
If you need a professional-grade high-precision saw that prioritizes performance over appearance, one that will not get in your way but will help you do better work, then these will be available in limited quantities for a limited time. Unlike me and thee, Takijiro is not getting younger everyday.
You can view our latest pricelist at this LINK.
YMHOS

Relevant Articles
- Handsaws: Some Guidelines to Aid Precision
- Japanese Handsaws: The Twins
- Japanese Handsaws: The Maebiki Oga
- Japanese Handsaws: The Hozohiki Precision Rip Saw
- Japanese Handsaws: The Dozuki Precision Crosscut Saw
If you have questions or would like to learn more about our tools, please use the “Contact Us” form located immediately below. Please share your insights and comments with everyone in the form located further below labeled “Leave a Reply.” We aren’t evil Google, incompetent facebook, or twitchy twitter and so won’t sell, share, or profitably “misplace” your information. My arm is untwistable.


Please Leave a Reply