
“Electrical tools are consumables, but handtools are as part of our bodies. Do not treat tools as just things, or as some recent invention. The shape of every tool was not decided recently, but over a long time.”
Nishioka Tsunekazu, Temple Carpenter in charge of the Horyuji and Yakshushiji Temple Restorations
There are many varieties of Japanese chisels, and most people, including Japanese, are confused by the meanings of their names, and their various applications. Your humble and obedient servant is neither historian nor archaeologist, but I have been using them for over 40 years both professionally and for the fun of it and like to flatter myself I know a bit about them. Perhaps this and future posts will help de-fuddle a little of the confusion out there.
In this first article in the series I will explain the components of Japanese woodworking chisels, and the two main categories. In later posts I will explain the various types of chisels included in these categories in some detail. But let’s begin with some language matters.
Terminology and Translation
I have used suitable English words if available, but for the most part, I have employed the Japanese terms converted from Kanji (Chinese pictogram characters) and Hiragana (phonetic Japanese characters) to the Roman letters used in most English-speaking nations. I apologize in advance if this causes consternation, but at least it will not add to the general confusion about these tools common among English speakers.
The word for “chisel” in Japanese is “nomi” (noh/mee 鑿). The Chinese character used to write this word is complicated, so it is normally converted to the phonetic hiragana letters as “のみ.” You will notice that nomi is part of every chisel’s name, so I will use it too.
Structure and Components of Japanese Chisels
The design of Japanese chisels are significantly more sophisticated in design than their Western counterparts, and for good reasons, but the basic components are generally the same. So let us examine the similarities and differences.
Blade and Neck Construction


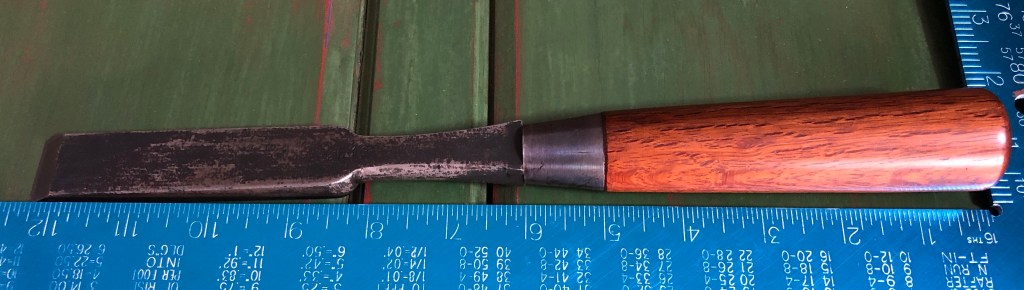
Traditional Japanese chisels have laminated blades with a body, neck and tang made of iron or very low-carbon steel that remains relatively soft during heat treatment.
A layer of high-carbon steel is laminated to this iron body beginning where the neck meets the flared shoulders and extending to the cutting edge. During the quenching process, this layer becomes very hard, typically 62~67 on the Rockwell C scale (Rc) versus the typical hardness of 58~60 Rc found in Western chisels. These two layers of metal are most visible at the bevel. The additional hardness of the steel layer has both advantages and disadvantages, depending on the crystalline structure of the steel after heat-treating and the skill with which the tool is used and maintained.
In the case of hand-forged (teuchi 手打) blades, this lamination is made by forge-welding the two types of metal over several heats using hammer, tongs, and anvil.
Make no mistake: European chisels were also fabricated using this technique before the advent of mass-produced inexpensive steel. Unfortunately, this once-universal excellent technique has been all but forgotten outside of Japan.
Materials & Process
The best professional-grade chisels are made of high-quality iron and the purest plain high-carbon steel. These ancient metals are difficult to work, being very sensitive to temperature and thermal shock and tending to warp and crack badly in less than experienced hands. Many alloys and processes have been developed over the last 70 years to make tool production more profitable using unskilled labor, but for simple cutting ability and ease of sharpening, nothing rivals this combination.
The blacksmithing process involves forge-welding the two types of metal to form a laminated blade, then shaping and hand-forging it over multiple heats, followed by carbon soaking and annealing, a coating of secret mud sauce after which the blade is heated to just the right temperature, and then subjected to multiple quenches followed by multiple temperings, a process that varies from blacksmith to blacksmith with each craftsman using different formulas and procedures. Of course, warpage must be compensated for by shaping a curve in the blade that straightens out during heat treatment. Learning these skills takes years of hands-on training from a young age under the eye of a master, and decades of dedication to quality. It certainly cannot be accomplished in a mass-production situation, much less by Chinese peasants or even CNC robots. The problem is that few but experienced craftsmen can tell the difference using Mark-1 Eyeball alone, and so fraud is common.
Mass-produced consumer-grade Japanese chisel are made from pre-laminated strip steel manufactured in steel mills by either cold-rolling or hot-rolling a layer of high-carbon steel to a layer of mild-steel. This material, called ” rikizai” (利器材)or ” fukugozai” (複合材)was originally developed for mass-producing inexpensive kitchen knives as a labour-saving material to reduce manufacturing costs.
Blades made from rikizai typically perform adequately for most consumers, but many professionals seek the higher performance of so-called ” fine-grain” steel’s smaller and more uniformly-distributed carbides as found in hand-forged, expertly heat-treated blades. Those who develop the skills necessary to discern the difference between such professional-grade and consumer-grade blades, can never be satisfied with the inferior tool.
Hollow-Ground “Ura”
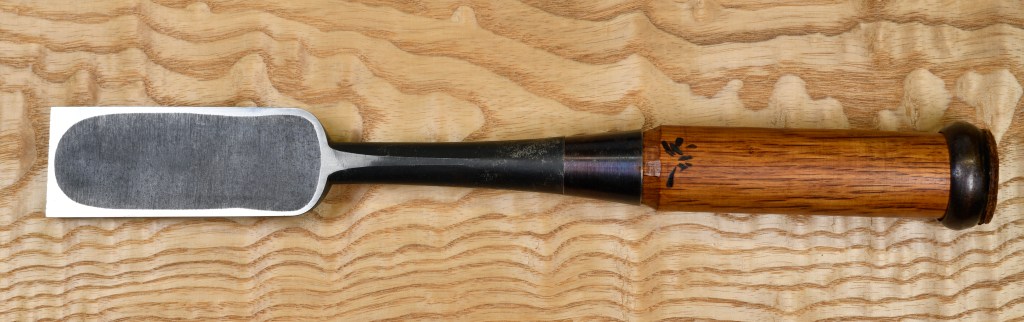
Japanese chisel blades have a hollow-ground back (the so-called ” flat” on Western chisels) which makes the harder steel layer easier to sharpen and keep flat. Without this hollow-ground ura feature you would find sharpening a simple, planar chisel blade of similar hardness time consuming and almost impossible to keep flat over many sharpenings.
Tang and Ferrule
Japanese chisels appear at first glance to be socket chisels, but they are definitely tang chisels with the distinct advantage over socket chisels that the blade and handle stay connected instead of separating at inconvenient times. Perhaps Gentle Reader has experienced the heartbreak of a valuable chisel blade jumping out of the handle of a traditional socket chisel landing cutting edge-first on a concrete slab. I howled like a werewolf the first time this happened to me.
The handle incorporates a steel ferrule shaped like a truncated cone and called the “ kuchigane” (口金) which translates to “mouth metal.”

This component receives the reaction forces of hammer impacts from the blade’s shoulders converting these thrust forces acting in the handle’s long axis to compression forces acting on the handle’s end thereby preventing splitting and locking the tang tightly into the handle. It is a subtle but clever and highly effective design that combines the best features of both tang chisels and socket chisels without any of the downsides.
The Crown
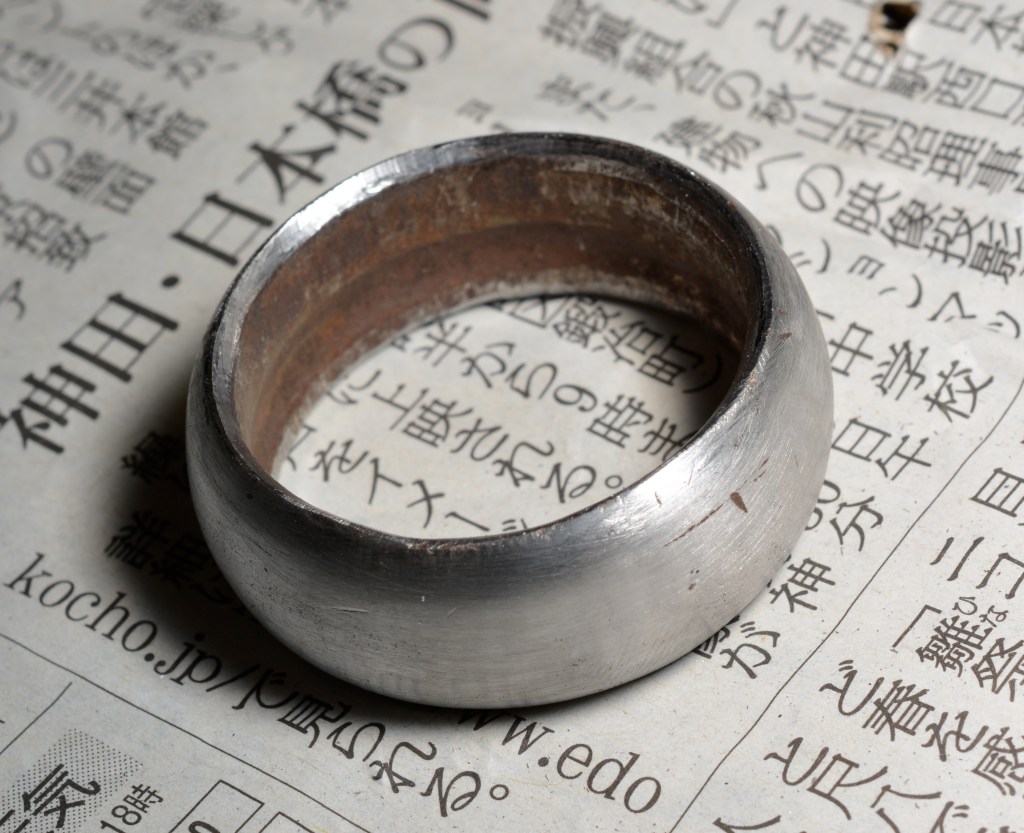
Chisels intended to be struck with a steel hammer have a sturdy steel hoop called a ” katsura” installed at the handle’s butt to prevent it from splitting.
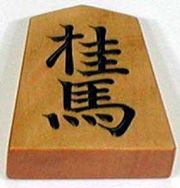
The characters used for this word include 冠, pronounced “kan” or “ kanmuri” meaning “crown” or 桂 meaning “Judas Tree” or “ knight” (桂馬)as in the chess piece. The word Katsura can also mean “ wig” a term that does not quite work in this case because chisel handles are as bald as I am. I have the bad habit of anthropomorphizing my tools, which they detest, so to avoid giving further offense (they sometimes bite, donchano), I prefer to translate katsura as the more elegant word “crown” instead of the more cruder word “hoop,” or follically-challenged word “wig.”
Just in case you aren’t entirely confused, please note that this same steel hoop is also called a ”sagariwa” (下り輪) which translates to ”drop hoop, ” a term that is accurately descriptive because, over many years of hammer blows, the handle gradually shortens and the hoop “drops,” shifting its position down the handle thereby continuing its protection.
The crown is made of relatively soft but still strong mild steel. In use, it will occasionally be struck by a steel hammer. This choice of material is not based on economics or convenience but on the practical reality that the face of a steel hammer impacting the edge of a hardened steel hoop will become dinged and even deform after enough hits.
But this creates another problem, namely that the crown may eventually become deformed by hammer strikes unless preventative measures are taken. This is not a trivial cosmetic matter because the hoop’s edge may deform to the point it curls back inside itself. Then, if the user continues to beat on the chisel, the hoop will gouge and eventually split the handle.

The best way to avoid this grief is to use a hammer with a flat instead of convex face and to properly setup the chisel when new. For instructions on doing this, please see my earlier post about Setting-up Japanese Chisels.
Another downside to the crown and steel hammer arrangement is that the end of Japanese tatakinoni are far from smooth and can be uncomfortable to use when paring, especially after the crown gets a bit dinged. The solution to this is three-fold. First, setup the crown properly and chamfer and smooth its edges. Second, avoid hitting the crown with hammer so it doesn’t become rough and gnarly. And finally, use a tsukinomi chisel for paring. Life is good.
Handle Materials
Chisel handles can be made of a variety of woods, but strong hardwoods such as oak are commonly fitted to chisels designed to be motivated with hammers.
Chisels not intended to be struck with a hammer can be fitted with more brittle but decorative wooden handles such as ebony or rosewood.
The Two Categories: Tatakinomi and Tsukinomi
Tsukinomi
There are two primary categories of Japanese chisels. I think these same categories apply to other traditions, but in the difference is especially clear-cut in Japan.
The first category is the “tsukinomi “ (突き鑿). Tsuki means “to push,” so tsukinomi refers to push, or paring, chisels. Standard widths range from 1.5mm to 48mm. Handle lengths and materials vary with the type of tsukinomi, the intended purpose, and personal preferences.

Tsukinomi are pushed by hand and sometimes by shoulder in the case of the large ootsukinomi, known in the West as “slicks.” Most tsukinomi have relatively longer, more slender and elegant necks. They incorporate the same kuchigane ferrule at the blade end of the handle, but do not have a steel crown hoop reinforcing the opposite end.


By definition these chisels are not intended to ever be struck with a hammer. Even if the handle does not split, their more slender necks will not endure impact forces gracefully. More often than not they are used to clean and pare to final tolerances joints cut using other chisels.
The types of tsukinomi most commonly seen include usunomi paring chisels, shinogi usunomi, kotenomi, and ootsukinomi.
Tatakinomi
The second main category of Japanese chisel is called the “tatakinomi” (叩き鑿)meaning “striking chisel.” This is the style of Japanese chisel best known outside Japan. Stronger and tougher than tsukinomi, they are intended to be struck with a steel hammer. More details can be found at this Article


Wooden mallets are not typically used with Japanese chisels. The logic for this practice is simple: A steel hammer is the smallest, lightest, and most energy-efficient way to motivate a chisel. The physics of this are self-evident. Accordingly, the logic behind the tatakinomi design is that, since it must efficiently remove lots of wood, and a steel hammer is the most efficient way to transmit kinetic energy produced by the user to a chisel, the tatakinomi’s handle must be designed and made strong enough to endure being struck by a steel hammer from sunrise to sunset. A simple calculus.

By contrast, modern Western chisels with their inherently fragile handles require users to baby them with relatively soft, energy-wasting, un-aerodynamic, big-ass mallets, an illogical and inefficient practice. But to each his own.
Some people stubbornly insist on using mallets to strike their Japanese tatakinomi too. These folks are perhaps like the country bumpkin that bought a newfangled chainsaw from a hardware store in town to cut firewood only to take it back to the store the next day complaining it was slower and more work to use than his old axe and handsaw. The puzzled hardware store owner checked the fuel and spark plug, but found no obvious problems. With a perplexed look he yanked the starter rope. The chainsaw’s motor started right up with a roar, belching a cloud of blue smoke. The shocked customer almost jumped out of his overalls in wide-eyed surprise, screeching “ what the hell’s that racket!?!”
According to the Takenaka Carpentry Tools Museum located in Kobe, there are 9 varieties of tatakinomi. The most popular by far is the oiirenomi. We carry several varieties of oiirenomi including mentori, shinogi, kakuuchi, and HSS mentori oiirenomi. Another popular style is the larger, stronger heavy-duty atsunomi, preferred by timber framers. And when we can get them, mukomachinomi.
In Part 2 of this series we will describe some of these beginning with the “Mentori Oiirenomi.”
YMHOS
If you have questions or would like to learn more about our tools, please click the “Pricelist” link here or at the top of the page and use the “Contact Us” form located immediately below.
Please share your insights and comments with everyone in the form located further below labeled “Leave a Reply.” We aren’t evil Google, fascist facebook, or thuggish Twitter and so won’t sell, share, or profitably “misplace” your information. If I lie may I grow an extra arm from my forehead.


Links to Other Posts in this Series
- The Varieties of Japanese Chisels Part 2 – The Mentori Oiirenomi (面取追入鑿)
- The Varieties of Japanese Chisels Part 3 – The Shinogi Oiirenomi (鎬追入鑿)
- The Varieties of Japanese Chisels Part 4 – Kakuuchi Oiirenomi (角打追入鑿)
- The Varieties of Japanese Chisels Part 5 – High-Speed Steel Oiirenomi (HSS 追入鑿)
- The Varieties of Japanese Chisels Part 6 – The Mortise Chisel (Mukomachi Nomi 向待鑿)
- The Varieties of Japanese Chisels Part 7 – The Nihon Mukomachi Nomi (二本向待鑿)
- The Varieties of Japanese Chisels Part 8 – The Atsunomi (厚鑿)
- The Varieties of Japanese Chisels Part 9 – The Uchimaru Nomi Gouge (内丸鑿)
- The Varieties of Japanese Chisels Part 10 – The Sotomaru Nomi Incannel Gouge (外丸鑿)
- The Varieties of Japanese Chisels Part 11 – The Tsuba Nomi Guard Chisel (鍔鑿)
- The Varieties of Japanese Chisels Part 12 – The Usunomi Paring Chisel (薄鑿)
- The Varieties of Japanese Chisels Part 13 – The Shinogi Usunomi 鎬薄鑿 Paring Chisel
- The Varieties of Japanese Chisels Part 14 – Kote Nomi (鏝鑿Trowel Chisel)
- The Varieties of Japanese Chisels Part 15 – Ootsuki Nomi 大突き鑿
- The Varieties of Japanese Chisels Part 16 – HSS Atsunomi
- The Varieties of Japanese Chisels Part 17 – Sokozarai Chisel
- The Varieties of Japanese Chisels Part 18 – The Hantataki Chisel

Please Leave a Reply