

I’m not only a philosopher, sir, I’m a fatalist. Somewhere, sometime, there may be the right bullet or the wrong bottle waiting for Josiah Boone. Why worry about when or where?
Doctor Josiah Boone, Stagecoach, 1939
This series of articles is about tools that have been around a long time, used by nearly every craftsman and builder throughout the span of human existence. Tools without batteries, with no plastic parts, with no need to update or replace glitchy decepticon software that intentionally breaks or evaporates after a few months. These are tools that don’t lend themselves to mass-production and corporate profits. You could even make them yourself with little effort.
I call them “Ancient Tools” because their origins are older than writing.
In this post, your humble servant would like to consider two of the most ancient such tools: the noble stringline and its stiffer brother: the straight edge. We will also touch on the divider.
But before we go into details, let’s consider some background about these tools and why they are so important.
Some History
It’s not even a featherweight of exaggeration to say that each of these tools was essential to the design, fabrication and installation of the wood, brick, stone and steel that make up the foundation of both ancient and modern human civilization.
Indeed, beyond simply making stuff, these small tools were critical to the elevation of human civilization above subsistence hunting, gathering, and the herding of goats. How did these simple tools build civilization, Gentle Reader may ask?
Well the reasons are simply that the stringline and straightedge were essential to the development of mathematics, geometry, trigonometry, navigation, astronomy, architecture, engineering, external ballistics, and many other practical sciences, all of which are essential to not only craftsmen, but modern civilization in total. An exaggeration? Not in the least degree.
Does Gentle Reader use round objects? Do you know how the number Pi was first approximated?
Does Gentle Reader ever ride ships on oceans, or airplanes in the sky? Or use objects transported by trains, cars or trucks over long railways and highways? Have you given thought to how ancient builders were able to plan and layout those railways, roads, highways and bridges? Or layout and cut the earth, stones and wood to make them? Have you considered how the Parthenon in Rome, the world’s oldest, and until recently, largest domes was designed and laid-out?
Have you considered how ancient sailing vessels were able to navigate oceans and chart constantly changing courses?
You may think that these tasks are all handled by theodolites, lasers, computers and GPS widgets nowadays, and that may be so, but it was the string line and straightedge that started it all.
It’s my humble contention that these simple tools remain of significant utility even to modern woodworkers.
Relevant History
Pardon me while I momentarily wax academic.
Did you know that the oldest and most respected treatise on geometry was a 13 book collection titled Elements of Geometry, written around 300 BC by the Greek mathematician, Euclid? That was along time ago.
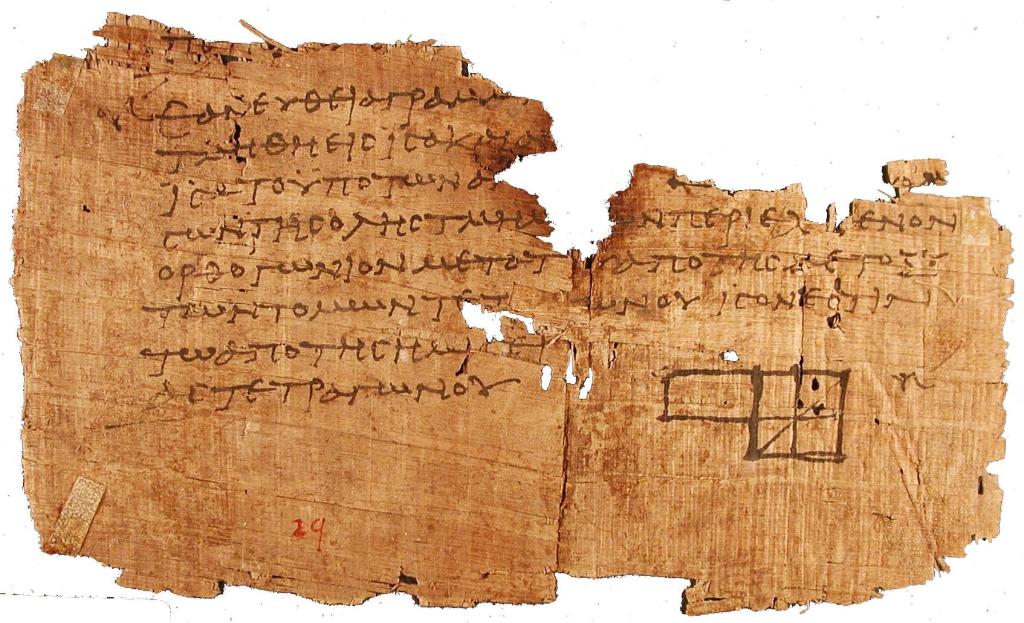
The fact is that Elements is the world’s oldest, extant, large-scale deductive treatment of mathematics, and for nearly two thousand years was the definitive document studied in the West and Middle East by those seeking an education about the physical world. This includes, of course, Leonardo of Pisa (Fibonacci) (c. 1170–1250 CE), René Descartes (1596–1650), Sir Isaac Newton (1642–1727), and every other mathematical giant. It’s an impressive set of books by any standard.
Of course, Maestro Euclid did not invent all the principles presented in his books but summarized the works of Eudoxus of Cnidus, Hippocrates of Chios, Thales and Theaetetus.
The exact same principles of mathematics and geometry written about in the Elements are taught in schools and universities nowadays, although the textbooks employed are abbreviated, fancier, plagiarized versions of the Elements shamefully giving no credit to Maestro Euclid or his teachers. Interestingly, the word plagiarize comes from the Latin word plagium, meaning to kidnap.
And here’s why The Elements is relevant to this humble scribble, because, you see, Euclid limited the constructions he presented in his books to those that could be produced using just a simple straight edge (not a ruler) and a basic divider, the two most important tools to civilization, and worthy of mastery.
Let’s first examine the father of both the straightedge, ruler and divider: the string line.
The Stringline
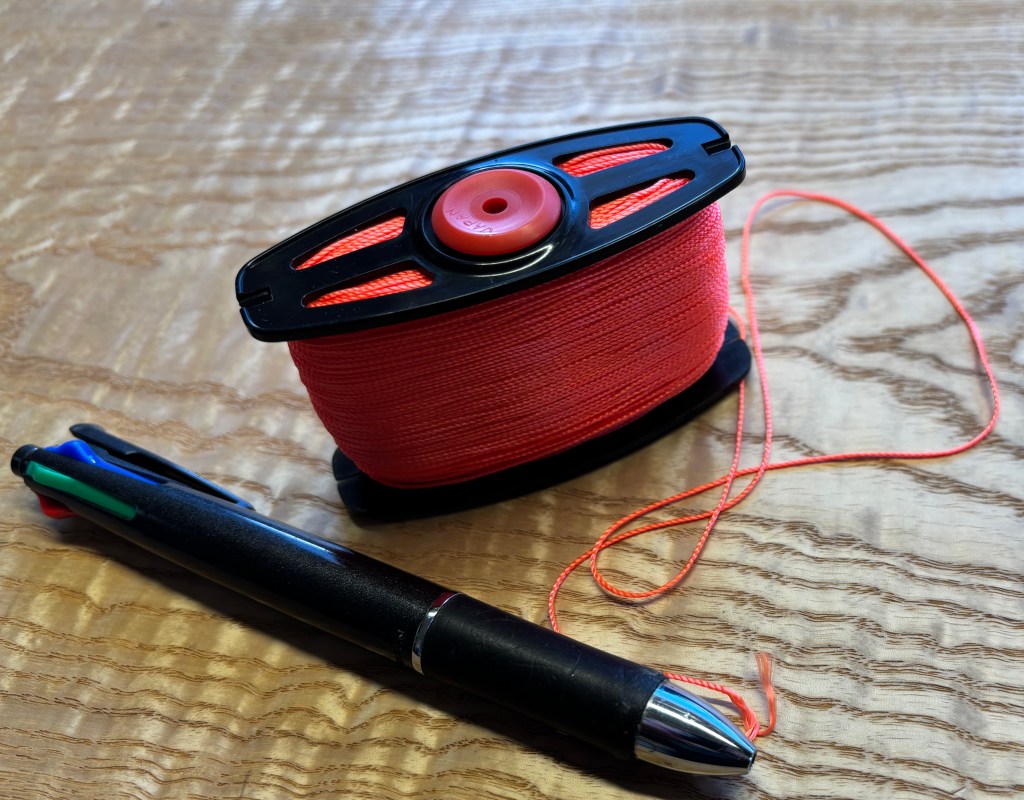
Before the straightedge there was the string line, a simple tool older than the straightedge, the ruler and the divider. Anyone can make one.
Think about it. If you must draw a straight line, or check that something is straight, and you lack a precision straightedge or carpenter’s square, or the tools you have are too short, how would you do it? The quickest, cheapest, most reliable tool for the job is the simple string line, be it made from palm fiber, camel hair, hemp, nettles or dried fish guts. Anyone can make it, and anyone can use it. They sell it at Home Despot, but batteries are not required!
The same string line can also be used as a divider or compass.
For example, if you need to divide a distance into 4 segments, simply stretch the line over the total distance and fold it back on itself 3 times. Each fold is a perfect 1/4 division of the total distance. This may be the origin of the 1/2″, 1/4″, 1/8″, 1/16″ progressions of divisions used in imperial measurements.
If we tie a knot, or make an ink mark at each of these divisions, we’ve now made a very accurate, graduated string line which can be used like a tape measure. And all it took was just some cordage made from a nettle plant or horse tail. Batteries not included.
The Straightedge
The straightedge is a stiffer, shorter, handier version of the string line. It takes some skill to make.
The ruler is a straightedge with marks (graduations) instead of knots. This takes more skill to make.
The folding rule and metal ruler are more durable, convenient versions of the wooden ruler, but take a lot of skill and expensive materials to make. They were too costly for ordinary craftsman to own until recent times.
Civilization & Public Standards of Measurement
In ancient times, each upstanding, well-organized community, be it town, city, abbey, temple, or castle, had a person responsible for establishing local legal standards of weights and distances, for maintaining official references materials (e.g. actual weights, graduated rulers or containers), and for checking on behalf of the local authorities, such as the Pharaoh, king, baron, castle owner, abbot or mayor, that the subordinate members of the community were in compliance with those standards.
In past millennia this system of public standards was considered proof of civilization, one of the primary justifications for government and taxes, while the lack thereof was considered a sure sign of barbarism and crooked government.
Indeed, failure to establish, maintain and enforce these standards frequently resulted in bitter disputes and even bloody wars even in the recent past.
With every Tom, Dick and Pharaoh striving madly to become emperor of the world and establish themself in history forever as the person who governs “standards” (aka the “ruler”), until relatively recently, these weights and measures varied from kingdom to kingdom, castle to castle, and town to town. What a confusing mess!
Matters of health, welfare and uniform commerce aside, from the days of Melchizedek, standards were, and still remain, absolutely essential to taxation, of course.
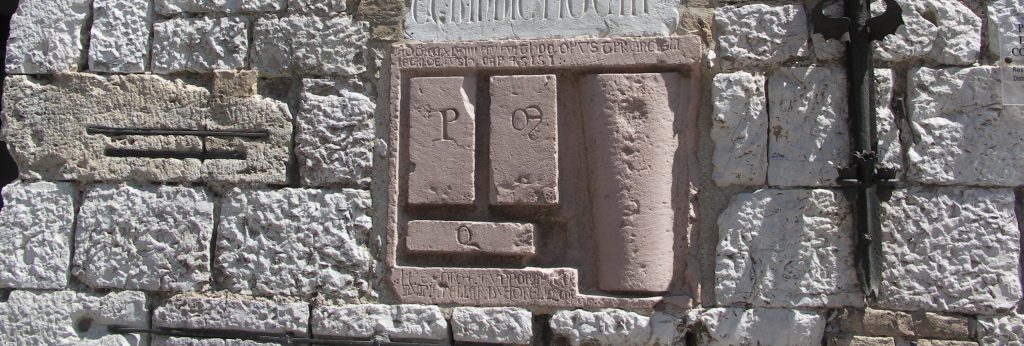
To ensure that buyers and vendors were familiar with the standard measures current in a certain place, in ancient times these standards were carved onto or embedded into the walls of public buildings and church facades in such a way that all could see and copy them, and so they could not be removed or defaced.
Defacing/modifying standards, sometimes by the taxed and often by those imposing taxes, has always been a convenient but ruinous way to make money. The recent bout of intentional high inflation and currency devaluation the world is experiencing is a symptom of currency adulteration, another ancient criminal activity related to defacement of standards.
Indeed failure to comply with officially-established standards was deemed a serious offense in many communities punishable by fines, imprisonment, dunking, public exposure, dismemberment, hanging and even crucifixion. Worldwide more than a few shopkeepers, bakers, brewers, weavers and even tile makers were maimed or executed for “shorting” their customers.
Historically, master builders and tool makers were often required to provide a letter from the local standards officer attesting that their scales and measuring tools were in full accord with the latest standards.
While we no longer embed standards of measure made of iron or stone in the walls of churches and city halls, in one form or another, this practice continues even today.
How To Use a Straightedge
I learned how to use straightedges, scales, dividers and compasses for carpentry and woodworking as a boy from my father, and from carpenters and other craftsman on jobsites over the years. But I learned the most from drafting classes in college. This was before drafting heads, digital protractors, dot-matrix printers, and CAD. Back then even lettering was done by hand or using plastic/metal templates. The professors back then were justifiably proud of their hard-earned skills and the beautiful and precise documents they could deftly produce entirely by hand.
The first lesson the Masters taught was this: Never lay one’s tape measure, rule or scale on the drawing/workpiece and mark from it directly using pencil, pen, scribe or marking knife, but instead use dividers to first measure the required distance on the scale/ruler, indexing the divider’s points in the engraved lines, and then use those same dividers to transfer and mark the distance onto the workpiece or paper. High precision indeed.
The intuitive, but inefficient way most careful people do the job is lay the ruler, yardstick or tape measure on the workpiece, index one end (a careful man will always “burn” 1″ or 12″ or 10mm and not index directly on the tool’s end), locate the target distance on the measuring tool, and make a mark. But if he is trying to layout an irregular distance like 2-3/64″ (= 52 (51.99) mm), for instance, a pencil’s lead or pen’s tip is too wide for precision, so he will use a scribe or marking knife instead. But in many cases, this requires extremely good eyesight, and sometimes even a magnifying glass. When I as a young man, many senior carpenters kept a magnifying glass in their toolbox. It works.
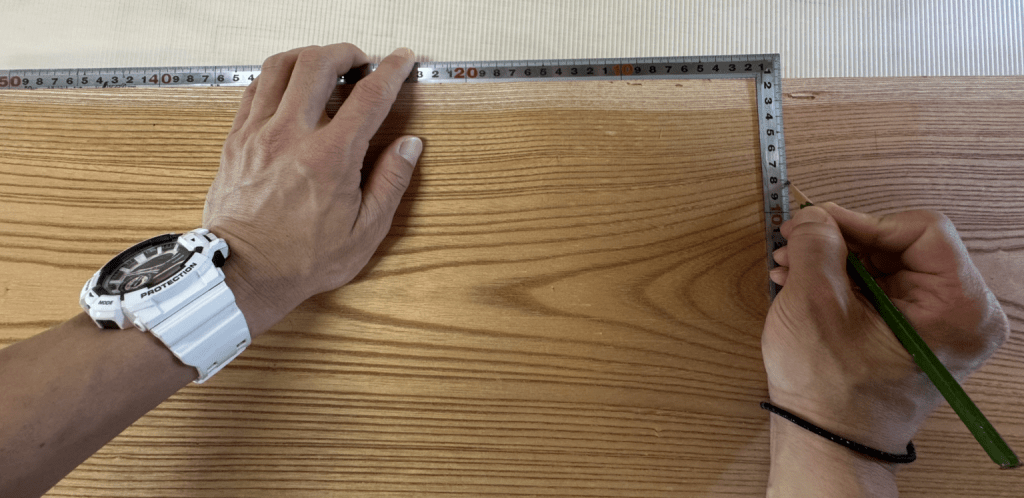
The wiser craftsman will tip the scale or ruler on its edge, kneel or bend down so he can see the scale’s/ruler’s marks clearly, fit the point of his marking knife or scribe into the engraved line on scale/ruler, and then transfer that to the workpiece, paper, or story stick with a quick “tick.”
There is a risk that the far end of the ruler/scale at the point he is measuring from may wiggle out of alignment messing up his precision. Or that the scribe/knife point may shift while making the “tick.” With practice, these tendencies can be overcome, but clearly this method is time consuming and the results may be questionable.
The improvements I recommend to make one’s marking knife more effective at this task can be seen here.
But using dividers, the wise craftsman can fit/index their points quickly and precisely into the engraved lines in scale/ruler at each end of the measurement, first time everytime, and without kneeling, squinting, pressing down, or worrying about wiggling and shifting mark the desired distance on the workpiece. Once he has set the dividers to the required distance, he can fit one of the sharp points precisely into the index hole, or onto the line he is measuring from, and then use the other point to make a precise scratch or hole in the workpiece, which can be used again for future layout reference. This technique greatly improves precision without using a magnifying glass.
This technique works with both dividers and trammel heads.
Standard dividers are quickest, but a locking divider with screw adjustment is easier to adjust precisely and is more likely to retain the measured distance with repeated usage.
You will find when drafting or doing layout that you repeat some distances frequently. Having 2 or 3 locking dividers set to these distances close at hand will allow you to layout those distances quickly and accurately without the need to refer to scale/ruler. Your humble servant keeps three in my toolchest.
The quality of your scale/ruler becomes important when attempting precision layout. A high-quality, professional-grade scale or ruler must of course be of proper length and uniform width and thickness, be free of twist, and have accurate lines. But to qualify as a high-quality scale/ruler, it must pass 2 simple quality tests, not an easy task nowadays.
- Accurately spaced graduations. Performing this quality check requires the skillful use of precision tools and time, so it is seldom economical to purchase discount scales/rulers.
- Consistently engraved graduations. Besides being spaced at the right distances, the graduations engraved into the metal must be the right length, width, depth and have smooth, straight walls. This too is also uncommon. Don’t settle for cheapo tools with shallow, uneven laser-etched or acid etched graduations. Photo-engraved graduations are best. Seldom found in Chinese or Indian tools.
We’ll consider more uses for these tools in the next installment of this crazy adventure.
YMHOS
If you have questions or would like to learn more about our tools, please click the “Pricelist” link here or at the top of the page and use the “Contact Us” form located immediately below.
Please share your insights and comments with everyone in the form located further below labeled “Leave a Reply.” We aren’t evil Google, fascist facebook, or raunchy Reddit and so won’t sell, share, or profitably “misplace” your information. If I lie may my straightedge warp and my string lines all break!


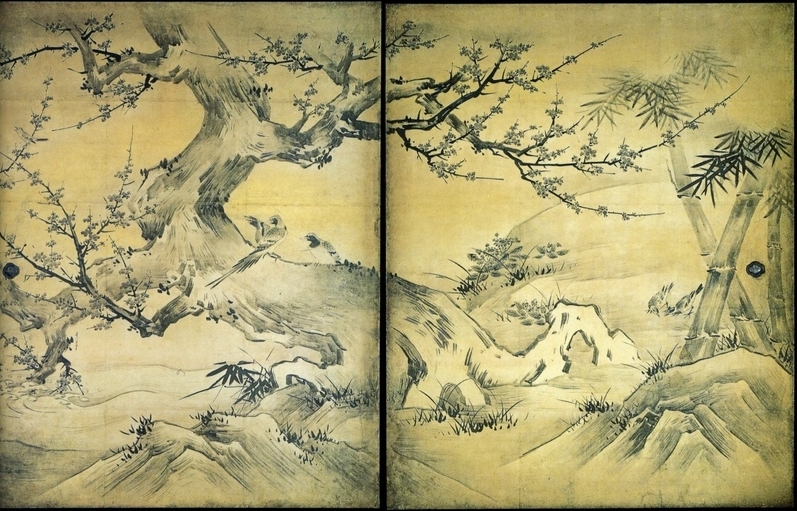
 Images from the “Kasuga Gongen Genki E,” completed in 1309. At the top of this image, the Master Carpenter and his helper use a water trough as a water level for layout. He uses a vertical string of a fixed length with a plumb bob attached to check the high stringline’s height above the water’s surface to adjust the line to be approximately level. At the center-right, A crew of 3 workmen excavate a hole and compact the soil at the intersection of two low stringlines installed by the Master Carpenter in preparation for placing a natural foundation stone, probably intended to support a main post. Notice the shovel: a wooden blade and handle fitted with a joined “T” handle and with a steel or iron cutting edge affixed. Bleeding-edge technology at the time.


ingenhovenarchitects.jpg)


Please Leave a Reply