Sharpening Part 29 – An Example

The expectations of life depend upon diligence; the mechanic that would perfect his work must first sharpen his tools.

Confucius

In this article in our series about sharpening Japanese woodworking blades your always humble and obedient servant will try to bring all the information provided in previous articles together into a single practical example. That does not mean the entire contents of those articles are repeated here, however, so please refer to the previous articles if things become confusing. I have provided some links in the text, and provided links to all the articles at the end.

But before we dive into our practical example, I would like to create some context.

Paying Debts

The purpose of this blog, as I have mentioned before, is not to sell stuff or attract clicks but to help our Beloved Customers increase their knowledge and improve their skills in maintaining and using the high-quality hand-forged professional-grade woodworking tools we purvey.

Another purpose is to pay a debt of the kind that can’t be recorded on paper, only in the heart.

In this series of posts I have carefully NOT promised quick and easy results, nor have I given abbreviated explanations or promoted dumbed-down techniques tailored to fit neatly within the publishing parameters of a book, magazine article, or a pretty little video. This is because the series is not about me, or my skills, or what I think is best, or selling stuff but rather helping our Beloved Customers obtain real long-term results and life-long skills of the sort expected of professional Japanese woodworkers. And since I can’t instruct them directly, our Beloved Customers must truly understand the principles and techniques so they can train themselves. Fragmentary instructions and short-cuts would be far easier to write about, but risk creating more confusion than progress.

I share many experiences in common with most of our Beloved Customers, but I’ve also had some unusual experiences working with and being mentored by extremely accomplished Japanese professional craftsmen including sword sharpeners, tool sharpeners, carpenters and joiners. None of those gentlemen charged me a notched nickle for their instruction. Likewise, I have never sought compensation for teaching others those same techniques. And so we come to the other reason for this series, namely to pay those gentlemen back for the time they spent and the kindness they showed me.

So gird up your loins, recall the information and techniques presented in the previous 28 articles in this series, and let’s sharpen a blade.

Removing Damage and Correcting the Bevel

I will not even try to deal with all the possible starting points for sharpening a woodworking blade, but in this example we shall assume a starting point of the lands surrounding the hollow-ground area at the blade’s ura being already flat, planar, and polished. If your blade is not in this condition, follow the instructions at the end of this section. We shall also assume the edge has a small chip that must be removed first. These conditions will cover 80% of sharpening jobs.

Richard Kell 625-3000 Brass Bevel Gauge

If the blade’s cutting edge bevel angle is where you want it to be, the bevel is already flat, and the blade isn’t damaged, please skip to Step 11 below.

1. Examine the Bevel Angle: Check the bevel angle with your bevel angle gauge. 27.5° ~ 30° for plane blades, 27.5° ~ 35° for oirenomi and atsunomi. No less than 24° for paring chisels.

2. Correct the Bevel Angle: If, based on your check in the previous step and the blade’s actual performance, you determine the bevel angle needs to be adjusted, correct the bevel angle using your 400~800 grit diamond plate or diamond stones or FLAT carborundum stones either free-hand or using a honing jig like the Lie-Nielson product, the Eclipse jig, or whatever catches your fancy. If you use a honing jig, you may want to add a drop of oil to the moving parts before they get wet. Be careful to avoid making a skewed or curved (cambered) cutting edge unless that is specifically what you need.

3. Examine the Edge: Examine the blade by eye and touch. Stroke the cutting edge with your thumb (over and away from the edge not towards the cutting edge!) to confirm its condition, and run a fingernail along its length to check for defects as described in the previous post in this series. Your fingerprints will snag on any rolls or burrs, and your fingernail will detect irregularities invisible to the eye. Assuming there is some minor damage, go the next step. If there is no damage, the bevel is in good shape, and the blade is just dull, skip to step 11 below.

4. Remove Damage: Remove chips and dings from the cutting edge by standing the blade, cutting edge down, on a flat 1000 grit stone, with ura facing away from you, tilted a few degrees from vertical towards you, and pull the blade towards you without applying downward pressure. Usually one or two light strokes will suffice. The goal is to remove damage by creating a flat at the cutting edge. Examine the flattened edge with eye, fingertip, and fingernail to see if the chip or defect has been removed. Repeat until it’s gone. Don’t overdo it. Whatever you do, don’t allow the blade to become skewed! This method takes a bit of courage the first time, but it is the quickest, surest, and most economical way to get the job done.

5. Clean the Blade: Carefully clean grit and mud from the blade and the honing jig’s wheel (if you use one) to prevent contaminating the next stone. This is important.

6. Check and Color the Bevel: Check the bevel frequently to confirm full contact. You might blacken the bevel with a marking pen or Dykem to make it easier to monitor progress. This step is worth repeating between stones because it is helpful in monitoring what you cannot see otherwise.

7. Sharpen on the Rough Stone: This is the most important stone in the process. Now that all the damage has been removed and the bevel is flat and in good shape, we need to abrade the bevel until the flat we made in step 4 is gone and we have created a minuscule, tiny, clean burr. Sharpen the blade’s bevel on your roughest diamond plate or FLAT carborundum stone. If sharpening freehand, take short strokes. Always use the entire face of the stone, including corners, edges and ends as described in the previous post in this series. Turn the stone end-for-end frequently to compensate for your natural tendency to work some areas of the stone harder than others. Watch the edge carefully to make sure the width of the flat made at the cutting edge in Step 4 above gradually decreases in width evenly along the cutting edge’s length. If the flat becomes narrower at one corner than the other, apply extra pressure at the wider side, or hang the corner of the blade’s narrower side off the stone for a few strokes to correct. Stop when the flat is gone, and a clean, uninterrupted, but barely detectable burr is created. With practice, you should be able to do this without a honing jig. When using all the stones and plates in this process, keep them wet at all times, and add water as necessary. If the stone becomes dry, not only will it clog and stop cutting efficiently, but friction may cause localized heating of the thin metal at the cutting edge softening it. Remember, you’re violently tearing metal from an extremely thin cutting edge. You cannot see it and your fingers cannot feel it but this destruction heats up metal at that thin edge, so cool it down with water.

8. Check the Burr: Your fingertip will feel the burr long before your eye can see it. Stop when you have a small, uniform burr without interruptions the full width of the blade. Confirm this with your fingernail. Anything beyond this is just wasting metal and stones. With practice, this process will go very quickly, and you can move onto the next stone while the burr is barely detectable.

9. Create Skewed Scratches: When you have a uniform burr, work the blade sideways, or at an angle, on the stone to create diagonal scratches on the bevel removing the straight-on scratches the stone produced.

10. Clean the Blade: Wipe and wash the blade (and the honing jig’s wheel, if you are using one) to remove grit and mud. This is very important to prevent contamination of finer-grit stones. 

At the conclusion of step 10, the bevel will be flat, uniform, and at the correct angle. The flat you created on the cutting edge during step 4 above will be gone, and you will be able to just detect a full-width tiny burr using your fingers. 

For the next steps, keep the blade attached to the honing jig if you used one in the previous steps. Otherwise, sharpen freehand if you can. Don’t let the honing jig become a crutch that slows you down and prevents you from developing control.

Normal Sharpening Procedures

This is where the sharpening process normally starts when the blade is not damaged and the bevel is in good shape but only needs to be sharpened. It usually does not include a honing jig which can only slow things down.

11. Check and True the Medium-Grit Stone: You may decide to use more than one medium grit stone. I mostly use a 1000 grit at this stage, but may use a 2,000 grit stone as well. Whatever stone you use, it must be clean and flat. As described in previous posts, you need to check the flatness of your stones frequently with a stainless steel straightedge. To do this, wash any mud off the stone and pad (don’t rub) the stone’s face dry with a lint-free clean cloth or paper towel. Hold the stone up to a light source, place the straightedge along the stone’s length, across its width, and across diagonals to check for light leaking between stone and straightedge. Make a pencil mark, such as a line or circle, on high spots using a wide carpenter’s pencil. Once you understand if and how the stone’s face is distorted, flatten it using whatever method you prefer, a diamond plate/stone, a specialized truing block, or my preferred method, another stone of the same grit. If you use my method you won’t need to worry about grit contamination and can save time and money by truing two stones at the same time. Six of one, half-dozen of the other.

12. Sharpen on the Medium-Grit Stone(s): Work the blade’s bevel on your medium-grit stone in short strokes using the stone’s entire face from side to side, end to end, and corner to corner, turning the stone end-for-end frequently and being careful to avoid rocking the blade. A bulging bevel is bad news, Bubba. You will know you are done with this stone when all the diagonal scratches from the previous stone, especially at the extreme edge, have been removed. The burr may or may not have evaporated by now, so check with your fingerprints and fingernail. If it still remains, it should be just barely detectable. If it is still big, you need a few more strokes on this stone to shrink it. Using a loupe at this point will be informative. End your work on this stone by creating some new diagonal scratches on the bevel erasing all the previous straight scratches.

You may want to repeat this step using another medium-grit stone, such as 2,000 grit, to save wear on your finishing stones. Either way is fine.

13. Clean the Blade: Wipe and wash the blade (and the honing jig’s wheel, if you are using one) to remove grit and mud. This is especially important at this stage in the sharpening process. Remove the honing jig at this point if you have been using one.

14. Polish on the Finishing Stone: Move onto your finishing stone, usually a 6,000~10,000 grit synthetic stone. This may not or may not be the final finishing stone you choose to use. Be sure it is flat, uncontaminated with grit from rougher stones, and wet. You may want to use your nagura stone to create a slurry from the stone’s corners and edges that will accelerate the polishing process. Be sure to keep the blade’s bevel in close contact with the stone’s surface on both the push and pull strokes. When all the diagonal scratches from the previous stones are gone, you are done with this stone. If there is still a burr left after the medium-grit stone, it should have evaporated by now. If not, the burr was probably too big to begin with and your technique needs refinement.

15. Examine the Bevel: Take a good look at the polished bevel. Are there still scratches left from the previous stone? This may be because you did not remove all the scratches from previous stones. Or it could be because this stone or previous stones in the series were contaminated with dust or rougher grit. If so, you should figure out why and correct the cause before the next sharpening session.

16. Polish the Bevel Using the Final Finishing Stone: This step may not be necessary, depending on the time available, the degree of sharpness required, and your inclinations. This extra polish probably won’t make a significant difference in the cutting tool’s cutting performance so is often abbreviated during a busy work day. If you use a natural finishing stone or a 10,000+ grit finishing stone, this is the time to use it. Simply repeat the process in step 14 above, but be sure to apply light pressure, keep the stone at least a little wet, and sharpen on both the push and pull strokes. The final finishing stone serves a polishing function, and because it’s grit is so fine, it lacks the ability to distort the bevel badly, so you can take longer strokes and polish the blade on both the forward and return strokes.

17. Polish the Ura: With the bevel polished as finely as you intend it to become, polish the ura on the final finishing stone only. Place the last 1/2” of blade’s length on the stone’s edge (the stone MUST be flat) with the cutting edge parallel with the stone’s length, and the rest of the blade hanging off the stone but supported by your right hand. Press down on the bevel with two or three fingers of your left hand. Be sure to apply even pressure with these fingers. These fingers press down only and do not move the blade. The right hand pushes the blade back and forth and onto and off-of the stone. Take light strokes focusing pressure on the extreme cutting edge, but without lifting the blade’s head.

18. Polish the Bevel (Again): After several strokes on the ura, polish the bevel.

19. Alternate Between Ura and Bevel: Go back and forth polishing the ura and bevel, but keep in mind that you want to limit the number of strokes on the ura side (assuming it’s already highly polished as discussed above).

20. Examine the Edge: Check the full length of the cutting edge frequently with your eyes, fingertips and fingernail. The burr should be gone entirely. The edge should be sharp, and absolutely smooth. All the rougher scratches from previous stones should have disappeared. I make a final sharpness test by shaving an ultra-thin slice of skin from a callous on a finger allowing my bones to sense the degree of sharpness. This method is much more accurate than shaving hair off the arm. If you try it please don’t draw blood.

21. Clean, Dry and Oil: After you are done sharpening the blade, rinse it with clean water or sharpening solution (Item 5 in Post 17) and wipe it dry on a clean cloth or paper towel. You may want to strop it lightly on a soft clean cloth (or the palm of your hand, if you are confident in your abilities) to remove hidden water. I recommend applying a spray liquid rust preventative to the blade that displaces moisture, such as CRC Industries’s 3-36 or WD-40. CRC3-36 is paraffin based, floats water out of the blade’s nooks and crannies, and leaves a film that will prevent corrosion long term. However, please note that, while WD-40 is readily available, very convenient and displaces moisture, it evaporates entirely and is therefore not adequate for long-term corrosion protection. If you are going to use the blade right away, a little oil from your oilpot is cheap, convenient, and will do the job just fine.

With practice, and assuming you have not let your stones become too distorted, this entire process from Step 1 should take no more than 10~15 minutes. This assumes the blade is chipped or damaged and you need to correct the bevel or use a honing jig. Honing jigs slow the process down but are convenient when using rough stones and coarse diamond plates.

If the blade is in good shape and just needs normal sharpening, the goal should be 5 minutes from the medium grit stone in step 11. If you can’t do it that quickly right away, don’t rush, just practice and get a little quicker each time: Remember the turtle with the sail: Festina Lente: Slow is smooth; Smooth is fast.

Note: If you are sharpening a new blade, or the ura needs to be trued and/or repaired, work the ura on all the stones used in the steps above, but be careful to limit the number of strokes on the rougher stones to the absolute minimum. Also, instead of keeping just 1/2” of the blade’s length on the stones, move it diagonally in and out towards the blade’s center to prevent the stones from digging grooves into the lands at the right and left of the ura. Use special care during this process.

I recommend covering at least your finishing stone with something when you are not using it to protect it from contaminating dust. I simply wrap mine in a sheet of newspaper. It doesn’t take any time or money. Some stones prefer to read the sports pages, others prefer current affairs or the fashion page. Mine seem to like the funny pages. Just ask them.

Conclusion

I am confident the techniques described in this series of posts will prove useful if sharp tools matter to you. Your tools may not talk much, but if you train yourself in these techniques I promise they will sing their appreciation.

I trust the gentlemen that taught and mentored me would be pleased with the content in this series of articles, although I doubt they have time for reading nowadays. I’ll make the introductions, so let’s ask them when we meet again in the big lumberyard in the sky.

In the next and final article in this series, we will consider how to restore a worn-out ura in a plane (and maybe even a chisel) blade. Is there no end to the excitement? Until then, I have the honor to remain,

YMHOS

If you have questions or would like to learn more about our tools, please click the see the “Pricelist” link here or at the top of the page and use the “Contact Us” form located immediately below.

Please share your insights and comments with everyone in the form located further below labeled “Leave a Reply.” We aren’t evil Google, fascist facebook, or thuggish Twitter and so won’t sell, share, or profitably “misplace” your information. If I lie may Mama Shishi bite my head off.

Leave a comment

The Tale of the Blacksmith’s Granny

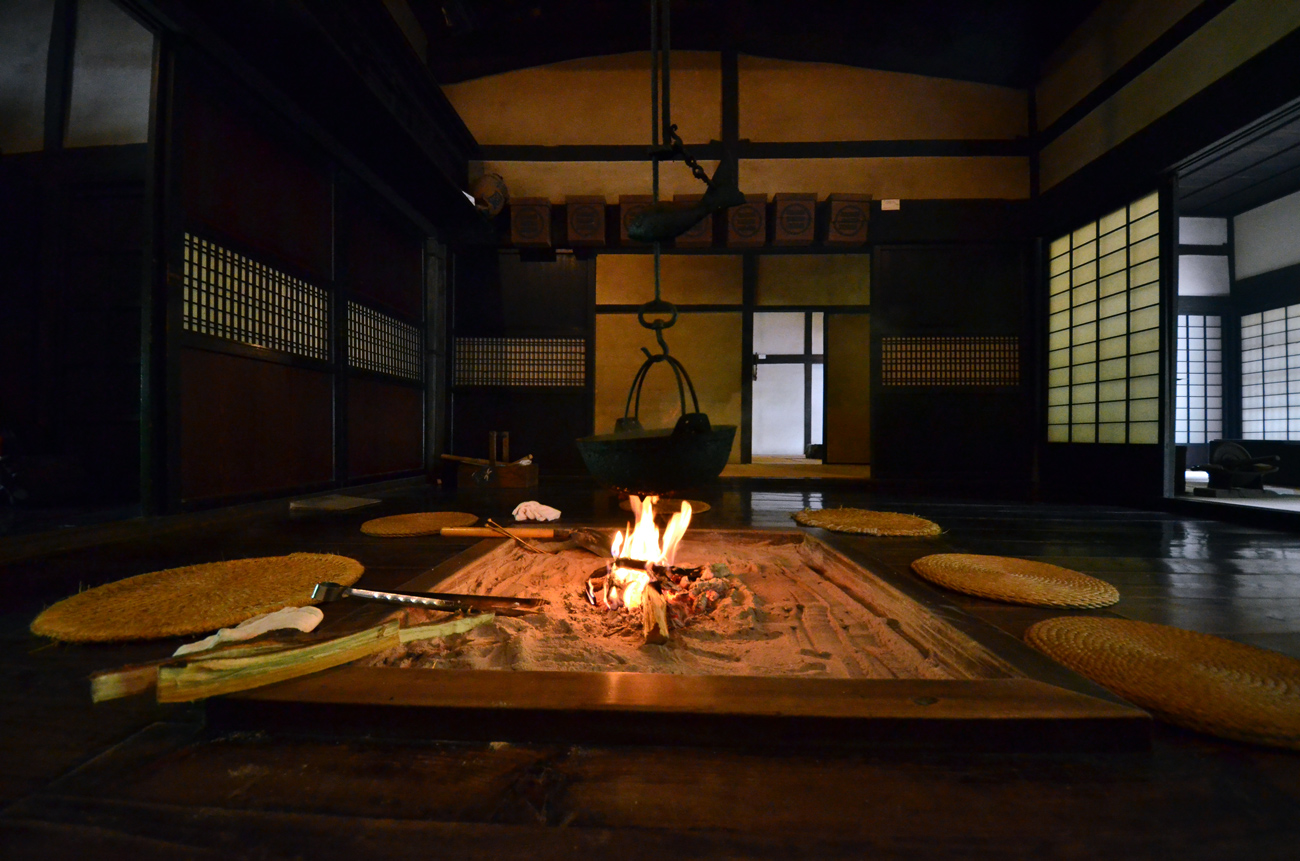
The following is an old country folktale of the sort a grandfather would tell his grandchildren before bedtime. So imagine you are little boy or girl sitting around an irori fire with your family on a full-moon autumn night, with the wind rustling the dried leaves on the trees just outside the closed wooden amado doors, as your white-bearded grandfather tells you this tale. Don’t be frightened!

This image has an empty alt attribute; its file name is a0220433_938222.jpg

Long ago and far away a traveling merchant was crossing over a mountain in the country of Oki in Japan (Sanin area) at  sunset. As he reached the highest point he came upon a large lone pine tree with a crotch at about twice a man’s height. Using a bit of rope he always carried, the chubby merchant managed to pull himself up into the crotch and fell soundly asleep as the darkness deepened around him.

Hearing a strange sound, the merchant woke suddenly and was shocked to see his tree surrounded by dozens of large, long-toothed goblin cats glaring up at him in the darkness and yowling. He panicked fearing the monsters would jump into the tree and attack, and him without any way to escape. But all he could do was sit in the tree and pray the goblin cats would just go away.

At some point the beleaguered merchant began to realize the goblin cats were not just yowling but were actually speaking words he could just make out.

“My fellow goblin cats” said the boss cat. “That plump human in yon tree is the perfect main course for our banquet tonight, but obviously we can’t wait here all night for it to fall out.” The largest cat proposed a solution. “Noble goblin cats, I tell you what; I’ll climb the tree and push the fat lump out. When he hits the ground you jump on him, and our feast will  be secured.” Without waiting for a response from his demonic feline friends the goblin cat placed a stick against the tree’s trunk, extended his sharp claws, and using the stick for his first step, slowly crept up the tree trunk towards the intended victuals.

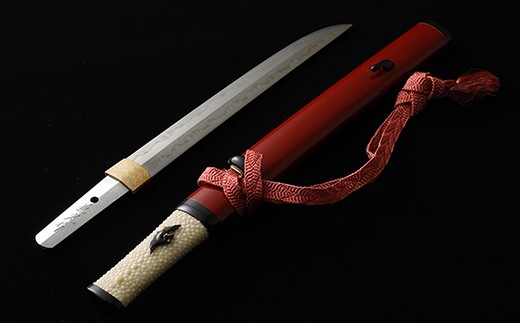
Hearing these strange words and seeing the boss goblin cat’s preparations, the merchant realized he was facing a sticky end best avoided, so he quietly unsheathed his long 9sun 5bu dagger (288mm, 11.3 inches) and readied it for the cat’s attack. (If you like blades, here are some links to YouTube videos of beautiful formally recognized historical examples: (Yoshimitsu tanto (designated National Treasure); A tanto by Sukesada of the Osafune School of Bizen in the “yoroidoushi” style intended to penetrate armor. A tanto designated as a “Tangible Cultural Property” with the name “Uebataima“.)

The plump merchant couldn’t see anything in the poor light, but he heard the frightening sound of the goblin cat’s claws cutting into the treebark as it climbed “Zaku.., zaku…, zaku..” 

He thought to himself “Here it comes!” “Just a little more now!!”

Suddenly the merchant saw the cat’s face just as it leaped at him with hooked claws extended and salivating fangs bared, but the merchant’s dagger pierced deeply into the big goblin cat’s abdomen releasing a fountain of blood, killing it instantly. The cat’s body collapsed in the same tree crotch with the merchant.

The goblin cats surrounding the base of the tree yowled and screeched like the demons from hell they were as they circled the tree’s base, shredding the bark with their wickedly sharp claws, then yowled and screeched some more. At last one of the evil creatures calmed down enough to say “It seems tonight’s dinner is more formidable than we first thought.” Hearing this, the merchant pushed the dead goblin cat’s limp and sticky body out of the tree so it landed with a wet thump right in front of furious goblin cats circling below.

Looking at their expired leader’s body, the goblin cats all jumped twisting into the air, cutting with their claws, spitting, frothing, screeching and yowling even harder. Then one said angrily “Now dinner’s gone and done it! This means war!” Spitting, hissing, and screaming things I won’t repeat to you children the goblin cats all scrambled up the tree towards the merchant getting in each other’s way and making a real hash of the job. In the confusion the merchant, who wasn’t really all that good with weapons, used his dagger to hack and stab every goblin cat that came within his reach killing and injuring more of the monsters.

The surviving goblin cats stopped their reckless attack and huddled panting and bloodied at the tree’s base arguing how to deal with this difficult menu item. “What shall we doooooo! What shall we doooooo!!“ they yowled up at the sky in frustration.

As they gradually calmed down one cool cat said “We must avenge these foul murders even if we all die in the attempt.” Another cat added “I’m not afraid to die but I worry about what will become of our mates and kittens if we are killed.”

The cool cat thought for a minute and finally said “Ok, here’s what we’ll do. Let’s go ask the blacksmith’s granny for help.” And with that all the goblin cats sped off into the dark like greased lightning.

Seeing his chance to escape, the merchant sheathed his dagger, gathered up his pack, and started to climb down from the tree. But before he could lower himself all the way down from his perch in the tree he heard the rhythmically chanting voices. In the dim light of the rising moon the merchant could just make out a palanquin born by six goblin cats chanting in cadence and surrounded by many others approach and stop beneath his tree. 

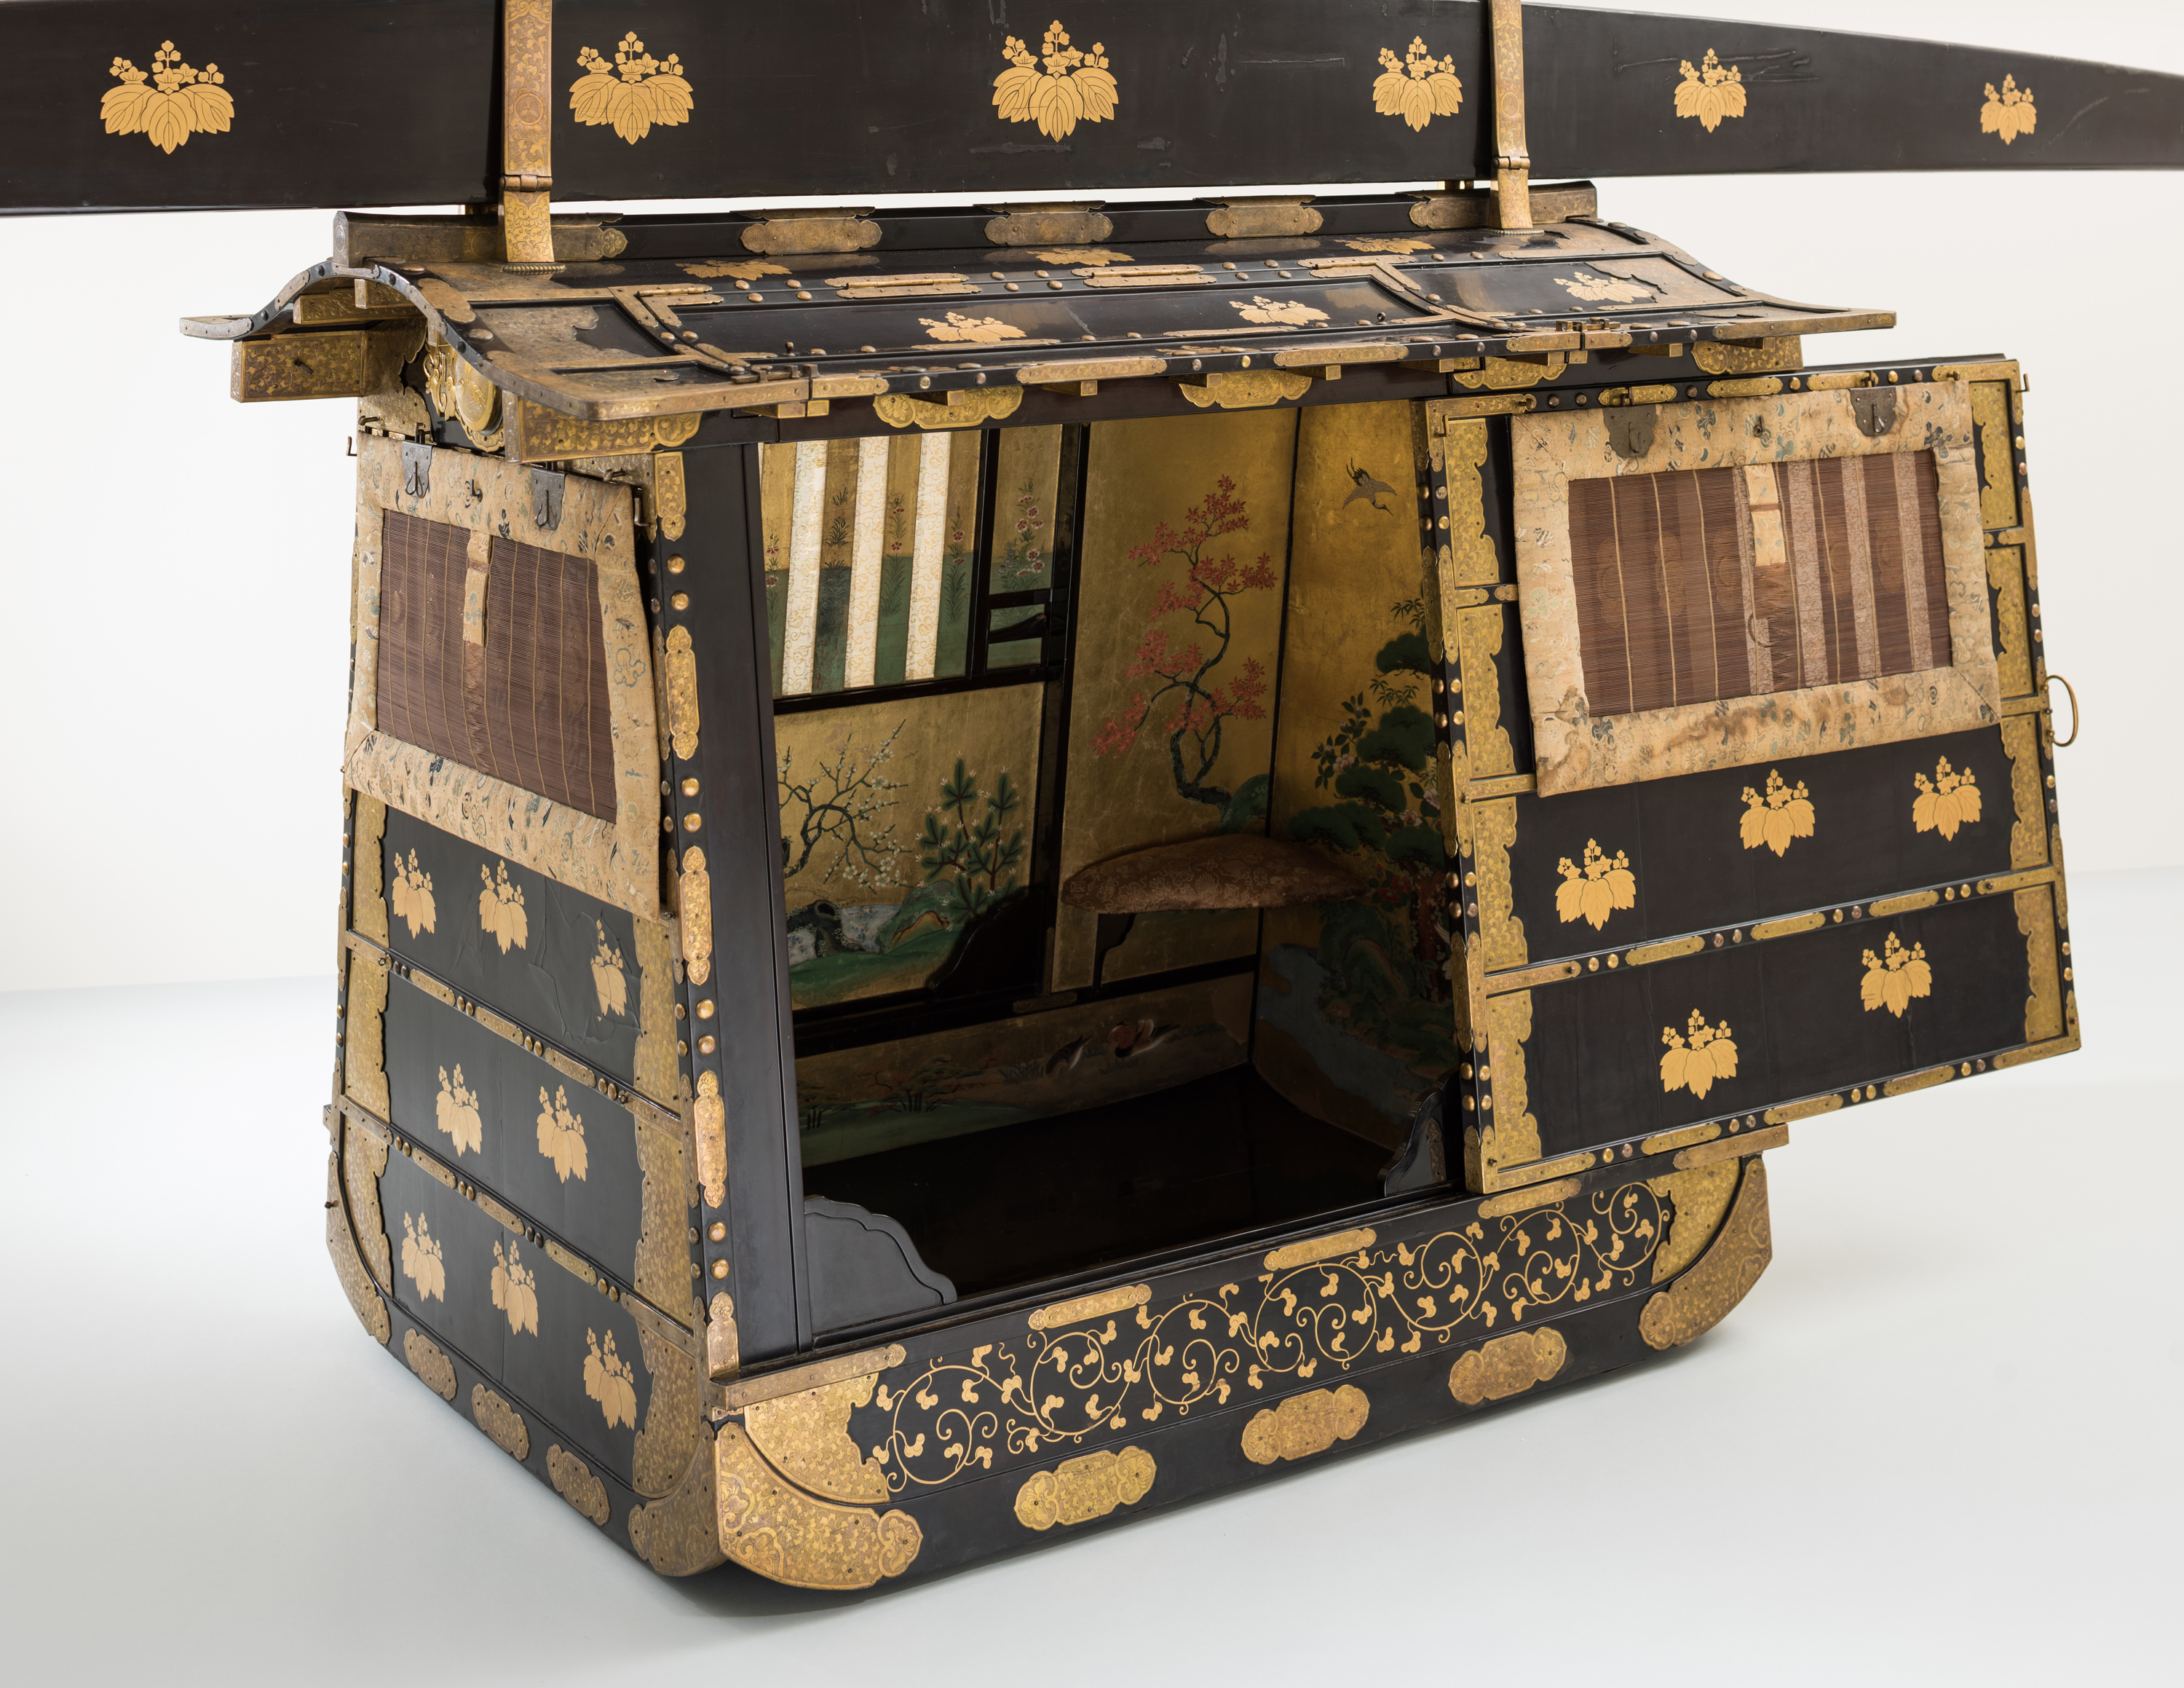
Cats carrying a palanquin. Is the blacksmith’s Granny inside?
The interior view of a luxurious lady’s palanquin. A noble lady would have been carried in this conveyance by her female bearers

“This is the place, Granny.” “Please knock that fat human out of this tree so we can eat him at our banquet!” beseeched the goblin cats. 

The palanquin door slowly slid open revealing not a human grandmother but a huge white goblin cat of great dignity wearing a sleeveless kimono with a snow-white shawl over its shoulders. The monster rolled its large eyes in disgust at the smaller goblin cats and said “What is wrong with you useless ninnies?! Can’t you even take care of a pitiful human like that? You bunch are hopeless as yakuza.” 

She paused her berating of her fellow goblin cats, and gazing up into the tree said “Well, I suppose I must knock this human out of the tree myself. Such a bother! You useless idiots stay out of my way now.”

With one voice the smaller goblin cats all yowled “Thank you Grandmother!”

Grandma cat removed her white shawl and handed it to the closest younger goblin cat, then began carefully testing her claws on the tree trunk. When her claws were ready, and without a second look up at the trapped merchant, she slowly began to climb the tree.

Let me pause here, children, to catch my breath and wet my whistle….. Ahh, thank you Hanako, an excellent libation indeed! Your mother’s sake brewing skills improve every year. And you helped, did you? An excellent child. Well done. Just one more sip.

Ah yes, and where was I? That’s right. The huge white goblin cat, who did not look anything like a granny at all, was slowly climbing a tree high in the moonlit mountains, one sharp claw at a time, to kill a plump, tasty human who had repelled and killed several precious members of her goblin cat yakuza gang.

So far the frightened merchant had bravely driven off every attack, but this time his legs were shaking with dread at the memory of the many goblin cats and the boss goblin cat that had attacked him already, but to make things worse, now a huge white monster goblin cat had arrived in a deluxe palanquin no less, and was climbing his tree! What terrible creatures they were! Can you imagine it little children?

Once again he heard the zaku.. zaku… zaku sound of claws cutting into the tree coming closer, but this time the pace seemed slower than before, perhaps because the newly arrived goblin cat was older and bigger. The poor merchant’s whole body shook like a leaf with fear.

It’s getting closer…. It’s almost here!! 

But after another minute passed the big goblin cat still hadn’t reached his roost, so the merchant began to hope he might be able to to fend off the monster with his blade.

He gripped his knife tighter in his sweaty hands… and raised it over his head… just like this!

Suddenly the big goblin cat’s huge eyes appeared right in front of the treed human’s face. Gyaaaaaaa! he screamed in fear.

The monster struck out with its wicked, curved claws cutting the shocked merchant’s face deeply. But the merchant recovered his senses, and despite his injury, cut about wildly with his knife.

The big white goblin cat jumped up onto a limb of the tree and deftly swatted away the merchant’s frantic blows with her huge paws.

In between blows the man and the goblin cat spat curses and gasped for breath covering each other’s face with stringy spittle.

Image

Although it seemed like the battle continued for hours, in less than a minute the merchant had been driven out to the end of the tree limb with no room to retreat. Suddenly, one of the goblin cats down below called out in despair, “Oh no, the sun is rising!”

Hearing this, the big white goblin cat stopped her attack, jumped down from the tree, stepped briskly into the palanquin, slid the door closed, and raced down the mountain road followed by all the other goblin cats scrambling like cockroaches in the sunlight.

As the sun began to rise in the East, the panting merchant collapsed back into his tree crotch. He thought about running far away from the terrible place until he recalled how afraid the goblin cats had seemed of the morning sun. And he thought of getting revenge for his injuries too, but confident there were enough hours of daylight left to make a decision, he collapsed back into his tree crotch and fell into an exhausted sleep. As he slept, he remembered the goblin cats that had first surrounded his tree saying something about the blacksmith’s grandmother.

When the sun was high and bright, the merchant climbed down from his tree, sore in every joint and with deep and painful cuts on his face, and followed the path down the mountain the goblin cats had taken. After he had walked a while he began to hear the “tink tonk tink tonk” sound of a hammer striking metal. Soon he came upon a small blacksmith’s shop with a house nearby. Inside the smithy was sweaty man hammering away at a hoe blade.

“May I ask you a question, good blacksmith?” said the merchant. The blacksmith paused his hammering, looked over the cut and bloody merchant and responded “Yup, what do you want?”

The merchant said “I heard there was a grandmother living around here….”  The blacksmith pointed his hammer towards the house and said “Well, maybe. My granny is been sick and hasn’t left the house over there in a long time.” He raised his chin, squinted his eys at the disheveled merchant, just like this, and asked sharply, “What’s your business?” The merchant calmly answered “I have something to deliver to her.” The blacksmith then asked “Who is it from?” The merchant said “they didn’t give their name, just handed me this package and left.” The package the merchant was holding contained a whole yellowtail tuna fish he had bought at a fishmonger’s shop on the way. It wasn’t a very fresh fish though, and stank badly.

The blacksmith gave the merchant a distrusting look, when from inside the house they heard a hoarse voice croaking out “Saburo!” The blacksmith’s name was apparently Saburo because he called back “Yes, grandmother?” The voice answered “What’s going on?” Saburo answered “Somebody brought you a big fish, grandmother.” “Well, what are you waiting for, bring it here.”

With that, Saburo accepted the stinky fish and took it inside the house. When he returned, the merchant whispered to him explaining the events of the night before and pointing at the deep cuts on his face and arms as evidence. But the blacksmith would not believe the strange story and responded “That’s ridiculous!” “But I tell you, it’s true” said the merchant. “If you doubt me, just take a look for yourself.”

The two men then walked around to the back of the house as quietly as a pair of tiny mice wearing fuzzy bunny slippers, slid open the shoji doors into grandma’s room just a crack, and peered inside where they saw an old woman wearing a white kimono sitting up on her futon. The old woman reached out to the package containing the fish, brought her nose close, and smelled it  “sniff, sniff.” As the two men watched, she greedily snatched the big raw smelly fish from inside the paper packaging and began to greedily bite off large chunks and swallow them.

Related image

With this, the merchant slammed open the shoji door, and jumped into the room. Saburo was too shocked to do anything but let out a roar of indignation. Surprised by the sudden noise, grandma turned back into her true form of a huge, white goblin cat, but before she could attack or flee, the merchant drew his sword and cut down the monster which leaked rivers of bright blue blood and died right there, thank you very much.

Saburo was so shocked by seeing his grandmother change into a monster and then die in a puddle of blue blood he could do nothing but stand there with his mouth hanging open as flies buzzed in and out. 

Finally, the merchant asked “How long has she been alone in this room?” Saburo closed his mouth, opened it again, and said “About three years now.” “Three years, huh? Well your real grandmother is nothing more than bones by now, I wager.”

At the merchant’s urging, the blacksmith and his neighbors searched the house, and towards evening they found a pile of white bones wearing the Blackmith’s grandmother’s kimono under the floor, meaning the big white goblin cat had killed grandma and had been passing itself of as her for 3 whole years.

A sad but all too common story. Time for bed now my little ones.

(A folk tale from Oki Province)

YMHOS

If you have questions or would like to learn more about our tools, please click the “Pricelist” link here or at the top of the page and use the “Contact Us” form located immediately below.

Please share your insights and comments with everyone in the form located further below labeled “Leave a Reply.” We aren’t evil Google, fascist facebook, or thuggish Twitter and so won’t sell, share, or profitably “misplace” your information. May a goblin cat nibble on my eyeballs if I lie.

Hammers to Use With Chisels Part 5 – Rhythm & Song

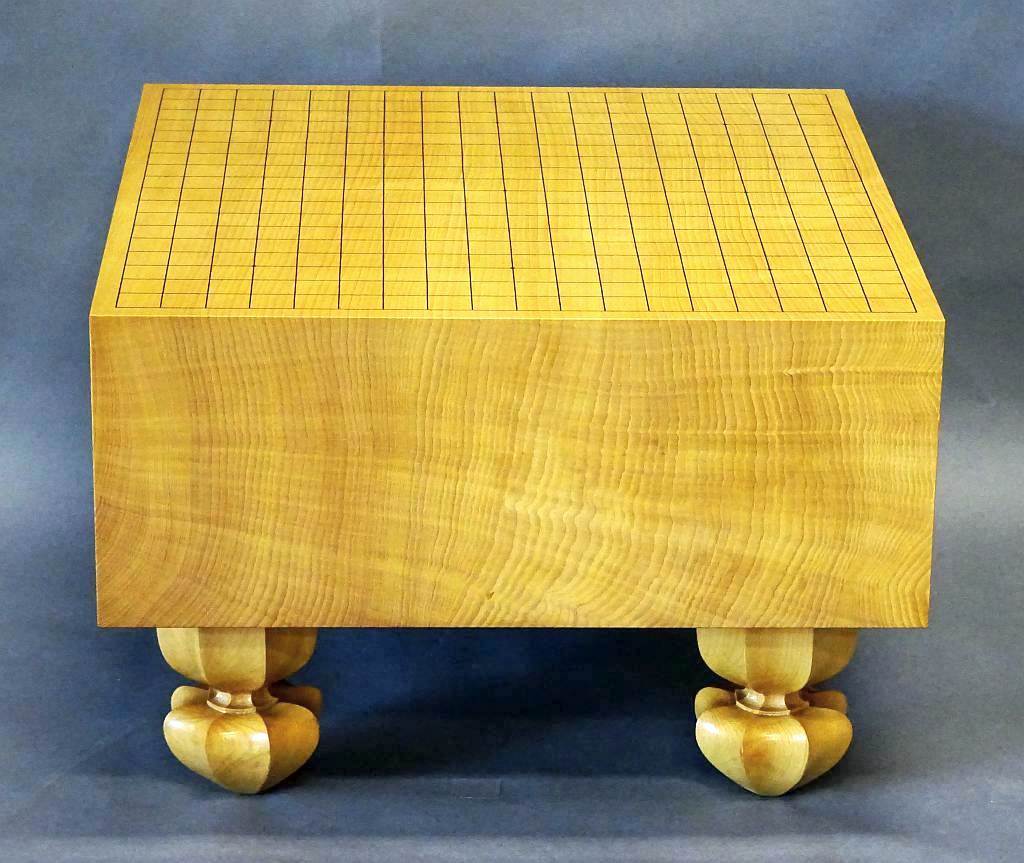
A masterpiece goban made in 1910 from a single block of wood. Overall height: 29cm (11.4″); 45.2×42.4cm (17.8″square) x thickness: 16.1cm (6.3″). This is the old style goban and a little smaller than modern models.

This life’s hard, but it’s harder if you’re stupid.

George V. Higgins, The Friends of Eddie Coyle

In previous articles in this series about the characteristics of the hammers Beloved Customer should use with C&S Tools’ chisels, we looked at factors such as the type of hammer, the sort of face it should have and how much it should weigh. We even examined ways to use our chisels and hammers as an efficient but dangerous team when cutting mortises, and how to avoid the dreaded chisel wiggle. Your humble servant trusts it was a footloose and gleeful read.

This time your humble servant will delve a little deeper into how to deploy a hammer and chisel team.

The photos above and below are of gameboards, and while gameboards are not really the subject of this post, these photos illustrate an aspect of precise work with chisel and hammer intended not to create a shape to please the eye, but an artistic sound to improve concentration. Perhaps you never have thought about using a chisel to make beautiful sounds, but many of our Beloved Customers that make musical instruments professionally are focused like a laser on this very objective. I hope you will find this little article amusing.

Natural Frequency

Much hammer and chisel work performed by professional woodworkers is repetitive with motions repeated thousands of times in a single day, each motion consuming time and energy, hopefully with precision and speed. Are time, energy, precision, and speed important to you? I propose that “Sure and steady wins the race,” sooner and more efficiently than a 2lb steel woodpecker on meth. If these factors matter not to you, then let me know and I will include some colorful bubblewrap in your next order for entertainment purposes.

If you studied pendulums and harmonic motion in physics classes you are aware that every moving object, from watch balances, to buildings, to mountain ranges (yes, mountains wiggle) have a natural “frequency” that defines the vibration of that object when subjected to specific forces. This reliable characteristic is why both mechanical clocks and a quartz crystal timepieces can keep accurate time. Like the pendulum in a grandfather clock, within a certain range of energy input, the longer and heavier an object is, the longer it’s natural frequency is likely to be.

In the case of hammer work this means that a man with a long, heavy arm and hammer combination will naturally swing a hammer cyclically slower than a man with a shorter, lighter arm/hammer combination. That does not mean one is better than the other, it just means that an arm/hammer combination will work most effectively if the assembly’s natural frequency is worked with instead of fought against.

There are several ways to reliably adjust this natural frequency, for instance changing the weight of the hammer/chisel combination, or changing the length of the hammer handle. The closer the hammer’s weight and length are to the ideal for a particular arm/chisel/wood combination the easier it becomes for us to consistently adjust the assembly’s frequency and rhythm of the cutting process while controlling the impact force and thereby the depth of cut.

Rhythm

So let’s say we have the hammer/chisel/wood/arm combination (or saw/wood/arm combination) where we need it to be and we start cutting wood in a repetitive motion. If we keep this motion consistent, like a clock pendulum, we will develop what in music is called “rhythm,” a phenomenon deeply rooted in the human beast. Rhythm is critical to cutting speed and precision. Anything that breaks that rhythm other than the job being completed is counterproductive.

Rhythm has psychological benefits too because it helps us to maintain focus and thereby accomplish more work quicker and more consistently.

But how does one maintain rhythm when cutting mortises? Perhaps you have an internal metronome. If not, it may help to take advantage of an extremely ancient tool called the “work song,” later called the “sea shanty.” These were songs sung by men and women working in groups to coordinate and make more efficient their physical labor, whether planting rice seedlings in flooded fields, pushing wagons over mountains, dragging logs through forests, or pulling soggy ship anchors up from the depths. If the song is in your head instead of just your ear you can easily adjust the song’s rhythm to match the natural frequency of your body and your tools.

I hum a work song when I do repetitive chisel work. I suppose three of my favorites are “What will we do with drunken sailor,” “The Wellerman,” and “Roll the Old Chariot Along.” There are also lots of old plantation and work gang songs that work well. Three modern tunes I find myself humming sometimes are “Señorita,” Havana” and “Poker Face,” depending on my mood. Here is another, more unusual version by an entertaining German polka band.

While the six songs listed above certainly illustrate the exquisitely refined taste in music your servants at C&S Tools possess in buckets and barrels, there are a few points I need to make. First, the words don’t matter at all. Second, the tune doesn’t matter so long as you like it, it isn’t tedious, and you can adjust the tempo in your mind’s ear to help maintain the rhythm of your chisel work. And third, Spanish-language novellas are best avoided. (ツ)

Just so there’s no confusion, unlike Miss Germanotta, I don’t wear a sequin bikini and white Gestapo hat when I hum Poker Face while sawing wood or chopping scarf joints. If I shaved my legs and trimmed my beard I am confident I would look devastating in such an outfit, but I must refrain for some of my chisels are quite sensitive in matters of decorum. Don’t hate me because I’m beautiful (ツ)。

Summary

The main points I wanted to make in this article can be summarized as follows:

  1. Whether you realize it or not, your chisel, hammer, and body have a natural frequency that you can either work with to your advantage, or fight against;
  2. Using the principles listed in earlier posts in this series you can develop a chisel/hammer combination that balances well with your body, adjusting your natural frequency to improve your productivity and precision;
  3. Develop a rhythm when doing repetitive work that compliments your natural frequency and that helps you maintain both focus and a steady wood-eating pace. Work songs really help. Sequin bikini, Ray Bans, and facial iron mongery are optional.

Well that’s enough German polka music and doggie apparel for now. In the final article in this series we will examine some health matters related to hammers. Y’all come back now, y’hear.

YMHOS

The traditional Japanese roof structure. Notice that no members are subject to tension forces, only compression and bending. Notice also that the bottom of the central beam is finished with just an adze in the classical “naguri” style.

If you have questions or would like to learn more about our tools, please click the “Pricelist” link here or at the top of the page and use the “Contact Us” form located immediately below.

Please share your insights and comments with everyone by using the form located further below labeled “Leave a Reply.” We aren’t evil Google, fascist facebook, or thuggish Twitter and so won’t sell, share, or profitably “misplace” your information. If I lie may all the sequins fall off my lederhosen!

Leave a comment

Part 1 – Hammer Varieties

Part 2 – Hammer Faces

Part 3 – Hammer Weight

Part 4 – The Chisel Cha-Cha

Part 5 – Rhythm & Song

Part 6 – Hammers & Health

Sharpening Part 28 – The Minuscule Burr

Do the difficult things while they are easy and do the great things while they are small.

Lao Tzu

A key milestone Beloved Customer should aim for when sharpening a blade is the production of a “burr” at the edge when abrading the bevel (not the ura) using the first rough stone in the series. The formation of the burr indicates that the extreme edge of the bevel side of the blade has probably been abraded enough.

In this post in the Sharpening Japanese Tools Series, we will examine how to raise this burr and why it is important to do so, how to use the burr to test the condition of the cutting edge as you are sharpening, and how to transition from one stone to the next finest stone in the series

Raise a Burr

The steps in creating and then abrading away a burr. The size of the burr in step 2 is grossly exaggerated for clarity. Indeed, unless severe damage to the edge needs to be repaired, you should not normally be able to detect the burr by Mark 1 Eyeball alone.

Japanese plane and chisel blades tend to have harder steel at their cutting edges than Western chisel and planes, and consequently, their steel does not exhibit the plastic deformation necessary to readily produce large burrs, or “wires” as some people call them, when being sharpened. In fact, “burrs” on professional-grade Japanese chisel and plane blades may be difficult to detect.

The key point to remember is that the formation of a burr is only a milestone in the sharpening process, not a goal. A clean, uniform, smooth burr signals the elimination of all major defects, chips, and dents at the cutting edge. Indeed, if we seek an efficient cutting edge, we must remove through abrasion enough metal to also remove the deepest defect in the cutting edge. But regardless of the ductility of the steel, a large, loopy burr or “wire” is not desirable because it will tend to break off prematurely leaving a jagged, ragged edge that will actually set back the sharpening process.

The milestone we need to pass in the sharpening process as soon as possible is the creation of a barely-detectable, tiny and clean burr. My advice is to produce it by abrading only the bevel side of the cutting edge on your roughest stone, although you may not be able to test if it is clean until after a few strokes on the medium-grit stone (1000 grit).

As we discussed in a previous post in this series, the way to keep the size of the burr minimal and the blade’s bevel flat is to focus the pressure of abrasion as close to the extreme cutting edge as possible, but without overbalancing and gouging the stone and dulling the edge. This is the most essential skill in freehand sharpening.

Now that we have a burr, let’s test it.

Testing the Burr

As you are working to produce the burr, you will need to frequently and quickly test its progress, but that can be difficult, if not impossible, to do by eye alone.

To make this process easier and quicker, rub the pad of your thumb or finger over the ura’s edge, away from the cutting edge, thank you very much, when using your rough stones. Your fingerprint ridges will snag on the burr long before you can see it. If the edge is chipped or damaged, the burr will not be consistent but will be interrupted at each defect. There is nothing at all to be gained and much to lose by allowing the burr to become larger than absolutely necessary, so pay attention.

Once you have produced a small burr the full width of the cutting edge, and confirmed its existence with your fingertips, you then need to test it for defects. If you run your fingernail along the burr’s length (the width of the blade), your fingernail will snag on nicks and defects in the burr, something your nerves can sense long before your naked eye can detect them. Keep working the blade’s bevel on the rough stone until the edge and/or burr is consistent across the full width of the blade, and free of nicks, dents and chips.

In the case where you need to remove serious damage to the cutting edge, you may want to use a loupe to ensure the defect has been transferred entirely to the burr and no longer remains in the cutting edge.

In the case of quality Japanese woodworking blades, if you are careful to focus the abrasive effect of the stones on the extreme cutting edge instead of the rear of the bevel, the burr created before moving onto the medium grit stones should be barely detectable or even non-existent. Once again, except in the case of removing large nicks, chips or other severe damage, creating a big burr is not only a waste of time, stones and steel, but if, heaven forfend, the large burr is torn off during sharpening, it will leave behind a tragic amount of damage that must be repaired by once again abrading the edge and raising a new burr. Don’t start chasing that tail.

Best to create just enough of a burr to confirm that damage has been removed and then encourage it to evaporate.

Don’t forget to check the angle of the bevel with your hand-dandy bevel gauge. See the section on Pixie Predation Prevention & Pacification in Part 11 of this series.

After the burr is in good shape, polish the bevel on the medium and then fine stones. The burr will be polished away evaporating without special effort.

Finally, polish the ura side of the blade on the finest stone you intend to use. Feel the burr with your fingerprints and check it with your fingernail. Then polish the bevel on the fine stone. Repeat this front and back polishing process until the burr is polished away entirely.

Assuming the ura is already polished on your finest finishing stone, you shouldn’t need to touch the blade’s ura again on any stone until the final finishing stone.

Transitioning From One Stone to the Next

Recall that the purpose of each stone used after the roughest stone in the series is simply to replace the deeper scratches left by the preceding stone with finer scratches. In fact, there is nothing to be gained and much to lose by moving onto a finer stone before all the scratches from the previous stone have been replaced, so please check that all the scratches from the previous stone have been polished out before moving to the next.

This is not always easy to confirm without magnification, so to make it easier and surer, I suggest you skew the blade’s bevel on all stones but the final finishing stone for the last 3 or 4 strokes creating new diagonal scratch marks on it.

These skewed scratches will be at a different angle than those produced by the next stone, of course, and will be easy to differentiate from the new scratches with the nekid eye. When the next finest stone removes them entirely, you will know you have probably spent enough time on that stone, and can go to the next. But don’t forget to skew the blade again before going to the next stone.

Of course, there is no need to skew the blade on the final finishing stone.

Summary

We have discussed three important sharpening techniques in this article which you must master if you have not already:

  1. Raise a burr by abrading the blade’s bevel on your rough stones using your skillful technique;
  2. Test the burr for size and completeness using your fingertip ridges, and for defects using your fingernails. If the burr is incomplete or has detectable defects, continue to work the blade on the rough stones on the bevel side only until the burr is good.
  3. Skew the blade during the last 3~4 strokes on each stone (except the final finishing stone, of course) to create diagonal scratches. When all those diagonal lines are polished off by the succeeding stone, you will know it is probably OK to move onto the next finest stone in the series.

You now have powerful tools at your disposal that can sense the state of a steel blade as thin as the edge of nothing, and without using your eyes, tools you’ve always had and which didn’t cost you a thing. How’s that for value? (ツ)

Be forewarned, however, that if you use these techniques you may be forced to choose between a glamorous career as an international professional fingernail model or the quiet life of an expert woodworker. What to do, what to do…..

In the next and final post in this series we will use all the aspects of the sharpening process discussed previously to sharpen a blade step-by-step. Be there or be square.

YMHOS

The University of Tokyo’s Yasudo Kodo building hidden behind Autumn Ginko leaves.

If you have questions or would like to learn more about our tools, please click the “Pricelist” link here or at the top of the page and use the “Contact Us” form located immediately below.

Please share your insights and comments with everyone in the form located further below labeled “Leave a Reply.” We aren’t evil Google, fascist facebook, or thuggish Twitter and so won’t sell, share, or profitably “misplace” your information. If I lie may my eyebrows grow 10 inches everyday.


Leave a comment

Other Relevant Posts

The Challenges of Professional-grade Japanese Chisels

Hammers to Use With Chisels Part 4 – The Chisel Cha-Cha

Your Most Humble and Obedient Servant hard at work. A dab of skin lotion may be called for.
Stan Laurel

You can lead a horse to water, but a pencil must be led.

Stan Laurel

In previous articles in this series about hammers to use with our chisels, your humble servant discussed the varieties of suitable hammers, the appropriate faces on those hammers, and recommended some weight guidelines. In this article we will examine some important hammer and chisel techniques Beloved Customer should consider to make your chisel work more efficient and your chisels last longer

The Chisel Wiggle

Something to keep in mind about our chisels when beating on them is that their cutting edges are intentionally and carefully hand-forged and heat treated by experienced blacksmiths (none with less than 40 years independent experience) to be especially hard to meet the demands of professional craftsmen for the extra sharpness and cutting longevity only hard, fine-grained steel makes possible. They are not the sharpened Chinese-made chisel-shaped screwdrivers sold by the big corporations that amateurs are accustomed to using nowadays.

To maximize the advantage such excellent steel affords, Beloved Customer must avoid driving the chisel so deeply into the wood when cutting mortises, for example, that the extreme cutting edge binds in the wood forcing the user to wiggle the chisel forward and back to loosen and extract it from the cut. I call this undignified movement the “chisel wiggle.”

Your humble servant realizes this is contrary to what many woodworking gurus with their soft-as-butta chisels teach, but I unabashedly assert that it is irresponsible behavior in the case of our professional-grade tools because binding the blade in the wood this way creates what I call a “high pressure cut” situation, placing a tremendous amount of clamping force on the thin metal at the extreme cutting edge. Doing the “chisel wiggle” in this situation will damage the cutting edge dulling it quickly. If you doubt this, please dig out your hand-dandy loupe and do a before-after comparison.

In addition, the time lost extracting the wedged-in-place chisel and the resulting interruption in the workflow caused by repositioning one’s hands, and perhaps even setting aside the hammer (egads!) while doing the chisel wiggle, makes it impossible to maintain an efficient cutting rhythm. If you doubt this, we double-dog dare you to do timed comparative tests. The difference in efficiency will become instantly clear.

People accustomed to using Western chisels with their softer, plasticy blades made from high-alloy high-scrap metal content steel with higgledy piggledy crystalline structure are actively taught to use the chisel like a crowbar to lever waste out of cuts. This is another type of “high-pressure cut” that damages the tool’s cutting edge at the microscopic level.

The mass-produced screwdrivers sold as chisels in the West nowadays are tough but relatively soft, can’t be made that sharp to begin with, and they dull significantly during the first few hammer strikes anyway, so most people can’t detect the edge degradation the chisel wiggle and prying create. Those who are satisfied with sharpened screwdrivers don’t buy our chisels anyway so I have no advice for those poor benighted souls, only prayers: Namu Amida Butsu. But it is of little matter because they seldom have the sharpening and tool skills required to tell the difference. Horse, meet water; Ah… not thirsty I see.

The Chisel Cha-Cha

Now that we have explained what not to do, let us examine what we should do instead.

Here is wisdom: There are at least three techniques the efficient craftsman should employ, or at least develop skills adequate to deploy, when cutting joints in wood:

  1. Limit the amount of wood included in each cut to an amount easily and quickly cut and easily and quickly removed. Strict control of one’s inner-badger is required;
  2. Stop striking the chisel with hammer during each cut just before the chisel binds in a high-pressure situation, or just before waste clogs the joint. Once again, control of one’s impertinent inner-badger is essential;
  3. And then, without changing your grip on its handle, or losing a beat in your cutting rhythm, flick your wrist forwards or backwards so the chisel blade flips the waste out of the joint you are cutting without any silly levering.

And Voila! No time lost extracting a stuck blade or setting down and picking up your hammer; and no repositioning your grip on the chisel. And the cutting work can continue uninterrupted without the wasted time and effort of extracting a bound chisel all while avoiding a damaged cutting edge.

It’s very much a crisp dance step performed by hammer and chisel with a rhythm something like: “chop, chop, flick, (reposition chisel for next cut)… chop, chop, flick, (reposition chisel for next cut) … chop chop flick.” With each “flick” bits of cleanly cut wood fly out of the joint. I call this series of controlled movements the “ chisel cha cha.”

Next let’s examine the nexus between hammer weight and avoiding the dreaded chisel wiggle.

The Dance of the Hammer and the Chisel

Cha Cha

As mentioned above, the way to avoid the chisel wiggle and instead dance the more efficient and sophisticated chisel cha-cha is to avoid banging the chisel into the cut too deeply/tightly and to limit the waste made with each cut to an easily-removable amount. To dance this dance you need to stop hammering just before the blade binds in the cut, precisely controlling the depth to which your hammer drives your chisel. Easy to say but difficult to accomplish if the hammer is too heavy. On the other hand, too light a hammer is also inefficient. Therefore, there is no one-size-fits-all-situations hammer weight.

A well-balanced, stable hammer with a handle that fits your hand/arm, and of a controllable weight makes it easier to develop and maintain this precise, unconscious control. Lots of factors are involved but the weight of the hammer/chisel combination is the most important one of the bunch.

How to determine the best weight? Of necessity it varies with the chisel, the type of cut being made, the nature of the wood being cut, and the nut holding the hammer so trial and error is the only practical solution. But generally, a hammer that feels a bit on the light side is best. And a good handle makes a world of difference. More on that in future posts, so stay tuned.

Summary

The following summarizes the points you should take away from this series of articles so far.

  1. Select a hammer weight that balances well with the width and weight of the chisel, the hardness of the wood you are cutting, your body, and the type of cuts you are making.
  2. The hammer should not be so heavy that you cannot precisely control the chisel’s depth of cut while maintaining an efficient cutting rhythm close to the natural frequency of the hand/arm/hammer assembly;
  3. Don’t drive the chisel so deeply into the wood that it binds forcing you to wiggle the chisel, or heaven forfend, demands wasteful movements like setting down your hammer to extract it;
  4. Use your sharp chisel for cutting wood, not like a screwdriver or crowbar for levering out waste. Instead, use your sharp blade to quickly cut the waste loose and then remove it from the joint by flicking your wrist without stopping, disrupting your cutting rhythm, or setting down your hammer.

There is nothing to stop you, your hammer, and your chisel from performing as a precise and graceful, but oh so violent, dance team, so enjoy!

In the next installment in this tale of bold hammers and graceful chisels we will examine in more detail the rhythmical motions involved in doing chisel-work efficiently and the role of the hammer in that dance. Sorry, no champagne or pretty girls but there just might be a song or two. Until then, I have the honor to remain,

YMHOS

If you have questions or would like to learn more about our tools, please click the “Pricelist” link here or at the top of the page and use the “Contact Us” form located immediately below.

Please share your insights and comments with everyone in the form located further below labeled “Leave a Reply.” We aren’t evil Google, fascist facebook, or thuggish Twitter and so won’t sell, share, or profitably “misplace” your information. May my chisel forever wiggle if I lie.

Leave a comment

Sharpening Part 27 – The Entire Face

A beautiful face: Oohirayama Lotus stone

If a dog will not come to you after having looked you in the face, you should go home and examine your conscience.

Woodrow Wilson

The subject of how to use the face of your sharpening stone is so basic and seems so unimportant that few give it the attention it warrants. But it is not trivial: it deserves its own post because it can truly make a big difference in the time and money you spend sharpening.

Money Down the Drain

Instead of focusing his attention on the blade alone, a wise man will make a conscious effort to use the entire face of his sharpening stone from edge to edge, end to end, and corner to corner instead of digging an oval swamp in the center of it’s poor abused face.

This habit will help to keep a stone’s faces flatter over more strokes longer, saving time truing the stone, and extending its life thereby saving money.

Remember that you paid money for the stone, the entire stone, not just the hollowed-out oval area in the center most people create when carelessly sharpening. How much of a stone do most people throw away? Idunno,… 20% maybe? Assuming this approximation is correct, just for the sake of illustrating a point, if you paid $100 dollars for the stone, that means $20 was turned into mud and washed away without providing Beloved Customer any benefit at all. And don’t forget the time you spent cutting down those high spots to keep the stone’s face flat. That makes it more than a $20 loss if you count your time worth anything, which you should.

Why not use the sides, ends and corners of the stone’s face too?

Developing Good Habits

When developing these intelligent work habits, it helps to cross-hatch the stone’s surface with a carpenter’s pencil to help you keep track of the areas you have not yet touched. Never fear, for while industrial diamonds are made from graphite, the form of graphite in pencil lead is still softer than the finest sharpening stone and won’t affect the sharpening process a bit.

Also, before and while sharpening, frequently use a thin stainless steel ruler to check the stone’s face lengthwise and crosswise at various locations, and of course on the diagonals to monitor wear. Don’t guess, lazy bones, examine. Between ruler and pencil you may discover you have developed less-than-efficient sharpening habits. With some thought you will also figure out how to change those habits so your sharpening efforts will be quicker and more cost-effective.

Before long, you will be able to detect uneven wear and warpage fairly reliably without using either tool as much, so stick with it until you do.

Hang Ten

One conundrum you have probably already discovered is that it is impractical to use the extreme right and left sides and both ends of the stone’s face to sharpen a blade. Or is it?

Here is wisdom: Teach yourself how to sharpen a blade’s bevel with one corner of the blade hanging off the stone part of the time, alternating evenly and frequently between right and left corners, of course. Strange as it may seem this technique is effective at not only keeping your sharpening stone flatter and making it last longer, but for keeping the cutting edges of your blades straighter. If this doesn’t make sense to you, think about it real hard. Then give it a try and you will see what I mean.

And since you are taking short strokes anyway, why not work the blade crosswise at the ends of the stone? A lot of expensive stone going to waste there, I’d wager.

I hate to sound like a broken record, but you will find that making short strokes will make it much easier to use the entire face of the stone.

If you feel this post needlessly states the obvious, or is “verbose,” allow me to remind Gentle Reader once again that the purpose of this blog is not to provide entertainment, sell stuff, troll for clicks or to trip and roll subscribers into Google Analytics’ s*thole, but to help our Beloved Customers develop good work habits through education. Some of them are newbies, and others are old hands, but if I were to write only for the professionals then I would be neglecting the newbies, so if you know this stuff already please congratulate yourself and celebrate your good fortune by buying a new carpenter’s pencil.

Related image

YMHOS

If you have questions or would like to learn more about our tools, please click the see the “Pricelist” link here or at the top of the page and use the “Contact Us” form located immediately below.

Please share your insights and comments with everyone in the form located further below labeled “Leave a Reply.” We aren’t evil Google, fascist facebook, or thuggish Twitter and so won’t sell, share, or profitably “misplace” your information. If I lie may my face fall off.

Leave a comment

Other Relevant Posts

Sharpening Japanese Woodworking Tools Part 1

Kinshiro Planes 金四郎鉋

Does the Japanese plane in the photo above look a little strange? It should. It’s a specialized plane for cutting decorative latticework used in traditional Japanese joinery and casework. There are more photos of this plane below.

We have a limited number of planes in-stock by a famous craftsman that used the brand name “Kinshiro” 金四郎 when he was active. This brand name translates to “golden fourth man.” It was once common in Japan to give male children names that reflected their order of birth.

Kinshiro is a Niigata Prefecture solo craftsman named Kuriyama Noboru 栗山昇. Born in 1932, he is the second generation in this line. The brand name came from his father’s name, “Kinshiro,” the first craftsman in the line, and reportedly a very severe master. Mr. Kuriyama retired in December 2011. 

Mr. Kuriyama specialized in making plane bodies, but made various other tools as well, including marking gauges, cutting gauges, and kudegoshi using blades provided by his distributor. Mr. Kuriyama’s dual-blade marking gauges (二丁鎌毛引き) are famous even outside Japan.

The blades were forged by a Niigata Prefecture blacksmith named Ishibashi Kenji, who has since left us for the big woodpile in the sky. Mr. Ishibashi used Aogami No.1 steel. I assume he used jigane from the same bridge in Yokohama that Niigata blacksmiths are still using today.

Small tool blades are a niche market served by specialist blacksmiths, so you may have not heard of Ishibashi Kenji-san before, but whatever you do, please do not mistake him with Ishibashi Toshichiro, a Niigata blacksmith who made standard plane blades and got in trouble for unknowingly making weapons for the Yakuza. Tsk tsk. Toshichiro’s blades were unimpressive.

Kinshiro’s products are well-known for their precision, functionality, extremely high quality and subtle style. We have been using Kinshiro products for many years with absolute satisfaction. They have always been expensive, but worth every penny. They have not decreased in value since his retirement.

Although new, and of course never used, these planes are old stock and a few of the blocks have some patina.

Most of them are extremely rare and are no longer made anywhere in Japan. When they are gone there will be no more. We wish we could hold onto them forever, but the time has come to release them into the world.

If you like rare collectable Japanese planes and appreciate exceptional craftsmanship, these will interest you. But don’t wait too long.

The Kinshiro planes we have in-stock are listed in the table below. Prices and more photos are the link below. Even if you aren’t interested in purchasing a Kinshiro plane, the photos are worth seeing. Be our guest. If you have questions please use the Questions Form below.

Link to Photos and Pricelist

ミニ組子 青海波 和風雑貨 インテリア 欄間サンプル タニハタ
ミニ組子 分銅輪つなぎ 和風雑貨 インテリア 欄間サンプル 組子欄間 タニハタ
Kinshiro PlanesWidth
Ireko moulding plane 入子面鉋27mm
Ireko moulding plane 入子面鉋36mm
Etemen Adjustable Chamfer Plane 猿面鉋 30mm 30 °/ 60°
Kiwaganna Skewed Rabbet Plane right hand36mm
Kiwaganna Skewed Rabbet Plane left hand36mm
Kiwaganna Small Skewed Rabbet Plane right hand single blade30mm
Kiwaganna Small Skewed Rabbet Plane right hand single blade15mm
Ovolo Moulding Plane 銀杏面鉋6mm
Ovolo Moulding Plane 銀杏面鉋9mm
Ovolo Moulding Plane 銀杏面鉋15mm
Flat Ovolo Moulding Plane 平銀杏面鉋5.4mm
Flat Ovolo Moulding Plane 平銀杏面鉋6mm
Flat Ovolo Moulding Plane 平銀杏面鉋12mm
Ogee Moulding Plane 瓢箪面鉋6mm
Ogee Moulding Plane 瓢箪面鉋7.5mm
Ogee Moulding Plane 瓢箪面鉋9mm
Ogee Moulding Plane 瓢箪面鉋12mm
Ogee Moulding Plane 瓢箪面鉋15mm
Ogee Moulding Plane 瓢箪面鉋18mm
Ogee Moulding Plane 瓢箪面鉋24mm
Roundover Moulding Plane 坊主面鉋4.5mm
Roundover Moulding Plane 坊主面鉋7.5mm
Roundover Moulding Plane 坊主面鉋9mm
Small Roundover Moulding Plane 豆坊主面鉋2mm
Round Moulding Plane 外丸鉋9㎜
Round Moulding Plane 外丸鉋12㎜
Round Moulding Plane 外丸鉋15㎜
Round Moulding Plane 外丸鉋18㎜
Round Moulding Plane 外丸鉋21㎜
Round Moulding Plane 外丸鉋24㎜
Round Moulding Plane 外丸鉋36㎜
Round Moulding Plane 外丸鉋42㎜
Hollow Moulding Plane 内丸鉋7.5㎜
Hollow Moulding Plane 内丸鉋9㎜
Hollow Moulding Plane 内丸鉋30㎜
45° Mitre Plane 留め鉋 (SOLD OUT)18㎜
Narrow Chamfer Plane 糸面鉋3㎜
Hanagata Kumiko Plane Square No.1 Extra-large 花形組子 角1号特大
Hanagata Kumiko Plane Round No.3 Large 花形組子 3号丸
Osaka Dado Plane 大阪作里18㎜

If you have questions or would like to learn more about our tools, please use the questions form located immediately below. Please share your insights and comments with everyone in the form located further below labeled “Leave a Reply.”