Four Habits and Three Mysteries

The carpenter dresses his plank, the tongue of his foreplane whistles its wild ascending lisp

Walt Whitman, “Song of Myself,” Leaves of Grass

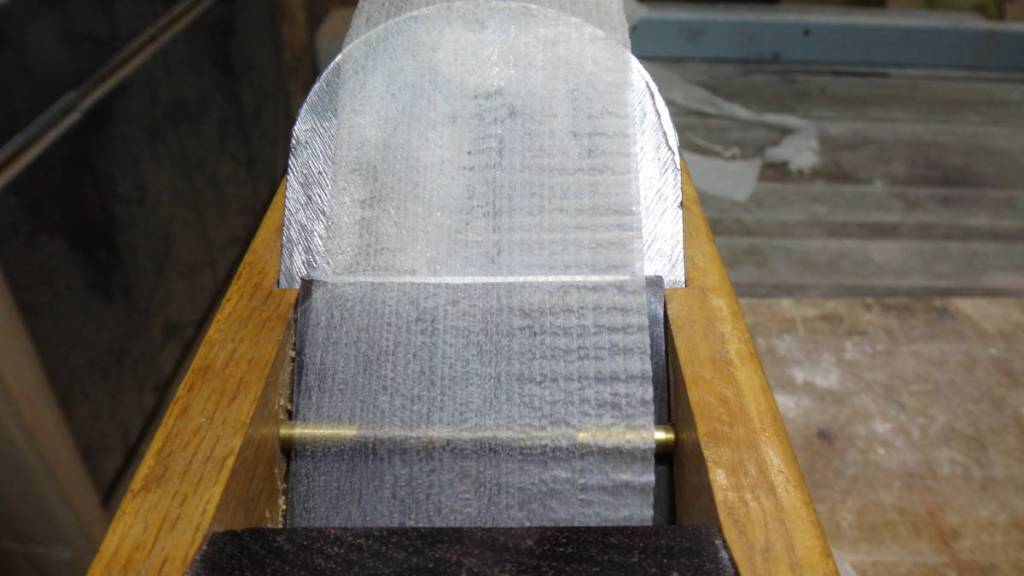
The efficient woodworker must continue accurately cutting or shaving wood just as long as possible without stopping to sharpen his blades too frequently because time spent sharpening is time the primary job isn’t getting done. He must therefore develop unconscious habits to help him constantly monitor the condition of his blades and the quality of the work being performed.

The Four Habits

As the saying goes, “timing is everything.”

If Beloved Customer pays attention, you will discover there is a point where a woodworking tool’s blade still cuts, but its cutting performance begins to drop off. Sensing this transition point is critical because if you continue cutting wood much past it, three things are likely to result.

  1. The energy needed to motivate the blade will increase dramatically;
  2. The quality of the cut will quickly deteriorate;
  3. The time and stone expenditure necessary to resharpen the blade will increase.

That’s three variables that could be expressed in a pretty graph if one was so inclined, a graph that would have at least one inflection point. Which variable is most important to you?

Most woodworkers fail to consider these efficiency variables; They simply keep cutting away until the tool either becomes too difficult to motivate, or the results resemble canine cuisine, then stop work, curse the poor innocent tool (often hurting its feelings) and resharpen the blade. But the wise woodworker will focus on minimizing the total time and total cost required to maintain his tools even if it means he must pause work to resharpen his blade well before its performance deteriorates badly.

This sharpening inflection point will vary from blade to blade and job to job because every blade, every piece of wood and and every user are unique. Simply counting strokes is not enough. It takes attention and practice to sense when a blade has reached this point.

The following are some things you should pay attention to, and habits you should develop, to help you identify the sharpening inflection point.

Habit No.1: Sense Resistance Forces: As you use a tool such as a plane, chisel, or saw, tune your senses to detect the point at which the blade becomes more difficult to motivate. As the blade dulls, the force that you must apply to the tool to keep it cutting will gradually increase. This is especially noticeable when planing and sawing. Develop the habit of paying attention to this force so you can determine when it is time to resharpen.

Your humble servant recommends you regularly use an oilpot to ensure any increased resistance is actually due to a dulled blade and not just increased friction between the tool and the wood (or pixie predations (ツ)).

Habit No.2: Listen to the Music: Pay attention to the tool’s song. That’s right, turn off the radio and CD player, shush that jabbering little 3 year old rolling around in plane shavings under your bench, and listen to the music your blades make instead. If you do, you will notice that each tool sings its own song, one that varies with the wood, the cut, and the condition of the blade. Is the blade singing, lisping, or croaking as it chews wood? Is it a saw with a basso profundo voice, or a mortise chisel with vibrant tenor tones, or perhaps a soprano finishing plane singing a woody aria? A sharp blade makes a clearer, happier sound when cutting or shaving wood than a dull one does. Learn the bright song it sings when it’s sharp and the sad noise it makes when it’s dull, and all the tones in between. If you have ears to hear, it will tell you what kind of job it is doing and when the time has come to resharpen it.

Habit No.3: Eyeball Your Cuts: Watch the tool and the wood it has cut. Is your chisel cutting cleanly, or is it crushing the wood cells? A sharp chisel blade cuts cleaner than a dull one. You can feel and hear the difference. And you can see the difference in both the shavings or chips and the surfaces the tool leaves behind. Don’t be a wood butcher: develop the habit of frequently checking the quality of your cuts. It doesn’t take extra time, and your tools will wiggle with happiness at the attention you give their efforts.

Habit No. 4: Feel the Surface of the Wood: Is your plane shaving the wood cleanly, or are the surfaces it leaves behind rough with tearout? Develop the habit of running your fingertips along the path your plane just cut to sense surface quality. If you detect roughness or tearout, the plane may be out of adjustment, or more likely, the blade is becoming dull. Or maybe you need to skew the blade, change the direction of the cut, or moisten the wood’s surface with a rag dampened with planing fluid (I use industrial-grade busthead whiskey, or unicorn wee wee when I can get it).

Next, run your fingertips across the path of the cut your plane just made to detect ridges that may have been created by irregularities or chips in your blade’s cutting edge. Every one of those ridges indicates a small waste of your time and energy and a flaw created in the wood. Don’t forget that the tops of those ridges contain compressed cells (kigoroshi) that may swell back to their original position and become even more pronounced with time. These tasks are easily accomplished in passing with a few swipes of the fingertips along and across the wood between cuts without spending any extra time.

These techniques are not rocket surgery. They don’t take extra time. They can be applied to any cutting tool all the time. The key is to pay attention; To listen to one’s tools; To watch their work; To feel their work.

Let’s next shift our attention to three of the Mysteries of Woodworking, their potential impacts on mental health, and how to avoid unfortunate wardrobe decisions.

The Mystery of the Tilting Board

To discuss this Mystery, we will call on the services of my old buddy Richard W. (Woody) Woodward. You may remember him from a mystery story in a previous article. Yes, it was a near thing, but he has fully recovered from alcohol poisoning after chugging a 5th of tequila in an emotionally-charged bout of drama over a brittle blade.

Anyway, this mystery goes something like this. Woody is planing a board about the same width as his plane’s blade down to a specific thickness, but for some unfathomable reason, the board ends up thinner on one side of its width than the other. He checks the blade’s projection from the plane’s mouth, but it is absolutely uniform. In fact, to plane the board to the correct thickness he ends up having to tilt the blade to take less of a cut on one side of the board than the other.

Most everyone has experienced this curious and wasteful phenomenon, but because it is not consistent, many never solve the mystery of the tilting board, blaming it on Murphy’s ministrations or pixie perfidiousness. But never fear, because the solution is elementary, Dear Watson.

In Habit No.4 listed above, your humble servant mentioned residual “ridges.” Please be aware that these ridges are not only unsightly and may damage applied finishes later, but they can actually keep your plane from cutting shavings of uniform thickness. Think about it.

Let’s assume you are planing a board the same width as your plane blade, but the blade has a tiny chip near the right end of the blade that leaves behind a .0005″ high ridge on the board’s surface. With each subsequent cut using this same blade with the same defect the right side of the plane’s body and likewise its blade will be elevated above the board’s surface by .0005″, while the left hand side, which doesn’t have any ridges for the plane’s sole to ride on, is shaved the normal amount. The difference in the amount of wood shaved from the right and left sides with each individual cut is minute, of course, but it accumulates with each pass sure as eggses is eggses

Assuming you checked that the blade is projecting from the plane’s mouth the same distance across its entire width, with each pass the surface of the board becomes tilted, a little high on the right side and a little low on the left, so that instead of a flat surface square to the board’s sides, you have produced a flat surface that is thinner on the left side and thicker on the right. Muy malo, amigo.

If, while performing the checks listed above, you detect ridges on a freshly-planed surface, immediately check the blade’s cutting edge by running a fingernail along it’s width. Don’t worry, it won’t dull the blade unless you are also a bricklayer. Your nail will feel the catch and grab of defects too small for your eye to see. A few small ones may make no difference, but on the other hand, they might make a big difference.

Often these ridges will show up as lines of thicker wood in your plane shavings. You do occasionally examine your shavings, right?

With this, the Mystery of the Tilting Board, one that has driven many a woodworker to distraction, too often leading to regrettable fashion decisions involving stiff, canvas jackets with long sleeves connected to straps and buckles that fasten behind the barking woodworker’s back and even pass under the crotch (decidedly uncomfortable, I assure you), has been solved. Rest assured, only the Beloved Customers and Gentle Readers of the C&S Tools Blog can be certain of avoiding this undignified state of dress.

The Mystery of the Missing Plan

Here is another mystery of woodworking, one that especially vexes those tender souls new to the calorie-burning fun of dimensioning boards by hand.

Let’s say Woody needs to turn a bunch of twisty, banana-shaped boards into flat, square, precisely dimensioned and cleanly-surfaced drawer fronts to make 24 piston-fit drawers. Let’s also assume the wood he uses for each drawer-front is unique in both appearance and warpage. It’s a heck of a lot of wood to cut with no time to waste, so our erstwhile wood butcher gets out his trusty handplane, sharpens it up, adjusts the blade and chipbreaker, gives it a kiss for luck, and send wood shavings fly through the air with gleeful abandon!

But wait just one frikin minute! No matter how much Woody planes, he just can’t seem to make some of the surfaces flat, free of wind and the sides square to the faces. It’s like some kinda moving target! Indeed, eventually he is dismayed to discover some of the board’s edges are getting too thin. What to do, what to do!?

Drama queens like dear Woody typically begin interesting antics at this point, but not so our Beloved Customers who, unlike Woody, are stoic, laconic, intelligent and of course, sharply-dressed, and therefore pause their physical efforts to focus their mental powers on solving this mystery.

At this point the resident benchdog may perk up his ears, tucks in his tail and beetle away in fear of the smoke and humming sound emanating from BC’s ears; Master Benchcat arches his backs, hisses like a goose, and flees the workshop as if his tail is on fire; And the resident pixies frantically hide in the lumberpile to avoid being disrupted by the power they sense radiating from BC’s mighty brain!

Of course, the culprit is operator error.

Don’t forget to clean up the cat urine because it’s toxic to tools. Seriously.

Too few people really pay attention when using their tools, focusing like a badger after a squirrel on making as many chips or shavings as quickly as possible without a plan. For example, a failure common to many woodworkers is to start planing without first identifying and marking the high spots that must be cut down first, and then areas to be cut down next. In other words, they fail to plan the sequence of the work. The result is that time, steel and sweat is wasted cutting wood that didn’t need to be cut while ignoring wood that should have been cut first. And all for lack of a plan measured with a straightedge or dryline and marked on the board with a few strokes or circles of a lumber crayon or carpenter pencil

This mystery too has been known to increase profits of the mental health industry and even (heaven forfend!) fashion decisions involving poorly-tailored canvas jackets with crotch straps. Simply not to be borne!

Remember, when the goal is to make a board flat efficiently, always begin the job by identifying high spots and low spots and marking them. Then, always begin by planing down the high spots while avoiding the low spots. One mystery solved!

The Mystery of the Sounding Board

Lastly, we come to perhaps the most frustrating and least-understood of the Mysteries of Woodworking. Not to say there are no other mysteries, because there is always that most ancient of riddles that baffled even the enigmatic Sphinx, one which has tortured men since before Pharaoh wore papyrus nappies, namely that of honestly answering one’s wife when she asks him if her new pair of jeans makes her bottom look “simply humongous.” Sadly, this is one mystery upon which your humble servant is unable to shed light because even I “never could find no sign on a woman’s heart.”

But I digress. This Mystery is one that torments those badly befuddled souls like friend Woody who, lacking a plan to follow, eyes that see, hands that feel and ears that hear, unwisely assume the board they are planing is stable simply because it doesn’t walk away. Perhaps it is the malevolent influence of pernicious pixies that causes him to ignore that the downward deflection the pressure of the plane unavoidably induces in a warped, unevenly supported board, or in a board being planed on a flimsy or crooked workbench.

This unintentional, indeed unnoticed deflection too often causes the board to escape the cutting blade resulting in hills being raised and valleys remaining low where flat surfaces were required. Of course, this leaves the handplane bitterly dissatisfied.

But this waste of wood, steel, sweat and goodwill can be avoided because, even if the board isn’t rocking like Zepplin and dear Woody can’t feel the board deflecting away from his plane’s cutting edge, he could detect the change in his plane’s song when it is cutting an unsupported area of a board if he only listened because the piece of wood he is shaping is also a “sounding board.”

Think of all the money saved that Woody would otherwise spend on lithium, Prozac, and small hotel rooms with padded walls to ease his mental anguish if only he had the foresight to make a plan, train his hands and eyes to confirm his tool’s performance, and his ears to listen to what his plane tries to tell him.

Here is wisdom: The experienced professional will investigate each board, make a plan for his work, mark the plan on the wood, shim the board so it is evenly supported on a flat workbench surface, and sharpen his blade if necessary before making a single cut. Then instead of cutting randomly like a paintbrush-wielding modern monkey artiste, he will make each cut intentionally, purposefully, in accordance with his plan to make the work go as efficiently as possible.

He will also pay attention to the reaction of the wood and feedback from his tools during each cut. He will use the four habits discussed above, and maybe even a drop or two of unicorn wee wee to limit tearout if his budget allows.

If Beloved Customer doesn’t have a master to give you a dirty look or to box your ears when you impatiently err, you must train yourself. Slow down. Make a plan. Execute the plan. Pay attention, use your senses, and spend the time needed to evaluate progress against the plan. Consider carefully why the work is going well or why it is not.

This process will slow the work down at first, but over time it will sharpen your instincts, tune your senses, and help you develop good habits that eventually accelerate your work while improving the quality of the end product.

It will guide you along the path to becoming a master craftsman.

May the gods of handsaws smile upon you always.

Until we meet again, I have the honor to remain,

YMHOS

If you have questions or would like to learn more about our tools, please click the see the “Pricelist” link here or at the top of the page and use the “Contact Us” form located immediately below.

Please share your insights and comments with everyone in the form located further below labeled “Leave a Reply.” We aren’t evil Google, fascist facebook, or thuggish Twitter and so won’t sell, share, or profitably “misplace” your information. If I lie may my straight-jacket straps dig infected furrows into my crotch.


Tool Maintenance: Corrosion Prevention

A Rusted Plane Blade by Hatsukuni. What did it do to deserve such horrible neglect?

“How dull it is to pause, to make an end,
To rust unburnish’d, not to shine in use!
As tho’ to breathe were life!”

Alfred Lord Tennyson, Ulysses

Between damaged tools and guns, corrosion prevention has been a high priority for your humble servant over the years motivating me to purchase many corrosion-prevention products and test them in various climates. After scaling mountains of hype and fording floods of BS I think at last I have something of value, perhaps even the genuine article, to share with Gentle Readers.

While by no means comprehensive, in this article your humble servant will address three common causes of corrosion in steel woodworking tools, as well as some methods of prevention. The three causes are: Corrosion due to sharpening, corrosion due to handling, and corrosion due to storage.

But first, to help Gentle Reader understand the basis for the measures I will recommend below, allow me to explain my sharpening philosophy.

Tool Philosophy

The word “philosophy” is of Greek origin and means the “love of wisdom.” I won’t flatter myself that I developed any original wisdom about maintaining tools, because the truth is I stole most of what I know from better men and the rest came ipso facto from my own screw-ups. Shame is the best teacher.

Professional craftsmen have no choice but to constantly maintain and repair the tools of their trade, but necessary or no, clients and employers often resent the time the craftsmen they hire spend maintaining tools during the work day. After all, they are paying them to make a product, not to fiddle with tools, at least that’s how most Clients look at it. The perceptive craftsman will strive to understand his Client’s perspective if he wants to be trusted with profitable repeat work.

Therefore, I don’t sharpen, fettle, or repair my tools at the jobsite anymore than is absolutely necessary, and never in front of the Client or employer. This is not some feel-good yuppy-zen BS, but a serious, concrete work philosophy with physical and financial consequences. It was taught to me by experienced craftsmen in America and Japan, all since retired to the big lumberyard in the sky, who knew what they were about. It has served me well.

So how do I keep working when blades dull, planes stop shaving, power tools stop spinning and bits stop biting? The most reliable solution is to have multiple saws, planes and chisels in the types/sizes critical for that day’s work, and even extra bits and power tools on-hand whenever possible, so that if a particular chisel or plane becomes too dull to get the job done, or a bit breaks, or a circular saw, for instance, goes tits-up, I need only pause work long enough to retrieve a sharp, ready to rock-n-roll replacement from my toolbox or tool bag.

This means I must purchase, sharpen, fettle and carry around more tools than I am likely to use during that workday. But since I don’t carry my tools in my “pocketses”, and they are partners that earn their keep, I do not consider it wasted money. In fact, this philosophy has resulted in tool-maintenance habits that I believe ultimately save me time and money while improving my work efficiency all while reinforcing my Client’s or employer’s confidence in me, just as the old boys I try to emulate said they would.

Of course, after a few days of continuous work I will have accumulated multiple blades that need sharpening, so if I am to keep making sawdust I must sharpen them in batches of 5~10 at a time. And because I sharpen in batches, as do professional sharpeners, I have given great thought over the years to maximizing positive results such as speed, sharpness achieved, and economical use of stones while minimizing negative results such as rusted steel. I humbly encourage Gentle Readers to give these matters just a few seconds of consideration. What have you got to lose besides steel?

Corrosion Prevention: Wet Sharpening

The bevel of the Hatsukuni blade shown above. Lovely colors.

The corrosion risk to tools when sharpening is caused by residual water in the scratches, cracks and crevices of the blade, as well as accumulated chlorine from tap water, promoting rust, especially at the very thin cutting edge. Yes, that’s right, I’m more worried about corrosion dulling the cutting edge than of it creating unsightly red spots elsewhere on the blade.

When sharpening a batch of blades in my workshop, after a blade is done on the final finish stone, I dry it with a clean paper towel, apply a few drops of Corrosion Block, smear it around on the blade to ensure a complete coating, and set it aside to draw water out of the pores and seal the steel. It works.

Corrosion-X is another good, but stinkier, product. Neither is good enough long-term, however.

After the blades have sat for a while, usually at the conclusion of the batch, I wipe off the CB and apply CRC 3-36. This is a paraffin-based corrosion preventative that floats out water. Paraffin won’t evaporate or wick-off and is the best product I have found to prevent rust developing on a clean, moisture-free surface.

CRC 3-36 sprays on easily and soaks into everything, and if allowed to dry, will give good long-term protection, as in years. It’s especially good for saw blades because it gets deep into the teeth. But you don’t want to apply it to anything even a little wet with water because paraffin may seal it in promoting rust. Ergo, Corrosion Block first.

There are many rust-prevention products on the market, so I am not suggesting CRC3-36 is the best, only the one I prefer, partly because The Mistress of the Blue Horizons doesn’t object to the smell too strongly if it wafts into her holy chambers from the workshop. If I use Corrosion-X, however, she bars the door with her trusty broom, bayonet fixed and leveled at my genital area, and makes me strip off my stinky clothes before she’ll let me back into the house. My love is a gentle flower! With sharp knives! But I digress.

This system works fine for short-term purposes, and even for long-term storage if I wrap the tool in newspaper or plastic to protect the coating.

When sharpening in the field, or if I will be using the tool right away, I don’t bother with spray products, but just strop the blade on a clean cloth or the palm of my hand to generate friction heat, apply some oil from my oilpot, and call it good.

If you don’t own and use an oilpot already I won’t call you an idiot, but I still remember the time long ago when that word was directed at me by someone I respected for not making and using one. He was right.

A useful trick I learned from professional sword sharpeners in Japan is to use chlorine-free, slightly alkaline water for sharpening. I mix Borax powder with distilled water in a plastic lab bottle to use to keep stones wet and to wash blades when sharpening. Washing soda works too. A little lye added to sharpening water will also increase its pH. Using such water will not entirely prevent corrosion, but it certainly slows it way down. Test it for yourself.

Corrosion Prevention: Handling

We sometimes pull out a chisel, saw, or plane blade to gaze upon it. They are lovely creatures, after all and welcome our adoration. There are two things to be aware of when doing this, however.

Recall that the adult human body is comprised of approximately 60% water, some of which is constantly leaking out of our skins mixed with oils and salts. When you touch bare steel with your hands, skin oils, sweat, and the salt contained in sweat stick to the steel and will cause rust. It’s only a matter of how quickly and deeply.

The solution is to avoid touching bare steel you will later store away with bare fingers, and if you do touch the blade, wipe it clean and apply some oil from your oilpot or spray can right away before returning it to storage.

Gentle Reader may be unaware, but there can be no doubt that harsh words not only hurt the tender feelings of quality tools, but can directly damage them. How do I know that rude language offends steel tools, you say? Well, I have ears don’t I? In addition, over the years I learned a thing or two from professional Japanese sword sharpeners and evaluators, who are even more obsessed with rust than your paranoid humble servant, no doubt because of the high financial and historical costs of corrosion in rare and expensive antique weapons.

With the gift to the entire world of the Wuhan Flu from Dr. Anthony Fauci (aka Mr. Science) and his Chinese research team, we have all become more aware of the human tendency to constantly spew droplets of bodily fluids, often containing nasty bugs, into the air around us sometimes with unpleasant consequences. A handsaw can’t catch the Wu-Fau Flu, but fine droplets may find their way to the steel surface when we talk to them or around them. Corrosion ensues.

In Japan it is considered rude to speak when holding a bare sword. Indeed, it is SOP to require viewers who will get close to a bare blade to grip a piece of clean paper between their teeth to confirm the mouth is indeed closed and not spewing droplets of spit onto the blade.

I am not exaggerating the cumulative long-term damage fingerprints and moisture droplets expelled from human mouths and noses cause to steel objects. Any museum curator can confirm.

How does this all apply to woodworking tools? If Gentle Reader takes a tool out of storage and either talks to it, or to humans around it, please wipe it clean, apply oil, and rewrap it unless you will be using it immediately. It’s the only polite thing to do.

Tools deserve respect. Perhaps I’m superstitious, but I’m convinced that if we avoid rudely smearing salty sweat or spraying globs of spittle that would cause our tools to turn red and go away, they in turn will be less inclined to cause us to leak red sticky stuff. Some tools are vindictive if offended, donchano, and many of them can bite.

Corrosion Prevention: Storage

The air on this earth contains dust and moisture. Dust often contains abrasive particles harder than steel as well as salts and other corrosive chemicals. We must keep these particles and chemicals away from our tools.

Air also contains moisture that, given access and a temperature differential, can condense on steel tool blades causing condensation rust.

Your humble servant discussed these matters in length in earlier articles about toolchests, but a critical criteria of proper storage is to prevent dust from landing on tools, and to prevent the tools from exposure to airborne moisture and temperature differentials. A closed, tightly sealed, clean container, cabinet, toolchest or toolbox is better for tool storage than pegboards or shelves.

If Gentle Reader does not already have such a tool container of some sort, I urge you to procure or make one.

Tool Rolls

Your humble servant owns and uses fabric tool rolls. They are handy for transporting tools such as chisels, files, rasps and saws to and from jobsites but they have limitations of which Gentle Reader should be aware.

The first problem with tool rolls is that they appear to protect the cutting edges of chisels and saws, but that is only wishful thinking because the delicate and dangerous cutting edges are only hidden behind a thin layer of cotton or nylon. Guess what happens if you drop a cloth tool roll of sharp chisels onto a concrete slab.

If you bump a tool roll of chisels against another tool, then brush your hand against the now exposed but hidden cutting edges while digging in your toolbox, red sticky stuff may get everywhere. Oh, the humanity! Will this wanton bloodshed never end!?

Do tool rolls protect tools against corrosion? No, in fact they can make it much worse because fibers in contact with steel, especially organic fibers such as cotton, can wick moisture to the steel producing corrosion. Please see the photos above.

Leather tool rolls can be especially bad in some cases because of residual tanning chemicals.

I’m not saying don’t use tool rolls, only to be aware of their limitations and use them wisely.

As mentioned above, I do use fabric tool rolls in the field. The trick to preventing rusted blades is to insulate them from the fabric, so I make little plastic liners from the hard but flexible plastic used for theft-proof retail product packaging that fit into the pockets. Just a strip of plastic cut wide enough to fit into the pocket tightly and folded in half. Besides preventing rusty blades (chisel crowns will still rust) these little liners make it much faster and easier to insert blades into the pockets without cutting the tool roll, and to keep the blades from cutting their way out of the tool roll once inserted. The price is right too.

Canvas tool wraps are convenient for transporting handsaws, but they too provide limited protection. I wrap my saw blades in thin polyethylene sheet foam to help protect the teeth, isolate the blade from direct contact with cotton fabric, and add some insulation.

If you need to use tool rolls for long-term storage, I recommend you clean the tools, coat them with a paraffin-based rust-prevention product, and wrap them full-length in plastic wrap before inserting them into the tool roll’s plastic-lined pockets.

If tools are faithful and profitable servants, indeed extensions of our hands and minds, don’t they deserve more from us while they are in our custody than a rusty, pitted, neglected ruin like the plane blade pictured above?

YMHOS

Our erstwhile apprentice from the clothing-optional workshop has dropped a chisel into the water while sharpening it, and laments the inevitable corrosion. Being bald as a bowling ball, I’m desperately jealous of her long, curly tresses, but I suppose they must get in the way when working on the stones. The sacrifices we make for art…

If you have questions or would like to learn more about our tools, please click the “Pricelist” link here or at the top of the page and use the “Contact Us” form located immediately below.

Please share your insights and comments with everyone in the form located further below labeled “Leave a Reply.” We aren’t evil Google, fascist facebook, or thuggish Twitter and so won’t sell, share, or profitably “misplace” your information. If I lie may crickets be my only friends.

The Essential Oilpot

The Essential Oilpot

Little strokes fell great oaks.

Ben Franklin

If set up and maintained properly, the blades of quality chisels and planes will endure many decades of hard daily use. Proper maintenance is the key. In this article your most humble and obedient servant will describe a tool that will not only make maintenance easier and more efficient, but will also make Beloved Customer’s tools perform better.

Historical Precedence

Versions of the oilpot have been used in all nations since ancient times. Indeed, we know from the archaeological record that tallow, simply rendered animal fat, was commonly placed in open grease pots to use as a tool lubricant in Europe from medieval times right up until petroleum products became widely available. It was also used in the Americas until the same time. I am told that the black crust found on many antique plane bodies (wood planes not airplanes) is oxidized and hardened tallow combined with dirt.

Indeed, I can recall my father, uncles, and grandfather using sticks of paraffin caning wax for the exact same purpose when I was a child, and before that my English ancestors probably used beeswax and tallow candle stubs.

Vegetable oil was more commonly used in Asia, and probably in Europe as well.

I haven’t tried soft tallow as a lubricant and probably never will since rancid fat has even less appeal to me than rancid vegetable oil, but I’m confident you will find the solution described below a serious improvement over these ancient methods.

Corrosion Protection

It’s a sad truth that the blades of woodworking tools often receive more damage while they are waiting to be used than when they are actually being used. Thankfully, corrosion of the sort that creates microscopic pits at the cutting edge can be easily avoided with common-sense solutions.

When not in use, store your chisels and planes where they will be protected from dust and large temperature swings. And oil your blades after every use to keep away oxygen, moisture, and chemicals that might make your expensive blades “turn red and go away.”

I convenient way to apply good oil to your blades is to use an oilpot, or aburatsubo (ah/boo/rah/tsu/boh 油壺) as it is called in Japan, similar to the one in the photo above. This is an effective, inexpensive, and time-proven tool for this purpose, certainly better than bottles or spray cans.

Friction Reduction

Oil pots are useful not only for keeping corrosion at bay, they also help minimize the friction your chisels, saws, planes, and knives generate when cutting wood, as well as the energy you need to expend in cutting. By using an oilpot to reduce friction as your blade cuts wood, that same wood will not deflect the blade away from your intended line of cut as easily, noticeably increasing the precision of your work. Do you doubt me? Give it a try and prepared to be surprised

Making the Essential Oilpot

In Japan, an oilpot is traditionally made by cutting a joint of well-dried, large-diameter bamboo into a cup 3 to 4 inches deep. If you don’t have access to bamboo where you live, a hollowed-out piece of some close-grained wood suitable for making water-tight barrels, such as white oak, or a plastic mug, or even a segment of capped PVC pipe will work just as well. The important thing is the container not be made of metal, glass, ceramic or any other material approaching the hardness of a chisel blade.

Shape the bottom or foot of the cup so it will rest on a more-or-less flat surface with perhaps some irregularities. Some people scallop the bottom so it rests on only four or five spots at the perimeter thereby making it more stable on irregular surfaces. And a piece of sandpaper glued to the bottom will prevent your planes from dragging the oilpot around when you pass their soles over the wick.

If you use bamboo or wood, prime and paint the inside of the cup, and underside of the foot, with a high-solids urethane or polyurethane paint. I used a natural urethane extracted from the cashew tree called “Cashew” on the bamboo joint in these photos. The gaudy orange color makes it easy to differentiate my oilpot from others on a jobsite

Line the inside of the cup with an unbroken sheet of aluminum foil to prevent the oil from soaking through. The paint alone will slow down the oil’s movement through the wood’s fibers, but sure as hogs are made of bacon, without a reliable liner of some sort, it will eventually seep out making a mess. Aluminum foil will fix this.

Next you will need some clean, white, cotton T-shirt fabric. Used clothing is fine. White because you want to be able to tell how dirty the fabric is at any time. T-shirt fabric because it sheds the least fibers. Clean because pixies hate it. If you don’t believe me, just ask them.

Roll the cloth up very tightly into a wick just a hair smaller in diameter than the inside of your container and bind it tightly with string or thread. You should be able to force this dense cloth wick tightly into the cup with approximately ½” projecting above the lip. It must be a tight enough fit to prevent the wick from falling or pulling out accidentally, but not so tight it breaks the container. It will take several tries to judge just the right amount of fabric, so be patient and keep at it until you get it right.

Add Oil

Now that the oilpot is made and wick installed we need to add some oil. Just soak the cloth wick with your favorite lubricant and you’ll be ready to rock-n’-roll like Zeppelin. It will take some time for the oil to saturate the dense wick, so be patient or it may overflow without saturating the wick. I get impatient and spill a little oil sometimes.

In Japan, I was taught to use vegetable oil and change the wick when it became rancid, which it always did. But I recommend Beloved Customer be smarter than I was back in the days when dinosaurs wandered the earth and use a non-organic oil from the start. Stinky wicks are such a waste.

Some people prefer to use straight mineral oil or scented furniture oil, which is just scented mineral oil. The lemony smell is nice. But please avoid any furniture polishes or oils that contain insidious silicon because it will weaken glue bonds.

Some people prefer camellia oil, and while this has a long history of usage as a lubricant, cosmetic and hair oil in Japan, be aware that the so-called camellia oil available commercially for rust protection is actually just mineral oil with a bit of yellow dye and some fragrance added, sold at an inflated price, much like commercial furniture oil. Caveat emptor, baby.

Mineral oil sold as lubricant laxative in pharmacies is not only cheaper but performs better than genuine camellia oil because it will not become rancid and gummy.

While it sounds strange, the best lubricant by far in my experience is a lightweight, light-colored synthetic motor oil such as Mobile-1 (5W). I have tried regular motor oil too, but the synthetic variety smells better, lasts longer and seems to perform better.

Oilpot Storage

Store your oilpot in a metal or plastic container with a lid when not in use to prevent abrasive dirt from contaminating it. Some people make a container from a segment of PVC pipe with a flat end cap glued on one end of their PVC segment to form the bottom of their oil pot and a domed cap on the other end left lose as a lid. I use a tin can with a slip-on lid.

Place some newspaper in the bottom of your container to absorb loose oil and cushion the pot from rattling around.

Even a plastic bag will do until you find something better.

Using and Maintaining the Essential Oilpot

When you are cutting a mortise with your chisel, make it a habit to occasionally jab its cutting edge into the oil pot, and even wipe the sides and ura (flat) on the wick to lubricate the blade. You will be pleasantly surprised to find that this bit of oil will make your chisel work not only go faster, but more precisely and with cleaner results. The oil will not weaken glue bonds, so long as it does not contain silicon.

Likewise, when using either a metal-bodied or wooden bodied plane, occasionally swipe its sole over the oil pot. This little bit of oil will greatly reduce friction, reduce wear on your planes’ soles and give you more control. But, if you value your public dignity, be forewarned that the first few cuts you make after doing this the first time will make you grin like a lunatic! (ツ)

The same benefits of reduced friction and increased precision can be found in the case of handsaws too, although the difference may not be as noticeable.

Before you store your tools away for the day, a dab of oil from your ever-present oil pot will prevent rust and frustrate corrosive pixies.

During use, the cloth will naturally become frazzled, coated with sawdust and wood chips, and will discolor accordingly. No problemo.

If you drop the oilpot and it hits the ground, heaven forbid, Murphy’s Law of Buttered Toast dictates it will land oily-cloth down contaminating it with abrasive grit (unless you work in a cleanroom). If ignored, frikin Murphy will smugly use your oilpot to damage your tools and ruin your work. But never fear: simply brush the cloth vigorously with a steel-wire brush and all the sawdust, wood chips, dust and grit will be gone. The sound you will hear while doing this will be Murphy gnashing his teeth in frustration.

Of course you always have a steel-wire brush close at hand to remove embedded grit from boards before planing them, right?

When the wick becomes too dirty for the steel wire brush to clean (difficult to imagine though that may be) you can re-roll or replace the cloth wick to expose a clean surface.

As the cloth wears and stops projecting from the oilpot’s mouth, remove the wick and place some clean rags in the bottom to elevate it thereby restoring the necessary projection of the wick.

The oilpot is an ancient, dirt-cheap tool you will find to be an invaluable addition to your woodworking tool kit. I promise it will make you grin when using handplanes!

YMHOS

© 2023 Stanley Covington All Rights Reserved

If you have questions or would like to learn more about our tools, please click the see the “Pricelist” link here or at the top of the page and use the “Contact Us” form located immediately below.

Please share your insights and comments with everyone in the form located further below labeled “Leave a Reply.” We aren’t evil Google, fascist facebook, or thuggish Twitter and so won’t sell, share, or profitably “misplace” your information. If I lie may ticks, fleas and biting flies be my only friends.

Tool Maintenance: Corrosion Prevention