
The gem cannot be polished without friction, nor man perfected without trials.”
Confucius
This post may not be as entertaining as previous ones in this series about sharpening Japanese woodworking tool blades: No swords or artwork or handsome Hollywood philosophers, I’m sorry to say. But with this addition to the series we will roll up our sleeves and get some work done.
Many Beloved Customers and Gentle Readers already know most of what is presented in this post, and of them your humble servant begs forgiveness, but it may be that careful Gentle Readers will stumble upon one or two gems among these scribbles.
You know the difference between the quality of work a sharp edge produces compared to that of a dull edge. The work goes quicker, cuts are clean, and finished surfaces are smooth, maybe even shimmering. Your tools are happy, singing and chirping as they cut away. But have you given thought to what a sharp edge really is?
In addition to the answer to this question, we shall also examine the naughty cutting edge that seems sharp fresh off the stones but suddenly and unexpectedly dulls after just a little use. Would it be useful to know how to detect such a cutting edge before it fails wasting your time and money?
Being in the construction industry, your humble servant would like to begin building this discussion on a firm foundation anchored in bedrock. So let’s get to digging.
The Basics
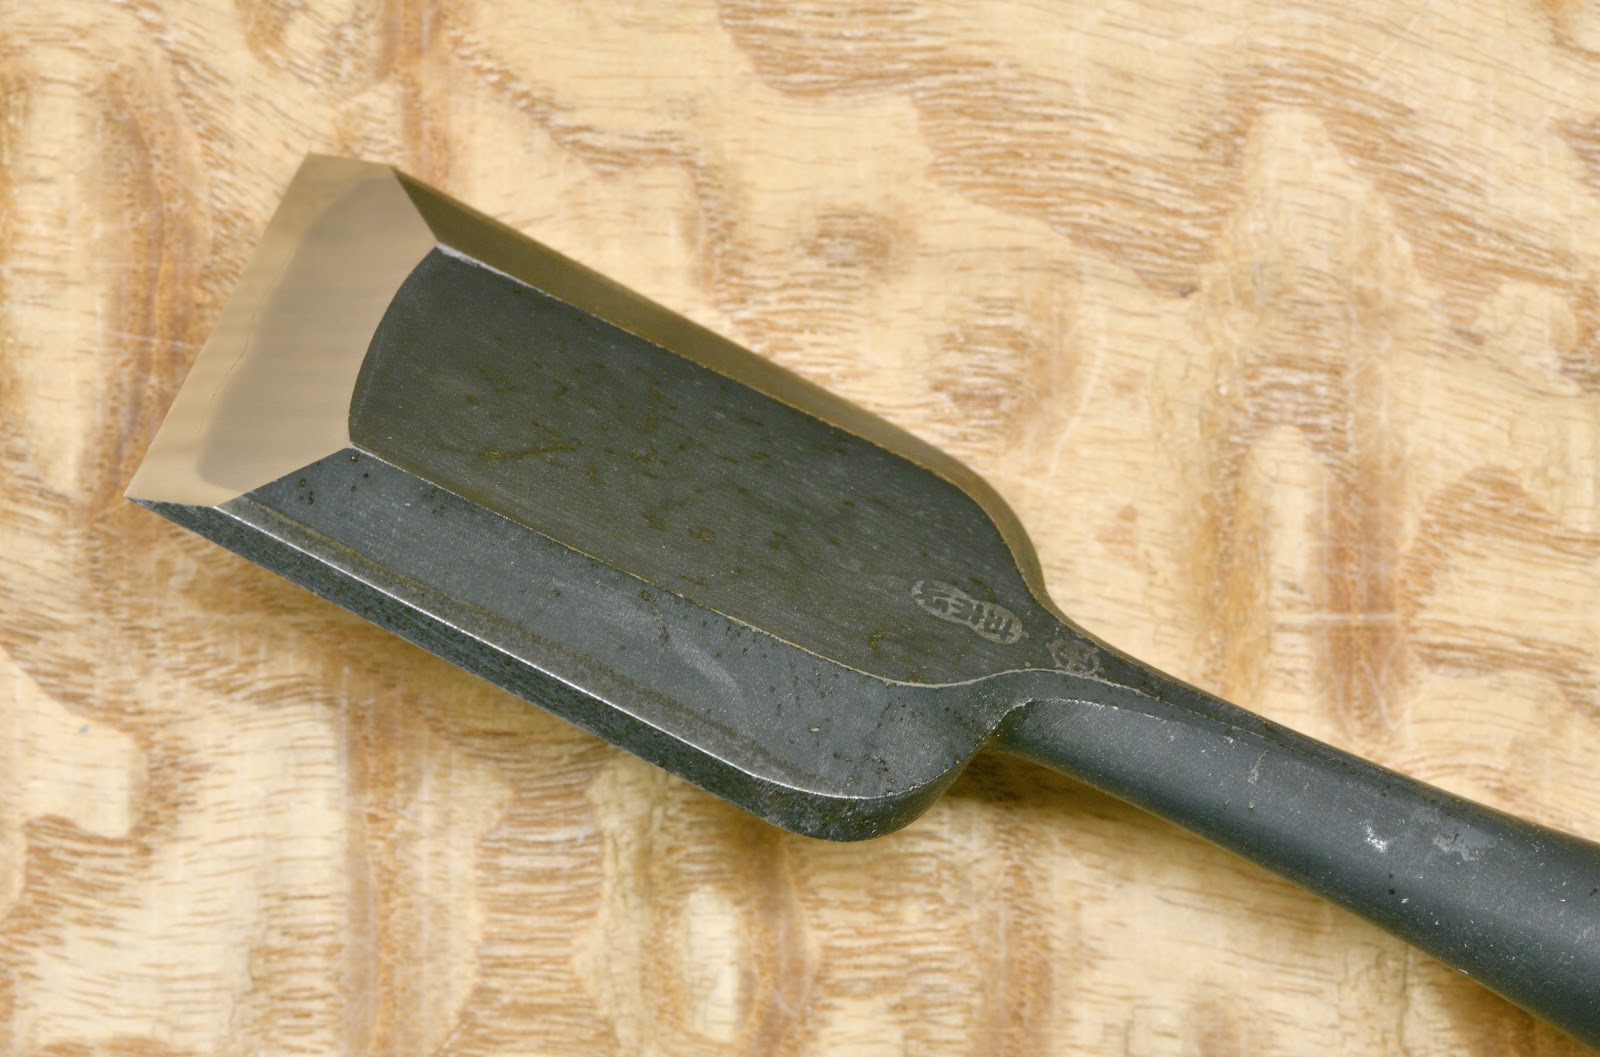
A cutting tool is essentially a wedge, with two flat sides meeting at an angle. Applying force causes the tool’s cutting edge to wedge apart and sever materials, be it wood, metal, meat or mushrooms.
The geometry of this wedge is critical to its performance. At one extreme, the angle could be 90°. It won’t be sharp, it will be hard to push, and it will crush and tear wood instead of cutting it cleanly, but it will be durable.
At the other extreme, the wedge might be made more acute, say 3°. Such an edge could be made extremely sharp indeed, but it would be too fragile to cut anything but whip cream for long. The point is that the sharp edge is a compromise, acute enough to cut well, but not so acute that cutting pressure and friction will make it dent, roll, wear away, crack or chip easily.
In a woodworking tool the wedge is incorporated into a blade as a beveled cutting edge. In an efficient tool this edge that will be thin enough to cut the intended material well, but at the same time resist dulling for a relatively long time. The words “well” and “long” in the previous sentence are where the magic lies. We will examine these important points in future posts in this series.
Wood Shaving’s Eye View
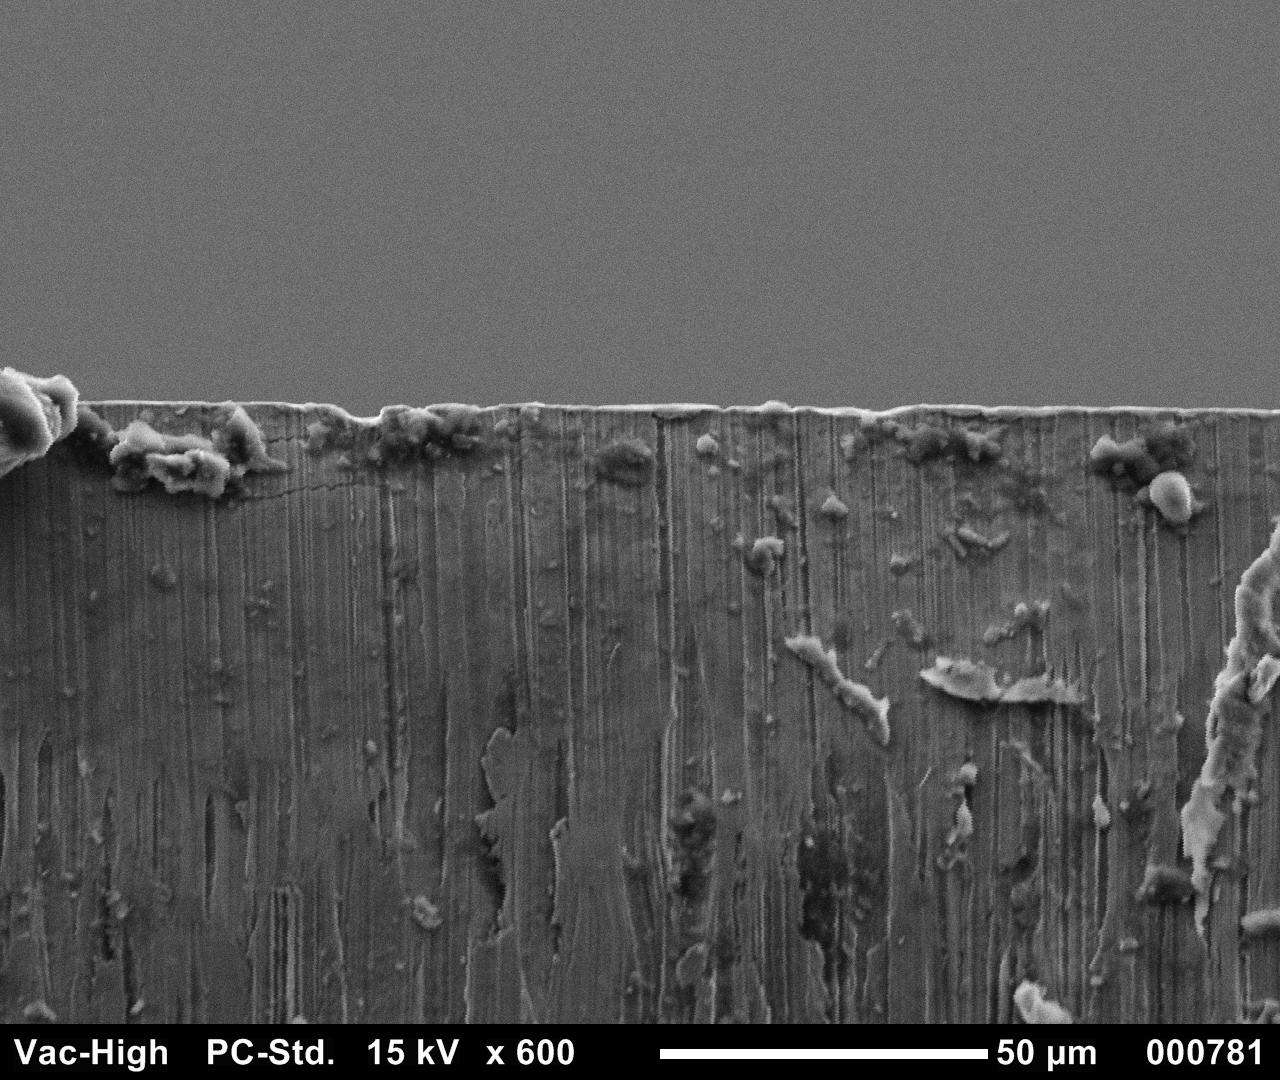
Ideally, the extreme edge of the ideal metal tool’s extreme cutting should be perfectly smooth and only a single molecule thick. In the real world, cutting edges are rougher and wider, but still manage to cut pretty well.
Examine a sharp cutting edge under a microscope, and you will see imperfections. A dull blade will look even worse of course, showing dents, rips, and even cracks.

Using a blade wears away and damages the cutting edge rounding and flattening it, destroying the geometry that makes it an effective wedge. Sharpening is the process of (1) restoring the intended wedge geometry; and (2) removing defects from the meeting of the wedge’s sides by abrading metal from one or both sides down past any damage, leaving a relatively clean, uniform wedge with minimal defects. This is the sharp edge. It is what the wood experiences. It requires effort to achieve, but it ain’t rocket surgery.
The most difficult part of achieving the two objectives listed above is making nothing from something, in a place that cannot be seen. Now that’s a Zen koan if I ever heard one.
Building confidence in one’s ability to achieve results at the microscopic level is not easy. The key is to understand the goal, and to consistently follow reliable procedures. I will describe those goals and procedures in future posts in this series.
Edge Failure
The ideal cutting edge is uniformly sharp, but few edges in the real world meet these severe criteria at the microscopic level where it matters most. A blade may be sharp in some places, and dull in others. We have all experienced those irritating blades that cut well for a while and then dull quickly and suddenly.
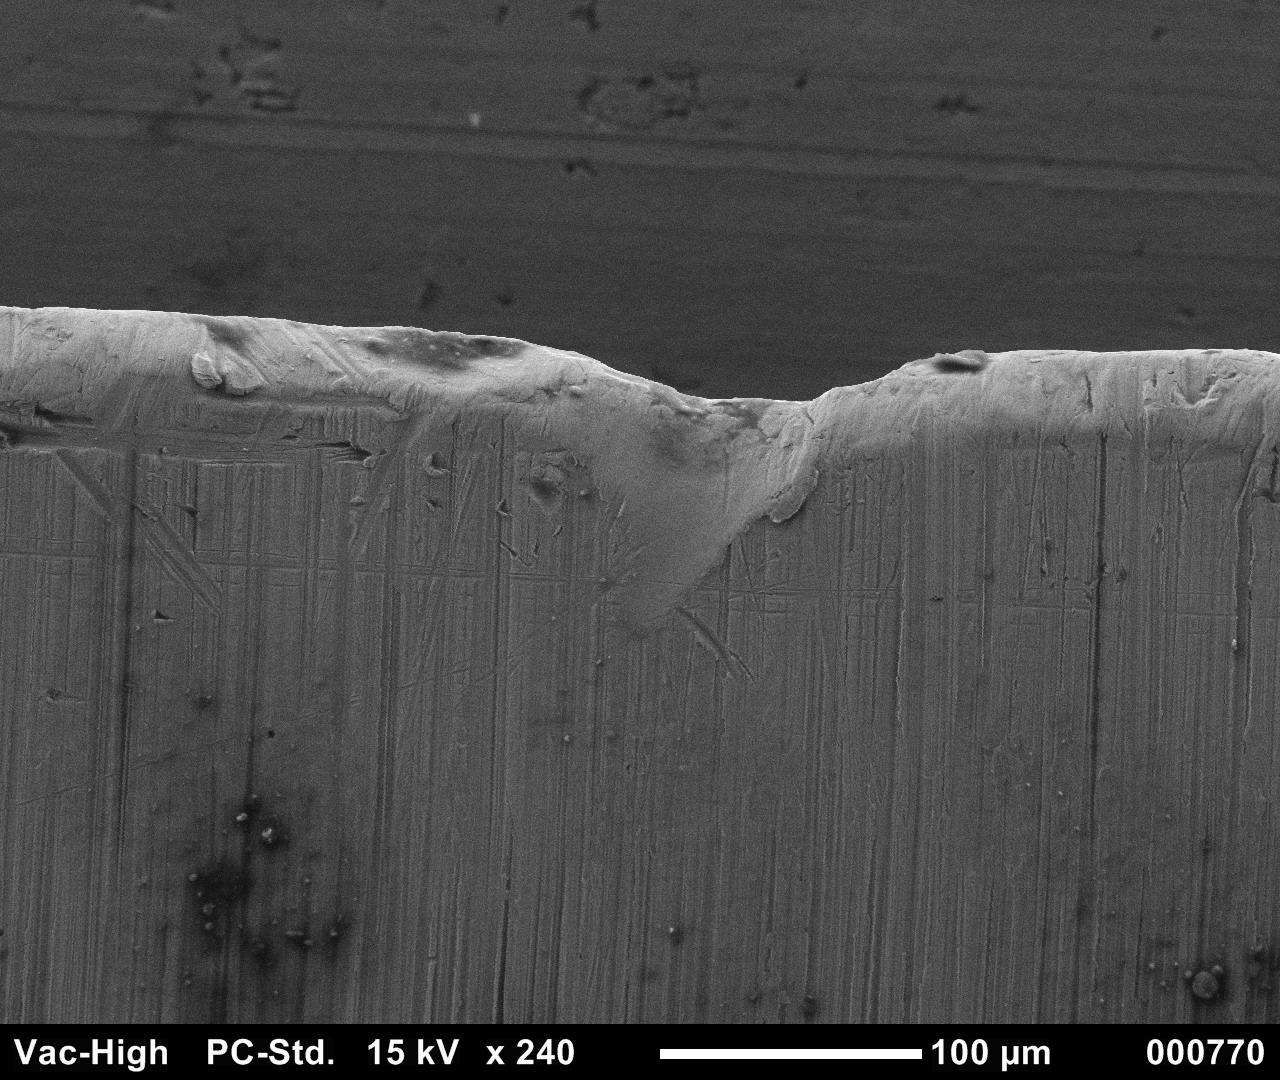
One common cause of these inconsistencies and failures you should be aware of is a cutting edge that is sharp only because it has a defect called a burr. Burrs by themselves can be sharp indeed, but in the case of chisel, plane and knife blades they are thin, irregular, and fragile, and being relatively unsupported by the rest of the blade, can easily bend, roll over, or break off at the root suddenly and unpredictably creating a nasty dull edge in an instant. A truly sharp edge will not just feel sharp, but will stay sharp for a relatively long time because it is properly shaped and well supported, instead of being only temporarily sharp because of an irregular and fragile burr.
I call burrs a “defect” because they are, but creating a burr is an important step in making a sharp edge. The trick is to continue to refine the wedge after the burr is created until the burr melts away on the stones and the edge is as perfect as we can reasonably expect to make it. Stop the refinement work too soon, or fail to do it completely, and all or part of that unreliable burr may survive to suddenly plop a floater into your punchbowl.
So how does one tell if an edge is properly sharp and free of deceptive burrs without using a scanning electron microscope?
Do you remember ‘Nando’s philosophy described in my previous post? One must reverse the latin lover’s logic. Don’t rely on mahvelous appearance. Don’t rely on silly bar room stunts like shaving arm hair or telemarketing tricks like cutting strips of paper. Develop skills and train your senses other than eyesight to detect the shape of steel at the microscopic level. This may sound strange but it is possible because your nerve endings are microscopic and can sense the difference between a burr and a truly sharp edge.
I will save the explanation of detailed techniques for a future post, but for now, here are two essential techniques for sensing things too small to see: Use your fingerprints and the exquisitely fine nerves connected to them to detect the presence and size of burrs; Use your fingernails and the microscopic nerves connected to them to check the condition of the burr and determine when the blade is ready to move onto the next stone in the sharpening process. Please don’t cut yourself.
In the meantime, let’s have some pleasure before pain. Prepare to be amazed, Ladies and Germs, because in Part 6, coming soon, The Mystery of Steel will unfold before your very eyes! There will be marble relief carvings, bronze statues, oil paintings, gods and demons, death and destruction, and even a pagan soap opera about forbidden love. Oh my! We’re in negotiations for the movie rights now ♫꒰・‿・๑꒱ and need someone to play Vulcan. If anyone knows Spiderman’s agent, please have his people contact my people right away.
YMHOS
If you have questions or would like to learn more about our tools, please click the “Pricelist” link here or at the top of the page and use the “Contact Us” form located immediately below.
Please share your insights and comments with everyone in the form located further below labeled “Leave a Reply.” We aren’t evil Google, fascist facebook, or treacherous TikTok and so won’t sell, share, or profitably “misplace” your information. If I lie may all my donuts be infested with lawyers.


Links to Other Posts in the “Sharpening” Series
- Sharpening Part 1 – Introduction
- Sharpening Part 3 – Philosophy
- Sharpening Part 4 – ‘Nando and the Sword Sharpener
- Sharpening Part 5 – The Sharp Edge
- Sharpening Part 6 – The Mystery of Steel
- Sharpening Part 7 – The Alchemy of Hard Steel 鋼
- Sharpening Part 8 – Soft Iron 地金
- Sharpening Part 9 – Hard Steel & Soft Iron 鍛接
- Sharpening Part 10 – The Ura 浦
- Sharpening Part 11 – Supernatural Bevel Angles
- Sharpening Part 12 – Skewampus Blades, Curved Cutting Edges, and Monkeyshines
- Sharpening Part 13 – Nitty Gritty
- Sharpening Part 14 – Natural Sharpening Stones
- Sharpening Part 15 – The Most Important Stone
- Sharpening Part 16 – Pixie Dust
- Sharpening Part 17 – Gear
- Sharpening Part 18 – The Nagura Stone
- Sharpening Part 19 – Maintaining Sharpening Stones
- Sharpening Part 20 – Flattening and Polishing the Ura
- Sharpening Part 21 – The Bulging Bevel
- Sharpening Part 22 – The Double-bevel Blues
- Sharpening Part 23 – Stance & Grip
- Sharpening Part 24 – Sharpening Direction
- Sharpening Part 25 – Short Strokes
- Sharpening Part 26 – The Taming of the Skew
- Sharpening Part 27 – The Entire Face
- Sharpening Part 28 – The Minuscule Burr
- Sharpening Part 29 – An Example
- Sharpening Part 30 – Uradashi & Uraoshi

Please Leave a Reply