It’s the job that’s never started as takes longest to finish.
J.R.R. Tolkien, The Lord of the Rings
In the previous post in this series we looked at the the lid of your humble servant’s toolchest, and the tools mounted inside it. In this post I intend to liven things up with an exciting discussion about trays! Be still my heart!
The Trays
Item No. 4 in the Performance Criteria list in Part 5 of this series is as follows:
“Tool Access: Tools used regularly are to be easily and quickly accessible without bending over or moving trays around.”
This was a critical factor in my mind, but one traditional toolchest designs often do not satisfy, so I had to get creative: always a dangerous thing.
The logic for this criteria is simple: Bending down and pawing through a jumbled toolchest is both unpleasant, inefficient, and distracting at a time when concentration is important. Shifting trays hither and thither every time a tool is needed is irritating and wasteful too. In addition, knees and backs do not last forever, no matter what we imagine when we are young, so a lot of bending is not acceptable. Therefore, contrary to some toolchest doctrine promulgated nowadays, the solution I struck on was for the tools I use regularly to be either mounted in plain view in the lid, or contained in exposed trays as wide as the chest’s internal dimensions would permit.
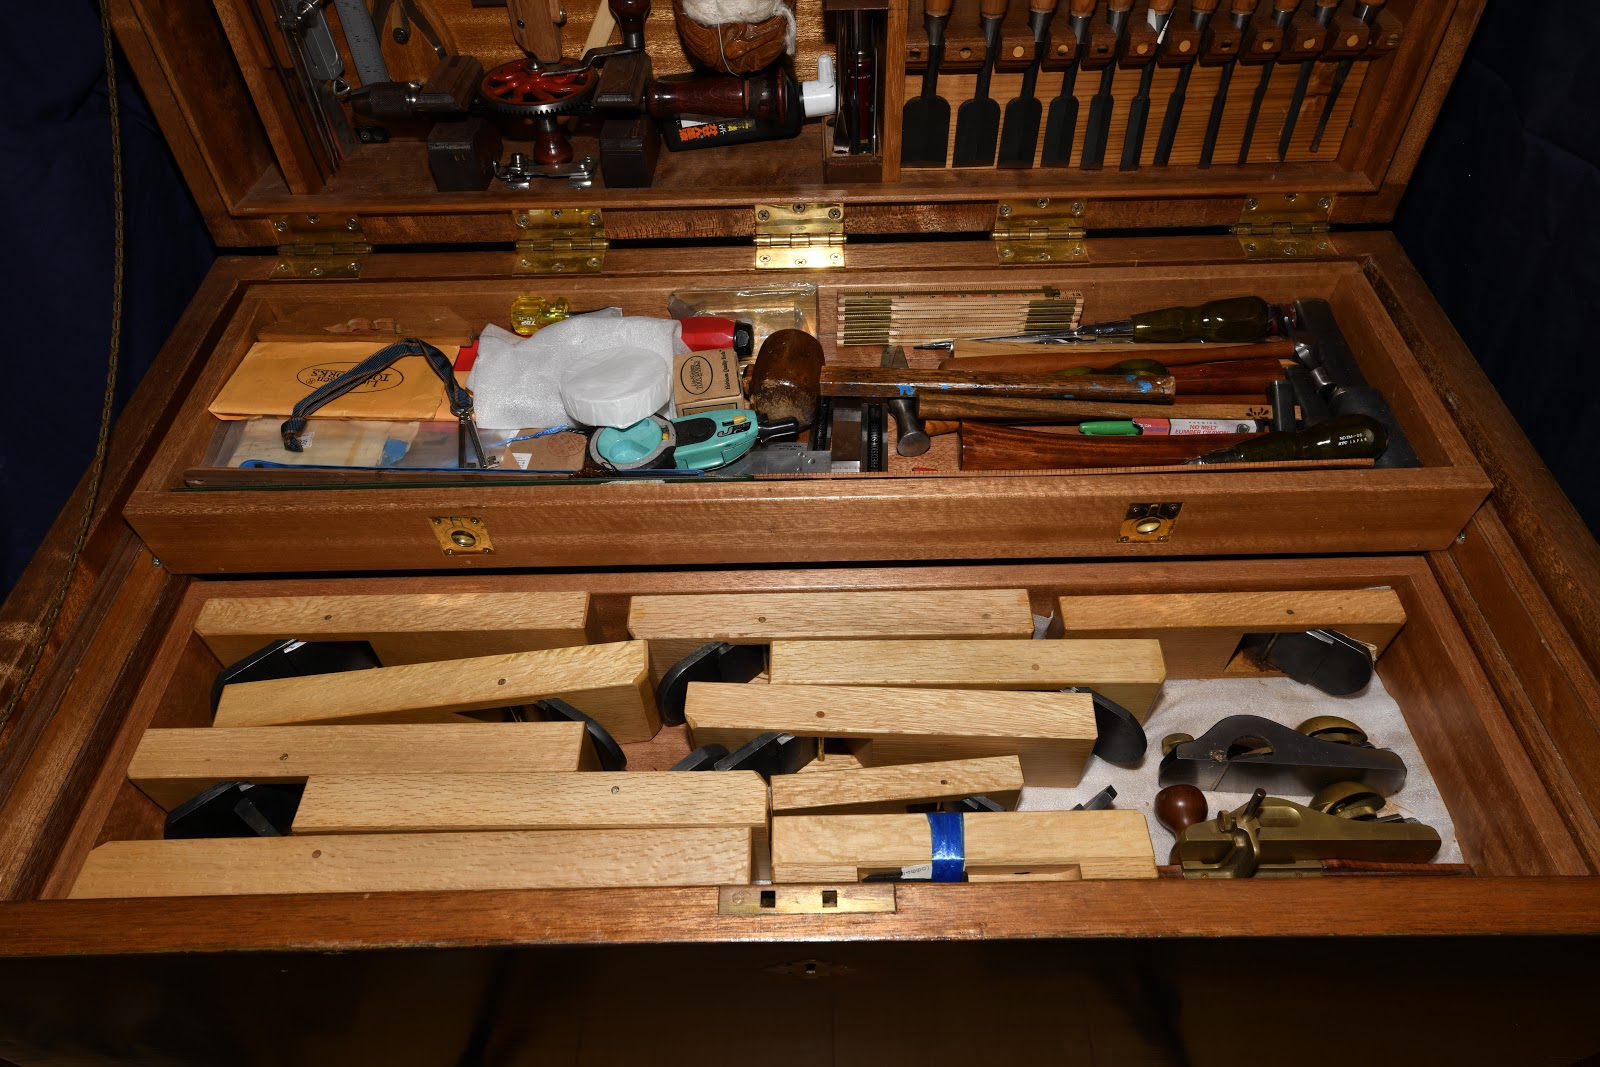
With the lid open, the top tray positioned to the rear, and the second tray positioned to the front as shown in the photo above, the tools I use most are all positioned front and center so I can quickly locate, extract and replace most of them one-handed without bending over, shuffling trays, or digging around. Maximizing the width of the trays and visibility of their contents was therefore of prime importance. Tool access is faster than any other “tool storage system” I have used besides exposed pegboard and open shelves, inefficient storage methods that do not provide adequate protection for my tools without a climate controlled environment.

The design includes three trays each dimensioned to half the chest’s internal width. All three trays differ in depth to accommodate specific tools and to leave adequate space in the lower dungeon for larger tools and chisel boxes.
The four corners are dovetailed and bottoms are twin frame-and-panel construction. Three panels might be better, and would certainly be luckier, being an odd number of course, but two is OK. Just where did my lucky fuzzy dice run off to….?
Unlike many traditional toolchests, but true to the British design that inspired it, I did not mount saws, chisels, screwdrivers or anything at all to the inside of the toolchest’s front wall, so the trays are the maximum width possible with nothing obstructing travel backwards or forwards.
This decision came from my strong dislike, for the three reasons listed in the previous post in this series, of storing sharp or pointy tools in a situation where I might cut myself on them while trying to dig out another tool. Run your wrist over the edge of a chisel or your knuckles along the edge of a saw just once and you will understand. The current mounting system places these tools in plain view with edges protected. I also find mounting tools to the front wall of the carcass to be an inefficient use of space. You will need to do the math yourself, but whatever you decide, please don’t let your chisels bite you!
The Top Tray
The top tray contains more of the tools I use all the time, including precision straightedges, layout tools, more hammers, inkpot, scrapers, jigs, odds and sods. The shallow depth of this tray is intentional.
Despite appearances, it is not a rat’s nest: I know exactly where every single tool is located. I believe excessive tidiness to be a mental illness people of intelligence should vigorously eschew.

Middle Tray
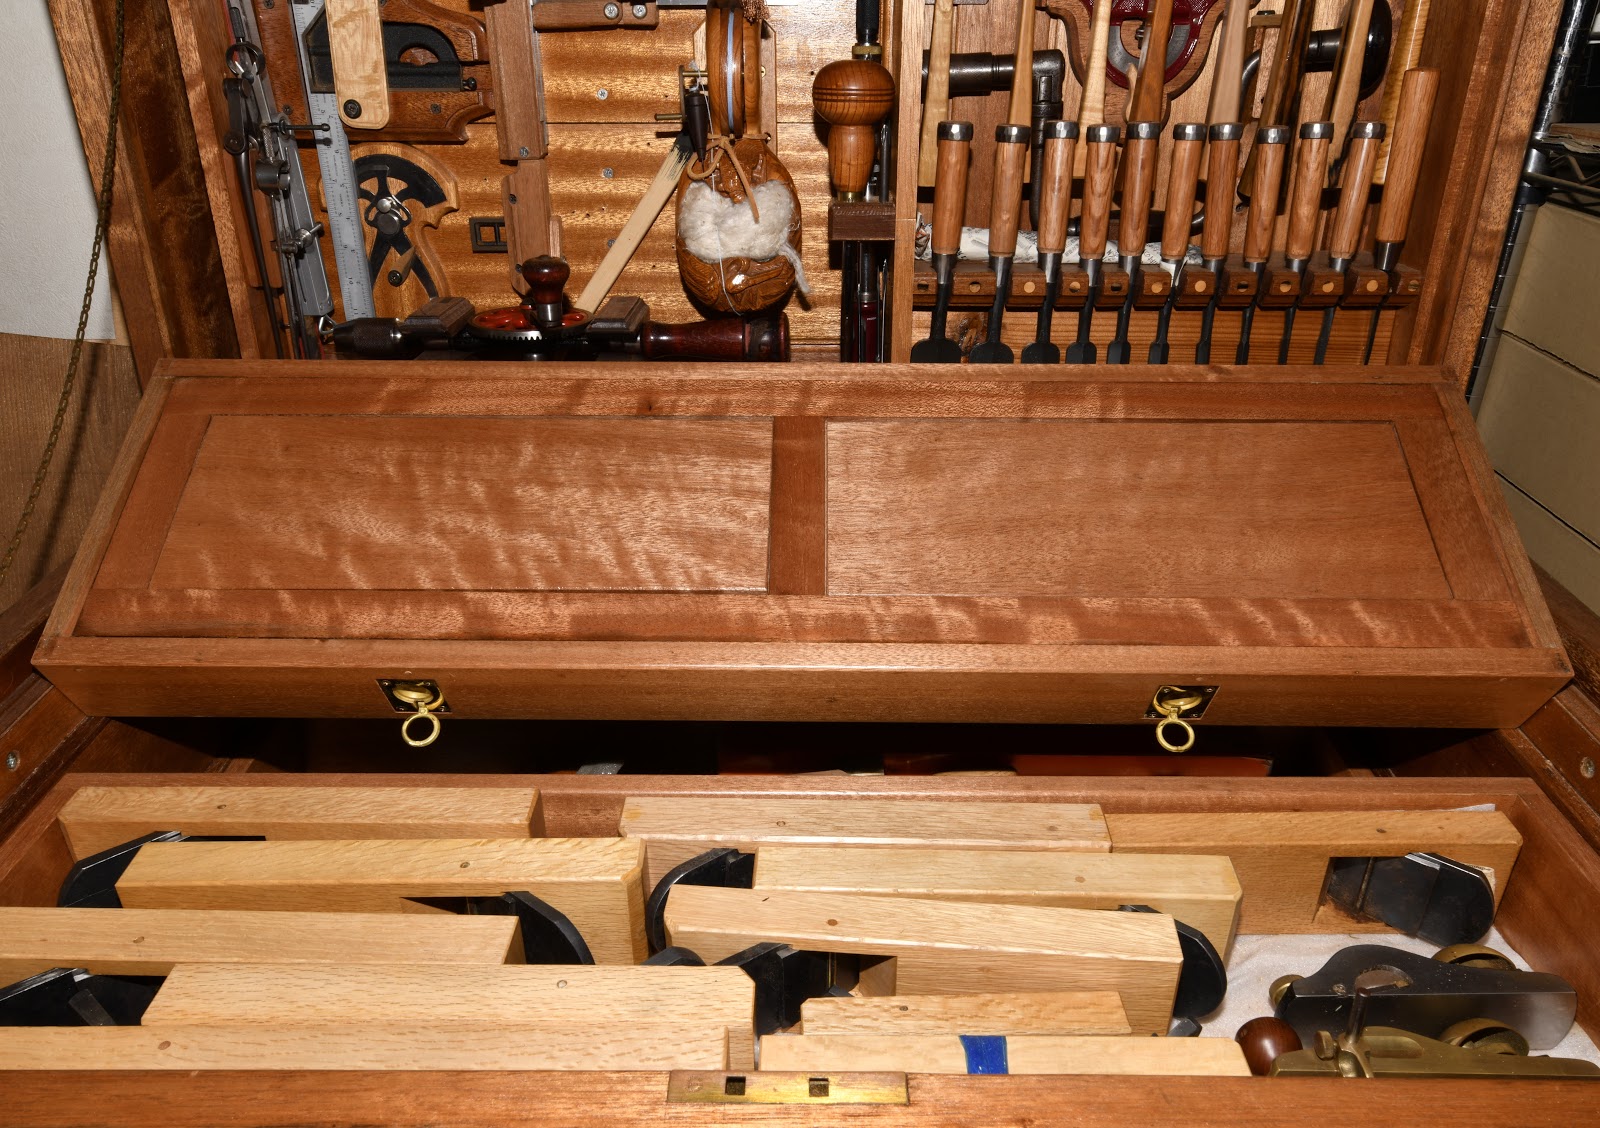
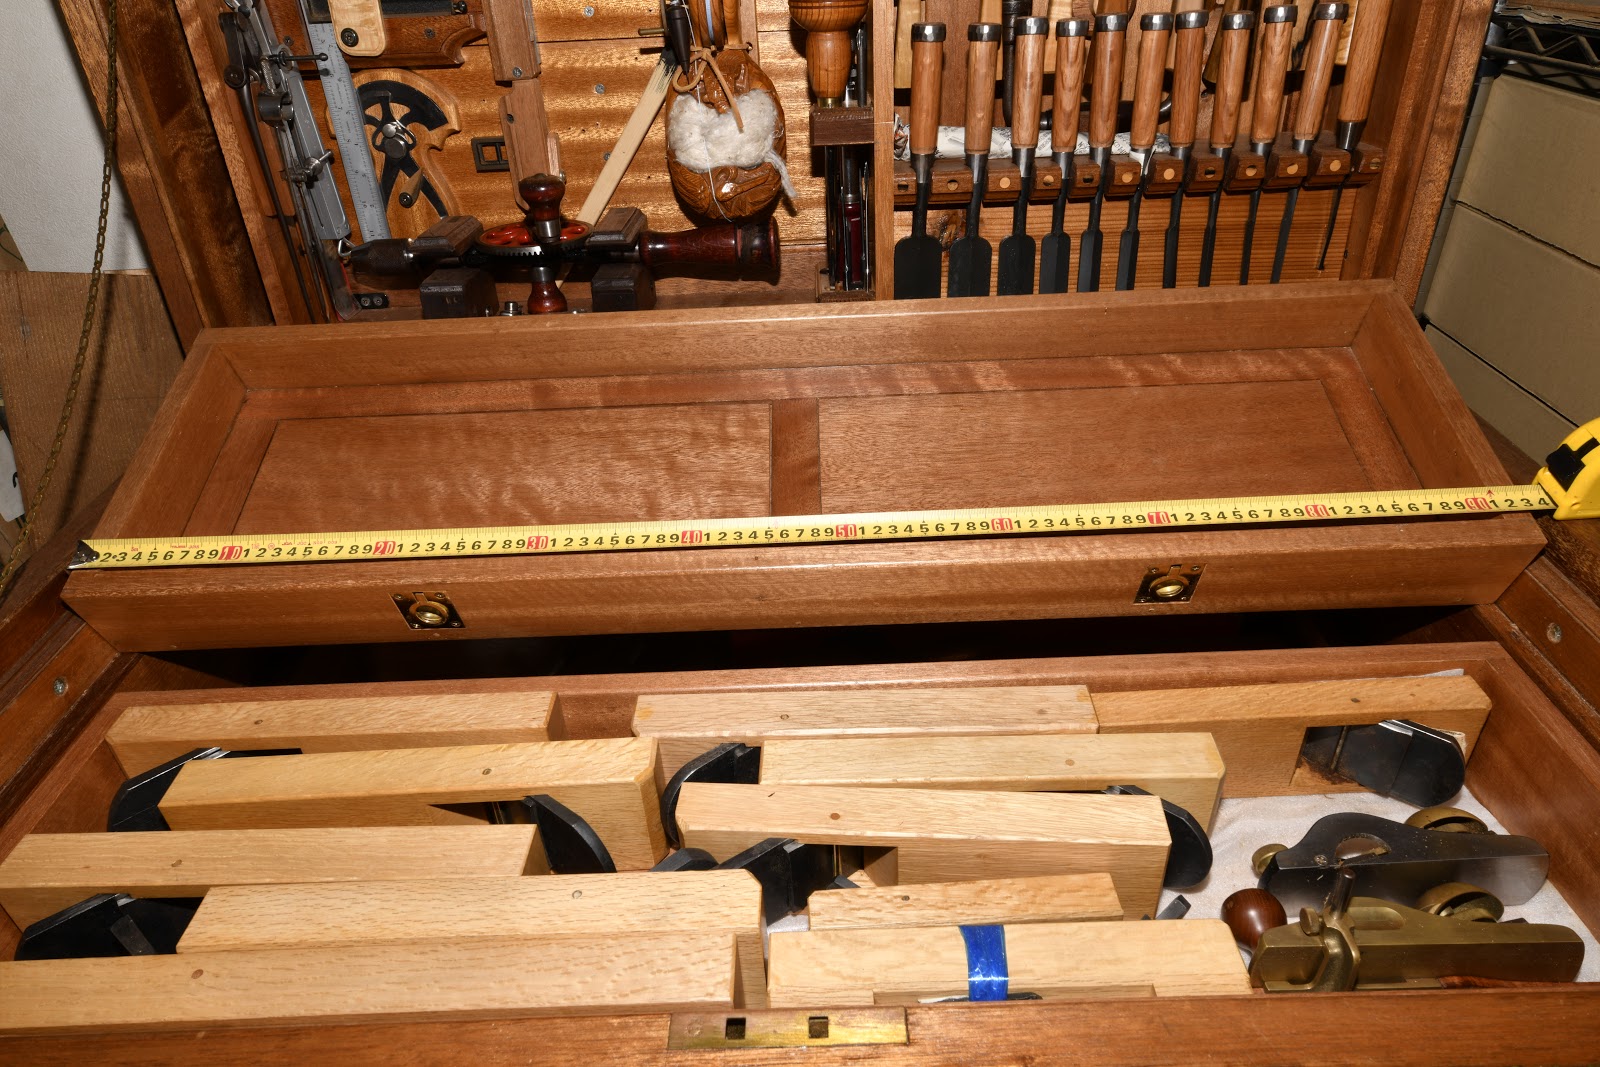
With the sawtill removed and placed nearby to serve as an independent toolchest dedicated to saws, the second tray normally resides in the forward position so I can see and access all the tools in the lid, the first tray, and this middle tray without moving anything. I will present the sawtill to you in a future post
As you can see, this tray contains 13 planes, (I like planes and use them a lot), including a 48mm mame plane, 60mm, 65mm, and 70mm hiraganna, LN rabbet block plane w/nicker, and an LN skewed rabbet plane. Molding planes are stored in a separate chest of drawers.
Japanese planes are more compact than their Western counterparts, as Gentle Reader no doubt observed. I haven’t calculated the necessary volume, but it is certain 13 Bailey-style planes would not fit in the same space, and the weight would be triple.
Third Tray
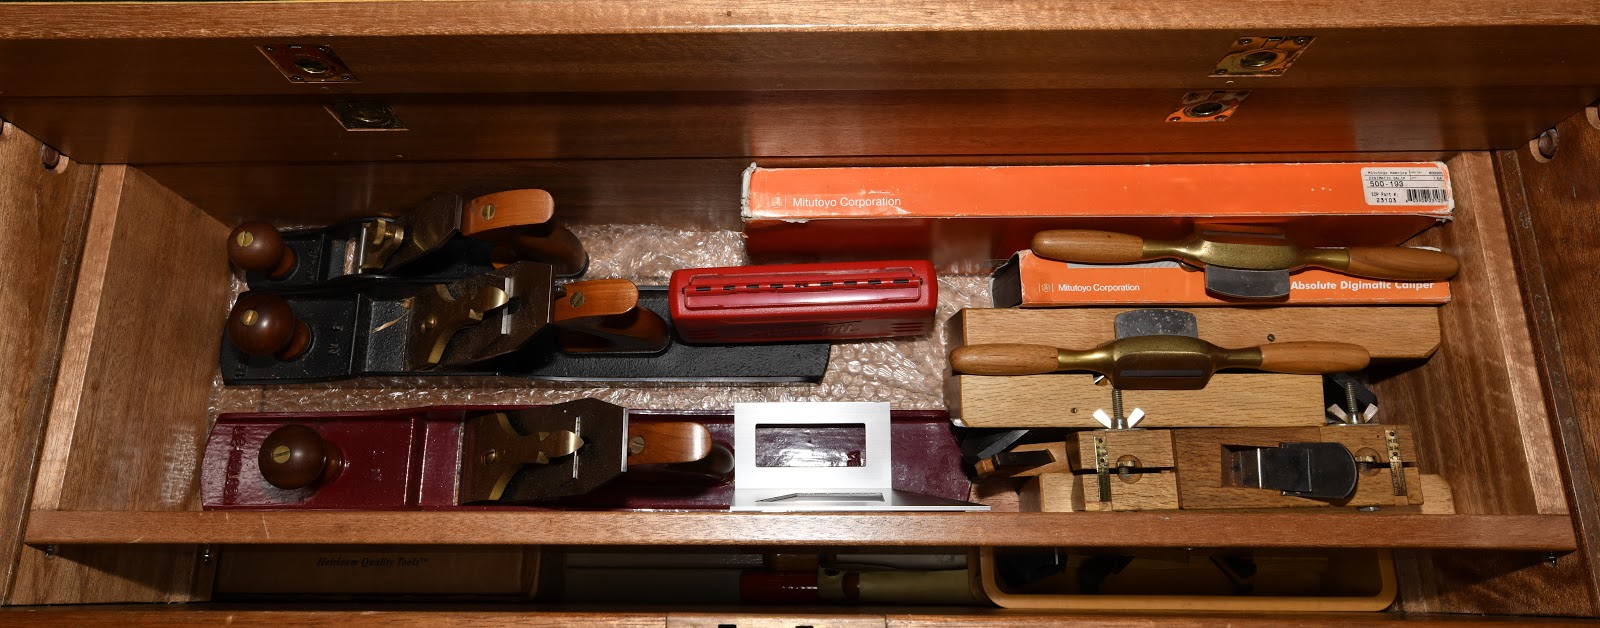
The third and lowest tray is deeper than the other two, and contains heavier and larger tools I don’t use as often, or tools I remove once at the beginning of a woodworking session and leave out all day.
You can see a Lie-Nielson No.6 and No.7, and scrub plane. I also have twist drill bits, two digital vernier calipers, spokeshaves, various jigs, a precision bevel square, two 80mm planes, shoulder planes, two kiwaganna planes (skewed rabbet planes), an adjustable 45° chamfer plane, etc. stored in this tray.
Thank you for your patience so far with this lengthy show-and-tell. In the next post we’ll peek into the toolchest’s dungeon to see what shall see. Rusty chains and moldy bones, perhaps? Please stay tuned.
YMHOS
If you have questions or would like to learn more about our tools, please click the see the “Pricelist” link here or at the top of the page and use the “Contact Us” form located immediately below.
Please share your insights and comments with everyone in the form located further below labeled “Leave a Reply.” We aren’t evil Google, fascist facebook, or thuggish Twitter and so won’t sell, share, or profitably “misplace” your information. If I lie may my chisels make me leak sticky red stuff.


