

Far over the misty mountains cold
JRR Tolkien – The Hobbit
To dungeons deep and caverns old
We must away ere break of day
To seek the pale enchanted gold.
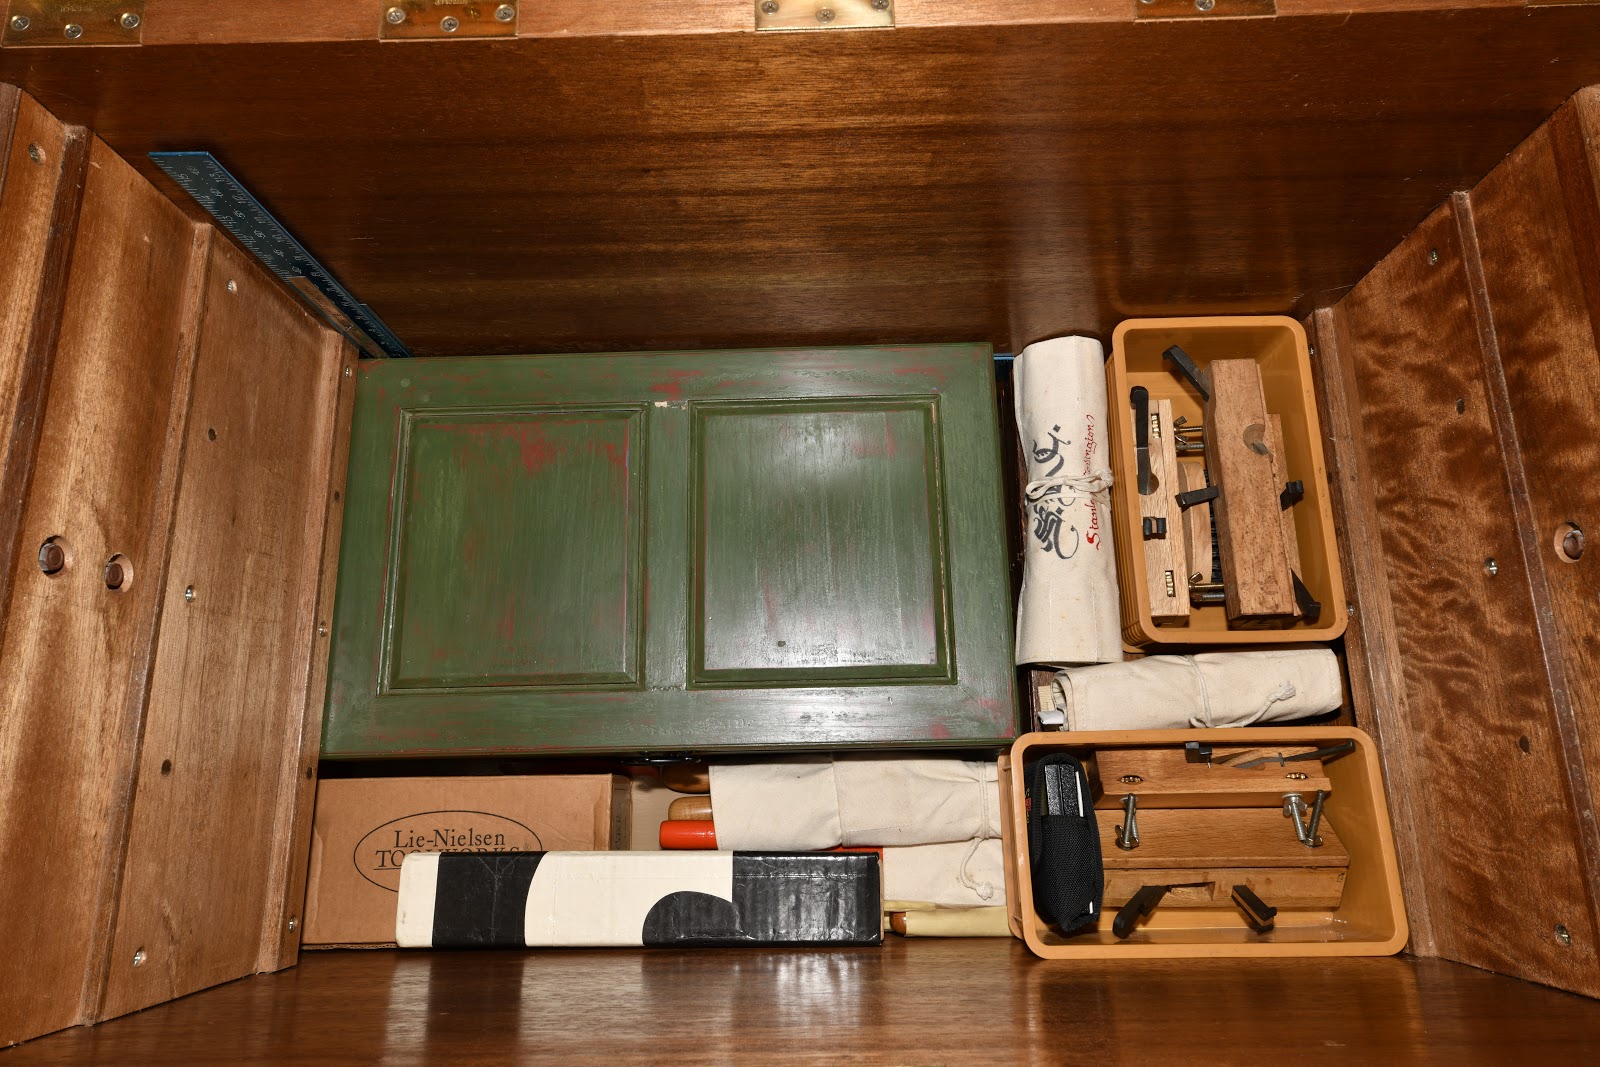
In the previous post your humble and obedient servant described the three sliding trays in my toolchest. In this post we will descend beneath those trays into the lowest depths, a lonely space I call “the Dungeon.” So light your torches, unsling your axes, and let’s meet what lurks in the dark. Don’t worry about me, Gentle Reader, I’ll be right behind you!
Chisel Storage
Many things suffer durance vile in the toolchest, but by far the largest number of denizens are chisels. They are sharp, dangerous tools and difficult to both store securely and access safely.
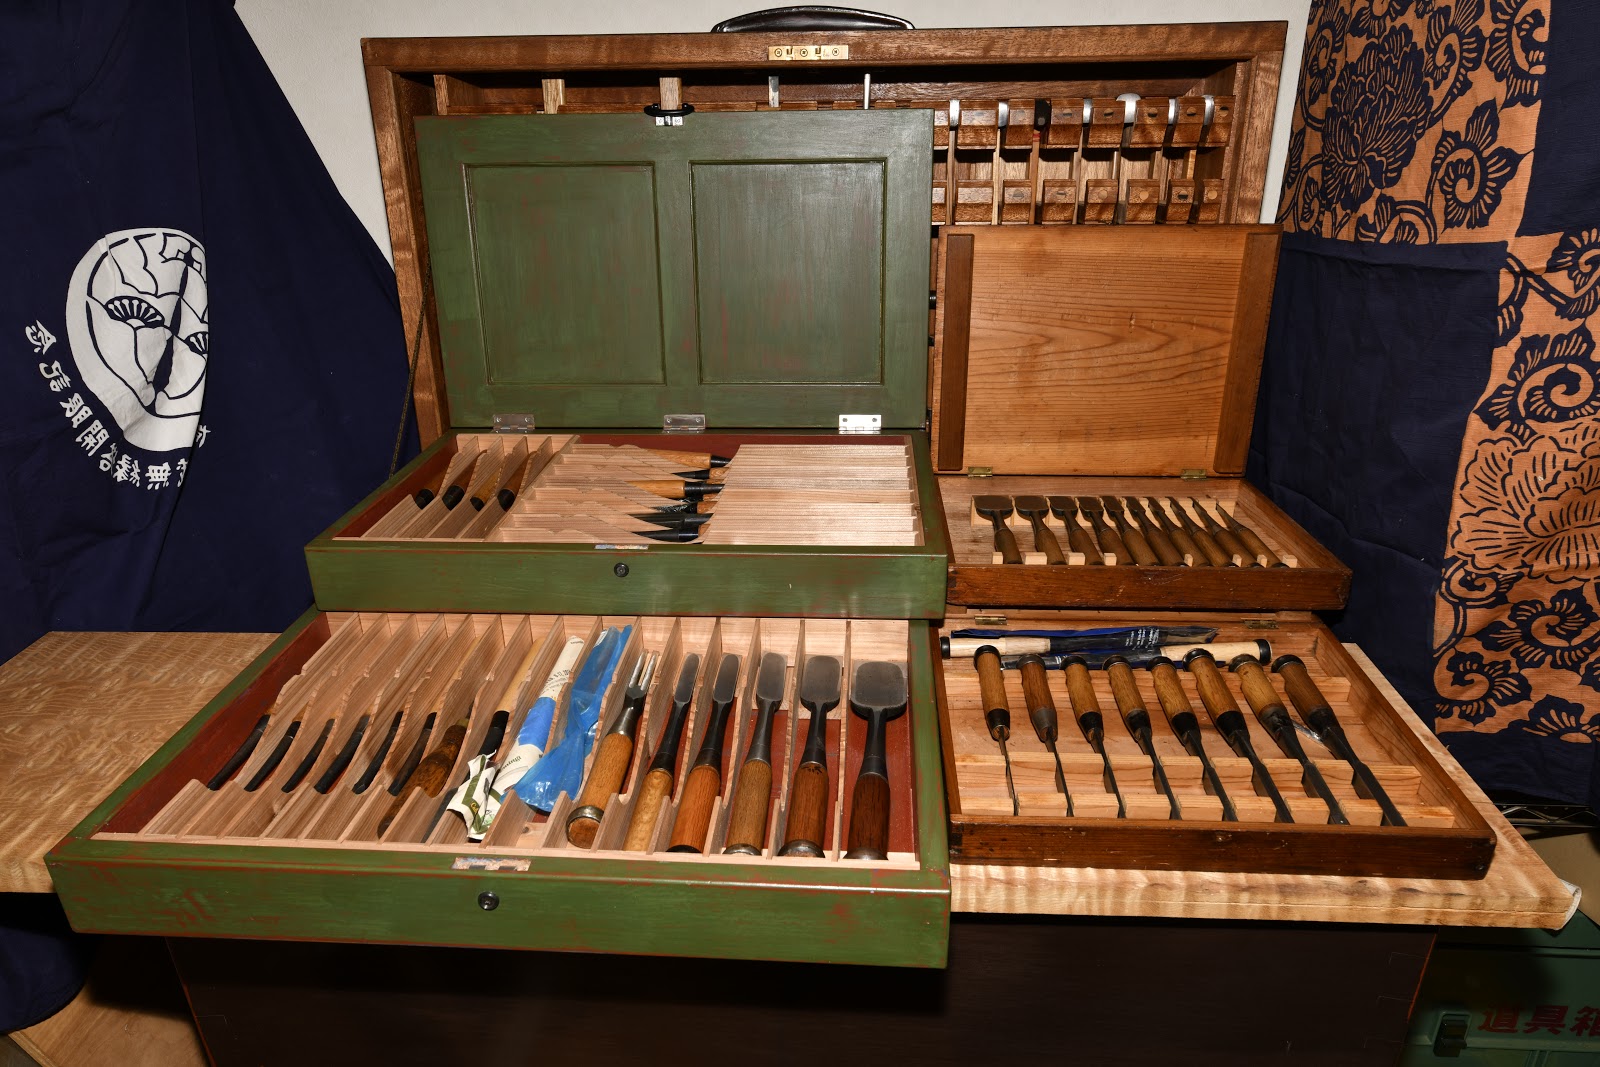
As mentioned in previous posts in this series I have a handy dandy 10-pc set of chisels mounted in the lid. This is a high-quality set of hand-forged shinogi oirenomi but they are not my best chisels; Those are stored in four wooden chisel boxes kept in the dungeon.
One chisel box contains a 10pc oirenomi set, another a 10-pc mukomachinomi (mortise chisel) set, the third and fourth boxes contain various usunomi, kotenomi, atsunomi, and other specialty chisels. Approximately 38 Kiyotada-brand chisels reside in these boxes, mostly custom-forged.

l have, and use, too many chisels to store in trays, so my work philosophy is to store them, sorted more or less by types, in wooden boxes which protect them thoroughly even outside the toolchest. I can remove my box of mortise chisels, for example, along with my box of usunomi paring chisels from the dungeon and set them either on or under my workbench and have quick access to all widths without wasting time digging around in the toolchest. When I am done with a chisel for a time, I wipe it down, oil it with my oilpot and return it to its place in its box keeping my workbench uncluttered and my valuable chisels protected.
Removing these four chisel boxes is as easy as sliding the 3 trays to the rear and reaching down into the dungeon which, along with the trays is designed specifically to provide adequate clearance for easy removal.
When I need to grab an oiirenomi chisel for a quick job, however, the 10-pc set mounted in the lid is handiest.
Other Implements of Torture
You will also notice two tan-colored plastic containers holding plow planes of various widths and a moisture meter. To avoid noise and dust problems I don’t have any electrical routers with me here in Tokyo, so while not as efficient, these rather old-fashioned and sometimes cantankerous tools are the best alternative.

Also visible in the photo are several canvas tool rolls containing mostly handmade rasps and files, as well as a cardboard box containing a router plane, another essential tool for the unplugged shop.
Besides chisels and planes I can also store a hewing hatchet, an adze, and a large Japanese “bukkiri gagari” rip saw on top of the chisel boxes, but I usually remove them, wrap them up, and hang them on my adjacent wire shelf when the toolbox is in residence.
In the Dungeon’s far left-hand corner one American framing square and two Japanese kanejaku squares, one in centimeter scale and the other in traditional shaku/sun scale, can be seen resting against the back wall. They were sleeping quietly at the time of the photo probably because of a late night. Judging by the ruckus they made at the time and the dead soldiers they left laying about in the morning, they must have spent the entire evening drinking, playing dice on the chisel boxes and arguing loudly about the superiority of the Japanese “Shaku” measuring system vs. the metric system vs. the imperial system. Fortunately, while squares have both tongues and blades, they lack arms and legs, so their drunken deliberations never become more violent than rattling. I don’t allow them any stogies, however; One must draw the line somewhere, I’m sure you’ll agree.
This arrangement keeps everything ship-shape and Bristol fashion, an idiom especially suitable to a toolchest with so many tools mounted in the lid even if it is not subject to the tides.
In the next post in this we will examine the toolchest’s bottom panel. Not as sexy as you might imagine, but more important than you may realize.

YMHOS
If you have questions or would like to learn more about our tools, please click the “Pricelist” link here or at the top of the page and use the “Contact Us” form located immediately below.
Please share your insights and comments with everyone in the form located further below labeled “Leave a Reply.” We aren’t evil Google, fascist facebook, thuggish Twitter or the Congressional IT department of the Democrat Party and so won’t sell, share, or profitably “misplace” your information. If I lie may I spend every Thursday night dicing in the dungeon with argumentative squares.


Other Posts in this Series:
- Toolchests Part 1 – And Away We Go
- Toolchests Part 2 – History
- Toolchests Part 3 – Pros & Cons
- Toolchests Part 4 – Goals & Objectives
- Toolchests Part 5 – Formulating Performance Criteria
- Toolchests Part 6 – Key Performance Criteria Solutions 1 – Durability & Longevity
- Toolchests Part 7 – Key Performance Criteria Solutions 2: Sealing, Insulation, Security, Portability & Tie-down
- Toolchests Part 8 – Under the Lid
- Toolchests Part 9 – Trays
- Toolchests Part 10 – The Dungeon
- Toolchests Part 11- The Bottom
- Toolchests Part 12 – The Sawtill
- Toolchests Part 13 – Finishes
- Toolchests Part 14 – Repairability

Please Leave a Reply