Short cuts make long delays.
J.R.R. Tolkien, The Fellowship of the Ring
In the previous two posts in this series about toolchests, we examined a few aspects of their history, as well as a few of the goals and objectives your humble servant applied.
In this post we will consider the pros and cons of the chest as a tool container and a few methods to maximize the pros and minimize the cons. The ultimate purpose of this article is simply to provide examples Gentle Reader may find useful to consider when planning and designing a toolchest.
As stated previously, this article is not intended to suggest the toolchest presented here is superior to any other. I, your most humble and obedient servant, am neither a Time Lord nor Holy Arbiter of Everything Traditional, so my efforts are unworthy of emulation. I respectfully present this series of articles merely as an example of one planning process and the lowly toolchest it produced.
Points in Favor of Wooden Toolchests
Wood as a material has some advantages over metal and plastic for making toolchests. Namely, it is often relatively inexpensive, can be easily worked, and has relatively high thermal insulative value. And wood is more appealing to many people than plastic, steel and aluminum. I think it’s safe to say that human attraction to wood is deeply rooted in our DNA. I don’t want to anthropomorphize, but I understand that robots feel the same way about brushed aluminum, at least that’s what they tell me (ツ).

If you have ever used a steel or aluminum gangbox, basically a bent and welded sheet-metal toolbox used on construction jobsites, often with huge locks housed in bolt cutter-proof recesses to prevent theft, or kept your tools stored in a metal toolbox mounted in your truck’s bed, you know what I mean. Gaps permit airflow while the metal transmits the heat or cold into the chest and the tools it contains very quickly resulting in condensation on metal surfaces and eventually rust. And the metal box itself dings and grinds the tools. But wood cushions tools and moderates these temperature swings providing the contents additional protection from wear and condensation corrosion especially if the container seals tightly.
As a structural system the wooden chest is easy to make stronger and more durable than modern front-loading cabinetry of the same volume, is much more portable, and can easily be sealed much tighter.
And finally, given the same amount of volume, there are many instances where the chest is a more economical storage system than modern cabinets, depending of course on the design and how the chest is used. That’s ten points in favor of wooden toolchests.
Points Against Wooden Toolchests
Wooden chests have fallen out of favor in modern times for valid reasons. Perhaps the biggest disadvantage of traditional chests in general is that items stored inside tend to get stacked one on top of the other in a jumble, and that darn Murphy (may he suffer the exquisite torment of eternal languishment in a liberal big-city Department of Motor Vehicle line without the necessary documents) has often hidden the item we need in the last place we could possibly look, at the very bottom.
Well-designed toolchests, on the other hand, have traditionally and quite successfully overcome this organizational challenge by using sliding trays and mounting tools to the lid’s underside and elsewhere. But of course, the effectiveness of this organization depends on the user.
Toolchests are not a viable solution for people who lack adequate organizational self-control. Indeed, for the person that lacks basic housekeeping skills and does not value their tools enough to care for them properly, a rusting pile on the floor may be a superior solution.
I am not like Adrian Monk when it comes to tool organization, but more than any other tool storage system, the toolchest is easiest for me to keep organized simply because, perhaps like some millionaire American politicians who only remember to wear pants in public because they need someplace to tuck-in their shirt-tail, I must.
Another disadvantage of the traditional chest is its low height compared to modern cabinetry. Space and weight practicalities typically limited the volume and height of traditional chests, resulting in a low profile. Mounting them on bases or adding legs made access easier. This transition from chests resting on the floor to cabinets supported on legs is well-documented in the historical record.
Compared to modern cabinetry which can be built as high as the ceiling permits and attached to walls, the chest may occupy more floor space per square meter of internal storage volume. Whether that is a practical disadvantage or not depends on the user’s requirements for portability, which the chest excels at, and if storage space inside fixed cabinets located at a height above the user’s line of sight is considered useful or not.
While typically far superior to modern cabinetry, perhaps the most difficult long-term challenge of the toolchest is the lid. Traditional Western wooden chests frequently had a poor seal at the lid. To make things worse, their lids routinely warped over time and with changes in humidity and due to design defects creating gaps and cracks which became the primary avenue of humidity, dust, insect and pixie infiltration. But fixing this detail is not rocket surgery.
Gaskets are one solution, I suppose, but an effective design, combined with skillful execution that lacks gaps to begin with and won’t develop cracks over time, is the most effective solution IMO.
Convenience, including kinky backs and creaky joints, is another shortcoming common to traditional chests. Chests often served double-duty as benches, tables and even beds positioned along the wall of the longhouse, at the foot of the bed or under a window, and so tended to be low, stable boxes. Digging stuff out of a traditional low chest requires contortions such as bending over, squatting, and even kneeling, motions hard on old backs and rickety knee joints (tu fui ego eris).
But I don’t sleep on top of my toolchest, or use it as a seating bench, or strap it to a mule when transporting it so a low height is not necessary. Therefore I see no need to make a toolchest squat or lightweight in order follow an inconvenient and even painful tradition that conflicts with function, especially when there are superior traditions to draw on, as we saw in Part 2 of this series.
Another disadvantage of the traditional chest configuration is that, when closed, it’s tempting to stack stuff on the closed lid or use the lid as a work surface, making it difficult to open the lid without removing the accumulated stuff. This is a workflow management problem and not insurmountable, but does require self-control. The historical record gives us several solutions to the “stacking” problem.
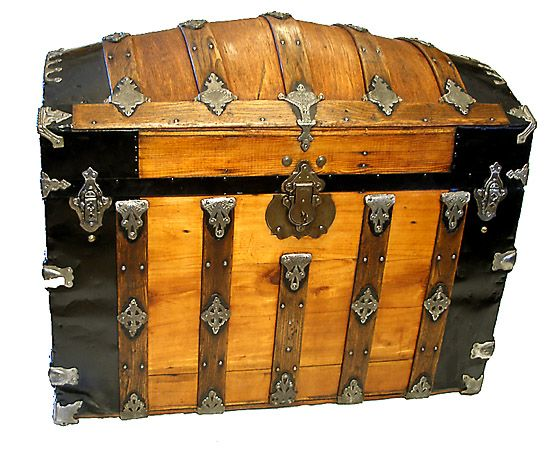
Travelers and traders in past centuries often had their chests made with arched and even peaked lids to prevent shippers and stevedores from stacking stuff, especially other chests, on top of theirs in wagons, trains or ship’s holds. Please see the photo of the steamer trunk at the top of this post or the seachest below. While bulbous lids may work well for storage and shipping of clothing, linen and bedding, I doubt they make a toolchest more efficient. For instance, a chest with an arched lid stored against a wall cannot be opened without pulling it away from the wall at least the thickness of the lid wasting precious floor space.
Another disadvantage of the wooden toolchest, at least compared to high-impact plastic and steel or aluminum toolboxes, is that it is less resistant to impact forces when dropped, possibly resulting in catastrophic failure. This damage is a real possibility, so a wise man will design and construct his toolchest to mitigate this risk. In my case, besides drops due to careless movers, I needed to plan for rude truck bumpers and vengeful forklift blades. Thank goodness I did.
And finally, wood can be weakened and destroyed by fungus, plenty of bugs love to eat it, and rodents can easily chew holes through it to build their dream home. That makes eight or nine points against the wooden chest, so if you are considering making a toolchest of your own you should plan appropriate solutions.
Allow me to state an important related point I’ve learned over many years of work in the construction industry: A bad design constructed perfectly is a still a failure; A good design executed poorly will eventually fail. Your tools deserve better than good-looking, short-term sucky failure, so proper planning and skillful execution should be your goals.
So far we’ve discussed some pros and cons of the wooden chest without delving deeply into solutions. I could of course have dived right into a discussion of the solutions I employed, but in the words of Professor Tolkien quoted above: “Short cuts make long delays.” But never fear, Gentle Reader, in the next post in this raucous tale of swashbuckling high-adventure, we will point our spyglass at some planning techniques and design criteria you may want to consider to overcome these shortcomings. Hoist the mainsail, me hearties!
YMHOS

If you have questions or would like to learn more about our tools, please click the “Pricelist” link here or at the top of the page and use the “Contact Us” form located immediately below.
Please share your insights and comments with everyone in the form located further below labeled “Leave a Reply.” We aren’t evil Google, fascist facebook, or thuggish Twitter and so won’t sell, share, or profitably “misplace” your information. If I lie may my toolchest be glued to the floor when a conflagration threatens.


Other Posts in this Series:
- Toolchests Part 1 – And Away We Go
- Toolchests Part 2 – History
- Toolchests Part 3 – Pros and Cons
- Toolchests Part 4 – Goals & Objectives
- Toolchests Part 5 – Key Performance Criteria: Avoiding The Whirlpool of Indecision
- Toolchests Part 6 – Key Performance Criteria Solutions 1
- Toolchests Part 7 – Key Performance Criteria Solutions 2 – Sealing, Insulation, Security, Portability & Tiedown
- Toolchests Part 8 – Under the Lid
- Toolchests Part 9 – Trays
- Toolchests Part 10 – The Dungeon
- Toolchests Part 11- The Bottom
- Toolchests Part 12 – The Sawtill
- Toolchests Part 13 – Finishes
- Toolchests Part 14 – Repairability

Please Leave a Reply