Advice is a dangerous gift, even from the wise to the wise, and all courses may run ill.
J.R.R. Tolkien, The Fellowship of the Ring
This is the second part of our series about toolchests. In this post, just to ensure we have a common understanding, we will examine some of the history and roles of chests in general.
The wooden chest is certainly the most ancient hard-sided container used by humankind. This fact alone makes it a method of tool storage Gentle Reader should at least consider.
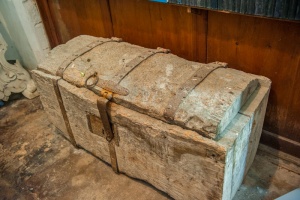
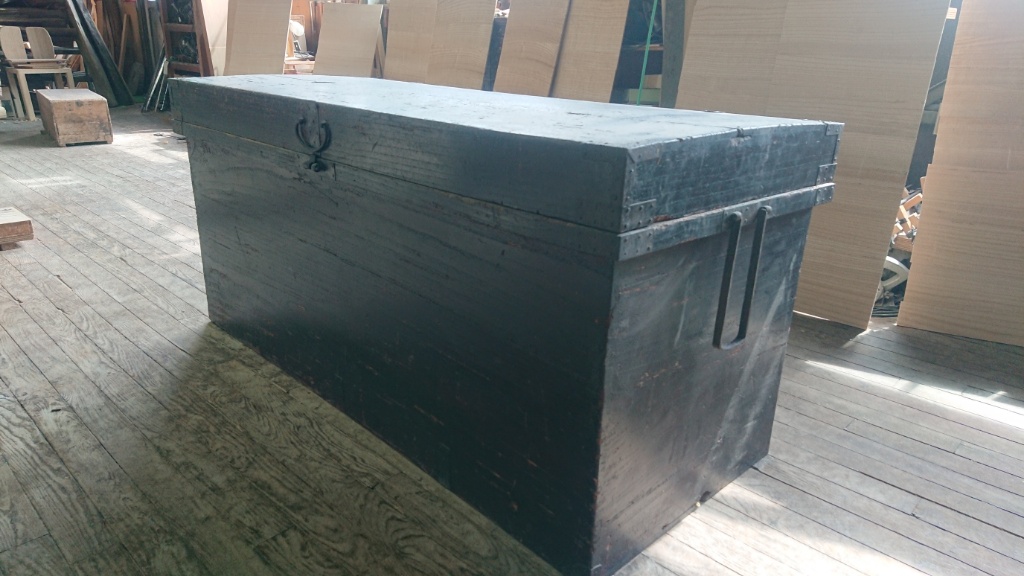
The traditional chest is simply a box with a lid. Throughout human history, most chests have been made of wood, although there are examples made of rushes, wicker, bamboo, tree bark, stone and various metals.
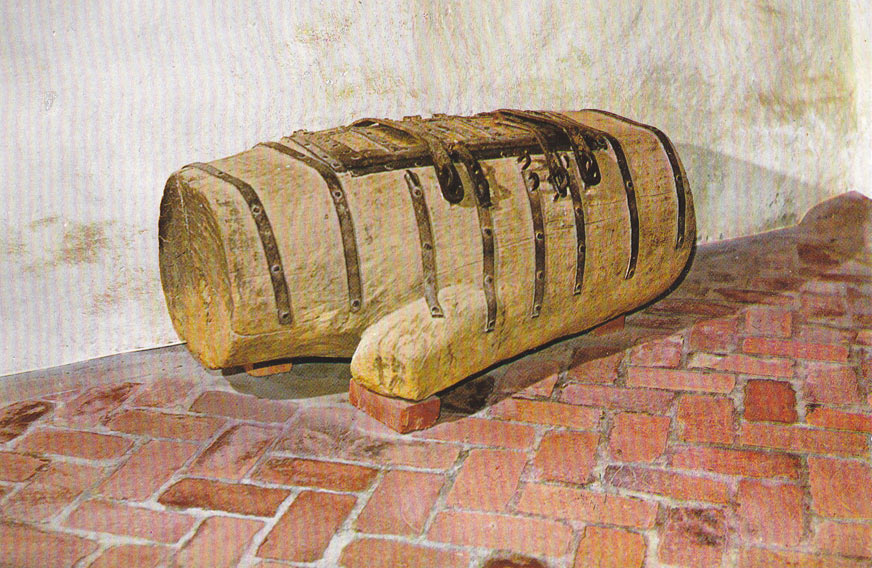
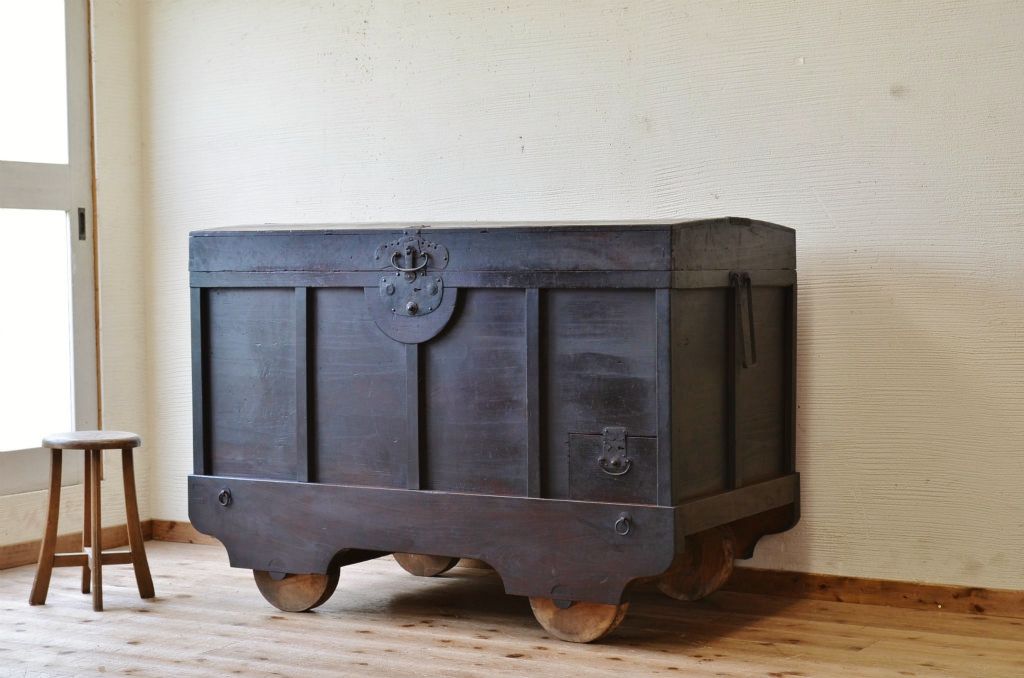
The basic chest has 4 fixed sides, a fixed bottom, and an operable lid on top. Some have legs of one type or another, others don’t. Some have drawers, but historically most did not. There are many ways to construct them, with some materials and methods better than others. There are even a few examples of nordic chests made by hollowing-out logs.
Since at least the bronze age, chests used by common folk were expected to provide more than just storage space, but to do double, even triple duty as tables, benches, beds, food storage, food processing equipment and sometimes even fortifications.

For millennia chests were used to house and protect clothes, blankets, linens, armor, weapons, boots, horse gear, cooking and eating utensils, food, and money, just to name a few categories. Nowadays we tend to think of chests as storage space for clothing and blankets, or as a bench seat placed at the foot of a bed, but they were also practical household tools used to store grain in hovels shared with livestock and lit by stinky rush lights when beeswax candles were a prohibitively expensive luxury. The inverted lid of these “grain arks” were used as a trough for kneading bread dough after the goodwife had turned the winnowed grain into meal during her “daily grind.”


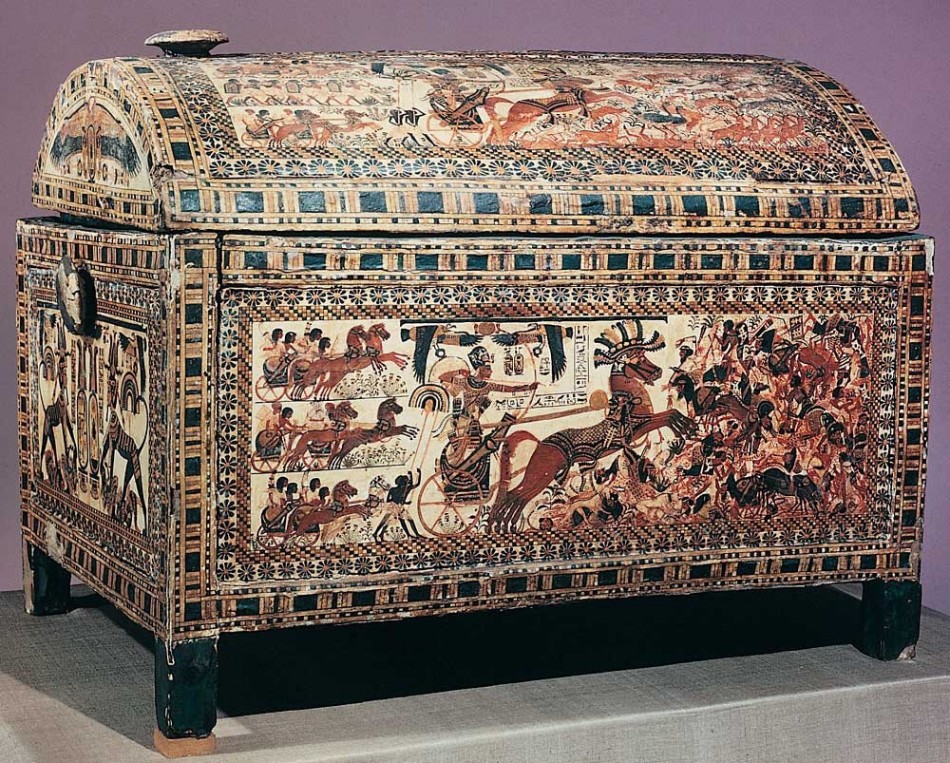
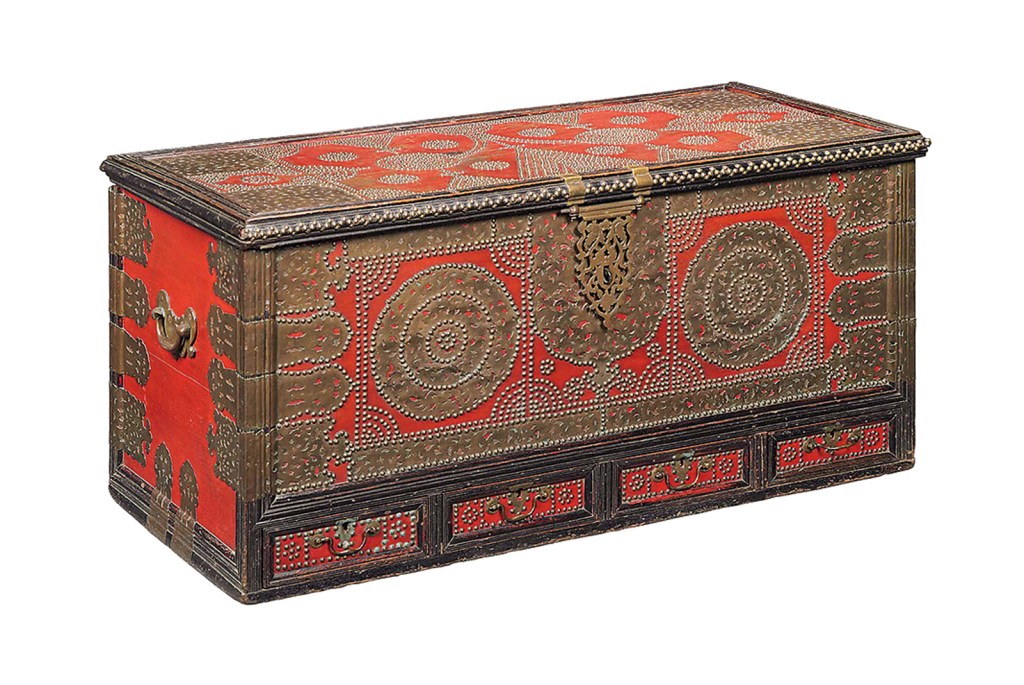
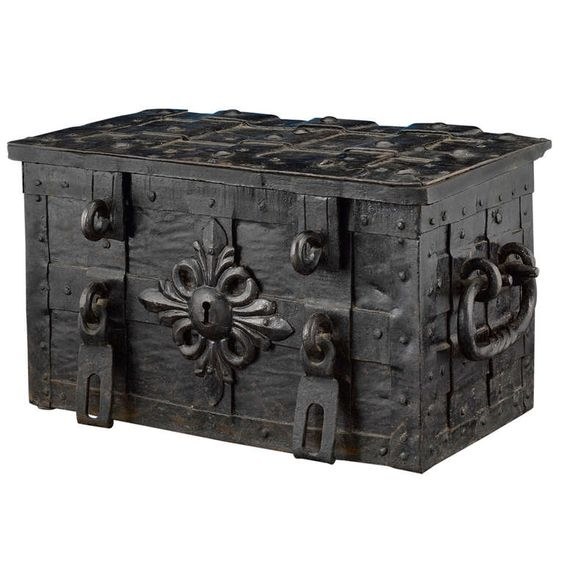
Chests throughout history have been mostly simple, durable boxes, but at times they have been fabulously expensive pieces of fragile high-art intended to communicate status and wealth, with many examples in museum collections.
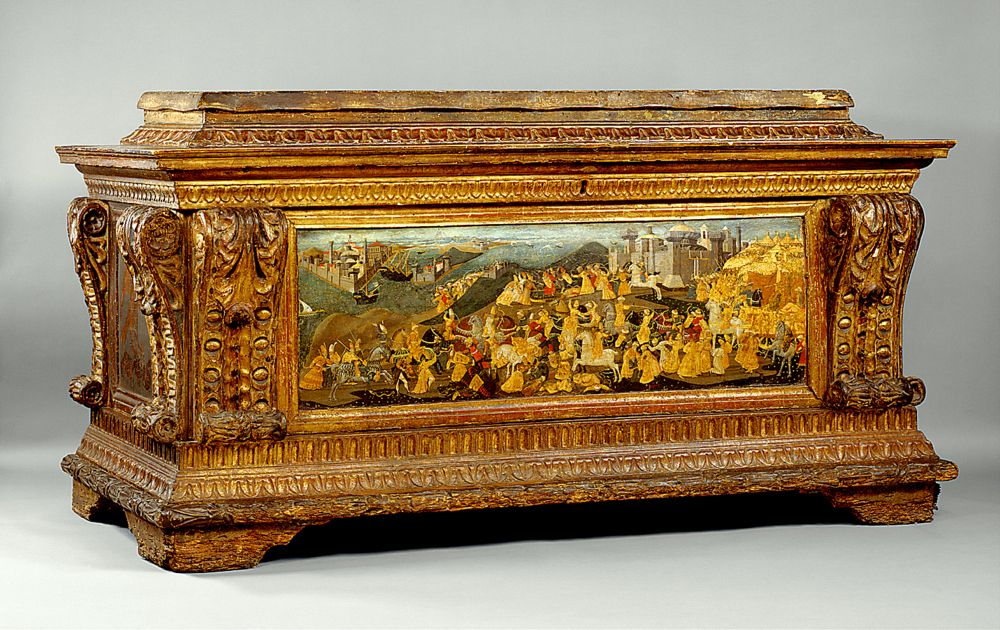
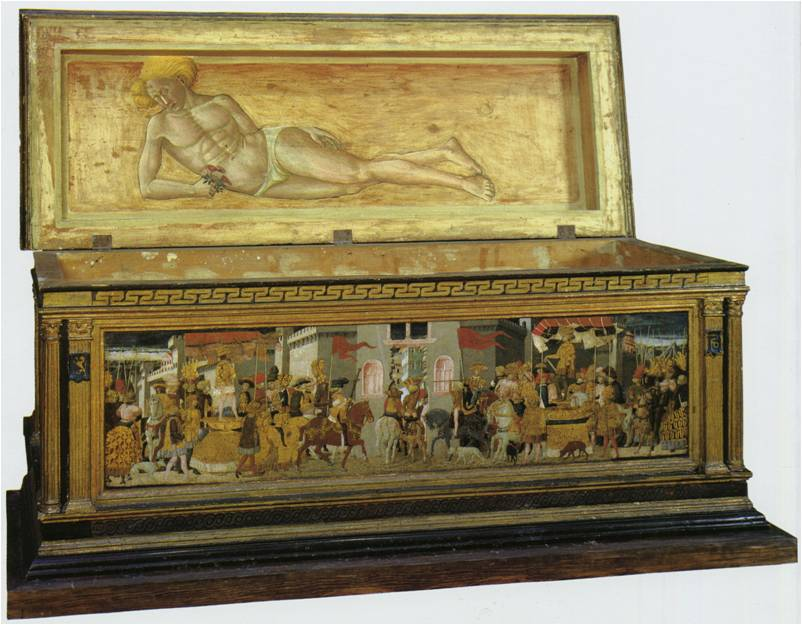
Throughout history chests have been carved, painted, lacquered, covered with nails, inlaid with mother of pearl or chased metal, and even gilded with gold leaf. They’ve served as strong-boxes for crusader banks, transported Inca and Aztec gold on Spanish galleons, and accompanied Italian princess to their new, married life. But whatever their purpose or appearance, chests were once the most common storage container in human civilization, with every well-established household throughout the world possessing at least one.
Regardless of where your forefathers hail from it is safe to say that thousands of chests served your ancestors down through history. The chest is older than the 4-legged chair, certainly older than the elevated bed. Only dirt has a longer track record.


Chests are not as ergonomic or convenient as modern cabinets, and for this reason and others have fallen out of fashion, but their utility is not diminished especially in the case of woodworking tools which do not wrinkle or molder.
There are many surviving examples of ancient toolchests we can learn from, and Europe and the Middle-east are not the only available sources of inspiration.


One of the first pieces of furniture a journeyman woodworker in centuries past would make was a toolchest to house his valuable tools. Accordingly, many old woodworking instruction books included designs for toolchests. One such book was the inspiration for my toolchest.
Based on statistical data, the vast majority of modern buildings have a useful lifespan of around 50 years. Furniture and casework is much less nowadays. While this mindset has been a reality, indeed has been celebrated for the last 80 years or so, it is a wasteful attitude your humble servant strongly adjures, one that diminishes the quality of our current existence, beggars civilization’s future, and stuffs landfills. I have no interest in making low-cost objects that self-destruct or that might embarrass me in the eyes of my descendants. Accordingly, I set the useful lifespan of objects I make for my own use at 200 years. There is an off-chance I won’t be around that long, but God willing and the creek don’t rise, I can be sure a few of the things I make with my own hands will, including this toolchest. Do you have useful lifespan goals for your woodworking?
While there are many varieties, no piece of furniture has served humanity longer or better than the chest. If you value your woodworking tools and want a woodworking project that will have long-term value, the toolchest is a storage system you should at least consider.
In the next post in this series on tool chests we will examine the goals and objectives you would be wise consider when designing a toolchest, as well as the challenges toolchests face in the real dirty world.
YMHOS

If you have questions or would like to learn more about our tools, please click the “Pricelist” link here or at the top of the page and use the “Contact Us” form located immediately below.
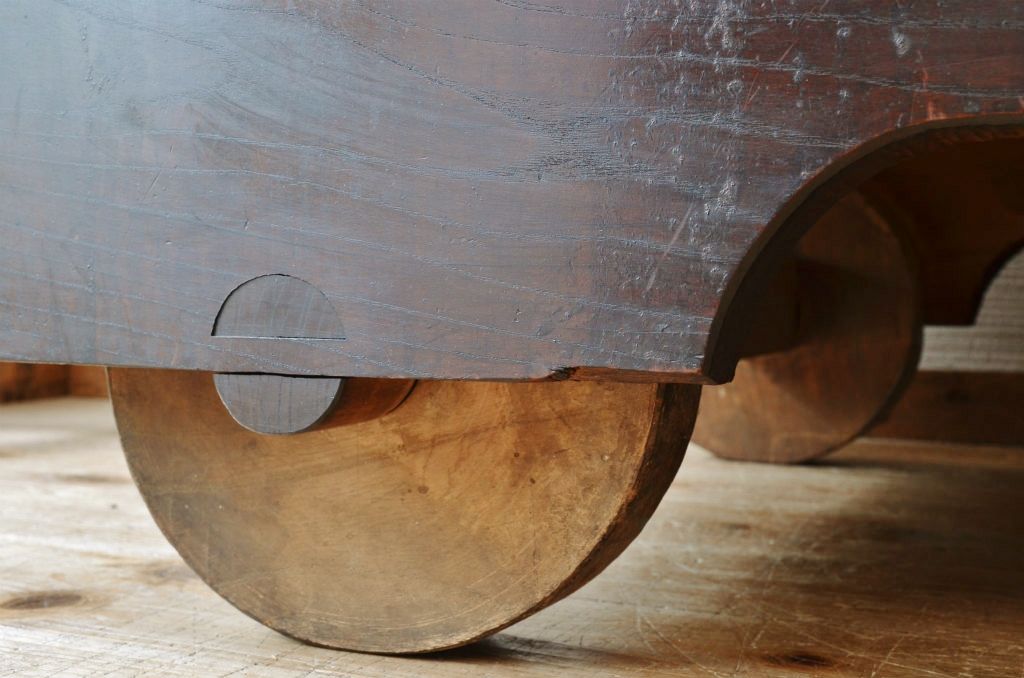
Please share your insights and comments with everyone in the form located further below labeled “Leave a Reply.” We aren’t evil Google, fascist facebook, or thuggish Twitter and so won’t sell, share, or profitably “misplace” your information. If I lie may the wheels on my toolchest become square.
Other Posts in this Series
- Toolchests Part 1 – And Away We Go
- Toolchests Part 3 – Pros and Cons
- Toolchests Part 4 – Goals & Objectives
- Toolchests Part 5 – Key Performance Criteria: Avoiding The Whirlpool of Indecision
- Toolchests Part 6 – Key Performance Criteria Solutions 1
- Toolchests Part 7 – Key Performance Criteria Solutions 2 – Sealing, Insulation, Security, Portability & Tiedown
- Toolchests Part 8 – Under the Lid
- Toolchests Part 9 – Trays
- Toolchests Part 10 – The Dungeon
- Toolchests Part 11- The Bottom
- Toolchests Part 12 – The Sawtill
- Toolchests Part 13 – Finishes
- Toolchests Part 14 – Repairability
Another chest making technique to add to the list is the bentwood box method used by the natives of the Pacific Northwest. The Haida were/are particularly good at making these.
LikeLike
Thanks, Gary. Excellent point!
LikeLike
I’m looking forward to the rest of this series. After my grandfather passed, I spent an afternoon in his workshop filling a rental car with whatever looked useful and/or well-loved. And so began my woodworking journey.
I stuffed odds and ends in what seemed at the time to my untrained eyes to simply be a loudly-painted, old teal box. It was so heavy and large in my small apartment that I thought it might better serve me sawn apart. Of course I later found out it had carried all of my great-grandfather’s tools across the Atlantic from Bohemia, where he continued his trade in Cleveland.
With any luck, perhaps your descendants will stumble upon some carefully joined box of yours and embarrass themselves!
LikeLike
Mike: Great story about valuable tools, made more-so by time, distance and the family connection. Any ideas how we might avoid such confusion with our grandchildren? Maybe a big brass plaque with a curse inscribed? Perhaps something like “Piles shall come on swift wings to him who abuses these tools?”
LikeLike
Looking again at the gorgeous wheeled nagamochi tansu.
Apart from the sweet little stool next to it, I notice that the lid of the chest is arched. That is an attractive detail, but it would prevent anyone from stacking other items on top. And the arch would provide I think only a minor increase in volume so it must have been done for esthetic reasons?
And I like the small drawer accessed from the outside. Is that a common feature of such chests?
And the wheels. I’m guessing that, as you suggest, these were “in case of emergency” wheels. Because they are made of wood and that bridle joinery between the axle and the side of of the chest is attractive but looks iffy. I would not want to roll that very far on cobbled streets. Much safer to get my minions to carry it.
LikeLike
Gary: I believe the arched top is probably intended to keep people from stacking stuff on top. I don’t believe it’s a common detail in Japanese tansu, but there are experts who would know more than I do.
Another upside to the arched lid is that it is more rigid than a flat plank lid and tends to warp less. A warped lid won’t seal tight and looks foolish.
It has the downside you noted that the interior space may not be used very effectively. Perhaps not too bad if clothing is stacked inside. The other downside I am aware of is that one would need to pull the chest away from the wall, at least the depth of the lid, to open it.
The little drawer is actually very common in Japanese tansu.
Remember, this was made before rubber was available in Japan and iron was expensive, so wood was a reasonable material for wheels. It was not that long ago that most wheeled carts in Europe and America had solid wood wheels without tires, not even iron ones.
Minions are a great idea. Where can I get some of those? …. Wait a minute, my wife thinks I’m her minion….So can a minion have minions?
LikeLike
Minions of minions, sometimes known as childrens, are a false promise and a veritable pit of constant requirement. Somewhats believed that as they age their usefulness greatens however dissension of opinion states otherwise by the other whatsomes. I am yet to find practical application for my two minions however on occasion great mirth is issued forth because of them and so they remain and so I am their minion.
LikeLike
Matt 23:11 But he that is greatest among you shall be your servant.
LikeLike
It just occurred to me as I anxiously await the next post in this series that if I don’t comment you have no way of gauging interest. I realize you would probably carry on either way but wanted you to know this is of particular interest to me right now as I’m setting up my first hand tool shop and trying to weigh my options without much experience. Eventually I’m just going to have to dive in and try something and see what my actual preferences are but I highly value the experiences of professionals.
I don’t particularly need my tools to be mobile and a wall cabinet appeals to me as the most practical but I also recognize there’s a lot of highly experienced people that value their chests. Of unique concern to me is my shop is 1/2 mile from the ocean, it is open air 24/7 and is an hour from where I live so at best I get to use the tools once or twice a week. So no matter what my ultimate tool storage solution I will need to be able to seal it.
I greatly appreciate all you share here and really look forward to where this series goes!
LikeLike
It just occurred to me as I anxiously await the next post in this series that if I don’t comment you have no way of gauging interest. I realize you would probably carry on either way but wanted you to know this is of particular interest to me as I set up my first hand tool shop and weigh my options without much experience. Eventually I’m just going to have to dive in and try something and see what my actual preferences are but I highly value the experiences of professionals.
I don’t particularly need my tools to be mobile and a wall cabinet appeals to me as the most practical but I also recognize there’s a lot of highly experienced people that value their chests. Of unique concern to me is my shop is 1/2 mile from the ocean, it is open air 24/7 and is an hour from where I live so at best I get to use the tools once or twice a week. So no matter what my ultimate tool storage solution I will need to be able to seal it.
I greatly appreciate all you share here and really look forward to where this series goes!
LikeLike
Jonathan:
Thanks for reading the blog and especially for your insightful comment. I do indeed appreciate the feedback. It helps me to do a better job.
Over the years I have tried every tool storage system I can imagine, cabinets included, of course. Besides my toolchest, I have a large rolling cabinet I use when back in the USA. Not sure where home is anymore…. My point is that I’ve been at this as both professional and hobbyist for a long time and don’t come at the problem of tool storage as someone that has tried only one way.
You mentioned being in close proximity to ocean air. My toolchest spent several years located close by the ocean on a hot, humid, rainy (squalls twice daily) voracious termite-infested tiny Pacific island constantly exposed to salty air. More than anywhere else my toolchest has been, rust was a serious problem there. Don’t forget that if you have salt in the air, you also have salt in the dust, so protecting metal tools from both airborne salt and salt in dust is important. Fortunately, if the chest is carefully designed and properly built, you can make it almost airtight so shutting out airborne salt and salty dust is as easy as putting the tools in their assigned spaces and closing the lid, something that modern cabinets and metal or plastic chests simply can’t achieve as effectively.
The toolchest has upsides and downsides which you should carefully consider before making a decision.
Please continue to share your thoughts with us. Stan
LikeLike
Perfect timing! I really enjoyed that next post (part 3) and your responses here. It’s good to know you have a cabinet as well and employ that at times that are most fitting. I really look forward to reading about the solutions you have implemented. I’ve gotten a little sneak peak by scouring the archives of the
forum (I have thoroughly enjoyed reading the knowledge you shared there and in all honesty, wanting to see pictures of your toolchest over a year ago is what got me to start paying $6 a year fee to be a member 🙂 but am looking forward to what you will present here.
I also have found Tony Konovaloff’s toolchest inspiring and really like what he did with incorporating side drawers rather than sliding tills. It appeals to me from an organizational perspective and keeping everything in it’s place. It seems like the bottom floor tools are more easily accessible without having to slide tills. The dutch tool chest design is appealing as well since it seems to raise the chest up a little higher and also doesn’t involve sliding tills out of the way.
Proper design and construction techniques is of the greatest interest to me as you mentioned to ensure I keep as much salty air out as possible and ensure the chest lasts for as long as possible. Again, I appreciate everything you do, especially by providing a solid source to premier Japanese tools that those of us on the other side of the world can trust!
Jonathan
LikeLike
Jonathan:
Thanks again for your insight. I don’t like to talk about the forum you mentioned. Too many bad memories of abuse by the excrement-covered puss-oozing fly-blown Great Goblin that owns it and his vicious nitwit troll minions. I long ago demanded he remove my posts, and even sent him formal notice that he is in violation of copyright law by not doing so, but goblins will be goblins and lawyers will be lawyers…. Just know where your 6 bucks is going. Anyway, enough of scatalogical memories.
I like Mr. Konovaloff’s toolchest. It is very classy. But I am worried about the lid. I don’t know the construction he used, but unless the lid is a veneered MDF or plywood of one kind or another, eventually it will self-destruct. I sincerely hope not.
I love black walnut, and used it as much of it as I could afford when I was a young man, but after learning expensive lessons with other people’s money in high-end commercial situations, I am no longer a fan because the color always fades and changes unpleasantly over decades of exposure to sunlight. Mr. Konovaloff considers his toolchest to have significant value in marketing his products and services, an attitude I respect highly. He calls it his business card. Well said. So for him, Walnut may be the perfect wood, but I would choose something else for better long-term performance if it was my “business card.” Its like a silk necktie, a piece of apparel I am forced to wear too often. Expensive embroidered patterns are often more beautiful and vibrant, but the threads always pull out making the tie look like frazzled rubbish too soon. Not cost effective and frequently embarrassing.
My toolchest is made from Honduras mahogany, an attractive, stable, bug-resistant wood, but the grade I selected is not as pretty as Black Walnut. I varnished and polished it when new so the finish looked like a classic mahogany speedboat. Very sexy, I thought. But varnish does not hold up well, and requires regular maintenance. It doesn’t do a good job of protecting wood, IMO. So I decided long ago that a fancy appearance was not cost-effective. Mr. Konovaloff’s situation is different.
He has a dedicated, fitted place for everything and everything is in its place. I find this approach aesthetically pleasing and organizationally satisfying. I too used it for some years in my toolchest. But while it is absolutely necessary for tools mounted to the lid, over time I found this approach to be tedious and too inflexible. Personal preference only, of course.
The Dutch toolchest is interesting, but I wonder about how efficiently space is used. The slanting lid would be great for shedding snow and preventing stuff from being stacked on top, but it seems like it wastes a lot of volume unnecessarily. And it seems like getting stuff out of the front would be a pain, relatively speaking, unless the entire chest is elevated, essentially making it .. what? ….a cabinet? It seems like it would be clumsy to use if set on the floor. I haven’t built one and so can’t say anything from experience.
The inconvenience of sliding tills around to access the basement of a toolchest is a real problem. I struck on four solutions, although I admit they are not anything I thought up.
First, make your tills and the narrow ledges they ride on carefully to minimize friction, and AVOID RACKING and binding. A lot of toolchests fall short here. This is just quality craftsmanship, like gap-free dovetails and drawers with a piston fit. Some maintenance is necessary every few years. Ball bearing drawer slides are an option.
Second, make the sliding surfaces from materials that wear well. For example, white pine or sugar pine are not good choices because, while they are lightweight, inexpensive, easily-worked fragrant woods, they wear too quickly and may excrete sap that will gum things up years later. No need to use Bocote, but cheap materials often produce cheap results. Benny Franklin said it well: “The bitterness of poor quality remains long after the sweetness of low price is forgotten.” This problem is commonly seen in antiques.
Third, keep the sliding surfaces waxed and free of dirt and grit. Wax doesn’t shed dust/grit automatically and it can build-up and become abrasive accelerating wear. Airborne dust from sandpaper and grinders is especially problematic. This is common-sense housekeeping but still often neglected. These three items will make sliding the tills effortless even when full of heavy tools, and for many years. In fact, if you have done the design, materials selection and construction properly, you will be able to move a full till forward or backward with one hand only. I promise.
Fourth, plan your tool workflow and use it to design your tool storage instead of guessing. Begin by analyzing your tool usage. Yes, that means making a list or even a spreadsheet and recording the frequency of each tool being removed and replaced. When that analysis is done you can accurately plan (versus guess) your tills and basement so the tools you remove/replace most frequently are immediately accessible without moving tills. In my toolchest, the tools I remove/replace most frequently are mounted in the lid and in the top two trays, locations always in front of my eyes when the lid is open, the top tray pushed to the back, and the second tray pulled forward, so they can be removed/replaced by one hand without moving trays at all. This is superior to most commonly-seen cabinet arrangements. French-fitted spaces in the tills makes this inefficient, I learned through experience.
If I need to access tools in the space under the tills, what I call “the Dungeon,” I only need to push the second and third tills back out of the way. Just two hand movements. After the trays are out of the way, everything in the dungeon can be removed/replaced using one hand and without searching with a flashlight.
It’s important to avoid putting small items loose in the dungeon. Most of the tools in my dungeon are contained in wooden boxes, plastic trays, or canvas tool rolls I can locate without looking and easily lift out. The only loose tools are big ones like framing squares, a hewing axe, an adze, or a big Japanese rip saw called a “gagari.” This totally eliminates searching through a jumble. I may need to remove a chisel box containing 15 usunomi chisels to retrieve a single kotenomi chisel, but I never have to search or fumble around for that one chisel. This approach keeps Murphy asleep and Slim drunk saving a lot of time and aggravation. Once again, lessons learned from 25 years of using a toolchest.
I have drawers in my tool cabinet, but they do not use my time and space as efficiently as the old-fashioned tills. Counter-intuitive, I know. And I find lots of thin fiddly drawers irritating when I am in a hurry, which I always am when working wood. I do have one drawer dedicated to thin Japanese saws in my removable saw till.
I have found the toolchest to be a superior method of storing handtools I use frequently. Better than cabinets. But when it comes to absolute volume, the cabinet wins every time, especially for bulky powertools and supplies. So I have both. But only the toolchest here in Tokyo.
Stan
LikeLike
I just wanted to add something about Mr. Konovaloff’s walnut toolchest because one of my questions about it left me scratching my head.
I checked my back issues of Fine Woodworking and found the article he wrote for the Oct 1991 issue about an earlier version of his toolchest in pine. The drawings explain how the lid, a solid-wood panel, is fixed to front frame of the lid, the edges ride in sliding dovetails, and the back of the panel is attached to the back frame with screws and buttons, like a tabletop. It’s a nice, simple design.
Mr. Konovaloff does excellent work. This was a few years before I designed and built mine, but the designs share little in common.
LikeLike
Stan,
Incredibly valuable insights, very enjoyable to read. You aren’t the only craftsman I’ve heard come to similar conclusions after spending many years working out of a toolchest and experimenting so the insights carry great weight and I consider them a superior foundation to begin my own experimentation with my work flow.
I’m disheartened to hear about your forum experience and angered that such valuable experience is so rudely disregarded and devalued. I’ve noticed the few remaining professionally experienced voices are dropping off to near zero. There is little I gain at this point other than searching the archives. You’ve given me pause to that now, and rightfully so. I’m grateful you have chosen to share here and hope you find the respect you deserve. I for one am extremely thankful and would pay for the knowledge shared in a heart beat.
You mentioned at one point that you had shelves and spots on the wall to hang your most used tools but they didn’t permanently live in those spots, just while you were using them. That really clicked for me, I’m not sure if you still work that way but it made a lot of sense to me. I don’t necessarily have to put everything back in the chest after each single use, but there is no argument to the value of being able to store everything there at the end of the day for protection from the elements and good housekeeping. It’s not very inspiring to show up to a cluttered bench first thing in the morning!
I believe you with the ease of sliding tills when properly fitted. When I lived in Iowa I was able to attend the first two Handwork events held in Amana, IA. Chris Schwarz brought his traveling toolchest and I will never forget the feeling of sliding that till. It was like it was floating on air. It makes me want tills just so I CAN move them 🙂 It was the first time I had encountered that level of craftsmanship and I’m thankful I got to. It’s sad it’s so rare today.
Thanks for engaging in this conversation and taking the time. I value all you share, there’s only so much we can learn on our own.
Jonathan
LikeLike
You are too extravagant in your praise.
I don’t mean to discourage you from searching the archives, just from giving honest money to the greasy Great Goblin.
Regarding shelves, sometimes I will install some on a wall if I own the house. Rentals not so much. Of course I use space under the workbench.
More often nowadays I place an adjustable wire shelf with casters adjacent or opposite my workbench. These have become inexpensive the last 15 years or so, and are easy to knock down when I move. And I can push it out of the way if I need an assembly space. I spread cardboard over the wire shelves to protect tools from direct contact with the chrome-plated metal. I use this shelving for tools and supplies I am using that day, especially when working with long boards that take up space on the workbench top. I also use it for storage of the components of the project I am working on. Of course, it provides little organization and almost no protection to the tools. And since it always devolves into a jumbled mess, every few days I need to kick myself to clean/reorganize it. So yes, I don’t return every tool to the toolchest immediately after using it. Mea culpa, mea culpa, mea maxima culpa.
Stan
LikeLike
This information is all the better for being considered, accept the praise and buy a bigger hat Stan!. A great deal of time is required to achieve a satisfactory result which being of the mental manipulation kind is difficult to quantify in an age of overvaluing shiny jingly things or the equivalent ones and o’s of digital ‘value’ .I have used steel and plastic for tool transportation and storage . Plastic, which inevitably never lasts the distance gives out with stress from impact or uv or weight or poor fastening/hinges/clasps etc. The steel is not kind to woodworking tools in some respects and the best steel toolboxes I have used are either twenty years old or older being second hand. The new ones I have come across readily available in my neck of the woods seem to suffer from shiny jingly syndrome in that you hand over some of your own for something which is not of value- it is crap so suffer the same fate as the plastic ones. Most of all I have found the layout of your own wooden toolbox made for your own woodworking tools far better and easier to utilise. The workshop is a little different, I have a bigger one I am working on. The existing is , ahem , compact about 3×3 mtres . The current workbench has a lot of inbuilt storage and a few racks on the wallspace not taken up by all the other junk ..err, really important good stuff which is stored in there. Stan, I find value in your writing and opinion because it is drawn from experience, much of which I find a commonality in with some of my own and because instead of ignoring history you draw knowledge from it. I made a scaled down Dutch toolchest relatively recently for usage on site and it has been so much better than the other options I have used previously for my woodworking hand tools I wish I had done it sooner. Hindsight ,hmm . Business card -yes, protects tools-yes, organised-yes, portable-yes but could do with antigravity device hop up, satisfaction personally-yes, last one? well , we are all a work in progress and many people have addressed tool storage and transport before so there is much to learn. Where I live excessive drying and heat is an issue to consider. The next few years will inform me a great deal about some of the construction choices I ran with and possibly may choose to run away from .
LikeLike
Gav:
Thanks for your kind words. It means much coming from you.
I would love to hear your thoughts on your Dutch Toolbox. It is an alien form to me, so much so that I wouldn’t be surprised if did have antigrav capability!
Stan
LikeLike
Stan, it is damn near impossible to leave anything on the lid when shut. This ensures I don’t . The construction itself is pretty quick for the basic box design of old- Lost Art Press guys/girls are all over that having analysed an old example. Dovetailing the two sides to the base, rebate for middle shelf , did use breadboards ala Chris Schwarz for the lid and the rest of the main construction is screws. This in itself leads to customising as so much time was saved , slippery slope indeed. The majority of the tools I jammed , carefully positioned, into the chest were ones I have used more or less continuously over many years and a few I like to have . The vertical top loading is quite handy for reach and easy viewpoint, for it’s size relatively tall although bending for me is 80% not an issue in knees or back and the majority of the tools have specific slots/holes /french fitting which does assist in not having to rifle through. I didn’t wish to have to shift around one thing to obtain another if I could help it . There is a small tray at the bottom that can hold infrequently used tools but ones I have used from time to time that makes life easier .Attaching tool holding cleats etc to the vertical grain does lead to a range of allowances for potential wood movement, some a little experimental on my part. In some ways I can appreciate the use of decent quality plywood for the construction of this type of chest but as salvaged wide boards of pine were available out of a job and I wanted to keep the weight down and I like solid timber they were used, they were also free! I am not particularly big in build so reduced the size to keep down the weight and keep the size manageable for handling. There is a seperate bottom drawer which hold in the majority boring bits of various guises along with some diamond paddles and a (close your ears) double sided oilstone and a strop. It can be removed easily to reduce the overall weight for portage. I will send you some pics if you like and if you have any specific queries ask away.
LikeLike
Gav:
Thanks for the insight. It sounds like a convenient and efficient toolbox. Is it two drawers or one? Does the sloped lid create much dead space?
The recycled pine boards sounds like a good solution. Much more satisfying than plywood, I think, especially if fasteners are used.
I would love to see some pictures. Sadly I can’t deal with them in these comments, but if you send them to my email that would be great!
Regards,
Stan
LikeLike
Stan,
Just wanted to say that if you find it supports your goal with this series I would be interested in seeing some pictures of the inside organization of Gav’s and any other tool chests you have that represent your values. The inside seems to be the greatest area for making or breaking the functionality of the chest (besides of course construction techniques) and each of us is unique in how we like things. Thanks again for sharing your hard earned experiences and knowledge.
Jonathan
LikeLike
Excellent idea! Gavin has kindly sent pictures and written a great description, including some clever design decisions, via email. I have asked him if he would be interested in writing a guest post. Fingers crossed!
LikeLike