

When I’ve painted a woman’s bottom so that I want to touch it, then [the painting] is finished.
Pierre-Auguste Renoir
A worthy toolchest’s bottom should be like that of an elegant woman: well-formed, seldom seen, and never heard. Not that your most humble and obedient servant has an obsession with bottoms, mind you, it’s just that my goal of a 200 year useful lifespan for my toolchest compelled me to give this obscure, oft-neglected component bottomless thought. If you expect your toolchest to endure eight generations, you too may want to give it some fundamental consideration too (ツ).
The Historical Record
A strong, rot-resistant bottom panel that shuts out moisture, dust, insects, and vermin is a critical component in any workman-like toolchest in your humble servant’s opinion.
You may think these are easily satisfied common-sense performance criteria, but the historical record shows that such is not the case. Indeed, a problem commonly seen in antique casework is rotted-out, bughole-weakened, rodent-nibbled bottom panels. One cause of this damage is that, during much of their lives, the bottoms of many old chests rested directly on damp floors or even the bare ground, absorbing moisture and creating a damp, woody environment for bacteria to run riot for decades on end, with no air circulation to remove dampness, and no exposure to sunlight to either dry the bottom or retard fungal growth. And don’t forget that yummy unprotected, unsealed softwood just begging to be munched on by bugs (betimes with a drop o’ Tabasco sauce, no doubt).
Indeed, damaged bottoms were so common in casework in past centuries that it appears to have been standard practice to make them easy to replace. Or perhaps they rotted because they were less visible, excusing the use of cheaper, less-durable, unfinished secondary woods attached using nails instead of more expensive and durable woods, finishes and joinery techniques, with easy replacement being just an unintended side-benefit of cheaper construction.
I will let the preservationists and historians argue this chicken-or-egg problem, but being a belt-and-suspenders-and-safety harness kind of guy, I’ll have nothing to do with a flawed chicken even if it was hatched from a traditional egg.
Frame & Panel Construction
There are a number of ways to build a toolchest’s bottom panel. Perhaps the most convenient but worst material to use is MDF, or as I like to call it, “garbage.”
Marine-grade plywood is a much better choice, but it too will delaminate and rot given enough time, moisture, and persistent micro-organisms.
Of course, in order avoid the failings common to most casework thereby ensuring the chest will provide useful service for 200 years, I selected time-proven frame-and-panel (F&P) construction in solid wood for my toolchest’s well-formed bottom.
Solid wood is not perfect, but it is better than either garbage or plywood on condition that the F&P assembly is built correctly, and some of the measures listed below are employed.
Some general principles of proper F&P construction follow:
- Properly Acclimated Wood: All the wood used must be well dried and its moisture content be in approximate equilibrium with the local environment at the time you make the assembly. Neglecting this condition is a common cause of eventual failure;
- Properly Sized Frame Members: The width of the frame members must not be too wide or the corner joints will fail and/or the frame may push the casework apart when it expands, or leave gaps when it shrinks, due to seasonal humidity changes;
- Properly Sized Panels: Panel width and the dimensions of the tongues and grooves that connect panel to frame must be sized so that seasonal humidity changes do not cause the panel to swell enough to break or warp the F&P assembly, or shrink enough to leave gaps between the panel and frame members;
- Unconstrained Movement: A very important consideration is related to number 3 above, namely that the movement (expansion/contraction/sliding) of panels must be unconstrained. A common failing in F&P assemblies is glue squeeze-out or finishing materials inadvertently gluing the panel’s tongues inside the frame’s grooves resulting in broken assemblies, and more frequently, cracked/split panels. The solution is of course to use the right amount of glue and be careful when finishing, but since Murphy is a cunning bugger adept at concealing glue squeeze-out and finish infiltration until it’s too late to detect (and pixies), I always coat the panel’s tongues and the inside of grooves with wax to prevent glue/finish adhesion. Please also be careful that nails/screws/dowels used to secure F&P assemblies into the casework do not prevent your panels from moving freely.
Isolation
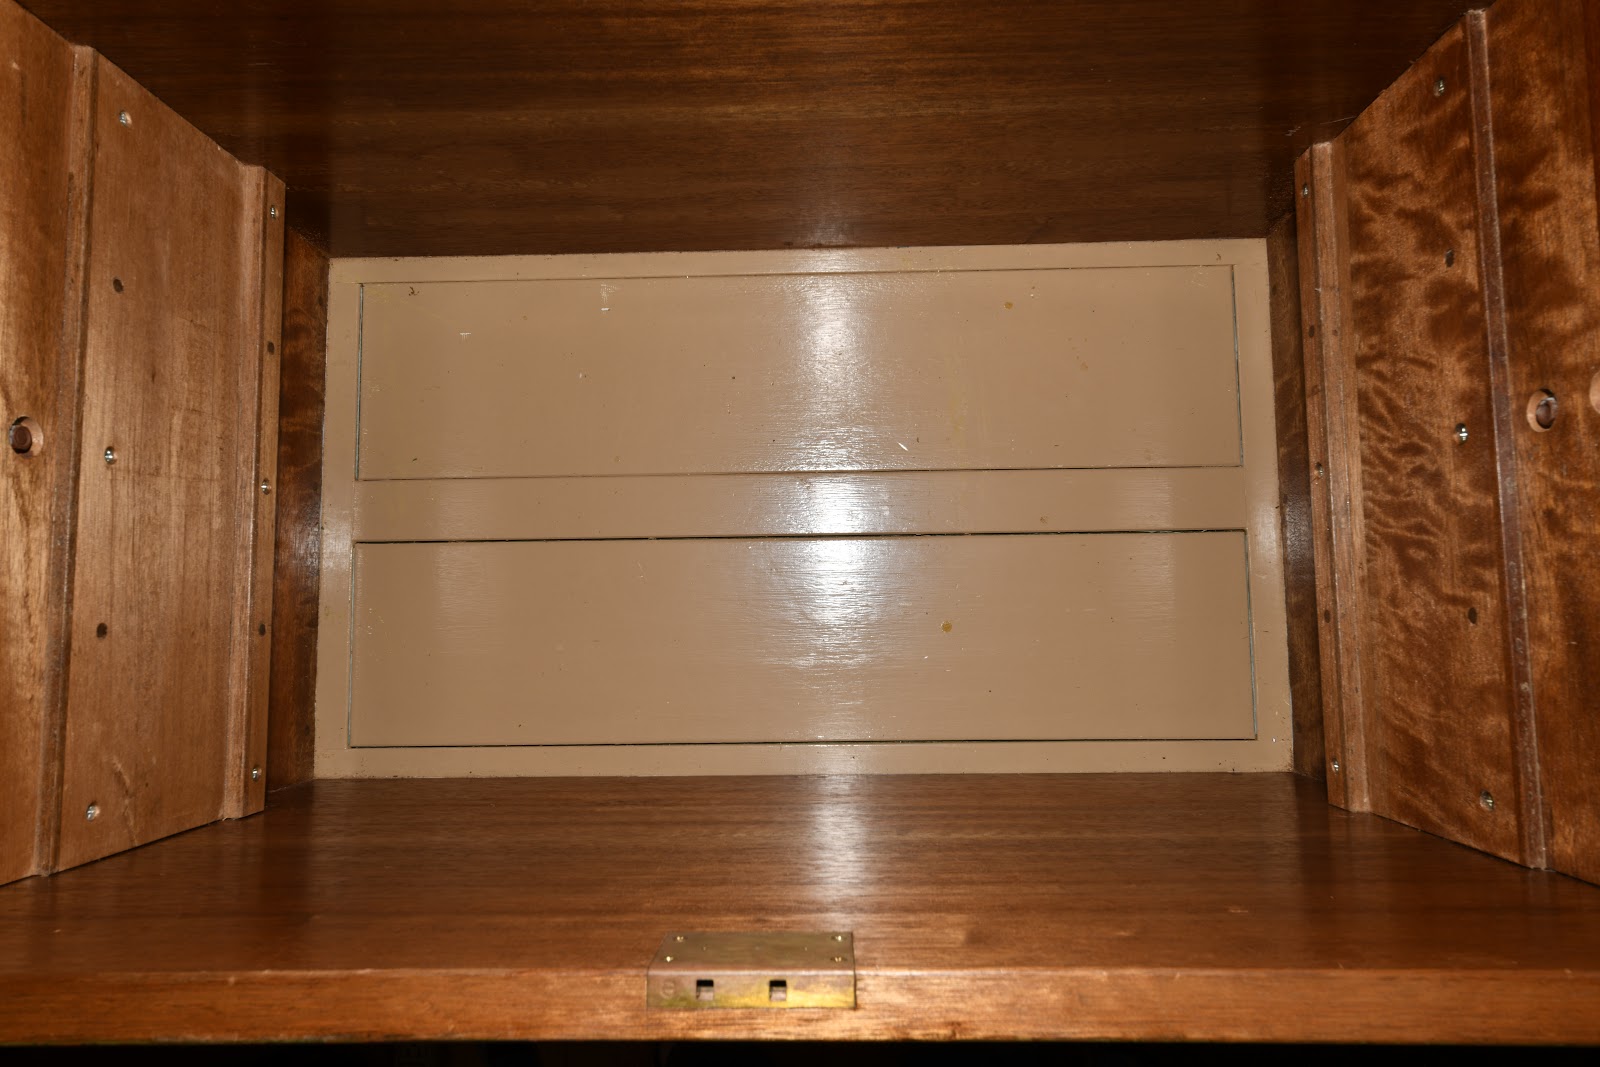
With a lifespan performance criteria of 200 years in mind, the first solution I employed to maximize the bottom’s longevity was to make it nearly impossible to place the bottom in direct contact with the floor or ground by leaving an “air-gap.” I did this by dropping the skirt below the chest’s bottom panel so the chest rests on the perimeter skirt instead of its bottom reducing the potential for moisture absorption through direct contact with the ground/floor. Better-quality casework in past centuries often incorporated this design detail because it works.
Ventilation
The second design detail I employed was to scallop the base/skirt to allow air to circulate underneath the toolchest from all four sides, and to facilitate cleaning. This too is a traditional detail superior to simpler modern designs.
Better Woodworking Through Chemistry
The third rot-prevention measure I employed is more or less modern. I saturated the frames and panels of the chest’s bottom as well as the skirt in CCA (chromated copper arsenic) wood preservative using plastic bags and a vacuum pump, then let the wood dry thoroughly. I also primed/painted the bottom panel with high-quality latex paint to keep out water and seal in the nastiness of CCA.
CCA is a very effective chemical that was not available before the mid 1930’s. Its use is restricted in the USA in some places, and is no longer available for retail sale in a few States, but despite what the coke-snorting enviro-despot lying lawyers in North Venezuela (the coastal badlands nestled between Mexico and Oregon) opine, it is quite safe if used properly. The key is to not ingest it. Please everyone recite the wood finisher’s pledge along with me now: “I will not drink wood preservatives, use CCA impregnated toothpicks, nor wash my face with oven cleaner.” Don’t you feel safer now?
Wood treated with CCA has a greenish color. No doubt you have seen construction lumber pressure-treated with this chemical. Copper is the active ingredient which prevents the growth of bacteria and fungi. Arsenic is the primary insecticide. The chromium component has little if any direct preservative effect but serves to fix the copper and arsenic to the wood. We don’t want it leaching out, of course.
So far, the bottom is holding up perfectly even after spending years resting directly on the concrete slab-on-grade floor of a non-air-conditioned garage on the very humid (80~95% RH year-round) and horrifically termite-infested Pacific island of Guam, but the final verdict won’t be in for another 175 years. I’ll let you know how that goes.
In the next exciting chapter in this tale of high adventure I would like to present the most unique feature of my toolchest, the sawtill. Trust me, you have not seen one like it before.
YMHOS

Other Posts in this Series:
- Toolchests Part 1 – And Away We Go
- Toolchests Part 2 – History
- Toolchests Part 3 – Pros & Cons
- Toolchests Part 4 – Goals & Objectives
- Toolchests Part 5 – Formulating Performance Criteria
- Toolchests Part 6 – Key Performance Criteria Solutions 1 – Durability & Longevity
- Toolchests Part 7 – Key Performance Criteria Solutions 2: Sealing, Insulation, Security, Portability & Tie-down
- Toolchests Part 8 – Under the Lid
- Toolchests Part 9 – Trays
- Toolchests Part 10 – The Dungeon
- Toolchests Part 12 – The Sawtill
- Toolchests Part 13 – Finishes
- Toolchests Part 14 – Repairability
If you have questions or would like to learn more about our tools, please click the “Pricelist” link here or at the top of the page and use the “Contact Us” form located immediately below.
Please share your insights and comments with everyone in the form located further below labeled “Leave a Reply.” We aren’t evil Google, fascist facebook, thuggish Twitter or the Congressional IT department of the Democrat Party and so won’t sell, share, or profitably “misplace” your information. If I lie may my toothpaste taste like oven cleaner.


Please Leave a Reply