The fissured and cracked jigane of a 70mm plane blade forged by Usui Kengo, another Niigata blacksmith (RIP). Notice the rod which retains the chipbreaker is non-existent, replaced by two short stubs. An elegant detail in this plane body by Ito-san (Soh 宗).
If you can’t explain it to a six year old, you don’t understand it yourself.
Albert Einstein
In the previous article about sharpening Japanese woodworking tool blades we looked primarily at the nature of the hard high-carbon steel used in making woodworking blades. In this post your humble servant will try to dispel some of the confusion that surrounds the other metal used in making most Japanese knives, axes and woodworking blades, namely the soft low-carbon/no-carbon steel called “Jigane” (地金). I hope this brief explanation will improve Beloved Customer’s understanding of some Japanese tools and aid your sharpening efforts.
Sources of Jigane
Most Japanese woodworking blades, and many knives, are comprised of a thin piece of hard high-carbon steel, discussed in your humble servant’s previous article in this series, forge-weld laminated to a larger and thicker piece of softer low-carbon steel or wrought iron called “Jigane” (jee/gah/neh 地金) in Japanese, which translates directly to “ground metal.”
We will discuss this bi-metal lamination more in the next post in this series, but for now take my word that it is essential to the performance of many types of Japanese cutting tools nowadays, and for many centuries was also critical to manufacturing cutting tools in America and Europe as well.
The best jigane material for plane blades is said to be scrap iron salvaged from the boilers of old trains, boats, and factories, etc. having been subjected to thousands of heating and cooling cycles during their decades of service driving out most of the carbon, indeed making the iron very soft to the point of weakness.
The most desirable jigane for plane blades is therefore called “tired” iron, named so because it is not only soft, but because it looks weak and exhibits a visible grain along with cracks and imperfections which those well-versed in Japanese plane blades covet.
A pile of jigane, probably old salvaged structural steel. Looks like boards of old wood, but it ain’t.
Wrought Iron Production
Nowadays, this very low-carbon steel, also known as “ wrought iron,” is not produced in any volume for several reasons. First, demand is just too low to make it worthwhile to manufacture. Hand-forged ornamental iron is the only commercial usage besides Japanese tools of which your humble servant is aware, relatively microscopic markets. In fact, a constant complaint from ornamental iron producers is the difficulty of working the relatively hard material available to them nowadays.
The second reason is that steel production processes have changed drastically in the last 150 years. For instance, it used to be that steel began as iron ore, basically rocks, which were crushed, melted and refined into wrought iron, an intermediate product of steel production. Indeed, at the time this low-carbon product was much less expensive to produce than high-carbon steel and so was used for everything from the boilers, bridges, trains, ships and anchor chains mentioned above to axes, chisels, farming implements, machinery, what’s called “miscellaneous metals” in the construction industry, and of course plane blades. There are still a few surviving structures around that were made using this weaker material.
Nowadays, things are different. With high temperatures more easily attainable than they were prior to the 1850’s, manufacturing techniques have advanced to the point that carbon is incorporated into the steel automatically entirely eliminating the low-carbon wrought iron intermediate product.
Also, scrap metal has become critical to steel manufacturing processes nowadays. Remember what happened to steel prices worldwide when bloody-handed China was buying up huge volumes of scrap metal worldwide for its Olympic infrastructure building projects?
I think we can agree that this energy-efficient cost-reducing recycling of natural materials is a very good thing. But it does have a tiny downside, namely that most commercial scrap metal available in any useful volume today has been cycled through the modern steel-manufacturing process many times and already contains not only high levels of carbon, relatively speaking, but alloys such as chrome, molybdenum, and nickel from previous melting pots. Indeed, undesirable chemicals such as phosphorus, sulfur and silica tend to be high in typical scrap metal, not much of a problem for use in the construction, automotive, and shipping industries but a serious problem for tool steels.
In summary, wrought iron simply isn’t made anymore because it is neither an intermediate product nor a profitable one.
Japanese blacksmiths making high-quality plane blades nowadays mostly use wrought iron recycled from old anchor chains, old iron bridges, or other recycled structural components. If you see a hole in a plane blade, like the extra-wide plane blade pictured below, it once housed a rivet. Yes, structural steel was once connected with hot rivets instead of bolts. Hi-tensile modern bolts are decidedly better if less romantic.
A plane blade with an old rivet hole in its face, probably from an old iron bridge that once stood in Yokohama and which was recycled many years ago.
Plane Blades
A plane blade by Ogata-san in his “Nami no Hana” series using a special version of Swedish Asaab K-120 steel. Notice not only the fissures and defects, but also the striations and grain typical of soft, tired “wrought iron.”
Mr. Takeo Nakano (see his photo below) makes our plane blades. He is a kind, unassuming man in the best tradition of Japanese craftsmen with the outward appearance of a sedentary grandfather, but when using hammer and tongs at his forge within his dark and smoky smithy, his posture and visage resemble that of an intense Vulcan reinforcing the steel gates barricading the world of light against a demon onslaught. Oh my!
Like nearly all the plane blacksmiths in Niigata, he uses scrap iron obtained in a single lot many years ago from an iron bridge that was dismantled in Yokohama Japan.
Mr. Nakano at home
I am told that most of the jigane used for plane blades in Hyogo Prefecture is old recycled anchor chains from a ship knacker.
The back of the same Usui plane blade. Notice the cracks and voids visible in this excellent jigane exposed at the polished bevel. Very wabi-sabi. This jigane was once part of an iron bridge in the city of Yokohama, Japan.
In the case of plane blades, structural strength is not critical, so laminating a thin layer of high-carbon steel forming the cutting edge to a soft iron body is adequate. Indeed, the thicker the hard steel layer, the more time and effort it takes to sharpen the blade, so in a high-quality blade the thicknesses of the high-carbon steel layer and the soft jigane body will be carefully balanced to ensure the blade’s bevel rides the sharpening stones nicely and can be quickly abraded.
More inexpensive plane blades are forged using the same strip jigane used for chisels, a material harder than the ideal for plane blades.
Chisel Blades
In the case of chisels, while ease of sharpening is still important, the body and neck must be harder/stiffer to prevent them from bending, so a different, stiffer variety of jigane with a higher carbon content and fewer defects is used, and the steel layer is typically made thicker.
The jigane used by our chisel blacksmiths is a commercial product not produced anymore (thank goodness they have stockpiles) called “gokunantetsu” 極軟鉄 which translates directly to “extremely soft iron.” With a carbon content of 0.04~0.07%, a better description would be “very low carbon steel.” When heated and quenched, it doesn’t harden significantly.
The adventure will continue in the next exciting episode where we will bring it all together into a blade. Don’t forget to have popcorn and jujubes on-hand!
YMHOS
If you have questions or would like to learn more about our tools, please click the “Pricelist” link here or at the top of the page and use the “Contact Us” form located immediately below.
Please share your insights and comments with everyone in the form located further below labeled “Leave a Reply.” We aren’t evil Google, fascist facebook, or thuggish Twitter and so won’t sell, share, or profitably “misplace” your information. If I lie may the fleas of a thousand camels infest my crotch.
An Alchemist and his assistants working late at night in his workshop.
Behold, I have created the smith that bloweth the coals in the fire, and that bringeth forth an instrument for his work.
Isaiah 54:16 KJV
In the previous post we looked at some of the supernatural aspects of making and forging steel. In this post we will examine some alchemical aspects of woodworking blades, in the particular the iron and steel used to make them and the related chemistry of sharpness and sharpening.
This post could be very technical, but your humble servant has simplified the description of chemical processes to make it easier for the non-technical Gentle Reader to follow. Please bear with me.
The Alchemy of Mutating Iron to Steel
When carbon is combined with iron in the right proportion, steel is formed. This mutation is easily accomplished nowadays, but for most of human history it was a fiendishly difficult, chancy, expensive process. No wonder those who could accomplish the deed were attributed with magical powers.
But just mixing chemicals does not yield a useful cutting tool. No, the blacksmith must make the steel hard enough to hold a cutting edge, but tough enough to endure actual work. The catalyst for this mutation is heat. The ability to create a fire hot enough to melt iron was, until fairly recently on the scale of human history, the biggest hurdle to producing quality steel consistently.
If steel is heated to within a specific range of temperatures (difficult to measure by eye) and then suddenly cooled, crystalline structures containing small, very hard and relatively brittle crystals called carbides form within a softer matrix of iron. These hard carbides supported in this rigid crystalline structure are what do the serious job of cutting, not the softer matrix.
At the extreme cutting edge, this structure might be compared to a modern circular saw blade comprised of a relatively soft body to which is attached very hard tungsten carbide cutting tips.
A steel blade dulls when the crystalline structure either shatters, or the pressure and friction of cutting wears away or cracks the softer supporting matrix, allowing the carbides to be torn from the matrix leaving behind gaps of soft, blunt metal. The larger the carbide clumps are and the greater the distance between them, the more easily they are shattered and torn away, and the duller a blade becomes with each crystal’s failure.
In a low-quality blade, and given the same amount of carbon in a fixed volume of steel, the crystals will form into relatively large and isolated clumps separated by wide rivers and lakes of softer metal, as seen from the viewpoint of a carbide. The steel will crack along these weaker pathways when stressed, and when cutting, the softer material in these lakes and rivers will erode first, leaving the desireable carbide clumps unsupported and more vulnerable to failure.
A photograph of Shirogami No.2 high-carbon steel following heat treatment and tempering. In this case, the temperatures used were less than ideal resulting in the irregular crystalline structure shown. The black material is carbon, the grey material is converted steel, and the whitish areas are soft, unconverted iron, points of natural weakness and paths of failure in the steel blade, not acceptable in a high-quality hand-forged blade.The same steel shown above but following quenching and tempering using proper temperatures. The converted steel crystals are small and more evenly distributed. Islands of unconverted carbon and lakes of soft unconverted iron do not remain. This is a sample of ideal high-carbon steel, and is typical of the crystalline structure of the blades of our chisels, planes and kiridashi.
In a high-quality steel blade, by comparison, and given the same amount of carbon in a fixed volume of steel, the crystalline clumps are comparatively smaller and distributed more evenly throughout the matrix making it more resistant to erosion, and the carbide crystals more resistant to damage. Such steel is called “fine grained,” and has been highly prized since ancient times for its relative toughness and ability to become very sharp and stay sharp for a long time. This is the steel preferred by woodworking professionals in Japan and is the only kind found in our tools. Without exception.
Sadly, this crystalline structure is not visible to the naked eye, and anyone who says differently is trying to sell Beloved Customer something brown and smelly, probably with a side dish of flies.
Impurities and Alloys
Other than excellent and abundant water, endless forests, mountains overgrown with wonderful trees, and diligent people, the islands of Japan are poor in most of the natural resources critical to industrialization, including iron ore, coal, and petroleum. Prior to the mass importation of such resources after 1854, the best source of iron in Japan had been black sand (satetsu 砂鉄) found in rivers. The article at the following link details some of these traditional Japanese production methods: A Story of a Few Steels
Regardless of their source, all iron ores naturally contain impurities such as phosphorus, sulfur, or silicon to one degree or another. When these impurities exceed acceptable limits, they can weaken the steel, make it brittle or tend to warp badly, or make heat treating results inconsistent. They are often expensive to remove.
Nagasaki Bay, the only Japanese port open to Western traders between 1639 and 1854, with primarily only Dutch ships permitted entrance.
There are three approaches commonly used to minimize the negative effects of these difficult-to-remove impurities. The first is simple avoidance of the problem by employing iron ore and scrap metal free of excess amounts of these contaminants. Such ore and scrap are available, but they are not found everywhere and are relatively expensive. For centuries, the purest iron ore has been mined in Sweden.
The second approach is to add purer iron or carefully sorted and tested scrap steel to the melting pot thereby reducing the percentages of the harmful contaminants, a technique called “ solution by dilution.”
Nakaya Takijiro’s saw forge in the floor of his smithy, originally made by his master’s master’s master for forging swords
The third fix is to add chemicals such as chrome, molybdenum, nickel, tungsten, vanadium and even lead to the pot forming steel “alloys” to help overcome the detrimental effects of natural impurities, specifically those related to brittleness, warping and unpredictable heat treatment. Some additives will make the steel more resistant to abrasion and corrosion, or even easier to cast, drop-forge, or machine.
Some steel alloys have serious advantages over plain high-carbon steel in mass-production, for example reducing material costs by allowing the use of cheaper lower-grade iron ore and scrap metal, or improved working and heat-treating characteristics making it possible to achieve higher productivity with fewer rejects even when worked by low-skill workers.
But the addition of these chemicals is not all blue bunnies and fairy farts because edged tools made from high-alloy steels typically have some disadvantages too. For instance, additives like chrome, nickel, molybdenum, vanadium and especially tungsten are costly. And due to the crystalline structure that develops in many high-alloy steels, products simply cannot be made as sharp as plain high-carbon steel, and are more difficult and time-consuming to sharpen by hand.
Some manufacturers cite the higher costs of high-alloy steels to justify higher prices for their products. However, what they never say out-loud is that labor costs are much much less when using high-alloy steel because skilled workers are not necessary. And because high-alloy steels produce fewer rejects, quality control is easier, overall productivity is higher, warranty problems are fewer, and profitability is increased. Indeed, without high-alloy steels, manufacturers would need to train and hire actual skilled workers and professionals instead of uneducated seasonal workers thereby destroying the Wally World mass-production model that is the foundation of modern society. Egads! Walmart’s shelves would be bare!
Our blacksmiths are not part of the Wally World production model, but make only professional-grade tools for craftsmen that value ease of sharpening, edge retention, and cutting performance above corporate profits. They charge more for plain high-carbon steel blades than for high-alloy steel products because labor and reject costs are higher.
So if a manufacturer brags about the excellence of the high-alloy steels they are using, rest assured increased profits are their motivation, not improved cutting performance. Caveat emptor, old son.
Japanese Steels
Varieties
The best plane and chisel blades are made from plain, high-purity, high-carbon steel. In Japan, the very best such steel is made by Hitachi Metals mostly using Swedish pig iron and carefully tested industrial scrap (vs used rebar and old car bumpers), and is designated Shirogamiko No.1 (白紙鋼 1 号 White-label steel No. 1). They also make a steel designated Shirogami No.2 steel containing less carbon. Another excellent steel for plane and chisel blades is designated Aogamiko No.1 steel (青紙鋼 Blue-label steel).
Aogami steel, like Shirogami steel, is made from extremely pure iron, but a bit of chrome and tungsten are added to make Aogami steel easier to heat treat with less warping. Aogami can be made very sharp, but it is not quite as easy or as pleasant to sharpen as Shirogami. Some of the plain high-carbon Swedish steels are also excellent.
If worked expertly, these steels consistently produce the highest quality “fine-grained” steel blades.
Sharpening
Let’s compare the sharpening characteristics of these two steels. To begin with Shirogami steel is easy, indeed pleasant, to sharpen. It rides stones nicely and abrades quickly in a controlled manner.
Aogami steel, by comparison, is neither difficult nor unpleasant to sharpen, but it is different from Shirogami steel in subtle ways. It takes a few more strokes to sharpen, and feels “stickier” on the stones, but it will still produce fine-grain steel blades and performs well.
Inexperienced people lacking advanced sharpening skills typically can’t tell the difference between blades made from Shirogami, Aogami or Swedish steel and steels of lesser quality. But due to the difficulty of forging and heat treating Shirogami or other plain high-carbon steels, a blacksmith that routinely uses them will simply be more skilled and have better QC procedures than those whose skills limit them to using only less-sensitive high-alloy steels.
Professional Japanese woodworkers insist on chisel blades made from Shirogami No.1 steel. Some prefer Aogami No.1 for plane blades believing the edge holds up a bit better. At C&S Tools our plane blacksmith prefers to use Aogami because it is easier to work and more productive (especially in the case of carving chisels), but for a little extra they are happy to forge blades from Shirogami Steel.
I own and use Japanese planes made from Shirogami, Aogami, Aogami Super, Swedish steel, and a British steel called “Inukubi,” which translates to “dog neck,” a commercial steel imported to Japan from England (Andrews Steel) in the late 1800’s. Of these, Shirogami No.1 steel is my favorite. It’s a matter of personal taste.
Beware of a plane or chisel blacksmith that refuses to use plain high-carbon steel and tries to charge you more for blades made from Aogami or Aogami Super steel.
The Challenges of Working Plain High-Carbon Steel
What makes plain high-carbon steel so difficult to work, you ask? Your humble servant has never even forged a check much less a tool blade, but I will share with you what the blacksmiths I use and swordsmiths I know have told me in response to this question.
First, plain high-carbon steel is much more difficult to successfully heat treat because the range of allowable temperatures for forging and heat-treating is narrow. Heat it too hot and it will “burn” and be ruined. Quench it at too high or too low a temperature and it will not achieve the desired crystalline structure and/or hardness. Miss the appropriate range of temperatures and the blade may even crack, ruining it. Yikes! Please see the numbers and photos in the article linked to above.
Second, even if the temperatures are nuts-on, plain high-carbon steel has a nasty habit of warping and cracking during heat treating resulting in more rejects than alloy steels with additives such as chrome, tungsten or molybdenum. Strange as it may seem, when the crystalline structures that make steel useful form during quenching, they increase the blade’s volume. This change produces differential expansion causing the metal to warp, a troublesome characteristic that can be more or less controlled, or at least compensated for, by a skillful blacksmith, but it takes real skill, extra work, and a bit of luck. Not just any old Barney can do it consistently, so when working plain high-carbon steel, a blacksmith needs to know his stuff and pay close attention.
Other than wastage due to rejects, it doesn’t cost more to forge and heat-treat a blade made from plain high-carbon steel, but it takes serious skills and dedication to quality control to make a living working it for 5+ decades.
Let me give you an example of skill and experience as it relates to warpage management of plain high-carbon steel.
The photo below is of a swordsmith the instant before he quenches a glowing hot sword blade made of tamahagane, a traditional type of plain high-carbon steel made from iron sand, in a water trough. Notice the condition of his smithy: he is working in the middle of the night, the time when the best magicians and alchemists have always done the most difficult jobs because temperatures are easier to judge without inconsistent sunlight confusing things. His posture and facial expression are tense because he is about to roll the bones and, in the blink of an eye, either succeed in the most risky part of making a sword, or fail wasting weeks or months of work and thousands of dollars worth of materials. Notice how straight the glowing blade is before the plunge.
A Japanese swordsmith with a blade made from high-carbon Tamahagane steel poised for quenching. The blade is straight at this point in the process. He has invested months of work into this blade to this point and a misjudgment or even bad luck in the next second can waste it all. Not a job for the inexperienced or timid.
Note that the quantity of crystalline carbides formed in a Japanese sword during the quench is greatest nearest the hard cutting edge, and cause that area of the blade to expand and warp the most. The swordsmith therefore forges the blade straight before quenching it in expectation of it warping to the intended curvature when the crystalline structures at the cutting edge form, as seen in the photo below. This curvature is an intentional design feature that takes years of experience to achieve in a controlled manner.
After quenching, the resulting warpage is dramatic. The swordsmith must plan for this distortion and shape the blade accordingly prior to the quench if he is to avoid unfortunate results. Tool blacksmiths are faced with the same challenges on a smaller scale but more frequently. Notice the mud applied to the blade before quenching intended to control the formation of crystalline structures and achieve differential hardness. The patterns the swordsmith made in applying this insulating mixture heavily influence the limits of differential heating in the blade as well as the appearance of the “hamon” pattern that develops.
If the swordsmith intended to make a straight sword blade, he would have a forged a reverse curvature into the blade to compensate for the warpage that occurs during quenching. Plane and chisel blades exhibit similar but less dramatic behavior due in part to the moderating effects of the low/no-carbon lamination.
A photo of both sides of an antiqueJapanese sword with the warpage being an intentional design feature
The thinner the piece of steel being heat-treated, the more unpredictable the warpage developed and more likely the blade will be to develop fatal cracks. Within limits, simple warpage can be corrected to a limited degree in thin blades during the first few seconds after quenching and/or tempering by bending and/or twisting the blade while it is still hot and malleable. These techniques do not work well in the case of thicker plane and chisel blades, however, so experienced blacksmiths don’t rely solely on corrective measures but anticipate warpage beforehand and create a curve or twist in the opposite direction when forging the blade to compensate. This takes skill and experience, and even then, some rejects are unavoidable.
Chemical alloys like chrome, molybdenum, and tungsten greatly reduce warping and the risk of cracking, so their benefits are huge.
None of this is mystical, but tools made from plain high-carbon steels such as Shirogami steel require more skill and experience than those possessed by factory workers, much less Chinese peasants, so mass-production is nearly impossible, labor costs are higher, profit margins are smaller, and advertising budgets are non-existent. No wonder such tools get little attention from the shills in the woodworking press.
While modern chemistry has unveiled the mystery of steel, it has only been during the last 70 years or so that metallurgical techniques were developed making it possible to understand the Mystery of Steel, and the tools to scientifically control the Alchemy of Steel are even younger.
The manufacture and working of steel are still magical processes that are the foundation of modern civilization. Be not deceived: while computer nerds, ijits with MBAs, and governments grifters take all the credit, without mastery of the alchemy of steel, human life on the mudball we call home would be short and brutal.
If you have good sharpening skills but haven’t yet tried chisel or plane blades made from Shirogami, Aogami or Asaab K-120 Swedish steel, you’re missing a treat.
In the next article in this magical series we will examine the genius of the soft iron component found in quality Japanese woodworking blades. Whether cat, bat or owl, please explain the details to your familiar to prepare them for the excitement to come!
YMHOS
If you have questions or would like to learn more about our tools, please click the “Pricelist” link here or at the top of the page and use the “Contact Us” form located immediately below.
Please share your insights and comments with everyone in the form located further below labeled “Leave a Reply.” We aren’t evil Google, fascist facebook, or thuggish Twitter and so won’t sell, share, or profitably “misplace” your information. If I lie may everything I eat taste like mud.
“The most beautiful experience we can have is the mysterious. It is the fundamental emotion that stands at the cradle of true art and true science.”
Albert Einstein, The World as I See It
The blades we are considering in this series of articles about sharpening are made from iron and steel, so it makes sense to examine these materials from the viewpoints of sharpness and sharpening. But let’s begin by considering some of the interesting supernatural and legendary aspects of working these materials.
Steel Magic
Steel is a magical substance. Since ancient times, the blacksmiths that worked it were sometimes seen as gods, sometimes as wizards, and always as essential. Shaped by local traditions, the power blacksmiths possess to combine and shape the elements of earth, wind, water, fire and even spirit into the tools and weapons of everyman’s trade was seen as magical.
Even the blacksmith’s forge and anvil were seen as magical in and of themselves, and rituals incorporating them were widely believed to keep evil at bay, provide good luck and blessings, and even to cure ailments.
There were several extremely famous magical blacksmiths back in the mists of time. Please allow your humble servant the honor of presenting two of them.
Vulcan the God
Vulcan (aka Hephaestus to the Greeks), Roman god of fire and blacksmithing. Archaic relief from Herculaneum (National Archaeological Museum, Naples).
The bas-relief stone carving in the photo above is of Vulcan, the Roman god of fire and blacksmithing, also known as Hephaestus to the Greeks. This carving was excavated at Herculaneum, located in the shadow of Mount Vesuvius near Pompeii. Herculaneum was an ancient Roman town destroyed by volcanic pyroclastic flows in 79 AD. The word “volcano” comes from the word Vulcan, so a stone carving of Vulcan retrieved from a town totally destroyed by Vulcan’s namesake is tragically ironic in the extreme.
Die Schmiede des Vulkan (The Forge of Vulcan) by Velázquez, Diego (1599–1660) Museo del Prado, Madrid, Spain.
The painting by Diego Velázquez above is from a scene in the Roman poet Ovid’s Metamorphoses where the god Apollo visits the god Vulcan in his forge to tell him that Venus, Vulcan’s wife, is being naughty with Mars, the god of war. Apollo is on the far left and can be recognized by his crown of laurel and shining aura. Vulcan stands next to Apollo with a shocked and incredulous expression on his less-than-beautiful face (nice abs, but the ‘stache needs a lot of work). Vulcan’s assistants have stopped their work on a plate armor project (decidedly 15th century in style) astounded by both the sudden appearance of Apollo and the news he delivers.
Obviously, Venus and Vulcan were not a happy couple. Legend says that whenever Venus was unfaithful, Vulcan grew angry and beat hammer on anvil so fiercely that sparks and smoke rose up from the top of Mount Etna on the island of Sicily, under which he had built a forge, creating a volcanic eruption. You could say he blew his top (ツ).
Perhaps Apollo is sharing this tidbit of news just to help out his old buddy Vulcan, or perhaps his reason for snitching is malicious. Whatever the reason, I think it’s safe to assume people loved drama in the 1600’s too. Nothing new under the sun.
Your humble servant’s point is that Vulcan (Hephaestus) was not only worshiped in ancient Greece but had a presence in popular culture from before an Etruscan tribe drained the swamps that became Rome in the 10th century BC, to as late as the 1600’s. And I won’t even get into Trekkie lore. Now that’s an influential craftsman.
Wayland the Smith
Wayland the Smith (Vølund Smed) 1873 sculpture. Stockholm Sweden.
Wayland the Smith was another famous blacksmith, metalworker, and magician. He was said to be a Lord of the Elvish folk who learned his trade from either giants or dwarves.
While not as old as Vulcan in human history, Wayland’s legend survives throughout Europe, and the products of his forge were central to heroic traditions of many peoples and kingdoms long before the days of the Viking longboats.
He is credited in Norse, Germanic, and Anglo-saxon legends and literature with forging magical objects of great renown, including rings of power (no, Professor Tolkien didn’t invent the concept), the impenetrable coat of ring mail worn by Beowulf during his epic battle with Grendel, the magical sword named Gram that Sigurd used to slay the dragon Fafnir, and even King Arthur’s sword Excalibur. Not just scribblers, but even Alfred the Great, king of the Anglo-Saxons (c.886~899AD) on the island that would later become England, wrote of him.
The chains on the legs of the statue above probably represent his maiming and imprisonment on an island at the pleasure of an evil Norse king upon whom he took a bizarre revenge involving unconventional drinking bowls and jewelry. Is Wayland’s slavery one of the reasons blacksmiths have wrapped chains around their anvils since ancient times, or is the purpose just to secure the anvil and mute the bright ringing song they sing? Another mystery…
Wayland’s influence in modern times is not insignificant. For example, Leonardo Da Vinci’s fascination with flying machines was probably stimulated by the legends of Wayland building and using a winged contraption to escape his slavery. And unlike Daedalus’s deadly device in Greek legend, Wayland’s glue didn’t melt.
Daedalus (the bald nekid guy) and his son Icarus (the falling nekid guy) using wings to escape the island of Crete, home of labyrinths and monsters. Against his father’s advice, legend holds that Icarus flew too near the sun melting the wax securing the feathers that made the wings function. “Oops!” Murphy chortled in his glee.
The legends of Wayland the Smith were once deadly serious matters.
In a lighter vein, the writings of J.R.R. Tolkien, the author of the most popular works of written fiction in human history (no kidding), were influenced by these same legends.
The Blacksmith’s Shop
While some blacksmithing traditions such as those involving Vulcan and Wayland are decidedly pagan in origin, others fit well with Christianity. For example, the ring of the blacksmith’s hammer on his anvil was once believed to strengthen the chains that bind the devil in hell barring him and his demons from God-fearing folk’s hearths. In darker times in human history the blacksmith’s workshop was believed by many to be a safe haven from evil forces, one that Satan and his imps actively avoided.
The village smithy. Notice the horseshoe on the wall in the background, and its downward orientation. Due to the lack of char marks on the wall, we can tell this is not where the smith normally hangs horseshoes to cool. There is method to the madness.
Below is a download link to a charming story about why blacksmiths ring their anvils and how to make sure a horseshoe brings you luck at work and at home. I encourage you to read it.
If you have ever spent time in small one-man traditional smithies of the sort where our blacksmiths labor to produce the tools we provide to our Beloved Customers then you know the other-worldly atmosphere typical of such workplaces. Imagine wattle and daub walls and exposed, twisting, rough-hewn wooden roof beams blackened with 70+ years of soot, the compacted but lumpy dirt floor, the darkness of carefully-managed sunlight (the better to judge metal temperatures by eye), the bitter smells of charcoal fumes, straw ash, flux, hot steel and smoking oil; the roar of forced gas forges; the sounds of grinders and the dangerous leather belt systems that drive them; and finally the terrible racket and vibration of spring hammers and ringing anvils. A man that could work alone in a place like that 12 hours a day for 65 years is not afraid of your garden variety demon, no siree Bob.
It’s quite a sight to see a craftsman working in such an environment. They often start late in the morning to avoid noise complaints from the neighbors, and work until late at night doing heat treating when sunlight won’t interfere with the colors of the hot metal.
By noon their arms are black to the elbows and there are charcoal smudges are on their faces. The sight of a small, wizened 82 year-old man with strong sinewy arms scowling into the face of yellow-hot steel as he hammers the hell out of it is like a scene from Dante’s Inferno. Something of the ancient magic of Vulcan and Wayland can be felt in such places.
In the next post we will examine some alchemical aspects of the Mystery of Steel. Until then, I have the honor to remain,
YMHOS
Mr. Junichi Takagi, Japan’s last adze blacksmith, passed away April 2, 2019. A kind man, talented blacksmith and excellent sharpener. He will be missed especially since he had no apprentices and left no one to carry on his work.Mr. Takagi working on his wet grinder in August 2018.Mr. Nakajima’s Forge in Yoita, Nagaoka Japan. Unfortunately it was recently demolished following his retirement.Nakaya Takijiro’s forge, originally made for swords, now dedicated to forging handsaws.
If you have questions or would like to learn more about our tools, please click the “Pricelist” link here or at the top of the page and use the “Contact Us” form located immediately below.
Please share your insights and comments with everyone in the form located further below labeled “Leave a Reply.” We aren’t evil Google, thuggish Twitter or treacherous TikTok and so won’t sell, share, or profitably “misplace” your information. If I lie may fresh boils burst forth on my nose daily.
The gem cannot be polished without friction, nor man perfected without trials.”
Confucius
This post may not be as entertaining as previous ones in this series about sharpening Japanese woodworking tool blades: No swords or artwork or handsome Hollywood philosophers, I’m sorry to say. But with this addition to the series we will roll up our sleeves and get some work done.
Many Beloved Customers and Gentle Readers already know most of what is presented in this post, and of them your humble servant begs forgiveness, but it may be that careful Gentle Readers will stumble upon one or two gems among these scribbles.
You know the difference between the quality of work a sharp edge produces compared to that of a dull edge. The work goes quicker, cuts are clean, and finished surfaces are smooth, maybe even shimmering. Your tools are happy, singing and chirping as they cut away. But have you given thought to what a sharp edge really is?
In addition to the answer to this question, we shall also examine the naughty cutting edge that seems sharp fresh off the stones but suddenly and unexpectedly dulls after just a little use. Would it be useful to know how to detect such a cutting edge before it fails wasting your time and money?
Being in the construction industry, your humble servant would like to begin building this discussion on a firm foundation anchored in bedrock. So let’s get to digging.
The Basics
A cutting tool is essentially a wedge, with two flat sides meeting at an angle. Applying force causes the tool’s cutting edge to wedge apart and sever materials, be it wood, metal, meat or mushrooms.
The geometry of this wedge is critical to its performance. At one extreme, the angle could be 90°. It won’t be sharp, it will be hard to push, and it will crush and tear wood instead of cutting it cleanly, but it will be durable.
At the other extreme, the wedge might be made more acute, say 3°. Such an edge could be made extremely sharp indeed, but it would be too fragile to cut anything but whip cream for long. The point is that the sharp edge is a compromise, acute enough to cut well, but not so acute that cutting pressure and friction will make it dent, roll, wear away, crack or chip easily.
In a woodworking tool the wedge is incorporated into a blade as a beveled cutting edge. In an efficient tool this edge that will be thin enough to cut the intended material well, but at the same time resist dulling for a relatively long time. The words “well” and “long” in the previous sentence are where the magic lies. We will examine these important points in future posts in this series.
Wood Shaving’s Eye View
Ideally, the extreme edge of the ideal metal tool’s extreme cutting should be perfectly smooth and only a single molecule thick. In the real world, cutting edges are rougher and wider, but still manage to cut pretty well.
Examine a sharp cutting edge under a microscope, and you will see imperfections. A dull blade will look even worse of course, showing dents, rips, and even cracks.
The edge created by an 800 grit stoneStill sharp but starting to wearA dulled and dented knife blade
Using a blade wears away and damages the cutting edge rounding and flattening it, destroying the geometry that makes it an effective wedge. Sharpening is the process of (1) restoring the intended wedge geometry; and (2) removing defects from the meeting of the wedge’s sides by abrading metal from one or both sides down past any damage, leaving a relatively clean, uniform wedge with minimal defects. This is the sharp edge. It is what the wood experiences. It requires effort to achieve, but it ain’t rocket surgery.
The most difficult part of achieving the two objectives listed above is making nothing from something, in a place that cannot be seen. Now that’s a Zen koan if I ever heard one.
Building confidence in one’s ability to achieve results at the microscopic level is not easy. The key is to understand the goal, and to consistently follow reliable procedures. I will describe those goals and procedures in future posts in this series.
Edge Failure
The ideal cutting edge is uniformly sharp, but few edges in the real world meet these severe criteria at the microscopic level where it matters most. A blade may be sharp in some places, and dull in others. We have all experienced those irritating blades that cut well for a while and then dull quickly and suddenly.
One common cause of these inconsistencies and failures you should be aware of is a cutting edge that is sharp only because it has a defect called a burr. Burrs by themselves can be sharp indeed, but in the case of chisel, plane and knife blades they are thin, irregular, and fragile, and being relatively unsupported by the rest of the blade, can easily bend, roll over, or break off at the root suddenly and unpredictably creating a nasty dull edge in an instant. A truly sharp edge will not just feel sharp, but will stay sharp for a relatively long time because it is properly shaped and well supported, instead of being only temporarily sharp because of an irregular and fragile burr.
I call burrs a “defect” because they are, but creating a burr is an important step in making a sharp edge. The trick is to continue to refine the wedge after the burr is created until the burr melts away on the stones and the edge is as perfect as we can reasonably expect to make it. Stop the refinement work too soon, or fail to do it completely, and all or part of that unreliable burr may survive to suddenly plop a floater into your punchbowl.
So how does one tell if an edge is properly sharp and free of deceptive burrs without using a scanning electron microscope?
Do you remember ‘Nando’s philosophy described in my previous post? One must reverse the latin lover’s logic. Don’t rely on mahvelous appearance. Don’t rely on silly bar room stunts like shaving arm hair or telemarketing tricks like cutting strips of paper. Develop skills and train your senses other than eyesight to detect the shape of steel at the microscopic level. This may sound strange but it is possible because your nerve endings are microscopic and can sense the difference between a burr and a truly sharp edge.
I will save the explanation of detailed techniques for a future post, but for now, here are two essential techniques for sensing things too small to see: Use your fingerprints and the exquisitely fine nerves connected to them to detect the presence and size of burrs; Use your fingernails and the microscopic nerves connected to them to check the condition of the burr and determine when the blade is ready to move onto the next stone in the sharpening process. Please don’t cut yourself.
In the meantime, let’s have some pleasure before pain. Prepare to be amazed, Ladies and Germs, because in Part 6, coming soon, The Mystery of Steel will unfold before your very eyes! There will be marble relief carvings, bronze statues, oil paintings, gods and demons, death and destruction, and even a pagan soap opera about forbidden love. Oh my! We’re in negotiations for the movie rights now ♫꒰・‿・๑꒱ and need someone to play Vulcan. If anyone knows Spiderman’s agent, please have his people contact my people right away.
YMHOS
If you have questions or would like to learn more about our tools, please click the “Pricelist” link here or at the top of the page and use the “Contact Us” form located immediately below.
Please share your insights and comments with everyone in the form located further below labeled “Leave a Reply.” We aren’t evil Google, fascist facebook, or treacherous TikTok and so won’t sell, share, or profitably “misplace” your information. If I lie may all my donuts be infested with lawyers.
A few weeks ago I posted an article about seismic dampers used on a high-rise building currently under construction near my office in Marunouchi Tokyo (a 3 minute walk from Tokyo Station). I pass this same jobsite on foot several times a week and take the occasional snapshot. I have other construction sites ongoing, but no high-rise buildings right now, and none that non-disclosure agreements will allow me to share with you. So this is a good opportunity to introduce you to some lesser-known details about major construction work in Tokyo as seen from the sidewalk without risk of offending any clients.
Please notice the gentleman in the orange uniform and big boots in the picture above. I have never met him before, but judging by the color of his uniform, he’s an employee with Obayashi Corporation, one of Japan’s largest and arguably most competent general contractors. I have done a lot of work with this company and respect it a great deal.
Sir Norman Foster, a famous British architect and the designer of Apple’s Campus 2 in Cupertino, California once said that Obayashi Corp is the world’s best general contractor. I tend to agree. And I say this as someone that used to work for two of Obayashi’s competitors in Japan, and who has also worked with many other contractors around the world. If you have visited the Boulder Dam near Las Vegas, Nevada recently, you probably drove over Obayashi’s bridge spanning the gorge.
Anyway, please notice that this erstwhile young man is wearing what looks like a thick coat all puffed up like a marshmallow on a sunny day in mid-August in 37℃ (98°F) temperatures in the shade and 76% relative humidity? Is he loco, Cisco?
Setting aside the somewhat inelegant safety boots (something glittery by Jimmy Choo would suit better methinks) and rolled trouser cuffs that do not help the fashion statement his ensemble is making, you will notice a round white grill on his coat near his elbow. There is an identical grill on the opposite side of the coat you can’t see.
If you haven’t already guessed, the two round grills are actually battery-powered fans pulling outside air into the coat and pushing it out at his collar and wrists cooling our young contractor as he labors diligently in the heat.
A maintenance dude sporting a two-fan cool coat
These “fan coats” are very popular in Japan. They can make a big difference so long as one can perspire adequately. Indeed, these battery-powered garments are credited with saving many construction workers from heat stroke and even death in hot months.
They also come in kiddie sizes and many colors.
Makita makes a “Cordless Fan Jacket” that is sold on Amazon overseas for a lot more than it costs in Japan. Instead of two fans, it has a single fan at the back. I have not used the Makita product and can’t endorse it.
The Makita Cordless Fan Jacket. Notice the high, stiff collar directing moving air over his neck for better cooling, and the fan unit at his back. The cord is leading to the angle grinder he is using, not to the fan.
I hope the weather in your neck of the woods is always balmy with cool breezes in summer so a coat like this is never useful. In the meantime, I’m just waiting for someone to develop sexy-looking steel-toed boots with cooling fans. I wonder what Jimmy Choo will be offering later this year (ツ)
YMHOS
If you have questions or would like to learn more about our tools, please use the questions form located immediately below. Please share your insights and comments with everyone in the form located further below labeled “Leave a Reply.” Your information will remain confidential (we’re not evil Google or incompetent facebook).
In the first post in this series, we examined the two main categories of Japanese chisels: the tatakinomi designed to be struck with hammer, and the tsukinomi used to pare wood without using a hammer. Beginning with this post we will shift our focus to several varieties of tsukinomi.
If you need to cut precise joints in wood, then you need both striking and paring chisels.
The most popular variety of tsukinomi is the mentori usunomi (面取り薄鑿)which translates to “beveled thin chisel.” The name is appropriate as the blade is long and thin and the neck gently tapered.
42mm Mentori Usunomi by Sukezane (Side View) 42mm Mentori Usunomi by Sukezane (Face View) 42mm Mentori Usunomi by Sukezane (Ura View)24mm Mentori Usunomi by Sukezane (Ura View)
Description
Just as with oiirenomi, the blades of tsukinomi can be made with different profiles, such as the stiffer rectangular cross-section of the kakuuchi, or the more triangular cross-section of the shinogi usunomi.
The mentori usunomi has a streamlined cross-section similar to the mentori oiirenomi with two bevels ground into the right and left sides of the blade’s face, flowing over the shoulders and feathering into the neck.
An atsunomi or oiirenomi can pare joints, of course, but the steel crown and mushroomed wood fibers on the handle’s end make them uncomfortable for using hours on end.
In comparison, lacking the steel crown and mushroomed handle, the usunomi is more comfortable to use. More importantly, the blades and handles of these chisels are longer and lighter in weight providing superior angular control for precision paring operations.
Western paring chisels by comparison are even thinner and have longer blades than Japanese paring chisels. There can be no denying they do a fine job. But Japanese paring chisels like the usunomi have a few potential advantages worth considering.
The most significant advantage is that the steel cutting edges of Japanese paring chisels are much harder. The paring chisels our blacksmiths forge are around 65~66 HRc in hardness, whereas Western paring chisels are usually around 55 HRc. A Western style paring chisel with its thin blade of uniform steel hardened to 65 HRc would easily snap in half in practical use.
This extra-hard lamination is hand-forged by our blacksmith from Hitachi Metal’s Yasugi Shirogami No.1 steel (aka “White Label Steel”), an exceptionally pure high-carbon steel that makes possible an edge that stays sharper longer, with the result that, given the same number of sharpening opportunities and time in a given workday, a professional-grade usunomi will help you do more hours of high-quality work than a softer blade.
For craftsmen that use their tools to feed their families this higher-level of performance is not something to be sniffed at.
The second advantage of the Japanese paring chisel is their hollow-ground ura which makes it easier to maintain a flat bearing surface, especially important in the case of the hard steel used in our chisels. If you haven’t used Japanese chisels, this claim may sound unlikely. But please recall that there are narrow lands surrounding the ura, all in the same plane, that create a flat bearing surface to guide the chisel.
Usage
This tool is well-suited to reaching into narrow mortises and other wood joints to clean and pare surfaces roughed out by axe, adze, saw and tatakinomi to precise tolerances.
It excels at trimming mortise side walls and end walls. And shaving tenon cheeks and shoulders to precise dimensions without causing spelching or cutting too deeply as shoulder planes are wont to do is a piece of cake.
In addition, the longer blade and flat face of the usunomi make it ideal for paring angles, such as 45° mitres, in combination with wooden guide blocks or jigs.
The usunomi may be struck with the heel of the hand, but never with a hammer or mallet. The slender neck, thin blade, and un-reinforced handle will simply not accept such abuse gracefully.
Chisels intended to be struck with a hammer typically perform best with a cutting edge bevel of 27~30°. Any shallower and the hard steel at the cutting edge may chip instantly dulling the tool. However, the cutting edges of usunomi along with other tsukinomi are not normally subjected to the high stresses chisels motivated with hammers must endure, so the cutting efficiency can be increased by lowering the angle to 24° or so without creating problems, depending of course, on nature of the wood you need to pare and the type of paring you intend. For instance, paring end the grain of maple may require a steeper angle than when paring the long grain of pine.
If you have used long-bladed Western chisels hard for a few years, you will have no doubt experienced your chisel’s flat becoming somewhat rounded over after many sharpenings. This occurs because, for various reasons, the center portion of the blade’s flat is abraded at a slower rate when being sharpened than the blade’s perimeter, resulting in distortion regardless of whether you keep your stones perfectly flat or not.
Obviously, a chisel with a flat that is banana-shaped lengthwise and crosswise is not ideal for paring flat surfaces, but there is a bigger problem. Namely, it is simply more difficult and time-consuming to create a sharp edge on a blade with a curved flat than one with a true flat. A flat like this begs for amateurish tricks using rulers, etc.. of the sort professionals would be embarrassed to use. A friend once scathingly described these techniques as “training wheels.” Oh my.
The ura on the Japanese chisel is specifically designed to deal with this shortcoming, and it does a great job of it.
30mm Unsunomi by Nagamitsu – View of Mitsuura30mm Unsunomi by Nagamitsu – View of Face30mm Unsunomi by Nagamitsu – Closeup of Mitsuura
The 30mm usunomi in the photo above has an ura with three hollow-ground areas instead of one. This detail is called a ” mitsuura” ミツ浦 meaning ”triple ura.” It has the advantage of providing a larger bearing surface than the standard ura does, one that is helpful when used with wooden jigs for paring to precise angles, for instance. It also helps the ura index better when paring large surfaces, especially with chisel blades wider than 24mm.
Some people prefer chisels with the mitsuura detail for their appearance. I admit mitsuura look sexy, but I am not a fan of using this detail unless it is truly necessary because of the downsides I will not deal with in this already overlong post.
If I can liken the atsunomi to a shire horse, then the usunomi is a falcon. Both are beautiful powerful animals, but just as one wouldn’t use a draught horse to chase down a rabbit, or a peregrine to pull a plow, neither oiirenomi nor atsunomi are as effective as the usunomi for paring and cleaning joints.
A Shire Horse and His Little Friend. Stout, heavy and strong is good for some jobs, but…
Slim, light, fast and sharp is better for others.
The usunomi is one of those tools that is a pleasure to use.
Among woodworking tools, the usunomi is special: as it becomes part of your hand, you will discover that neither the blade nor your hand but your mind is shaping the wood.
YMHOS
If you have questions or would like to learn more about our tools, please click the see the “Pricelist” link here or at the top of the page and use the “Contact Us” form located immediately below, or email us at Covingtonandsons@gmail.com
Please share your insights and comments with everyone by using the form located further below labeled “Leave a Reply.” We aren’t evil Google, fascist facebook, or thuggish Twitter and so won’t sell, share, or profitably “misplace” your information. If I lie may a shire horse polish his hooves on my back.
And this is from my heart Which is deep inside my body: It’s better to look good Than to feel good
Fernando
This article is a little longer and more roundabout than your most humble and obedient servant’s previous posts, but I wanted to share with you some of Japan’s history, and examples of this country’s most fabulous practical art as produced by its blacksmiths and professional sharpeners as insight into the Japanese mindset regarding sharpening. But before I get into that, I would like to share some relevant words of wisdom from Hollywood’s wisest man.
The handsome gentleman in the picture above is Fernando (actually Billy Crystal). He is neither a blacksmith nor a sharpener of tools or weapons, but his insight into physical beauty and words of wisdom about happiness are pertinent to sharpening, as we shall see below. If you are not familiar with ‘Nando, I suggest you google him or view a video or two on NoobTube.
So what does this dapper Latin lover have to do with sharpening? And swords? Read on kind sir.
As ‘Nando taught the world, a wise person will not equate looking good with feeling good. Likewise, you would be wise to not confuse a blade’s appearance with its performance. Indeed, a blade that looks as sharp as the skinny end of nothing may not actually cut well in some applications. A good example is Japanese swords. Let me tell you a true story to illustrate my point.
When I was a university student in Japan, I was privileged to be entrusted with a number of swords that belonged at the time to the late Dr. Walter Compton, Chairman of Miles Laboratories and the inventor of Alka-Seltzer. He was a wealthy man who had a huge collection of swords obtained while an officer for the US military in Japan immediately after the war when Allied forces required the defeated Japanese people, on pain of death, to surrender all swords, civilian and military. Of course, many valuable and rare family heirlooms were surrendered or forcefully confiscated. Supposedly they all went to the bottom of Tokyo Bay in bunches, or were melted for scrap. But we know better, don’t we.
Towards the end of his life, Dr. Compton put a lot of money into having his better swords professionally sharpened, new shirasaya scabbards and furniture made, and formally evaluated in preparation for donating them to the Boston Museum of Art, where many of them reside in obscurity today. Sadly, due to progressive dementia, some of his most valuable swords were auctioned off without his permission. “The feckless sons of wealthy men” is the operative phrase in this case, I fear.
I assisted Dr. Compton’s representative by transporting over 70 of these swords to and from Japan and performing the necessary legwork to accomplish these goals inside Japan. During those years I held in my hands and feasted my eyes on rare and beautiful blades of great historical value several of which would have easily been designated National Treasures if they had been intended to remain in Japan (“National Treasures” may not leave Japan).
During those years I spent a lot of time meeting, questioning, and requesting services of the best sword sharpeners in Japan, learning much about swords, stones, and sharpening. Dr. Compton’s reputation was such, and his swords were of such rarity and high quality, that I had no difficulty persuading the very best craftsmen to work on them and speak with me, including a famous sword polisher named Mr. Okisato Fujishiro.
Interestingly, in Japan such craftsmen are called “Togishi” (研師), an unambiguous word that can only be translated as “sharpener.” However, in the West these same Japanese craftsmen are called “ Sword Polishers.” In the post-war context, this actually may be more accurate than the Japanese term. In a post-war world it’s certainly more politic.
A very subtle, high quality sword tip brought to life by the arts of the Sword Sharpener. Notice the peaceful elegant hamon (wavy milky pattern at the cutting edge oriented towards the top of the photograph), the grain of the steel just below the hamon, and the burnished polish surrounding the fuller. Notice also the clean delineation where the blade tip, the “boshi,” begins. Very nice work.
Before the elimination of the caste system Japanese society had 4 main divisions labeled “Shi No Ko Sho,” meaning, in descending order, Warrior (samurai), Farmer, Craftsman, and Merchant at the bottom. The Emperor, Court Nobles, and Shoguns were above these strata, although of the three, only the Shogun possessed any actual power because the man with the sword makes the rules, and those without weapons do as they are told and quickly, or they go away permanently. Thus it has always been because both fool and wise man leak red sticky stuff.
Blacksmiths and sword sharpeners were both in the craftsman caste, but curiously the sword sharpener was above the swordsmith in rank. Depending on their support among the warrior caste, and with the generous application of yellow metallic lubricant, both swordsmiths and sword sharpeners occasionally obtained noble rank, an honor to which few craftsmen, farmers, and merchants could aspire. My point is that sword sharpeners, while of relatively lower caste, often had a perceived rank higher than their craftsman position would suggest.
Why was the Japanese sword sharpener of higher effective rank than the swordsmith? I haven’t seen documentation from back in the day confirming it, but I suspect it is because the sharpener turns the swordsmith’s plain steel blade into a thing of jewel-like sculptural beauty that almost seems alive. One only has to see a sword blade fresh from the swordsmith’s shop and compare it with the same sword after the sharpener’s ministrations to understand.
The Nikko Sukezane sword, a designated National Treasure of JapanThis sword is known as the “Nikko Sukezane,” Nikko for the temple commemorating the Shogun Tokugawa Ieyasu (徳川家康, January 31, 1543 – June 1, 1616) where it is stored, and Sukezane (助真 meaning “Aid the Truth) for the name of the smith who forged it for the Kamakura Shogunate (1185~1333). The blade’s shape and crystalline pattern above the hamon are characteristic of Sukezane’s work. This sword’s brother was in my care for about 2 years while it was being polished and appraised in Tokyo.This sword is another of Japan’s National Treasures. It was forged by a swordsmith name Nagamitsu (長光)during the same time period as the Sukezane above. The tang (nakago) is corroded by exposure to bare hands over a period of around 700 years. Multiple holes were drilled in the tang to accommodate a variety of hilts during its lifetime. I also had a sword by this same smith and of very similar appearance in my care for about one year, although it was not owned by Dr. Compton.A different Nagamitsu sword, also listed as a National Treasure. An unusually healthy example.
I have even witnessed a skilled sword sharpener create a beautiful hamon (a pattern formed on the edge of a sword by the steel’s crystalline structure) on a sword forged by a famous smith that had lost the crystalline structure necessary to form an actual hamon. While a deception of sorts, the intention was not to deceive for profit (the sword was donated to a museum), but to return an unusual and historically important sword to its former beauty, a glory that would have been lost but for the sword polisher’s exceptional skills.
A dramatic chouji midare hamon in a modern sword. The pattern exists not because of a lamination or some silly pattern welding but because of the changing crystalline structure of the blade that results from the differential heat treatment process performed by the blacksmith. It only exists because of the swordsmith’s skill, but it is only visible and beautiful because of the sword sharpener’s stones and his skill with them. Is the blade sharp? Don’t judge a blade’s performance by its polish.
If we liken the swordsmith with his forge and hammer to the quarry worker cutting marble from the mountain, then the sword sharpener is Michelangelo cutting the Pietà with his chisels and files. Both craftsmen work on the marble and blade respectively, and both are essential. The sculptor uses steel to bring stone to life, while the sword sharpener uses stone to bring steel to life.
Another dramatic hamon in a modern sword. This pattern is a surface manifestation of the steel’s crystalline structure as created by the swordsmith, but revealed and made glorious by the polisher
But despite these artistic abilities, modern “Sword Polishers” have no interest in and put forth no effort to actually make a sword blade cut well. Indeed, in some cases, they actually intentionally dull the blade so it can’t cut, thereby making it safer. This intentional vandalism is called “habiki.”
A different style of hamon pattern on a blade with a different grain pattern. Notice the different colors and lines inside the hamon. All these crystalline details are categorized, have names, and are studied intensely by aficionados. All things equal, this sort of pattern and color is considered to be more elegant and desirable than the two more dramatic hamon pictured above. An extremely deep rabbit hole, I assure you. Please watch your step!
The Key Point
Here’s the key point your humble servant wants Beloved Customers and Gentle Readers to grasp: Despite the long years of apprenticeship, advanced skills learned, and gallons of red sticky stuff unintentionally leaked by sword sharpeners, the frank sword sharpeners I have spoken with all admitted that, of all the craftsmen in Japan that used edged tools, woodworkers like carpenters, cabinetmakers, and joiners routinely create sharper blades despite those blades not appearing to be as sharp as swords. This is consistent with my direct experience of handling over 70 swords before and after being worked on by sword sharpeners.
While there is great pleasure to be found in polishing a plane or chisel or knife blade to levels of great beauty, do not make the mistake of equating appearance with performance.
Appearance aside, and looking strictly at cutting performance, will a chisel or plane or knife blade skillfully sharpened on a 15,000 grit stone cut better and longer than if sharpened on an 8,000 grit stone? In the case of woodworking blades and kitchen knives, no it won’t. In fact, due to higher levels of friction the higher degree of polish produces in the cut, it will certainly not cut wood as well. More on this subject later.
An oiirenomi chisel by Hidarino Ichihiro. The hazy silver of the hard steel hagane lamination and the cloudy grey of the softer iron jigane lamination, combined with the shape and upward curvature of the corners of the lamination are indicative of excellent craftsmanship by the blacksmith, superior skills of the sharpener, and wonderful stones. Such details are considered sublimely beautiful to tool connoisseurs. But will the edge cut well? We can’t tell from this photo.
Keep in mind that the stones used to apply the beautiful polish and accentuate the hamon on Japanese swords are different from those used to sharpen woodworking tools. For instance, the uchigumori stones sword polishers use are small slices of soft stone glued to paper using urushi lacquer adhesive, and are only 3,000~5,000 grit. These small slips of stone are rubbed on the sword blade using thumb and fingertips.
Here is a link to a blog showing Mr. Fujishiro, son of one of the sword sharpeners I employed back in the day, making and using these thin slices of stone.
Tools are designed to perform specific tasks. Although it could do the job, more or less, you wouldn’t use a crescent wrench to stir spaghetti sauce on the stovetop would you? A longish spoon just might work better.
Does a sword’s edge need to be extremely sharp to cut the enemy effectively? No, it doesn’t because the sword’s geometry, blade orientation, speed, impact force, and the swordman’s technique drive its cutting effectiveness much more than simple sharpness. So sword sharpeners in Japan, and probably most of the world too, have always been more focused on edge durability, resistance to chipping, and appearance than absolute sharpness. In modern times, when swords are almost never used to cut living flesh outside of Saudi Arabia, the blade’s appearance may be critical, but sharpness is not a practical concern.
Another example is food preparation knives. A chef’s knife looks terribly sharp, and as it slices tomatoes and fillets fish we can see that it cuts well. But how sharp is it really? In comparison with a joiner’s plane blade, not really that sharp. But both tools are exactly suited to the job assigned them.
The “willow-leaf” yanagiba chef’s knife shown above is most effectively used in slicing or drawing motions, much as expert swordsmen use their weapons against enemies. In this style of cut, a smooth and uniform cutting edge does not perform as well as a more ragged, serrated edge as seen at the microscopic level. Therefore, there is little if any practical benefit (assuming beauty is not practical) to be obtained by sharpening a kitchen knife beyond 1,000~3,000 grit. In fact, at least in Japan, these are the upper-limit of stones in daily use by professional chefs of all varieties. Yes, and that includes sushi chefs.
But don’t misunderstand my point: In the case of both swords and yanagiba hocho knives, the bevel angle must be correct for both the blade being used and the material being cut, and the microscopic edge must be a clean intersection of planes. If you get these two factors wrong, a crescent wrench might work just as well.
The other point I want to make is that, while I enjoy using high-level skills to give a beautiful appearance to extremely sharp blades, such a blade will not perform better than an identical blade of equal sharpness but with a less polished appearance, and the extra time and money spent on improving outward appearance is wasted on bread and butter work.
Since easily-deceived, morally-challenged Hollywood celebrities have the answers to all the world’s problems (at the cost of other people’s money, labor and freedom, of course) perhaps our quest for the sharp edge can benefit from the wisdom of the famous Latin lover ‘Nando, Tinseltown’s most elegant star. ‘Nando once shared his father’s advice that it is “better to look good than to feel good.” Accordingly, perhaps we should all go crazy nuts and polish our blades like beautiful but dull museum swords and wear waistcoats and cravats as we cut sliding dovetails and plane door stiles. After all, one must be ready for every photo op. In this way, our woodworking blades may be worthy of ‘Nando’s highest praise: “You, dahling, you look mahvelous, absolutely mahvelous!”
Fernando Lamas in “The Merry Widow.” The crease in his pant leg could slice bacon.
No, on second thought, while there is much one can learn from Fernando’s elegant philosophy, his standards of beauty and suffering are too high for me. I would rather be a simple joiner or cabinetmaker in stained work clothes that has the ability to make a blade exceptionally beautiful but chooses not to expend the time and cost required to do so most of the time, rather than someone who doesn’t because they can’t.
Although Fernando has a pressing appointment for a tango lesson (discretion prevents me from naming the young lady he will be pressing) and won’t be providing further insight today, our adventures in sharpening Japanese woodworking tools will continue in Part 5 of this series.
Let’s meet at Tsukiji for sushi afterwards. Until then, I have the honor to remain,
YMHOS
If you have questions or would like to learn more about our tools, please click the “Pricelist” link here or at the top of the page and use the “Contact Us” form located immediately below.
Please share your insights and comments with everyone in the form located further below labeled “Leave a Reply.” We aren’t evil Google, fascist facebook, or treacherous TikTok and so won’t sell, share, or profitably “misplace” your information. If I lie may all my dance steps turn to stumbles.
“A wild boar was sharpening his tusks upon the trunk of a tree in the forest when a fox came by and asked, Why are you doing that, pray? The huntsmen are not out today and there are no other dangers at hand that I can see. True, my friend, replied the Boar, but the instant my life is in danger, I shall need to use my tusks. There will be no time to sharpen them then.”
Aesop (621~565 BC)
It’s nice to have a philosophy on a subject because it helps one distill random thoughts down to the essentials.
Allow your humble servant to explain his philosophy about sharpening woodworking tools, not because it is charming and unique, and not because you should emulate it, but because it will provide insight into the things written in this blog and elsewhere. Use it to calibrate your BS meter. It’s often nose-deep when people talk about sharpening.
My philosophy regarding sharpening was shaped by my experience as a carpenter, contractor, commercial cabinetmaker, and joiner working under pressure, against a clock, sometimes with a boss watching with eagle eye, and often in front of customers, not as a hobbyist fiddling around in a garage workshop. Married young with a growing family to support, I quickly discovered that children eat constantly and in ever-increasing quantities, so efficiency was and is important to me.
Efficiency was also important to the Clients who hired me. Sharpening and maintaining tools is, of course, part of the job, but from the viewpoint of Client or employer it’s wasted time, so it’s important to minimize time spent fiddling with tools during the work day. Accordingly, I followed the example of craftsmen I respected and started the day with sharp tools in good working order, and kept spare planes and chisels sharpened and ready to go as backup.
Self-employment hammered into me the monetary value of time. It also taught me that quality sharpening stones and tools are expensive and wear out, and that to feed wife and babies every day I had to work efficiently to minimize time and money expended on maintaining tools, while maximizing the amount of work I accomplished between sharpening sessions.
I developed a strong dislike, nay hatred, for blades that fail to perform, refuse to become extremely sharp, that dull quickly, or take too much time and effort to sharpen. I loathe them not just because they are irritating, but because they waste my time and money. Even considering the higher initial cash outlay, the cost-effectiveness of handmade, professional-grade tools in helping my mind and hands do good work and feed the family became as obvious as a burning road flare on a midnight highway.
You, Beloved Customer, may not feel the time and financial pressures that professionals do, but owning professional-grade cutting tools and learning how to sharpen them in an efficient and professional manner will make woodworking less frustrating, more profitable, and more enjoyable.
What is your philosophy?
The journey will continue in Part 4 with wisdom from a celebrity and pictures of pretty swords. Until then, I have the honor of remaining,
YMHOS
Sharpening a plane blade at the jobsite, then back to work, jiggity-jog.
YMHOS
If you have questions or would like to learn more about our tools, please click the “Pricelist” link here or at the top of the page and use the “Contact Us” form located immediately below.
Please share your insights and comments with everyone in the form located further below labeled “Leave a Reply.” We aren’t evil Google, fascist facebook, or thuggish Twitter and so won’t sell, share, or profitably “misplace” your information. If I lie may I never finish the journey.
You don’t have a soul, Doctor. You are a soul. You have a body, temporarily.”
Walter M. Miller Jr., A Canticle for Leibowitz
Life is neither a dead-end course nor a race, but a hard journey along many paths all leading to a single gateway. Without exception, all the physical things, possessions, financial wealth, qualifications, status, accomplishments and accolades we value and struggle like fevered demons to obtain and preserve in this life, even our own bodies, will all return to shadows and dust. What truly matters are the friends and family that journey with us, the kind deeds we do, the joy we share, the things we experience and learn along the way, and most importantly, the quality of our souls at the journey’s end, for these are all that will pass through that last gateway into eternity with us; Nothing else matters a handful of beans.
Woodworking can be a wonderful diversion and even a source of joy during this journey, one that can make our lives and the lives of those around us more pleasant. For many it is a way to keep body and soul connected. For those that rely on their tools to feed their families, the efficiency of that work, and the joy they find in doing it are not trivial matters.
Thoughtful woodworkers on this path learn early that dull tools are an impediment to making excellent wooden products regardless of the skill of the hand and eye that manipulates them, because, being an extension of the user’s mind and hands, a dull tool will often darken the mind and leaden the hand of even an accomplished woodworker.
Sharpening has always been the most important woodworking skill. It is no coincidence that for millennia the first thing apprentices were taught once they were permitted to handle valuable tools was how to sharpen them properly.
In our time the prevalence of machinery with built-in precision and spinning cutters driven by motors and sharpened by others has made it possible for those lacking even basic sharpening skills to represent themselves as craftsmen. Although they may be skilled, I believe such individuals are less craftsmen in wood and more machinery operators.
Those thoughtful souls who aspire to become accomplished woodworkers, and not just machine operators, need minimal sharpening skills. Untold thousands of years of human history verify the truth that all other woodworking accomplishments flow from this bedrock skill.
I believe, perhaps because the men I learned from and respected also believed, that free-hand sharpening is the way a skilled craftsman maintains his tools. My experience and observations over many years have confirmed the efficiency of this technique. It is consistent with my work-driven philosophy about sharpening which I will explain in more detail in the next post in this series.
Sharpening a blade free-hand is a zen-like activity. It requires observation. It requires muscle memory. It requires consistency. It requires composure. It requires meditative focus. And at the pinnacle, it requires one to feel and hear work being done in a place one cannot see, a place where destruction creates order; where nothing becomes something.
Some will disagree with my beliefs about free-hand sharpening, especially the machinist-types, the scribblers and gurus promising instant results in a few hours for the price of a book, DVD, or class, and the purveyors of sharpening jigs disinclined to work without “training wheels.” No mystery there, so I won’t even try to please everyone, just professional woodworkers.
When professional woodworkers gather in the presence of edged tools, they often talk about sharpening techniques and rare stones, and they are always curious about the quality of other men’s tools. In Japan, it is considered rude to pick up another’s tools and examine the edges, or even to look at them too hard, but the desire is always there nonetheless because it is human nature to compare oneself to one’s peers.
Indeed, much can be learned about a man’s quality standards and his skills from his blades. Perhaps the condition of one’s tools gives a tiny glimpse into the owner’s character.
What do your tools say about you? Some are terrible gossips, you know. (ツ)
Allow me to end this article with a quote from the best-selling book of fiction in human history:
End? No, the journey doesn’t end here. Death is just another path. One that we all must take.
J.R.R. Tolkien, The Return of the King
YMHOS
Tianmen Gate, China. 999 steps to the natural gateway above.
If you have questions or would like to learn more about our tools, please click the “Pricelist” link here or at the top of the page and use the “Contact Us” form located immediately below.
Please share your insights and comments with everyone in the form located further below labeled “Leave a Reply.” We aren’t evil Google or fascist facebook and so won’t sell, share, or profitably “misplace” your information. If I lie may I never finish the journey.
It is well with me only when I have a chisel in my hand
Michelangelo 1475-1564
This is the first in a series of 30 articles that describe the sharpening procedures your humble servant uses and recommends for Japanese plane and chisel blades. Links to the other 29 articles are located at the end of this one.
The purpose of these articles is to share with our Beloved Customers reliable techniques for sharpening and maintaining the tools we sell consistent with standard practice among advanced Japanese professional woodworkers.
Each article in this series describes separate but related aspects of sharpening Japanese woodworking tools, especially chisels, plane blades, and kiridashi knives. While 30 articles sounds like a lot, it is certainly not enough to cover all details of this first and most important woodworking skill. No doubt Beloved Customer could add chapters based on your own experiences.
If it seems less than concise, please understand that it is written with enough detail so even the first-time sharpener can benefit from it, but with enough advanced techniques to stimulate the interest of even jaded professionals.
Of course, if I wrote only for the professionals, then those new to the process would be left confused and frustrated. Likewise, if I wrote only for Beloved Customers new to sharpening Japanese tools, then the professionals reading it would begin to make snoring noises (highly intelligently, of course). I hope you can appreciate the conundrum and forgive the resulting compromises.
Unlike most of what is available on the internet, these techniques are not based on irresponsible rumors expounded as fact in smelly, troll-infested forums, articles in magazines written by self-educated journalists, or silly videos on NoobTube.
I didn’t invent the techniques described herein, but they are nonetheless my techniques, the results of hard experience working with, and lessons learned from, professional craftsmen in Japan over a period of some 30 years, sometimes working as a professional woodworker, and other times working as an employee of two of Japan’s largest “super” general contractors.
This series of posts has 4 objectives: To save Beloved Customer (1) time, and (2) money, and to make your Japanese blades (3) sharper, and (4) cut longer. These benefits are worth obtaining if you are serious about woodworking, as professional woodworkers must be, but the requisite attention to detail and manual skills may not come easily to some.
Indeed, you may need to unlearn bad habits, and develop new habits, skills and muscle memory in order to achieve these objectives. This is not a 90 minute process but will take weeks, maybe months. It certainly took me years to completely unlearn my bad habits and develop the necessary skills. I am confident these writings will make the process more efficient for you, if you follow them. I only wish I had the benefit of this information all in one place back in the day.
Of course these are not the only viable solutions available. Many woodworkers are self-taught nowadays and learn how to sharpen from books, magazines, videos, and classes, and have developed methods that work well for them. I am not minimizing those successes, merely proposing methods to further advance their skills.
However, be aware that several of the techniques described herein may directly contradict the teachings of the Holy Woodworking Gurus oozing virtue received from the Giant Pixie and who make a living scribbling, making videos, and teaching classes about woodworking.
These guys achieve popularity and financial success by helping amateurs get better results quickly after reading only a few pages in their $29.99 book, or attending their 2-hour class. To maintain their popularity and income, the techniques some (but not all) of them promote must be dumb-as-dirt simple, and often involve shortcuts and gimmicks yielding “instantaneous gratification,” without the need to learn real skills. Nothing wrong with that, but is it good enough for you?
Unlike amateurs satisfied with superficial results, professionals need real skills that yield consistent results long-term.
Don’t be shocked, but I am not offering 90 minute gratification in exchange for your money.
There are no “sponsors “of this blog. There are no advertisements, period, so this blog generates no direct income.
I have no “click goals, ” or “SEO strategy” to deploy; I don’t care if you “like” me, “subscribe” to my BoobTube channel (I don’t have one), or buy access to my online tutorials (don’t do those either). In fact, this website doesn’t require you to register, it doesn’t use Google Analytics, it doesn’t embed cookies in your computer or attempt to mine your data in any way.
The advice I offer is free, but if you prefer gimmicks to lifetime skills, the techniques described here are not for you. I am sure such Gentle Readers can find some brightly-colored bubble-wrap to keep themselves entertained.
Do I have a profit motive? Nope, this information is free. I am not a sneaky corporate shill trying to sell books, magazines, videos, video games, advertising space, banners, VPN services, home security systems, sharpening stones, or heaven forfend, powertools with laser sights. I have never been lent or given a tool in exchange for a review, nor have I been wined, dined, laid or paid to write good things about crappy tools.
Over the years, my professional needs and curiosity led me to purchase literally hundreds of planes and chisels made by many blacksmiths and companies. The operative word here is “purchased.” With my own money. Not a single one was ever given or loaned to me. Some I later sold, the good ones I kept. The two points I want to make are: (i) I put my money where my mouth is; and (ii) I have no financial conflict of interest.
I have several motivations for writing and sharing this information. One is selfish convenience. Over the years, people have asked me how to sharpen Japanese tools, and I have explained the process in letters, emails, and in person many times. This series of articles is essentially a collection of my scribblings on the subject over several decades, and is intended to save me time explaining processes.
Another motivation is to ensure that the people who buy the small number of hand-forged tools we sell (our “Beloved Customers”) know how to properly sharpen and maintain them, so that those tools will provide long, productive, high-performance service. Our tools deserve to be properly maintained.
Some who experience difficulties with Japanese woodworking tools blame the tools, but in many cases the problem lies not in defective tools but rather stems from an insufficient understanding of basic sharpening principles and lack of experience. Without exception everyone with aspirations to be an excellent woodworker must go through that learning process at least once. Your humble servant hopes these scribblings will enlighten more than confuse.
But my primary motivation for making this series of articles available at no cost is to fulfill a promise I made to freely share with others the techniques I learned from the many carpenters, joiners, blacksmiths, tool makers and professional sharpeners in Japan who taught me. In exchange for this free information all I ask of you, Beloved Customer, is an open mind and eager hands. Please, don’t cut either of them.
The adventure will continue in Part 2! But be forewarned, the price of admission may double. (ツ)
YMHOS
If you have questions or would like to learn more about our tools, please click the “Pricelist” link here or at the top of the page and use the “Contact Us” form located immediately below.
Please share your insights and comments with everyone in the form located further below labeled “Leave a Reply.” We aren’t evil Google, fascist facebook, or thuggish Twitter and so won’t sell, share, or profitably “misplace” your information. If I lie may the bird of paradise fly up my nose.


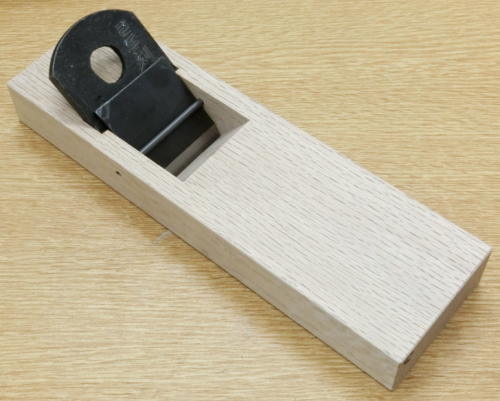


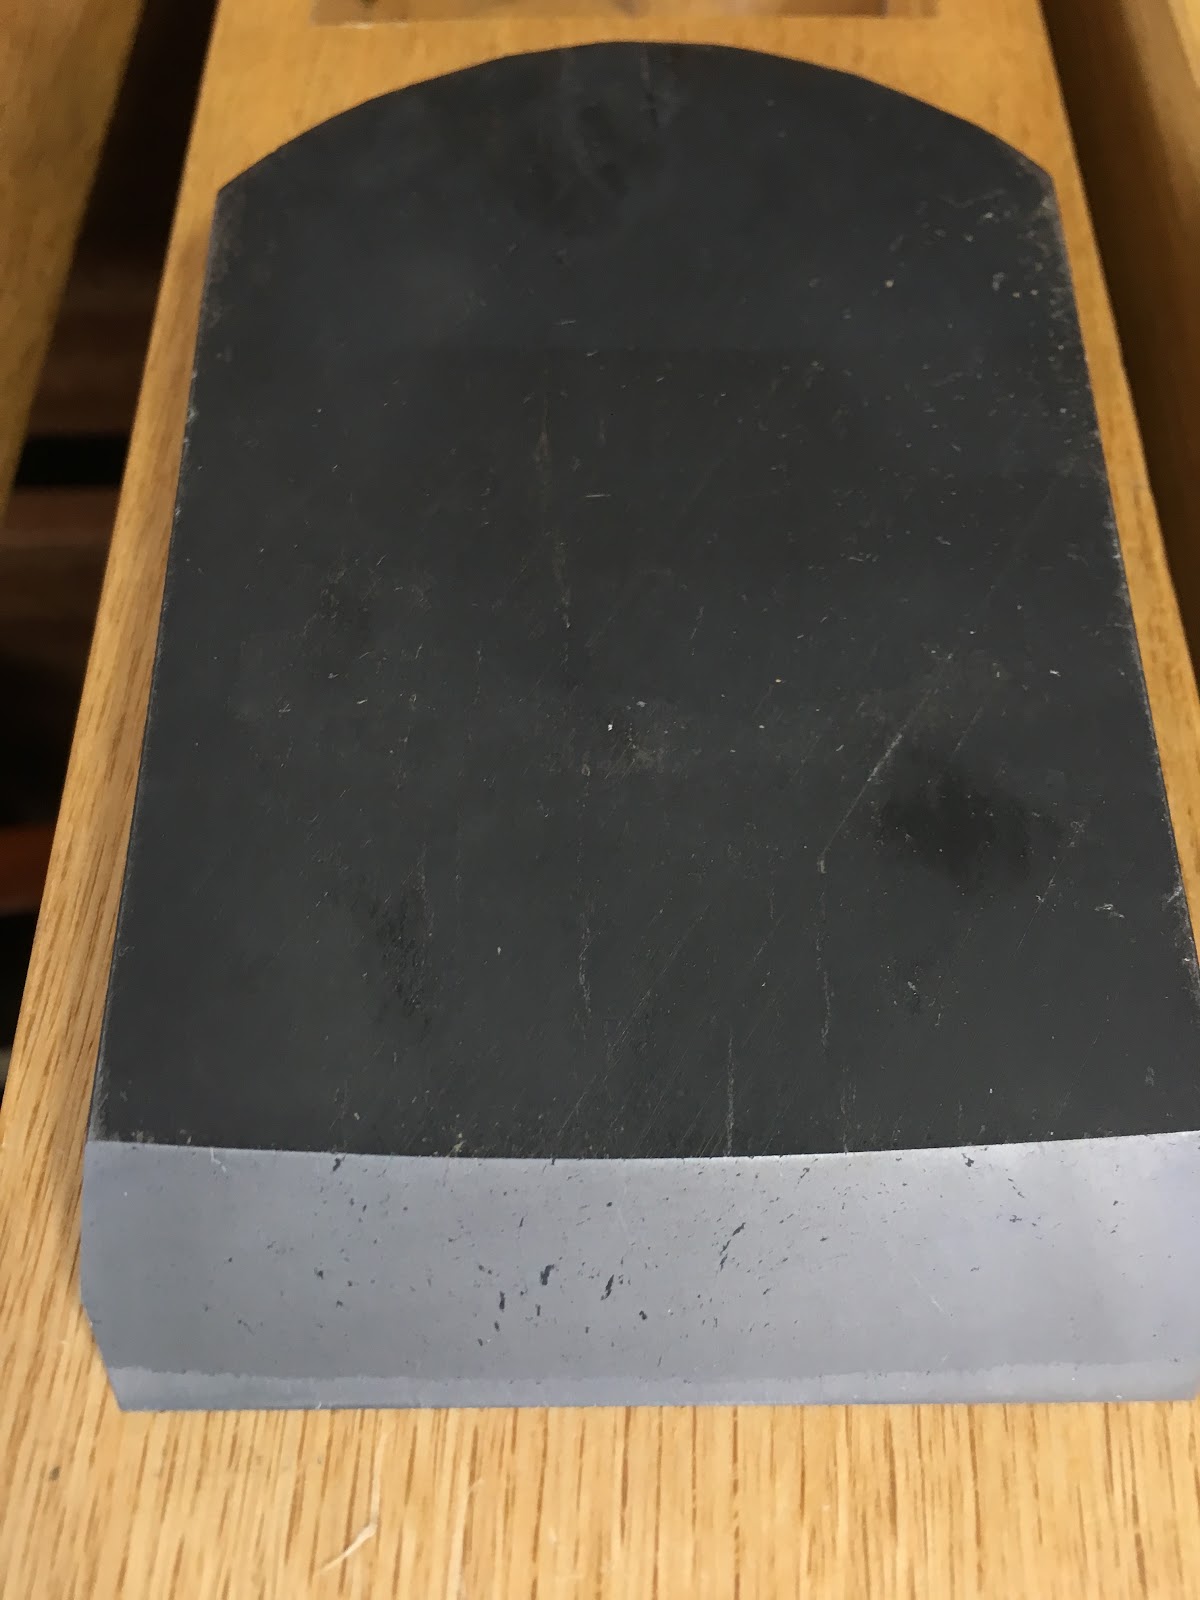


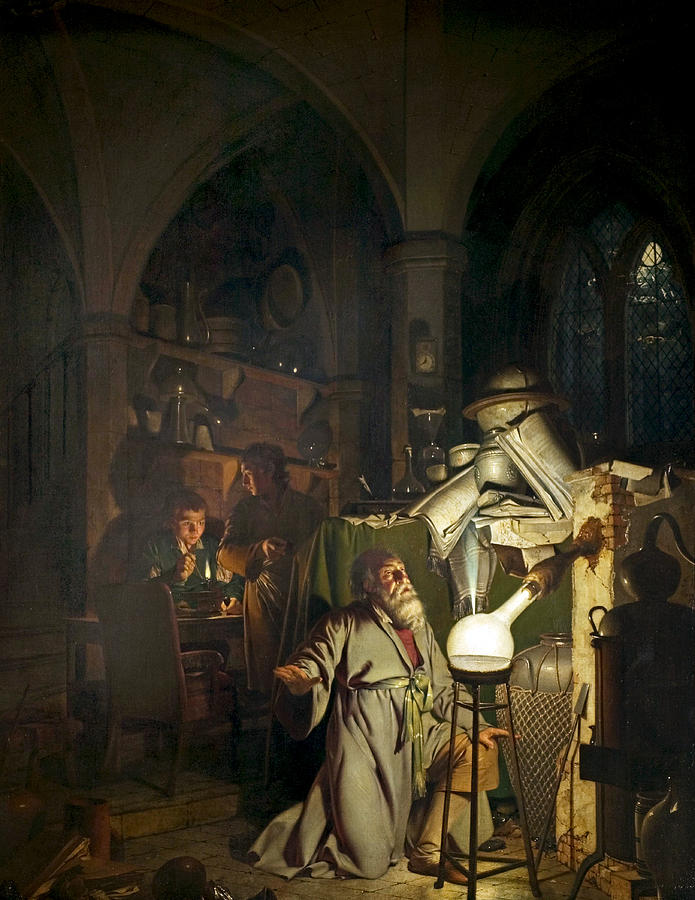


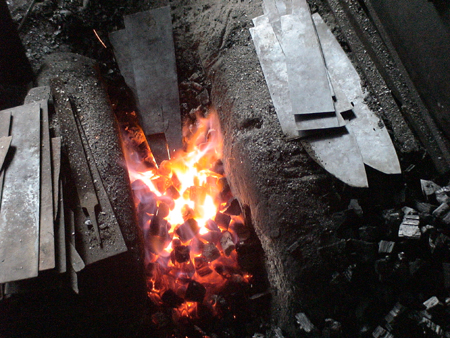


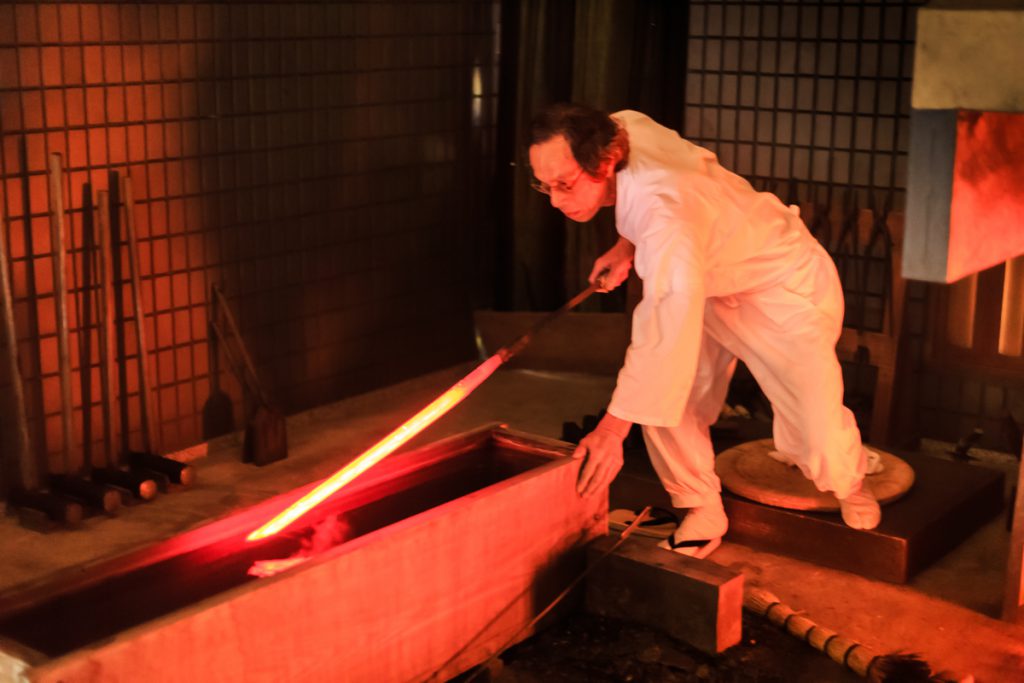


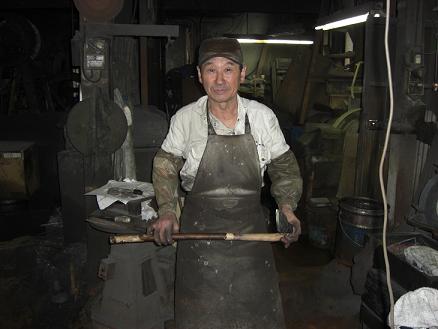


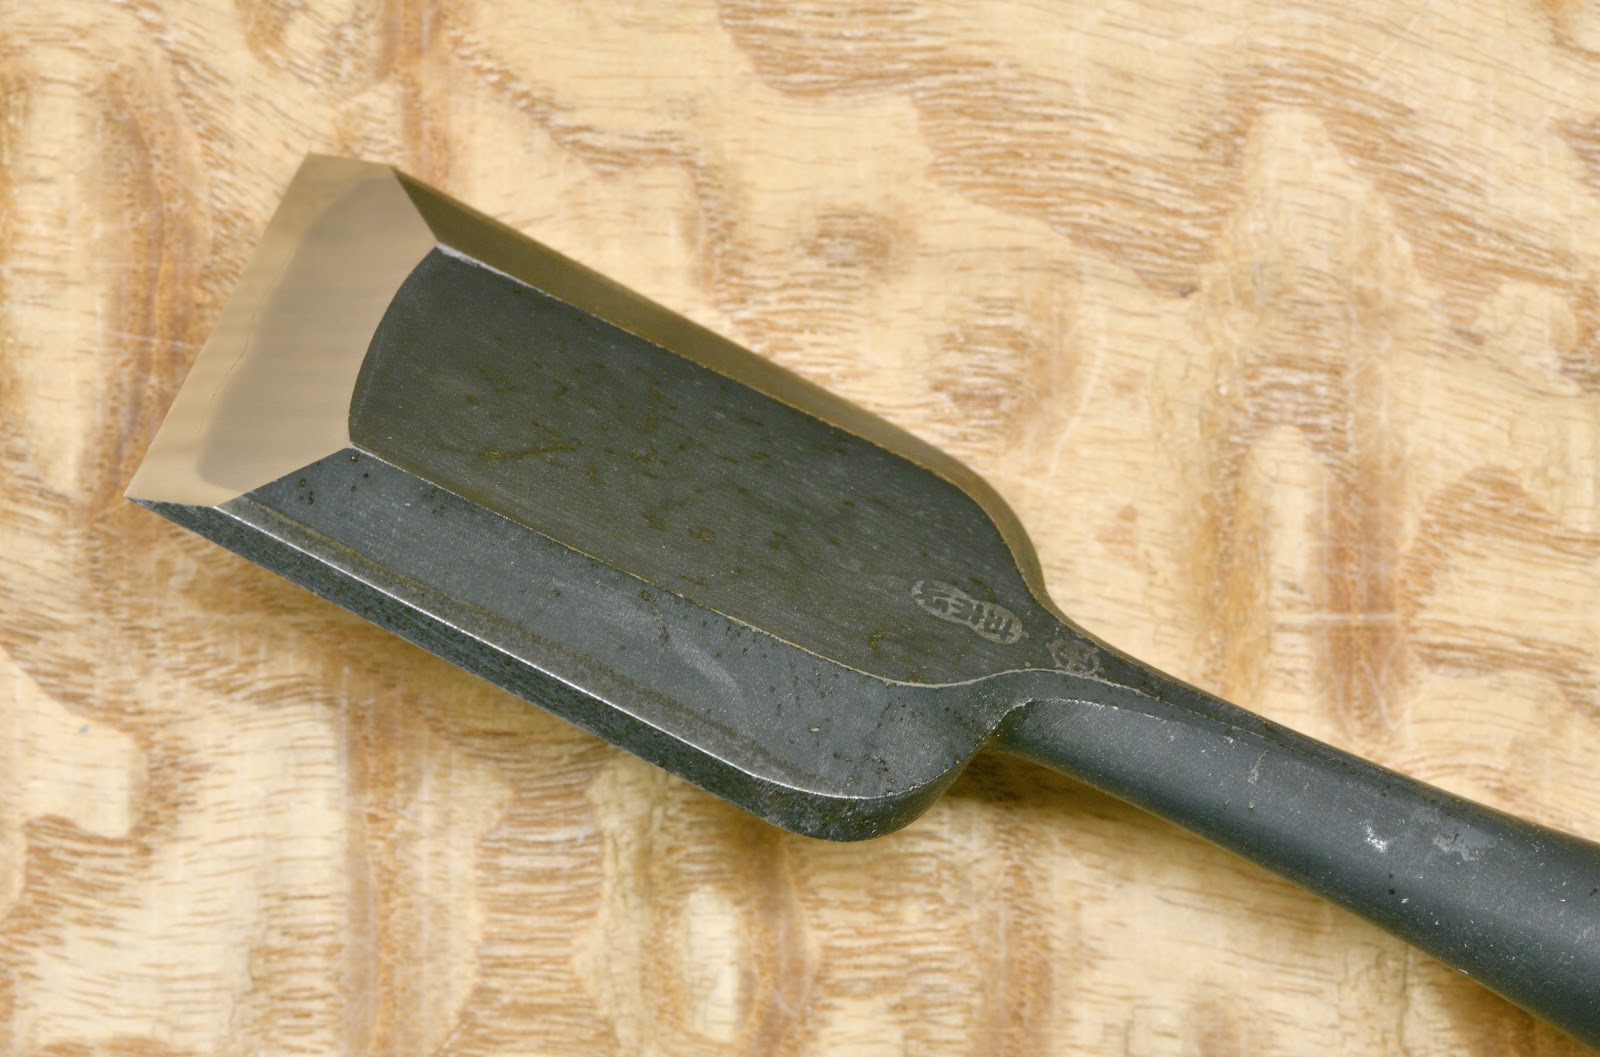

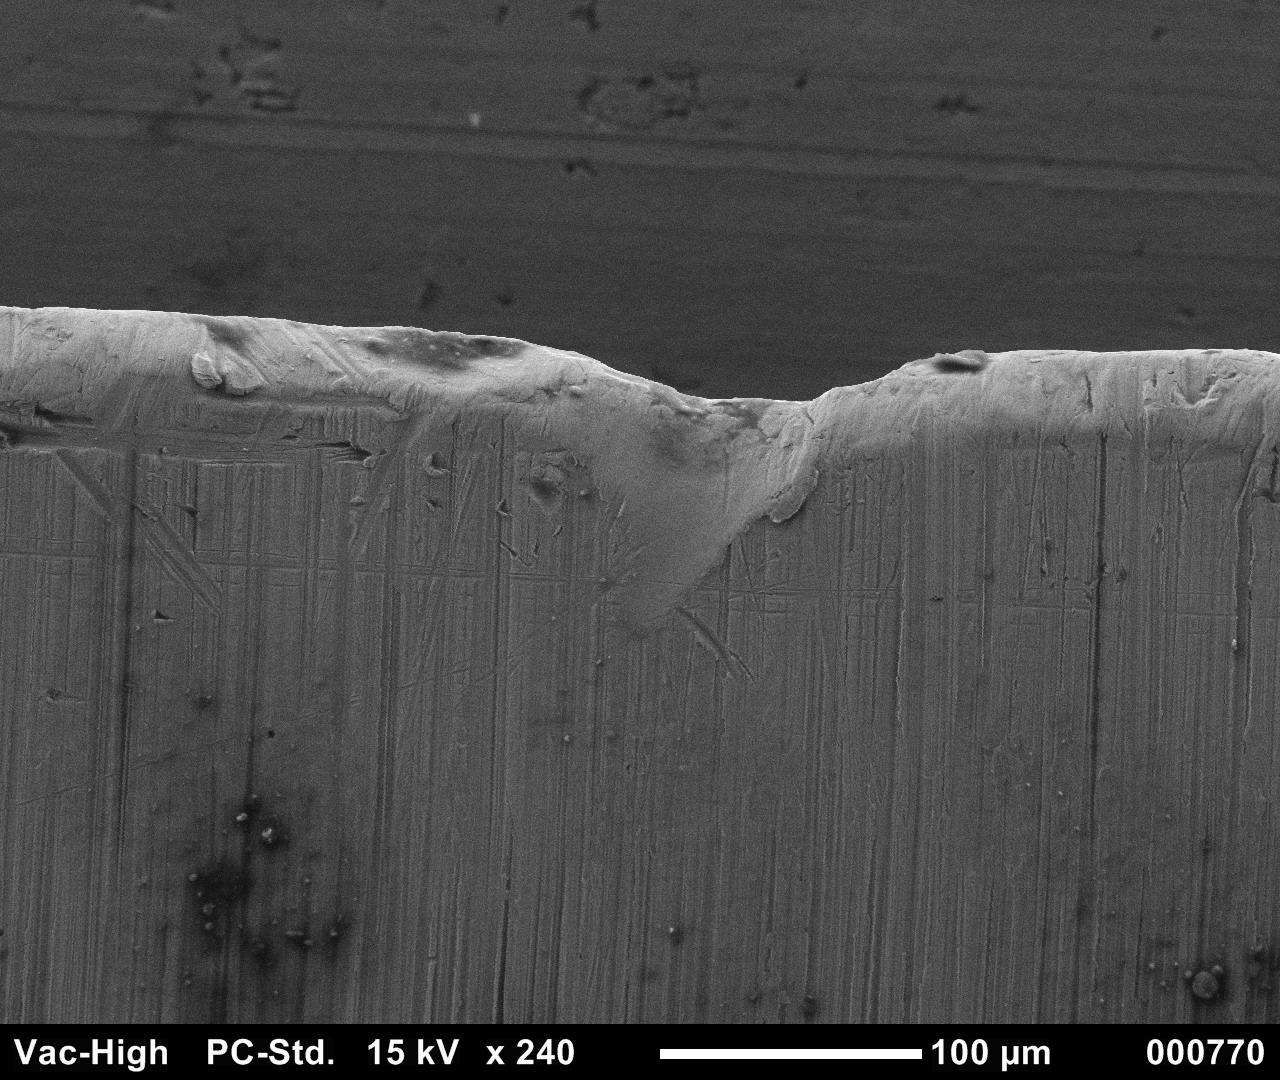


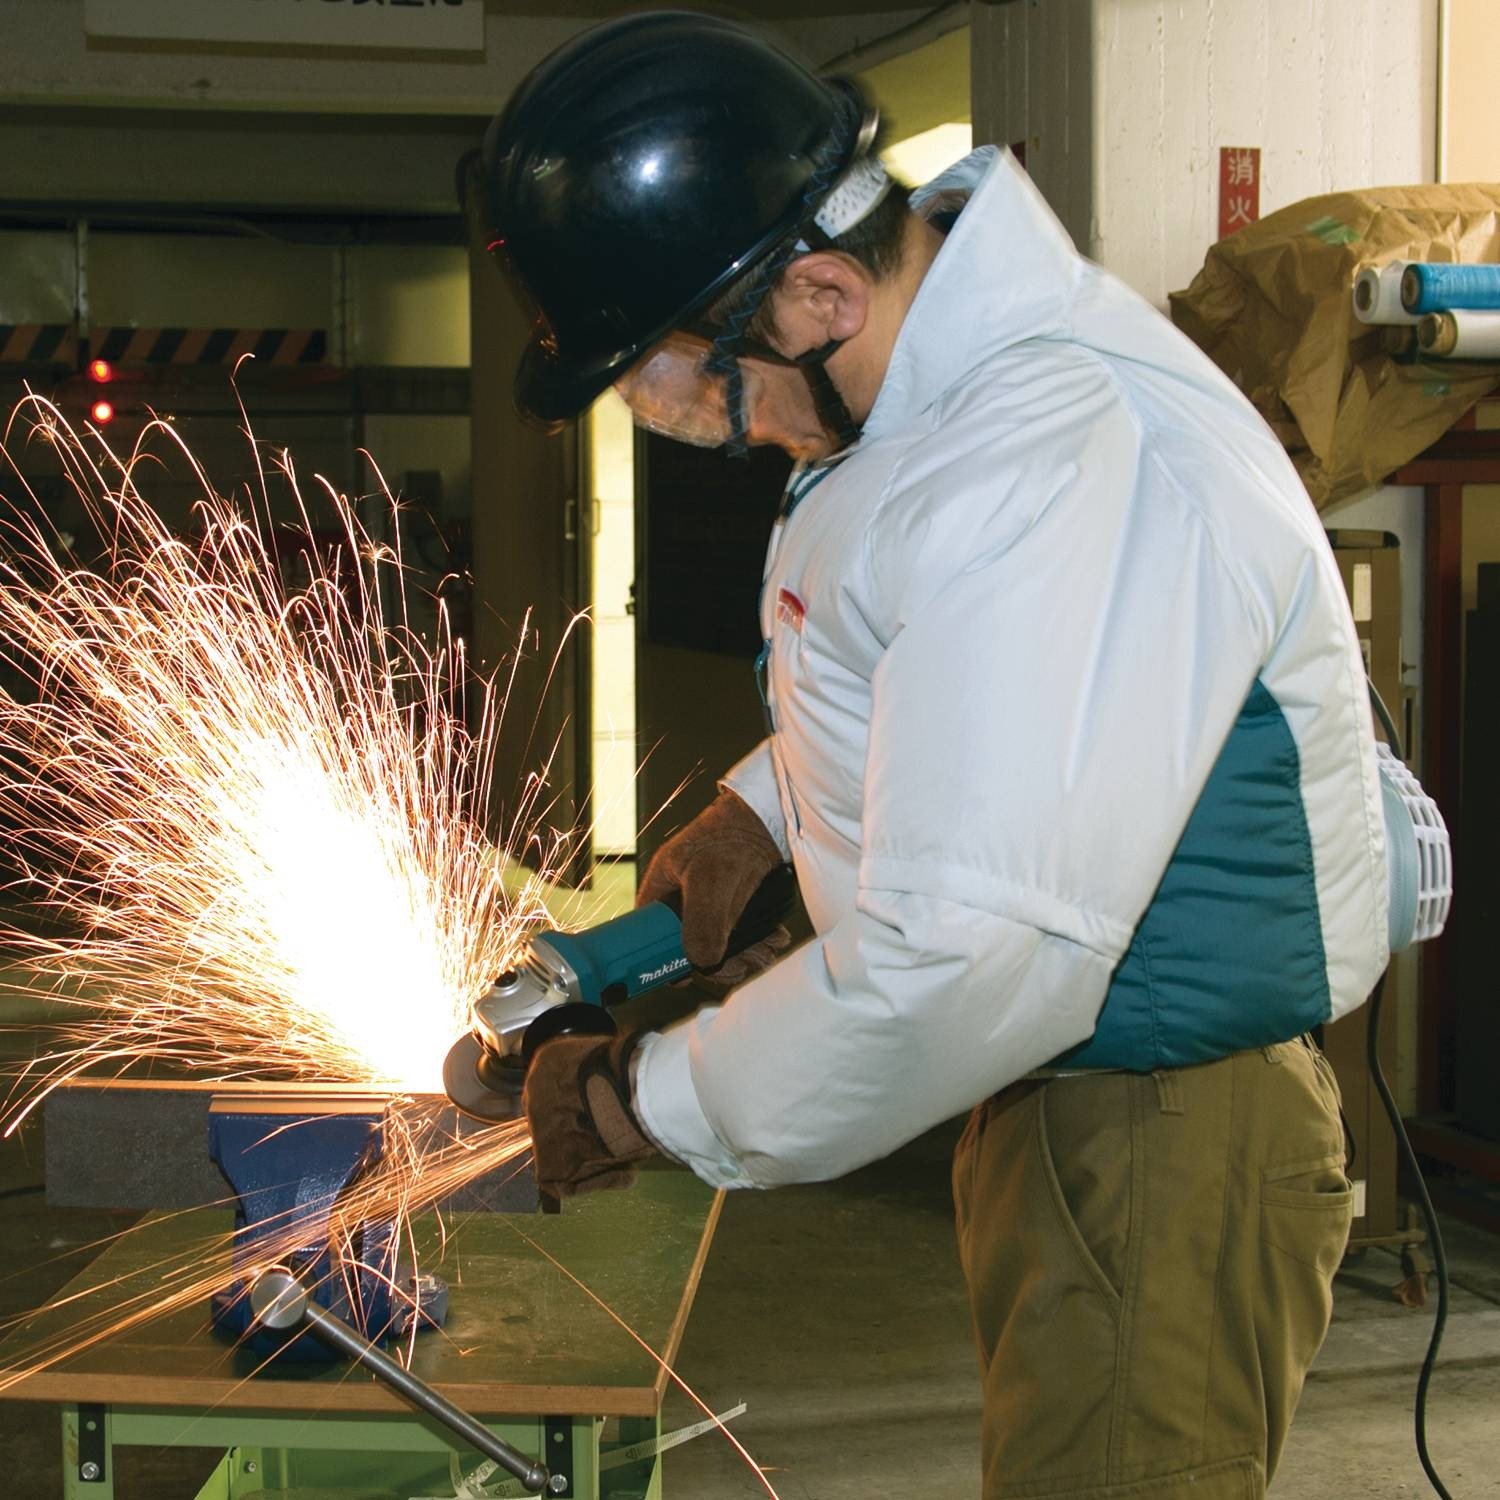


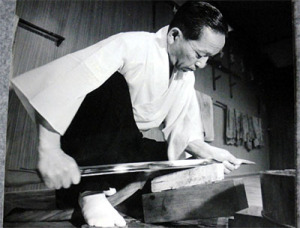
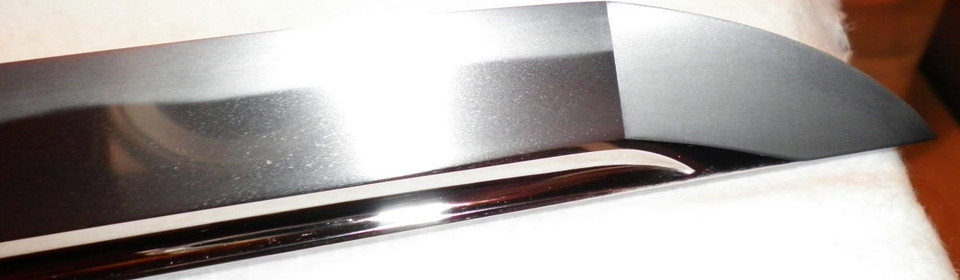


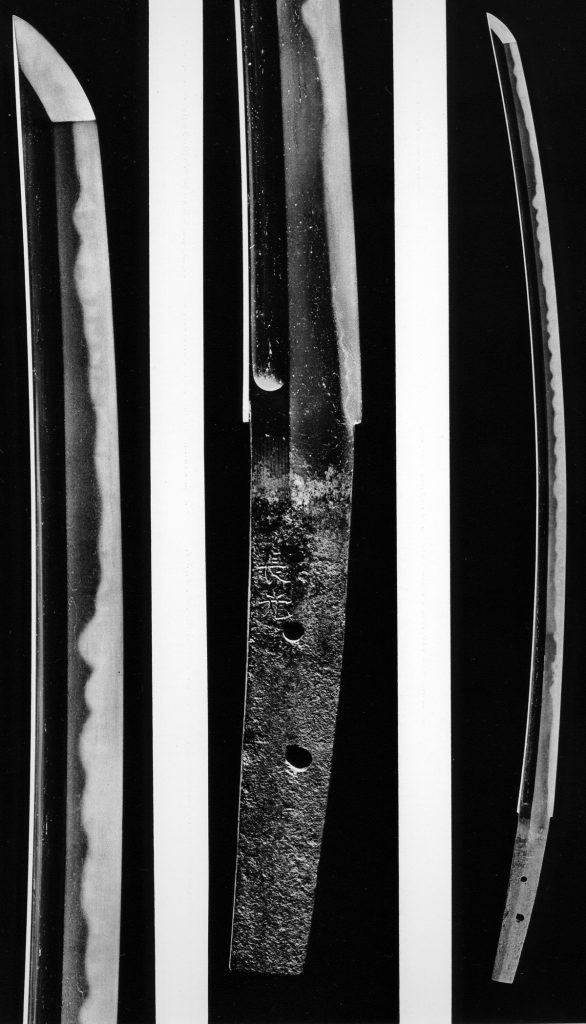
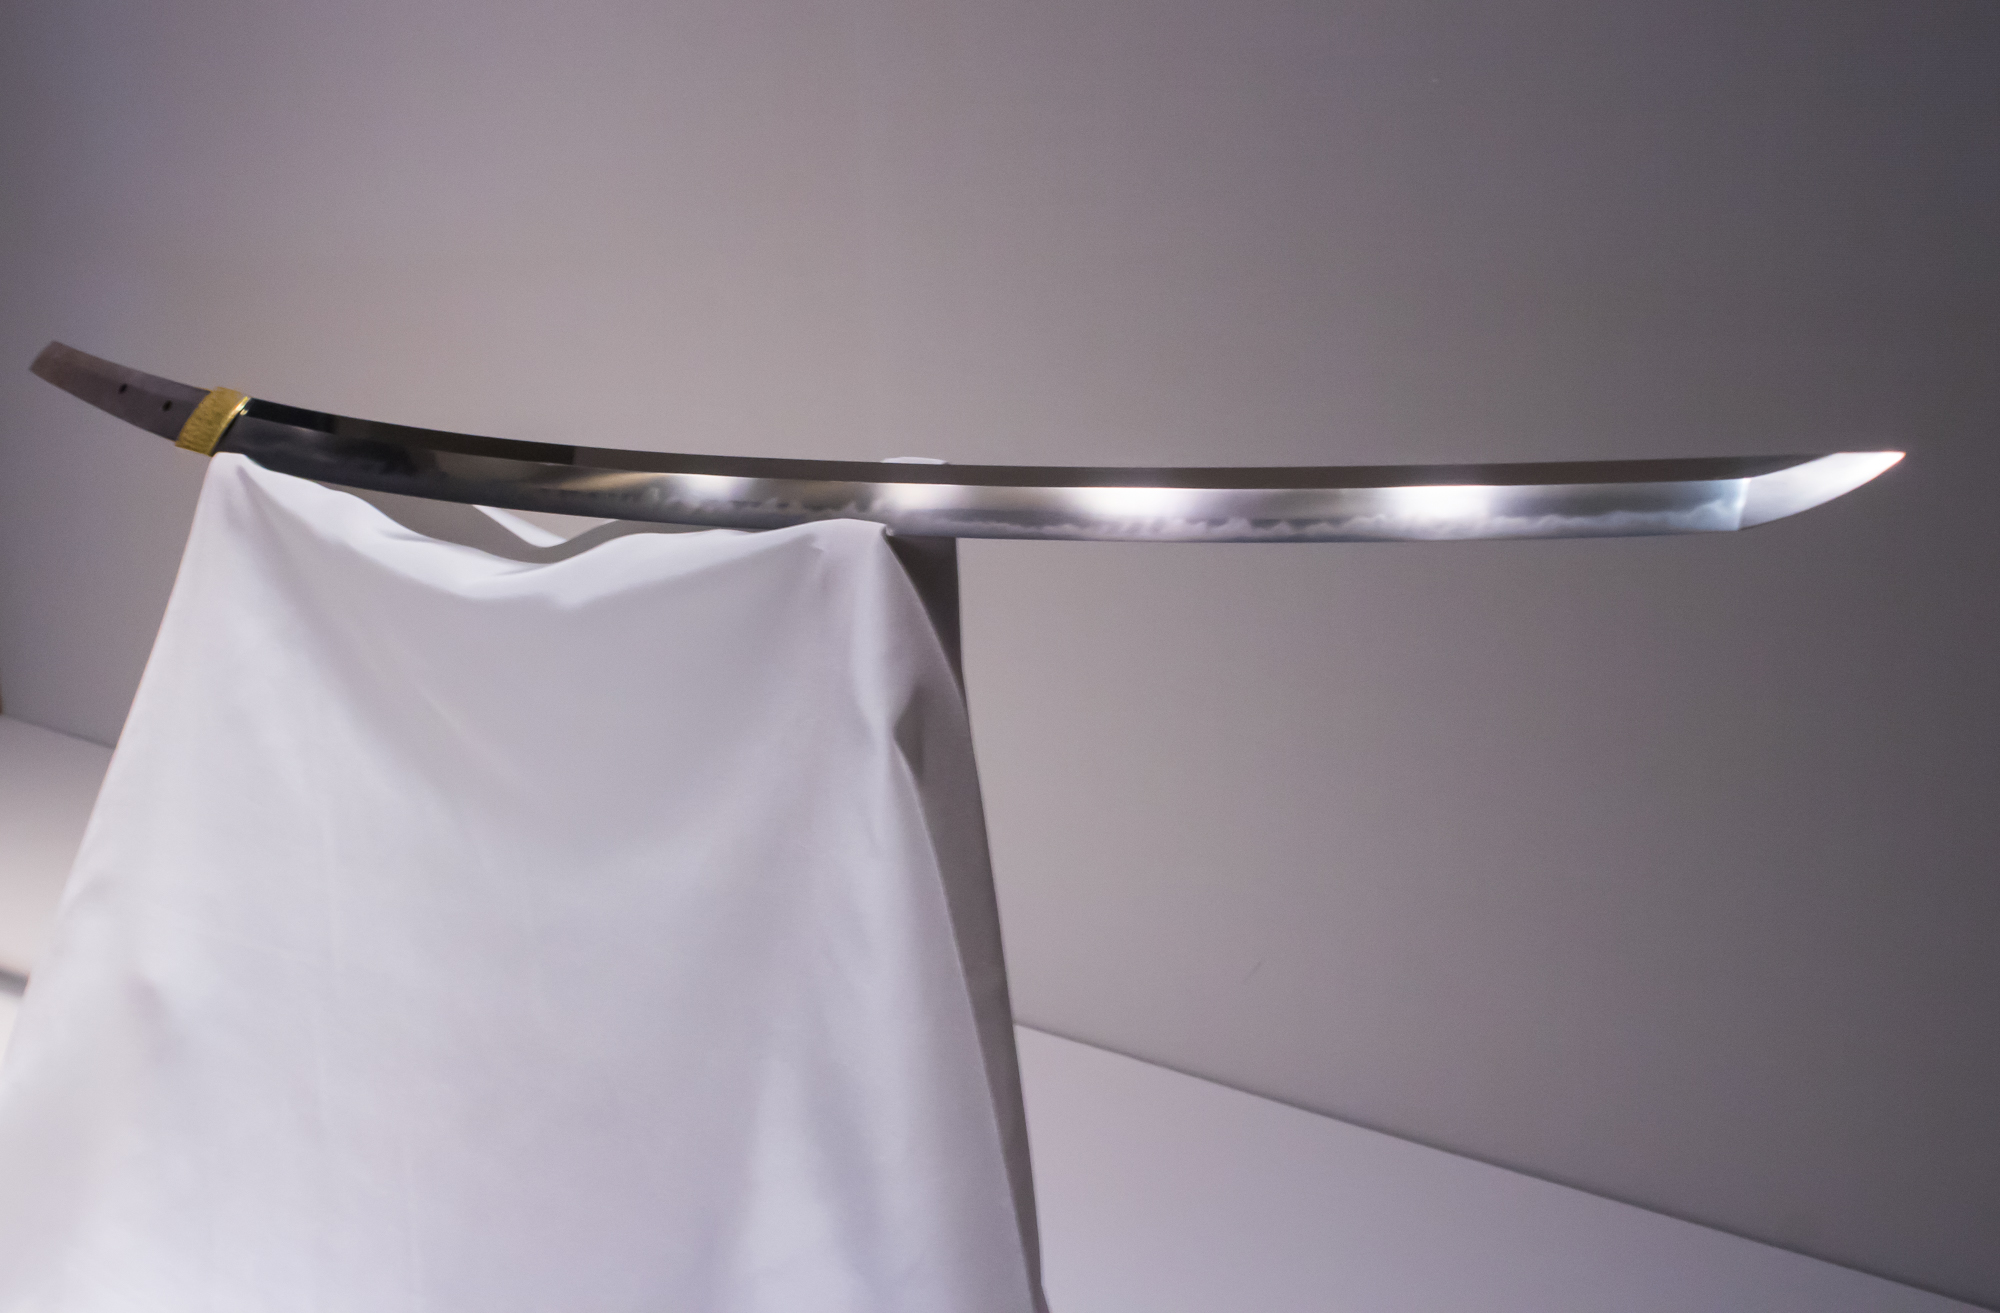
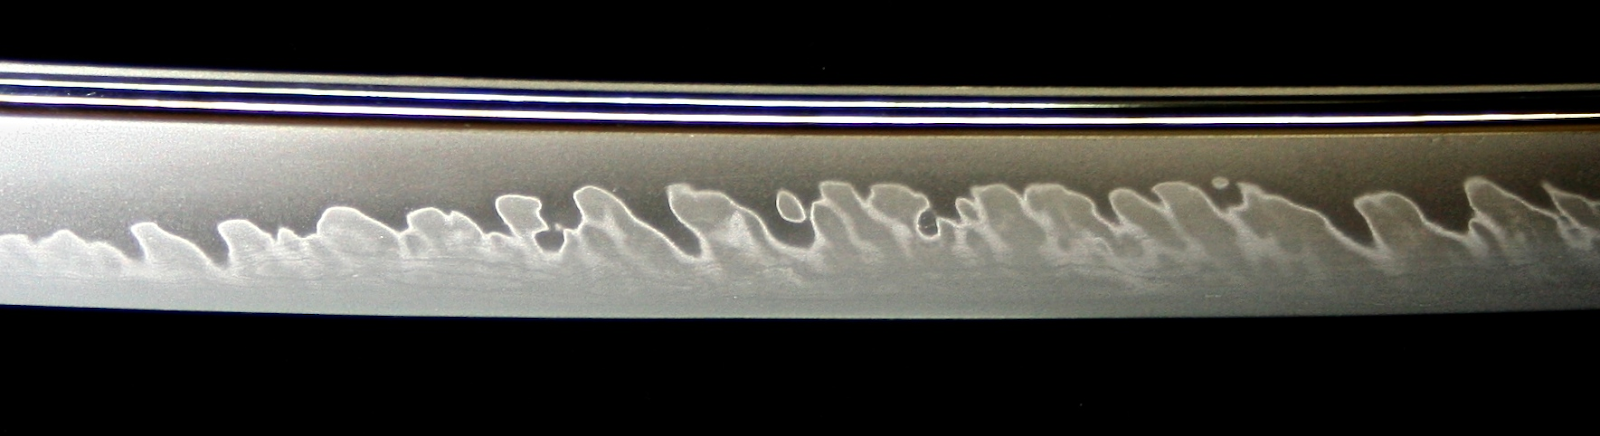
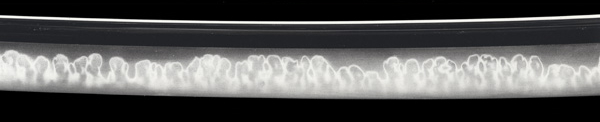


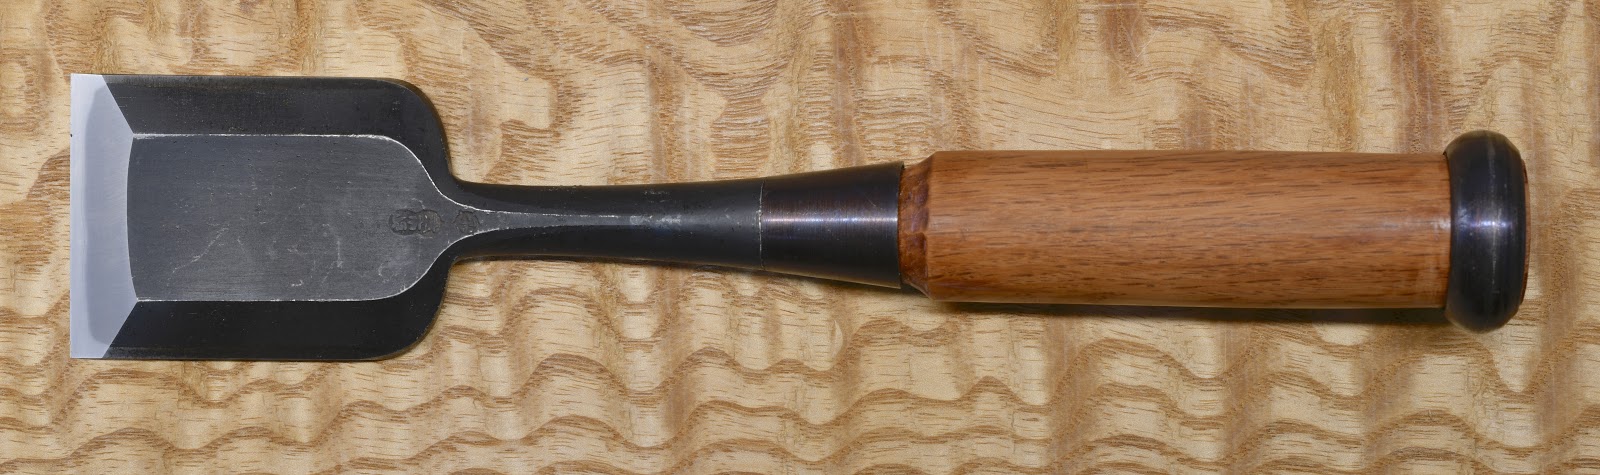
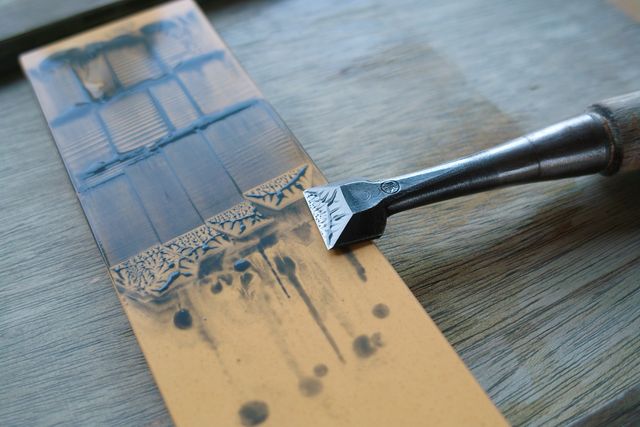
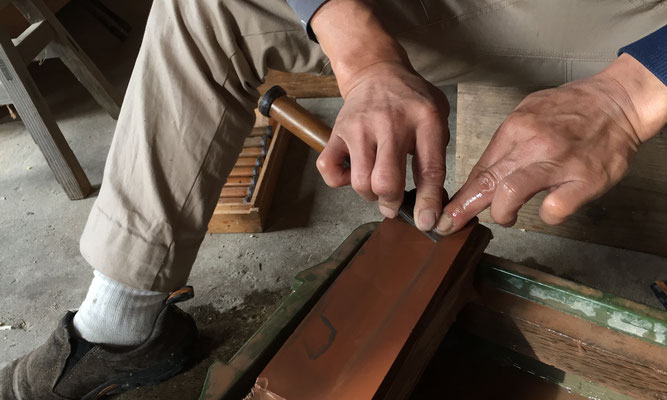

Leave a comment