Trees, Wood, Carbon and Bugs

A giant California redwood tree located at the time of this photo near my former home in Forestville California. The gentlemen shown have done a marvelously clean bit of work up to this point using only a two-man saw and their axes. A serious job performed by serious men.

All that is gold does not glitter,
Not all those who wander are lost;
The old that is strong does not wither,
Deep roots are not reached by the frost.

From the ashes a fire shall be woken,
A light from the shadows shall spring;
Renewed shall be blade that was broken,
The crownless again shall be king.

J. R. R. Tolkien, The Fellowship of the Ring

Thank you for visiting our humble website, focused primarily on woodworking tools, especially those made by Japanese craftsmen for Japanese professional carpenters and woodworkers.

Consistent with the educational and contemplative nature of this website, in this article we will examine the nature of wood itself including the trees that produce it, two of their controversial by-products, and a couple of techniques for dealing with wood’s inherent weaknesses of which Gentle Reader may not be aware. It will a useful read without being boring, I swear by Grabthar’s Hammer!

The Miracle of Trees

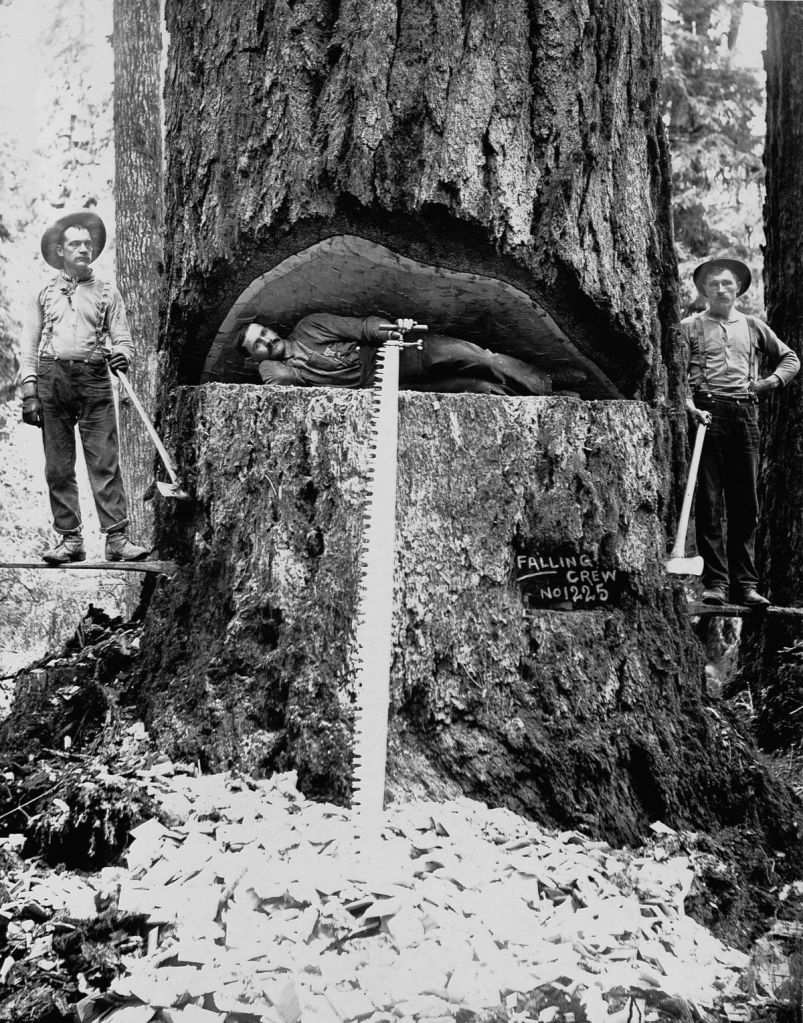
As a matter of common sense, most people assume that trees, such as the California Redwood shown above which once grew very near my old house in Forestville, grow to such height, diameter and mass by extracting minerals from the ground at their roots. That huge mass must come from somewhere, right?

Of course trees do extract some minerals from the ground, along with many tons of water. But if it’s as simple as that, please consider why trees don’t create correspondingly huge depressions in the soil into which they are rooted, depleting minerals and biomass from the soil. Moreover, please consider how trees add biomass to the soil they’re rooted in instead of making a hole. You’ve heard of conservation of energy, no doubt, but is conservation of mass a thing?

Most people think plants and trees are made of minerals robbed from soil, but the fact about trees and plants so heavily hushed-up nowadays is that they are built almost entirely of carbon extracted directly and entirely from the atmosphere. Yes, from thin air.

Clearly, despite what the doom goblins wail on TV in order to shame and coerce actors and politicians for support, to solicit clicks, and to extort donations, carbon dioxide is a useful substance critical to all plant life; it’s not the poison the smelly, screeching environmentalist orcs claim it is. Consider what would happen to this planet and all creatures who live on it if carbon dioxide went away. Or if oxygen went away.

If you aren’t clear on this point, please spend some time and effort to learn, or risk being an environment cuck. Ah! Could it be there’s no money to be made speaking the simple truth rather than inciting panic?

A climate scientist fleecing the ignorant (and gullible) masses. I wonder if he has any of my favorite Idiotbegone pills in his wagon?

Of course, plants do extract a few minerals from the soil along with great amounts of water. Powered only by sunlight, plants and trees remove carbon from the air and use it to create cellulose, a material very similar to sugar, BTW, and which many insects and animals, but not humans, can digest. Think grass and other plant matter.

Show me a single “scientist” that can replicate this miracle in a lab and I will bow down and kiss his bulging bunions. Good luck in your search for that miracle worker, but in the meantime, I won’t be needing any scientific kneepads.

Plants need free carbon dioxide in the atmosphere to grow, and animals, including me and thee, need both plants and oxygen. Indeed the greater the concentration of CO2 available, the more plants grow, the more CO2 they remove from the atmosphere, and the more oxygen they produce. Indeed, every molecule of oxygen surrounding planet earth was produced by a plant. Hmm, sounds almost like an endless, natural cycle, one that animals and humans rely on unconditionally. Imagine that…

Plants are marvelous sunlight-powered miracles. And don’t forget, except for the salt, every crumb of every ingredient in your peanut butter, humus and boiled mutton sandwich on rye originated with plants produced using sunlight, carbon, and water.

The Importance of Wood

Wood is a wonderful material, used by humankind since well before the archaeological record to produce heat, light, shelter, clothing, tools, weapons, food and water. Even today it remains the supreme catalyst.

Although computers, concrete and carbon fiber get all the attention nowadays, and those who evaluate the complicated “environmental” impacts of materials on this world carefully ignore it, there would simply be no human civilization without wood.

There are those who disagree with this statement, mostly highly edumacated individuals affiliated with supposedly serious organizations, many of whom are short-sighted, financially-conflicted souls with short attention spans that never exceed the news cycle, and who, despite clear evidence to the contrary, choose to equate the use of wood with the destruction and/or pollution of the natural environment for fun and profit.

Of course, they believe, or at least profess, that the carbon released by the combustion and decomposition of wood is wholly poisonous. These nitwit geniuses instead promote the supposedly “ecological” use of steel and concrete and petroleum products instead, all materials that require huge amounts of energy to fabricate, transport and recycle, all while releasing millions of tons of truly (versus imagined) poisonous substances into the natural environment annually. Alas, the medicinal cure for idiocy your humble servant strongly advocates is apparently not yet widely available.

Wood contains a tremendous amount of energy, as Gentle Reader has observed in wood-fueled fires. The immutable laws of thermodynamics state, in essence, that all heat comes at a cost. Oil costs money to pump, transport and refine as well as special machinery to use it, but the heat given off by wood is simply the conversion of sunlight gathered by the plant while it was alive back into heat and light. A complete and pure circle.

Sure, the combustion and decomposition of wood releases carbon back into the ground and atmosphere, but every molecule of carbon released by wood was originally extracted directly from the atmosphere by many, many plants over many many cycles. Therefore, plants remove carbon from the atmosphere, and only release that carbon when they return to the big lumberyard in the sky. This is true “net zero,” without the production of an ounce of pollution, unlike steel, concrete, oil, coal and every other fuel and material used by mankind without exception.

I’m not suggesting the use of petroleum and coal and windpower, within limits, is irresponsible, but if the environment is important to you, as it should be, then using organic materials and fuels instead of oil, coal, steel, concrete and wind turbines should be a high priority.

Furniture Pests

Our Beloved Customers use our tools to make elegant, useful stuff out of wood. This wood is formed of cellulose, the most abundant organic compound on Earth, one very similar to but fundamentally different from the sugars we consume for energy. Many animals, including herbivores such as elephants, cows, rabbits and termites have the built-in ability to convert the cellulose in the plant matter they eat into energy by a process we cannot replicate. Humans can’t do this, nor have we figured out a way to accomplish this apparent magic without the intervention of animals, insects or fungus. Once again, puffed-up prideful science can’t do what every carpenter ant and every mushroom obediently does without even be asked to.

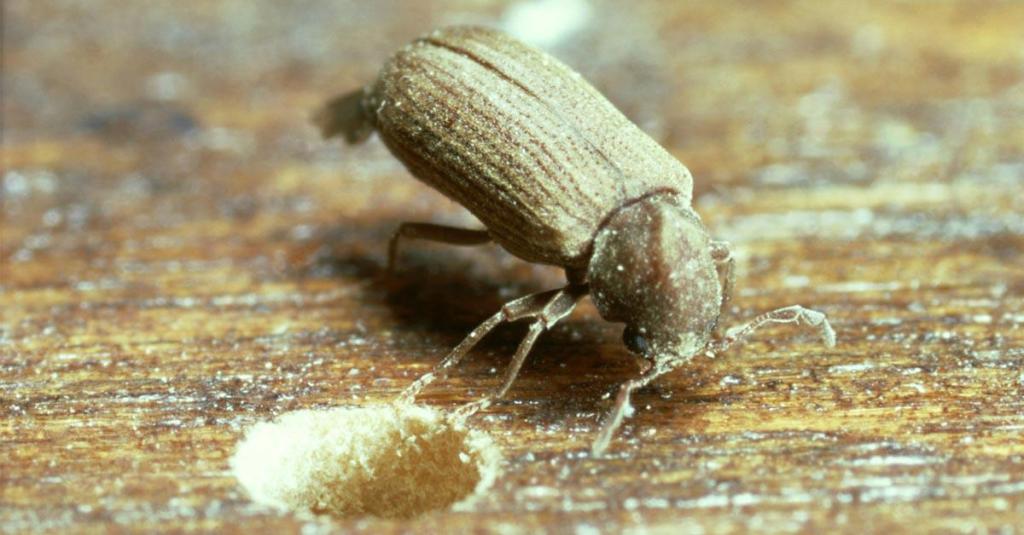
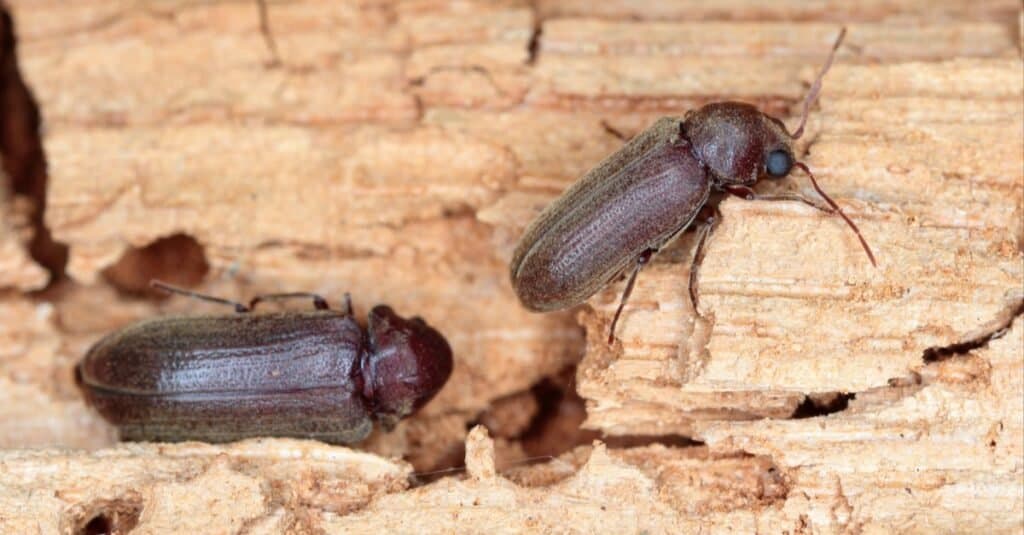
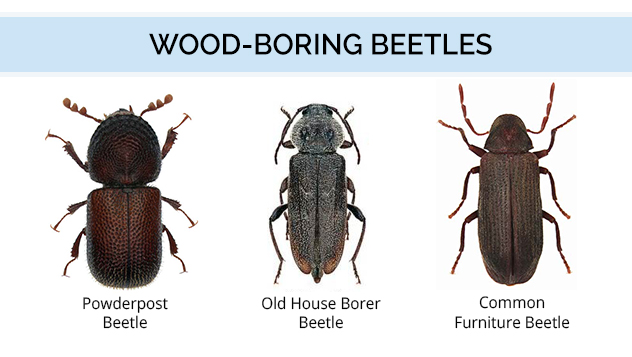
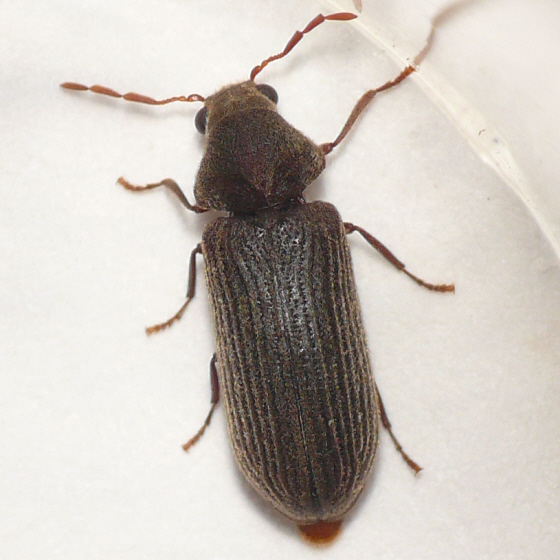
A part of the “carbon cycle” relies on such animals, bugs and micro-organisms. If left to their own devices bugs and fungus quickly recycle wooden objects, including houses, furniture and parts of our tools made from wood. You may not have noticed these pesky critters, but you’ve probably seen the holes they chew and the wood dust they excrete. Check an old tool handle, handplane body, or antique table leg for evidence of death watch beetles of powderpost beetles, two common varieties of bugs commonly called “furniture beetles.”

I don’t know about you, but I hate the very idea of icky bugs eating my furniture, tools and handiwork. But what to do?

There are plenty of chemicals manufactured to make wood taste yucky to bugs and fungus, but most of those are toxic and/or carcinogenic so you wouldn’t want to leave them in contact with your skin or lungs for any period of time. But what’s a safe way to keep bugs and fungus from chewing on your workbench, furniture, tool handles or plane bodies? And what can be done once some of them have taken up residence therein?

Termites are are problem bugs, too of course, but most of them prefer a higher moisture content in the wood they dine on than is typically found in houses and tools. That said, I’ve seen subterranean termites and Formosa termites in Guam swarm and eat interior furniture and wooden doors down to hollowed-out toilet paper tubes in front of my eyes. Scary stuff. This is precisely why people don’t build much of anything from wood on that island but spend lots of money on chemicals to prevent termites from turning cellulose into bug crap.

For example, while living on Guam, I had a neighbor in the US Airforce stationed there who’d imported some beautiful Amish furniture made of American Cherry wood from his home in Pennsylvania. Unfortunately, there was a crack in the concrete slab-on-grade floor underneath his beautiful dining table with a corresponding gap in the ceramic tile on top that allowed the local termites to access a single cabriole leg of that table unseen. The table collapsed into a pile of sticks and red termite crap after a year. I kid thee not. Vicious, voracious, vile bugs.

If Gentle Reader has ever frequented flea markets and antique shops, or even perused photos of antiques, you will have seen the many holes left by furniture beetles. I own several old hammers, axes and planes with their wooden components riddled with bugholes. But how can you prevent bugs from infesting your valuable wooden objects in the first place without using highly-toxic, corrosive, and expensive chemicals containing lead, chromium and/or arsenic? Easy peezy. Borax is the answer.

A Non-toxic and Inexpensive Method of Wood Preservation

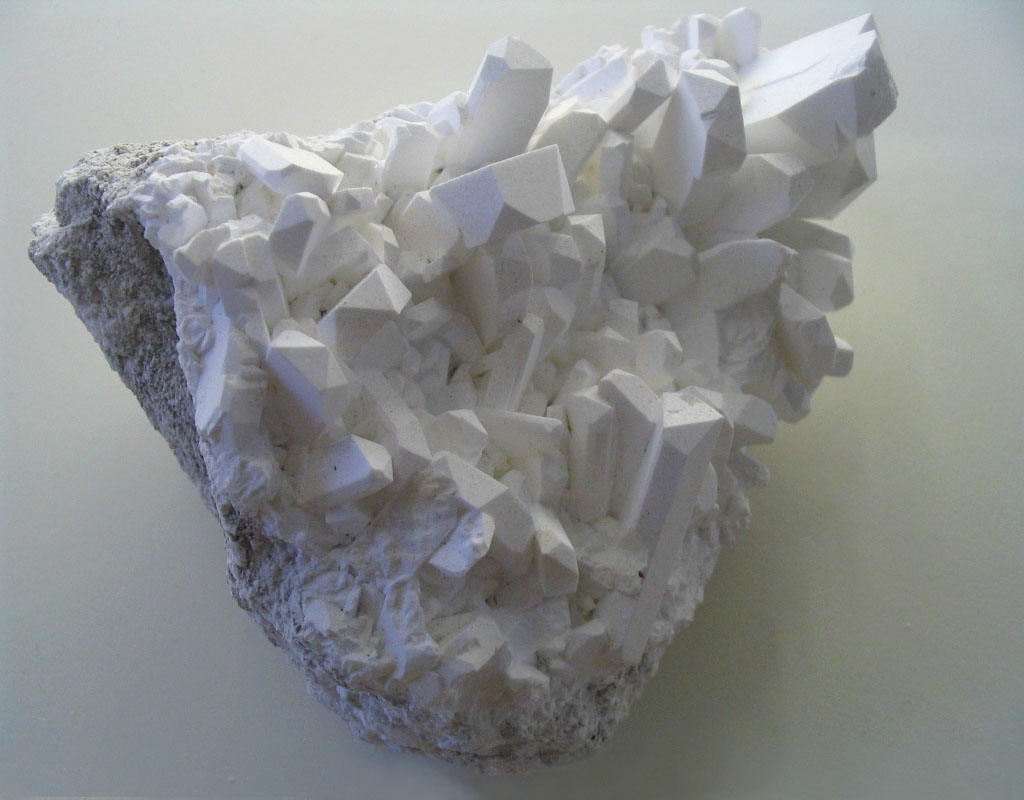
There are any number of effective chemicals available for wood preservation against insects and fungus. Borax is what I recommend based on direct workplace experience. Its a naturally-occurring white powder sold everywhere as a laundry detergent additive. But it’s not just for washing Gentle Reader’s socks, oh no. It’s essential in many industrial processes, including blacksmithing, where it’s used as a flux when forge-welding iron and steel. Japanese blacksmiths use it too.

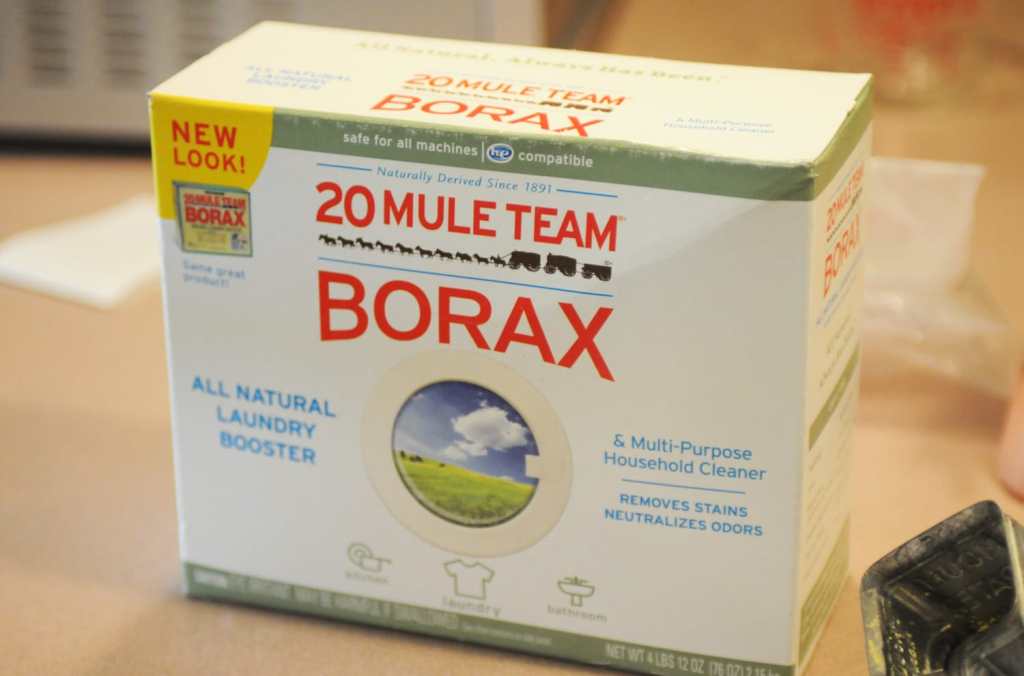
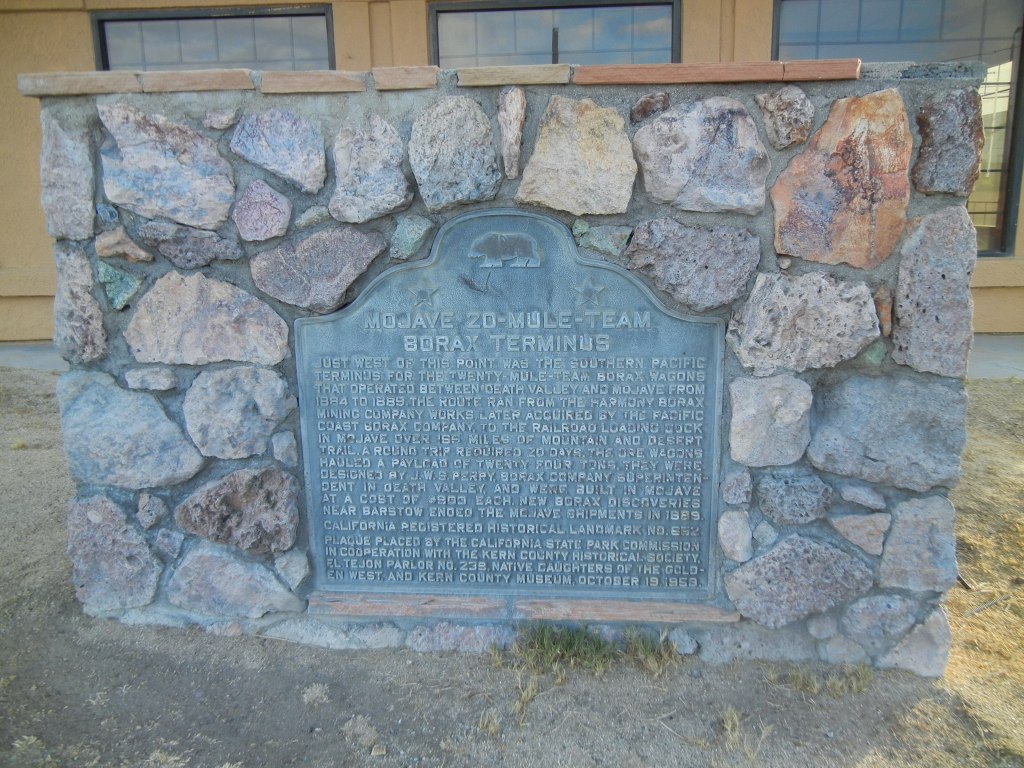
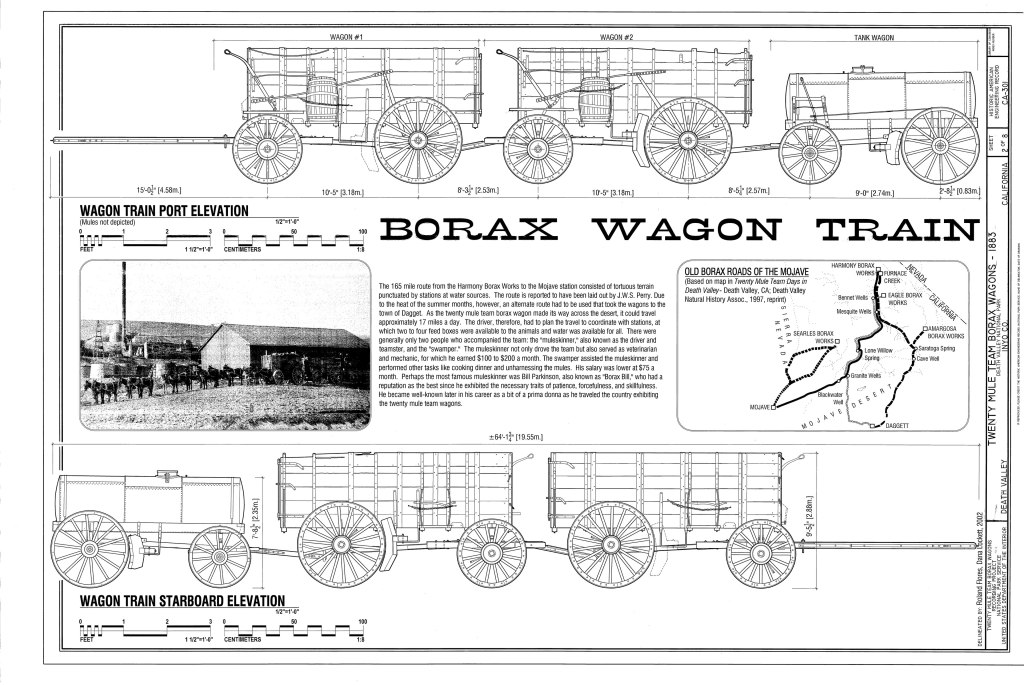
The vast majority of borax is mined in California where there are huge deposits in ancient lake beds. You may have heard of the famous “Twenty Mule Team” wagon trains once used to transport borax from Death Valley.

For this application you don’t need wagons or mules, just water and borax powder, but NOT Borax-brand washing detergent. Both are sold as laundry additives in the supermarket and big-box stores, so don’t confuse them.

To prepare this wood preservative and insecticide, dissolve borax powder in warm water to make a 7-10% mixture. Then spray it onto wooden objects at-risk, or better yet, soak the wooden objects in this mixture and let dry. Be careful not to spray the cat or the carpet.

Borax messes with the internal functions of bugs and fungus, but it’s harmless to humans and domestic animals to handle, so long as you don’t soak in it and ingest it. Indeed borax and its variants are the only sure way to protect wood against bugs and rot without putting human life and health at risk. No VOC risk. No carcinogens. It won’t pass through skin. No environmental contamination risk (that’s important). It won’t corrode metal fasteners. It has no odor. And it’s cheap. These are all important reasons for woodworkers to use borax.

There are only two downsides to using borax. First, since it’s water soluble, you need to keep wood treated with borax from repeated wetting or the borax will leach out. Second, you need to keep wood treated with borax out of direct contact with soil because moisture in soil will, once again, leach borax out of wood.

I add borax to the water I soak my sharpening stones in to prevent crud from growing. It works for years at a stretch, and doesn’t harm any variety of sharpening stone, synthetic or natural, nor does contact with dissolved borax harm me, or even irritate my skin, so long as I don’t drink it (see the Wood Finisher’s Pledge above). That said, I don’t bathe in it, and I understand that some people have a reaction to it, so don’t go crazy.

Borax also makes the water alkaline preventing rust. I add it to the water I use to clean my blades when sharpening and for cleaning my muzzleloading rifles. Entirely historically correct too.

But before using this mixture for any purpose, please recite the Wood Finisher’s Pledge along with me now: “I will not drink wood preservatives, use CCA impregnated toothpicks, nor wash my face with oven cleaner.”

A Quick, and Cheap But Slightly Toxic Way to Eliminate Bugs from Wood

Borax will kill bugs already in the wood given time, but is there a quicker way to get rid of those voracious beasties?

Here’s a technique to deal with wood-eating bug infestations I learned from woodworkers in Japan. I’m sure its not unique, but I’ve never heard of it being used elsewhere.

Before employ this methodology, please recite the Wood Finisher’s Pledge again, but with more feeling this time.

Simply find the entrance/exit holes bugs chew into and out of an infested wooden object and, using a syringe or pipette, squirt or drip a little gasoline into each of them. You might even soak the wood overall in a bit of gasoline.

But, be warned, because Murphy rules the universe and truly wants to hurt you and yours, so be sure you do this outdoors well away from anything flammable. Also be sure to put out your stogey, give your Puffco Cupsy bong a rest, and dial down your “electrifying personality” because “hair on fire” is not simply a real risk around uncontained gasoline, it’s garan-frikin-teed.

After judiciouly and carefully applying this small amount of gasoline, you can wrap the object in plastic, or place it into some kind of airtight container, to allow the gasoline vapors to permeate the wood. Do this outdoors, once again, and refrain from smoking. The gasoline fumes will promptly send the bugs, their eggs, and all their chilluns to the big lumberyard in the sky. In nomine Patris et Filii et Spiritus Sancti, Amen.

After a few days, unwrap/unseal the wooden object and place it outdoors in the sunlight to remove the smell of gasoline.

This technique works perfectly, every time, and costs almost nothing.

The chemical companies don’t make a penny on either of the highly-effective processes described herein which is why you’ve never heard of them before.

Until we meet again and all your bugs have been purged, I have the singular honor to remain,

YMHOS

I can’t believe those damned bugs ate my favorite bow! If only I’d followed Stan’s advice and treated it with that white powder…

If you have questions or would like to learn more about our tools, please click the “Pricelist” link here or at the top of the page and use the “Contact Us” form located immediately below. You can also reach us at Covingtonandsons@gmail.com

Please share your insights and comments with everyone in the form located further below labeled “Leave a Reply.” We aren’t evil Google, fascist facebook, or the Congressional IT department of the Democrat Party and so won’t sell, share, or profitably “misplace” your information. If I lie may bugs eat all my tool handles, and food taste like charcoal.

Please Leave a Reply

← Back

Thank you for your response. ✨

The Japanese Gennou Hammer & Handle Part 21 – Installing the Head

No one should be ashamed to admit he is wrong, which is but saying, in other words, that he is wiser today than he was yesterday.

Alexander Pope

In the previous article in this series we finished fitting and shaping the handle of our gennou hammer in accordance with our design document. Some refinements may be pending the results of testing, but in any case the time has come to attach the head.

This is an important task, perhaps not as easy as it sounds, because this is a craftsman’s handle, made with love and skill, not a mass-produced cockroach killer ground out by barefoot Bangladeshi farmers and secured with crude wedges. Nor is it typical of the tools sold at Home Despot designed to fail quickly and be tossed into a landfill soonest. And because the head is not secured with barbaric wedges but relies entirely on the extremely tight fit between the eye of the steel head and the tenon Beloved Customer cut on the end of the handle, some careful, but nonetheless violent action is required to successful connect head and handle. The purpose of the article, therefore, is to help you install it carefully with all due violence.

Installing the Head

Beloved Customer can install the head either before or after sanding and finishing the handle, but in this example we’ll attach the head before testing and finishing the handle. This approach will be most efficient if you decide to adjust or rework the handle after performing the tests I recommend in the next article.

In this case, I use the word “finish” to mean to apply a chemical “finish material” to the wood, not to “complete” the work or “conclude” the job. This difference in definition matters to me because confusion regarding the dual, even treble meaning of the word “finish” has caused problems for me in the past. So there you are.

Preparing the Tenon

First, remove any tape remaining on the tenon and, if necessary, use a solvent such as lacquer thinner to remove any adhesive residue. DO NOT USE soap, water, or any water-based chemical as this will make the tenon swell! After cleaning there should be no finish material, wax, oil or unicorn wee wee left on the tenon.

Depending on the relative humidity the handle is acclimated to, it may be advisable to make an effort to shrink the tenon a bit by placing the handle in a low-humidity environment for a time. Please do NOT microwave your handle, cook it in your oven, or heat it in your toaster, not even with cheese and Tabasco Sauce.

There are several ways to remove moisture from the tenon in order to shrink its width and thickness a bit without ruining the handle or burning down your workshop. Perhaps the safest way is to store it for a time in a tightly-sealed plastic container with packages of silica desiccant. Other ways include placing it in a warm spot close to an operating gas furnace, or indirectly exposing it to an electric room heater for a day or so.

If you use any method that involves heat, make sure you are nearby to monitor progress and deal with scorching and fires.

Orienting the Tenon

You’ve already shaped the handle, and shaved and lightly chamfered the tenon so it should partially fit into the head’s eye almost as deep as the chamfer, but should go no further using only hand pressure.

Please keep in mind during this process that it’s extremely important to get the tenon started in the eye straight, and to keep it straight, without allowing it to become cocked.

It’s also important to install the head in the correct orientation. This usually means its flat striking face is oriented towards chisel or nail, and the brand oriented towards the handle’s butt.

Some people like to orient the head’s brand so it faces up (away from the butt) when using the hammer. I can understand this compulsion, and while it makes no difference in performance one way or the other, you should be aware that it’s seen as bass-ackwards among professionals in Japan.

Starting the Tenon

Of course, in accordance with your humble servant’s advice in previous articles, you’ve already created an elegant dome on your hammer’s butt to prevent these taps and strikes from damaging the handle.

I like to place the head on a working surface such as a benchtop or a softwood board like pine or cedar resting on the floor/ground cushioned by a piece of leather or rubber to prevent slipping.

Insert the tenon into the eye, and, after sighting the handle and head from multiple directions to check alignment, when you are absolutely certain the tenon is poised to go into the eye straight, tap the handle’s butt with a flat-faced hammer, genno (not a domed-face hammer) or mallet. After a few taps, stop tapping, check your progress, and make sure the tenon is going in straight and not cocked.

Although the tenon should not have entered the eye more than a millimeter or two, it should be an extremely tight fit, with each tap making barely any progress.

I can’t describe the sensation in writing, but if the fit is too tight at this point in the process, you may need to scrape or sand the tenon a little.

Driving the Tenon Home

This is where the “violent” part of the job begins.

With the tenon properly aligned and started in the eye, stand up, hold the hammer in a fist with the head hanging straight down, and strike the butt of the handle with your hammer or mallet paying attention to its progress into the eye with each strike and the friction created. Gradually adjust the impact force of your strikes accordingly. Don’t be surprised if it takes literally dozens of extremely hard strikes to install the handle completely. If the tenon just slips in, however, we have a problem, Houston.

If you find that the fit is too loose, however, don’t despair, simply shim it with quality paper as described in the last section of the previous article. Remember, most people find it difficult to get the tenon/eye fit right the first time. Such adjustments to a new handle are nothing to brag about, but neither are they something to be ashamed of. It’s more the rule than the exception until experience is gained.

Some people like to make their tenon extra-long so it projects out of the eye 6-12mm or so. Nothing wrong with this approach, but it looks silly to me in the case of a new handle. Once again, beauty is in the eye of the bean holder.

I was taught that the ideal is for the tenon of a new handle to remain recessed inside the eye a few millimeters. The purpose for this goes back to one of the reasons for the gennou handle design described in this series of articles, namely, that the handle does not have a tumorous swelling below the head but the neck is approximately the same dimensions as the eye for a portion of its length to permit the user to tap the handle further into the eye should it loosen. By leaving the end of the tenon short of the end of the eye in the case of a new handle, one provides visual evidence that (1) the handle is tightly fitted and; (2) that plenty of tenon length is available for making such adjustments.

Accordingly, a tenon projecting a long way out of the eye indicates to the knowledgeable observer that either the handle is old and has been adjusted many times, or the tenon fit was sloppy from the beginning. In my humble opinion, a tenon of a new handle projecting from the eye a significant distance looks odd, but in practice, it doesn’t make much difference. The choice is yours.

In the next article in this series of articles about danger and violence, we’ll test you’re new handle. How exciting!

YMHOS

If you have questions or would like to learn more about our tools, please use the questions form located immediately below, or email us at Covingtonandsons@gmail.com. To see a list of our tools and their pricing, or to contact us, please click the “Pricelist” link here or at the top of this page.

Please share your insights and comments with all Gentle Readers in the form located further below labeled “Leave a Reply.”

We see data miners and their bilious bots as dastardly sneak thieves and so promise to never share, sell or profitably “misplace” your information for any reason. If I lie may all my hammers swim away from me!

Title: Cormorant. This ink drawing was made by Japan’s most famous swordsman, Miyamoto Musashi (c. 1583 – 13 June 1645). This style of art (suibokuga) is not well-known outside Asian countries, but despite the few materials used (paper, ink stick, inkstone, brush and water), it’s an extremely difficult art to master. Why? There’s no pencil layout to follow, so the artist must have the drawing planned down to the last stroke in his mind’s eye. Each stroke must be made precisely but without hesitation or mulligans. The ink is black, so color gradations can only be achieved by altering the speed of the brush and the ever-changing water/ink balance contained in the brush. High-speed, high-precision, powerful lines, no wasted strokes. Very much the work of a swordsman.

A list of our gennou heads: C&S Tools – Gennou Hammer Head Pricelists & Photos

If you have questions or would like to learn more about our tools, please use the questions form located immediately below. To see a list of our tools and their pricing, or to contact us, please click the “Pricelist” link here or at the top of this page, or email us at Covingtonandsons@gmail.com.

Please share your insights and comments with all Gentle Readers in the form located further below labeled “Leave a Reply”

We see data miners and their bots as dastardly sneak thieves and so promise to never share, sell or profitably “misplace” your information for any reason. If I lie may my eyes go blind!

Previous Posts in The Japanese Gennou Hammer & Handle Series

Please Leave a Reply

← Back

Thank you for your response. ✨

Sharpening Part 4 – ‘Nando and the Sword Sharpener

Billy Crystal in Fernando’s Hideaway

And this is from my heart
Which is deep inside my body:
It’s better to look good
Than to feel good

Fernando

This article is a little longer and more roundabout than your most humble and obedient servant’s previous posts, but I wanted to share with you some of Japan’s history, and examples of this country’s most fabulous practical art as produced by its blacksmiths and professional sharpeners as insight into the Japanese mindset regarding sharpening. But before I get into that, I would like to share some relevant words of wisdom from Hollywood’s wisest man.

The handsome gentleman in the picture above is Fernando (actually Billy Crystal). He is neither a blacksmith nor a sharpener of tools or weapons, but his insight into physical beauty and words of wisdom about happiness are pertinent to sharpening, as we shall see below. If you are not familiar with ‘Nando, I suggest you google him or view a video or two on NoobTube.

So what does this dapper Latin lover have to do with sharpening? And swords? Read on kind sir.

As ‘Nando taught the world, a wise person will not equate looking good with feeling good. Likewise, you would be wise to not confuse a blade’s appearance with its performance. Indeed, a blade that looks as sharp as the skinny end of nothing may not actually cut well in some applications.  A good example is Japanese swords. Let me tell you a true story to illustrate my point.

When I was a university student in Japan, I was privileged to be entrusted with a number of swords that belonged at the time to the late Dr. Walter Compton, Chairman of Miles Laboratories and the inventor of Alka-Seltzer. He was a wealthy man who had a huge collection of swords obtained while an officer for the US military in Japan immediately after the war when Allied forces required the defeated Japanese people, on pain of death, to surrender all swords, civilian and military. Of course, many valuable and rare family heirlooms were surrendered or forcefully confiscated. Supposedly they all went to the bottom of Tokyo Bay in bunches, or were melted for scrap. But we know better, don’t we.

Towards the end of his life, Dr. Compton put a lot of money into having his better swords professionally sharpened, new shirasaya scabbards and furniture made, and formally evaluated in preparation for donating them to the Boston Museum of Art, where many of them reside in obscurity today. Sadly, due to progressive dementia, some of his most valuable swords were auctioned off without his permission. “The feckless sons of wealthy men” is the operative phrase in this case, I fear.

I assisted Dr. Compton’s representative by transporting over 70 of these swords to and from Japan and performing the necessary legwork to accomplish these goals inside Japan. During those years I held in my hands and feasted my eyes on rare and beautiful blades of great historical value several of which would have easily been designated National Treasures if they had been intended to remain in Japan (“National Treasures” may not leave Japan). 

During those years I spent a lot of time meeting, questioning, and requesting services of the best sword sharpeners in Japan, learning much about swords, stones, and sharpening. Dr. Compton’s reputation was such, and his swords were of such rarity and high quality, that I had no difficulty persuading the very best craftsmen to work on them and speak with me, including a famous sword polisher named Mr. Okisato Fujishiro.

Interestingly, in Japan such craftsmen are called “Togishi” (研師), an unambiguous word that can only be translated as “sharpener.” However, in the West these same Japanese craftsmen are called “ Sword Polishers.” In the post-war context, this actually may be more accurate than the Japanese term. In a post-war world it’s certainly more politic.

A very subtle, high quality sword tip brought to life by the arts of the Sword Sharpener. Notice the peaceful elegant hamon (wavy milky pattern at the cutting edge oriented towards the top of the photograph), the grain of the steel just below the hamon, and the burnished polish surrounding the fuller. Notice also the clean delineation where the blade tip, the “boshi,” begins. Very nice work.

Before the elimination of the caste system Japanese society had 4 main divisions labeled  “Shi No Ko Sho,” meaning, in descending order, Warrior (samurai), Farmer, Craftsman, and Merchant at the bottom. The Emperor, Court Nobles, and Shoguns were above these strata, although of the three, only the Shogun possessed any actual power because the man with the sword makes the rules, and those without weapons do as they are told and quickly, or they go away permanently. Thus it has always been because both fool and wise man leak red sticky stuff.

Blacksmiths and sword sharpeners were both in the craftsman caste, but curiously the sword sharpener was above the swordsmith in rank. Depending on their support among the warrior caste, and with the generous application of yellow metallic lubricant, both swordsmiths and sword sharpeners occasionally obtained noble rank, an honor to which few craftsmen, farmers, and merchants could aspire. My point is that sword sharpeners, while of relatively lower caste, often had a perceived rank higher than their craftsman position would suggest.

Why was the Japanese sword sharpener of higher effective rank than the swordsmith? I haven’t seen documentation from back in the day confirming it, but I suspect it is because the sharpener turns the swordsmith’s plain steel blade into a thing of jewel-like sculptural beauty that almost seems alive. One only has to see a sword blade fresh from the swordsmith’s shop and compare it with the same sword after the sharpener’s ministrations to understand.

The Nikko Sukezane sword, a designated National Treasure of Japan
Related image
This sword is known as the “Nikko Sukezane,” Nikko for the temple commemorating the Shogun Tokugawa Ieyasu (徳川家康, January 31, 1543 – June 1, 1616) where it is stored, and Sukezane (助真 meaning “Aid the Truth) for the name of the smith who forged it for the Kamakura Shogunate (1185~1333). The blade’s shape and crystalline pattern above the hamon are characteristic of Sukezane’s work. This sword’s brother was in my care for about 2 years while it was being polished and appraised in Tokyo.
大般若長光-画像2
This sword is another of Japan’s National Treasures. It was forged by a swordsmith name Nagamitsu (長光)during the same time period as the Sukezane above. The tang (nakago) is corroded by exposure to bare hands over a period of around 700 years. Multiple holes were drilled in the tang to accommodate a variety of hilts during its lifetime. I also had a sword by this same smith and of very similar appearance in my care for about one year, although it was not owned by Dr. Compton.
A different Nagamitsu sword, also listed as a National Treasure. An unusually healthy example.

I have even witnessed a skilled sword sharpener create a beautiful hamon (a pattern formed on the edge of a sword by the steel’s crystalline structure) on a sword forged by a famous smith that had lost the crystalline structure necessary to form an actual hamon. While a deception of sorts, the intention was not to deceive for profit (the sword was donated to a museum), but to return an unusual and historically important sword to its former beauty, a glory that would have been lost but for the sword polisher’s exceptional skills.

A dramatic chouji midare hamon in a modern sword. The pattern exists not because of a lamination or some silly pattern welding but because of the changing crystalline structure of the blade that results from the differential heat treatment process performed by the blacksmith. It only exists because of the swordsmith’s skill, but it is only visible and beautiful because of the sword sharpener’s stones and his skill with them. Is the blade sharp? Don’t judge a blade’s performance by its polish.

If we liken the swordsmith with his forge and hammer to the quarry worker cutting marble from the mountain, then the sword sharpener is Michelangelo cutting the Pietà with his chisels and files. Both craftsmen work on the marble and blade respectively, and both are essential. The sculptor uses steel to bring stone to life, while the sword sharpener uses stone to bring steel to life.

chojimidare.jpg
Another dramatic hamon in a modern sword. This pattern is a surface manifestation of the steel’s crystalline structure as created by the swordsmith, but revealed and made glorious by the polisher

But despite these artistic abilities, modern “Sword Polishers” have no interest in and put forth no effort to actually make a sword blade cut well. Indeed, in some cases, they actually intentionally dull the blade so it can’t cut, thereby making it safer. This intentional vandalism is called “habiki.”

A different style of hamon pattern on a blade with a different grain pattern. Notice the different colors and lines inside the hamon. All these crystalline details are categorized, have names, and are studied intensely by aficionados. All things equal, this sort of pattern and color is considered to be more elegant and desirable than the two more dramatic hamon pictured above. An extremely deep rabbit hole, I assure you. Please watch your step!

The Key Point

Here’s the key point your humble servant wants Beloved Customers and Gentle Readers to grasp: Despite the long years of apprenticeship, advanced skills learned, and gallons of red sticky stuff unintentionally leaked by sword sharpeners, the frank sword sharpeners I have spoken with all admitted that, of all the craftsmen in Japan that used edged tools, woodworkers like carpenters, cabinetmakers, and joiners routinely create sharper blades despite those blades not appearing to be as sharp as swords. This is consistent with my direct experience of handling over 70 swords before and after being worked on by sword sharpeners.

While there is great pleasure to be found in polishing a plane or chisel or knife blade to levels of great beauty, do not make the mistake of equating appearance with performance.

Appearance aside, and looking strictly at cutting performance, will a chisel or plane or knife blade skillfully sharpened on a 15,000 grit stone cut better and longer than if sharpened on an 8,000 grit stone? In the case of woodworking blades and kitchen knives, no it won’t. In fact, due to higher levels of friction the higher degree of polish produces in the cut, it will certainly not cut wood as well. More on this subject later.

An oiirenomi chisel by Hidarino Ichihiro. The hazy silver of the hard steel hagane lamination and the cloudy grey of the softer iron jigane lamination, combined with the shape and upward curvature of the corners of the lamination are indicative of excellent craftsmanship by the blacksmith, superior skills of the sharpener, and wonderful stones. Such details are considered sublimely beautiful to tool connoisseurs. But will the edge cut well? We can’t tell from this photo.

Keep in mind that the stones used to apply the beautiful polish and accentuate the hamon on Japanese swords are different from those used to sharpen woodworking tools. For instance, the uchigumori stones sword polishers use are small slices of soft stone glued to paper using urushi lacquer adhesive, and are only 3,000~5,000 grit. These small slips of stone are rubbed on the sword blade using thumb and fingertips.

Here is a link to a blog showing Mr. Fujishiro, son of one of the sword sharpeners I employed back in the day, making and using these thin slices of stone.

Tools are designed to perform specific tasks. Although it could do the job, more or less, you wouldn’t use a crescent wrench to stir spaghetti sauce on the stovetop would you? A longish spoon just might work better.

Does a sword’s edge need to be extremely sharp to cut the enemy effectively? No, it doesn’t because the sword’s geometry, blade orientation, speed, impact force, and the swordman’s technique drive its cutting effectiveness much more than simple sharpness. So sword sharpeners in Japan, and probably most of the world too, have always been more focused on edge durability, resistance to chipping, and appearance than absolute sharpness. In modern times, when swords are almost never used to cut living flesh outside of Saudi Arabia, the blade’s appearance may be critical, but sharpness is not a practical concern.

Another example is food preparation knives. A chef’s knife looks terribly sharp, and as it slices tomatoes and fillets fish we can see that it cuts well. But how sharp is it really? In comparison with a joiner’s plane blade, not really that sharp. But both tools are exactly suited to the job assigned them.

The “willow-leaf” yanagiba chef’s knife shown above is most effectively used in slicing or drawing motions, much as expert swordsmen use their weapons against enemies. In this style of cut, a smooth and uniform cutting edge does not perform as well as a more ragged, serrated edge as seen at the microscopic level. Therefore, there is little if any practical benefit (assuming beauty is not practical) to be obtained by sharpening a kitchen knife beyond 1,000~3,000 grit. In fact, at least in Japan, these are the upper-limit of stones in daily use by professional chefs of all varieties. Yes, and that includes sushi chefs.

But don’t misunderstand my point: In the case of both swords and yanagiba hocho knives, the bevel angle must be correct for both the blade being used and the material being cut, and the microscopic edge must be a clean intersection of planes. If you get these two factors wrong, a crescent wrench might work just as well.

The other point I want to make is that, while I enjoy using high-level skills to give a beautiful appearance to extremely sharp blades, such a blade will not perform better than an identical blade of equal sharpness but with a less polished appearance, and the extra time and money spent on improving outward appearance is wasted on bread and butter work. 

Since easily-deceived, morally-challenged Hollywood celebrities have the answers to all the world’s problems (at the cost of other people’s money, labor and freedom, of course) perhaps our quest for the sharp edge can benefit from the wisdom of the famous Latin lover ‘Nando, Tinseltown’s most elegant star. ‘Nando once shared his father’s advice that it is “better to look good than to feel good.” Accordingly, perhaps we should all go crazy nuts and polish our blades like beautiful but dull museum swords and wear waistcoats and cravats as we cut sliding dovetails and plane door stiles. After all, one must be ready for every photo op. In this way, our woodworking blades may be worthy of ‘Nando’s highest praise: “You, dahling, you look mahvelous, absolutely mahvelous!”

Fernando Lamas in “The Merry Widow.” The crease in his pant leg could slice bacon.

No, on second thought, while there is much one can learn from Fernando’s elegant philosophy, his standards of beauty and suffering are too high for me. I would rather be a simple joiner or cabinetmaker in stained work clothes that has the ability to make a blade exceptionally beautiful but chooses not to expend the time and cost required to do so most of the time, rather than someone who doesn’t because they can’t.

Although Fernando has a pressing appointment for a tango lesson (discretion prevents me from naming the young lady he will be pressing) and won’t be providing further insight today, our adventures in sharpening Japanese woodworking tools will continue in Part 5 of this series.

Let’s meet at Tsukiji for sushi afterwards. Until then, I have the honor to remain,

YMHOS

If you have questions or would like to learn more about our tools, please click the “Pricelist” link here or at the top of the page and use the “Contact Us” form located immediately below.

Please share your insights and comments with everyone in the form located further below labeled “Leave a Reply.” We aren’t evil Google, fascist facebook, or treacherous TikTok and so won’t sell, share, or profitably “misplace” your information. If I lie may all my dance steps turn to stumbles.

Please Leave a Reply

← Back

Thank you for your response. ✨

Sharpening Part 3 – Philosophy

Always ready for battle

“A wild boar was sharpening his tusks upon the trunk of a tree in the forest when a fox came by and asked, Why are you doing that, pray? The huntsmen are not out today and there are no other dangers at hand that I can see. True, my friend, replied the Boar, but the instant my life is in danger, I shall need to use my tusks. There will be no time to sharpen them then.”

Aesop (621~565 BC)

It’s nice to have a philosophy on a subject because it helps one distill random thoughts down to the essentials.

Allow your humble servant to explain his philosophy about sharpening woodworking tools, not because it is charming and unique, and not because you should emulate it, but because it will provide insight into the things written in this blog and elsewhere. Use it to calibrate your BS meter. It’s often nose-deep when people talk about sharpening.

My philosophy regarding sharpening was shaped by my experience as a carpenter, contractor, commercial cabinetmaker, and joiner working under pressure, against a clock, sometimes with a boss watching with eagle eye, and often in front of customers, not as a hobbyist fiddling around in a garage workshop. Married young with a growing family to support, I quickly discovered that children eat constantly and in ever-increasing quantities, so efficiency was and is important to me. 

Efficiency was also important to the Clients who hired me. Sharpening and maintaining tools is, of course, part of the job, but from the viewpoint of Client or employer it’s wasted time, so it’s important to minimize time spent fiddling with tools during the work day. Accordingly, I followed the example of craftsmen I respected and started the day with sharp tools in good working order, and kept spare planes and chisels sharpened and ready to go as backup.

Self-employment hammered into me the monetary value of time. It also taught me that quality sharpening stones and tools are expensive and wear out, and that to feed wife and babies every day I had to work efficiently to minimize time and money expended on maintaining tools, while maximizing the amount of work I accomplished between sharpening sessions. 

I developed a strong dislike, nay hatred, for blades that fail to perform, refuse to become extremely sharp, that dull quickly, or take too much time and effort to sharpen. I loathe them not just because they are irritating, but because they waste my time and money. Even considering the higher initial cash outlay, the cost-effectiveness of handmade, professional-grade tools in helping my mind and hands do good work and feed the family became as obvious as a burning road flare on a midnight highway.

You, Beloved Customer, may not feel the time and financial pressures that professionals do, but owning professional-grade cutting tools and learning how to sharpen them in an efficient and professional manner will make woodworking less frustrating, more profitable, and more enjoyable.

What is your philosophy?

The journey will continue in Part 4 with wisdom from a celebrity and pictures of pretty swords. Until then, I have the honor of remaining,

YMHOS

Sharpening a plane blade at the jobsite, then back to work, jiggity-jog.

YMHOS

If you have questions or would like to learn more about our tools, please click the “Pricelist” link here or at the top of the page and use the “Contact Us” form located immediately below.

Please share your insights and comments with everyone in the form located further below labeled “Leave a Reply.” We aren’t evil Google, fascist facebook, or thuggish Twitter and so won’t sell, share, or profitably “misplace” your information. If I lie may I never finish the journey.

← Back

Thank you for your response. ✨

Please Leave a Reply