My relationship to reality has been so utterly skewed for so long that I don’t even notice it any more. It’s just my reality.
Ethan Hawke
The Taming of the Skew
Beloved Customer has of course noticed that it is easier to keep a blade stable when sharpening its bevel if you skew it on the stone. There is nothing wrong with skewing the blade so long as you understand the natural consequences of doing so and compensate for them appropriately. In this article we will examine some of those consequences.
The first and most immediately obvious consequence of skewing the blade when sharpening it is that the blade tends to wear-out, or hollow-out, the center area of the sharpening stone’s face quicker. This is inefficient, wasting time and stones, but can be compensated for if you pay attention and work the blade evenly over the stone’s entire face, including the edges, ends and those pesky corners. BTW, this is not a kindly suggestion but a commandment.
Second, skewing the blade usually results in the nut holding the blade placing uneven pressure on it, with the natural result that the blade wears unevenly, and quite often, develops a skewed cutting edge. Think about it.
In addition, the leading corner is exposed to more fresher, sharper, larger grit particles (which cut more aggressively) than the trailing corner. As a result, the blade’s leading corner tends to be abraded more, causing the blade’s edge to gradually become skewed or rounded in shape over many sharpening sessions. This is definitely bad, and is often mistaken for the work of those devilish iron pixies, especially in the case of kiwaganna and other skewed-blade planes, causing self-doubt, mental anguish, and even piranha in the head (aka “going bananas“). But if you are aware this can happen, and pay attention, you can easily compensate for this tendency thereby avoiding months of expensive psychoanalysis by Dr. Alonzo and the need to consume pallets of his pretty purple pills.
Third, and I have no way to confirm this, I am told by the guys with microscopes that diagonal scratches at the extreme cutting edge leave it a tad weaker, causing it to dull just a bit quicker.
The way to remove problematic diagonal scratches, BTW, is to make the last few strokes on the finishing stone perpendicular to the cutting edge.
So in summary, habitually skewing a blade while sharpening it is not ideal and should be avoided, but is not catastrophic. It will make one’s sharpening efforts a little less efficient and may cause blades and stones to become distorted, but these negatives can be dealt with, at some cost.
Please read the quotation at the top of this article and consider whether or not your sharpening reality has become skewed without your realizing it. Your humble servant confesses, and Dr. Alonzo can confirm, that his was indeed skewed for a long time.
These aren’t things you wouldn’t have figured out for yourself eventually, Beloved Customer, but now, at least if you pay attention, you’re a few years ahead on the learning curve. In the worst case, at least ignorance isn’t an excuse anymore. And there’s always those pretty purple pills to take the edge off (ツ).
YMHOS
Shakespeare’s Shrew, Katherine Minola, played by Elizabeth Taylor in the 1987 movie. In this photograph she’s obviously watching someone skewing a plane or chisel blade while sharpening it. Clint Eastwood probably learned a thing or two about squinting from this lady.
If you have questions or would like to learn more about our tools, please click the “Pricelist” link here or at the top of the page and use the “Contact Us” form located immediately below.
Please share your insights and comments with everyone in the form located further below labeled “Leave a Reply.” We aren’t evil Google, fascist facebook, or thuggish Twitter and so won’t sell, share, or profitably “misplace” your information. If I lie may all my mental faculties become hopelessly skewed such that the only occupation I will be fit for is politics.
This is a brief post about an unusual Japanese plane made by an unusual craftsman and used in an unusual way, or at least one not seen often in the West.
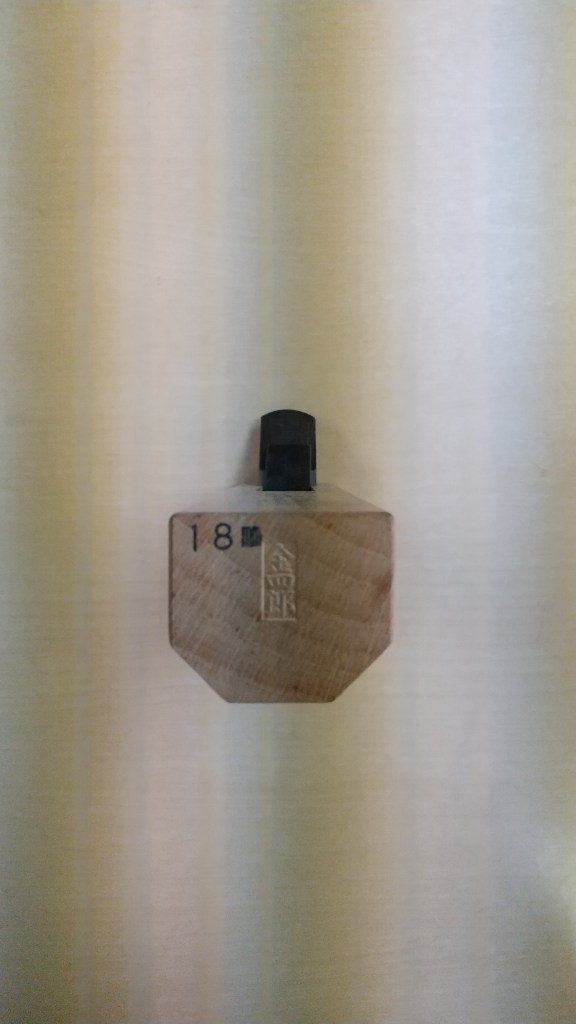
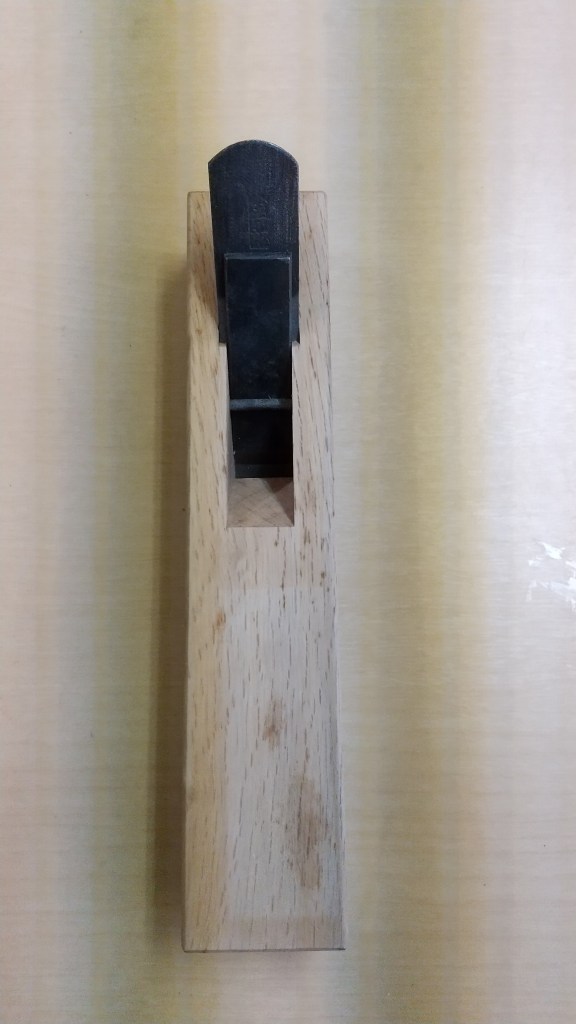
The plane is called the “Tome ganna” written 留鉋 which means “mitre plane.” In this case, mitre does not necessarily mean just a standard 45 ° mitre as in a picture frame corner, but the planes pictured above are indeed intended to cut a 45 ° mitre for corner joints between two boards.
It is specialized for cutting a critical part of the secret dovetail mitre joint used for casework, and is a standard tool for cabinetmakers and sashimonoshi in Japan.
The plane rides on its beveled sides when shooting the mitre joint. This page has illustrations of how to cut this joint the Japanese way using this plane.
This job can be done using jigs and chisels, shoulder planes, or better yet, kiwaganna, but the tomeganna is better balanced and handier, can cut either direction more precisely and quicker, so is a must-have for advanced casework.
If you enjoy casework, the secret dovetail mitre is a challenging joint you really should give a try. The results are great fun, even if they aren’t flashy.
The excellent Mr. David Charlesworth has even produced a video sold by Lie-Nielson about how to make this joint, although he uses a jig and a paring chisel to good effect.
This is a link to a pricelist and pictures of our limited number of planes by the famous craftsman Kinshiro. You might find the story and photographs interesting.
YMHOS
If you have questions or would like to learn more about our tools, please use the questions form located immediately below. Please share your insights and comments with everyone in the form located further below labeled “Leave a Reply.” We aren’t evil Google or incompetent facebook and so won’t sell, share, or conveniently and profitably “misplace” your information.
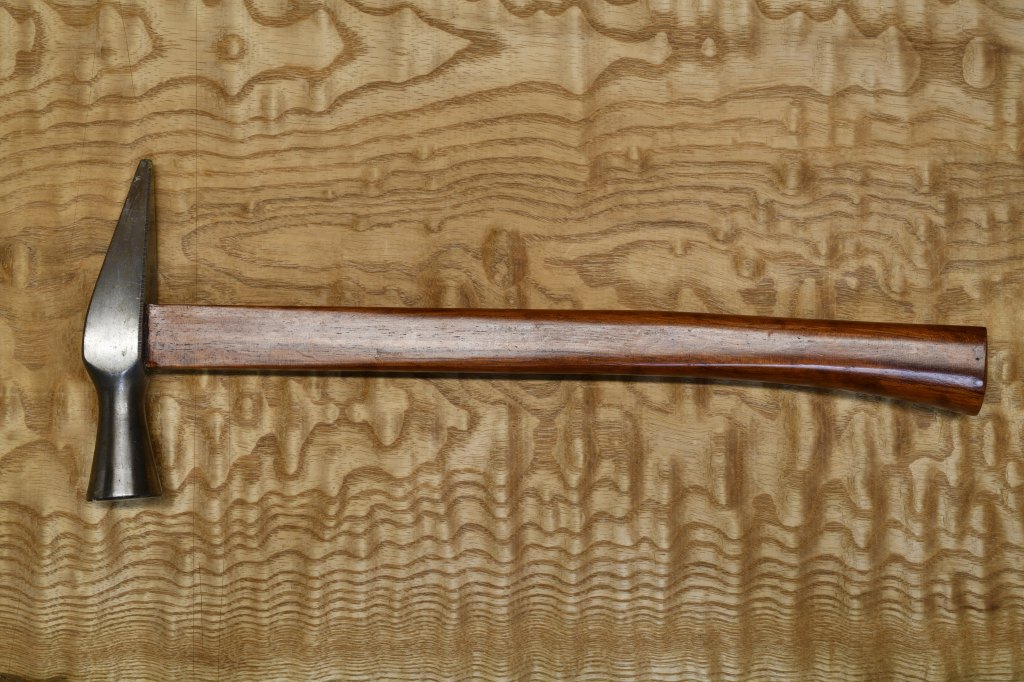
Top: 375gm Yamakichi gennou head by Hiroki with new osage orange handle. Bottom: Ryoguchi-style gennou head by Kosaburo with a seasoned handle of the same osage orange. This same hammer was shown in Part 1 of this series when it was fresh and nuclear-flash yellow. With time and exposure to sunlight the color has changed to this pleasant brown. Thanks Matt for the OO!
“All that is gold does not glitter,
Not all those who wander are lost;
The old that is strong does not wither,
Deep roots are not reached by the frost.
From the ashes a fire shall be woken,
A light from the shadows shall spring;
Renewed shall be blade that was broken,
The crownless again shall be king.
J.R.R. Tolkien, The Fellowship of the Ring
In previous articles in this series about hammers to use with our chisels, your most humble and obedient servant discussed the varieties of hammers and the types of faces suitable for using with our chisels. In this article we will examine not only hammer weights but other factors to help your chisel work go more efficiently.
Beater & Beatee
You can usually tell when a hammer is too light for the job because the chisel or nail isn’t moved much and the beater bounces off. But it’s the other end of the weight scale that causes more serious problems so let’s consider the case of too heavy hammers so we can bracket the Goldilocks weight: Not too heavy, not too light, but just right.
Some people like to use heavy hammers for striking chisels. 2~3-lb ox-killers are good for some jobs, but there are a few things you should consider before defaulting too such a heavy lump.
Is the impact force produced by a heavy hammer really necessary to drive a chisel? Too often not so much. But not everything we do must focus exclusively on efficiency: swinging a hammer is good exercise and it burns calories, something those with excess “ dignity,” such as your humble servant, could use more of. However, in light of other factors discussed below, I urge you to resist the natural compulsion to remain one of the “beautiful people” by maintaining at all costs a sylphlike figure worthy of Paris Fashion Week by obsessively using overly-heavy hammers. Relax, for you already look mahvelous, darling, absolutely mahvelous!
Besides the herculean strength of your mighty arm and the chisel’s durability, Gentle Reader should also consider the durability of your body. Swinging a hammer that is too heavy can over-stress muscles, tendons, bones and joints, stresses that can make workdays long, nights painful and your work sloppy, if not now then certainly as you age. More on that subject in a future article.
But if the weight of the head is a good balance with the work you are doing, and you have a good handle on your hammer or gennou, things just go better. We will look at this more in the final post in this series.
Let’s start at the beginning and consider the movement of the hammer and the forces generated when accelerating it towards nail or chisel and the resulting stresses produced in muscles, tendons, bones and joints. Obviously, it is wise to keep these stresses within acceptable limits, especially if you need to repeat this movement hundreds or even thousands of times in a day. It should likewise be obvious that a hammer that is overly heavy makes limiting these stresses difficult.
Now that we have the hammer moving, let’s examine what happens when it stops as it strikes nail or chisel. Is wacking the nail or chisel as hard as possible the goal, or is the goal to drive the nail into the wood the right depth, or to motivate the chisel to cut wood an appropriate distance? If the latter, then there is a practical limit to the impact force required.
In other words, does driving a nail so deeply the wood is damaged unnecessarily, or does wacking a chisel so hard it cuts all the way through the board, or even binds in the wood, help us do better work?
Are the excessive stresses and vibrations flowing and slamming through one’s joints and tendons as a result of the violent acceleration, deceleration and impact forces generated when swinging an overweight hammer healthy and helpful? Or do they just waste energy, damage our work product, cause bruising, pinching, grinding and numbness and generally wear out hands and arms? Do these excessive stresses and vibrations improve our precision?
The positive and negative results of using a hammer are easier to control if the hammer’s weight is balanced with our bodies, the nail or chisel, and the wood.
Another factor to consider is the nature of the beatee. Nails often suffer from hammer abuse, but they don’t have feelings or form mutual support groups with monthly meetings and free coffee and donuts, while chisels do, so I encourage you be sensitive to your chisel’s needs when selecting a hammer weight. Oh, and don’t forget to donate a box of fresh donuts occasionally (with sprinkles).
Our chisels are hand-made professional-grade tools intended to be used by craftsmen who demand the extra sharpness and cutting longevity only hard, fine-grained steel makes possible. Therefore they are not as tough as the soft, sharpened Chinese screwdrivers sold by the big corporations as chisels that amateurs are accustomed to nowadays. Accordingly you should select a hammer weight that won’t damage the blades or splinter the handles of your fine chisels even if you must use them all day for days on end hard enough for the impact forces to make the handles hot. You may be as strong as John Henry, but a 2-lb hammer will destroy most any chisel given time and determination.
Weighty Matters
Of course, the harder the wood, the deeper the cut, the wider and heavier the chisel, the heavier the hammer needed. But what is an efficient hammer weight? Let’s consider some guidelines.
Oiirenomi & Mukomachinomi Chisels
For most commercially-available woods you are likely to cut with your oiirenomi chisels or mukomachinomi (mortise chisel), 260gm/9oz/70monme is a good place to start when using narrower width chisels 18mm and less.
300gm (10.5oz/80monme) to 375gm (14oz/100monme) is probably good for wider chisels. BTW the standard carpenter’s hammer in Japan weighs between 375gm (14oz/100monme) to 450gm (16oz/120monme), but this is too heavy for most precision work using oiirenomi in furniture, cabinets, and joinery work.
Atsunomi Chisels
For the heavier atsunomi chisels from 18mm to 24mm in width, 375gm (14oz/100monme) ~ 450gm (16oz/120monme) is usually a good weight.
For wider atsunomi chisels, 675gm (24oz/180monme) to 750gm (26oz/200monme) is good. Maybe as heavy as 937gm (32oz/250monme) for motivating wide 48-54mm chisels when cutting hard woods if you have experience, strong wrists, and speed is not important. Yes, within limits and with a good handle, lighter weight hammers tend to accomplish more work quicker.
As Captain Barbossa explained the Pirate’s Code, these are “more what you’d call “guidelines” than actual rules.”
In future posts in this series we will examine factors such as how to use hammers and chisels efficiently, and how to avoid injuries.
Until then, I have the honor to remain,
YMHOS
PS: We have also published another series of articles about making a handle for your hammer that fits your body and will work most efficiently for you, beginning HERE. So let’s talk some more soon.
Harrrrg. Your hammer’s how heavy?!
If you have questions or would like to learn more about our tools, please click the “Pricelist” link here or at the top of the page and use the “Contact Us” form located immediately below.
Please share your insights and comments with everyone in the form located further below labeled “Leave a Reply.” We aren’t evil Google, fascist facebook, or thuggish Twitter and so won’t sell, share, or profitably “misplace” your information. If I lie may fingers become beatees.
Festina Lente Doors in the Palazzo Vecchio, Florence, Italy
Long-term consistency beats short-term intensity.
Bruce Lee
We have discussed many details about sharpening in this series, and while this may be the shortest article of the bunch, it is by no means the most insignificant. For some it will be the most difficult technique to master, so classical references shouldn’t prove too onerous.
If Beloved Customer pays attention to their blade’s movement when sharpening, you will notice how each reversal of direction tends to cause the bevel to rock forward and backward on the stone’s face. And what happens when we let the blade go rock-n-rolla? That’s right, the crapulous bulging bevel rears its ugly head and spits stinky sticky stuff in our eye.
Using short strokes, somewhere around 1-½ inch in length, makes it much easier to keep the blade from rocking.
A Gentle Reader named Oskar observed that, following the logic in the previous sentence, shorter strokes result in more, not less, reversals in stroke direction, and therefore shorter strokes should lead to more rocking rather than less. I concur with Oskar’s analysis and conclusion, as far as it goes, and am adding the following clarification to avoid confusion.
A short stroke produces smaller changes in the angles of one’s joints during the stroke compared to the changes during a longer stroke, making it much easier to maintain the bevel at the correct angle on the stone’s face. In other words, the angles of the joints in hand, wrist, arm and shoulder change less during short strokes than in longer strokes, making it easier to manage joints and tendons yielding greater repeatability.
In addition, shorter strokes tend to focus one’s attention on properly indexing the bevel on the stone during each individual stroke, attention that tends to wander more during long strokes. It’s that darn badger again.
Please note that this analysis is simply your humble servant’s opinion, and perhaps not a weighty one at that because I am not a physician, nor have I conducted the physiological studies and dissections upon which a rigorous opinion should be based.
I know that making short strokes feels inefficient, and it is compared to a machine, but Beloved Customer is probably not a Cyberdyne Systems product with a titanium alloy combat chassis. However, with practice, you will find you are able to increase the distance and speed of each stroke, especially as your focus and hand-soul coordination improves and your wrists and elbows relax and become trained.
Long extravagant strokes on rough or medium grit stones are for sharpening axes and kitchen knives, not chisels or planes.
The exception to this rule is the finishing stone, as mentioned in the previous article.
Festina Lente
In conclusion, and in order to improve your classical education, let’s review our latin lesson from the previous article: “Festina lente” translates directly as “make hast slowly.” It is defined in the dictionary as “proceed expeditiously but prudently.” We chose to translate the phrase as “Slow is smooth; Smooth is fast. ”
At least two Roman emperors, one Pope, and the powerful Medici family of the City State of Firenze Italy, back in the days when emperors, popes, and noble merchants had real power measured in armies they controlled and cities and continents they ruled, thought these two words important enough to include in their mottos and coats of arms. The words even appear in the original French version of the tale of the “Hare and Tortoise.”
They are also relevant to sharpening if you are clever enough to understand why.
YMHOS
Bug-nibbled woodwork in the Laurencian Library in Florence Italy with the Medici’s motto of Festina Lente and the turtle with a sail carved into it.
If you have questions or would like to learn more about our tools, please click the “Pricelist” link here or at the top of the page and use the “Contact Us” form located immediately below.
Please share your insights and comments with everyone in the form located further below labeled “Leave a Reply.” We aren’t evil Google, fascist facebook, or thuggish Twitter and so won’t sell, share, or profitably “misplace” your information. If I lie may my food turn to ashes in my mouth (a very ancient curse indeed).
If you do not change direction, you may end up where you are heading.
Lao Tzu
When using rough stones ( ≤1000grit), and especially when learning basic sharpening skills, it is best to sharpen the bevel in one direction only, lifting the blade off the stone, or at least removing all downward pressure, on the return stroke. The reason for this seemingly inefficient movement is simply that, at least for most people, and until one’s hands and wrists beceome trained, trying to abrade the blade on both push and pull strokes is likely to cause the blade to rock creating the bilious bulging bevel.
There are certainly exceptions to this rule, and we actively encourage Beloved Customer to try to develop the concentration and muscle control required to sharpen in both directions on rough and medium stones, but be aware it may take some years. In the meantime, remember the ancient adage and imperial moto: festina lente, which we chose to translate as “Slow is smooth; Smooth is fast. “
Part of the difficulty of sharpening in both directions is the resulting loss of concentration: the swing of the thing and angle of the dangle are hard to sense. Perhaps another part of it is due to the difficulty of controlling the complicated and constantly-changing angles of bones and joints. Both of these natural mental and physical tendencies can be overcome by talented and determined people given time and daily practice, but in the case of everyone your humble servant has ever spoken with on the subject, it takes years of focused on-the-job practice, and extreme concentration at first to overcome pre-existing bad habits and to avoid developing importune muscle memory.
Which Direction?
At this point you need to make a decision, unless you have already made it inadvertently. That is, whether to sharpen on the push stroke (pushing the blade away from you) or on the pull stroke (pulling the blade towards you). Most people choose the push stroke, as do I, but in reality the pull stroke is actually a little more efficient because the pressure tends to focus closer to the bevel’s front instead of back, and rocking is reduced. Whichever direction you choose, use it consistently.
However, as mentioned in previous articles in this series, and this is critically important, when it comes to the final finishing stone, work the blade back and forth in both directions. The finishing stone is not abrasive enough to change the bevel’s shape, and since you need to polish the last few microns width of blade’s cutting edge, a very tiny amount of unintentional rocking is actually helpful.
Training Techniques
If Beloved Customer is determined to develop the ability to sharpen on both push and pull strokes, your humble servant can share some helpful guidance that was given to me many years ago by a sword polisher.
The first step in training yourself is to begin by lifting the blade from the stone’s surface entirely on the return stroke (either push or pull depending on your preferred direction). All the things mentioned above apply. Becoming proficient with this technique is foundational. Strive to project your senses into the blade traveling over the stone, indeed right down to the last few microns of the cutting edge, becoming Zen Master Bubba.
When you are able to create a sharp edge while maintaining a flat bevel consistently and without much concentration using this “one-way” technique, then move on to the second step, which is to keep the blade in contact with the stone on the return stroke, but relieve all downward pressure. Begin slowly with full concentration and strive for smooth motion. It’s at the transition from one direction to the other where Murphy will toss a banana peel under your heel.
And finally, when you have mastered the “light-touch” technique, try applying downward pressure in both directions, beginning slowly at first and with full concentration striving for smooth motion.
Remember, don’t grip the blade like a thrashing alligator, but hold it lightly in your hands like a small bird: too tightly and it will be crushed; too loosely and it will fly away.
Don’t lock your wrists or elbows, but actively and consciously rotate them to keep the blade’s bevel always perfectly flat on the stone (your stone is flat right, right?). This is very important.
And don’t forget to use your thin stainless steel straightedge and brass bevel gauge frequently to check the bevel for flatness and proper angle.
And as always, relentlessly beat down your inner badger, brutally crush and sow salt on bad habits, and don’t allow new bad ones to take root.
Sadly, this is a skill that, once learned, tends to deteriorate with time unless practiced frequently. As with cherry blossoms, muscles, tendons and eyes are neither static nor eternal. Setsunai, desu ne.
YMHOS
If you have questions or would like to learn more about our tools, please click the “Pricelist” link here or at the top of the page and use the “Contact Us” form located immediately below.
Please share your insights and comments with everyone in the form located further below labeled “Leave a Reply.” We aren’t evil Google, fascist facebook, or thuggish Twitter and so won’t sell, share, or profitably “misplace” your information. If I lie may my wife be plagued with runners in her hose.
Beware the Jabberwock, my son! The jaws that bite, the claws that catch! Beware the Jubjub bird, and shun The frumious Bandersnatch!
Lewis Carroll
This is the second post in our six-part series about hammers to use with our chisels. As with all the tool-related articles we publish, this one is based on past communications with, and in response to direct questions from, our Beloved Customers. Your humble servant hopes that not only Beloved Customers (may the hair on their toes never fall out) but Gentle Readers too may gain something from these articles.
We sell limited quantities of hand-forged professional-grade chisels to professionals who use them to please their customers and feed their families.
We are tickled pink when amateurs purchase our products, but our target customer is the experienced professional woodworker. If you do your part our chisels will provide faithful, reliable service until, after many decades, nothing is left of the blade but a nub. But to achieve this longevity, and to avoid smiles turning upside down, we insist Beloved Customers use flat-faced hammers to motivate our chisels as a condition of our warranty. It’s that important, at least for the professional that uses his chisel even after the blade and handle become hot.
375gm gennou by Kosaburo with a black Persimmon handle resting on a Go board. The head is a classical style seldom seen nowadays.
In the previous post in this series we looked at the Japanese gennou hammer with its two faces: one domed and the other flat. In this post we will examine these two styles of hammer faces in more detail. We will leave waffle-faces to the Belgians for now.
The Domed Hammer Face
Few people in industrialized countries outside of Japan have any experience with flat-faced hammers since manufacturers automatically grind a convex or domed striking face on their hammers nowadays. It’s simply what consumers are accustomed too. But I daresay few have ever considered the ramifications of the dome.
Does the domed face on this standard 16oz American finish hammer look centered to you? Does it look smooth?
A domed face on a hammer has some advantages, of course. For instance, when one needs to “set” a nail with its head just below the flat surface of the piece of wood into which the nail is driven. But does a domed face help the hammer drive nails faster or straighter? Does it help reduce the ratio of bent nails to straight nails? Does it motivate chisels more efficiently? No, no and no.
Another more questionable feature of the domed face (depending on your viewpoint) is that it makes it difficult to judge the accuracy of one’s alignment of the centerpoint of the domed face and with the centerline of the hammer head. Who, pray tell, profits from this ambivalent construction? I’ll give you one guess, and it ain’t me or thee.
Indeed, if your working hammer tends to bend a lot of nails, I recommend you carefully examine its face with a square for centricity and uniformity. “Doh! (palm to forehead). No frikin wonder,” may well be your genteel reaction.
While it may seem passing strange, we strongly recommend Beloved Customers use a hammer with a flat striking face to motivate our oiirenomi chisels, atsunomi chisels, and mortise chisels.
So why is a domed-face hammer a problem when striking Japanese chisels? Simply because it tends to focus the impact forces on a relatively smaller area on the wooden handle than a flat-faced hammer does accelerating wear on, and shortening the life of, the handle.
In addition, and especially if you are skilled at hitting the handle dead-center a high percentage of the time, a domed face will actually encourage the mild-steel crown to try to jump off the handle whereupon the steel hammer gleefully beats the crown and deforms it, often to the point where the deformed crown itself may damage the handle. Yes, this takes some time, but it happens frequently, a wasteful tragedy that can be avoided by using a hammer with a flat face and some simple setup procedures.
The Flat Hammer Face
While your humble servant is inordinately fond of the Japanese gennou hammer, it is by no means the only viable option. Indeed, you can easily modify most any decent-quality, properly-hardened hammer to have a flat face by simply abrading it with a grinder or sander.
Be sure you make the new face planar (flat) and truly square to the hammer’s centerline because a tilt to the left or right will make doing precise work inexplicably difficult and may lead to insanity. I once knew a “frugal” carpenter (read “cheap jackass”) who insisted on using a hammer with a skewampus face. The cumulative corrosion to his confidence caused his wits to wander into the weeds (iambic pentameter?). A sad story but one, I am told, that is commonly heard at AA meetings.
If you are modifying a standard hammer with a standard handle, you may benefit from tilting the face’s plane a bit inwards towards the handle, but there is not adequate space in this post to discuss this modification in detail.
Whatever you do, be especially careful to avoid overheating the hammer’s face while grinding/sanding it; Too hot and the temper will be damaged softening the hammer’s face and ruining it. Seriously. Even a wooden chisel handle will eventually mushroom a steel hammer that has lost its temper.
Here’s a guideline: If the hammer’s face becomes too hot to touch with your bare finger, its temper is at serious risk.
Finally, once the face is as flat and square and smooth as you can make it with your grinder or sander, be sure to polish the face because a smooth face wears out the chisel handle slower. A final polish with 320 grit W/D sandpaper is adequate. We polish ours even finer on sharpening stones. Overkill? Yup. Why bother? Because we like purty hammers and they deserve our love. Don’t worry, the polish won’t make the hammer’s face slippery, unless you imitate Mr. March Hare and spread butter on it.
By the way, once your flat-face hammer is ready, try driving nails with it. You will find it works a lot better for everything except setting nailheads below the board’s face. A nailset works better for that job anyway.
We hope our Beloved Customers will take this article to heart for the sake of their chisels.
Summary
In this post we reviewed two types of hammer faces: domed and flat. We also considered the advantages and disadvantages of each, and explained why a flat face is best for beating on Japanese chisels, and gave an example of the brutish damage a domed face can inflict on a poor innocent chisel. Like me, some of you may have shed a tear at the sight, but I bid you take heart because we also instructed you in how to convert a common domed-face hammer of any sort to a more genteel, polished, flat-faced hammer at no cost, one that will also drive nails better without butter. O frabjous day! Callooh! Callay!
To motivate chisels efficiently, the hammer must not only have a flat face, but it must be of the appropriate weight. Of course, the harder the wood, the deeper the cut, the wider and heavier the chisel, the heavier the hammer needed. But what is an efficient hammer weight? We will examine some options in the next post in this series. Please stay tuned, my beamish boy.
Until then, I have the honor to remain,
YMHOS
A hand-forged square gennou head by Hiroki with a handle made from a traditional Japanese handle wood called “Kamatsu” (Pourthiaea villosa) meaning “sickle handle, also called “Ushikoroshi (“cow killer”). Despite the appearance, the head is one-piece of uniform steel, not a jigane body with forge-welded steel faces. BTW, if someone tells you that hammers with forge-welded faces are superior, direct them to the closest legal marijuana dispensary so they can maintain their waking psychotic dreams.
If you have questions or would like to learn more about our tools, please click the see the “Pricelist” link here or at the top of the page and use the “Contact Us” form located immediately below.
Please share your insights and comments with everyone in the form located further below labeled “Leave a Reply.” We aren’t evil Google, fascist facebook, or thuggish Twitter and so won’t sell, share, or profitably “misplace” your information. If I lie may a Bandersnatch fruminate all over my face!
“And so the spring buds burst, and so I gaze, And so the blossoms fall, and so my days …”
Onitsura
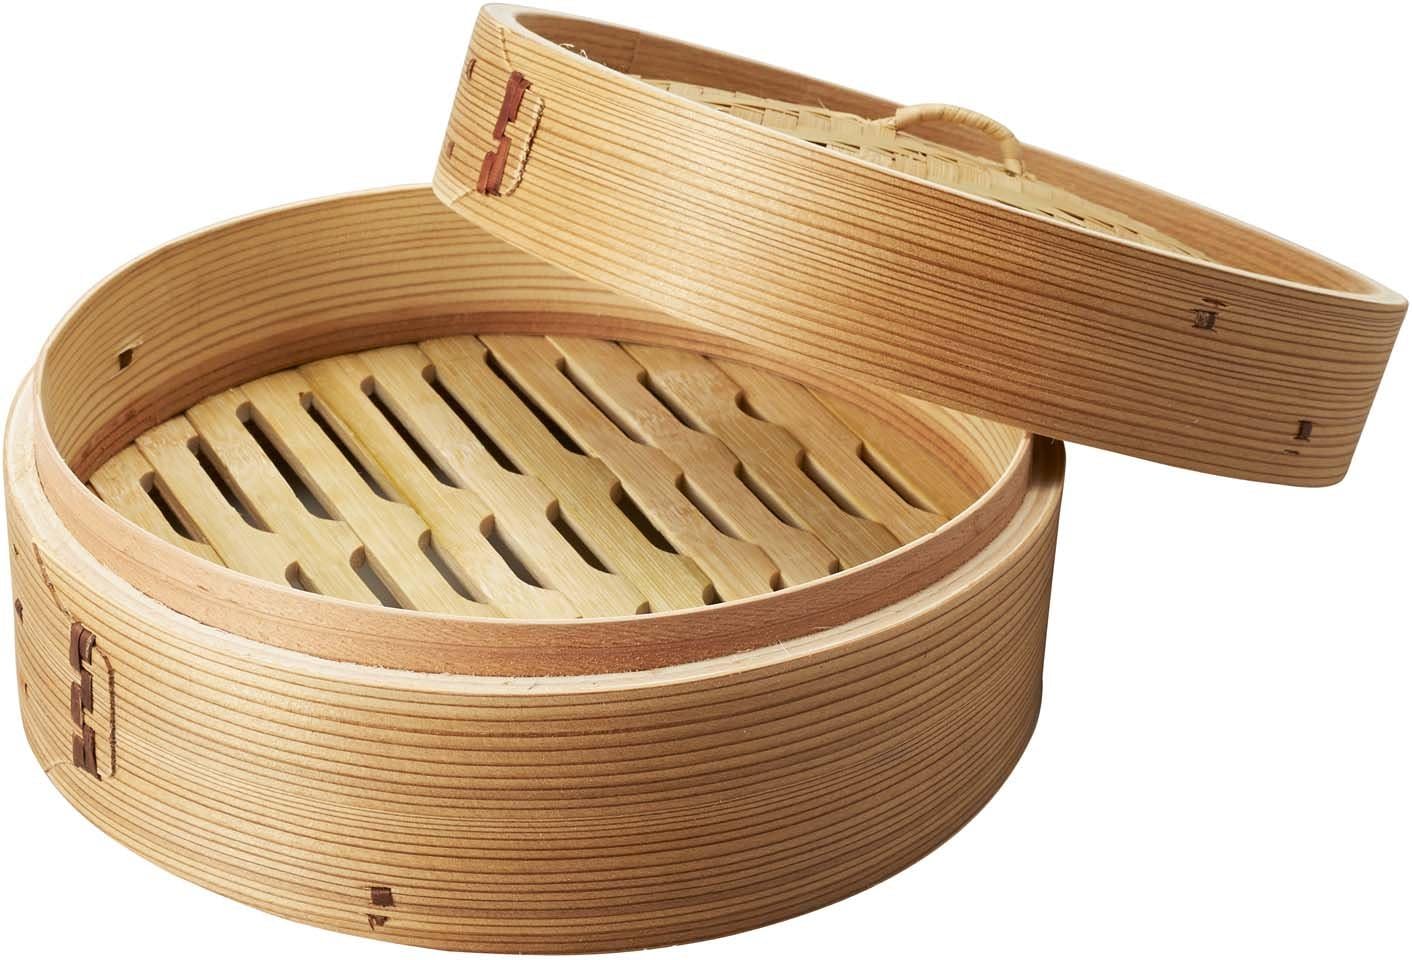
As I walked near my home today I was pleasantly surprised to see plum trees and even a few cherry trees working on their beautiful spring dresses. It reminded me of a day in April when my wife Kazuko and I went to Kappabashi street in Tokyo to buy a seiro, a dumpling steamer made of fragrant bent Akita Cedar wood and bamboo.
I don’t share her fascination for computerized sewing machines, smoothie blenders, and fuzzy bunny slippers, but she is an excellent cook and I would be a fool to deny her every possible assistance in obtaining any food-prep tool she desires.
Kappabashi Market
The entrance to Kappabashi Street, a center for kitchenware and restaurant supplies in Tokyo. If you enjoy cooking and the tools used in that contact sport, you must visit this huge shopping area.The primary goal for the day: A cedar and bamboo seiro for steaming yummy dumplings. Mmm…. Dumplings.A dish store in Kappabashi named Komatsuya. The wide angle lens makes it look bigger than it is, but the sheer volume and variety of dishes is not exaggerated.
A knife store in Kappabashi with a 100 year history. When professional chefs in Eastern Japan buy the tools of their profession, this is where they go. There are 8-10 such cutlery stores like this, all selling the world’s best food prep knives.
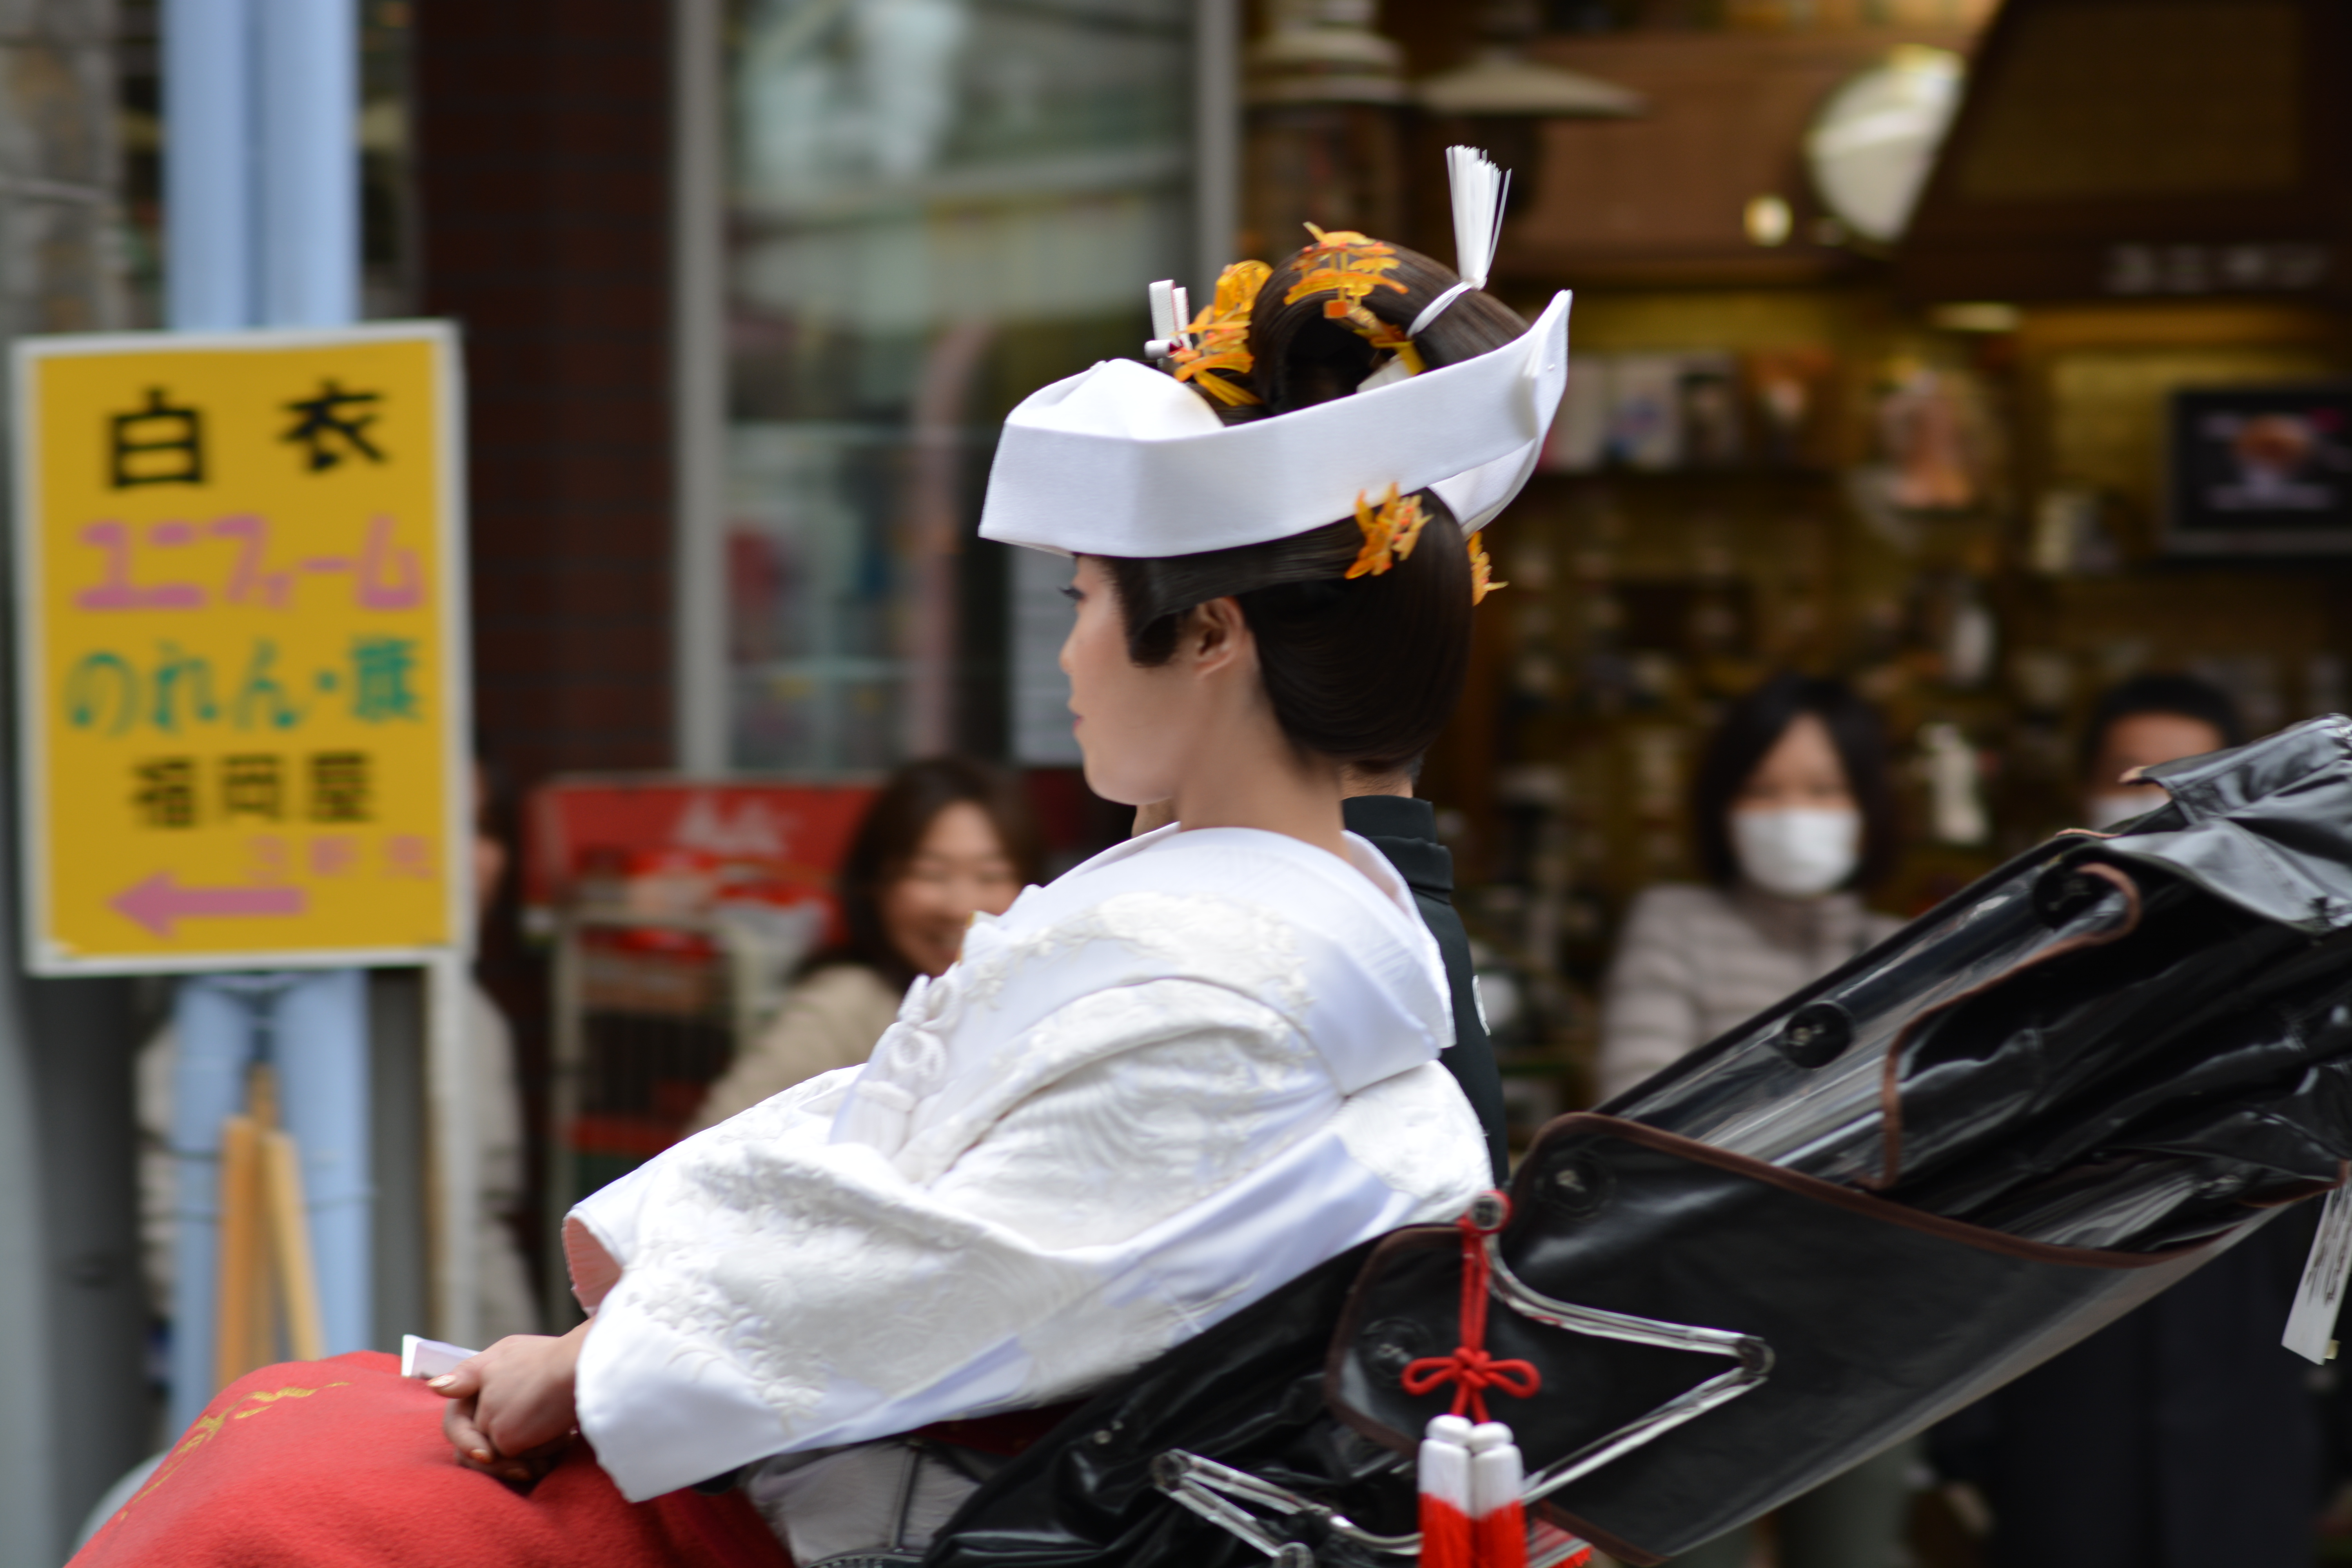
A bride going for a ride in a human-powered rikisha at Kappabashi.
Kaminari Mon (Lightning Gate)
From Kappabashi we walked to nearby Sensoji Temple, famous for the Kaminari Mon aka “The Lightning Gate” in Asakusa. Crowded with tourists, but good to see every few years.
The huge paper lantern hanging inside the Kaminari Gate at Sensoji Temple in Asakusa. H3.9m x D3.3m x 700kg (1,543lbs). A dragon in clouds is carved into the base.
After purchasing the seiro and other essential items at Kappabashi and visiting Sensouji Temple and Kaminarimon, we went to a little restaurant and enjoyed a nice lunch. After lunch we traveled a little further afield to view the last hours of the year’s cherry blossoms.
Cherry Blossoms
Cherry blossoms have an important place in the hearts of the Japanese people. The seasons change suddenly here and cherry blossoms seem to explode into bloom. For a few days the trees are bright and fluffy and glorious, but as quickly as they appear the individual petals fall to the earth leaving green leaves behind. The fallen flower petals decorate parks, sidewalks and ponds and flow down the rivers in spinning, colorful rafts.
The Japanese people love to walk underneath blossoming cherry trees, and where possible, spread a blanket under the flowers to enjoy lunch and few adult beverages with family and friends.
Since ancient times, as evidenced in literature, poetry (see the famous example above), and artwork, the budding, bloom and fall of cherry blossoms have been seen as a metaphor of all living things, including humans. Cherry blossoms represent a quiet, elegant, pure life with an inevitable, unselfish, beautiful ending. The cherry tree shares its bright raiment with everyone; The blossoms dance in the wind that scatters them. No complaints, no regrets, just the cycle of life.
Modest pink cherry blossoms close to the end
One of my favorite memories is of walking home from the train station late one night after a long day at work. It was a cold night and the wind was blowing. Fallen cherry blossom petals formed a soft, beautiful snowstorm that whirled around me in an unexpected and sudden blessing of nature.
Setsunai 切ない
Lest any druids or tree-huggers among my Gentle Readers be offended, I will not say that trees do not have emotions, but I think we can agree their language skills are limited. Humans however definitely have emotions and lots of words, so allow me to delve a little deeper into the Japanese language and the emotions cherry blossoms evoke in the hearts of many Japanese people (at least the mature ones). If there is even a little bit of an artist or poet hiding among the dusty barrels in your soul’s basement you should find it interesting.
There is a strange word in the Japanese language pronounced “Setsunai” and written 切ない The direct translation of the characters means “can’t cut.” Strange, right?
The dictionaries translate the word as “painful” (both physical and emotional); sad; or even “heartrending sorrow.” But when used in the context of something as beautiful and inevitable as the budding, flowering, falling, scattering and often muddy end of cherry blossoms, it is used to express the emotions of the quite, sad, unavoidable end of a beautiful thing that once gave joy, a natural event that repeats every year. Not hopelessness or despair, in this case, but sadness after beauty.
A human life is (hopefully) much like this cycle. A baby is born and becomes a happy, energetic child. It grows into an adult, is productive and loving, and imparts beauty into the world. The adult grows old; its beauty and energies change. And the day comes when each human’s physical existence fails and their spirit is carried away, perhaps dancing on the wind like the petals of a cherry blossom. Beautiful on the one hand, sad on the other, but definitely setsunai.
Knowing cherry blossoms will appear next year and the cycle of life will continue tempers the sadness at the loss of such great, unselfish beauty, and gives one hope for the future, at least for a while.
I invite you to read Onitsura’s poem at the top of this blog again. Simple but setsunai indeed.
A craftsman, upon realizing a chisel, plane or saw blade won’t cut may jokingly call it “setsunai,” but not in the poetic sense.
The End of the Day
We enjoyed a beautiful day at Kappabashi and Asakusa, complete with a lunch of tempura soba for me and some sort of raw fish for my patient wife. Life is short and sometimes hard, but it has its beautiful moments. I pray you have many such moments, and that your blossoming will be joyous and your dance on the wind graceful.
Fallen cherry blossoms floating quietly on the Shakujii Park pond. A beautiful ending to a short life. Who could ask for more?
YMHOS
If you have questions or would like to learn more about our tools, please use the questions form located immediately below. Please share your insights and comments with everyone in the form located further below labeled “Leave a Reply.” We aren’t evil Google or incompetent facebook and so won’t sell, share, or conveniently and profitably “misplace” your information.
When the show starts, I am in my SpongeBob stance, and I walk like SpongeBob, and the first step that I take, I am SpongeBob.
Ethan Slater
In this post in our series about sharpening Japanese woodworking blades, your humble servant will propose some useful stances and grips to employ when sharpening. I hope we can do a better job than Mr. Squarepants, at least.
Stances
There are several practical stances for sharpening, including standing, sitting on a bucket, a bench or a chair, squatting, kneeling on the floor, or sitting on the floor. With practice, all these stances can be made to work well.
When starting out, however, I think most people benefit from using a standing position with the stones placed on a workbench or table, or on a board spanning a sink.
Whichever stance you choose, locate and be conscious of your center of gravity, (usually just below your belly button), and try to keep it at the same elevation above the floor while moving the blade forward and back.
Flex your knee joints, and loosen your elbow joints and wrists, because locking up your wrists and elbows will make it impossible to avoid rocking the blade. This is important: You must actively concentrate on allowing your wrists to rotate so as to keep the blade’s bevel flat on the stone’s face, because it won’t happen by accident, or because Jesus loves you.
In the case of a normal resharpening job, instead of a major repair, remember the goal that craftsmen have endlessly sought for thousands of years: to abrade and polish the last few microns of steel at the extreme cutting edge, using the flat bevel as an alignment jig.
But don’t let yourself get lost in the weeds; Focus on abrading and polishing the entire bevel. If you do so, the last few microns, which the human eye can’t see, will be in good shape.
Focus the majority of your finger’s pressure on the extreme cutting edge, and less on the rear of the bevel, but without lifting the rear of the bevel off the stone. In the case of Japanese blades, the rear of the bevel is all soft jigane iron and will take care of itself. Yes, it is a balancing act. Yes, it takes focus. Yes, you will make mistakes, overbalance, gouge the stone and mess up the cutting edge a time or two. Everyone since the day the first caveman tried to grind his stone axe on another stone has made that mistake, so don’t worry about it. Remember, you fell off your bicycle the first few tries, scraped your knees and elbows, survived, and now ride like the wind! Yiiiiiihah!
Get a Grip
The way you hold your plane or chisel blade when sharpening it will influence the quality of the results and the stress on your hands and wrists, so it is worth paying attention to.
There are as many was to hold a plane or chisel blade when sharpening as Baskin Robbins has ice cream flavors. And like ice cream, none are right or wrong, except Burgundy Cherry, which of course is superior to all others (ツ)。 In the interest of brevity, we’ll only consider three grip methods here. If you are not using them now, give each a try over a couple of sharpening sessions to see if they are an improvement or not. Feel free to adapt these or develop your own.
The Gorilla Grip
First, let’s examine what I call the “Gorilla Grip.” With the plane blade resting ura facing up, the blade’s long axis pointing at 11:00, and the cutting edge furthest away from you, grip the blade’s sides with your right-hand’s thumb on the left side, ring finger and pinkie on the right, the tip of the middle finger resting on the right corner directly behind the cutting edge, and index finger extended alongside the middle finger. Then lift the blade and roll your ring and pinkie under it.
Rest the tip of the ring finger of your left hand on the left corner directly behind the cutting edge, with your middle finger and index fingers extended and their tips resting adjacent.
Extend your left palm over your right thumb’s last joint, and wrap your left thumb under the blade. You are now ready to rock-n-roll, without the rocking and rolling motion
The advantage to this grip is that it is very strong, ergo “ gorilla.” The downside is the blade tends to end up skewed on the stone because the right wrist must be twisted to keep the blade straight. Also, because the wrist joints are at very different angles with respect to the blade, and it is easy to apply a lot of force, extra care is necessary to keep the wrists firm but loose and rotating in harmony.
Notice how thumbs are poised to fit under the blade’s headFour fingers pressing down on the blade’s ura as close to the cutting edge as reasonably possible.Finger position on a chisel. The left hand thumb passes under the blade’s neck supporting it vertically, while the pad presses against the neck’s right side. The right hand thumb passes over the top of the neck, restraining the tool vertically, and presses against the neck’s left side firmly securing the neck between both thumbs. More fingers can press down on the ura in the case of wider blades. Conversely, only one finger can press on narrow blades.
The Three-finger Grip
The other grip is one I call “three-finger,”(指三本) after the most proper way of bowing in Japan when seated directly on the floor (preferably tatami mat) in the “seiza” posture with legs folded underneath the body, both hands touching side by side with the pads of three fingers of each hand extended and touching the floor in front of the knees, and the thumbs and pinkies tucked out of sight. Very proper, especially for elegant ladies.
In the case of the three-finger grip, the blade is oriented directly in front of and on the body’s centerline with cutting edge located furthest away. The hands hold the blade in a more symmetrical fashion than the gorilla grip, with the middle and index fingers pressing down on the blade’s corners closest the cutting edge (depending on the space available), with the thumbs curled under the blade’s head (end opposite the cutting edge), and either the ring fingers or pinkies touching the blade’s sides to assist in lifting it.
The advantages to this grip are less tendency to skew the blade, looser wrists, and better control of bevel angle. The disadvantage is slightly less power because it is harder to get the shoulders over the blade. This is the burgundy cherry version, in your humble servant’s opinion.
The Three-finger Monkey Grip
A hybrid of these two methods is one I call the “three-finger monkey.” Place the right-hand thumb alongside the blade’s left side, instead of under the head forming a combination of the gorilla grip and three-finger grip. This method provides a little more power than the three-finger grip, and less skew than the gorilla grip.
Is one of these grips best? It’s like riding a bike: None are wrong, but some work better than others.
In all three of these grips, most of the pressure will tend to focus at the blade’s corners which can create uneven wear on the ura and a rounded cutting edge. While this may be unavoidable, especially in the case of narrow blades, try to counteract this tendency by focusing the majority of pressure on the centerline of the cutting edge. It seems insignificant, but if left uncorrected, the resulting unbalanced pressure will cause the blade to wear quicker at the corners and become curved. Yes the blade is iron and steel and does not flex much, but it is a verifiable fact that the points where your fingers apply direct pressure will be abraded quicker.
There is a saying in Japan which is quite appropriate when talking about sharpening that says “Dripping water wears away stone.” In this case, just a little differential pressure from your fingertips will shape the blade over many weeks and many passes over the stone, wearing away both stone and steel in ways that can be either useful or not, depending on whether you are the sharp-eyed master of the process or the grunting badger. Please remain aware of this potential.
Chisel Grip
The grip I use on chisels is very similar to the grip for planes, and varies with width.
Like the famous Mexican weather babe Yanet Garcia, the chisel’s long handle shifts its center of gravity towards the butt making it a bit more difficult to manage, so a grip method that is absolutely stable in a single hand is advantageous.
Most solutions involve holding the chisel in the palm secured by middle finger, ring finger, and pinkie, with the index finger extended and centered right behind the cutting edge.
The index and middle fingers of the other hand can also be pressed near the edge and the thumb wrapped underneath the handle.
Polishing the Ura
Polishing a 70mm plane blade’s ura.
When polishing the ura of a blade, be it plane or chisel, make sure the stone is flat. If it isn’t, you will regret it later without realizing why.
Let’s look at a plane blade first. Notice in the photo above how my right hand is curled under the blade’s head supporting it while my thumb presses down on the bevel close to the cutting edge, a grip that makes it easy to apply a lot of pressure precisely while maintaining control of the blade.
Two fingertips of my left hand are pressing down on the bevel for a total of three pressure points. The thumb can press down as light or hard as you feel is necessary, but it typically applies the highest amount of pressure. It’s important the left hand fingertips apply equal downward pressure to avoid creating uneven wear (unless one corner of the blade specifically needs more pressure applied).
Try to remove nearly all the weight of the blade’s head from the stone so that all but a tiny amount of applied pressure is focused on the “itoura” cutting land at the blade’s extreme cutting edge. This too requires zen-like focus and strict control over one’s inner badger to avoid wearing notches into the ura’s side lands.
Move the blade in two directions at the same time: Mostly to and fro in line with the cutting edge; but also on and off the stone’s edge perpendicular to the cutting edge. This will help avoid wearing notches into the side lands, and produce a stronger cutting edge (IMO).
Keep the stone flat and reverse it frequently to ensure even wear and less wasted stone.
Concentrate your senses and develop hand-soul coordination : You are a leaf on the wind; Watch how you soar (Hoban “Wash” Washburne in Serenity). I hope you have better luck than Wash did…
In the case of chisels, I hold the handle in the palm of my right hand and place thumb and forefinger on opposite sides of the neck/shoulders pinching it between them. I place the tips of the fingers of my left hand on the bevel, and move right and left hand together. And as in the case of plane blades, I move the blade both forward and backwards and left to right at the same time.
Give it a try. What do you have to loose?
In the next post in this series on sharpening, we will look at which direction to sharpen. Few give this matter any thought, but most should.
YMHOS
The intrepid bucket of bolts Serenity.
If you have questions or would like to learn more about our tools, please click the “Pricelist” link here or at the top of the page and use the “Contact Us” form located immediately below.
Please share your insights and comments with everyone in the form located further below labeled “Leave a Reply.” We aren’t evil Google, fascist facebook, or thuggish Twitter and so won’t sell, share, or profitably “misplace” your information. If I lie may I grow a lucky third nose.
Written by Guest Author, Gavin Sollars, Timber Frame Carpenter, UK
The village is the token and pride of England; there are usually found in it vestiges of earlier life – cottages, manor-houses, farm-houses, with buildings of more or less historic interest; and who should understand them, their origin, their peculiarity of structure, better than the local carpenter?
Walter Rose, The Village Carpenter
The reconstruction job site as seen from across the River Test. Notice the green netting installed to prevent things from falling into the environmentally-sensitive river.
Introduction
I became acquainted with Stan early in 2019 when I decided to look at buying an Ootsuki Nomi. During my search I became skeptical of many of the Japanese tools that are widely available to the European market and, after a lot of research, I came across Stan’s contact details and sent him an email. Stan took a great deal of time to discuss with me what really motivated my purchase, the kinds of things I should take into consideration when looking at Japanese tools and went into detail about the intricacies of Japanese craftsmanship. The information he freely provided was invaluable, and with his help I feel I made a very good choice, and now have a tool that will serve me for my entire career.
I recently updated Stan with some pictures of buildings I had worked on and he asked if I would be willing to share them with the readers of his blog. The overall aim of these ramblings is to describe to you (who Stan calls his “Gentle Readers”) the general outlines of the reconstruction of an 18th century traditionally-jointed timber frame structure in a beautiful area of the English countryside in the summer of 2019. I hope that this article will give you an understanding of the work that was undertaken and also the enthusiasm I have for this archaic variety of building craft and carpentry as a whole.
Project Background
Timber framing in the UK has enjoyed a resurgence in popularity over the last 30 or so years, with quite a number of small to medium sized specialists in the craft building new ‘post and beam’ style buildings that emulate the traditional frames of the past. These companies are mixing time-honoured design details and timber framing techniques with more modern methods of production: chiefly circular saws and portable chain mortisers to rough out the work. This deep understanding and appreciation of historic building vernacular made my employer (The Green Oak Carpentry Co.) well placed to undertake the reconstruction of this Project.
The Mill prior to 2018 fire
The company was awarded the contract to reconstruct the building as close to the original as possible.
The Project is situated to the North of the Test Valley in Hampshire County in Southern England on the banks of the beautiful River Test, famous for trout fly fishing and “gin-clear waters.” The original waterwheel powered a grain mill. It was later converted to paper production, and even later housed a generator serving the nearby Manor House. Unfortunately, the original structure was completely destroyed by fire in early 2018.
At 21 metres (68.8’) long and 5.7 metres (18.7’) wide, the main structure is situated on a small island created by a man-made diversion in the River Test. The river flows from the north and is then diverted via a sluice gate to the right. The river then widens into a pool and bubbles quickly along the west side of the building. The diversion along the east flank drives the turbine, and passes underneath a wing that links the main structure back to the existing dwelling and also houses the turbine and mill workings.
Historical & Structural Considerations
The original building was “listed” with the Historic Buildings and Monuments Commission for England confirming the historical importance of the building on the one hand while placing restrictions on how any work to the building can be performed on the other. What remained of the original building after the fire was still subject to the Commission’s rules and regulations, of course. It oncefeatured shorter posts sitting on top of a brick wall from approximately first floor height. In the wake of the fire the surviving outer brick walls were deemed too structurally unsound to bear a load – however, due to the walls being “protected” under UK law, they had to be preserved. To get around this issue we installed two outer plates running around the perimeter of the building with the lower of the two (D – below drawing) supported on metal brackets (C) connected to the back of the timber Jowl posts (B) by lag bolts. The full weight of these two plates, as well as the softwood stud wall with conventional insulation and weatherboarding is carried by these brackets transferring the load to the jowl posts (B).
A detail drawing (drawn by myself) of the steel bracket, showing how load was removed from the fragile existing wall. The drawing also explains the interplay between our frame and the other elements in the building.
Design & Construction Details
Framing work started in July 2019 with a team of eight carpenters framing the bulk of the structure over a period of five weeks in workshops off-site. A team of four transported the fabricated components of the timber frame to the jobsite, assembled and raised the frame, framed the hips and valleys, then fitted the common rafters and cut and assembled the jack rafters.
Constructed entirely from European green oak, the structural frame is very utilitarian by design and lacks the aesthetic details like the curved braces typical in many historic timber structures in the UK. Nonetheless, it has some nice detailing that might not be obvious at first glance.
The main posts (wooden structural columns) are mostly jowl posts (aka “gunstock posts”) that flare at the top with tenons that fit into both the top plate (beam running along the top of and connecting the exterior posts) the column and tie beam. Historically, jowl posts were cut from the flaring grain of the base of a tree. These butts were often quartered and each post placed in the building adjacent to its sibling. I believe that this is a similarity historic English carpentry shares with its Japanese counterpart.
Here you can see the cross frame construction
The dominant style of cross frame (or bent in North America) features a bridging beam (the large beam that spans the first floor and carries the common joists), a tie beam which spans the top plates. This beam stops the wall frames from spreading under the load from the roof. And then a simple truss design consisting of two vertical studs and an upper collar with short stub ties jointed horizontally between the principle rafters and studs. The purlins (the members that run the length of the roof) are ‘clasped’ between the stub tie and the principal rafter.
The main roof frame is comprised of bridled common rafter pairs, a pre-Georgian (prior to 1714) hip gable at one end and a standard gable at the other. A pre-Georgian hip is the English name for a hip rafter that is usually square in section and canted so that one edge is in the plane of either the gable or the main roof. Hip roofs were historically framed in this way until carpentry methods changed and more of a ‘hip board’ set plumb with jacks pitched onto the sides became the preferred method of hip framing.
The pre-Georgian hip gable. The effect of canting the hip rafter in this way means that the jack rafters pitched from the two walls have a side cut angle on top and a square cut on the edge, but the jack rafters on the gables have a more complex (and comically named!) ‘nuns crutch’ or ‘lip cut’.
The adjoining wing has a wider span and a higher apex to the main building, and the roof meets the main roof in a valley. These valleys are similarly canted into the plane of the roof like the hips. In the same way the hips produce two different jack rafter cuts so does the valley. You’ll notice that on the main building there is a square jack cut and on the linking building the jacks have a compound cut onto the valley rafter. After running into the valleys, two small hip rafters pick up the opposite slope of the main roof. All of these angles were found using the framing square.
The junction between the wing and the main building looking back down the east wall.
The main building is split into two clear halves; one which is vaulted floor to ceiling, and the other which has two floors of joists.
Green Oak Timbers
What sets this type of carpentry apart from other woodworking is its use of timbers that are rough-sawn and often of irregular dimensions, requiring an understanding of how to deal with imperfections. For example, timbers are often significantly out of square, and dimensions only approximate: according to the European standard allowable tolerances are +9mm ~ -3mm in section. 5mm of deflection per metre is also allowed. These significant irregularities complicate the carpenter’s job.
Moisture contents can be in excess of 60% in fresher felled stock and during the summer months the warmer weather can cause problems with drying and shrinkage – we often keep our stacks covered with hessian cloth in an effort to shade the timbers and reduce warpage and cracking.
Timber framing using this challenging material teaches a carpenter much about the nature of wood as a living thing, the characteristics of the timbers, how they are likely to behave and what can be asked of them.
The Layout Process
Carpenters have developed various layout systems over many centuries to overcome the difficulties of working with irregular timbers. In my company we use lofting, for example. According to this method, we draw out entire layups on the floor and align the outside edges of each member to these lines with any sectional irregularities placed on the inside of the building, whilst any crowning (deflection or bowing) is oriented upwards and outwards.
Once the layout is drawn full-scale on the lofting floor, the timbers are placed on blocks in alignment with their corresponding grid lines on the floor. The various members are then laid one over the other so carpenters can accurately mark out lengths and scribe the shoulders of the joints using levels and plumb bobs.
The plumb bob is an ancient tool that you are doubtless familiar with – its importance in carpentry cannot be overstated. Plumb bob scribing, or ‘scribe rule’ layout, is a difficult thing to describe without actually seeing it done. What it boils down to is using a perfect reference in a less than perfect situation. By sighting down the plane of the timber by eye and comparing it at the same time with a plumb line a carpenter can gauge to what degree that face is out of plumb and then accurately replicate that plane on the shoulder of the intersecting timber. The shoulders of tenons and widths of mortices are carefully marked using this technique.
Once a frame is cut and fitted back together, a plumb bob can be used to accurately transfer and mark additional details up from the floor. In the case of this watermill I used a plumb bob to mark the theoretical positions of the purlin housings on each truss. The result was that, regardless of the amount of deflection or variation in thickness of each principal rafter, the purlin housing was maintained in a consistent level position down the entire length of the building.
A plumb bob being used to mark the principal rafter to tie beam joint. On the floor you can see the layout lines. We mark out each individual frame in a building full size on the floor with chalk lines, and then set up the timbers to those lines. This plumb bob belonged to my great grandfather who was also a carpenter.
Frames are generally made up of wall frames (running the length of a building) and cross frames (spanning a building). Many of the timbers are therefore used repeatedly in multiple layups. In the case of main posts they are first framed into the exterior walls of a building. Once the walls are completed they are framed in the ‘cross frame layups’. To ensure that the posts return to the right height and rotation that they were in during their previous layups, we use scratched datums (often a set distance from the top of top plate) and rotation marks that allow us to wedge the timber to return it to plumb or level.
Ensuring that a designated point on each timber is plumb and level is essential, particularly for those in multiple layups. It guarantees that a timber has been returned to the correct plane each time it is fitted up so that when it is stood up and connected to multiple beams, the rotation of each individual shoulder scribe is correct.
Once the bulk of the main structure is framed we laid-up floor joist and ‘cogged’ the tie beams into the top plates. Traditionally tie beams were dovetailed into the plates but because the shrinkage of dovetails (green oak, remember) tends to cause the building to spread, it is now more common to see a simple cog used. A cog also slightly outperforms a dovetail in green timber when under tension.
Assembly and Erection at the Job Site
The building enclosed two concrete pads differing in elevation by about 200mm (8”). The base of each post therefore was designed to accommodate this change maintaining the design elevation of the building. This and other variables made laying-out of the building one of the most challenging I have ever been involved in.
This photo shows the “jowl posts” and the boom of the spider crane as assembly work is underway.
The only access to the site was a track through a field at the rear of the building and a small trackway and bridge over the river too narrow for a mobile crane to cross. The solution we employed was to bring in and set up a small spider crane in various places inside the building. The limitations of this machine required us to be very methodical about the assembly sequencing to ensure we didn’t obstruct subsequent lifts.
Space was at a premium. Without a large area to unload the piles of timber, we had to unload the timbers and other materials in the field behind the property and then use a remote-controlled tracked carrier to ferry timber across the narrow access bridge.
And, to throw one more element into the mix, the river is an extremely well-protected ‘Site of Specific Scientific Interest’, meaning we had to be very careful when cutting roof members to prevent sawdust from drifting into the water course. The scaffolders installed netting around the entire perimeter to prevent anything from falling from the scaffold. We also did the majority of our cutting away from the edge of the scaffold on a plywood deck we laid on the joists.
As the building began to take shape its scale became more apparent. At nearly nine meters high, it’s an impressive structure.
Lessons Learned
I took away a lot of lessons from this building project such as managing levels on-site, and the importance of every trade singing off the same song sheet, as it were.
We had issues with the initial layout of the structure as it became clear that the structural steel that effectively served as the starting point for everything above it had not been installed at the correct elevation. The work was delayed while we sorted out this problem.
I also learned valuable lessons about effective joint placement. Because of the space constraints mentioned above, we were forced to erect the structure by lifting and placing each cross frame and then linking it back with its purlins. However, because the scarf joint landed on the wrong side of each truss, every time we craned a purlin into position, it was left temporarily unsupported at one end. These decisions were admittedly made early on before any proper site visits were made. A proper method statement was in place, of course, but the experience taught me that starting with the end in mind is important when planning.
I hope that you, Gentle Reader, gained some insight into the work that I am involved with and found it an interesting read. If you would like further information about historic timber framing in the UK, I recommend a small book titled Discovering Timber Framed Buildings by Richard Harris.
– Gavin Sollars
Gavin Sollars hard at work
Thank you for your reading this article. It is rare to find a craftsman like Gavin with the skills and inclination to write about his work and a willingness to share it freely with others. Gavin did not write this to promote his company, but if you like this sort of thing as much as we do, please visit his company’s website and sign up for their newsletter.
In the next post in this series Gavin will outline the construction of the roof frame. Please stay tuned.
YMHOS
If you have questions or would like to learn more about our tools, please use the questions form located immediately below. Please share your insights and comments with everyone in the form located further below labeled “Leave a Reply.” We aren’t evil Google or incompetent facebook and so won’t sell, share, or profitably “misplace” your information. Stick a needle in my eye.
A modern-style 750gm gennou head hand-forged by Kosaburo, hung with a black persimmon handle. I purchased this high-quality head over 33 years ago. An heirloom tool and a good buddy.
Yet such is oft the course of deeds that move the wheels of the world: small hands do them because they must, while the eyes of the great are elsewhere.
Elrond
This is the first article in a six-part series that condenses the advice your humble servant has given to our Beloved Customers over the years regarding the hammers they should use with our chisels. While some of this information is relevant to our warranty, all of it is relevant to how well our chisels will perform and the pleasure Beloved Customers will enjoy using them.
In this first part we will focus on the varieties of hammers we recommend. Subsequent articles in this series will focus on appropriate hammer weights and faces, how to use a chisel efficiently, the “chisel cha-cha,” the importance of rhythm, as well as a discussion about health and hammers. There may even be a song or two to hum along with. Helluvalot better than a performance of Cats, and cheaper too!
In the future we will present several different series, one with more details about hammer heads, and another explaining why and describing how to make a handle for a Japanese gennou hammer (or any hammer for that matter), with scaled reference drawings. We will of course provide the entire contents of these articles wrapped up in a happy wiggling bundle to Beloved Customers that purchase one of our gennou heads. Yes, there are more perks to being a Beloved Customer than simple toe-curling joy (ツ)。As Blackadder’s little buddy Baldrick often said: ” I have a cunning plan.”
Hammer Materials
30mm Atsunomi by Kiyotada
We sell tatakinomi chisels such as oiirenomi,hantataki chisels, mukomachinomi (mortise chisels), or atsunomi all designed to be motivated by the most efficient method available, namely a steel hammer swung by human hand and arm. I won’t debate the pros/cons of steel hammers versus wooden mallets versus plastic mallets versus brass hammers in this post because the physics are as obvious as a lemur in a lingerie shop (they’re a bit hairy, they jump and climb all over the displays and bra straps are forever slipping off their skinny shoulders, but not in a seductive manner!) beyond noting that a hardened steel hammer imparts more energy to a chisel in a more easily focused and controllable manner than any other type of beater. Some may disagree; A mind is a terrible thing to taste.
Occasionally Gentle Readers, and sometimes even Beloved Customers, ask if it’s OK to use a mallet of wood or plastic. Of course, it’s entirely acceptable, but no more necessary in the case of our professional-grade chisels than a speed governor set at 45mph is in a Ferrari.
The advantages of using a steel hammer to motivate chisels are quite obvious, even without doing energy calculations, but are there any disadvantages? Mochiron (Japanese for “of course”).
Steel hammers can concentrate so much energy on a tool handle so efficiently and so quickly that they routinely destroy the handles of the sharpened screwdrivers sold as chisels nowadays in Western countries due to faulty handle design.
At this point, wise Gentle Reader will ask themself why the handles of modern chisels are so fragile. Is it just an accident? If intentional, is modern wood softer and easier to cut than wood a few hundred years ago? Or has modern man become demented forgetting all the lessons of the past regarding chisel design, just as some have forgotten what the word “woman” means?
While dementia, sexual perversion and corruption among the leaders of the nations is obviously a serious problem nowadays, it is likely many marketing gurus, e-commerce pukes and cad operators never learned much about the tools they manufacture and sell. It’s also as obvious as lingerie on a lemur that most modern chisels are designed not to provide good service but rather to maximize profits through: (1) Lowest possible manufacturing costs; (2) Attractive appearance while hanging on hooks in the hardware store; and (3) Future purchases to replace chisels with broken handles, in other words, a cheap, eye-catching product incorporating planned obsolescence.
Prosimians flouncing around in lacy unmentionables aside, the tataki nomi chisels we sell are professional-grade tools designed to be struck by hardened-steel flat-faced hammers all day long and need not be coddled. They have tough Japanese oak handles protected by a cleverly-designed mild-steel kuchigane (coned ferrule) fitted where the handle meets the blade, and a mild-steel hoop, or crown, seated at the butt end of the handle, so they will not split or break when setup and used properly.
We have provided clear instructions for how to perform this setup job here.
But there is more to hammers than just materials, so let’s continue onto the next subject.
Japanese Hammer Types
A Kosaburo head with a brand-new nuclear-flash colored Osage Orange handle
The traditional hammer used in Eastern Japan for striking chisels and general carpentry work is called a “gennou” pronounced “ghen/noh.”
The gennou common to Eastern Japan is a simple symmetrical cylinder of one sort or another with a flat face on one end and a domed face on the other, often called the “ryoguchi gennou.” No claws, no pointy tail. The flat face is used for striking chisels and pounding nails. The domed face is used for something called “kigoroshi” and for the last stroke when setting nails. It’s a handy tool and more stable in the swing than a claw hammer. It’s just a matter of physics.
Japanese carpenters use a specialized nail bar for pulling nails effectively increasing the lifespan of their hammer handles, so claws are not necessary.
3 gennou heads. The far left head is a simple economy head. The center head is a higher-grade head slightly flared towards the ends. The far right head is an entirely hand-forged classic head by Kosaburo.
The Yamakichi style gennou head (see photo below) is another variety popular primarily in Western Japan. The tail is not pointy but tapers to a small square face that is useful for starting small nails and for “ tapping out” plane blades. The striking face typically has a slight curvature which is helpful for setting nails, but not enough to damage a chisel. The moment of inertia is less than the symmetrical gennou head so it is not as stable in the swing, but it is still a fine head and very sexy looking.
A “Yamakichi” style head by Hiroki with a mellowed Osage Orange handle
The pictures below are of a gennou head called “Funate,” which translates to “boat hand.” I have heard it originated with ship carpenters, but am uncertain. The tail end is a small square as you can see from the photo, and is handy for setting nails. It makes a great finish hammer, but as a hammer for striking gennou it never appealed to me. But there are plenty of craftsmen that love this hammer.
a Funate gennou with a bubinga handle
Any of these hammers will do the job: it’s all personal preference.
Western Hammer Types
The purpose of this article is is not to suggest that Beloved Customers must use a Japanese gennou hammer when beating on our chisels. In fact, nearly any variety of quality steel hammer can be easily modified to do the job more-or-less satisfactorily, including claw hammers, engineer’s hammers, warrington hammers, or even ball peen hammers, so it isn’t necessary to buy a special hammer. In fact, we’ll discuss those modifications in detail as well as the relevant physics of hammers in future articles in this series. Rejoice for there will be formulas!
In the next post in this series we will examine the type of face a hammer used to strike our chisels should have. Please come back and bring your fuzzy primate friends.
YMHOS
Do you have something extra-slinky with red Chantilly lace trim?
If you have questions or would like to learn more about our tools, please click the see the “Pricelist” link here or at the top of the page and use the “Contact Us” form located immediately below.
Please share your insights and comments with everyone in the form located further below labeled “Leave a Reply.” We aren’t evil Google, fascist facebook, or thuggish Twitter and so won’t sell, share, or profitably “misplace” your information. If I lie may my nose grow to the size of a watermelon.


Leave a comment