The Japanese Sumitsubo Inkpot 墨壺: Part 2: The Classic Version and the Modern Variant

The purpose of literature is to turn blood into ink.

T.S. Eliot

This is the second article in our series about the Japanese Sumitsubo.

We’ve discussed this tool before, but this time we will examine historical examples as well as an example of an actual sumitsubo ink pot (墨壺 pronounced sue/mee/tsu/boh) currently in your humble servant’s possession. Certainly not a comprehensive explanation by any means, but hopefully it will be informative and mayhap even interesting.

Although the Western chalkbox is now available in Japan, and the Japanese version of this tool is a big improvement over the ones my father taught me how to use when I was a slender “ute,” in Japan the inkline has only been augmented, not replaced, by the chalkbox.

Let’s begin by considering if the sumitsubo is a tool of value to the professional woodworker.

Why Use a Sumitsubo?

Carpenters, woodworkers, steel fabricators, masons and those in many other trades need to mark straight lines for layout and cutting purposes, but what is the longest line one can accurately make using a steel or aluminum straightedge? 1 meter? 4ft? Do you own a truly accurate 1 meter long straightedge or a 4ft long drywall square? How much did it cost? How fragile is it? Will it fit in your nailbag or tool box?

The laser is becoming more and more practical for layout work, but such electronic tools are still not small, light or inexpensive and certainly won’t leave a permanent line. And they have those pesky and expensive batteries that must be constantly recharged and periodically replaced. Very profitable for the manufacturers, of course, but they inevitably end up as poisonous landfill stuffing. When a permanent line is needed for layout or when making long rip cuts with handsaw or circular saw, the snapline is the only viable portable option.

Indeed, the snapline has been the tool for making long, straight layout lines by humans since before recorded history. Sometimes the line has been coated with chalk or limestone dust, sometimes with red soil dust, sometimes with charcoal dust, and in Asia, with a wet ink made from the soot of burned pine tree sap. But humans have such short memories, so most craftsmen younger than 30 years old have forgotten this tool.

The problem with the chalkbox and dry colorants such chalk, charcoal dust or soil is the wide, fuzzy, unclear line they produce.

By comparison, the inkline snaps a relatively narrow, clearly delineated and easy to follow mark on wood, stone and masonry. Not as perfect as a line drawn with a technical pen, of course, but no wider than a laser line and much better than a chalk line.

The second advantage of the inkline is that the line it produces will never get blown away by wind, or be easily smudged. And if you use waterproof ink, one that can be washed away while still wet but becomes indelible once dry, even rain isn’t a problem. And sumitsubo ink has long been available in many colors, including psychedelic hues. Groovy, man!

Does the inkline have downsides? A few, of course. To begin with, you need to be careful to keep the ink bottle tightly closed so it doesn’t leak. Yea, I’ve done that (シ)。

Next, you need to add enough ink to the inkwell to wet the line but not so much it sloshes out making a mess. To paraphrase the ancient Greek poet Hesiod: “Moderation is good.”

And finally, while it can be minimized or even avoided with caution and practice, using an inkline involves getting a bit of ink on at least one fingertip. Fortunately, the Japanese variety doesn’t stain skin like fountain pen or ballpoint pen ink, but washes off quickly and cleanly.

It used to be that a craftsman had to make his own ink by rubbing a stick of sumi ink on a stone with water, a tedious task. Some miyadaiku carpenters still make the ink they use for the first layout lines on important projects in this time-consuming traditional way as a sort of meditative, purifying ceremony, but nowadays, handy ink that won’t separate or mildew is sold cheaply in sturdy plastic bottles. There are of course other ways for a carpenter to obtain Satori.

In any case, your humble servant believes the sumitsubo to be a tool with concrete advantages diligent craftsmen should consider for the toolkit they carry along the sawdust and shaving-strewn path to woodworking enlightenment.

Let’s next next turn our attention to the main subject of this post, the classic, hand-carved wooden sumitsubo.

A Couple of Antique Styles

Not long ago the sumitsubo was a tool each craftsman made for himself by his own hand, giving him incentive to use unusual, even fanciful shapes as an expression of his personal woodcarving skills and artistic sensibilities. Can you judge the skill of the craftsman by his tools? Perhaps not, but it is human nature to do so nonetheless.

Besides the shapes shown in this article, wooden sumitsubo have often been made in the image of animals such as squirrels, rabbits and frogs, insects such as snails and grasshoppers, and even vegetables and plants, not to mention religious images and mythical shapes such as dragons or baku. Many were made to resemble musical instruments such as the three-stringed shamisen, or even boats. Human imagination combined with willing wood and sharp cutting tools can produce fun things.

A variety of hand-carved antique sumitsubo

In the next section we will examine three historical styles that more-or-less illustrate the development of the tool over the centuries.

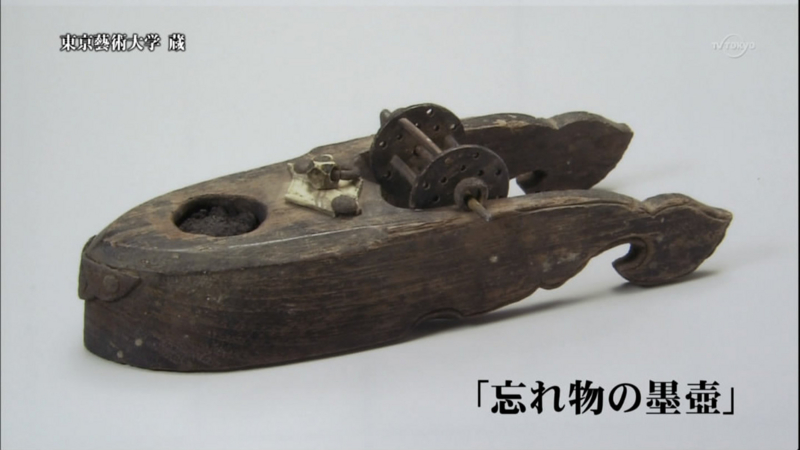
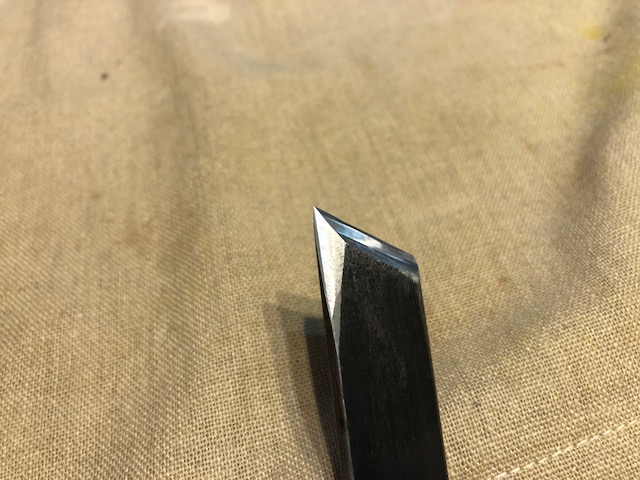
The Split-tail Sumitsubo

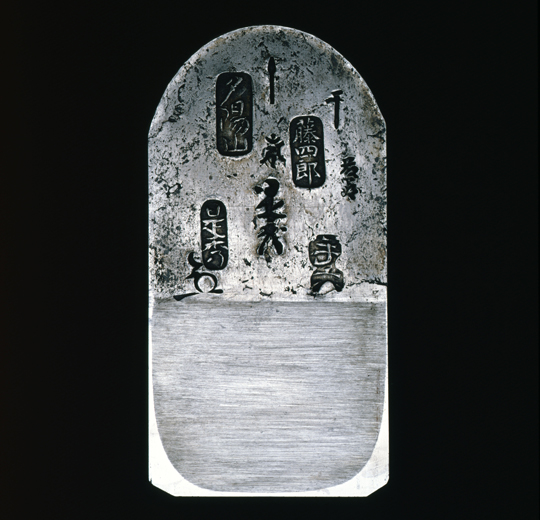
The first style your humble servant would like present is called the “Split Tail” sumitsubo shown in the image below. We discussed this well-preserved example in this post.

I have never owned or used this style of sumitsubo, but friends who have tell me that the excellent air circulation it provides to the reel and resulting mildew reduction is its biggest advantage.

Despite its unique appearance, this style is obsolete for good reasons. Its first design problem is the small inkwell not suited to easy use with a sumisashi pen. And then there’s the total lack of a waist making it easy to fumble. And don’t forget the relatively weak legs and fanciful details easily damaged if the tool is dropped.

This image has an empty alt attribute; its file name is U_QDfMHgjIUEH6aF8GszHomXR2CymzfcS_ISEgkznpwiRz4oRiz9hGwufJ46t_k6JLjSEqbp9J41D4kS9dJHkFCrqGZMjs17P5F6KP1W29F0eUVVCh4zJf7yaxF1xLNqAQdOfXeB
The so-called “Split-tail” sumitsubo. This example is estimated to be nearly 700 years old. Notice the metal ring located in front of the reel intended to facilitate using the tool as a plumbline of sorts.

The “Ichimonji” Style Sumitsubo

The second style of sumitsubo we will examine is a simpler, more compact one called “ichimonji” 一文字, which translates directly to “The character one” and refers to the shape of the tool being a simple line as in the number one, or “一” as it is written using the Chinese character.

A modern ichimonji-style sumitsubo in daily use in the workshop. A simple, elegant design easily fabricated. I know a miyadaiku who uses a similar tool daily in the temple construction work he performs in his workshop.
An antique ichimonji-style sumitsubo. The inkwell was replaced with a wooden insert sometime in the past, probably to deal with ink leaking from the crack visible on its side.
This image has an empty alt attribute; its file name is HMI3N-zMEbzNThvQ9yu68_vAufI8U1hiwxccCEhIgnYn61A_YhQoR0laaH4yvbZX6b9SwRrzN_2xqNoFqzDstfIUnzVHBN8G3LPrGZsfjS1Sk1S7CVcAoAFMtNtvyC1ka7l5WEZV
Another antique ichimonji-style sumitsubo with tasteful gold-leaf decorations. A compact, simple, and attractive version of this ancient tool.

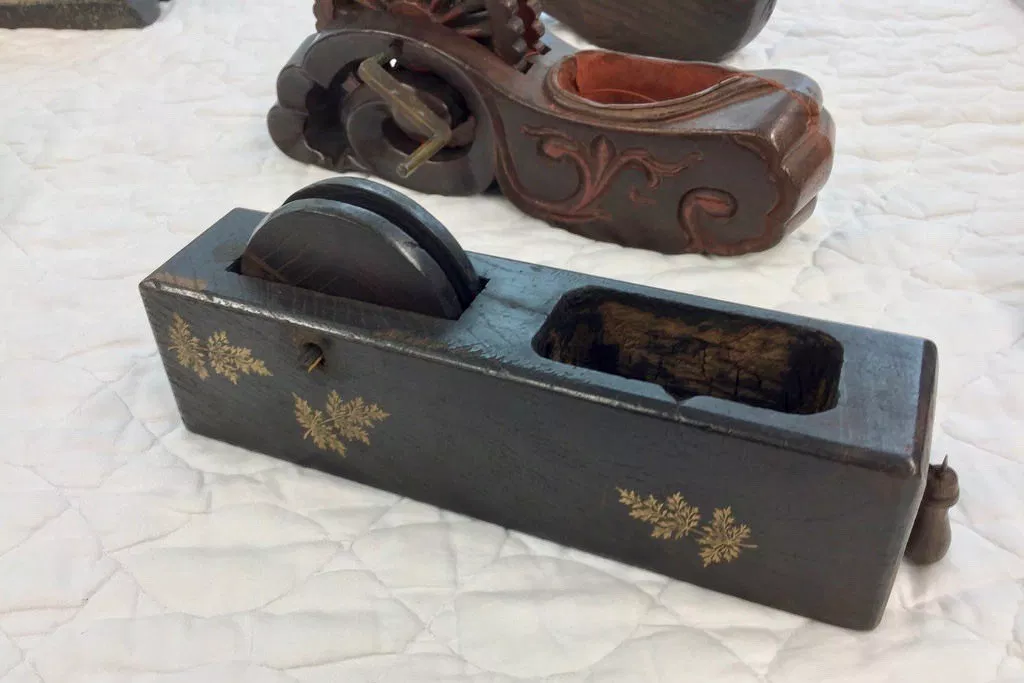
This antique style is compact, easy to make, visually uncluttered, classy and appealing to many craftsmen that make their own sumitsubo, even nowadays. But it too has fallen out of general use for good reasons.

Like the split-tail, the ichimoji sumitsubo has a slab-sided body and no waist making it clumsy to grip in one hand, fine inside the workshop but less than ideal on a construction jobsite.

Another problem is the tiny inkwell which runs out of ink quickly and is clumsy to use with a sumisashi pen.

The reel is obviously on the small size too holding less line than is sometimes needed.

And notice that more than half the reel’s surfaces are enclosed within the body, and that the body has no piercings to encourage air circulation, making mildew growth a problem. At least that was the case before the advent of commercial mildew-resistant ink.

Despite these shortcomings, it is a style appropriate to a workshop environment where the lines snapped are shorter, fumbling is not a concern and the smaller size is useful.

The Genji-style Sumitsubo

A side view of my hand-carved Zelkova wood Genji sumitsubo. Seen from this angle, the crane carved into the prow does not pop out, but his right wing wrapped around the hollow inkwell is clearly visible. The crane is looking towards the heavens, while the angry-looking turtle with his long kilt of seaweed is focused more on keeping the inkline under control, evil pixies at bay, and Murphy feeling hung-over. He’s a serious little fella not prone to small-talk. In Japanese mythology, storks and turtles are considered extremely lucky creatures with the crane said to live 1,000 years and the turtle 10,000 years.
A view of the sumitsubo’s prow. Please notice the unused blue inkline entering the inkwell from the reel to the right and exiting the inkwell at the prow on the left. Please also notice the ceramic thimble inlet in the end of the tool through which the inkline passes and keeps the line from wearing a large hole in the wood. There is a similar thimble where the line enters the opposite end of the inkwell. Sometimes these are made of brass, and other times glass, but fired ceramic is considered the best material for the job. A sumitsubo without thimbles simply won’t last.

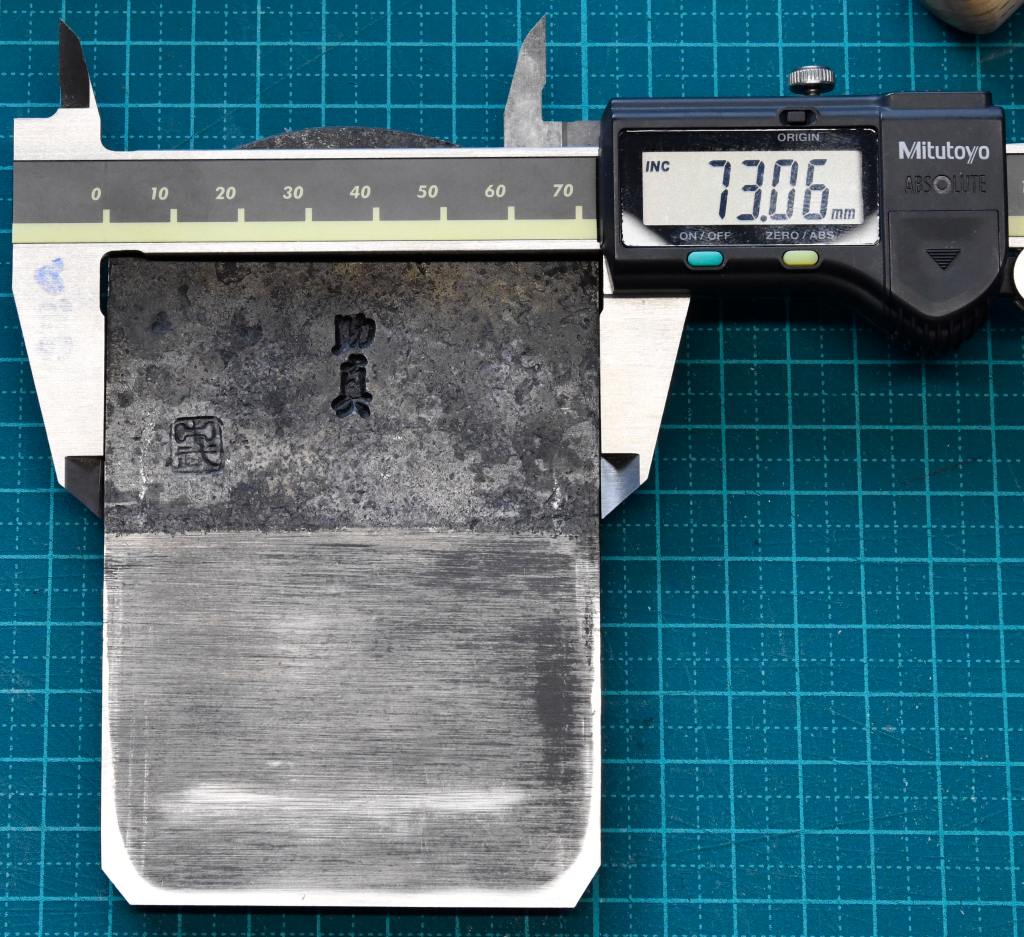
The sumitsubo in the photos above and below was hand-carved from zelkova wood (keyaki 欅), a wood popular in Japan for architectural work, carving and furniture. Most exposed woodwork seen in Buddhist temples in Japan is zelkova. It has a pronounced grain, nice color, carves nicely, and is fairly rot-resistant, although not nearly as much as Hinoki, the wood preferred for Shinto shrines. The brandname of this example is “Tsubo Gen” 壺源 .

Back in storage in the US I have a medium-grade wooden Genji sumitsubo I bought in Japan and used for many years, but I purchased the tool pictured here in Tokyo 9 or 10 years ago and have not used it at all, as you can tell from its pristine condition.

It was finished with lacquer when I purchased it so I refinished it with Cashew brand natural urethane last year just for vanity’s sake.

I normally mount this tool inside the lid of my toolchest to please the eye, attract good luck, and fend off malevolent iron pixies. It has accomplished these tasks well probably due to the noble efforts of the scowling little turtle; The crane doesn’t seem to impress them, I fear. We will discuss the lucky aspects of this tool below.

This is a Tokyo version of the Genji sumitsubo as witnessed by the brass crank used for spooling in line. In Western Japan, cranks are not as common, so craftsmen pass the palm of their hand over the top of the reel to spool in line. I’m not sure which style is most efficient.

It is a clever design evolution that resolves the shortcomings of the older designs. I see the following six advantages in this design.

The first advantage to the Genji design is the narrower waist between the reel and inkwell that makes it much easier to securely grip the tool in one hand while at the same time tensioning the line or even braking the reel with the same hand. This is a huge improvement over all older styles.

The second advantage is the wider, larger-capacity inkwell which stays wetter longer and makes it easy to use with a sumisashi for applying layout and designation marks on timbers. It also provides a stable place to rest the sumishashi when not in use without setting it down in the dirt or stuffing it in a nailbag pocket (and making everything else in the pocket wet with black ink).

The third advantage is the larger-diameter inkline reel which contains more line while at the same time being quicker to reel in.

The fourth advantage to this design is the improved air circulation to the line stored on the reel thereby reducing mildew growth. Not only does the wooden reel project further out of the top of the body, but it is also pierced with carved spokes exposing the sides and even the underside of the line on the reel. In addition, the body is pierced at the sides and even the underside to further improve air circulation and reduce weight.

The fifth advantage is that, despite the larger-capacity inkwell and reel, much unnecessary material has been carved away making the tool relatively lighter in weight.

And finally, the sixth advantage of this design is the lucky symbols frequently carved into the body. We all need a little luck.

Typical of many things Japanese, a lot of thought went into these subtle design improvements.

Propitious Symbology

The Japanese Tancho Tsuru crane

One of the most common lucky symbols in Japanese mythology is the crane, said to live 1,000 years and bring good luck, prosperity and happiness. The Japanese love these tall cranes with their little red caps and graceful mating dances. Here’s a link to an interesting video about them.

The turtle, especially the sea turtle, is also considered extremely lucky but for a longer 10,000 years. The turtle carved into sumitsubo usually has a trailing skirt of seaweed flowing from its shell, as does mine, evidence of its great age and accumulated wisdom.

Dragons, Chinese Lions, Baku and other mythological creatures of good fortune are also used.

I’m not a superstitious guy, but I’ll keep my crane and scowling turtle close by just in case, thank you very much.

The components of the typical Genji-style sumitsubo. The body, shown from above, is in the lower half of the photo. The inkwell is coated with a shiny elastomeric polymer to prevent ink from soaking into the wood. The blue polyester line can be seen passing through inkwell, exiting at the prow where it connects to an ebony “karuko” with a steel needle at the far left. When in-use, the pristine natural-color silk wadding above the body is stuffed into the inkwell where it surrounds the inkline. When soaked with ink, this wadding shrinks in volume to half, and wets the line as it passes through the inkwell. The inkline and wadding in this photo have never been used and so are not blackened with ink. The reel, carved with pierced spokes in imitation of the classic Japanese wagon wheel motif, is above and to the right. Notice how the inkline is exposed on both sides and towards the center of the reel improving air circulation and reducing the growth of mildew, not a real problem with modern commercial sumitsubo inks. The brass insert in the reel’s side receives the threaded end of the crank, connecting reel to crank and retaining the reel in the body. The spring on the shaft of the crank is one I had laying around the shop that I added to take up slop, but it’s actually unnecessary. Easier to disassemble than a Glock 19.

The First Modern Variant: The Plastic Sumitsubo

An economic and durable plastic version of the Genji sumitsubo.

The first sumitsubo I owned I bought in the city of Matsuyama on Shikoku Island in 1978. Having few funds, I was unable to afford the hand-carved wooden one I admired, so I bought a plastic version of the Genji-style wooden sumitsubo identical to the photo right.

Being made of plastic using molds from a hand-carved wooden model, it looks exactly like the traditional wooden sumitsubo except for the color, texture and weight. Offsetting the marvelously unsatisfying feel in the hand, this tool has several serious advantages.

The first advantage is its low cost. It can be purchased new for around ¥2,100.

The second advantage is the toughness of plastic. A wooden sumitsubo will at least be dinged and dented if dropped and may even break, but this one will take a likin and keep on tikin. I have seen one survive being run over by a truck.

The third advantage is the certain fact that the inkwell will never develop cracks or leak, unless you notch it with a circular saw or melt a hole in it with welding sparks (yes, I’ve seen that done too (シ)).

And it still has the elegant lucky crane to bring happiness and productivity and his snappy little turtle buddy to keep Murphy away. What more could you want? Egg in your beer?

The classic wooden sumitsubo may not be the most practical tool in the field, but it is the one selected by master carpenters when doing layout, not only because of the tactile experience it provides, but because the tool reflects on the craftsman that uses it. Face it, like a light-blue polyester leisure suit worn with white belt and white shoes, the plastic sumitsubo may be practical but it is simply undignified.

We will discuss some other Modern Variants in a future post.

How to Use the Sumitsubo

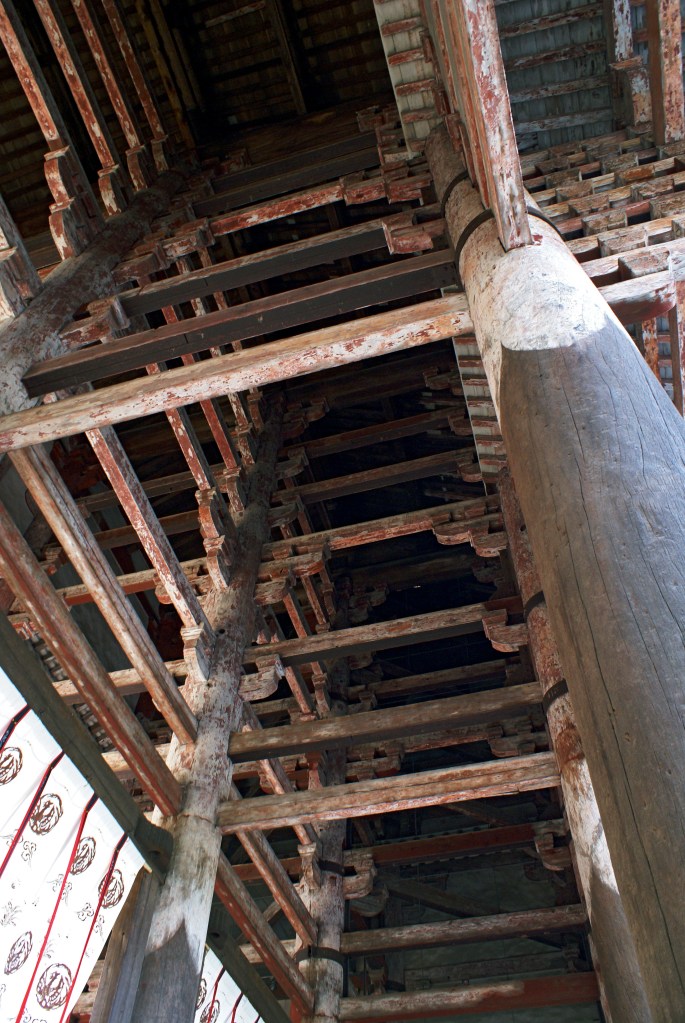
The image below is not only historical, but instructive in ways to use the sumitsubo. It depicts an ongoing construction project at the Kasuka Shrine during Japan’s Kamakura period (1192~1333) where carpenters are preparing lumber and timbers to be incorporated into the shrine.

An excerpt from the “Kasuka Gonge Genki E” scroll.

Please notice the “Split-tail” sumitsubo resting on the ground near the feet of the carpenter on the bottom-left, and in the hands of both carpenters to the right.

The team of two carpenters in the lower half of the image are using an adze to keep the log from rolling away and their squares to layout plumb lines on both ends of the log. The carpenter on the bottom right is orienting his square in the vertical direction by squinting at a plumb line made using his inkline and sumitsubo, while the carpenter at the bottom left is matching his square to that of his partner by sighting along the horizontal short tongue of his square. Winding sticks? We don’t need no stinkin winding sticks!

In his right hand you can see the bamboo sumisashi ink pen he is using to mark the plumb line, not doubt with ink from his sumitsubo’s inkwell.

The carpenter and his helper in the upper half of the image are using a sumitsubo to mark the edges of a split plank. The scruffy helper at the left holds the line in place to a mark, while the carpenter in the fancy hat lifts the line with his fingertips and releases it to snap a line of ink onto the plank.

Maybe it’s his hat, but he appears to be laughing like a maniac at some joke I wish the artist had recorded in this image since there is so little humor left in our dry-as-dust politically-correct world ruled by willfully brain-dead, corrupt zombie scolds. No doubt Gentle Reader has met a few of these zombie scolds who tried to suck every ounce of joy from him. Never fear, because I am convinced friend crane and friend turtle can discourage them from climbing the tree to get at us.

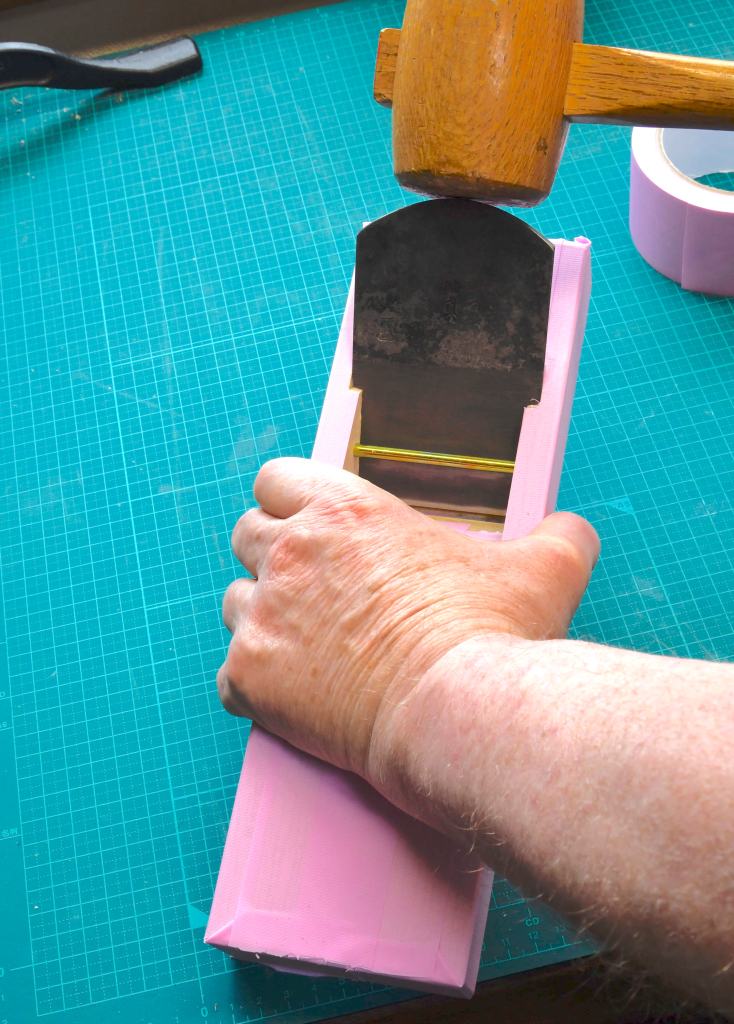
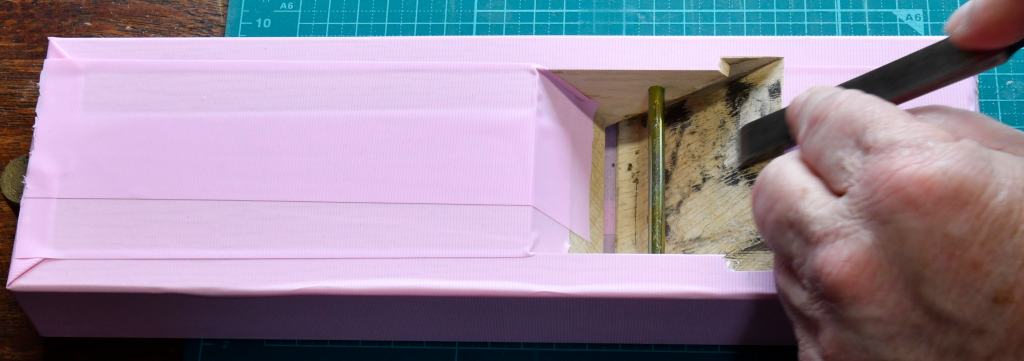
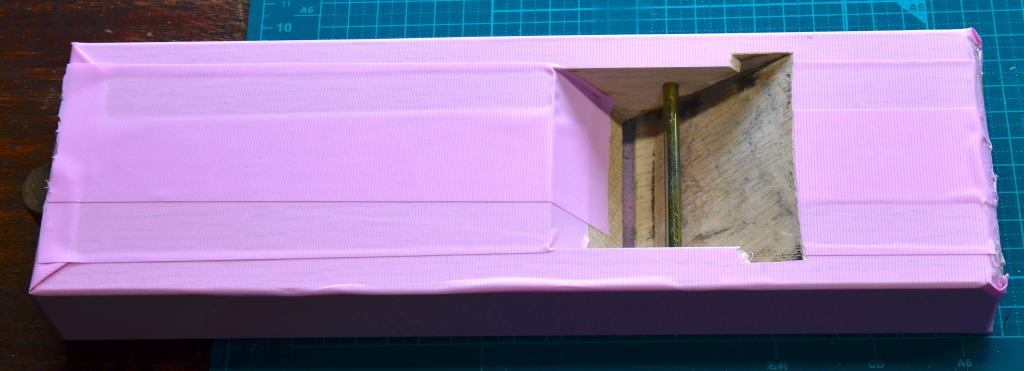
The steps to using the wooden sumitsubo are described in the photos below.

One adds ink to the inkwell from a plastic bottle of commercial ink as shown in this photo. The sumishashi ink pen is resting securely across the crank with the wider business end in the inkwell. In this position, one can carry the sumitsubo and sumishashi securely in the left hand with little risk of fumbling or dropping either tool. An excellent design!
The bamboo sumisashi pen is indispensible not only for operating the sumitsubo but for also marking layout and designations on boards and timbers. In recent years, pencils, ballpoint pens and capless marking pens have become popular for these marking tasks. An important role of the sumitsubo is to retain the sumisashi pen in a handy orientation when the sumitsubo is not in use, as shown above. This sumitsubo was carefully designed specifically to retain the pen in-place as shown, and my scowling little lucky turtle considers it his job to keep the pen from running off and getting lost. He hates pixies with a deadly wrath, BTW, and has snapped off the legs, wings, arms and even the heads of many of the pernicious creatures who were bold enough to get within reach of his jaws. I think you’ll agree he does a great job, and never complains. And because of his natural lucky powers, Murphy can’t interfere.
The first step is to wrap the inkline around the needle in the end of karuko. Please note that the line in this photo is dry. When making an actual snapline, the inkline must be wet with ink.
Next, push the sharp needle into the wood to be snapped with the line carefully aligned with a mark. No mark is shown in this image, but if snapping an actual line, one makes the mark first.
This sumitsubo in this photo does not contain ink and so the raw silk wadding is still white and fluffy and the line is blue, but ink is of course necessary to actually snap a line. To persuade the line to soak up ink, one must press down on the wadding and the inkline simultaneously with a sumisashi pen as the inkline passes through the inkwell and out the hole in the prow. The sumisashi and sumitsubo are a team. One controls the tension on the line by pressing the heel of the left hand against the side of the reel, or the pinky finger against the underside of the reel, an operation the design of the Genji-style sumitsubo makes easy, unlike earlier styles. I have my right hand on the crank in this photo, but that was just to take up extra line. To spool out wet line, simply pull the sumitsubo away from the karuko and its needle as the crank spins free, while controlling the tension on the line with the heel of the thumb, and simultaneously pressing down on the line/wadding with the sumisashi. There are two ways to manipulate the sumisashi at this point. Some people hold the sumitsubo in the left hand and pull it to spool out line while using the right hand to press the sumisashi down on the line/wadding. Many people prefer smaller sumitsubo, but the kindly gentlemen that taught me how to use them insisted that the sumitsubo’s inkwell must be large enough and shaped so that the sumisashi can be laid across the line, pressed onto the line /wadding, and securely retained in this position by the left thumb alone as the line is spooled out, as shown in this photo, leaving the right hand entirely free to control the inkline and/or the board being snapped. It’s also much safer when working at any height. Give it a try and you’ll see what I mean. The Genji style sumitsubo is the only one that makes this more efficient and safer technique possible, entirely by design.

Here are links to a few GooberTube videos of guys using sumitsubo. My old master would have been disappointed with their techniques, especially with how they let the sumishashi get in the way, with one guy even sticking it in his mouth to free his hands (egads!). But there’s no denying they are getting the job done. Video 1, Video 2.

Both of these gentlemen are using sumitsubo without cranks, strongly suggesting they are located in Western Japan and not the Tokyo area.

I’m sure Gentle Reader will agree that the hand-carved wooden sumitsubo adds class and dignity to a craftsman’s work, and maybe even a little good luck.

In the next post in this series about the Japanese sumitsubo we will take a look at the most recent evolution of the tool. They look like something designed by Cylons, but they are serious, effective tools nonetheless.

Until we meet again, I have the honor to remain,

YMHOS

If you have questions or would like to learn more about our tools, please click the “Pricelist” link here or at the top of the page and use the “Contact Us” form located immediately below.

Please share your insights and comments with all Gentle Readers using the form located further below labeled “Leave a Reply.” We aren’t evil Google, fascist facebook, thuggish Twitter, nor an Assistant Director of the FBI and so won’t sell, share, or profitably “misplace” your information. May my scowling lucky turtle nip notches in my fingers if I lie.

← Back

Thank you for your response. ✨

Other Posts in Japanese Sumitsubo Inkpot Series

A Few Masterpieces

“Living by faith includes the call to something greater than cowardly self-preservation.”

J.R.R. Tolkein

In this post your humble servant will present a few modern masterpieces of the blacksmith’s art produced recently by a single craftsman. I hope you are as thrilled as I am to know there is at least one craftsman left in the world that can produce chisels of this quality.

The Blacksmith

The craftsman that made these chisels is very unusual in that, unlike the frantically self-promoting, technically mediocre Hollywood blacksmiths such as Tasai, Funatsu, Kiyohisa, and the modern Chiyozuru gang, he is reclusive and shuns attention. Accordingly, I have been requested to not share any personal details about him, so please don’t ask. The fact is I don’t even know his real name just the brand he uses.

I won’t discuss why he is reclusive, but I will go so far as to say that he is self-employed, well-known in his chosen field, and that chisels are not his primary work product but only a sideline. He makes no more than 5 chisels monthly.

His business philosophy and blacksmithing techniques are interesting so I will share some details about them. He has four strict requirements that a Customer must satisfy before he will accept an order. The first two are business-related, and the last two are about the Customer.

  1. The Blacksmith sets the delivery schedule. Period.
  2. The Blacksmith sets the price. Period
  3. The Customer must be a professional worker in wood who needs and will use the tools the Blacksmith will forge daily. His track record must be independently verifiable. Amateurs and/or hobbyists, regardless of their skill levels, need not apply. Collectors are specifically unwelcome.
  4. Besides being expert in the use of chisels, the Customer must have a minimum level of skills, including the ability to make chisel handles and cut a high-quality Japanese plane block using only hand tools. Once again, this must be verified before an order will be accepted.

Your humble servant commissioned a few chisels from the Blacksmith many years ago and went through this same qualification process, although I didn’t realize it at the time.

The quality of his forging and heat-treat technique is unsurpassed producing a crystalline structure in hard steel that will take an extremely sharp edge, will hold that edge without easily dulling, chipping or rolling while cutting a lot of wood, and is easily sharpened.

But it is his metal shaping and finishing skills that are so awe-inspiring. Please notice the straightness and cleanness of the lines and planes, as well as the uniform and smooth curvature at the shoulders, and perfect symmetry. If Gentle Reader is unimpressed, I encourage you to make a full-scale model from cold wood before trying it in hot metal. I promise you will be convinced.

The Blacksmith uses only “free-forging” techniques, and does not employ the rough shaping dies other modern blacksmiths rely on to improve production speed. His forging technique is so sublime that the entire chisel is shaped to nearly final dimension by fire and hammer, not grinders and belt sanders.

He finishes his products using only hand-powered scrapers (sen) and files.

The performance of Blacksmith’s products are equal to or better than those of Kiyotada back in the day, and are more precisely shaped and more beautifully finished than those of Ichihiro (the Yamazaki Brothers) at their very best. They are simply the best chisels that have been made in Japan in the last 70 years.

Let’s take a look at four chisels recently completed for a Beloved Customer in the USA.

34 x 485mm Anaya Chisel

The Anaya chisel is an antique style used for cutting deep mortises and making other joints in large timbers. It is no longer commercially available.

Top view of a Anaya 34x485mm Anaya chisel
Ura view of 34x485mm Anaya chisel
Side view of 34x485mm Anaya chisel

57 x 485mm Anaya Chisel

42 x 490mm Bachi Nomi

The Bachi nomi is the equivalent to the fishtail chisel in English-speaking countries. The word bachi comes from the splayed tool used to play the 3-string Japanese shamisen, a banjo-type musical instrument. Here is a link to a video of two ladies using shamisen and bachi to perform a famous traditional song in Tokyo.

The Bachi nomi excells at getting into tight places to cut joints with acute internal angles such as the dovetail joints that connect beams to purlins.

There are several ways to resolve the angles at the tool’s face, but in this case the Beloved Customer and Blacksmith agreed on the most difficult, rigid and beautiful solution, the shinogi. This design has the advantage of maintaining a shallower side-bevel angle from cutting edge to neck return providing better clearance in tight dovetail joints.

The handwork performed on this chisel’s face is simply amazing, but the hollow-ground ura is even more spectacular to those who know about this things.

54 x 540mm Sotomaru Incannel Gouge

The Sotomaru or incannel gouge is a strong and convenient chisel used for cutting joints in logs and rounded members on architecture. More information can be found at this link.

This is an especially beautiful example as seen the symmetrical confluence of planes and curves at the shoulders.

Conclusion

I hope Gentle Reader found this post informative. You will never find better examples of the Japanese blacksmith’s art outside of one particular museum. It is exciting to consider that there is still one craftsman alive that can routinely perform this level of work.

While your humble servant has praised these chisels and the blacksmith that made them highly, please do not make the mistake of assuming that I am soliciting orders, or even suggesting that commissioning them is possible, because they are simply not available at any price. Please don’t ask.

YMHOS

If you have questions or would like to learn more about our tools, please click the “Pricelist” link here or at the top of the page and use the “Contact Us” form located immediately below.

Please share your insights and comments with everyone in the form located further below labeled “Leave a Reply.” We aren’t evil Google, fascist facebook, or thuggish Twitter and so won’t sell, share, or profitably “misplace” your information. May my ootsukinomi roll from my workbench and land cutting-edge down on my toes if I lie.

← Back

Thank you for your response. ✨

Leave a comment

The Japanese Handplane Part 5: The Chipbreaker

A 60mm plane blade with its chipbreaker resting on the ura as when installed into the wooden body. Please note that there are no screws connecting these two parts making it a simple and reliable system.

There are three things extremely hard: steel, a diamond, and to know one’s self.

Benjamin Franklin

n this fifth post in our series about the Japanese handplane, we will discuss a single one of its component parts, the chipbreaker.

Professional woodworkers that use handplanes daily usually have this simple widget thoroughly figured out, but your humble servant has been asked to clarify why the chipbreaker is necessary and how to make it work so many times recently that I can no longer gracefully avoid publishing a more complete, BS-free explanation for the benefit of our Beloved Customers, may the hair on their toes ever grow long.

As always, this post is intended to provide a bit of insight, or at least a different viewpoint, to our Beloved Customers, many of whom are professional woodworkers and Luthiers.

This is a longish article. If your humble servant was a lazy man I would simply state stand-alone conclusions as have so many with half-baked knowledge of handplanes, and leave it up to Beloved Customer to figure out the why of things on your own, but that would be boorish behavior.

Even if you already know everything there is know about the chipbreaker, you may still find a new crunchy, scrumptious tidbit or two in this scribbling if you look.

Factors Critical to Controlling Tearout

The sole purpose of the chipbreaker is to control and, whenever possible, completely prevent the unsightly and wasteful tearout that often occurs when using a handplane to surface wood. We will examine the causes of and some solutions to tearout below, but let’s begin this discussion by examining factors critical to controlling/eliminating tearout that are more important than the chipbreaker. Your efforts to control tearout should always begin with these factors. But first allow me to share a story.

This was an educational effort, one that I magnificently failed twice before finally getting it right, but it taught me the three most important factors in reducing tearout in handplanes, whether with wooden or steel body, with chipbreaker or without. Unlike my curmudgeonly old masters, I won’t insist Beloved Customer stop reading until they have mastered all three of these factors, but master them you must if you are to achieve excellence with the handplane.

Factor 1: The blade must be sharp. This factor depends on the quality of the blade and the skill of the person who sharpens it. We have a series of 30 posts about sharpening Japanese woodworking blades Beloved Customers may find beneficial. The series starts with this LINK.

Factor 2: The mouth opening (gap between the sole and the cutting edge) must be as tight as practically possible and still pass shavings. Please make an effort to truly understand what this means, because it is not always easily accomplished. Of course, the mouth opening of a super finishing plane intended to take transparent shavings will of necessity be narrower than that of a plane intended to dimension boards by taking thicker shavings; Horses for courses;

Factor 3: The area on the sole directly in front of the mouth opening, a strip across the entire width of the sole of the plane and perhaps 3~10mm wide, must be true and flat and apply even pressure on the board being planed right up to the last few microns of the mouth opening. This is not an exaggeration. Much else can be out of wack but if this is right the plane will usually cut well.

There are of course other variables worthy of consideration, but why are these three factors critical to mastering the handplane?

To begin with, a dull blade won’t sever fibers cleanly but will tend to tear contrary fibers up and out of the board’s surface, the very definition of “tear out.” Can’t have that, ergo, Factor 1.

Since the soles of handplanes wear and consequently the width of mouth openings change with that wear, Factors 2 & 3 are dependent on the team of craftsmen that originally made the handplane as well as the craftsman/owner that uses and maintains the handplane over its lifetime. That’s you, Beloved Customer, so please pay attention, learn the lessons and develop the necessary skills.

Indeed, Factors 2 & 3 act in unison to control the movement of contrary fibers immediately before and after they contact the blade directing them into the cutting edge to be cleanly severed by the sharp blade (Factor 1), while at the same time serving to bend, buckle and weaken those fibers that would otherwise tend to develop a lever arm and tear out below the surface of the board. If this doesn’t make sense to you, please give it careful thought because you must figure it out if you intend to become proficient with handplanes.

These three factors are bedrock essential to controlling tearout regardless of the type of handplane in question and whether it has a chipbreaker or not. Few new planes, whether made of wood or steel, satisfy these conditions. And after regular use, resharpening and adjustments become necessary, so Beloved Customers are strongly encouraged to understand how to evaluate these three factors in your handplanes and learn how fettle them. We will address the necessary techniques in future posts, but it will take more than just reading, so consider it an assignment. Indeed, expect to screw it up royally at first and learn from your mistakes, just as your humble servant once did.

The Chipbreaker & Historical Lumber Processing Techniques

To better understand the chipbreaker, Beloved Customer may find it useful to understand a few historical factors about the wood they are shaving and some background about the tool making those shavings.

Before the proliferation of the large rip saw, and especially the water-powered sawmill, the only practical method of producing boards and beams from logs was to “rive” (split) them out using wedges and axes. This was the same worldwide.

Riven wood has two convenient advantages. The first one is that, because the grain of the lumber is relatively straight and continuous, grain runout is reduced, making it somewhat stronger structurally. And second, the occurrence of tearout when surfacing riven lumber is often less than what typically occurs in sawn lumber.

The thing about logs is that not all of them have grain straight enough to produce useful lumber when riven. Large, long, straight, old-growth trees are most efficiently processed, but as nearby old-growth primeval forests with large, straight trees were cut down and premium-quality logs became harder to come by, much construction and shipbuilding came to rely on more economical beams, posts and boards sawed from logs with wonky grain.

A beam sawn from a log to make an exposed structural member in a traditional Japanese house. Instead of trying to square it off, the carpenters have taken advantage of the natural curvature of the tree trunk to add strength as well as an interesting appearance. Please note, however, that being sawn, much contrary grain has been exposed that would have made riving such a log to this shape impossible, with the result that tearout is unavoidable. Also, and while this has nothing to do with tearout, the knots exposed at the bottom beam are in the worst possible location seriously weakening the integrity of this member in bending.

Unlike a team using axes and wedges, large rip saws in the hands of sawyers made practical through the proliferation of inexpensive, reliable steel, and especially the water-driven sawmill, could more easily and quickly cut long, straight boards and beams out of most any log regardless of grain direction. Consequently, logs that would have been rejected before the days of the sawmill can now be readily processed reducing the man-hours/cost of producing lumber significantly, at least that was the case until environmentalist grifters gained sway.

On the other hand, the grain direction of lumber produced using large saws and sawmills tends to wander everywhere increasing runout and making the job of cleanly surfacing the boards more difficult for subsequent craftsmen. This is the situation we face now.

We don’t know when or where the chipbreaker was invented, or how the concept spread around the world, but it’s a safe bet to assume its ability to calm the wild grain of sawn lumber during surfacing was one reason for its popularity. At least, that’s how it went in Japan. And wood is wood no matter where you are.

Two carpenters selecting a curved log to use a roof beam
Naturally-shaped logs used as roof beams in the restoration of a historically-significant building in Japan

Why Does Tearout Occur?

Let’s next examine some basic causes of tearout.

Please recall that wood is comprised of various types of cells, each with a job to do, but most of those that eventually become lumber specialize in exposing green leaves to the sunlight, transporting water from the ground up to the leaves, and nutrients formed in the leaves to the rest of the tree.

Transporting literally tons of water daily from the roots far up into the sky is the job of groups of cells that form what are effectively continuous waterpipes connecting the roots to the stomata in the leaves. In a living tree these pipes have semi-flexible cell walls, and while they mostly grow parallel with roots, limbs and trunk, their shape is influenced by wind, rain, snowload, shifting soil, microbes, bugs and ever-changing exposure to the sun over the life of the tree, so they are seldom perfectly straight. Indeed, once dried, it’s partly the changes in direction of these tubular cells, often called fibers, that gives harvested lumber its beautiful grain patterns and shimmering chatoyance.

The blade on the left is cutting with the grain and is unlikely to produce tearout, while the blade on right is cutting against the grain and is more likely to produce tearout.

When planing with the grain (the blade on the left in the illustration above), the blade severs fibers which are oriented either parallel with or sloping up to the board’s surface and angled in the plane’s direction of travel producing pretty shavings comprised of relatively short, flexible segments of fiber.

But when planing against the grain (blade on the right), the blade must sever fibers that are diving down into the board. Instead of consenting to being cleanly severed, often these longer, more rigid fibers tend to ride up the face of the blade, bridging and avoiding the cutting edge.

When this happens, instead of severing them cleanly, the blade tends to lever these longer fibers up out of the board’s surface until they suddenly break off below the surface of the board leaving a rough uneven surface. This damage is called “tear-out” in English and Sakame (sah/kah/meh 逆目) in Japanese, which translates directly to “reverse grain.”

How Does the Chipbreaker Work?

Whether the handplane in question be Western or Japanese in design, the chipbreaker, aka “uragane” 裏金 (oo/rah/gah/neh) as it is called in Japan, seems at first glance to provide little benefit in exchange for the added weight and complication. Indeed, if all the cuts you make when planing wood are in the direction of the grain (id est fibers either oriented parallel with, or rising up to, the surface of the board and angled away from the direction of the cut), the chipbreaker will be about as useful as a frilly lace brassier on a boar. But wood grain is seldom so cooperative, donchano.

With the addition of the chipbreaker, and in combination with the three factors listed above, those contrary fibers that try to bridge and ride up the face of the blade without being severed immediately run smack dab into the abrupt face of the chipbreaker thereby bending and buckling them and preventing them from bridging and developing the lever arm necessary to break them off below the surface of the board.

At the same time the collision with the chipbreaker redirects many of these mischievous fibers into the cutting edge to be severed, thereby preventing, or at least reducing, nasty tearout.

Bless us and splash us, preciousss! What a wonderful counterintuitive thing!

To better understand how the chipbreaker works, I highly recommend Beloved Customers devour, like starving little piggies, the video titled “Influence of the Cap-iron on Hand Plane,” Created by Professor Yasunori Kawai and Honorary Professor Chutaro Kato, Faculty of Education, Art and Science, Yamagata University (with subtitles). Much will come into focus after watching this.

Downsides to the Chipbreaker

While your humble servant has written glowing things about the chipbreaker, I am not so foolish as to suggest all is blue bunnies and fairy farts because the chipbreaker has some downsides:

  1. The chipbreaker adds weight, complication and cost;
  2. The impact of wood fibers on the chipbreaker produces friction heat and consumes energy whether cutting with or against the grain. This energy loss is not insignificant;
  3. When cutting with the grain, the chipbreaker adds little benefit while tending to reduce the luster of the planed surface;
  4. To be effective, the chipbreaker must be setup, tuned, installed and maintained properly, requiring the user to have adequate knowledge and to put forth effort periodically.

Despite these downsides, your humble servant believes, as have millions of craftsmen over untold centuries, that the chipbreaker is a component worth mastering.

Alternatives to the Chipbreak

In light of the gains and losses associated with the chipbreaker, it would be short-sighted, indeed amateurish, to assume it is always necessary, and just as short-sighted and amateurish to assume it is never necessary. So let’s examine some alternatives next.

Alternative 1: No Chipbreaker

The first alternative to the chipbreaker we must consider is, of course, no chipbreaker at all. Indeed, if you always plane with the grain of the wood, and your plane has a sharp blade and tight mouth, as mentioned above the chipbreaker adds no value while only wasting energy. Indeed it may even reduce the quality of the finished surface’s appearance.

In the case of the Bailey pattern plane or other styles with cap irons and the chipbreaker and blade attached to each other by screws, using the plane without the chipbreaker is inconvenient. But in the case of Japanese plane, the chipbreaker can be easily and speedily removed without influencing the cutter. The resulting finish created by the plane may or may not be improved, but the force required to motivate the tool will absolutely decrease. Sadly, such cooperative wood can be elusive.

This is an excellent solution, one I highly recommend to Beloved Customers.

Alternative 2: High Bedding Angle Without a Chipbreaker

Another option with a long history worldwide is to install the cutting blade in the plane’s body at a higher bedding angle, perhaps 50~55˚+. Combined with a sharp blade, tight mouth and solid uniform contact/pressure between the board being planed and the area of the sole directly in front of the mouth opening, the more abrupt change in direction forced on shavings by this high-angle blade will then tend to buckle the long contrary fibers on its own without a chipbreaker. But no guarantees.

While a high bedding angle does indeed tend to reduce tearout, adding a chipbreaker is a more reliable way to further reduce tearout in woods with contrary grain even more.

The one undeniable downside to a high bedding angle is the extra energy one must always expend to motivate the plane.

Alternative 3: Bevel-up Handplanes Without a Chipbreaker

Another alternative is the “bevel-up” planes that have become popular in recent years. This style of plane is not a new solution. I own some and have used them, but other than the block plane versions, I regret falling prey to specious marketing claims spouted by shills. Losing all credibility sucks.

Amateurs like BU planes because parts are fewer, maintenance is easier, and the necessary skills one must acquire are fewer.

One gentleman boldly informed me that he believes bevel-up planes to be superior to all others because he would rather spend the time it takes to master the chipbreaker on making wooden objects instead. My mind boggled like a weasel binging on crystal meth….

Bevel-up planes work in exactly the same way high bedding-angle planes described in Alternative 2 above do by presenting a steeper angle for contrary fibers to climb causing them to either be severed or to buckle instead of tearing-out. This assumes, of course, that the blade is sharp, the mouth is tight and contact between the board being planed and the area of the sole directly in front of the mouth opening is uniform.

Sadly, the efficacy of this action is no more consistent than the high-angle blade without a chipbreaker discussed above.

The downside to the bevel-up plane is that the additional, more-consistent results afforded by a well-tuned chipbreaker are, like heaven’s pearly gates to a Shat Francisco politician, forever unattainable.

Alternative 4: Back-bevels

Another alternative is the quick and dirty back bevel applied to the ura or face side of the cutting edge, as discussed in a previous post. This works for the same reason the high-angle blade does, but it is not an effective long-term solution, and certainly qualifies as tool abuse in the case of Japanese handplanes IMHO. Consider yourself well and truly warned.

I highly recommend Beloved Customers use planes with chipbreakers and learn how to sharpen, properly setup, maintain, and adjust them for maximum results. It’s the way advanced professional woodworkers with real skills get the job done.

Keys to Making Chipbreakers Work Effectively

A naturally curved log shaped as a “Nijibari” rainbow beam at the main entrance to a Buddhist temple.

The following is a condensed list of tasks Beloved Customer needs to accomplish to get consistently good results from their chipbreakers. We will discuss all these items in greater detail in future articles in this series. I strongly encourage you to invest in yourself by developing the requisite skills:

  1. Fit the chipbreaker to the blade as lovey dovey as two newlyweds and so there is no gap between the cutting blade and extreme edge of the chipbreaker. This is not difficult to achieve, but the fit must be nearly perfect to prevent naughty shavings from wiggling between the blade and chipbreaker, because if they do get jammed in there, back-pressure will increase and the finished surface will look like poached crap on toast. We will discuss this more in the next post in this series;
  2. Fit the chipbreaker to both the plane’s body and retention rod so the chipbreaker will remain in-place;
  3. Grind a 70˚~80˚ striking bevel at the cutting edge of the chipbreaker to effectively buckle shavings. It doesn’t need to be a perfect bevel, and if it is rounded, that’s OK too. Yes, I know this seems ridiculously steep; If you don’t like it by all means experiment until your little pink heart sings, but after you’ve wasted a few months on hit-and-miss research, please remember that YMHOS toldjahso;
  4. Polish the chipbreaker’s striking bevel to reduce friction and prevent wood sap from building up on it too quickly. Re-polish it as necessary. If you pay attention to the condition of this abrupt bevel you will notice that it may actually become pitted from the heat and friction of the wood shavings, especially when planing wood containing hardish minerals. Total neglect will harm efficiency;
  5. Clean accumulated wood sap from the striking face regularly and oil it occasionally with your oilpot to reduce friction;
  6. If shavings tend to become stuck in the mouth, check to see that the chipbreaker is not so thick as to obstruct their smooth passage. If necessary, grind the chipbreaker thinner near the mouth and polish it to improve the flow of shavings;
  7. When you deem the chipbreaker to be necessary, install it as close as practical to the cutting edge. The ideal distance will depend on your plane, the wood you are cutting, and the depth of cut, but 0.5~0.8mm is usually a good place to start. I highly recommend you actively experiment to find the best distance. With practice it will become second nature. While it is not applicable to Japanese handplanes, Rhett Fulkerson of Nice Planes in Frankfort, Ky., has an intelligent technique for systematically setting chipbreakers and cap irons I find useful. LAP has an article about it here.

Conclusions

The chip breaker has been around a long time only because it consistently works.

In Japan, where the single-blade plane was the standard for hundreds of years, with the shift from riven lumber to more economical sawn lumber, the chipbreaker was added to the handplane, perhaps 150+ years ago, and remains in-use even today, solely because it consistently works.

The chip breaker won’t solve all your tearout problems, but it will definitely help on condition that you set it up and maintain it properly. It isn’t difficult and the results of doing so set the professional apart from the amateur.

In the next post in this swashbuckling tale of bare-chested Scottish warriors riding feather-footed war horses over the highlands to rescue buxom lassies clad in flowing gowns from evil leering Lords, we will describe in detail how to setup and maintain the awesome chip breaker. Don’t forget your kilt and claymore!

YMHOS

If you have questions or would like to learn more about our tools, please click the “Pricelist” link here or at the top of the page and use the “Contact Us” form located immediately below.

Please share your insights and comments with everyone in the form located further below labeled “Leave a Reply.” We aren’t evil Google, fascist facebook, thuggish Twitter or a manager of the Democrat Congressional IT team and so won’t sell, share, or profitably “misplace” your information. If I lie, may all my chipbreakers chip and fail.

← Back

Thank you for your response. ✨

Leave a comment

The Intelligent Chef: Cutting Boards

Government’s first duty is to protect the people, not run their lives.

President Ronald Reagan

This article is about the cutting board, a tool every household contains, but about which relatively few have given serious thought despite it’s constant role in our lives and the potentially huge negative health impacts it sometimes conceals.

Civilization’s Ultimate Tool: The Knife

Some anthropologists have asserted, and with good reason, that the food-preparation knife is not only the oldest, but the single most important tool ever invented by the human race, increasing populations, improving health and longevity, and saving many hours not only in harvesting food, but in making it edible, nutritional and safe to eat.

We will discuss kitchen knives in a separate post, but because a food-preparation knife without a cutting board is less than 100% effective, I will focus on cutting boards in this article.

Cutting Board Materials – Plastic vs. Wood

Allow your humble servant to begin this article by urging Gentle Readers to please use wooden cutting boards in their kitchens.

But before we dig into the engineering aspects of cutting boards, I would like to make an observation (maybe even a rant) about modern societal trends that have influenced health and safety laws. I beg your kind indulgence.

As I grow older I am constantly amazed at how many people are blithely immune to facts in both their private lives and public duties, and proud as a peacock of it. They demand that their uninformed opinions and personal biases be given precedence over both actual, verifiable evidence and the scientific method, and call anyone who disagrees with them fascist and/or anti-science. Talk about psychological projection.

A recent example of this tendency in the United States is the strange idea that requiring voters to provide personal ID when voting is both unnecessary and “obviously” voter suppression, implying that minorities are either too lazy or too stupid to obtain a personal ID card, an insulting, racist, and demonstrably false supposition. Anyone who made such an assertion 20 years ago would have been universally viewed as either corrupt or mentally deranged. What does it mean that, during the last 4~6 years, top leaders of the US Congress and Senate as well as the top executives of major corporations routinely insist this strange concept should govern elections?

Plantation politics aside, some health professionals blame this form of brain damage on social media, but it is an unfortunate tendency that was around even before Twitter and facebook.

What people believe in their private lives is up to them, but to allow such tendencies to rule public policy and determine regulations with possible health and penal consequences is a big step back towards barbarism, IMHO.

Sorry, I almost fell of that damned soapbox and broke my silly neck again! Back to the subject at hand.

I am fully aware that many governmental health agencies in advanced countries around the world require commercial kitchens to use non-porous cutting boards made of plastic, HDPE (high-density polyethelene) or other synthetic materials. Like much of what is claimed to be hard scientific fact nowadays by incompetent, lazy, illiterate, irresponsible, unaccountable bureaucrats who then make regulations with teeth based on their poor understanding of unverified results produced contrary to the scientific method, the ban on wooden cutting boards too is based on nothing more than a casual supposition rather than verifiable facts.

This webpage summarizes this fubar beyond all doubt.

Your humble servant first became aware of this cutting board contradiction when I asked sushi chefs in Tokyo some years ago why they used wooden cutting boards in full view of customers instead of the more sterile-looking white plastic boards seen in the commercial kitchens I had constructed over the years. Their response was eye-opening.

Their first point was that wooden cutting boards are easier on the cutting edges of their valuable knives keeping them sharper longer. That makes perfect sense, depending on the wood, of course.

Their second point, that wood is simply more sanitary than plastic, shocked me.

Now I know for a fact that the Japanese health agencies that regulate commercial kitchens are very strict about food safety, and that compliance costs commercial kitchens tons of money for special health & safety related equipment. I also know that most commercial kitchens in Japan do indeed use HDPE cutting boards. So why would sushi restaurants that serve raw fish and shellfish be different?

During subsequent conversations over several years with government health agencies, kitchen designers and subcontractors involved in obtaining kitchen permits and inspections for my construction projects, I asked them this same question. One gentleman responded by showing me the studies that formed the basis for health regulations for cutting boards. I have since done more research.

The essence of the concern about the safety of cutting boards in general is that liquids and particles of food, along with bacteria scrambling around on those foods and floating in the air in even the cleanest kitchen, not only spread over the surface of a cutting board in-use, but soak into the many cuts left by knife blades. In the case of wood, these may soak into the wood fibers too. Yuck, right?

Whether made of plastic or wood, liquids, particles and bugs can and do interact on the board’s surface where bugs make lots of baby bugs. Yes, that’s right: bug orgies on your cutting board! Double yuck!!

If the surface of the board is left wet and dirty for long, bacteria can multiply to dangerous levels to contaminate foods placed on the cutting board and later consumed causing food poisoning. BTW, most cases of food poisoning occur when eating out.

Try as we may, we cannot escape microbes and viruses entirely. They contaminate the surface of cutting boards regardless of both our caution and the cutting board material. The only workable solution to the sometimes lethal danger bacteria and viruses pose, short of working under burning UV lights, irradiating all foodstuffs with Gama rays (yes, that’s a real thing) and working in a cleanroom periodically drenched with caustic anti-bacterial chemicals, is to limit their numbers and their growth so we can avoid ingesting more than our immune systems can safely deal with.

The misunderstanding that became the basis for health regulations in some areas outlawing wooden cutting boards in commercial kitchens started honestly enough with the observation that bacteria find their way into cuts below the surface of cutting boards and can potentially increase to dangerous levels. But the undeniable fact is that the researchers who made this common-sense observation had been testing non-porous materials, not wood. Their reason for objecting to wooden cutting boards was based on an assumption, which they did not bother to check, that because wood is more porous than plastic, the bacterial infestation in wooden cutting boards must of course be much much worse than plastic. Easy enough to check, and many more careful researchers have soundly refuted this conclusion since, but the myth still stands. Government health agencies (bureaucrats, every one) responsible for making kitchen regulations took this supposition at face value without bothering to consider more competent research. The earth is flat because, well…, it makes sense.

To make wise decisions about materials, responsible and intelligent people always obtain a sound understanding of the materials in question, something the advocates of plastic cutting boards fail to consider. So let us bravely examine plastic cutting boards and wooden cutting boards from a microbe’s eye view.

The first difference between plastic and wood is nothing less than a miracle of nature. Wood comes from trees which are, functionally, big waterpumps reaching up into the sky. Therefore, unlike plastic, which started life as black sludge deep in the earth, living wood spends its entire life both wet and exposed to soil, fungi and bacteria. God designed trees and wood specifically to be resistant to fungi and bacteria, producing chemicals to fight them off. Even many years after a tree has been turned into lumber, these chemicals remain more or less effective at killing and preventing the growth of microbes that cause food poisoning too. Microbes are offended by trees with such noxious flavors, and rightly so. I like my wood spicy. What about you?

Does plastic contain chemicals unpleasant to microbes? No, not unless someone applies them. Tabasco Sauce is a proven antimicrobial, BTW, although I am not suggesting Gentle Readers douse their plastic cutting boards with it, unless they REALLY like spicy flavors, a sure sign of a warm personality. (ツ)

There are of course antimicrobial chemicals, such as silver colloid compounds used in many medicinal antiseptic compounds, that can be added to plastics to control bacterial growth for a time, but you don’t want them in your food.

The second difference between wood and plastic is found in the very structure of wood, because the cellulose tubes that make up wood are designed specifically for transporting water. Consequently, liquids that enter the wood through knife cuts naturally tend to be wicked away to the surface of the wood and dry relatively quickly denying bacteria the moisture they need to grow out of control. The result is that bacteria in the knife-cuts in wooden cutting boards do not survive long, much less grow to dangerous levels. This assumes standard cleaning and maintenance, of course.

But wait a minute now. Plastic cutting boards dry out too right? Of course they do, but the sucky reality is that, while the surface of a plastic cutting board may be dry, the liquids, food particles, and bacteria inside the knife cuts, having fewer avenues for evaporation and/or dispersion than wood provides, remain wet for much much longer forming a pleasant environment for bacteria to continue their bug orgies and enjoy water sports. The Salmonella Water Polo Team not only kicks ass but is super horny! Goooo Salmo-!!

To eliminate bacteria inside cuts in plastic cutting boards one must either soak boards in chemicals that will permeate all the way into the cuts to kill bacteria, such as chlorine, or subject the board to high temperatures almost hot enough to melt the plastic. While they may make your teeth whiter and your breathe less dragon-like, do you think chlorine or other bactericides will improve the flavor of your favorite sushi or salad? Tabasco Sauce might, but chlorine won’t.

In addition, plastic boards are demonstrably harder on the cutting edges of knives, dulling them much quicker than wood does, an important factor for professionals.

Assuming proper cleanliness procedures are performed regularly, a wooden cutting board is better for your health, better for your knives and better for the flavor of your food.

The Bacteria Water Polo League and Your Cutting Board

Although we don’t like to think about it, the fact remains that the raw materials we make our meals from always contain bacteria, some more than others. This is why God gave humans stomach acid.

Heat kills bacteria too, which is why cooked food is much safer than raw food. Next time you belly-up to a salad bar in Bangkok, Beijing, or Acapulco, Gentle Reader, think about the sanitary nature of the water and fertilizer farmer Bui used to grow those raw veggies, and if a little heat might not be a good thing.

Chicken, beef, and pork are good examples of problematic foods because these domestic animals all live in feces-covered environments and have higher tolerances to microbes like Salmonella and E.coli than humans in advanced countries typically do. Chicken products from large industrial poultry farms are especially bad. Unfortunately, too frequently these killer fecal bacteria are transferred to meat and poultry when being processed.

According to WebMD, 83% of the chickens tested in a recent Consumer Reports investigation were contaminated with one or both of the leading bacterial causes of food-borne disease — salmonella and campylobacter. Most of this bacteria was found on the chicken’s skin. As someone who has repeatedly suffered painful and debilitating food poisoning from eating contaminated chicken, believe me, Fuzzy Freddie Nietzsche was absolutely wrong because, while salmonella poisoning may not kill you, it won’t make you stronger but will just make you wish you were dead. Seriously.

The Salmonella Water Polo Team kicking back between matches and orgies
The screwy Campylobacter Jejuni bacteria cause most food-poisoning cases.

What does all this have to do with cutting boards? Let’s take a common, real-world example.

Say you cut up a chicken for a barbecue using your favorite knife and cutting board. The heat of the grill will kill salmonella, but the bacteria on the chicken skin will have transferred to and remained on your cutting board (and knife) sure as eggses is eggses.

Now that the chicken is cut down to size, shall we slice some carrots and celery for a dip, and maybe cut some tomatoes, lettuce, cheese and ham for a salad? Sounds like a yummy plan.

But wait a second, Gentle Reader. Do you think the Salmonella Water-polo Team or the Campylobacter Dance Troupe left behind on the surface of the cutting board by that bird-brain chicken will have all died and gone to bug heaven during the two minutes you were getting the lettuce out of the fridge? Not so much. And will either group of lusty microbes call a time-out on the surface of board and refuse to transfer to the veggies you will cut on the same board and eat raw 20 minutes from now? See the problem?

There are three potential solutions to keep horny microbes under control. The first is to clean and sterilize cutting boards used to cut poultry or other meats with boiling water before using them to cut foods you will serve raw. I highly recommend this technique, and have made some proven suggestions below.

The second solution is to have two clean cutting boards on-hand, one for meat and one for veggies.

The third, more economical and space-saving solution is to have only a single cutting board but to designate one side dedicated for cutting meat and the opposite side for veggies and other foods that will be eaten raw. Not a perfect solution but it will help.

Wood Varieties for Cutting Boards

The Japanese are very particular about the taste of the food they eat. Indeed, they claim, and I wholeheartedly agree, that the steel of the knife used to prepare the food, and the sharpness of its blade, both impact the flavor of the food, especially foods eaten raw. This is something worth investigating for yourself if you hadn’t noticed it already.

It makes sense therefore, that the material the cutting board is made from can impart flavors good or bad to the food we prepare. So what are some good woods from the viewpoint of flavor, and why?

Hinoki Cypress

Many Japanese sushi chefs like cutting boards made of Hinoki wood, a type of cypress.

Hinoki is a beautiful, light-yellow colored wood that planes like no other wood in the world. It has a unique characteristic in that it reaches maximum strength approximately 300 years after being felled, which, when combined with the natural resistance of the wood to fungus and bugs, explains why Japanese temples and shrines last for so long. Amazing stuff.

It also contains essential oils that smell very pleasant, and make time spent in a Hinoki bathtub filled with hot water absolutely heavenly.

These preservative chemicals are effective at killing fungus and bacteria, but they also impart flavor to the food they touch, especially when a knife is making fine cuts releasing fresh volatile oils constantly. These essential oils compliment the flavors of rice and most varieties of fish used in sushi and sashimi. But not all foods.

And while Hinoki has layers of soft summer wood, it also has harder layers of winter wood that, while not as harmful to a knife’s cutting edge as is Douglas Fir, for example, are not ideal. So what are the other options in common professional use in Japan?

Willow

Willow wood is considered by many professional Japanese chefs to be the ideal wood for cutting boards. It is soft, easy on knives, and it has a neutral flavor.

Ginkgo Biloba Wood

A quarter-sawn cutting board of Ginkgo wood

Gingko Biloba, also called the Maidenhair tree because of the spreading shape of its leaves, is another wood popular with professional chefs for cutting boards. It is my favorite.

Called the ”Ginnan” or “Ichou” tree in Japanese and written 銀杏 in Chinese characters, it’s the official symbol of Japan’s capital city of Tokyo and is planted along many city streets in part because it is hardy, beautiful, and quite resistant to urban pollution. It’s also the symbol of the Japanese university where I earned my graduate degree, and is included in the logo mark of C&S Tools

Despite being a huge deciduous tree, Ginkgo wood has a uniform grain with little difference between summer and winter wood, a feature that helps keep knives sharper longer. Its flavor is neutral. In fact, its cells naturally contain flavonoids (polyphenolic secondary metabolites) that are effective at reducing odors, rare in woods, and especially suited to food preparation involving strongly aromatic food ingredients such as garlic.

Ginkgo, Willow and Hinoki are the three woods Japanese professional chefs prefer for their cutting boards. We carry cutting boards made from Ginkgo wood, and highly recommend them based on many years of direct experience.

Cutting Board Maintenance

There are two aspects of maintenance Gentle Readers should consider. The first is keeping the cutting board clean and sanitary, and the second is keeping it relatively flat.

Cleaning and Disinfecting a Cutting Board

Obviously we need to keep our cutting boards clean and free of nasty bugs if we are to avoid tummy aches, diarrhea, expensive visits to hospitals or those time consuming funerals, but there is more to proper maintenance and keeping them free of dangerous microbes than wiping them down after each use.

Unless your wooden cutting board becomes covered with oily, greasy stuff, don’t wash it with detergents or scrub it with cleansers. Detergents remove the natural chemicals in the wood that control bacteria. Cleansers do too, but they are much nastier because the hard particles they contain can become embedded in the wood dulling your precious knives and adding unpleasant chemicals to your food for a long time. This applies to plastic cutting boards too.

The best way to clean a cutting board of any variety is to wash it under running water while scrubbing it with a brush, and then stand it on-edge exposed to sunlight to air-dry. Running water combined with physical force is very effective. Air circulation is important when drying, as is sunlight.

I also recommend you pour boiling water on the board’s work surfaces after each use to sterilize them. Here is wisdom: While disinfectant chemical products packaged in colorful handy-dandy plastic bottles provide employment for thousands of marketing minions and make tons of cashy money for corporations, nothing you can safely use in a kitchen and combine with food is more effective at busting bacteria and violating viruses than boiling water. Nothing.

Just place the board in the sink with one end elevated an inch or so to help it drain, and pour boiling hot water over it from a pot or tea kettle. Turn it over and repeat. Don’t dry it by wiping it with a cloth or paper towel, just let it air dry because any cloth you use will be less sanitary than the board is now. Nothing beats hot water or steam for open-air sterilization purposes.

Some people like to oil their cutting boards. Not a good idea, IMHO, because oil makes airborne dust and bugs stick to the cutting board.

Never use any wood finishes on a cutting board because the chemicals they contain are seldom safe to ingest, which you will.

If you don’t plan to use the board for more than a few days, wrap it in a clean cloth or clean fresh newspaper to keep dust and other contaminants off while allowing the wood to dry.

Flattening a Cutting Board

If you use knives on your cutting board, eventually it will become hollowed-out in the center, much like a sharpening stone. A hollowed-out cutting board makes it harder to cut foodstuffs quickly and cleanly.

Yet another advantage of the wooden cutting board is that you can re-flatten its surface and make it absolutely pristine with just a few passes of a handplane, making it once again a pretty, happy tool. Try that with a slab of plastic.

If you have a few minutes here’s an experiment you will find interesting. Use a hand plane to true the face of one wooden cutting board. Then use a belt sander or other abrasive tool to true the face of another. Then gently place a single drop of water in the center of each board at the same time. You will notice that the water drop stands proud of the surface of the planed board, while it quickly soaks into the rough, hairy surface of the sanded board. Which surface do you think stays cleaner and is less inviting to the Salmonella Water Polo Team?

And which surface has more knife-dulling, tooth-wearing abrasive grit embedded in it?

Cutting board maintenance is a good reason for owning and using handplanes even She Who Must Be Obeyed can appreciate.

Here’s how to efficiently flatten your cutting board. You will need a straightedge at least as long as the board, a handplane, a marking gauge, and a carpenter’s pencil.

You don’t want to unduly reduce the useful life-span of your cutting board, so plan your work to return the board to uniform thickness if you can. Examine the ends and sides of the board. Is it uniform thickness on the edges? Many are not.

Use your straightedge to sight the length, width and diagonals of the board, noting where depressed areas are.

Use your pencil to cross-hatch the surface of the board to help you check your progress. Remember to plane the high spots first and avoid the low spots until they are only a wood shaving’s thickness lower than the higher areas. While planing, periodically check the board using your straightedge and apply more graphite cross-hatching.

Once you have one side flat, use a marking gauge to mark the target thickness of the board on its edges. A guestimate of this thickness is fine, but if you want to get a precise measurement, fit feeler gauges between the straightedge and the lowest depressed area, and mark this thickness on the board’s sides and ends using a marking gauge.

I know it’s tempting to just shave wood as fast as you can, but with a little bit of examination, planning and layout, your cutting board will look and cut better and last a lot longer.

Or, if you have an electric thickness planer, knock yourself out. But carefully.

Conclusion

I will end this article with a question: In the case of cutting boards, which material is healthier, tastes better, is easier on expensive kitchen knives, more biodegradable, requires less energy and releases fewer carbon emissions to produce, and is more sustainable – petroleum products or wood?

YMHOS

PS: We carry a special line of Ginkgo wood cutting boards. These are solid wood, not laminated. Most are quartersawn for stability. They make a great gift. If you would like to give one a try, please let us know in the “Contact Us” form below.

An avenue of Ginkgo trees at night in Tokyo

If you have questions or would like to learn more about our tools, please click the “Pricelist” link here or at the top of the page and use the “Contact Us” form located immediately below.

Please share your insights and comments with everyone in the form located further below labeled “Leave a Reply.” We aren’t evil Google, fascist facebook, or thuggish Twitter and so won’t sell, share, or profitably “misplace” your information. If I lie, may the Salmonella Water Polo Team forever have icky orgies in my cereal bowl.

← Back

Thank you for your response. ✨

Leave a comment

The Marking Knife

A spearpoint marking knife

“Make sure that you always have the right tools for the job. It’s no use trying to eat a steak with a teaspoon and a straw.” 

Anthony T. Hincks

There are many varieties of marking knives used for woodworking around the world. In this article your humble servant would like to discuss the Japanese version.

Let’s will begin with some definitions, followed by an explanation of the design details and structure of the tool.

We’ll save the best for last by presenting two subtle but effective professional modifications to improve the tool’s performance and possibly even the quality of the results produced Beloved Customer might deign to employ.

Definitions

The Japanese marking knife is called a “shiragaki” or sometimes “shirabiki” in the Japanese language. Don’t bother looking it up in a dictionary, though. The characters used vary, but can translate directly to “white pull” (白引き), which makes some sense, or “white persimmon” (白柿), which makes little sense, so I suppose the persimmon character is used as a phonetic substitute for “kaki” (書き) which means to write. I choose to write the word as 白書 so the Kanji translate directly to “white writing.” That makes more sense to me.

Such confusing substitutions are all too common in the Japanese language in the case of words with purely phonetic origins. The fact is that, much like psychologists, lawyers, and priests, the Japanese people almost perversely enjoy confusing terminology. It’s an ancient habit that probably won’t change soon. I say this as someone that has been reading, writing and speaking the Japanese language at graduate school level for 45 years, been a resident of, attended school and worked in Japan for 30+ years, and been married to a Japanese woman and had Japanese relatives for 44 years. I can get into serious trouble in the Japanese language.

Now that we are done with the Japanese language lesson, I will simply call this tool a “marking knife.”

Purpose of the Marking Knife

Precise and speedy layout is an essential aspect of executing quality woodworking. “Layout” in this case refers to the task of making lines in the material being worked, whether it be wood, steel, glass, stone, concrete, asphalt or even dirt, indicating where items such as walls or foundations are to be constructed, cuts are to be made, and joints between components are to be aligned. It often, but not always, involves transferring dimensions and intersections of lines shown in drawings, or existing in the craftsman’s head, to the material to be worked. The quality of the final product depends heavily on the quality of the craftsman’s efforts in layout, which is why the job of layout was historically assigned to the most experienced craftsmen worldwide.

In Japanese this process is called “sumitsuke” 墨付け, which translates to “marking with ink,” a term more easily understood than “layout” IMHO. The term springs no doubt from the Asian tradition of using black/red ink and inklines to mark layout. This article will focus on the marking knife used in laying-out joints in wood.

The Japanese marking knife is a bladed tool made of iron and steel used to cut thin, precise layout lines in a board’s surface, most often but not always at a 90 ° angle to the direction of the wood grain.

Every woodworking tradition I am aware of includes the marking knife, and regardless of their preferred style, anyone serious about woodworking will own at least one, and know how to use it.

Advantages of the Marking Knife

The marking knife has distinct advantages over other methods of marking a line more-or-less perpendicular to the direction of the wood grain. Here are a few:

  1. The line it makes can be as thin as the edge of nothing, achieving precision unapproachable by pencils, pens, scribes, sumisashi, inklines, chalklines, laser-sights, or even wishful thinking for layout in wood in the case of lines at more-or-less 90˚ to the direction of the grain. The line it makes, however, is not as easy to see as an ink or even pencil line, so it is not always useful for rough layout work;
  2. The layout line cut by a marking knife penetrates the wood’s surface providing a physical place into which the woodworker can index the edge of his chisel, or nicker of his plow plane or rabbet plane, or the teeth of his saw, or points of his divider quickly, precisely and confidently without relying heavily on Mark-1 Eyeball, improving the efficiency and quality of both his layout and fabrication efforts. The resulting time savings, improvement in accuracy, and reduced eye strain this indexing effect provides are absolutely huge.
  3. When making layout lines perpendicular to the grain of the wood on the faces of a member, such as a table apron, for instance, after making one line on the reference face, the remaining three lines can be indexed and extended from each other with a marking knife, confirming the accuracy of the member’s dimensions and ensuring the tenon shoulders will be sawed accurately creating an excellent tenon, assuming the craftsman knows how to use a saw properly, of course. This is a subtle but powerful technique.
  4. The line cut by a marking knife severs the fibers near the board’s surface helping to prevent fibers from being torn out of the board by the blades of saws, chisels or the even router bits leaving ragged, chipped edges.

Are you convinced yet?

Design & Materials

Shirabiki Ura by Konobu

There are many styles of marking knives used around the world, and your humble servant has tried most of them at one time or another, but none that I am aware of are as simple as, or functionally superior to, the Japanese version.

Lacking a pretty, turned handle and looking more like a blackened steel popsicle stick than a precision tool, the Japanese marking knife appears unfinished, even barbaric. But despite its stark appearance, it has a sophisticated design that employs superior metallurgical and blacksmithing techniques.

Like many Japanese woodworking tools, the professional-grade marking knife is made with a layer of hard high-carbon steel forming the cutting edge which is forge-welded to a softer layer of low-carbon steel comprising the body of the tool.

They are almost always flat, generally thin, and not especially wide tools. Perhaps 1/2 the length of one side is ground flat and bright. This surface is called the “ura.” A hollow-ground depression called the “uratsuki” is ground into the ura. The opposite side is plain and includes the cutting edge’s bevel.

Some marking knives, such as the photo at the top of this article, have a spear point or “kensaki” (剣先)meaning “sword point” which is convenient because the same knife can be used either left-handed or right-handed. It’s a logical and attractive feature that some people prefer, but in my experience it has limited usefulness. To each his own.

The demands on the marking knife in terms of sharpness, durability, and edge-holding capability are not as severe as for chisel and plane blades. The better-quality ones are hand-forged of high-carbon steel and quality jigane, properly shaped and filed, and carefully heat-treated.

Because of their thinness, marking knives tend to warp badly during heat treat, and consequently demand either a blacksmith with better than average skills or the use of high-alloy steels that warp little. Even experienced blacksmiths end up with a few rejects due to cracking and excess warpage, which perhaps explains the relatively high cost of handmade ones. It has mostly been a tool made by specialist blacksmiths, which is the case for those carried by C&S Tools.

For this reason, and because the performance demands on the cutting edge are not severe, Blue Label steel is entirely acceptable IMO. But ours are hand-forged from White Label Steel No.1.

The Ura

I mentioned the “ura” above, but let’s examine it a bit more. Ura is a Japanese word written using the Chinese character  浦. It means a bay or inlet from a lake or ocean, usually without rocks, and often with a sandy or gravelly shore. This word also means “depression,” as in a low area in a field, not the feeling your humble servant experiences when he sees his head in the mirror in the morning and remembers his once energetic head of hair in an afro do (ツ)。You can imagine why this word was employed to describe the hollow-ground depression in many Japanese woodworking blades.

In North America, similar curved surfaces and depressions were once said to be “swamped” even though they were made in metal. This term is obsolete nowadays.

The ura is what makes the Japanese marking knife superior to its Western counterparts for two reasons. The first reason is that the ura makes it easier to keep the hard layer of steel at the reference side of the blade flat, an important feature when using a knife for layout using a steel straightedge or square. Second, the ura makes it much quicker to accurately sharpen the blade and especially the extremely hard layer of high-carbon steel that forms the cutting edge.

Without the ura, the hard steel would be time consuming to sharpen and would tend to become rounded instead of remaining a flat reference face to index against a steel square or straightedge. It’s a subtle and clever design more sophisticated than its simple appearance suggests.

In use, the flat ura side is pressed lightly against the leg of a steel square with the point cutting lightly into the wood and the heel floating above. The blade is then pulled toward the user to cut a straight layout line.

Lubrication

I recommend Beloved Customer use an oilpot to lubricate the marking knife’s blade to reduce friction and wear between the blade and the straightedge or square, as well as friction between the cutting point and the wood. Not only will your square last longer, but your layout lines will be more accurate. Don’t believe me? Give it a try.

Marking knives are simple tools for a simple job, but there are a couple of subtle improvements some advanced Japanese craftsmen, especially joiners, make that Beloved Customer may want to consider.

1. Habiki

This first improvement is intended to minimize one downside of the marking knife, namely its tendency to shave metal from the square or straightedge used to guide it, shortening their useful lifespan and reducing their accuracy.

In Japanese this modification is called ” habiki “ 刃引き which translates directly to “blade pulling, ” as in pulling the blade’s cutting edge over a stone to intentionally dull it. It is a term borrowed from the Japanese sword world.

The steps to accomplish this modification are as follows:

  1. First, sharpen the blade;
  2. Then, with the tool’s ura side facing towards you, stand the blade vertically on the face of a medium grit waterstone, diamond stone, diamond plate or oilstone with its cutting edge resting on the stone. Adjust the position of the cutting edge on the stone so the last 2~3 millimeters of the blade, measured from the tip, hang off the stone’s side so the tip does not contact the stone;
  3. Finally, drag the blade towards you creating a flat on the cutting edge, while leaving 2~3mm of the blade’s tip sharp. A single light stroke will usually suffice. Voila.

The dulled portion of the cutting edge will now be less likely to shave your square or straightedge, while the sharp tip will cut the wood and make a pretty, accurate layout line, assuming you do your job, of course.

I know that the idea of sharpening a good blade and then intentionally dulling part of the cutting edge sounds gaga. In fact, when Honda-san showed it to me, I thought the old guy was pulling my leg, even though he didn’t ask for a nickle (ツ) or pass wind. But Honda-san was a nationally-recognized master among masters, a man in his 80’s who had been making extremely high-end custom joinery since he was 17 years old, one who took his tools extremely seriously, so although I was skeptical I wisely gave him the benefit of the doubt. In addition, he let me try his knife so I was quickly convinced.

Honda-san’s habiki technique works, so gather up your courage and give it a try before allowing your inner-troll to embarrass you. I promise you’ll like the results and your square will thank you.

2. Tip Bevel

The second modification is also one Honda-san taught me. There are several ways of doing it, but the essence is to grind an angled flat 15~18mm long  on the top edge of the blade’s side angled away from the ura, ending at the cutting edge’s point. The goal is to create a sharp “clipped” point at the meeting point of three surfaces or planes.

This angled flat has three purposes: First, it removes metal that would otherwise get in the way of your clearly seeing the knife’s cutting tip. This is important because often a marking knife must be indexed off a tiny mark left by a divider’s leg or a previous layout line, for instance when marking the shoulders of a tenon on four sides of a stick of wood. Removing this unnecessary metal will make it easier to both see and index the knife’s point, and begin the layout mark exactly where it is needed. The positive impact of this small modification on accuracy and speed cannot be overstated.

The second purpose is to reduce the friction between blade and wood when cutting a layout line, thereby improving control, like racing tires on a fast car.

And third, it provides a convenient place to rest your fingertip to better control the knife.

If you imagine this modification can’t make much of a difference, then your lack of experience is showing. How embarrassing >~(ツ)~<

Squares to Use With Marking Knives

Some prefer to use a wooden square for layout work, and others brass squares. Both work just fine with a marking knife until they don’t. A steel square is a big improvement over these two options, but Gentle Reader would be wise to consider using a hardened steel square, or better yet, a precision hardened stainless steel square with your Japanese marking knife. Anyone with eyes who has used a steel marking knife for layout for a period of time has observed that their layout square tends to become worn and lose precision with use as the marking knife gradually shaves metal from the square’s blade changing its shape. A hardened steel square will simply resist this wear longer. And a stainless steel square will resist rust from salty sweat better than plain steel.

There are hardened carbon steel and hardened stainless steel combination squares and die maker squares available on the market, but I think they are too bulky, clumsy and too costly for making simple 90° layout lines on wood, especially for furniture and joinery work.

Matsui Precision produces a series of excellent hardened stainless steel squares that are popular in Japan and which we carry. They are well worth the cost. I have been using them for years. Send me a note if you are interested.

The Japanese marking knife is a great tool. Once you use one, especially after making the modifications described herein, your confidence in your layout efforts as well as the precision of your joints will increase. Indeed, I daresay you will wonder how you ever got decent layout work done without one.

You can see the marking knife we carry at the link below.

C&S Tools Marking Knife

YMHOS

My old marking knife was hard on my eyes and fingers, but now I know how to fix it!

If you have questions or would like to learn more about our tools, please click the “Pricelist” link here or at the top of the page and use the “Contact Us” form located immediately below.

Please share your insights and comments with everyone in the form located further below labeled “Leave a Reply.” We aren’t evil Google or fascist facebook and so won’t sell, share, or profitably “misplace” your information. May my square warp and wiggle if I lie.

← Back

Thank you for your response. ✨

Leave a comment


Salt, Rice, Sake and a Prayer

Mother troll introducing her two handsome, well-dressed sons as suitors to a fairy princess. Impossible to choose between such handsome specimens!

But when the fairy sang the whole world listened to him. Stephen felt clouds pause in their passing; he felt sleeping hills shift and murmur; he felt cold mists dance. He understood for the first time that the world is not dumb at all, but merely waiting for someone to speak to it in a language it understands. In the fairy’s song the earth recognized the names by which it called itself.

Susanna Clarke, Jonathan Strange & Mr Norrell

Most of the articles at the C&S Tools blog are focused on how to select, maintain and use woodworking handtools. But in this article your humble servant would like to examine the relationship between supernatural influences and construction jobsite safety from a Japanese perspective.

We will also briefly examine a traditional way to deal with supernatural beings in order to increase both safety during construction and the welfare of those who will occupy the completed structure.

Gentle Readers involved in construction, either as customer or worker, may find this article informative and maybe even helpful.

Supernatural Beings

Your humble servant has often sensed unexplainable presences when alone in deep forests, high mountains, dark caves, and open deserts where human influence is absent. These irrational feelings may spring from an overactive imagination, or perhaps the gentle ministrations of a butter-fingered baby-sitter when I was small, but I’m not alone in my perceptions because humans in all parts of the world have felt similarly about certain places on the earth such as hills, groves, and caves since before recorded history. What about you?

So it’s not a surprise that the peoples occupying the heavily-forested islands of Japan have, since ancient times, believed that spirits reside in trees, hills, rocks, rivers and of course the ground. Indeed, Japan’s indigenous religion, called Shinto, which can be translated as “The Path of the Gods,” is a vague belief system lacking the systematic doctrine of most religions, being based almost entirely on this amorphous perception. It is no coincidence that Shinto has heavily influenced Japanese architecture and carpentry traditions.

If one believes that supernatural beings reside in trees, groves, mountains, water and even rocks, it’s not a stretch to believe that some of those beings, or spirits, are naughty and some are nice. Besides, the bad things that happen to us can’t all be blamed on Fortuna, right?

Since most people can neither see nor readily converse with these beings or spirits that don’t give a rodent’s ruddy fundament about what judges and lawyers do and say, how can we protect ourselves from their naughty tendencies, especially when human activities evoke their ire?

Indeed, it may be productive to consider what human activities piss-off vengeful supernatural beings in nature. Loud music, perhaps? Racism against pixies? Wearing socks with sandals? Nah, none of those. In the case of Japan it has been traditionally held that clearing and grubbing trees and vegetation and excavating soil for construction projects is asking for trouble from the supernatural beings that call such places home. Accidents, injuries and even deaths during construction work are believed to be a direct result of such activities, and the malevolent effects of PO’d spirits can make entire buildings dangerous, unhealthy and unlucky places both short-term and over the entire life of the building.

So how does one keep potentially dangerous spirits happy? In Japan a traditional approach is a ceremony called the Jichinsai.

Jichinsai Ceremony

The name of this common ceremony is pronounced jee/cheen/sah/ee, and is written 地鎮祭 in Chinese characters as used in Japan.

The first character 地, pronounced “Ji” or “Chi,” means ground or earth. The second character means “weight” as in “paper weight,” but it also means to “suppress” or “calm.” The last character is pronounced “sai” and can also be read “matsuri,” meaning ceremony or festival. One practical translation of this ceremony is “Earth-calming ceremony.”

There are records of Jichinsai being performed in Japan as early as AD 690.

I think I participated in my first Jichinsai in Japan in 1987. I have since attended many in Japan and even a couple more since then in the United States.

I like to think of the Jinchinsai as a ceremony to keep mischievous pixies sleepy and to hide the building and workers from Murphy’s attentions.

The Jichinsai ceremony is typically performed prior to the beginning of a construction project. Its goal is to show respect to and appease the local spirits, and thereby forestall them from seeking revenge for the contractor’s rude disruption of their happy homes.

The ceremony accomplishes these goals by first performing polite, formal greetings to the spirits, then providing offerings of food, booze and greeting to them, thereby showing proper respect, providing a bit of ritual theater for their entertainment, a few delicious tidbits to eat, some information about the construction plans, and a prayer asking for their protection or at least forbearance. Basically, salt, munchies, wine and flattery followed by a polite, well-phrased request, just like a good pickup line (except maybe the salt). (ツ)

Nowadays, this ceremony has been appropriated as an income-source by Shinto priests hired to conduct the ceremony, but it is neither Buddhist nor even Shinto in origin, having roots much older than formal religion.

Indeed, while priests saying theatrical prayers and dressed in silk brocade robes and wearing oh-so-goofy hats add to the pageantry, and they insist the efficacy, of the ceremony, in your humble servant’s opinion they add little but cost because, at its heart, the only true participants in the ceremony are the workmen who will perform the construction work, those who will live in or will use the completed building, and the spirits that reside in the vegetation and ground to be disturbed. But it is human nature to enjoy and even find meaning in pageantry. If not, the Academy Awards program would have been canceled years ago for being such a boring, preachy stinker. And besides, priests need work too. 

“Lord, what fools these mortals be!”

– The famous pixie (or fairy) Puck in Shakespeare’s play “A Midsummer Night’s Dream”

Indeed, if only the builder conducts and attends the ceremony, that is sufficient for purposes of promoting safety for himself and his workers during the construction work, although the Owner, if he doesn’t participate, could arguably miss out on some of the blessings possibly provided by the ceremony such as his safety, prosperity and good luck in using the land and building.

A Shinto priest dressed in silk robes, wooden shoes and lacquered hat conducting a Jichinsai ceremony for a corporate construction project. A specialist subcontractor has erected the tent and provided seating and props. Notice the wooden stand with offerings of salt, foods and wine, standing bamboo at the four corners, and Cleyera Japonica cuttings below and behind. At this point in the ceremony, the Priest has sung several prayers and scattered bits of paper around. The pile of sand in the foreground is still undisturbed, but towards the end of the ceremony the Client’s representatives will poke it with a wooden hoe to let the spirits know dirt work will start soon. The step-by-step program for the ceremony is listed on the board to the right. Participants in the ceremony are required to stand, clap hands, bow, drink a drop of demon rum and make plant offerings several times. It may seem serious, but it’s a deadly serious business.

Groundbreaking ceremonies have been around for a long time in other nations too. Nowadays in the West, they have degraded to a photo opportunity for publicity hounds like politicians and business owners, but the tradition of dedicating, blessing and/or sanctifying the ground upon which a building will stand has ancient roots in both Christian and Pagan traditions too. 

Nowadays most versions of the ceremony are centralized on a wooden table set up on the site where the building will be constructed surrounded by green bamboo cuttings stuck into the ground forming a square. A rope is strung around these poles and pieces of paper cut into a special pattern particular to Shinto ceremonies are hung from these ropes. 

Various offerings are placed on the table, always including at least rice, salt and sake. Some additional offerings might include products from the sea, such as fish, and products from the mountains, such as the various herbs and vegetables that supernatural beings like to nibble on. Fruits are often included as well, but no red meat.

The general contractor usually hosts the ceremony, sets the stage, makes other arrangements and pays the costs. Of course priests don’t work for free so the cost of the ceremony is included in the contractor’s construction contract amount, although it is seldom shown as a line item. Often, however, the GC will inquire before submitting his bid or tender if the Owner desires a Jinchinsai to ascertain if the cost should be included or not. 

I won’t go into all the details of what goes into a Jinchinsai because it would take months of research and a book I do not have the time to write.

The following links are to YouTube videos of an actual Jichinsai with all the trimmings. Video 1 Video 2

Why Perform a Jichinsai Ceremony?

I mentioned above that I do a lot of work for international corporate Clients in Japan. Indeed, Gentle Reader no doubt uses their products daily. These are corporations that are decidedly non-religious and are careful to avoid allowing religious influence to become apparent in their business dealings. So how do they justify spending money and time on a ceremony intended to deal with metaphysical influences? Your humble servant has given this some thought, and the reasons, as I understand them, are threefold: (1) Peace of mind; (2) Employee and Customer relations; and (3) Avoidance of blame. Reason 3 is indeed cynical. but is nonetheless entirely practical.

Let’s examine reasons 1 & 2 first.

After many millennia of belief, the local Japanese employees of even large international corporations have a fear of malevolent supernatural influences embedded in their DNA, so to actively reject a harmless, basically non-religious, non-controversial tradition intended to protect them may cause undue stress in some individuals.

You don’t believe me? Here’s a true story.

A Ghost Story

Some years ago my team and I were managing a two-phase construction project for a very wealthy and well-known international consumer electronics company.

Phase One included office fitout work and cleanroom construction (tenant improvements) in a leased space in a brand spankin new building located in Yokohama. Although the grade of the completed project was exceptionally high, it was just a temporary facility.

Phase Two, however, was the construction of a large, elegant, high-tech, structurally-advanced building intended for long-term operations. When completed it was without doubt the most beautiful and both technologically and environmentally advanced building in Japan, if I do say so myself.

The Client anticipated hiring hundreds of new engineers to work in both the Phase One and Phase Two spaces, but sadly hiring lagged far behind plan, so even though we had completed the construction work of the Phase One office spaces on-time and installed some nice office furniture too, it was mostly empty.

For many months after most of Phase One was complete, my team and I used the otherwise unoccupied, high-ceiling leased space as our workplace for the planning and design of Phase Two. Although it was full of new desks and furniture, it was a large, empty, lonely space.

This intense project involved working late into the evening far too often. An exceptionally diligent lady on my team I will call Naomi worked many evenings alone in these empty spaces. After a few months Naomi became seriously stressed and complained about hearing strange noises and feeling like she was being watched by unkind eyes. Even I thought the place felt creepy. Soon the entire team was feeling weird and stressed.

I took Naomi’s complaints seriously because, when it comes to workplace stress, perception is absolutely reality. And so I shifted our base of operations to a less-comfortable pre-fab jobsite office sooner than originally planned to get the team out of that spacious but creepy place. Problem solved.

Indeed, there may have been problematic influences on the leased building because, besides the hiring SNAFU, the Client’s operations in the building accomplished much less than planned. Indeed, serious and very unpleasant acrimony developed among the Client’s employees that occupied it. When the new building was completed, they too moved out of the leased space as soon as humanly possible.

We later learned from the general contractor that developed, constructed and owned the office building that it had been built smack dab on top of an old graveyard. Hmmmm.

Did I mention that the Client decided to not perform a Jinchinsai prior to fit-out construction at the leased space? Big mistake, maybe…

A Good Beginning

For the new building, however, the Client wisely decided they wanted to avoid the risk of not doing a Jichinsai, a decision that was welcomed by the general contractor, the thousands of workmen that were involved in its construction and the Owner’s employees.

Despite having 14 large crawler cranes lifting heavy stuff and drilling 200+ 70m deep piles, and 600+ heavy trucks carrying soil out of and concrete and materials into the extremely tight and dangerous site daily, and over 10,000 workmen on-site for months on end, we only experienced one injury when a sheet-metal worker cut his hand on some sharp metal scrap, and one accident when a careless iron-worker managed to start a small localized fire in some urethane concrete blankets with a cutting torch.

Another worker with a well-documented history of a bad ticker had a fatal heart attack on the way home one day, but that incident was ultimately deemed unrelated to the construction work.

This safety record was a miracle in my book. Was it a direct result of the Jichinsai? Who can say. I only know that if we hadn’t done the ceremony, and a serious accident or death had occurred on the job site, the Client would have been blamed for carelessly not performing the ceremony and the work would probably have suffered as a consequence.

And this illustrates the ultimate reason for conducting a Jichinsai ceremony: Better to be safe than sore. 

The Simplified Jichinsai

There are various approaches to pacifying possibly malevolent spirits. One is the full-blown Jichinsai ceremony, of course. Another is a simpler, humbler, and less-expensive version, because, after all, what the ceremony boils down to is a sincere offering of salt, rice and sake wine and a sincere request to the resident spirits for forbearance.

One such simplified example is quietly and routinely performed by either the general contractor or his steel erection subcontractor. They simply place a small mound of salt, another of uncooked rice, and a small cup of sake wine at the base of the first column erected, then the employees of the GC and/or the erection team offer a silent prayer. No muss, no fuss, no silly hats, but it’s still taken very seriously by the workers.

When I was a self-employed contractor, I would do something similar. Before beginning any excavation, I would politely place a small mound of salt, another of rice, and a small cup of local wine on the ground at what would later become the center of the completed building or renovation and leave it overnight. I would also lay a branch of the local vegetation, be it tree or bush, beside the offerings. Before leaving at the end of the day, I would offer a silent prayer to wherever, and to whoever might bother to listen, that the job would proceed without accident or injury to any workmen involved, and that the project would remain on-schedule and under-budget.

Did it work? I don’t know, but the only serious jobsite injuries and deaths I have experienced over the years have been where a Jichinsai of some sort was not performed. Cheaper insurance you will never find.

One Beloved Customer located in the Pacific Northwest of the United States Coast recently began construction on a small but elegant outbuilding using beautiful Port Orford Cedar wood with traditional and extremely intricate interlocking Japanese handcut joints and hand-planed finish, and natural stone foundations supporting hand-fitted posts.

The photos below are of his simple Jichinsai. No accidents or injuries so far!

YMHOS

If you have questions or would like to learn more about our tools, please click the “Pricelist” link here or at the top of the page and use the “Contact Us” form located immediately below.

Please share your insights and comments with everyone in the form located further below labeled “Leave a Reply.” We aren’t evil Google, fascist facebook, or thuggish Twitter and so won’t sell, share, or profitably “misplace” your information. If I lie, may tree spirits drop limbs on me from a great height.

← Back

Thank you for your response. ✨

Leave a comment

Japanese Handplanes – Part 4: The Marriage of Blade & Body

After tumbling down the rabbit hole, Alice discusses her options with her new friends Gryphon and Mock Turtle. After perusing this article, I hope Beloved Customer will be less discombobulated than poor Alice, less tearful than tender-hearted Mock Turtle, and less indignant than Noble Gryphon.

A Bruise Is A Lesson… And Each Lesson Makes Us Better.

George R.R. Martin, Syrio Forel, Game of Thrones,

In this the fourth article in our series about the Japanese hiraganna handplane, we will discuss how to fit the plane’s wooden body to the blade thereby improving the tool’s performance.

As is the case for most of the articles in this blog, this one too is intended primarily for the information and entertainment of our Beloved Customers, but all well-behaved Gentle Readers are welcome to partake. Bon apetit.

Why Fit Body to Blade?

Beloved Customers may wonder why your most humble and obedient servant is inflicting the digital world with another pointless article about Japanese planes, especially since the handplanes purveyed by C&S Tools are advertised as “ready to use” when new. Please allow me to address this absolutely valid concern herein.

As mentioned in the Part 3 of the Japanese Handplane Series, Mr. Inomoto, the daiuchi shokunin that cuts the bodies of our planes from Japanese White Oak to fit the blades forged and sharpened by Mr. Nakano, does indeed do more than just cut a gap for a blade to slot into, but fits the body to the blade so each plane is able to produce a decent shaving before it leaves his workshop. However, due to cost considerations and practical limitations to his prodigious prophetic talents and clairvoyant insights regarding who will eventually own each plane, and their preferences for the blade-body marriage, he fits the blade on the tight side, assuming the end-user will fettle the body to best suit his own purposes. Ergo the paragraph titled “Plane Philosophy” in Part 3.

I suspect relatively few Beloved Customers have given the subject serious thought, but it is nonetheless true that each owner of a Japanese plane must develop their own philosophy regarding the relationship between blade and body, and if they deem it necessary, adjust their plane body accordingly.

This article assumes Beloved Customer has decided to refine the fit between blade and body, and instructs in how to achieve those refinements. Are they absolutely necessary? Nah. Will they make a difference? Yes, but the degree of improvement achieved will vary from plane to plane and person to person.

Nonetheless, your humble servant recommends Beloved Customers, especially those interested in obtaining professional-level plane maintenance and usage skills, to perform the operations described in this and future articles in this series. You’ll be glad you did even if it may take some years for the benefits obtained to become evident. At the very least you may be fortunate enough to avoid the stupid mistakes YMHOS made when he was green.

So with that out of the way, let’s assemble the tools we will need to make some righteous sawdust.

Tools

The following is a list of tools I recommend for this job.

  1. Wooden, plastic or rawhide mallet for striking the blade and body;
  2. Carpenter’s pencil and/or marking pen;
  3. Masking tape to protect the wooden body from oily/graphity fingerprints;
  4. Caliper (vernier, dial or digital) and/or divider for measuring and comparing;
  5. Various chisels (e.g. 3mm, 6mm, 9mm usunomi paring chisels). Although it may seem strange, wider chisels are typically not necessary for this task.
  6. Metal file (to be modified) or a 15~18mm wide chisel (to be modified).
The tools needed for fitting the body to the blade. The chisel next to the digital caliper is an old Sorby chisel modified especially for working on plane beds and gifted to me by Chris Vandiver. Thanks, Chris.

Regarding the modified file or chisel listed above, this is a push scraper, a truly ancient tool once commonly used for precision metalwork. Your humble servant uses it to shave the bed to fit the blade. You can make this tool as wide as you wish, but please note that if the blade of either file or chisel is too wide, your shaving efforts may not produce smooth results.

You can easily make this scraping tool from a chisel or an old file by grinding a flat on the end of the file or cutting edge of the chisel square to the centerline of the blade and at an 80~90˚bevel angle. Then hone this square cutting edge and at least one of the two adjoining surfaces to 1000 grit. Voila.

If you adapt a file to make this tool you will want to attach a handle to its tang to avoid getting red sticky stuff on your pretty wood.

If you prefer to use a regular chisel, that’s OK too, but you will find this scraper does a cleaner job with less effort.

Blade Preparation

This explanation assumes the blade is sharp and the ura is in good shape. If not, please sharpen the blade because it will of course affect the fit of blade to body.

While you are at it, check that the side edges of the blade are free of burrs or rough grinder marks which might abrade the grooves after some use. Some grinder marks may be unavoidable, but if the sides feel rough and abrasive to the back of your hand, smooth the edges a little using a sander and/or sharpening stones.

In addition, please make sure the right and left clipped corners of the blade’s cutting edge, called “ears,” are properly trimmed, meaning that they are ground large enough to reduce the width of the sharp cutting edge so the cutting edge fills the width of the plane’s mouth but does not extend into the grooves, because if it does get into the grooves, shavings will become jammed between the blade and groove wasting your energy and leaving nasty scuff marks and sometimes even tracks on the planed surface. それは困る.

When sharpening a plane blade, therefore, it is important to check and trim these ears periodically. A few passes on a diamond plate or rough stone will do the job; It doesn’t need to be pretty, and the ears don’t need to be sharpened because they will never touch the surfaces to be planed.

The disassembled plane used as an example in this article, a 70mm finish plane with a Blue-label steel blade hand-forged by Mr. Nakano Takeo and a Japanese White Oak body by Mr. Inomoto Isao. An excellent tool.

Checking & Tuning the Mouth

Beloved Customers won’t need to worry about this, but Gentle Readers fettling plane bodies made by themselves or others should be careful the first time they adjust the blade’s cutting edge to project through the mouth to ensure there is adequate clearance because if the mouth isn’t wide enough to allow the cutting edge to pass through cleanly with a little clearance to spare, the blade may chip out the sole.

If there is any question about the adequacy of your plane’s mouth/blade clearance, the first time you extend the blade through the mouth press the plane sole-down on a piece of clean wood while tapping the head of the blade with your mallet to make a zero clearance cut at the mouth. The supporting board will prevent the mouth from chipping. This is also standard practice when opening the mouth of a new plane body.

Hold the plane up to a light and peer through the mouth to observe the gap between cutting edge and body. The width of this gap must be greater than zero, and it should be constant the full width of the blade, but how wide it needs to be will depend on the thickness of the shaving you intend to cut.

Ugly tear-out can be minimized and the polish of the planed surface increased by having a tight mouth. Indeed, the tightness of the mouth and the area of the sole directly in front of the mouth applying uniform pressure on the wooden surface being planed up to the last .001 millimeter in front of the mouth is critical for exceptionally fine tearout-free cuts. On the other hand a mouth gap that is too narrow to pass the intended thickness of shaving will jamb every time, so the user must balance the width of the mouth, the desired shaving thickness, and blade projection to obtain good results.

Here is wisdom: allowing shavings to repeatedly become tightly jammed in the mouth is not only hard on the blade, but it will damage the mouth, so before this happens too many times, you want to either adjust the mouth or your expectations for shaving thickness.

To open up or adjust the mouth, cut a hardwood guide block to use with a chisel to pare the mouth opening, and clamp it to the sole. The angle of the block will vary with the angle of the blade.

Then, using an exceptionally sharp paring chisel and this guide block, take minute shavings at the mouth using skewed strokes. A paring chisel with a three-hollow mitsuura ura is ideal for this task, but any sharp chisel with a longish blade will do the job.

Body Protection

This process will involve graphite pencils, marking pen ink and fingers, so to keep the wooden body from looking dirty, please cover the top and sides with a low-tack masking tape. In this example, I used a pretty pink tape.

Adjusting the Blade to the Mouth

As mentioned above, the blade fits into and is clamped in-place in the wooden body by the two tapered grooves cut into the body. Sometimes the fit between the side edges of the blade and the bottom of these grooves is too tight. This can occur in a new plane if the body was improperly cut to begin with, but the most common cause is shrinkage of the body due to humidity changes.

Of course, the wooden body will change dimensions with changes in ambient humidity, while the blade won’t. If a plane is shipped from a highly humid climate like Japan (at some times of the year) to a dry climate like the Mojave Desert (all times of the year), for example, the body may shrink in width developing tremendous pressure on the side edges of the blade, sometimes enough to crack or split the body. Therefore, if you are located in a dry climate and acquire a plane from a wetter climate, it may be wise to remove the blade and let the body acclimatize for a week or so.

As mentioned above, the blade is tapered in width, being wider at the head and narrowest near the cutting edge. This is intentional. Ideally, you want the side edges of the blade to just kiss the bottom of the grooves where they exit the top surface of the body, and not touch the bottom of the grooves anywhere else. This type of fit will make it easy to make minute right or left adjustments to the cutting edge’s projection by tapping the shoulders of the blade right or left.

Obviously (and this is an important point to understand), if both of the blade’s side edges are in close contact with the bottom of the grooves their full-length, this important method of adjustment will be no bueno.

Use your vernier, dial or digital caliper or mechanical divider to check that the blade does indeed become narrower in width from the point where it exits the grooves at the top surface of the body and the point where the cutting bevel begins. If it doesn’t, you will need to grind in some taper. How much? Mr. Nakano’s blades typically taper the amounts shown in the photos above, but they are handmade and each one is little different.

The distance measured between the blade grooves where the blade makes contact at the top of the grooves. Please notice that this distance is slightly greater than the width of the blade at this point as shown in the photo on the right above.

In any case, please ensure the body provides adequate clearance to just accommodate the blade’s width. Mark-1 Eyeball is often good enough for this task, but a divider is better and a caliper is ideal for this task.

Make a final check by applying marking pen ink to the sides of the blade 1cm down from where the blade would normally exit the grooves at the top surface of the body. More ink is not necessary.

If some paring of the grooves is necessary to provide adequate clearance, please remove no more wood than is absolutely necessary.

Remember that we want just a little clearance between the blade’s sides and the top of the grooves, as shown in the photos above, and more clearance at the bottom of the grooves to make it easy to adjust the blade’s projection from the mouth.

Groove Maintenance

A common problem we see with old planes is cracked and split bodies caused by the tapered blade becoming shorter over the years due to repeated sharpenings, and therefore the edges of the blade exerting excessive pressure on the bottom of the grooves when a careless user mercilessly pounds the blade into the body. This sort of damage is entirely avoidable by humans, but some gorillas advocate paring the bottom of the grooves of new planes to create a gap of 2~2.5mm between the groove and blade to accommodate all the reduction in length the blade may experience over many years of service at once. To this practice, your most humble and obedient servant can only respond “Poppycock!”

Why do I object to what seems to be a logical solution? Glad you asked.

If you chisel out a big gap between the side edges of the blade and bottom of the groove, not only will you unnecessarily weaken the body by severing continuous wood fibers at the narrowest, weakest, most critical point of the body (think about it real frikin hard), but the pivoting action required to adjust the blade’s projection right and left by tapping the head right and left will become more difficult, while at the same time the blade will become less stable in the body.

I write this based on bitter experience obtained from following bad advice received before I knew better, and later being mocked by more experienced craftsmen who noticed my silly error. An embarrassing episode indeed, one I was ashamed of for many years.

Beloved Customers will of course have purchased a high-quality plane from C&S Tools, with a blade hand-forged by Mr. Nakano Takeo and a Japanese White Oak body cut by Mr. Inomoto Isao, but just in case you are working on a lower-grade tool, here are some things you need to check.

The way to avoid body damage due to shrinkage of body or increase in blade width blade is simple: (1) Pay attention to the fit of the blade in the grooves; (2) Adjust the clearance when appropriate by either shaving the bottom of the blade retention grooves or grinding the blade’s side edges, and; (3) Avoid excessive use of recreational mushrooms which may dull the senses and cause chronic tool neglect.

In other words, when you notice the blade becoming tight in the grooves, simply grind/hone the blade a little narrower, or pare the bottom of the grooves a nat’s mustache hair deeper. Don’t get carried away because a little contact is a good thing!

Our 6mm and 3mm usunomi paring chisels are ideal for this job. but standard oiirenomi chisels can accomplish the task too.

Beloved Customer has the choice of learning from your humble servant’s stupid mistakes or from your own. Of course, I suppose there’s always the default option too many lost and wandering souls select through default of neglecting to learn anything at all…

Fitting the Bed to the Blade’s Back

Assuming Beloved Customer has completed the checks and adjustments in the previous sections, the general steps for fitting the bed to the blade are as follows:

  1. Begin by rubbing the back of the blade from where the cutting bevel begins to the end of the steel lamination with your carpenter’s pencil giving it a light coat of graphite. Marking pen ink or Dykem works too.
  2. Insert the blade into the grooves and tap it with your wood, plastic or rawhide metal mallet (egads, not a metal hammer!) until the cutting edge is nearly projecting from the mouth. You may need to really wack the blade hard 5~10 times to accomplish this the first time.
  3. Next remove the blade by holding the plane in your hand and alternating strikes on the right and left sides of the chamfer on the body behind the blade’s head. Don’t strike the flat end of the body! The blade should wiggle out after some less-than-gentle persuasion. If your plane doesn’t already have a pretty 6~8mm wide chamfer cut on this edge, please make one.
  4. Examine the bed. You will notice how areas in contact with the blade are now marked with graphite. We need to pare or scrape down these contact points to achieve a more uniform contact. Don’t fiddle with the grooves yet.
  5. Use your chisel or scraper tool to carefully shave down the high spots marked with graphite. Cut/scrape only those areas marked with graphite. Before you begin making sawdust, however, please be careful to not remove any wood from any of the three surfaces inside each side groove (blade retention groove) for now. You need to sneak up on the final shape of the bed like a kitten stalking a grasshopper, with eyes wide open, gently and a little bit at a time. Be careful not to twitch your tail! It would be a serious mistake to try to make a perfect fit after only a few passes.
  6. Repeat steps 2~5. You may need to do this kitten stalk 10 times to get it right. You won’t need to apply more graphite each time, just rub the back with a piece of cloth to redistribute the graphite. Or you can use your carpenter’s pencil again. With each iteration, the graphite marks left on the bed will increase in number and become larger. You want to be able to seat the plane blade with only three or four medium strikes with your mallet, and make fine adjustments with just a few more. At no time should your plane squeal a complaint.
  7. When the blade can be easily seated with 3 or four medium wacks of your mallet, use a metal file to lightly smooth out the rest of the bed. Perfection is neither attainable nor should it be sought.
The bed before applying graphite and any shaving. Mr. Inomoto Isao does a nice job, so contact is good, but still tighter than I prefer. The No.13 you see in this photo is a mark he made to keep blade and body matched. Notice the “tsutsumi” shelf cut at the bed just inside the mouth. This is a nice, pretty detail that aids in preventing the blade from “sniping” the ends of narrow boards, but sometimes it gets in the way, and after much use, it becomes so thin it must be removed. While a nice, useful feature, it is neither critical nor sacred.
The back of the blade has been rubbed with a graphite pencil, and is being tapped into the body. It takes some forceful strikes to get it into position. Notice the purty-pink low-tack masking tape applied to the body to help keep it free of graphity fingerprints. My planes seem to appreciate brighter, feminine colors.
Graphite marks left on the bed from the first insertion of the blade. Not terrible, but contact could be better.
Shaving the bed with a scraper chisel the first time
Shaving the bed with a scraper chisel after the blade was seated a second time
The bed after shaving it the third time.
The completed bed following final cleanup with a file. The blade can be inserted with three medium mallet strikes, and fine adjustments made in 3~4 strikes. The blade does not tend to twist out of alignment. Notice the graphite marks left on the tsutsumi shelf where the blade has contacted it.

The Peppermint Twist

Now that the bed is fitted to the blade, we need to return our attention to the grooves.

If one groove is pinching the blade significantly more than the other, the blade will want to twist out of alignment. This can be very irritating.

The surfaces inside the grooves touching the ura and back of the blade should be clean and straight. In any case, unless it causes a serious performance problem, it’s best to leave these surfaces alone for a while because after inserting and removing the blade several times the fit may improve automatically.

If the blade continues to twist out of alignment, however, determine where the high points are on the surface of the groove touching the blade’s ura. You can do this by peering into and through the mouth while shining a light into the groove.

Once you have identified the high spot(s) glue a piece of fine sandpaper to a thin stick of wood and sand it down a little bit at a time between inserting and removing the blade frequently to check the fit.

Don’t sand down the surface inside the groove which contacts the blade’s back unless absolutely necessary because this will effectively open up the mouth, something we want to avoid for as long as possible.

With this, your plane’s hard, sharp blade and soft wooden body should fit together like hand in glove. It may sound like a lot of work, but it usually isn’t. In fact, besides prepping the blade, the whole process can usually be completed in less time than it takes to read about it.

So far in this series your humble servant has provided a lot more detail and explanation than I have ever seen in writing elsewhere. It took me many years of fumbling in the dark, much consultation with older, more experienced craftsmen, no few curses and ungentle slaps to the back of the head, and numerous expensive mistakes to learn these things. I hope Beloved Customer profits from them.

In the next post in this ongoing adventure towards the perfect Japanese handplane we will shift our attention to marrying the chipbreaker (uragane 裏金) to the blade.

Y’all come back now, y’hear.

YMHOS

Alice asking advice of a caterpillar sitting on a magic mushroom, smoking magic mushroom. This nasty habit is perhaps the reason why this solitary bug is never described in the story as having skill with a handplane.

If you have questions or would like to learn more about our tools, please click the “Pricelist” link here or at the top of the page and use the “Contact Us” form located immediately below.

Please share your insights and comments with everyone in the form located further below labeled “Leave a Reply.” We aren’t evil Google, fascist facebook, or thuggish Twitter and so won’t sell, share, or profitably “misplace” your information. If I lie, may the ears of all my plane blades become clogged with wax.

← Back

Thank you for your response. ✨

Leave a comment

Other Posts in the Japanese Handplane Series:

Japanese Handplanes – Part 3: The Blade Itself

A beautiful and even poetic plane blade forged by the famous Chiyozuru Korehide. The carved inscription reads ”Shin, Un, Mu” meaning “God, Cloud, Dream.”

The best steel doesn’t always shine the brightest.

Joe Abercrombie, The Blade Itself

n this the third article in our series about the Japanese hiraganna handplane your most humble and obedient servant will review some of the design details of the iron and steel laminated plane blade. Why? Because to become proficient at using and maintaining the Japanese handplane, one must understand it more than just superficially, indeed, a healthy and mutually respectful relationship should be Beloved Customer’s goal.

In addition, I will be so bold as to briefly present the story of a single plane blade made for a famous carpenter by a famous blacksmith.

The Shin Un Mu Blade 神雲夢の刃

The plane blade pictured at the top of this article was forged 6 years after the end of World War II by a famous Tokyo blacksmith named Kato Hiroshi (加藤 廣 1874~1957), who used the nom de forge of Chiyozuru Korehide, (千代鶴是秀 ). The Chiyozuru name has been copyrighted and is still in use to this day, although the current holders of the rights to the name are unworthy to even pour Mr. Kato a beer, if Mr. Kato was still a drinking man.

Chiyozuru-san forged this blade at the request of a famous Tokyo carpenter named Nomura Sadao. The engraving on the back states the blade (and matching chipbreaker) was made by him for by Mr. Kato completed on June 4, 1951. I’m told Chiyozuru-san charged Nomura-san ¥10,000, a huge amount back in the day.

You will notice that it looks different from most plane blades in that it lacks the beveled “ears” at the right and left corners of the blade’s cutting edge commonly seen in Japanese plane blades intended to prevent the cutting edge from extending into the grooves on each side of the blade opening used to retain the wedge-shaped blade in-place thereby preventing wood shavings from becoming jammed between the groove and blade leaving unsightly marks on the surface of the wood being planed. More on this below.

The blade in question, however, has rabbets cut into the jigane at the left and right edges of the blade so the ura area is thicker than the sides which fit into the retaining grooves, and the cutting edge, therefore, does not intrude into the grooves, making beveled ears unnecessary. This is a very logical solution, although as it was explained to me by Tsuchida Noboru-san, it was not actually invented by either Chiyozuru-san or Nomura-san, but a design Nomura-san first observed at a technical school for cabinetmakers. He then made a wooden full-scale model and asked Chiyozuru-san to forge it for him.

While it is an elegant solution to a real performance issue, it is much more difficult to make this style of blade than the conventional one, and so never became popular.

On the subject of materials, Chiyozuru is well known for preferring to use imported steel, mostly from England, instead of traditional domestic Tamahagane steel. Although the source of the soft jigane is uncertain, there can be no doubt the steel lamination is made of British high-carbon steel.

Gentle Readers are no doubt aware that Japan has always been a land of many disasters, some man-made and others natural, with earthquakes and city-destroying fires being especially common. To protect this important blade from becoming lost to posterity, as were so many valuable things during the war, upon his retirement Nomura-san entrusted the blade to the Takenaka Carpentry Tools Museum located in Kobe, Japan.

Ironically, a large earthquake struck Kobe on January 17, 1995 killing over 6,400 people and tearing the city a new one. Fortunately, while the museum’s exhibits were jumbled up, this blade was not damaged.

Upon Nomura-san’s reassignment to the big lumberyard in the sky, his heirs formally donated the blade to the same museum where it remains to this day.

The four Chinese characters engraved into the face of the blade read, from top down, 神雲夢, pronounced “Shin, Un, Mu” which translates directly into English as “God, Cloud, Dream.” No doubt there is some deep poetic meaning being expressed through these three characters, but it is far above the poor understanding of your humble, barely-literate servant.

Interpretations from Beloved Customers and Gentle Readers are welcome.

Definition of Fettle

While we are on the subject of literacy, I would like to clarify the meaning of a word pertaining to working on tools, and especially planes.

Gentle readers have no doubt heard the word “fettle” used in the phrase “fine fettle,” usually referring to someone being in good health or physical condition. But it has other, older meanings.

In the British dialect, it means “to set in order,” or “to get ready,” from Middle English fetlen to shape, prepare; perhaps akin to Old English fetian to fetch.

Your humble servant commonly uses the word fettle as a verb, mostly for truing or adjusting a plane or other tool.

Never let it be said that the Gentle Readers of the C&S Tools blog are less than exquisitely erudite and thoroughly edumacated.

Blade Details

Misunderstandings abound and deep, pungent rivers of BS frequently burst their banks when the details of the Japanese hiraganna plane’s blade are discussed; Buckets, mops and even garbage pumps are necessary to clean up the mess. I despair: What to do, what to do?

While it appears to be a simple, crude, even haphazard component to the uninformed, the design of a well-made plane blade is subtle and its execution elegant. I am confident Beloved Customers willing to ignore ridiculous internet rumor along with the squeals, grunts and felonious farts emanating from the orc-infested woodworking forums, and able to forego magic mushrooms for a time will quickly understand. So without further ado, let’s turn on the pumps and get our mops amovin.

Laminated Construction

The plane’s blade is made by forge-weld laminating a piece of hard high-carbon steel to a larger piece of softer low/no carbon steel/iron. These details are discussed in more detail in the two posts linked to below. It is important to understand these details if Beloved Customer intends to become skillful in using and maintaining Japanese planes.

Sharpening Part 8 – Soft Iron 地金

Sharpening Part 9 – Hard Steel & Soft Iron 鍛接

The Ura

The blades of quality Japanese chisels and planes have a hollow-ground area on the surface of the blade called the “flat” in the case of Western planes. In the case of plane blades, it is located on the surface your humble servant calls the “face,” which is oriented upwards facing the user when installed in the body. An accurate understanding of this structural detail is essential to using and maintaining the Japanese handplane. We discussed this detail in a previous article linked to below. Please review this post if you haven’t done so previously.

Sharpening Part 10 – The Ura 浦

We discussed how to perform periodical maintenance on the ura in an earlier post. Oh joy!

The face of another plane blade by Chiyozuru Korehide engraved with many of the brands he used during his career. His Korehide brand is the the lozenge-shaped mark at the lower left. It has a sweet, sculptural ura.

Blade Retention

It is essential to understand that the blade of the Japanese handplane is retained in its wooden body by friction produced by the pinching action on the face and back (top and bottom surfaces) of the blade inside the tapered grooves cut into each side of the mouth opening, NOT pressure on the side edges, nor pressure on the back of the blade. This arrangement eliminates the dedicated wedges, usually made of wood, employed since at least Roman times to retain the blades of Western planes. It also makes irrelevant the screws and linkage common to modern planes such as the Bailey-pattern, considered by many to be the pinnacle of plane design in the West. Simple is best, don’t you agree?

A common misunderstanding about Japanese planes many suffer under is that pressure between the wooden body and the back of the blade is necessary to both lock the blade into the body and to eliminate chatter resulting from blade vibration. In response, your humble servant can only turn up the speed dial on the garbage pump and say “poppycock!”

Except in the case of a poor quality body/blade, or one damaged through improper setup and maintenance, the pinching forces, and resulting friction, acting on the front and back of the narrow portion of the blade inserted into the two grooves in the body’s mouth must be sufficient to hold the blade in-place without relying on pressure on the blade’s back. If you know anyone who disagrees with this statement, rest assured any brown stuff dribbling out of their ears is not chocolate mousse.

Unlike the potato chip-thin blades common to many Western planes, the quality Japanese plane blade of the sort we carry with its relatively thick, laminated construction may have a few female characteristics such as beauty, elegance, and a cutting wit, but despite fitting into a truly tiny mouth it simply will not chatter. After all, it’s chisels and squares that love to gossip.

While a tiny amount of uniform contact and pressure between the bed in the wooden body and the back of the blade is desirable to align and steady the blade in-use, many fit their blades (or perhaps “neglect to properly fit their blades” would be a more accurate description) to develop high pressure between blade and bed, making it difficult to adjust the blade and distorting the body unnecessarily. In extreme cases, this pressure can even push out the sole, preventing the plane from working entirely, a situation that has shaken many a poor woodworker to the core! Pixie involvement cannot be dismissed.

If your plane is misbehaving, this bulging sole phenomenon is something you would be wise to check for and remedy if found. You have been warned.

This subject is discussed in more detail in Part 7 of this series

Lengthwise Taper

A casual observation reveals that the blade is tapered in thickness along its length, being thickest at the head projecting proud of the body, and thinnest at the cutting edge bevel.

Interestingly, prior to the advent of the Bailey pattern plane, the blades of most Western planes were tapered in the opposite direction, being thinner at the head and thickest at the cutting edge’s bevel to enable a wooden wedge to retain the blade/chipbreaker assembly. Having owned and used both varieties, I find the Japanese handplane to be simpler, steadier, and generally superior in performance. What do you think?

The purpose of this taper in the Japanese handplane’s blade is simply to tightly wedge the blade into the two retention grooves cut into its body. Consequently, once installed the blade doesn’t require screws, adjustment linkage or separate wedges etc. to lock it firmly in-place, thankee kindly.

Please note that this wedging action does tend to cause the body to deflect to some degree, something which must be taken into account when fettling the sole, a subject we will discuss in a future post in this series.

Transverse Taper

The blade is also tapered in its width, being widest at the head and narrowest at the cutting bevel. This is both counterintuitive and perplexing to the inexperienced.

Ideally the side edges of the blade are in intimate contact with the bottoms of the retention grooves only where they exit at the top surface of the body, but should normally have no contact in the grooves elsewhere, making it possible to adjust the blade’s projection through the mouth to a uniform distance by gently tapping its head either right or left a small amount.

Curved Back

Finally, please observe that the back (vs. the ura) of a quality blade is not flat, but is slightly hollow-ground around the centerline of the blade’s length. The depth of this hollow should be more-or-less uniform over the blade’s length, disappearing near the head and shoulders.

One purpose of this detail is of course to lighten the blade’s weight, but more importantly it helps keep the blade from twisting out of alignment in-use. If you have ever made a wooden plane body in the Krenovian style to fit a blade with a flat back, you may have experienced the irritating tendency of the blade to twist out of alignment under heavy planing forces. This is typically not a concern with the Japanese design because of the curved back detail, so long as the body’s bed is well-fitted to the blade.

Since each blade and its matched wooden body are a little different, and not yet in perfect accord when new, fitting the body to the blade is one of the first things one must do to a new plane. This fettling operation will be the subject of a future post.

A plane blade by Mr. Ogata. Notice the curved back. Notice also the trimmed and beveled “ears” at the right and left corners of the cutting edge.

Common Sense and Plane Philosophy

Traditionally, everywhere planes were used around the world, a craftsman would commission or purchase the metal parts for his plane and cut the wooden body himself.

In recent history in Japan professional plane body makers called “daiuchi shokunin” 台打ち職人, which translates directly to “plane-body beater” (I kid you not) have become common. These craftsmen fit blade to body making a nearly complete retail product.

Many of these ostensibly completed planes are sold in a “sugu tsukai” 直ぐ使い condition, meaning “ready-to-use.” As witness of this, such planes usually have a wood shaving resting in their mouths when sold. However, the fit between blade and body is intentionally very tight to allow for the end-user to fit the body to the blade and adjust it to his preferences. This is where the philosophy of the plane’s master comes into play.

Being extremely mountainous with only 16% arable land, prior to modernization beginning with the Meiji Reformation the islands of Japan were comprised of many small, isolated villages and a very few open areas still isolated from each other by rivers, rocky coasts, steep mountains, the lack of a common tongue, and never-ending feudal rivalries and wars. There were no railroads, little ocean transport, few decent roads, and a scarcity, indeed direct prohibition of, wheeled transport pulled by animal teams resulting in little long-distance trade. These factors produced significant regional preferences for tools, including sickles, saws, axes, adzes, chisels and of course plane blades. A remnant of this history is the preference in the farthest Eastern portions of Japan, especially the Tohoku area and Hokkaido, for thicker, heavier plane blades, whereas in Tokyo and Western Japan, thinner blades are traditional.

But while discussions of these differences make the hearts of historians go pitter patter, they are irrelevant to persons living outside Japan, so we will ignore them for now.

There are, however, two general, practical approaches to blade size and fit of which Beloved Customers should be aware. Namely, architectural (residential and temple) carpenters tend to prefer thicker blades that fit very tightly into the body because such planes tend to retain their settings better when working heavier timbers in the rough conditions of a construction jobsite. The downside to the thick blade is that it’s heavier, it takes longer to sharpen, and it’s more difficult to make fine adjustments to.

Craftsmen that do finer, more precise work such as joiners, sashimonoshi, furniture makers and cabinet/tansu makers typically prefer thinner blades that are quicker to sharpen and easier to frequently adjust to make fine, precise cuts. Is your humble servant suggesting that carpenters tend to be less-skilled, or less delicate in using planes than joiners, furniture makers and cabinetmakers? In general, yes.

We have Mr. Nakano forge the blades for our planes more in the Tokyo style: thicker than some but thinner than most.

Not knowing who will purchase the plane, unless directed otherwise most daiuchi shokunin cut tight-fitting bodies more suited to the carpenter, and assume the user will adjust the blade/body fit to their preference. This is the only practical solution in a “ride it like you stole it” handplane, but the reality is that too often the pressure on the back of the blade is so high it ends up creating problems for the user.

Too many inexperienced users of Japanese planes, especially amateurs located overseas, learn how to use Japanese planes without knowledgeable supervisors or fellow workers near at hand to notice their mistakes, wack them upside the head, and tell them how to correct their errors (welcome to the gentle world of the Japanese craftsman), and consequently never really figure out how to setup, fettle and maintain Japanese handplanes. I suspect a similar lack of expert supervision is why so many Western woodworkers who give Japanese planes a try fail to ever get satisfactory performance out of them and become frustrated, eventually flogging them in disgust on PeeBay.

While your humble servant is eager to provide Beloved Customers all practical support and encouragement, the guidance I can provide is limited by distance, the written word, and the undeniable fact that he is a gentleman of great refinement and exquisite sensitivity (She Who Must Be Obeyed has been known to disagree, but what does she know?).

Therefore, upon making a significant mistake, Beloved Customers must instead call themselves rude names and slap their own heads to aid learning retention. May I suggest “Blockhead” as an appropriate self-imprecation in the case of planes? (ツ)

Conclusion

In this post we considered some of the unique design features of the Japanese hiraganna handplane’s uncompromising and bitterly sharp blade.

We even examined a historically-important, unusual, and exceptionally beautiful blade made by a famous blacksmith for a famous craftsman with curious engraving of mysterious meaning.

And we discussed regional differences in tool design. You can’t make this stuff up, ladies and germs!

In the next adventure in this series we will turn our attention to the body of the Japanese handplane, the softer, gentler, wooden component of the tool, the one with the tiny mouth that directs and controls the work of cutting.

And I promise we will make some sawdust. Until then, I have the exquisite honor to remain,

YMHOS

Chiyozuru Korehide (1874~1957), the blacksmith of the blade shown above.

If you have questions or would like to learn more about our tools, please click the “Pricelist” link here or at the top of the page and use the “Contact Us” form located immediately below.

Please share your insights and comments with everyone using the form located further below labeled “Leave a Reply.” We aren’t evil Google, fascist facebook, or the corrupt leadership of a teacher’s union and so won’t sell, share, or profitably “misplace” your information. If I lie, may my plane blades chatter and gossip unceasingly!

← Back

Thank you for your response. ✨

Leave a comment

Sharpening Japanese Tools Part 30 : Uradashi & Uraoshi

And now at last it comes. You will give me the Ring freely! In place of the Dark Lord you will set up a Queen. And I shall not be dark, but beautiful and terrible as the Morning and the Night! Fair as the Sea and the Sun and the Snow upon the Mountain! Dreadful as the Storm and the Lightning! Stronger than the foundations of the earth. All shall love me and despair!

J. R. R. Tolkien

This article is a continuation of, and probably the conclusion to, our “Sharpening Japanese Tools” series. The last article was one year ago and gave an example of how to employ the lessons taught in the previous 29 posts. At that time, your humble servant promised to discuss the subjects of this article at a later date. It’s later.

Why the delay? Simply because I am an excessively compassionate sumbitch who wanted Beloved Customers who hadn’t already figured out plane blade sharpening on their own to become proficient at regular sharpening operations before worrying about something as bizarre as wacking hard steel blades with hard steel hammers. After all, in the words of Miss Benatar, it’s sometimes a heartbreaker.

But now with the blog teetering on the loose and crumbly edge of the rabbit hole that is the Japanese handplane, we have the choice of either gliding gracefully into its depths or clumsily tumbling down ass over tea kettle (oh my!). Alas, we can tarry balanced in this precarious position no longer.

With his article we will begin our graceful swan-like journey by studying a matched set of operations Beloved Customers need to master to become proficient at maintaining Japanese woodworking blades: one called “Uradashi,” and a related operation called “Uraoshi. If you already have these skills, accept my highest praise. The target audience for this post, however, is those that don’t have experience with uradashi and uraoshi as well as those that want to review and improve the skills they already have.

So spread your wings and fly, my brave cygnets!

Definitions

Beloved Customers should already be aware of the hollow-ground “uratsuki,” typical to Japanese chisel and plane blades. If not, please review the article at this link.

Another important term is “Itoura” pronounced ee/toh/oo/rah, which translates directly as “thread land.” This is the polished land on the ura side of the blade across the width of the blade and immediately adjacent to the cutting edge. In fact, it forms one-half of the cutting edge, and the maintenance of this tiny bit of metal is the purpose of the operations described herein.

Uradashi is pronounced oo/rah/dah/she and written 浦出し in the Chinese characters as they are used in Japan. These characters translate directly to “push-out the ura.”

Uraoshi is pronounced oo/rah/oh/she and written 浦押しwhich translates directly to “press the ura.”

These two maintenance operations are performed to restore the blade’s cutting edge to useful condition when the thin itoura land at the cutting edge is almost worn out. We will discuss the why and how below.

Long-term Strategy

Before we start pecking on steel, let’s consider our sharpening strategy.

Professional-grade blades are not only expensive, they are difficult to make, hard to find, and require an investment of time and effort from the user if they are to deliver high-performance results over many years. To minimize the required expenditure of time and effort, and to maximize the benefits achieved we need more than just technique, we need a maintenance strategy.

In previous posts in this series we have discussed multiple strategies, some physical, some psychological, and even a few supernatural ones. The following is one I strongly urge Beloved Customers to adopt:

  1. Get the ura in good fettle, and then;
  2. Avoid working the ura on anything but one’s finest-grit sharpening stone thereafter, (with the exception of uraoshi following uradashi, of course).

Simple, no?

The ura is formed by grinding the lamination of extra-hard high-carbon steel to form a depressed area. Because hard steel is time-consuming to abrade, a wise craftsman will work to keep the ura as deep as possible, and consequently the four flat lands surrounding the hollow-ground uratsuki as narrow as possible, for as long as possible, thereby minimizing the area of hard steel that must be abraded with each sharpening.

But no matter how careful we are to preserve the ura, sharpening the bevel makes the blade incrementally shorter, so the day will come, at least in the case of plane blades, when the itoura land becomes as thin as a thread. Once it disappears, the blade will no longer function. This is the only drawback to the Japanese ura feature, and can only be solved by drastic methods.

Bending Hard Steel

The goal of uradashi is to cause the lamination of hard steel at the cutting edge to bend towards the ura so that when we subsequently abrade the bent portion the itoura land will be restored.

Now if you think about this for a second you will realize that trying to bend a thin plate of steel hardened to Rc65~66 without snapping it is a fool’s errand. In the case of Japanese blades it is possible to accomplish but only because of the thicker, supporting layer of soft low-carbon/no-carbon iron, called the “jigane,” to which the hard steel layer is laminated. The other point to understand is that only the portion of the high-carbon steel layer actually directly laminated to the softer jigane can be bent, not the fully-exposed high-carbon steel layer at the extreme cutting edge.

Your humble servant struggled at first with uradashi, in part because every explanation I read about the process in both English and Japanese was written by people who either didn’t really know what they were talking about, or were too lazy to explain it well. Some years, several broken blades, and much heartbreak later I finally figured it out. Better information is available nowadays, but there is still plenty of BS out there to shovel.

Despite the title of this section, the first key point to understand and always remember is that uradashi is not about using a hammer to bend the hard steel layer; Never ever ever never touch this steel with your hammer! I forbid it on pain of 20 lashes with a wet noodle.

Instead, the goal is to peck on the soft iron jigane layer of the laminated blade at the bevel, as described below, deforming it and causing it to expand.

The jigane would normally just deform away from the hammer’s impact point, but the hard steel hagane lamination on the ura side of the blade restrains it causing the entire blade at the cutting bevel to curve in the direction of the ura without snapping or cracking. This is another aspect of the blacksmith’s magic unique to the Japanese plane blade.

The second key point you need to grasp around the neck with both hands and dig your Jimmy Choos deep into is that it is indeed a fool’s errand to try to bend the soft iron lamination by the power of your mighty arm, Oh Lord of Thunder. No, we must be as clever as Loki.

So, how do we cleverly do this job, and what tools should we use?

This 60mm blade belongs to one of my arashiko planes and was forged by Mr. Uchihashi Keisuke from Swedish K-120 steel. The brand name is “Keisaburo.” An excellent blade and still functional, but the itoura is getting a little skinny.

Tools

You will need the following tools to properly perform uradashi and uraoshi on a blade:

  1. A small hammer. Great force is neither necessary nor useful; Indeed you must be able to control this hammer very precisely, so the lighter it is the better. One with a pointy end like a funate or a Yamamichi, or a corner of the thin end of a Warrington hammer or tack hammer is ideal because the tiny impact face focuses maximum pressure on a small area, deforming the jigane efficiently. A small, pointy hammer also makes it easier to guide and control the hammer to ensure precise impacts. And control matters a lot because if you miss and strike the hard steel at the cutting edge it will be damaged and bitter tears will flow. Consider yourself duly warned, Oh Might Thor;
  2. An anvil of sorts. This can be any piece of steel with some mass and with a rounded-over corner. A piece of railroad track is great. I use the face of a small sledge-hammer clamped in my vise. A sharp corner is not good, so round a corner by grinding or filing and then smoothing it. A piece of thin postcard material glued to this rounded corner help keeps the blade from slipping;
  3. A small square or straightedge;
  4. A marking pen or scribe to mark the “target area” on the bevel;
  5. A rough diamond plate/stone or a mild-steel kanaban plate + carborundum powder;
  6. Parking pen or Dykem for coloring the ura’s lands;
  7. Regular sharpening tools (stones, water, etc.).
A small sledge hammer used as an anvil by clamping it in a vise with another clamp as a stabilizer.

Target Area Layout

Let’s begin by laying out the target area on the soft iron jigane at the blade’s bevel with a marking pen. Or you can scratch lines into the jigane with a metal scribe. This target area will indicate the area you will peck with your little hammer producing many small dents. You must not strike outside this target area even if tempted with donuts. Not even if they have those tasty sparkly sprinkles on top.

The striking area marked with marking pen.

The dents you will make with your little hammer need to be limited to a band on the jigane parallel to the cutting edge and beginning 2~3mm from where the jigane lamination begins extending to the end of the jigane lamination at the blade’s back, in the case of plane blades, or the face where the brandname is engraved in the case of chisel blades.

Make a line with your scribe or marking pen the full width of the bevel at this distance from and parallel to the cutting edge. Everything above this line in the direction of the blade’s back, in the case of plane blades, or the face where the brandname is engraved in the case of chisels and knives, is the primary target area. Make sure you get this right.

The dents need to extend across the full width of the jigane layer, except where the corners (ears) have been ground to a bevel at the right and left end of the blade, so the right and left limits of the target area are delineated by the ears.

Although we need to tap the full width of the blade to avoid stress concentrations, there is nothing to be gained by trying to bend the far right and left corners of the blade, so we want to focus approximately 2/3rds of our hammer impacts and the resulting dents near the center 1/3 of the blade’s width. Mark the right and left limits of this central area on your blade with a marking pen or scribe.

The Grip

If you are right handed, hold the blade in your left hand with your index finger extended and pressed against the ura parallel with the cutting edge, and about 5~10mm away from it. Press down with your thumb on the blade’s back clamping the blade between your thumb and the side of your index finger. Your other fingers should support the blade from the ura side.

This photo shows how to hold the blade against the anvil.

Your index finger will be the fence that keeps the blade in proper alignment during the tapping-out process.

Next, we need to figure out how to align and move the blade on the anvil, as well as where to place hammer blows in relation to the blade and anvil.

This photo shows the grip without the blade in the way. Notice how the index finger is touching the anvil. The blade is shifted right and left using the index finger as a fence to keep blade and hammer in precise alignment and under tight control.

Manipulating the Blade on the Anvil

Place the blade’s ura on the rounded corner of your anvil. You may want to tape or glue a piece of thin cardboard, postcard, or manila file folder to the anvil’s corner, not so much as a cushion, but to help prevent the blade from slipping, but this is not mandatory.

Adjust the distance between your extended index finger and the cutting edge as necessary so your finger is touching the anvil stabilizing its position, and so you can slide the blade to the left and right indexing off your finger to keep the target area in proper alignment.

Next, while still in position facing your anvil and with hammer in hand, move the blade aside and tap the rounded corner of your anvil with your hammer lightly. Memorize this location and your position because every tap from now on must be aimed at this same exact spot on the anvil.

The Tap Dance

The time has come to begin the dance.

Reposition the blade on the anvil and use your little hammer to tap the soft jigane layer at the bevel (only the jigane!) in the target area you marked earlier making a row of small dents in it.

These small dents don’t need to be pretty or uniform. Be patient because you may need to make hundreds of pecks, each one quite precisely.

Here is the key point to understand: You want each little dent to cause the jigane to deform and expand in length and width a tiny bit, gradually, until a significant degree of deformation accumulates. The hard steel layer, however, will constrain the jigane layer from expanding, causing the blade to bend, and causing the hard steel layer to deflect and curve towards the ura, bending it without breaking it. It doesn’t seem possible at first, but I promise it will happen, so please be patient.

The trick then is to use the grip described above with your forefinger indexing the blade against the anvil while moving your hand, along with the blade, a tiny bit right or left with each strike, with the each point of impact firmly supported on the anvil, in-line with the hammer blow, thereby squishing the jigane between hammer and anvil. In this way, since the hammer is always aimed at the same exact point on the anvil, you don’t need to worry about realigning it with each blow, removing several difficult-to-control variables from the tap dance at once.

Remember, keep the hammer and anvil precisely aligned, and move the blade left and right, not the hammer. It helps to touch the inside of the elbow of the arm using the hammer against your side in a fixed location to help maintain a consistent hammer swing and distance. Until you have mastered consistency, speed is risky.

Another key point to understand is that, if the point of impact of your little hammer is not directly in-line with the point where the ura on the opposite side of the blade is touching the anvil, the force of the hammer’s impact will tend to cause the blade to jump and wiggle around instead of deforming the jigane. This wastes time and energy and makes it difficult to make precise taps.

Here’s a video of Eleanor Powell tapping away with great control, and with the aid of her faithful Fido. I don’t recommend including a benchdog in your tapping-out routine other than as a deterrent to any pernicious pixies lurking in your workshop eager to cause you to miss with your hammer and chip your blade. Evil pixies!

Here’s a video of Sarah Reich tap dancing with every strike landing precisely in the target area. I need to get a pair of shiny red lycra pants like her to go with my most excellent aluminum foil hat with the curly copper wires and red fringe. Do you think they would make my butt look huge?

Remember, force is neither necessary nor useful. The goals is to make many precisely aligned tiny taps producing many small deformations in the target area, with no impacts on the hard steel layer.

Dent Removal

We talked about “dents” above. If you are using a round-faced hammer, those dents will be little crescents. If you use a hammer with a tiny striking face on one end like a Yamakichi or Funate, that tiny face will dig into the metal making ugly little peck marks instead of pretty little crescents. I have used all varieties of hammers but prefer the ones with pointy ends because their impact face is small and, it seems to me, easier to control. Six of one half-dozen of the other.

But remember that we will abrade away all those dents/pecks/craters after a few sharpening sessions, so appearance is of zero importance.

The Goldilocks Itoura

The goal, of course, is to bend the blade at the ura land just behind the cutting edge enough to create a useful, flat ura. But how wide should the itoura be when the process is complete? Among plane connoisseurs a narrow itoura is, like a willowy super model, considered a thing of beauty. By narrow I mean some where around 0.50~1.0mm.

A narrow itoura does indeed look sexy, so much so that fashion-conscious plane blade blacksmiths make a skinny ura a point of pride. And, in fact, a bulimic itoura makes it easier and quicker to sharpen the blade because the square millimeters of hard steel one must abrade/polish is minimal compared to a wider itoura.

The downside to the super-skinny itoura is that it wears out sooner, making it high maintenance. Now, I’m not suggesting that if your plane blade has a slender itoura it will demand weekly spa visits, twice monthly trips on a G700 jet to the Vienna Opera, annual ski holidays in Verbier, and bi-annual boob jobs, but there is no doubt you will need to do the uradashi tap-dance more often. Shiny lycra pants are optional, but ooh sooo sexy! (シ)

On the other hand, a wider itoura of 3~4mm has some advantages too. It’s easier to fit the chipbreaker (uragane), and you don’t need to do uradashi/uraoshi as often. Much wider than this, however, and I find it can be difficult to get a screaming-sharp edge at times. Moderation in all things, I guess.

I don’t know how to describe when to stop tapping-out the ura to obtain a good width for your itorura because every blade is a little different, but after doing it a few times you will develop a sense of when enough is enough. However, to develop that sense you should make frequent checks on your tapping-out progress by placing your handy dandy straightedge or square right on the itoura parallel to the cutting edge and sighting between the blade and the straightedge/square with a strong light shining at the gap. You will be able to see the itoura gradually bulge upwards at the center. Even a little bit of a bulge will give you a useful itoura, so don’t get carried away.

Uraoshi

Once the tap dance is done, we need to grind down the ura to form a new itoura, a process called “ uraoshi” (ooh/rah/oh/she)

The traditional method is to use the mild steel kanaban lapping plate mentioned above, although any true lapping plate will work. One sprinkles a small amount of carborundum powder on the plate along with a little water, and then works the ura side to side grinding down the bulged area to make a flat.

The problem with using lapping plates and carborundum powder is that not only is it a messy process, but unless you are careful to keep the right amount of wet grit on the plate, the results tend to be a tad irregular. I recommend using diamond plates or ceramic diamond stones (like those made by Naniwa) because they produce more consistent results quicker.

Whether you use a kanaban lapping plate or a diamond plate/stone, it’s important to focus pressure on the thin area where you need the itoura to develop. Pressure anywhere else is not helpful, but only wears out the itoura prematurely.

Here is wisdom: When they first attempt uraoshi most people try to stabilize the blade by applying uniform pressure across the back of the blade. This seems to makes perfect sense, but it always results in grinding a nasty little trench in the two side lands at the ura where it touches the extreme edge of the kanaban or diamond plate. Remember, the uraoshi process tapped out a bit of metal right at the cutting edge, and mostly at its center. This is what you need to abrade, NOT the right and left lands of the ura, and certainly no more than 3~4mm from the cutting edge. So please keep tight rein on your inner badger and carefully focus the pressure you apply during uraoshi only on the thin area where you need to restore the uraoshi.

Some people like to apply a thin strip of paste wax, perhaps 3~4mm wide, on the edge of their kanaban or diamond plate to prevent it from digging ugly trenches in their beautiful and delicate side lands. Others like to apply a thin strip of mylar tape at the same place for the same reason. These techniques all work, but professional sharpeners don’t use them because they know how to apply pressure correctly.

A quick touch of the blade on the diamond plate shows where the black marking pen ink has been removed along with the highest spots on the bent itoura.

After the itoura has been restored (perfection is not necessary), polish the blade using your normal sharpening routine.

The restored itoura. Please notice the lack of trenches.
The bevel after working it on the diamond plate and stones. The remaining peck marks will disappear entirely after a few sharpening sessions. Notice how your unworthy servant has focused his abrasion efforts nearest the cutting edge. Good boy.

Chisel Blades Versus Plane Blades

Uraoshi and uradashi are operations typically, but not exclusively, performed on plane blades. About the only time chisels need to have uradashi performed is to restore the itoura after the blade receives major damage, like a big chip, a sad event all users of Japanese tools experience from time to time

There is a structural difference between plane blades and chisel blades Beloved Customer must understand when considering performing uradashi on a chisel blade.

Plane blades have a steel lamination that is more-or-less uniform in thickness because that’s all that’s necessary. Chisel blades, on the other hand, are subject to much higher bending stresses than plane blades, so to prevent yielding and failure, traditional chisels are forge-laminated with the steel lamination wrapped up the right and left sides of the blade, forming something akin to a structural steel U-channel, producing a higher moment of inertia, and therefore greater strength and rigidity,

Because of this additional strength, chisel blades are more difficult to bend at the right and left sides using uradashi techniques compared to plane blades. Indeed, they may break if you try.

Since you can hope to safely bend the steel lamination only in areas away from the more rigid sides, uradashi operations on narrow chisel blades will go as smoothly as throwing a cat through a screen door. I wouldn’t even try it on any chisel narrower than 18mm. Beloved Customers have been warned.

If you feel compelled to attempt uradashi on a chisel blade, my only advice is don’t peck within 3mm of the right and left sides.

With this article, our Sharpening Japanese Tools Series is complete (probably). Your humble servant hopes it has been informative. If Beloved Customer had the patience to read it all, and the clairvoyant ability needed to understand most of it, then you know a heck of a lot more on the subject of sharpening than I did when I started the journey. At least you have received some great ideas for sexy new additions to your simply mahvelous woodworking wardrobe!

YMHOS

If you have questions or would like to learn more about our tools, please click the “Pricelist” link here or at the top of the page and use the “Contact Us” form located immediately below.

Please share your insights and comments with everyone in the form located further below labeled “Leave a Reply.” We aren’t evil Google, fascist facebook, or thuggish Twitter and so won’t sell, share, or profitably “misplace” your information. If I lie may Iron Pixies pass gas in my cornflakes every morning.

← Back

Thank you for your response. ✨

Leave a comment

Other Relevant Articles

The Challenges of Professional-grade Japanese Chisels

The Forgotten Sumitsubo 忘れ物の墨壺

The Forgotten Sumitsubo

Remember me when I am gone away,
Gone far away into the silent land;
When you can no more hold me by the hand,
Nor I half turn to go yet turning stay …

Christina Rossetti

The tool pictured above is a very old “split-tail” variety of “sumitsubo” inkpot.

Versions of this tool are used in many trades worldwide to mark a straight layout line on material being worked. In the West, the line is coated in chalk to produce a “chalkline” when snapped, but in Japan a silk line wound on the spool near the tail of the tool is soaked in ink as it passes through the “pond” near the pointy front of the tool to produce the same sort of layout line when snapped.

This particular tool is unusual not only because it is one of the best-preserved examples of Japanese sumitsubo in existence, but also because it was discovered during restoration work on the 27m tall Nandaimon gate of Todaiji temple in Nara Japan in 1879. Since its discovery it has become famous as the so-called “Forgotten Sumitsubo.”

The reason for the unusual name, indeed the very reason it has survived in such a good state of preservation, is that Todaiji Temple’s Nandaimon gatehouse where this sumitsubo was found perched peacefully on top of a beam high in the structure that was built in the year 1199, so it is likely this sumitsubo had remained there undisturbed for around 680 years, a long time for a wooden tool.

Was it really forgotten? I like to think some carpenter left it there on purpose to look after his work. But that’s just me…

Related image
Front elevation of the Nandaimon gate of Todaiji temple, Nara, Japan. The deer of Nara are like pigeons. The stall to the left is selling “deer crackers” for tourists to feed them.
The eaves of Nandaimon Gate
Related image
Looking up into the structure of Todaiji’s Nandaimon Gatehouse
Cross-section sketch of Todaiji’s Nadaimon Gate

So, if you ever misplace a tool at a jobsite, instead of fretting about it, just imagine that someone, someday, will find it hidden inside the building 700 years later and reverently put it in a museum. Certainly more romantic than any other more likely option. (ツ)

YMHOS

If you have questions or would like to learn more about our tools, please click the “Pricelist” link here or at the top of the page and use the “Contact Us” form located immediately below.

Please share your insights and comments with everyone in the form located further below labeled “Leave a Reply.” We aren’t evil Google, fascist facebook, or thuggish Twitter and so won’t sell, share, or profitably “misplace” your information. If I lie may the two guardian kings above refuse to let me shower alone.

← Back

Thank you for your response. ✨

Leave a comment

Other Posts in Japanese Sumitsubo Inkpot Series