I warn you, if you bore me, I shall take my revenge.
J.R.R. Tolkein
Your most humble and obedient servant has received many requests over the years for explanations about how to setup, adjust, maintain and use Japanese planes. To those of our Beloved Customers with aspirations of professional-level skills with this most ancient and essential tool it’s an important subject, one that would require a veritable mountain of electrons to properly document, an overwhelming challenge for this broken and bedraggled blog. Nevertheless in this series of articles about the Japanese handplane I will try to summarize the subject in enough generality that new guys can follow, but with enough detail that professionals may glean something useful.
In this series we will discuss how to adjust a Japanese plane so it works well, how to tune it to increase performance, how to treat the body to reduce warpage and keep it looking good, how to deal with normal wear and tear, how to periodically tap out and dress the ura during sharpening, and of course how to use a Japanese plane.
This last subject is extremely simple but one many amateur users of Japanese planes and most users overseas get wrong. It happens so frequently that I am confident the improvement in Beloved Customer’s personal performance with Japanese planes will improve dramatically from this last subject alone.
The problem with Japanese planes is that, while they are exceedingly simple tools, their appearance belies their sophistication. Dealing with these subtle details without properly understanding how they interact with each other leaves many as confused as a ball of yarn among a dozen big-eyed kittens, so to avoid having too many strands running all over the place, let’s start with the basics, namely how to adjust them. Planes that is, not kittens or balls of yarn. For purposes of this discussion, we will assume our plane is in good fettle to begin with.
Preparing the Body
Although not an issue in the case of the planes C&S Tools purveys, Beloved Customer will want to inspect their plane, and perhaps make a few modifications to the body before strenuous use.
Striking Chamfer
When removing the blade or reducing the cutting edge’s projection through the mouth, we need to strike the white oak body on the 90˚ intersection between the flat end of the plane’s body and its top surface. Accordingly we need to cut a chamfer at this edge to prevent damage to the body. How wide? 3~5mm is a good range. What angle? Cut the striking chamfer approximately square (90˚) to the long axis of the blade.
While you are at it, cut off the corners formed at the right and left corners of this chamfer.
This is a one-time operation.
Sole Chamfers
If your plane doesn’t already have them, you will need to cut chamfers on the two edges at the right and left sides (long direction) of your plane’s sole. These chamfers have two purposes. First, to prevent the edges of the sole from chipping. Second, to make a small gap for your fingers to grip when lifting up the plane.
As the sole wears, Beloved Customers will need to be refresh these chamfers at the sole from time to time, so further explanation is necessary.
Some people like big, wide, honkin 45˚ chamfers at these locations. Your humble servant has even seen country bumpkins cut these wide chamfers and then carve unsightly grooves resembling a shark’s grin leading from the sides of the mouth to these chamfers for shavings to escape into. Codswallop!
Why is this a problem, you ask? Because the thinnest, weakest portion of any wooden plane’s body is the sidewalls right at the mouth. This is also where most warpage originates, so please don’t weaken it more than is absolutely necessary by cutting unnecessarily-wide chamfers or smiley faces.
In addition, wood removed from the sole by cutting overly-large chamfers reduces the bearing area of wood on the surface being planed accelerating wear on the sole. Keep these chamfers narrow at 2~4mm and a max angle measured from the sole of 25~29˚ More than this is unnecessary and possibly harmful.
A chamfer is not necessary at the trailing end of the sole so long as you have the self control to not strike the sole with your mallet.
Do not cut a chamfer at the leading edge of the sole as it will guide sawdust and shavings between the sole and the surface you are planing. Pas bien.
Top Chamfers
Apply a small chamfer on the front and side edges of the top surface, just enough to prevent chipping. 45˚ chamfers are fine, but a roundover (bozumen 坊主面 which translates to “Priest’s edge,” probably in reference to the bald head of Buddhist priests in Japan) is a friendlier, more elegant edge treatment, IMHO. Your choice.
Hammer or Mallet
In order to use a plane of any kind, one must remove the blade to sharpen it, and then re-install the blade and adjust its projection from the body’s mouth to produce a wood shaving of the desired thickness.
Like most wooden-bodied planes, one adjusts a Japanese plane by striking it with either a hammer or mallet. To drive the blade further into the wooden body (called a “dai” 台 in Japanese) when installing the blade or when increasing the depth of cut, one taps the head of the blade down into the wooden body. Pretty straightforward. But like most things in life, there are both clever and stupid ways to get even simple jobs done. Shall we try a clever technique first?
You can use either a metallic hammer or a mallet made of wood, plastic or even rawhide to tap the blade or body (dai 台) during these operations. They all work just fine, but there are long-term consequences to this selection to consider.
In Japan a steel hammer is traditionally used by carpenters to adjust planes. Without a doubt it’s convenient and effective, but there are some serious downsides to using a steel hammer you may not realize. Those include:
A steel hammer always mushrooms the blade’s head, without exception;
A steel hammer always dings the blade’s pretty face when adjusting the chipbreaker, and most critically;
After many strikes, the focused, high impact forces steel hammers impart will often crack and even split the wooden body. Ouch!
Although your humble servant believes such abuse reflects poorly on the perpetrator, a deformed and ugly blade is not a great tragedy. But there can be no doubt a split and splintered body is an expensive and time-wasting catastrophe, especially to the professional that needs his planes to keep cutting.
This photo shows the unavoidable damage caused by using a steel hammer, including deformed head and shoulders, and enough hammer dents produced when adjusting the chipbreaker to nearly obliterate the lower portion of the signature and brandmark. What did this once happy blade do to deserve such barbaric abuse?
All the worst depredations of a fool are condensed in this one photo. Notice the wastefully mushroomed head and shoulders of the blade which the owner has probably already ground down several times. We can’t see the blade’s face, but notice how the chipbreaker’s face is all dinged up. I guarantee you the blade is even more damaged. And of course, the split dai. Only a steel hammer in the hands of a drunken fool could have caused all this damage. What did this sad little plane do to deserve such barbaric treatment?! And how much money was wasted? But the damage began when the fool cut the humungous 45˚ chamfers we see into the sole’s sides, all the way to the mouth, for Pete’s sake! And besides the fatal crack at the center, cracks have also begun at both corners of the mouth, cracks that might have been prevented if a normal chamfer had been cut instead of the bloody abortion-by-chainsaw we see.
There are Beloved Customers who will say: “But I’ve seen Japanese craftsmen using steel hammers to adjust their planes, so it can’t be wrong.” The first part of this observation may be true, but the last bit isn’t. The undeniable truth is that steel hammers have dinged, deformed, mushroomed and made hideous many innocent blades, and cracked and splintered many sinless dai entirely unnecessarily.
Young carpenters often learn standard methods to fix the split bodies of hand-me-down planes using bolts, glue and even epoxy that after much time and effort yield results resembling some of Dr. Frankenstein’s experiments. But I assure you, not all Japanese craftsmen are so willfully wasteful and inured to the suffering of their tools.
C&S Tool’s planes don’t deserve such violent abuse, so we recommend Beloved Customers use a wooden mallet to adjust them. Without exception. A nylon, plastic or rawhide mallet with a wooden handle will work just as well.
Removing the Blade and Chipbreaker
Both the blade and chipbreaker are removed by tapping the chamfered corner of the block behind the blade with a mallet. We discussed this chamfer above.
It is of course possible to loosen the blade by tapping flat on the flat tail end of the block, but there is a risk of striking the bottom edge and deforming or even chipping the sole. Best avoided altogether.
The physics work best when the mallet impacts are applied in a vector more or less parallel with the blade’s long axis.
The chipbreaker (uragane) must be removed before the blade, but pay heed to prevent two unfortunate accidents that frequently occur during this process. The first accident is the chipbreaker jumping out of the block in an uncontrolled manner providing Murphy many yucks!
The second accident is the blade backing out of the body further/faster than the chipbreaker causing the chipbreaker to ride over the blade’s cutting edge dulling it and causing Murphy to squirt into his pants. This point is one newbies often overlook until they wonder why the pretty cutting edge they just sharpened is dinged even before they begin cutting.
How best to keep blade and chipbreaker under control? Your humble servant recommends pressing a forefinger onto the chipbreaker as shown the photo below and applying pressure upwards when removing it to encourage the chipbreaker to shift upwards ahead of the blade and in a controlled manner. Do the same on the face of the blade when its turn comes.
When removing the chipbreaker, apply pressure towards the blade and upwards with your index finger to monitor its movement and keep it under control. It is critical that the chipbreaker precede the blade up and out of the dai to prevent the chipbreaker from contacting the blade’s cutting edge dulling/damaging it.While applying upward pressure with the index finger on the chipbreaker, tap the chamfer behind the blade to cause the chipbreaker to move up and out of the body’s mouth. BTW, please make it a habit to not strike the center of the chamfer, but instead alternate strikes between the right and left sides of the chamfer to ensure the body will provide long service. You’ll feel the difference if you pay attention.
Once the chipbreaker is loose, remove it and go back to tapping the body to loosen the blade further. Continue to apply light pressure to the blade’s face to better monitor the blade’s movement, and to prevent it from jumping out of the body.
The plane shown in this example is an extra-wide 80mm finish plane with a shirogami No. 1 blade forged by Yokosaka Masato. This wider blade can finish-plane wider boards a little more efficiently than a 70mm (sunpachi) blade. The oasaebo steel rod which retains the chipbreaker in-use can be seen installed across the mouth. This is typically never removed over the life of the plane but you may need to file yours to ensure a good fit with, and even pressure on, the uragane. In the center are the blade and the chipbreaker (uragane). To the right is the mallet your humble servant uses for plane adjustments. This plane has seen extensive use but Beloved Customers and Gentle Readers will carefully notice the head and shoulders of the blade are not mushroomed, its pretty face as well as that of the chipbreaker are entirely free of unsightly dents and dings, and the body too is free of the dents, cracks and splits that always result from using steel hammers. Also, despite your humble servant’s skin consistently causing Japanese white oak to turn a dirty grey color, the applied London Finish has prevented such “patinazation.”
Adjusting the Chipbreaker (Uragane)
The chipbreaker is a recent addition to the Japanese plane. In earlier centuries, they had only a single-blade. Unlike the Western Bailey-pattern planes that incorporate the chipbreaker into the linkage necessary to adjust the blade, hiraganna planes work just fine without the chipbreaker, thankee kindly. Indeed the chipbreaker’s only role is to reduce tearout, so when tearout is not a concern, removing the chipbreaker will reduce the force necessary to motivate the plane and may even produce a smoother cut.
The chipbreaker of a new plane often needs to be fitted to the blade and body using files and stones, but that is a subject for a future article, so to keep things simple, we will assume the chipbreaker is in good shape and is happily wedded and bedded to its blade.
Gentle Reader is no doubt wondering how to adjust the chipbreaker with the large head of a mallet. The answer is to use the butt of the handle as shown in the photo below. Just hold the mallet’s handle in a fist with the head upward and bring the handle’s butt down on the chipbreaker. Easy as falling off a dog, as me dear departed father would say. The connection between the mallet’s head and handle must be quite solid, of course. These mallets are easily made.
Using this technique, your plane blades will remain beautiful for their entire lifetime, and your dai will give you many years of reliable service. And although they only have tiny mouths with just a single, shiny tooth, if you look carefully you may see their sharp little smiles.
Using the end of the mallet’s handle to adjust the chipbreaker. Notice that, once again, the index finger is used to monitor the chipbreaker’s movement and to keep it under careful control. To ensure the chipbreaker will do its job, its edge should ultimately be adjusted to be in very close proximity to the cutting edge (>0.002″ (0.05mm). This distance will vary with your plane and the wood being cut, and will require experimentation and fiddling to get right, but with practice, this process will become automatic and intuitive. Be careful to prevent the chipbreaker passing over the cutting edge as this may dull the blade causing Beloved Customer to say undignified things and Murphy to soil his undergarments.
To remove or back-out the chipbreaker, one strikes the dai as if loosening the blade, but with a finger on the chipbreaker to keep it from dragging over and perhaps dulling the blade’s cutting edge.
When adjusting the chipbreaker, sometimes the blade will shift position too, so a back and forth adjustment of blade-chipbreaker-blade is sometimes necessary.
The tighter the fit of the blade and chipbreaker in the body, the more fiddling is required, so craftsmen such as joiners, sashimonoshi and cabinetmakers that routinely make fine, precise cuts and sharpen frequently tend to prefer thinner blades that fit into the body with less force and are easier to adjust than do carpenters who perform less refined work or work in rougher conditions.
We will delve into this aspect of handplane setup in our journey spinning ass over teakettle down the rabbit hole in a future post.
Adjusting the Blade
In order to take a clean, full-width cut, the blade must project from the mouth the appropriate amount, and evenly across its width. In other words, it must project neither too far, nor too little, and one corner of the blade must not project more than the opposite corner.
It’s important to note that if the blade does not project through the mouth evenly, the shavings it cuts will be thicker on one side than the other. Why does this matter? If your aim is to hog vast quantities of wood it doesn’t matter much, but if the same poorly-adjusted plane is used to take multiple shavings on the same board, the accumulation of shavings thicker on one side will naturally make the board thinner on one edge than the other. Many have spent hours trying to flatten a board only to find their poorly-adjusted plane blade is making things worse, thereby wasting valuable wood and slowing progress. And because they don’t realize the cause of this devilish behavior, their self-confidence is ultimately damaged.
With experience, one can simply see and feel the shavings their plane makes to determine if it is making cuts of uniform thickness. But a caliper, either vernier, dial or digital, used to measure and compare the thickness of shavings at their right and left sides, can provide useful insight.
To evaluate the blade’s projection through the plane’s mouth, hold the plane upside down to a light-colored uniform background and peer along the plane’s sole. The correct projection will be a thin dark line of uniform height across the width of the sole. Assuming the plane’s sole is true, if one side of the blade is projecting more than the opposite side, the blade is either skewed in the body, or the cutting edge is shaped skewed.
If the line of the blade’s cutting edge projecting through the body’s mouth is skewed, tap the shoulder of blade to the right or left with the mallet. If, however, a few taps fail to make the projection uniform, please check the blade for a skewed cutting edge, a problem frequently resulting from lack of attention when sharpening. Don’t worry, everyone does it occasionally, but careful attention is best. If the cutting edge has become skewed through improper sharpening, it must be reshaped, not a difficult task but a wasteful pain in the tuckus.
A word of caution: Continued and heavy lateral pounding on the blade’s shoulders will not improve the situation and may damage the wooden body.
Most planes allow a little bit of wiggle room for the blade, but sometimes, especially if the body shrinks in width due to reduced ambient humidity, the bottoms of the retention grooves in the side walls of the mouth may need to be pared slightly deeper, or the blade ground narrower, to provide this right/left wiggle space. Be very careful, however, to avoid paring these grooves more than a thin shaving or two wider because, as mentioned above, removing wood at the grooves directly and irrevocably weakens the most tender point in the wooden body. We will discuss this subject in Part 4: Fitting Blade & Body.
Remember, the ideal is for the right and left sides of the blade where they exit the grooves at the top surface of the body to be in intimate contact with the bottom of the retention grooves. At the same time, some space between the grooves and the sides of the blade is necessary moving towards the sole. This is natural because a quality plane blade will intentionally be shaped narrower in width near the cutting edge than the head. Because of this clever shape, the blade will pivot in a controlled manner in the retention grooves when you tap its shoulders. If the fit in the grooves is sloppy, however, the blade will wiggle too much during this dance and seem uncooperative, because it is.
When looking down the sole to ascertain the blade’s projection, a black line will be visible above the sole as in this photo. A light-colored, uniform background is helpful for this evaluation. In this case, two adjustments are necessary. The first problem with this picture is that the blade is projecting waaaay too far. This is easily resolved by tapping the chamfer on the body behind the blade, something that, with practice, can be done while the plane is held upside-down in this position. The second problem that must be resolved is the skew evidenced by the blade’s projection being much greater on the left side of the photograph.Adjusting a skewed blade by tapping the blade’s head laterally. If a few taps will not correct a skewed blade, it probably needs to be reshaped to correct a skew that developed during sharpening.A much smaller, useful projection with just a tiny bit of residual skew to correct. When taking extremely fine finish cuts, the ability to determine the blade’s projection sometimes seems more clairvoyant than simply optical.
To test the projection of the blade, and ensure skew has been removed, hold a short, narrow piece of softwood such as pine or cedar in your hand and run it over the cutting edge, first on one side of the blade, then the opposite side, and finally the center, and observe the shavings (if any) produced. They will tell you the truth. Be careful not to shave your fingers unless they have become too fuzzy (ツ).
Even experienced craftsmen betimes become gutted, gobsmacked, and guragura upon discovering their otherwise perfect plane blade has become skewed and is projecting too far on one side to be adjusted for a good cut without resharpening it. Of course, the culprit is almost always pernicious pixies, but a wise Beloved Customer (inconceivable that there could be any other kind) will be careful to follow Petruchio’s example and tame the skew. And don’t forget to use a hardened stainless steel straightedge to check the blade for square when sharpening.
Striking the Body of the Plane
Your humble servant does not want to seem repetitious, but just so there is no confusion, I feel compelled to review a point or two before we end this discussion.
When backing out or removing the blade, make it a habit to strike the chamfered edge of the dai (body) behind the blade alternating between the right and left sides instead of dead-center.
Also, angle your strikes so they are more or less parallel to the long axis of the blade. With a little practice this will become second nature. The reason for this action is simply that it is both more effective and at the same time helps to keep the dai in one piece.
Please, avoid striking the flat tail-end of the plane’s body flat-on, but instead strike the chamfered top edge behind the blade. Too many people who strike the flat butt get carried away and end up damaging the sole.
If you examine your plane you will notice that there is actually very little wood holding the plane’s body together in the mouth area. Indeed the only continuous wood is at the sides, and it is only as thick as the distance between the bottom of the blade grooves and the exterior sides of the body. Not a lotta meat.
If we strike the center of the butt, the body, being relatively unsupported in this area, must flex creating stresses, sometimes enough to crack it, sometimes even enough to split it as evidenced in the photo above. This sort of damage is commonly seen, but is almost entirely avoidable because, if we strike the right and left extremes of chamfered edge behind the blade, forces will be directed through the stronger sides of the mouth opening reducing the chances of cracking and/or splitting the tail. You can feel and even hear the difference if you pay attention.
If you have money dribbling out of your ears, don’t care how nasty your plane looks, don’t mind sending the message to everyone who sees it that you are ham-handed wood butcher, and prefer replacing or fixing your planes instead of using them, by all means scrupulously disregard this suggestion, in which case you might want to get some extra bubble wrap to keep yourself entertained while the bolt and epoxy repair to your poor plane’s broken body cures.
BTW, damage to the body or blades of C&S Tool’s planes caused by the incorrect use of metal hammers will void the tool’s warranty.
Plane Storage
When you purchase a plane, the blade is already installed in the body, although the cutting edge is usually recessed inside the mouth to protect it. The first step, therefore, is to remove the blade and examine it.
If you live in a low humidity area such as Nevada, Arizona or Southern Calipornia in the USA and purchase a plane from a part of the world with high-humidity at times, such as Japan, it is wise to remove the blade and set the plane aside in the area where it will spend most of its time for a few days to let the body become acclimatized, especially if you plan to use the plane in a space with central heating and cooling which may cause the wooden body to shrink in width.
If you plan to store your plane for several years in a dry climate, or in a space with central heating and cooling, we recommend you remove the blade and chipbreaker, oil them, wrap them in aluminum foil, and store the body and blades together but without being installed in the body to prevent the blades from restraining the body’s shrinkage causing it to crack. Just to be safe.
In the next post in this adventure we will discuss how to modify a Japanese plane’s body to make it easier to use.
The end view of an amazing nagadai plane body by Inomoto-san made from a piece of Japanese White Oak combining “Oimasa” grain orientation and the highly-desireable ripple grain. In oimasa orientation a high ratio of the dense, tough, light-colored medullary rays are intersecting the sole, making the sole wear slower. Using plain-sawn wood will direct even more of these rays to intersect the sole further reducing wear, but at the same time will increase the tendency of the sole to warp. On the other hand, orienting the annual rings vertically in a “quartersawn” configuration would maximize the body’s stability, but at the same time would cause the sole to wear much quicker while making the body less resistant to cracking and splitting. The oimasa orientation shown in this photo is a compromise intended to reduce warping without reducing strength while improving the sole’s wear resistance. Ripple-grain white oak is not only more beautiful, it exposes more of the harder winter wood at the sole making it both more wear-resistant and more stable than ordinary white oak. A thing of beauty.
If you have questions or would like to learn more about our tools, please click the “Pricelist” link here or at the top of the page and use the “Contact Us” form located immediately below.
Please share your insights and comments with everyone in the form located further below labeled “Leave a Reply.” We aren’t evil Google, fascist facebook, or thuggish Twitter and so won’t sell, share, or profitably “misplace” your information. May my plane blade be forever skewed if I lie.
The carpenter dresses his plank, the tongue of his foreplane whistles its wild ascending lisp
Walt Whitman, “Song of Myself,” Leaves of Grass
The efficient woodworker must continue accurately cutting or shaving wood just as long as possible without stopping to sharpen his blades too frequently because time spent sharpening is time the primary job isn’t getting done. He must therefore develop unconscious habits to help him constantly monitor the condition of his blades and the quality of the work being performed.
The Four Habits
As the saying goes, “timing is everything.”
If Beloved Customer pays attention, you will discover there is a point where a woodworking tool’s blade still cuts, but its cutting performance begins to drop off. Sensing this transition point is critical because if you continue cutting wood much past it, three things are likely to result.
The energy needed to motivate the blade will increase dramatically;
The quality of the cut will quickly deteriorate;
The time and stone expenditure necessary to resharpen the blade will increase.
That’s three variables that could be expressed in a pretty graph if one was so inclined, a graph that would have at least one inflection point. Which variable is most important to you?
Most woodworkers fail to consider these efficiency variables; They simply keep cutting away until the tool either becomes too difficult to motivate, or the results resemble canine cuisine, then stop work, curse the poor innocent tool (often hurting its feelings) and resharpen the blade. But the wise woodworker will focus on minimizing the total time and total cost required to maintain his tools even if it means he must pause work to resharpen his blade well before its performance deteriorates badly.
This sharpening inflection point will vary from blade to blade and job to job because every blade, every piece of wood and and every user are unique. Simply counting strokes is not enough. It takes attention and practice to sense when a blade has reached this point.
The following are some things you should pay attention to, and habits you should develop, to help you identify the sharpening inflection point.
Habit No.1: Sense Resistance Forces: As you use a tool such as a plane, chisel, or saw, tune your senses to detect the point at which the blade becomes more difficult to motivate. As the blade dulls, the force that you must apply to the tool to keep it cutting will gradually increase. This is especially noticeable when planing and sawing. Develop the habit of paying attention to this force so you can determine when it is time to resharpen.
Your humble servant recommends you regularly use an oilpot to ensure any increased resistance is actually due to a dulled blade and not just increased friction between the tool and the wood (or pixie predations (ツ)).
Habit No.2: Listen to the Music: Pay attention to the tool’s song. That’s right, turn off the radio and CD player, shush that jabbering little 3 year old rolling around in plane shavings under your bench, and listen to the music your blades make instead. If you do, you will notice that each tool sings its own song, one that varies with the wood, the cut, and the condition of the blade. Is the blade singing, lisping, or croaking as it chews wood? Is it a saw with a basso profundo voice, or a mortise chisel with vibrant tenor tones, or perhaps a soprano finishing plane singing a woody aria? A sharp blade makes a clearer, happier sound when cutting or shaving wood than a dull one does. Learn the bright song it sings when it’s sharp and the sad noise it makes when it’s dull, and all the tones in between. If you have ears to hear, it will tell you what kind of job it is doing and when the time has come to resharpen it.
Habit No.3: Eyeball Your Cuts: Watch the tool and the wood it has cut. Is your chisel cutting cleanly, or is it crushing the wood cells? A sharp chisel blade cuts cleaner than a dull one. You can feel and hear the difference. And you can see the difference in both the shavings or chips and the surfaces the tool leaves behind. Don’t be a wood butcher: develop the habit of frequently checking the quality of your cuts. It doesn’t take extra time, and your tools will wiggle with happiness at the attention you give their efforts.
Habit No. 4: Feel the Surface of the Wood:Is your plane shaving the wood cleanly, or are the surfaces it leaves behind rough with tearout? Develop the habit of running your fingertips along the path your plane just cut to sense surface quality. If you detect roughness or tearout, the plane may be out of adjustment, or more likely, the blade is becoming dull. Or maybe you need to skew the blade, change the direction of the cut, or moisten the wood’s surface with a rag dampened with planing fluid (I use industrial-grade busthead whiskey, or unicorn wee wee when I can get it).
Next, run your fingertips across the path of the cut your plane just made to detect ridges that may have been created by irregularities or chips in your blade’s cutting edge. Every one of those ridges indicates a small waste of your time and energy and a flaw created in the wood. Don’t forget that the tops of those ridges contain compressed wood cells (kigoroshi) that may swell back to their original volume becoming even more pronounced with time.
These tasks are easily accomplished in passing with a few swipes of the fingertips along and across the wood between cuts without spending any extra time.
These techniques are not rocket surgery. They don’t take extra time. They can be applied to any cutting tool all the time. The key is to pay attention; To listen to one’s tools; To watch their work; To feel their work.
Let’s next shift our attention to three of the Mysteries of Woodworking, their potential impacts on mental health, and how to avoid unfortunate wardrobe decisions.
The Mystery of the Tilting Board
To discuss this Mystery, we will call on the services of my old buddy Richard W. (Woody) Woodward. You may remember him from a mystery story in a previous article. Yes, it was a near thing, but he has fully recovered from alcohol poisoning after chugging a 5th of tequila in an emotionally-charged bout of drama over a brittle blade.
Anyway, this mystery goes something like this. Woody is planing a board about the same width as his plane’s blade down to a specific thickness, but for some unfathomable reason, the board ends up thinner on one side of its width than the other. He checks the blade’s projection from the plane’s mouth, but it is absolutely uniform. In fact, to plane the board to the correct thickness he ends up having to tilt the blade to take less of a cut on one side of the board than the other.
Most everyone has experienced this curious and wasteful phenomenon, but because it is not consistent, many never solve the mystery of the tilting board, blaming it on Murphy’s ministrations or pixie perfidiousness. But never fear, because the solution is elementary, Dear Watson.
In Habit No.4 listed above, your humble servant mentioned residual “ridges.” Please be aware that these ridges are not only unsightly and may damage applied finishes later, but they can actually keep your plane from cutting shavings of uniform thickness. Think about it.
Let’s assume you are planing a board the same width as your plane blade, but the blade has a tiny chip near the right end of the blade that leaves behind a .0005″ high ridge on the board’s surface. With each subsequent cut using this same blade with the same defect the right side of the plane’s body and likewise its blade will be elevated above the board’s surface by .0005″, while the left hand side, which doesn’t have any ridges for the plane’s sole to ride on, is shaved the normal amount. The difference in the amount of wood shaved from the right and left sides with each individual cut is minute, of course, but it accumulates with each pass sure as eggses is eggses
Assuming you checked that the blade is projecting from the plane’s mouth the same distance across its entire width, with each pass the surface of the board becomes tilted, a little high on the right side and a little low on the left, so that instead of a flat surface square to the board’s sides, you have produced a flat surface that is thinner on the left side and thicker on the right. Muy malo, amigo.
If, while performing the checks listed above, you detect ridges on a freshly-planed surface, immediately check the blade’s cutting edge by running a fingernail along it’s width. Don’t worry, it won’t dull the blade unless you are also a bricklayer. Your nail will feel the catch and grab of defects too small for your eye to see. A few small ones may make no difference, but on the other hand, they might make a big difference.
Often these ridges will show up as lines of thicker wood in your plane shavings. You do occasionally examine your shavings, right?
With this, the Mystery of the Tilting Board, one that has driven many a woodworker to distraction, too often leading to regrettable fashion decisions involving stiff, canvas jackets with long sleeves connected to straps and buckles that fasten behind the barking woodworker’s back and even pass under the crotch (decidedly uncomfortable, I assure you), has been solved. Rest assured, only the Beloved Customers and Gentle Readers of the C&S Tools Blog can be certain of avoiding this undignified state of dress.
The Mystery of the Missing Plan
Here is another mystery of woodworking, one that especially vexes those tender souls new to the calorie-burning fun of dimensioning boards by hand.
Let’s say Woody needs to turn a bunch of twisty, banana-shaped boards into flat, square, precisely dimensioned and cleanly-surfaced drawer fronts to make 24 piston-fit drawers. Let’s also assume the wood he uses for each drawer-front is unique in both appearance and warpage. It’s a heck of a lot of wood to cut with no time to waste, so our erstwhile wood butcher gets out his trusty handplane, sharpens it up, adjusts the blade and chipbreaker, gives it a kiss for luck, and proceeds to send wood shavings flying through the air with gleeful abandon!
But wait just one frikin minute! No matter how much Woody planes, he just can’t seem to make some of the surfaces flat, free of wind and the sides square to the faces. It’s like some kinda moving target! Indeed, eventually he is dismayed to discover some of the board’s edges are getting too thin. What to do, what to do!?
Drama queens like dear Woody typically begin interesting antics at this point, but not so our Beloved Customers who, unlike Woody, are stoic, laconic, intelligent and of course, sharply-dressed, and therefore pause their physical efforts to focus their mental powers on solving this mystery.
At this point the resident benchdog may perk up his ears, tucks in his tail and beetle away in fear of the smoke and humming sound emanating from BC’s ears; Master Benchcat arches his backs, hisses like a goose, and flees the workshop as if his tail is on fire; And the resident pixies frantically hide in the lumberpile to avoid being disrupted by the power they sense radiating from BC’s mighty brain!
Of course, the culprit is simply operator error.
Don’t forget to clean up the cat pee because it’s toxic to tools. Seriously.
Too few people really pay attention when using their tools, focusing like a badger digging out a tasty squirrel on making as many chips or shavings as quickly as possible, all without a plan.
For example, a failure common to many woodworkers is to start planing without first identifying and marking the high spots that must be cut down first, and then areas to be cut down next. In other words, they fail to plan the sequence of the work. The result is that time, steel and sweat is wasted cutting wood that didn’t need to be cut while ignoring wood that should have been cut first. And all for lack of a plan measured with a straightedge or dryline and marked on the board with a few strokes or circles of a lumber crayon or carpenter pencil. Too sad to bear stoically or to describe laconically even if one’s wardrobe is perfection.
This mystery too has been known to increase profits of the mental health industry and even (heaven forfend!) fashion decisions involving poorly-tailored canvas jackets with itchy crotch straps. Simply not to be borne!
Remember, when the goal is to make a board flat efficiently, always begin the job by identifying high spots and low spots and marking them. Then, always begin planing by shaving down the high spots while avoiding the low spots. One mystery solved!
The Mystery of the Sounding Board
Lastly, we come to perhaps the most frustrating and least-understood of the Mysteries of Woodworking. Not to say there are no other mysteries, because there is always that most ancient of riddles that baffled even the enigmatic Sphinx, one which has tortured men since before Pharaoh wore papyrus nappies, namely that of how best to answer one’s wife when she asks if her new pair of jeans makes her bottom look “simply humongous.”
Sadly, this is one mystery upon which your humble servant is unable to shed light because even I “never could find no sign on a woman’s heart.”
But I digress. This Mystery is one that torments those badly befuddled souls like friend Woody who, lacking a plan to follow, eyes that see, hands that feel and ears that hear, unwisely assume the board they are planing is stable simply because it doesn’t walk away to get a beer from the shop’s mini fridge.
Perhaps it is the malevolent influence of pernicious pixies that causes him to ignore that the downward deflection the pressure of the plane unavoidably induces in a warped, unevenly supported board, or in a board being planed on a flimsy or crooked workbench.
This unintentional, indeed unnoticed deflection too often causes the board to escape the cutting blade resulting in hills being raised and valleys remaining low where flat surfaces were required. Of course, such evasive behavior leaves the handplane bitterly dissatisfied.
But this waste of wood, steel, sweat and goodwill can be avoided because, even if the board isn’t rocking like Zepplin and dear Woody can’t feel the board deflecting away from his plane’s cutting edge, he could detect the change in his plane’s song when it is cutting an unsupported area of a board if he only listened because the piece of wood he is shaping is also a “sounding board.”
Think of all the money saved that Woody would otherwise spend on lithium, Prozac, and small hotel rooms with padded walls to ease his mental anguish if only he had the foresight to make a plan, train his hands and eyes to confirm his tool’s performance, and his ears to listen to what his plane tries to tell him.
Here is wisdom: The experienced professional will investigate each board, make a plan for his work, mark the plan on the wood, shim the still un-planed off face of the board so it is evenly supported on a flat workbench surface to prevent it from rocking and deflecting downward too much, and sharpen his blade if necessary before making a single cut. Then instead of moving his plane randomly like a simian Picasso with a paintbrush, will make each cut intentionally, purposefully, in accordance with his plan to make the work go as efficiently as possible.
He will also pay attention to the reaction of the wood and feedback from his tools during each cut. He will use the four habits discussed above, and maybe even a drop or two of unicorn wee wee to limit tearout if his budget allows.
If Beloved Customer doesn’t have a master to give you a dirty look or to box your ears when you impatiently err, you must train yourself. Slow down. Make a plan. Execute the plan. Pay attention, use your senses, and spend the time needed to evaluate progress against the plan. Consider carefully why the work is going well or why it is not.
This process will slow the work down at first, but over time it will sharpen your instincts, tune your senses, and help you develop good habits that eventually accelerate your work while improving the quality of the end product.
It will guide you along the path to becoming a master craftsman.
May the gods of handsaws smile upon you always.
Until we meet again, I have the honor to remain,
YMHOS
If you have questions or would like to learn more about our tools, please click the see the “Pricelist” link here or at the top of the page and use the “Contact Us” form located immediately below.
Please share your insights and comments with everyone in the form located further below labeled “Leave a Reply.” We aren’t evil Google, fascist facebook, or thuggish Twitter and so won’t sell, share, or profitably “misplace” your information. If I lie may inch-long purple maggots infest the gouges in my crotch made by my straight-jacket straps.
We occasionally publish testimonials from our Beloved Customers. This one by a talented and diligent professional in Montana is especially well-written, and representative of much of the customer feedback we’ve received over the years. More importantly, it contains pictures of a beautifully-made solid-walnut table.
Stan Covington, C&S Tools
As a 4th generation carpenter, I’ve always been interested in the legacy of well crafted items. Finally, after 25 years as a carpenter I was ready to build my collection of heirloom-quality hand tools.
I’ve owned many chisels, most of them new Stanley chisels, but they never held a satisfactory edge. I bought some older chisels off eBay and rehabilitated them, hoping for a better steel (based on my research), but the blades always curled when they hit knots. During my in-depth research of quality chisels I eventually came across Covington and Sons Tools.
I learned a lot from the C&S website and blog posts. Stan took the time to make sure I was purchasing the right tools for my needs.
The tools that Stan provides are made by craftsmen whose attention to detail and legacy is crystallized in the tools they forge. You’ll know what I mean when you use them.
Honing a high-quality blade to a mirror finish, and then feeling it slide through wood with just light hand pressure is an experience lesser woodworking tools truly cannot provide.
Working with people who understand quality is a pleasure.
Here are some photos of my most recent project, using chisels and a plane purchased from Covington and Sons.
C&S Tools Sukezane brand 70mm finish plane. Shirogami No.1 steel blade hand-forged by Nakano Takeo, body by Inomoto-san.
The Road goes ever on and on, Down from the door where it began. Now far ahead the Road has gone, And I must follow, if I can, Pursuing it with eager feet, Until it joins some larger way Where many paths and errands meet. And whither then? I cannot say.
The Road goes ever on and on Out from the door where it began. Now far ahead the Road has gone, Let others follow it who can! Let them a journey new begin, But I at last with weary feet Will turn towards the lighted inn, My evening-rest and sleep to meet.
Bilbo Baggins
Your humble servant has received many inquiries over the years from Honorable Friends and Beloved Customers (may the hair on their toes never fall out!) about how to setup, maintain and use Japanese planes to which I have gladly responded when the request for information was made politely.
The Japanese hiraganna handplane is an elegant tool with a simple yet deceptively sophisticated design, not a difficult tool to master once one understands its unique design principles and learns a few basic techniques easily taught in person; But it can be frustrating to master them using only written guidance.
But despite my hesitation heretofore, I believe the time has come to begin this journey. I pray Beloved Customers will have the courage to accompany me down this road that goes ever on and on until we reach the lighted inn. When we arrive, the first round of root beer will be on me, so drink up!
Let’s begin the journey by examining some relevant terminology. Don’t forget your handkerchief!
Terminology
The Japanese Yariganna in-use. Prior to the advent of the handplane to the islands of Japan, an approximation of this tool was used for finish-planing the surfaces of wood following the adze. It creates a unique and practical surface texture.
In this and subsequent posts in this series your humble servant will not attempt to educate Beloved Customers in all the Japanese language terms for every part of the plane, nor will I use Japanese conventions for describing handplanes, since that would be about as useful as ice-skates on a hog. Instead I will use standard English language terms wherever possible. There is an illustration below that shows the various components and features along with Japanese language labels for those interested.
Indeed, since the plane is a relatively recent tool in the Japanese woodworker’s toolbox, and has a much longer archeological history in the West, it seems silly to use more Japanese words than absolutely necessary to describe something that did not originate in Japan, and can easily be described in English. I will, however, venture to describe some of the more common general terms specific to the Japanese handplane.
I am neither a lawyer nor a government employee and so see no need to make things more confusing than necessary. I humbly apologize in advance to any purists who enjoy being confused.
The standard handplane in Japan, and the one used for creating and/or smoothing flat surfaces (versus rabbet, chamfer or molding planes) is called the “hiraganna,” pronounced hee/rah/gahn/nah, and written using the Chinese ideograms 平鉋 , without emphasis on any part of the word.
The first character 平 is pronounced, in this case, “hira” (there are at least 6 standard pronunciations for this character as it is used in Japan) and means “flat.” makes sense, right?
The second character 鉋 , written “kanna” in the Latin alphabet and pronounced “kan/nah,” means “plane” (as in “handplane”). This character is comprised of two standalone characters combined to make a single character, a common practice in the Chinese and Japanese languages. The one on the left side, 金, means gold or metal, while the one on the right, 包 means “to wrap.” Kinda sorta makes sense; Almost hardly.
The character for kanna was not invented in Japan but is said to have been used in China since the Táng period AD618 – 907, although the tool it represented at the time was a multi-blade scraper of sorts and not a handplane.
Comparison Between Western and Japanese Wooden-bodied Bench Planes
If your humble servant may be permitted a brief digression on a personal subject, I would like to clarify a point of some small relevance to this explanation of the Japanese handplane.
I have at times been called a Japanophile, and although I confess to being fond of the mountainous islands and the wonderful people of Japan, the years I have spent living in Japan, and my ability to read, write and speak the language were not born of some starry-eyed infatuation with or even simple admiration of Japan, but by practical service obligations, educational pursuits and my work in the construction industry.
My point is that I prefer Japanese tools and techniques when I think they are superior, and by the same token prefer Western tools and techniques when I believe they are superior. Consequently, I like to flatter myself that I can provide a relatively unbiased viewpoint, one which will come into clearer focus near the end of this article.
Of course, those who prefer Western tools and techniques above all others will say I am biased towards the Japanese way, while those who prefer Japanese tools and techniques above all others will insist I am biased toward Western tools and techniques. There is no way to win such an argument, so Beloved Customers must judge for themselves. Anyway, back to the subject at hand.
A detailed treatise comparing wooden-bodied Japanese handplanes to steel-bodied Western handplanes would be an extravagant waste of Beloved Customer’s precious time, so I will resist the temptation. But I would be remiss to not point out that Bailey-pattern steel-body handplanes do have a few serious advantages over wooden-bodied planes in general, while wooden-bodied planes in general, and Japanese hiraganna planes in particular, have several serious advantages over modern Bailey-pattern planes the thoughtful woodworker should understand.
Some of the advantages of modern steel-bodied Baily-pattern planes over all wooden-bodied planes include the following:
The steel plane’s body is unaffected by seasonal humidity changes and therefore warps less and requires less fettling. This is a huge advantage;
The steel plane’s sole is harder and wears slower than a wooden sole, and therefore lasts longer and requires less fettling. Also, since the sole wears slower, the mouth does not easily become wider as soon, and seldom if ever needs to have a new mouth inlet. This is another huge advantage.
Both of these advantages can have a humongous impact on the effectiveness and productivity of the tool over the years.
Some of the advantages of Japanese wooden-bodied planes over steel-bodied planes include the following:
The wooden body is not as easily damaged as a traditional cast-iron steel-bodied plane’s body which will bend and/or fracture if dropped onto a hard surface (the ductile cast iron used in some high-end planes nowadays is a significant improvement in this regard). Fracturing has been the bane of cast-iron-bodied planes since the beginning. This is a huge advantage;
The plane’s Owner can modify, repair, or make a replacement wooden body exactly to his preferences quickly and inexpensively;
The wooden sole is softer than a steel sole and therefore is not only less likely to scratch the surface being planed, but will tend to burnish it instead;
The wooden sole is easier to true, fettle, and even modify;
The wooden body is lighter in weight and therefore both less tiring to use and easier to transport;
Japanese handplanes have lower profiles so they take up less volume in the toolchest and/or toolbag, and are easier to store and transport;
Japanese handplanes have few if any screws and no levers so adjustment is simpler, more intuitive, and entirely dispenses with the clumsy, often sloppy mechanical linkage common to mass-produced Bailey-pattern steel-bodied planes;
And finally, the biggest advantage of the Japanese handplane is, (drumroll please), the blade. If hand-forged from high-quality steel and properly heat-treated, the blade of the hiraganna plane will become much sharper, stay sharper longer and will be easier to sharpen than the blades of modern steel-bodied Bailey-pattern handplanes. No contest. Your humble servant believes the blade’s performance is the most important aspect of a handplane because, after all, it is a cutting tool, not a paperweight (although I admit to having a pretty little LN No.1 benchplane in white bronze I use as a paperweight. My associates here in Japan can’t figure out what it is so I tell them it’s for shaving kiwi fruit (ツ)).
Allow me to expound a little further on the advantages of the Japanese handplane:
Blade Performance:
A beautifully-polished kanna blade with what appears to be excellent grey jigane and a milky-silver hagane cutting edge. It takes your humble servant’s breathe away.
The Japanese planes we carry have hand-forged laminated blades made from specialized high-carbon tool steel to meet the performance expectations of professional woodworkers in Japan. Not steel intended for farming implements, car springs, or dies.
The crystalline structure of this steel once made into a blade by our blacksmiths is fine-grained and uniform. Blades are exceptionally hard at 65~66Rc, and remain sharp a long time while being easily sharpened.
There was a time in centuries past when Western blades were of near equal quality, but the Western tool corporations and their Chinese suppliers ended those days with a knife to the gut.
Sadly, the blades of most Bailey-pattern planes manufactured nowadays are made of high-alloy steels for which quality control can be easily automated, but which were never intended for handplane blades. These steels are undeniably tough, but won’t become very sharp initially, quickly dull, and are, relatively speaking, an “evil screaming bitch” to sharpen (pardon the excessively-technical jargon).
Blade Appearance:
While it used to be that Western wooden-bodied planes had interesting maker’s marks stamped in their blades, such is no longer the case. Japanese planes, on the other hand, make a point of having decorative engraving, stampings and surface treatments applied to their blades for a significantly more interesting presentation of the blacksmith’s art than the plain, boring sanded steel of modern Western planes.
A plane by Usui Kengo with a nekkiri yabane (cut arrow feather) ground and stunningly artful calligraphy handcut into the face.
Reliable Blade Retention:
The blade of Japanese handplanes is wedged tightly into two grooves in the side of the body preventing shifting and rotation, and providing reliable settings. Most modern Western handplanes rely on a relatively complicated and less-secure blade retention and adjustment mechanism.
Simplicity:
The standard Japanese hiraganna plane has at most 4 components: The body, blade, chipbreaker (uragane), and chipbreaker rod. Planes with adjustable mouths will have more parts, but those are not standard planes. Screwdrivers and wrenches are not necessary for adjusting or disassembly of Japanese handplanes. Western planes often, but not always, have at least 21 and sometimes more components and require tools to field-strip.
And all the parts in Bailey-pattern handplanes have built-in slop which grows worse with use and often makes adjustment irritating and sometimes even unreliable.
The Japanese hiraganna does not have a separate wedge or a mechanical assembly securing the blade in-place. Instead, the blade itself is wedge-shaped, narrowing in thickness from the head to the cutting edge, so that it fits tightly into two grooves, one cut into each sidewall of the mouth opening, for a secure fit, an elegant, simple and utterly reliable design.
The various component parts of a Japanese Hiraganna. There are only 4.
Lower Profile and Reduced Weight:
Japanese hiraganna have thinner bodies and a lower profile than Western Bailey-pattern planes and even Western wooden-bodied planes. Accordingly, they weigh less and take up less space in the toolbox.
While there are times when your humble servant appreciates the extra momentum a heavier steel body affords when making deep cuts, those instances are limited to specific applications. The rest of the time the extra mass is like a bloated and corrupt government agency: a pointless burden.
In all other applications, the lighter weight of the wooden-bodied Japanese hiraganna plane is a blessing.
Smoother Surface
Where wooden-bodied planes of all types excel is the superior finish they leave on the wood they are used to plane. That is not to say steel-bodied planes cannot create a perfectly smooth surface, but it is the nature of steel to develop dings and burrs in-use that frequently leave scratches in the wood they are planing. And while a wooden sole will burnish a wooden surface, the best steel can do is rub it.
Western Steel-bodied Handplanes: The Right Tool for the Right Job 適材適所
There is a saying in Japan I am told that comes from the boat-building tradition where many types of wood are used for the various components in a quality vessel, and it goes something like this: Tekizai tekisho 適材適所 meaning: “The right wood for the right place.”
Your humble servant is a pragmatic son of a gun, and a firm believer in using the best tool available to achieve the best results possible. Accordingly, it would be exceedingly foolish to insist that Japanese handplanes are always the best tool for every planing job. Indeed, I have used a combination of both Bailey-pattern steel-bodied handplanes and Japanese-style handplanes for many decades, selecting the best tool for the specific job at-hand. So what steel-bodied planes do I believe excel?
Scrub Plane
I have found the Stanley No.40 furring plane and especially its more modern equivalent the Lie-Nielson 40 1/2 scrub plane to be superior for removing material when dimensioning lumber (making it thinner and flatter).
This is an extremely simple plane with a narrow, thick blade 1.450″ x 3/16″ ground to a large curvature and a big mouth designed to hog lots of wood. The handles make it easier to leverage body weight into the cuts.
In the case of the LN model, the blade is A2 steel, a material developed originally for dies, not plane blades, a tool steel that will never become especially sharp, and which dulls quickly, but once it has dulled to a certain point simply keeps on cutting, seemingly forever. And while the blade may become dented and dinged, it will not easily chip, perfect for the rough work of dimensioning dirty and stone-infested rough-sawn lumber.
The ductile iron sole of the LN product will be of course be scratched by dirt and stones hidden in the wood, but who cares? Better a steel scrub plane than the white oak of my Japanese planes. I consider Lie-Nielson 40 1/2 to be an essential plane in my toolchest.
Block Plane
The steel-bodied Western block plane is also an essential tool IMHO.
There are of course Japanese planes with similar dimensions, of lighter weight and with better blades, but they all have one weak point, namely the area right in front of the mouth becomes scratched and grooved and wears quickly because block planes are often used to trim and clean edges, a job which applies high point loads on the mouth. The fix used in Japan is to inlet a brass plate at the mouth. We carry small planes with this feature when new.
Also, I use my block planes for finish carpentry and installations which involves working around hidden finish nails, little pieces of steel that damage wooden bodies and hard blades, but which a steel block plane shrugs off.
I own several block planes, being fond of experimenting with tools, but have found the Lie-Nielson No. 60-1/2 rabbet block plane with nicker to be the one most useful for me.
Jointer Plane
Another Bailey-pattern steel-bodied plane I consider to be excellent is the jointer plane. When a young man I owned an old Stanley No.7 jointer plane I bought at a flea market, but it fell from the back of my 1966 VW van many moons ago and suffered the fate common to most old cast-iron planes, breaking both the old cast iron body and my younger heart in half. I bought the Lie-Nielson version many years later and have been pleased with it’s performance (my expectations were never very high).
It’s a monster at 22″ long and weighing 8-1/4 lbs. I hate the heck out of the A2 steel blade. To make things worse, the sole was warped when I bought it new, so I had to spend hours flattening it on sandpaper and glass. Why do I like it? The cast ductile iron sole is tough and never warps (or at least hasn’t since it came to me). The extra length makes it especially stable for cuts ending or starting off the piece of wood I am planing. When I have a large surface such as a table to flatten, my No.7 may not cut like a dream or be easy to use, but it always makes the job go quicker.
Conclusion
In this post we have briefly touched on the history, terminology, advantages and disadvantages of the Japanese hiraganna plane. We have also compared it to Western planes, and concluded with several examples of Western handplanes your humble servant believes to be superior to their Japanese counterpart.
I hope you will agree that the Japanese handplane is a tool worth mastering if only because of the excellent work it can help you execute. Besides, they’re a lot of fun.
In the next post in this story of supernatural intrigue and inter-dimensional romance we will discuss how to properly adjust a Japanese hiraganna plane without hurting its feelings.
YMHOS
‘Look at them,’ mother Troll said. ‘Look at my sons! You won’t find more beautiful trolls on this side of the moon’ (John Albert Bauer (1882–1918) A difficult choice indeed for a fairy princess.
If you have questions or would like to learn more about our tools, please click the “Pricelist” link here or at the top of the page and use the “Contact Us” form located immediately below.
Please share your insights and comments with everyone in the form located further below labeled “Leave a Reply.” We aren’t evil Google, fascist facebook, or thuggish Twitter and so won’t sell, share, or profitably “misplace” your information. If I lie may my jointer plane break in half and bust my toes.
There are few blessings without a curse hidden inside, nor curses without a whiff of blessing. Like most things, it’s a matter of how you look at it.
Joe Abercrombie, Isern, “A Little Hatred”
In this article your humble servant will attempt to shed more light on the ancient “Mystery of Steel.”
This story does not begin on a dark Scottish moor, nor on a foggy London night in a drawing room with the door inexplicably locked from the inside concealing bloody mayhem splattered across intricately carved linenfold oak paneling; Rather, it begins in an ordinary woodworking shop. And it goes something like this.
The Brittle Edge
The curtain rises on a humble detached workshop where, unbeknownst to our victim, an erstwhile woodworker we shall call “Woody,” dastardly events are about to unfold (cue the deep, ominous music). It’s really just an old dilapidated garage, but it’s Woody’s kingdom and he is master here, or so his bench cat allows him to imagine. He’s expecting us, so we’ll just go on in.
Make sure the door is firmly closed behind you now; It tends to stick and Woody’s bench dog loves to jet out and root around in the neighbor’s garbage. No mystery about why they call the fuzzy leg-humper “Stinky.” (ツ)
Pine and cedar plane shavings litter the floor of Woody’s shop and their fragrant aroma fills the air erasing the mutt funk. Autumn sunlight filters gently through the single dusty window as sawdust motes dance above a limp bench cat sleeping at the far end of the workbench dreaming of buffalo wings and big-eyed kittens. All appears well in Woody World.
Woody’s sitting at his workbench on his white Smith & Wesson padded stool where he has just unpacked his new chisel, admired it, checked the fit, finish and edge, and appears quite satisfied. He lays out a test mortise hole on a piece of scrap oak, picks up his gennou hammer (the one with the classic Kosaburo head and the sexy Osage Orange handle that turned out so well), and begins to chop a test mortise. But, wait!… Something’s not right!
With trembling hands, Woody examines the chisel’s cutting edge to discover the last thousandth of an inch or so has changed from smooth and sharp to ragged and dull. “Nooooo!” Woody wails as he lifts his arms to the ceiling, arches his back, and slumps to the floor on his knees in a pose reminiscent of Sergent Elias in that poignant moment on a battlefield in Vietnam; “I have been betrayed!” he cries with wavering voice. Yes, Woody’s a talented and enthusiastic drama queen in the Smeagle mold; Maybe even good enough to run for the US Congress.
Another of Woody’s qualifications for high public office is that he dearly loves to pull a cork, so while he walks to the corner Piggly Wiggly to get a 5th of tequila to anesthetize his emotional shock and refill his thespian fuel tanks, let’s take a load off and sit on his workshop sofa over there while I explain the cause of his emotional fragility. Yep, you’re right; It’s a recycled bench seat from an old Dodge Power Wagon he salvaged from a junkyard and converted to a sofa for watching ballgames and taking naps in the shop away from the jaundiced eye of “She Who Must Be Obeyed.” Don’t worry about your pretty pink dress, princess, it’s just honest sawdust.
With tools, tequila, and the mystery of steel involved, this could be a long story, so let’s consider how to solve this particular mystery before Woody gets back and starts up his caterwauling again.
But just so you don’t become discouraged, let me state right now that while all seems dark and hopeless to Woody now, there’s a tunnel at the end of the light, and he may actually have reason to rejoice greatly! But that’s for later in the story.
The Questions
A Japanese blacksmith fluxing and placing a piece of high-carbon steel onto a hot piece of jigane in preparation for forge-welding the lamination of a blade.
Your humble servant always asks the following questions when someone complains of a chipped cutting edge on a chisel or plane blade. When Woody gets back, and if he manages to remain coherent and vertical long enough, we’ll ask him these same questions. If your blades are causing you grief, you should consider asking yourself these questions too. Jose Cuervo and acting skills are not required.
What sort of quality is your problem chisel/plane? Low? Medium? High? How do you know? This is relevant because a poor-quality chisel/plane will fail just by looking at it too hard;
What type of chisel is it? A striking chisel or a paring chisel? Each type of chisel is used for different tasks and in different ways;
What and how were you cutting when the edge failed? This is important because some woods are best cut in a different manner than others, and some cuts require a special approach if we are to avoid damaging the tool;
What is the bevel angle? If the angle is much less than the ideal for the type of chisel/plane, cut and wood, we may have found the culprit. Finding the perfect angle for your chisel and situation may take some experimentation;
How did the edge fail? Did it crumble? Chip? Roll? Dent? A combo failure (with cheese)? This will tell us a lot about the tool.
Was the wood you were cutting dirty? Did it contain embedded grit? This is an important question because many people carelessly use their valuable chisels, planes and powertool blades to cut hard minerals instead of scrumptious wood. The lesson? Don’t be a slob: Scrub your wood with a steel brush before cutting it. And saw the last 3~4 millimeters off both ends of every board, or at least chamfer the ends with a block plane, drawknife or knife to remove the grit always embedded in end grain, before you put it through your jointer, thickness planner or tablesaw, or cut it with handsaws, planes or chisel. If you have not made a habit of doing this, don your scratchy sackcloth tidy whiteies, smear ashes on your face, then repent and be baptized because you have been abusing your innocent tools, Bubba. Clean your wood and you will notice the difference. Strange that no one I have ever asked this question has admitted to using dirty, stony wood at first. The reason is usually simply that they didn’t realize it was filthy until I pointed it out to them, just as it was pointed out to me many years ago. What’s that you say? You don’t have a stiff steel wire brush in your toolbox?! Shame on you;
Did you abuse the chisel by trying to lever wood out of the cut, a mortise for instance? This is a common cause of failure. People accustomed to using amateur-grade tools with soft cutting edges frequently discover the edge of their new chisel has chipped after using it like a cheap Chinese screwdriver to lever waste, never imagining the harder and more brittle steel of a quality chisel might be damaged. Such boorish behavior voids the warranty on our chisels, BTW, because a chisel is a cutting tool, not a prybar, can opener, or paint stirrer, much less a screwdriver.
Did your answers to these questions suggest any remedial action to you? The best answer to Question 1 is often to procure a better-performing tool.
But if your tool is professional-grade instead of hardware-store grade, then you may need to learn how to use it and maintain it properly. But that is a story for another day.
Let us shift our attention briefly to another, related mystery, one that has more to do with human nature.
Why Are the Blades of So Many Modern Tools Mediocre Performers?
It wasn’t always that way, but there are sound business reasons why chisel and plane blades are such poor performers nowadays, even in Japan, and like many things, it boils down to money as taught by the Harvard School of Business Department of Quality Adulteration. The numbers of craftsmen that routinely use handtools has decreased, and therefore the demand for professional-grade tools is way down. In Western countries the degradation of tool standards started even earlier.
In this situation, and where customer expectations are as high as an earthworm’s vest pocket, mediocre tools are simply more profitable for manufacturers and retailers. After all, low-quality materials are cheaper and it only takes ordinary machines and minimum-wage factory workers, not expensive trained blacksmiths, to make tool-shaped objects from mediocre-quality materials. Professional woodworkers won’t touch such crap, but amateurs, the inexperienced and those bewildered souls who judge performance based solely on lowest costbuy them by the ton.
More now than ever, “sustainability” is given pious, pompous lip-service, while the reality of modern society is that high-volume sales of colorful but poor-quality tools designed to meet planned obsolescence goals, manufactured in lots of thousands by Chinese farmers, and destined to become early landfill stuffing has become the only viable business model left standing. Gofigga.
More importantly, even if they would do better if given half a chance, inexperienced amateurs seldom have anyone to teach them how to use and maintain their tools, so they never learn proper maintenance principles and cutting techniques. When they damage their woodworking tool blades carelessly, they blame the tool supplier for their own failure. As Mr. T would say: “I pity the fool.”
Faced with this sort of consumer, it is simply easier and more profitable for tool companies to manufacture, and for retailers to sell, chisels and planes with softer, tougher, cheaper blades suited to amateurs. I think you can see the vicious cycle.
A kakuuchi oiirenomi chisel by Hidari no IchihiroAn Atsunomi chisel by Hidari no Ichihiro
A Non-technical Technical Explanation
Your humble servant’s earlier comment that Woody may have cause to rejoice about what appears to be metallurgical malfeasance may cause some Gentle Readers to wonder if I am mad as a sack of owls; Perhaps my most excellent aluminum-foil skull cap (the one with purty curly copper wires) malfunctioned permitting those icky inter-dimensional aliens’ mind-control waves to leak through?
Like our absent drama queen, I too was devastated when first faced with a manifestation of the Mystery of the Brittle Blade many years ago, but I can now explain why it may be sign of a blessing instead of a curse. But allow your unworthy and slothful servant to provide some background and explain some time proven solutions before presenting the good news. Steak before ice-cream, you see.
I beg the indulgence of knowledgeable Gentle Readers who feel insulted by the lack of temperature curve drawings and jargon such as “pearlite,” “martensite” and “ austentite,” and ask them to understand that, while this blog is focused primarily on informing our professional Beloved Customers, many Gentle Readers require a less technical explanation. Simple hospitality demands that your humble servant make an effort to provide useful insight to a wide range of Gentle Readers. As a dude wearing a leather skirt and sandals in a movie once said: “ Are you not entertained?”
A shinogi oiirenomi chisel blade by Hidari no Ichihiro
Quenching the Blade
When a blacksmith quenches a high-carbon steel blade in water in the ancient manner (called “Yakiire” 焼き入れ in Japanese which translates to “burn in” in English), the steel suffers a thermal shock, sometimes severe enough to crack it. This violent cooling also causes a peculiar crystalline structure to form in the metal, one that causes it to become harder and increase in volume, and even to warp to some degree. The casual observer may imagine the water cools the entire blade uniformly, but ‘tain’t so.
Those areas of the blade that cool the quickest form the highest volume of carbide crystals, the bulkiest latticework, and become hardest. In the case of chisels, planes, and kiridashi knives, the end of the blade has the most exposure to water, cools quickest, and therefore becomes hardest, at least during the first quench.
The blacksmith may carefully repeat the heating and quenching process multiple times, sometimes varying the heat time and temperature to achieve the desired crystalline structure and uniform distribution of small, hard carbides that define “fine-grained steel,” but the quenching process by itself always leaves the blade too hard and too brittle to be useful as-is.
Tempering the Blade
Now that the blade is hardened, indeed too hard, the blacksmith must mellow the steel, reducing its hardness while at the same time increasing its toughness by carefully reheating and cooling the steel to modify the crystallized steel in a process called “tempering,” in English and “yakimodoshi “ 焼戻し ( literally “ burn return” ) in Japanese. In this way, a steel blade hardened to Rc85 degrees during the first quench, indeed brittle enough to break into pieces if dropped onto a concrete floor, can be softened to a useful hardness while becoming at the same time much tougher.
In materials science and metallurgy, toughness is defined as the ability of a material to absorb energy and elastically deform without fracturing. To “elastically deform” means an object changes shape or deforms when pressure is applied, but returns to its original shape when the pressure is removed. For example, if you clamp one end of a piece of mild-steel wire in a vise and apply a little force with your hand at the other end it will bend at first and then spring back to its original shape when you remove pressure. This is an example of “elastic deformation.” But if you apply enough pressure the wire will not spring back (“rebound”) but will remain bent. This permanent bend is called “plastic deformation.” Mild steel wire is truly “tough as nails.”
Glass is the opposite case. While it exhibits more elastic deformation than most people realize it can, it will tolerate no plastic deformation, because when the stresses in glass reach the “yield point,” instead of bending plastically, it breaks.
A brittle blade is hard but not tough, and while it will elastically deform a little bit (often so little it’s unnoticeable), it too easily breaks. Proper tempering therefore, is critical to obtain useful toughness.
But this reduction in hardness and increase in toughness brought about through tempering is not always 100% uniform, and as mentioned above, the extreme cutting edge of the blade of a chisel or plane tends to be hardest and therefore most brittle in the case of hand-forged tools, even after tempering. The cheap, mass-production solution is to simply make the entire blade softer, say HRc45 for example, so brittleness will never be a problem. But such a tool is more a sharpened screwdriver than a cutting tool suited to the needs of professional woodworkers, IMHO.
I’m being too harsh, you say? Not even a little bit. A soft blade dulls quickly, wastes the professional woodworker’s time and money, and is irritating instead of useful. Perfect for turning screws, spreading spackle or stirring paint but not much good for quickly and precisely cutting lots of wood for pay, thank you very much.
Solutions 1 & 2
The Mystery we are investigating on Woody’s behalf is as ancient as steel itself. And of course there are reliable ancient solutions our blacksmiths employ. Let’s consider two of them.
First, create a crystalline structure in the blade through hand-forging that is more resistant to fracturing than ordinary steel regardless of its hardness. The difference hand-forging produces occurs in the crystalline structures in the steel and is not visible to the naked eye. It doesn’t happen by accident.
Second, employ painstaking heat-treatment techniques combined with uncompromising quality control to achieve the right balance of hardness vs. toughness.
To help control the heat-treat process, our blacksmiths apply a special mud-like compound to specific areas of the blade to slow down the thermal shock during the quench and improve the steel’s crystalline structure. Every blacksmith has their own “secret sauce,” so I can’t tell you what it contains, but I’m confident there’s no mayonnaise or Tabasco Sauce involved. This technique is not unique to Japan, BTW, but we know it has been successfully used by Japanese swordsmiths for at least 900+ years. I’m confident there were some old boys in ancient Syria and India that had the knack too.
It ain’t rocket surgery, but factory workers in Guangzhou or Mumbai can’t do it even with unlimited supplies of Tabasco Sauce.
So, we have discussed the reasons, and some solutions, but what to do about a blade that’s already chippy?
Solution 3
Assuming the blade has been forged by an expert blacksmith in accordance with the principles outlined above, as our tools are, the fix to chippiness (oops, did I coin a word?) is to be patient and sharpen the blade three or four times thereby removing the extra-brittle steel exposed at the cutting edge, the area that became harder and less tough than the rest of the blade during the heat-treating process. With few exceptions, the blade will then “calm down” and stop misbehaving.
This is the solution we ask our Beloved Customers to employ when this problem infrequently arises. It requires faith, and patience, but it almost always works.
Solution 4
The last solution, and one I certainly do not recommend to anyone except as a last resort, is to heat the cutting edge under a candle flame. Not an acetylene torch; Not a gas stove; Not a propane torch; Not even a butane cigarette lighter; A candle flame only. You want the extreme cutting edge to become just a smidge hotter than you can comfortably touch with your bare finger. Don’t heat the entire blade, just the cutting edge.
BIG FRIKIN DISCLAIMER 1: This method won’t fix a poor-quality blade or one that was initially ruined during forging or heat-treat.
BIG FRIKIN DISCLAIMER 2: If you do this wrong you can easily ruin the blade!
Rejoice Greatly!
But what parasitic-worm-induced brain fever made your silly deranged servant suggest that Woody should rejoice when the cutting edge of his new chisel crumbles? I assure you, my reasoning is sound, I have Woody’s best interests at heart, and I will explain all to him when he sobers up. Probably tomorrow afternoon, at this rate. (ツ)
But I’ll explain it now to you, Beloved Customer, if you will be good enough to get me a root beer to wet my whistle from Woody’s cooler over there. No, that’s not a Class M-3 Model B-9 General Utility Non-Theorizing Environmental Control Robot, it’s a mini-fridge with a glass candy bowl epoxied to its top supported by a shop vac perched on two skateboards and wrapped in miniature blinking Christmas lights. Woody puts it out on his front porch for Halloween to thrill the kids. And its no coincidence it’s a good place to stash some cold adult beverages, and root beer too of course, close at hand. He’s very practical that way. Oh, BTW, please don’t tell SWMBO about the adult beverages, or you’ll ruin a great Halloween tradition and preclude many erudite discussions in the future: Vino Veritas
Ahh, that’s better. Nothing like an ice-cold root beer.
Now where was I? Oh yes, the reason for my optimism: A high-quality blade that crumbles like Woody’s did when brand new, and mellows after a few sharpenings, is highly likely to be an exceptionally fine tool!
On the other hand, a blade that is too soft when new will never crumble or chip, but it will always quickly dull and never improve. A veritable gasket scraper. (个_个)
There are exceptions, of course: some hand-forged blades are defective and crumbly from beginning to end, usually a result of overheating the steel during the forging process (called “burning” the steel), a rookie mistake. You should return such a defective blade to the retailer you purchased it from. If, however, to save a few bucks, you rolled the dice and bought a tool without a warranty, or purchased it from an online auction, to obtain satisfaction you will need to enlist the services of Murphy’s two bubbly buddies at the law firm of Doodly & Squat. Good luck with that!
Somehow I doubt Woody will thank me for solving this piece of the Mystery of Steel for him, but I am confident he will love the flavor of that chisel for the rest of his life.
YMHOS
PS: If you found this interesting, you may find other posts regarding the Mystery of Steel found in our “Sharpening Series” interesting too. The one at this link in particular is relevant to this discussion.
A kakuuchi oiirenomi chisel by Hidari no Ichihiro. The blade has been polished removing the black oxide formed in the forge. Beautiful work like this is no longer available.
If you have questions or would like to learn more about our tools, please click the “Pricelist” link here or at the top of the page and use the “Contact Us” form located immediately below.
Please share your insights and comments with everyone in the form located further below labeled “Leave a Reply.” We aren’t evil Google, fascist facebook, or thuggish Twitter and so won’t sell, share, or profitably “misplace” your information. May I gag on a hairball if I lie.
If your wife’s having a good time and you’re not, you’re still having a better time than if you’re having a good time and she’s not.
Red Green
The sumitsubo is a Japanese marking and layout tool similar in function to the Western chalk line. Although few Gentle Readers in Western countries have experience using this tool, it has much to recommend it.
In this post we will briefly examine this tool so prevalent in Asia. Our focus however, will be on the traditional wooden versions, not the modern plastic one, a version of less beauty but perhaps greater utility.
The Japanese word “Sumitsubo” is written using the Chinese characters 墨壷 which directly translates to “ink pot.” It’s pronounced “sue/me/tsu/bow.”
The inkpot has been a common tool in many Asian countries since ancient times. Indeed, until recently, few craftsmen in Asia had even heard of the dusty chalkbox used in the West.
This is just conjecture by your humble servant, but the fact that nearly all writing and much artwork in many Asian countries during recorded history relied heavily on brushes and sumi ink, the black carbon reside of burnt pine sap, may be the reason the inkpot became the standard tool for marking straight (and sometimes intentionally curved) lines.
Using the Sumitsubo
The sumitsubo works on various surfaces including wood, stone, concrete, gypsum board, and other construction materials. It is not unique to Japan, but is found in one form or another throughout Asia. It is an essential tool for carpenters.
A thin line spooled around a reel attached to the sumitsubo passes through holes at each end of a “pond” or inkwell filled with absorbent silk or cotton waste soaked with ink. As the line is let out, and with encouraging pressure applied by the user, it soaks up ink from the inkwell.
Wooden “karuko” bobs.
In Japan, a wooden bob called a “karuko” with a sharpened steel pin is attached at the line’s far end. The workman pushes this pin into the surface of the wood being marked to secure the end of the line in place for marking.
To use the sumitsubo, the workman stretches the damp inkline over the surface of the object to be marked, secures it in the desired position at the far end using a pin, weight, or helper, reels out and stretches the line, picks up the line with his fingers and releases it snapping an inkline. There are other more subtle actions that the user must perform at the same time, but this is the essence.
Depending on the user’s skill and the available line, a perfectly straight line can be marked on a flat, level surface to many meters in length.
The ink line has several undeniable advantages over the Western chalk line. First, the line it leaves is narrower and less “ fuzzy,” sufficient for fairly accurate carpentry work, much more precise than the typical chalk line.
Second, it is not as easily rubbed off or blown away as chalk.
Third, while inks of various colors can be used, black is most common and contrasts nicely with most building materials, but red is another traditional color. Nowadays, ink can be purchased in a rainbow of colors, some in permanent ink and even some that glow-in-the-dark.
The standard variety of ink used with sumitsubo is not entirely waterproof and if applied to a non-absorbent material like stone or steel, will not endure a rainstorm well. There are waterproof inks available, however, and of course the standard trick of using a spray can of clear lacquer to seal the snapline works as well with ink lines as it does with chalk lines.
History and Design
As your humble servant has mentioned in previous articles, the marketplace development that makes it possible to purchase completed woodworking tools is fairly recent. In previous centuries and millennia, when material costs were high, transportation of goods was difficult, and labor costs were low, craftsmen would commission a blacksmith to make the metal components of their tools while would make the wooden components themselves. In Japan at least, the sumitsubo too was made by the individual craftsman and became an opportunity to display both his skills and imagination, yielding unique, beautiful, and sometimes even bizarre tools.
There is neither adequate time nor space in this insignificant little blog to go into the evolution of sumitsubo design in any detail, much less the design variations, but the Takenaka Tool Museum’s website has pictures of representative examples.
An old “Ichimonji” style sumitsubo. These squarish sumitsubo have their own charm, but are not as functional or convenient as later designs.This antique sumitsubo shows the design evolution of the tool with the narrow tail, which is easily held, the large reel which not only holds more line but helps the line dry retarding fungal growth, the wide and shallow pond, and the ceramic ferrule for the line. The owner used this tool exclusively for red ink. This sample does not have a crank for working the reel, typical of Western Japan.A fancier craftsman-made version of the sumitsubo above, with a smaller pond, a hand crank, and a more elegant wave motif
The style used for the last 200 hundred years or so is shown at the top of this post, and in the photo below. The major improvements include a larger ink pond with a grinning mouth designed to both hold more ink work better with the bamboo sumisashi inkpen used for layout, a larger, more exposed reel to hold more line, making it quicker to reel in, and providing better ventilation to reduce mildew, and a narrower, easier to grip tail containing the reel greatly improving functionality while reducing fumbling and drop damage.
Appearance aside, the genius of this design does not become apparent until you’ve used several types in the field in side-by-side comparisons, but I assure you the intelligence on display in the design of this chunk of carved wood and silk string makes Bill Gates look like a wealthy hot dog vendor.
A typical sumitsubo nowadays with crane and turtle facing each other across the ink pond, no doubt talking about sports scores. Zelkova wood
The carving seen in sumitsubo has meanings, of course, which varied with the craftsman and popular whim. The most popular style nowadays has a turtle and a crane facing each other across the ink pond. In Japanese mythology, both are considered lucky, with the crane said to live 1,000 years and the turtle 10,000 years. The turtle normally has a hair skirt flowing behind.
A very artistic craftsman-made sumitsubo with a peony blossom and Chinese lion holding court at each end of the ink pond, and a lotus leaf reel. These three symbols hark back to a famous Japanese Noh play titled “Shakkyou.” The lion in mythology is the king of beasts. It drives away demons and evil forces and protects against disease. The peony is the king of flowers. The lotus is a thing of grace and beauty that lives in, yet floats above the dirty mortal world, and with its roots purifies it. A potent symbol in Buddhism as well. However carved this sumitsubo was well-educated. It has never been used, but several cracks reveal its fragility, and the size of the lion on his precarious perch would limit its practicality in the field. Bottom view. Notice the opening below the reel to intended to promote air circulationA side view of the Chinese lion, facing away from Gentle Reader. No offense intended, of course, but dignity must be maintained.A professionally-carved sumitsubo by Kimura Isaburo showing lotsu leaves surrounding the ink pond with a tiny frog poised on the rim of the pond. “Jump little guy!”A closeup of the lotus ink-pond’s froggy.Another sumitsubo carved by by Kimura Isaburo. This one too has a tiny frog on the rim of the ink pond, but instead of reposing, he is preparing to jump to escape the snake on the opposite edge. The body of the snake wraps around the wheel and tail of the tool.
Dragons are another mythological motif seen in sumitsubo, being a fierce but noble and benevolent creature in Japanese tradition
The reel end of the sumitsubo typically incorporates water or wave details, perhaps related to the ancient Japanese motif of wagon wheels in flowing water.
The last sumitsubo maker in Niigata Prefecture was Mr. Tamaki (RIP). Those Gentle Readers who have visited Kezuroukai competitions in Japan may have seen him doing exhibitions. Here is a link to a video of him making sawdust.
Here is a link to a video of a huge (2.3 shaku = 700mm = 27.4″) sumitsubo by a famous Niigata craftsman named Ichimonji Masakane. The size brings the carving details into focus. This is of course not a practical tool, but was created for decorative purposes. Once, every major tool store had a similar sumitsubo on display. If you visit Suiheiya in Tokyo you can see similar examples.
The sumitsubo is a tool Western woodworkers could benefit from when making straight layout lines because it’s not only cheaper, more convenient and more reliable than a long steel or wooden straightedge, it produces a finer, easier to see, and more indelible mark than a chalkbox can.
The sumitsubo was once said to be the symbol of the master carpenter, the craftsman that created the design and performed layout of major aspects of a construction project. Even today, older carpenters prefer the wooden sumitsubo and insist that it does a better job. I suppose every generation in human history had similar attachments to older ways and older tools. But I won’t dismiss it as retro obsession because even your humble servant has a hand-carved Zelkova wood sumitsubo mounted under the lid of my toolbox.
Does that make me an old fart?
A drachma for your thoughts.
YMHOS
A traditional wooden crane and turtle sumitsubo at work.
If you have questions or would like to learn more about our tools, please click the see the “Pricelist” link here or at the top of the page and use the “Contact Us” form located immediately below.
Please share your insights and comments with everyone in the form located further below labeled “Leave a Reply.” We aren’t evil Google, fascist facebook, or thuggish Twitter and so won’t sell, share, or profitably “misplace” your information. If I lie may a fortuitous crane do a damp doodoo on my head.
Sukezane brand 9mm mortise chisel (mukomachinomi) side view
It is well with me only when I have a chisel in my hand
Michelangelo 1475-1564
This is the first in a series of articles about the Mortise Chisel, especially the Japanese version called the “mukomachi nomi.”
Also called the “Joiner’s Chisel” in Japan, this is a specialized chisel used by specialist craftsmen to cut precise, smallish mortise & tenon joints when making furniture, cabinetry and joinery. Carpenters don’t use it, and few in that august trade have even seen one.
In this article your humble servant will introduce a tiny bit of the terribly long history of the mortise and tenon joint, and give a description of this tool.
In future articles in this series of international intrigue we will consider how to evaluate, adjust and even how to use the Mortise Chisel in general and the Japanese Mortise Chisel in particular. We will also touch on bevel angles and blade hardness problems, what to look for in a good mortise chisel, and how to examine it with an eye to increasing its performance. This is something most users of chisels never consider, but it can make a big difference in the case of mortise chisels. Indeed, I daresay most Gentle Readers and even a few Beloved Customers will mutter the equivalent of “Bless us and splash us” when they read it.
Of course we must not neglect to discuss how to effectively correct irregularities in our mortise chisel that negatively impact performance, irregularities most people never notice.
After our Mortise Chisel is properly fettled (they almost always have some problems) we will take our racing chisel out for a few laps, but prior to that we will consider how to effectively use it. Too few receive proper training nowadays in chisel work, but here are C&S Tools we feel it our duty to help our Beloved Customers maximize their skills.
We will conclude this series by taking the “Old Master’s Test,” just to make sure both our Mortise Chisel and our skills are improving.
While focused on the Japanese Mortise Chisel, the principles and improvements discussed in this series of articles are applicable to any chisel used to cut mortises.
While all Gentle Readers with eyes to see, ears to hear, and hands that love wood are welcome to share this hard-earned knowledge, it is intended primarily for our Beloved Customers, especially those who use chisels professionally to keep body and soul in close proximity.
Some Background
Your humble servant drafted this series of posts years ago, and has shared bits of it with friends and Beloved Customers from time to time when requested, but the information has not always been well-received for a number of reasons.
There is an old Japanese saying, one which probably originated in China, written 「馬の耳に念仏」and pronounced “Uma no mimi ni nenbutsu,” which translates to “Prayers in a horse’s ear.” Why are Buddhist prayers relevant you ask? Good question. You see, some of the principles your humble servant will present in this series directly contradict doctrine profitably expounded by some of the Popes & Professors of Woodworking in the West, and may offend their disciples. But like vespers to a beast of burden, wisdom is wasted on the willfully, woefully ignorant (wow, that sounds almost like iambic pentameter!).
But our Beloved Customers are neither angels nor asses but shockingly intelligent mortal humans with whom your humble servant is convinced the time has come to share the gospel of the Mortise Chisel as it was taught to me by Masters who have since abandoned this impure world to sort boards in the big lumberyard in the sky.
This series of posts is equivalent to a graduate school course in chisels, something like “Mortise Chisels 701.” And just like a course in advanced differential equations, most Gentle Readers will never need it. But never let it be said that your humble servant didn’t do his best to improve both the skills and the tools of our Beloved Customers.
Some History of the Mortise & Tenon Joint
Mortise chisels are used for cutting rectangular holes in wood usually intended to receive matching tenons to form a structural connection called the “mortise and tenon joint” between pieces of wood.
No one knows how long humans have been using the mortise and tenon joint, but it’s a technique older than nails, although modern humans with their lithium battery-powered, made in China, landfill-bound, multicolored plastic and rubber screwdrivers may find it difficult to imagine.
So let’s begin the journey by briefly examining just two well-documented extant physical examples that may provide motivation for using this enduring joint.
The oldest known wooden structure is a neolithic well liner discovered near Leipzig Germany, constructed from oak timbers shaped by stone adze and joined at the corners with half-lap joints and pinned tusk-tenons at through-mortises. Tests indicate the trees these timbers were split from were felled between the years 5206 and 5098 BC, making the assembly at least 7200 years old.
Next, let’s look at a less soggy but more recent, more complicated and elegant example.
The oldest existing wooden building in the world is a Buddhist Temple named Horyuji located in Nara Japan. Originally constructed around 600 A.D. and rebuilt around 700 A.D. after a fire, this huge 1300 year-old temple and pagoda complex was reconstructed using hundreds of thousands of hand-cut mortise and tenon joints, testifying to the longevity of wooden structural systems and the value of this universal connection technique.
Horyuji is far more than just a temple to Buddhism, it is a temple to woodworking. If you haven’t yet visited it, you’re truly missing something.
I mention these two examples to illustrate the universality, strength, and durability of the mortise and tenon joint. Anyone serious about woodworking must master this most ancient and essential connection.
The mortise chisel is the best handtool for the job of cutting mortises less than 15mm in width. For wider mortises, well-fettled oiirenomi or atsunomi are more efficient.
Japanese Mortise Chisels
12mm mortise chisel (mukomachinomi) Face (top) View12mm mortise chisel (mukomachinomi) Side ViewView of ura (flat) of the same 12mm mortise chisel 12mm mortise chisel (mukomachinomi). Please notice the rectangular cross-section precise right angles, and straight, clean sides. This is the most precise of the Japanese chisels. The apparent tan-colored stains on the shoulder are not rust but easily-removed sharpening stone residue left by the professional sharpener who prepared the blade.
In the Japanese language mortise chisels are called “mukomachi nomi” (向待鑿), with “nomi” meaning “chisel.” Don’t ask me the origin of the rest of the word because I don’t have a clue, and have heard few plausible explanations. There is another post linked to here that contains more information about this chisel.
I will use the term mortise chisel in this article to refer to the mukomachi nomi.
For our Gentle Readers interested in the Japanese language, there are several combinations of Chinese characters used to write mukomachi, none of which make much sense or seem related in any way to either tools or woodworking. The most common characters used are “向待” with the first character meaning “there” or “direction,” and the second character meaning “wait.” Combined, they seem to mean “Waiting over there,” or something like that.
I assume the name was originally phonetic and somebody decided to use these kanji because their pronunciation matched the phonetic name. This sort of linguistic contortion is seen frequently in Japan, and has been a source of confusion for all and sundry for many centuries. I blame it on elitist Buddhist priests going back and forth between Japan and China over the centuries, but it is typical of the Japanese people in general and priests in particular to take a perverse pleasure in intentionally making and using terms others can’t figure out.
This confusing practice is not unique to bald priests. When I was an engineering student, I recall the professors insisting we never attempt to simplify or too clearly explain the technical jargon of the trade to non-professionals because it was essential to job security for them to never quite understand it.
If you are familiar with Japanese architecture, you have seen the wooden lattice work that defines it in doors, windows, dividers, shoji, fusuma, koshido, glass doors, ceilings, and even fences, all items made by “tategushi” or “joiners” in Japan. Each piece of any lattice needs two tenons and two matching mortises to stay in-place, so a single piece of traditional Japanese joinery may contain literally hundreds of small, highly precise mortises, indeed thousands in the more complicated pieces. The Japanese mortise chisel was developed specifically at the request of joiners for this type of work. Therefore, it is also known as the “Tategu Nomi” which translates to “joinery chisel.” Few carpenters use this chisel.
Nora Brand 6mm Mortise Chisel (Mukomachinomi) Side View. Although it appears to be a simple, unsophisticated tool, nothing could be further from the truth. Based on the Kiyotada pattern, this is an especially beautiful example to those with eyes to see.Nora Brand 6mm Mortise Chisel (Mukomachinomi) Ura ViewNora Brand 6mm Mortise Chisel (Mukomachinomi) Shoulder View. Exceptional shaping and filework .
Japanese mortise chisels are similar to other Japanese chisels in having a laminated steel structure with a hollow-ground ura (flat), an integral tang, wooden handle, and steel ferrule and hoop. Unlike most other chisels it has a rectangular cross-section with sides usually oriented 90˚square to the hollow-ground ura, and either flat or just slightly hollow-ground to better keep the blade aligned in the cut and to dimension and smooth the mortise’s walls.
Western mortise chisels do not typically share this detail, although unusually intelligent and observant Western woodworkers of course modify their chisels to gain similar benefits.
If speed and precision are important to you, then the sides of the chisel being oriented at 90° to the ura absolutely provide a serious advantage when cutting most mortises because the sides, and especially the two sharpish corners where these three planes meet, will effectively shave and precisely dimension the mortise’s side walls as the mortise is being cut without the need to pare them later.
Unlike most mortise joints cut with oiirenomi or atsunomi, so long as the mortise is the same width as the mortise chisel, and the user has the ability to maintain the chisel at the right angle while striking it with a hammer, the width of mortises cut with this chisel are usually quite precise and seldom if ever need be cleaned with a paring chisel. This functionality means that you can cut mortises, and especially small ones, both precisely and quickly with great confidence. It’s not called the “joiner’s chisel” for nothing.
The mukomachi chisel does not work as well in wider widths because of the increased friction between the chisel’s sides and the mortise’s walls. For joints wider than 15mm, please use a trued oiirenomi or atsunomi. And don’t forget to use your oilpot.
Conclusion
In the next class in our graduate course on the care and feeding of the wild mortise chisel, we will examine the various details to look for in an effective mukomachi nomi, most of which are applicable to other chisels such as oiirenomi and atsunomi too, indeed any chisel intended to be used to cut mortises including Western mortise chisels.
But wait a minute! Before ya’ll run out of the classroom like a caravan of crazy stoats chasing a pixie, please pick up your homework assignments from the table by the exit doors. And please, don’t leave your empties behind on the floor. Paper coffee cups are one thing, but discarded aluminum beer cans attract out-of-work divorce lawyers and other slavering vermin.
See you next time.
YMHOS
Your most humble and obedient servant’s set of well-used mortise chisels. The 8 older pieces on the right are by Kiyotada (1.5mm~15mm). The two 2 newer chisels on the far left are by Nora. Over the years I have used these tools both professionally and as a hobbyist more than any other of my chisels, as you can perhaps tell from the differing blade and handle lengths which have become shorter with use. A stoic tool, they gossip among themselves less than most other chisels. They are good friends and reliable workmates that worked hard for many years to pay rent, tuition and to buy food for the wife and babies.
If you have questions or would like to learn more about our tools, please click the see the “Pricelist” link here or at the top of the page and use the “Contact Us” form located immediately below.
Please share your insights and comments with everyone in the form located further below labeled “Leave a Reply.” We aren’t evil Google, fascist facebook, or thuggish Twitter and so won’t sell, share, or profitably “misplace” your information. If I lie may Mama Shishi bite my head off.
An illustration of the Eidai tatara furnace (a cross-section illustration is shown at the end of this article) with human-powered blowers to right and left. Looks like hot work.
The things that will destroy America are prosperity-at-any-price, peace-at-any-price, safety-first instead of duty-first, the love of soft living, and the get-rich-quick theory of life.
Theodore Roosevelt
The terms White Steel and Blue Steel frequently pop up in discussions about Japanese woodworking tools and kitchen knives. The usual misunderstandings abound in those discussions and BS takes majestic wing.
In this article your humble unworthy servant will try to share some accurate information sourced directly from the steel manufacturer, ancient blacksmiths that actually work these steels, and Japanese professional craftsmen paid to make sawdust and shavings using these steels instead of the usual soft-handed shopkeepers and self-proclaimed experts pontificating from their Mom’s basement.
We will begin by studying some etymology of two of Japan’s most famous modern tool steels. We will then transition through space and time to discuss ancient domestic Japanese steel, and then shift our attention to why these modern steels came into being. After that, we will go to metallurgy class, sans most of the technical jargon, to understand what chemicals these steels contain and why. We will also outline several performance characteristics particular to these two steels in the case of woodworking tools.
For those who enjoy more technical details combined with pretty pictures, we have concluded with the results of a brief but very informative materials engineering study.
There’s much work to be done, so please stretch your back and shoulders and ready your BS shovel.
Product Designations: Yellow, Blue and White Label Steels
These terms refer to tool steels manufactured by Hitachi Metals, Ltd. (HML) in their plant located in Yasugi City in Shimane Prefecture, Japan. If you are into woodworking tools or Japanese cutlery you have probably heard of them.
Hitachi, Ltd., founded in 1910, is one of Japan’s largest and most prestigious manufacturers. Its subsidiary, Hitachi Metals, Ltd., was established in 1956 through acquisition.
“White Steel” is an abbreviated translation of HML’s nomenclature of “Shirogamiko” 白紙鋼, which directly translates to “White Paper Steel.” Likewise, “Blue Steel” is an abbreviation of “Blue Paper Steel,” the translation of “Aogamiko” 青紙鋼.
Regarding the color terminology in these product designations, just as “Johnnie Walker Blue Label” is the product name of a Scottish whiskey with a blue paper label pasted onto the bottle, Aogami is the designation of a particular formulation of high-carbon tool steel with a blue paper label pasted onto it by the steel mill. It’s that simple.
While Johnny Walker may be kinda sorta yellow in hue, it’s no more tinted blue than JW Red Label is sangre. Likewise, the actual color of Hitachi Metal’s tool steels do not vary in color, only their labels do. BTW, if someone tells you they can tell the difference between these steels by simply looking at them, tell them to give you a nickle and pull your toe for some fragrant, musical entertainment.
Surprisingly, some folks insist they can tell the difference between steels by licking them. Our feline masters see this as further evidence human mothers lack not only retractable claws, but have butter fingers (ツ)。
Since your humble servant can read and write Japanese, I feel foolish calling these materials White Steel or Blue Steel as many in English-speaking countries do, so I prefer to use the more correct names of Kigami, Aogami, or Shirogami steel, or the English translations of Yellow Label Steel, White Label Steel or Blue Label Steel. Please excuse this accurate affectation.
Now that adult beverage nomenclature, greenhouse gases and feline viewpoints are out of the way, let’s go back in time a few hundred years. My tardis is that green box just over there. Yes, the one with the doohickey on top.
A change into period-correct wardrobe will not be necessary, but please put away your smartphone and kindly don’t embarrass me in front of the locals by holding it over your head and wailing “There’s no signal!!”
Traditional Domestic Japanese Steel: Tamahagane
Tamahagane, written 玉鋼 in Chinese characters, which translates to “Jewel Steel” and is pronounced tah/mah/hah/gah/neh, is famous as the domestic steel traditionally used to forge Japanese swords prior to the importation of bulk steel from overseas beginning with products of the Andrews Steel mill in England. Indeed, at one time tamahagane was at the center of all steel production in Japan.
But tamahagane does not grow on trees. Indeed, before Admiral Perry’s black ships re-opened the many kingdoms and fiefdoms scattered across the islands that now comprise modern Japan, the only significant local source of iron was a material called satetsu, a loose surface particulate iron written 砂鉄 in Chinese characters, meaning ”sand iron,” and pronounced sah/teh/tsu. Satetsu looks exactly like black sand. It’s quite common throughout the world, as you may discover if you drag a magnet through a dark sandy riverbed or over a black beach.
Typically found in rivers and estuaries, for many centuries the area around Yasugi City in Shimane Prefecture was a prime source.
Satetsu iron, loose and with a magnet
Satetsu was historically harvested in Japan using dredges and sluices creating horrendous environmental damage. Fortunately, the days of wholesale estuary destruction are in Japan’s past.
Although Aluminum is the most abundant metal found on the third rock from the sun, people who must have huge scales say that iron makes up 34% of the earth’s mass. Japanese satetsu as harvested is a fairly pure form of iron lacking nearly all of the problematic impurities found in commercial iron ore nowadays.
Historically, satetsu was refined in rather crude furnaces called ” tatara” yielding clumps of brittle steel containing excessive amounts of carbon and other impurities, but few of the inconvenient impurities common to iron ore extracted by mining. This “bloomery” technique is not unique to Japan, although many Japanese people who should know better mistakenly believe it is.
A tatara furnace in operation. Satetsu is combined with charcoal and heated over several days. The resulting bloom steel, called “Tamahagane,” settles to the bottom in clumps and puddles and is removed by breaking the furnace apart.Freshly-smelted Tamahagane. Being raw iron, it oxidizes quickly.
Steel produced this way in the West is called “bloom steel.”
Blacksmiths hammer, fold, and re-hammer these crumbly lumps to remove impurities and reduce/distribute carbon forming the more homogeneous Tamahagane steel. This webpage has some interesting photos of tamahagane.
A clump of Tamahagane early in the forging process. Most of this material will be lost as waste before a useful piece of steel is born.After the Blacksmith hammers the raw clumps of Tamahagane hundreds of times, he then forms it into numerous small flat steel patties, which he breaks into the pieces shown in this photo in preparation for forge-welding them into a single larger piece of steel that he can then forge into a blade.
Tatara furnaces are still operated on a limited basis today producing Tamahagane in limited quantities for use by licensed swordsmiths. Tool blacksmiths use Tamahagane occasionally too out of interest in traditional materials and methods. It’s expensive and difficult to work, with lots of waste.
A sawsmith on the island of Shikoku in Japan who was active both before and after the availability of British steel is recorded as saying that imported Western steel increased saw production efficiency in his area tenfold. Clearly, Tamahagane was a very labor intensive material.
Mr. Kosuke Iwasaki, a famous modern Japanese metallurgist and blacksmith, described forging Tamahagane as being like “hammering butter” because it flattened and spread too quickly and unpredictably, at least compared to modern steels.
Besides its peculiar forging characteristics, compared to modern tool steels Tamahagane is a difficult material infamous for being overly sensitive to temperature and easily ruined during all phases of forging and heat treatment. These traits have created a historical sensitivity among Japanese blacksmiths regarding precise temperature control, a beneficial habit when working the tool steels discussed herein.
In use, tools made from Tamahagane behave differently from modern commercial steel, or so I am told. I own and use a straight razor custom forged from Tamahagane for me many years ago by Mr. Iwasaki. I also own antique Scheffield and German razors, but my hand-forged Iwasaki razor puts them all to shame in terms of sharpness, edge retention, and ease of sharpening. I also own a couple of antique Tamahagane saws, but I have not used them much, nor have I used Tamahagane chisels, planes or knives, so my experience is limited to this one wickedly sharp little blade.
My beloved Tamahagane cutthroat razor by Iwasaki
Why do I bother Gentle Reader with these tales of ancient smelting techniques and obscure products no longer viable? Simply because Tamahagane and the cutting tools and weapons it was once used to produce profoundly influenced both Japan’s history and the Japanese people’s attitude towards edged weapons and cutting tools, in your humble servant’s opinion.
Although imported Western steel served Japan well during its ramp-up to modernity, the memory of the performance of cutting tools made from Tamahagane has remained alive in the national memory. Indeed, I am convinced the Japanese people’s love and fear of sharp things is not only psychological but genetic, although I have not seen any studies on the “sharpness gene.” But that’s a story we should save for the next time we are enjoying a mug of hot coco together around the iori fire on a moonlit Autumn night. May that evening come soon.
Modern Japanese Tool Steels
Enough ancient history. Let’s jump back into the tardis and travel to the late 1950’s to consider a few modern steels before returning home.
Yes, you can turn your mobile phone back on once inside, but reception may be poor for a few centuries. No you can’t bring back souvenirs. I don’t care what Doctor Whatsit did with his tardis, we are responsible time travelers and will avoid creating causal conundrums. Besides, the import taxes are pure murder. And please, do be careful no little children slip inside with you.
When Japan began to mass-produce commercial steel from imported pig iron using modern techniques, the first standard tool steel produced was identical to Western steels, including the impurities. These are still produced today as the “SK” series of steels as defined by Japan Industrial Standards (JIS).
Eventually, to satisfy the irrepressible sharpness gene of their domestic customers, Japanese blacksmiths and cutlery manufacturers pressured Japanese steel companies to develop products with fewer impurities and with performance characteristics approaching traditional Tamahagane.
Rising to the challenge, Hitachi Metals endeavored to replicate the performance of Tamagane using modern smelting techniques and imported pig iron and scrap metal instead of expensive and environmentally unsustainable satetsu.
Ingots of Swedish pig iron
To this end Hitachi purchased and modernized an old steel plant in Yasugi City, Shimane Prefecture for this purpose. They formulated the best steel they could make using the best pig iron they could find, sourced mostly from Sweden, an area famous for hundreds of years for producing especially pure iron ore. The results were Shirogami Steel (pronounced she/roh/gah/mee/koh 白紙鋼), Aogami Steel (pronounced aoh/gah/mee/koh 青紙鋼), and Kigami Steel (pronounced kee/gah/me/koh and written黄紙鋼) meaning “Yellow Label Steel.” Later, they developed Aogami Super steel (青紙スパー ) (a mediocre high-speed steel) and Silver Label Steel (stainless steel). Each of these products are available in various subgroups, each having a unique chemical formulation.
For a time, Hitachi marketed some of these steels with the “Tamahagane” designation. Problematic, that. Indeed, many saws and knives were deceptively stamped “Tamahagane” when these steels were first introduced.
With the explosive popularity of Japanese knives overseas, several Japanese manufacturers have once again made the decision to body surf smelly waves of BS deceptively labeling their products as being made from “Tamahagane” despite being made of common SK steels and even stainless steels. Because these spurious representations were and continue to be made for the purpose of increasing profits for companies that clearly know better, in your humble servant’s opinion even the stinky label of BS is too good for them.
Caveat emptor, booby.
Chemistry
We tend to think of steel as a hard metallic thing, but lo and behold, ’tis a chemical compound!
Few chemicals humans dabble with are absolutely pure, and while White Label, Blue Label, and Yellow Label steels contain exceptionally low amounts of undesirable contaminants, they do exist. Dealing with the negative impacts of these impurities has been the bane of blacksmiths since before Vulcan was chopping charcoal in hairy goatskin nappies.
The most common undesirable impurities found in commercial iron include Phosphorus (reduces ductility, increases brittleness, and messes with heat treating), Silicon (a useful chemical that increases strength, but too much decreases impact resistance), and Sulfur (a demonic chemical that reduces strength, increases brittleness and gleefully promotes warping). Obviously, something must be done about these bad boys.
Some people imagine that, through the alchemy of “Science” (a word that’s lost nearly all of its positive value nowadays through adulteration and profiteering by corrupt, credentialed scam artists both public and private and narcissistic publicity hounds pretending to be “scientists”), impurities are simply “disappeared” from steel during smelting. While some impurities can in fact be eliminated through heat and chemical reactions, it is not possible to significantly reduce the content of those listed above through smelting and forging alone.
Undesirable chemicals can be tolerated in steel to some degree because, like arsenic in drinking water and carbon monoxide in air, below certain levels they cause no significant harm. The best solution we have discovered is to reduce the concentration of impurities to acceptable levels by using ore and scrap material that contain low levels of impurities to begin with, and constantly testing, and either rejecting or diluting the ”pot” as necessary to keep impurities below acceptable levels. This practice is known as “Solution by Dilution.”
White Label steel is plain high-carbon steel without other additives, while Blue Label, Silver Label, and Aogami Super steels have various chemical additives to achieve specific performance criteria. Please see the flowchart below.
Production Flowchart of Yellow Label, White Label, Blue Label, and Super Aogami Steels
A flowchart outlining the manufacturing process
Another technique used to mitigate the negative effects of impurities found in iron ore is to add chemicals such as chrome, molybdenum, vanadium, tungsten, etc. to the pot producing so-called “high-alloy” steels that can be more predictably forged and heat-treated, are less likely to crack and warp, and will reliably develop useful crystalline structures despite containing high levels of detrimental impurities. Such high-alloy steels can reliably produce useful tools in mass-production situations by unskilled labor and with minimal manpower spent on quality control while greatly improving productivity and decreasing costs. But regardless of the hype, such chemicals do not improve sharpness or make sharpening easier, important considerations in the case of woodworking tools. Indeed, the exact opposite is true.
The pages in Hitachi’s Japanese-language catalog regarding their relevant cutlery steels can be found immediately below.
The table below is a summary of a few relevant tool steels listed in Hitachi Metal’s catalogue.
Gentle Reader will notice that White Label and Blue Label steels both have the same minute allowable amounts of impurities such as Silicon, Phosphorus, and Sulfur.
Chemical Table of White Label, Blue Label and Aogami Super Steels
Chemical Table of White Label and Blue Label steels as well as Aogami Super (this table can be scrolled left~right)
Carbon of course is the element that changes soft iron into hardenable steel, so all five steels listed in the table above contain carbon, but you will notice that White Label No.1 has more carbon than White Label No.2. Likewise, Blue Label No.1 has more carbon than Blue Label No.2.
The greater the carbon content, the harder the steel can be made, but with increased hardness comes increased brittleness, so White Label No.1 is likely to produce a chisel with a harder, more brittle blade than one made of White Label No.2.
With impurities and carbon content the same, the chemical difference between White Label No.1 and Blue Label No. 1 then is the addition of chrome and tungsten, elements which make the steel much easier to heat treat, and reduce warping and cracking, thereby yielding fewer defects with less work. Chrome, and especially tungsten, are expensive chemicals that make Blue Label steel costlier than White Label steel, but with easier quality control and fewer rejects, overall production costs are reduced.
White Label No.2 steel makes a wonderful saw, but the plates and teeth of saws forged from White Label No.1 tend to be fragile unless the blacksmith removes excess carbon during forging to improve toughness. This is entirely within the skillset of an experienced blacksmith, and can even occur by accident.
My point is that an experienced and conscientious blacksmith will use the steel most likely to achieve his customer’s expectations for performance, not just the most profitable or more easily-worked material.
In the case of chisels, plane blades, and kitchen knives intended for professional use, White Label No.1 is the first choice of Japanese professionals followed by Blue Label No.1 steel.
Where high performance at less cost is required, Blue Label No.1 is often preferred.
All things considered, and this is a critical point to understand, compared to White Label steel, Blue Label steel is easier to forge and heat-treat, with fewer rejects, making it a more cost-effective material despite being a more expensive material. Indeed, many blacksmiths and all mass-producers prefer Blue Label steel over White Label steel, when given a choice, because it is easier to use and more profitable, not because it makes a superior blade.
Many wholesalers and retailers insist that Blue Label steel is superior to White Label steel simply because, as a material, it’s costlier and contains elements that make it more resistant to wear and so-called “abrasion,” intimating that it will stay sharper longer. Those poor derelict souls who are easily deceived, have less than professional sharpening skills, or do not follow this blog may accept this convenient marketing ploy, but when wise Gentle Readers hear this sort of nonsense they will know to quickly put on their flippers and floaties in time to keep their heads above the stinky, brown flood of BS about to engulf them.
Wise Beloved Customers who choose blades forged from Blue Label steel will do so because they know that Blue Label steel makes a fine blade at less cost than White Label steel, not because Blue Label steel blades are superior in performance. Moreover, regardless of the steel used, they will always purchase blades forged by blacksmiths that possess the requisite dedication and have mastered the skills and QC procedures necessary to routinely produce high-quality blades from the more temperamental White Label steel. The reasons are made clear in the Technical Example below.
Quenching & Tempering
Let us next consider the process of hardening steel, called “heat treatment,” (in Japanese “netsu shori” 熱処理) the key to making useful tools.
High-alloy steels vary in this regard, but in the case of plain high-carbon steels, the two primary stages (with various intermediate steps we won’t touch on) of heat treatment are called “quenching” and “tempering.”
Quenching
Despite what many, including Supreme Court Justice Jackson, imagine, both men and women are fundamentally different and at the same time essential to making hoomans. Iron and carbon too are fundamentally different elements, and both are essential to making steel. And like men and women, these two elements sometimes make nice, but sometimes don’t get along well at all.
Indeed, prior to heat treating, the carbon molecules in steel tend to isolate themselves from the larger mass of iron forming isolated clumps, an organization that makes steel weak and/or brittle. When the steel is heated above a specific temperature, however, the carbon clumps tend to dissolve, become mobile, and meld with the iron molecules in a very friendly manner, if Gentle Reader will forgive me for anthropomorphizing chemistry. If the steel is then allowed time to cool naturally the carbon molecules will once again separate themselves into useless clumps creating a soft or brittle material.
But if the yellow-hot steel is instead suddenly quenched in oil or water it will cool rapidly such that carbon molecules lack the time needed to reform the weak clumps it naturally prefers leaving it stranded and mixed with the iron, forming extremely hard “carbide” particles, locked into a rigid crystalline matrix. This transformation is the first part of what your humble servant and others call The Mystery of Steel.
After quenching, the steel is brittle enough to shatter if dropped onto a concrete floor, for instance, and not suitable for tools, so further measures are necessary.
Tempering
The next step in the heat-treatment process is called “tempering,” a process that adjusts the rigid crystalline structures created during the quench, losing some carbides and loosening the rigid crystalline structure somewhat, but making the steel less brittle and much tougher.
This is achieved by reheating the steel to a set temperature for a set period of time and then cooling it in a specific way. This heating and cooling process can happen in air (e.g. oven), oil, or even molten lead. All that really matters is the temperature/time curve applied. Every blacksmith has their own preferences and procedures.
With that ridiculously overly-simplified explanation out of the way, let’s next take a gander at the “Quench Temp” row in the table above which indicates the acceptable range of temperatures within which each steel can be quenched to successfully achieve proper hardness. These ranges are important because if quenching is attempted outside these ranges, hardening will fail and the blade may be ruined.
In the case of White Label steel, Gentle Reader will observe that the quenching temperature range is listed as 760~800°C, or 40°C. Please note that this is a very narrow range to both judge and maintain in the case of yellow-hot steel, demanding a sharp, well-trained eye, a good thermometer, proper preparation, and speedy, decisive action, not to mention a thorough purging of iron pixies and malevolent spirits from the workplace.
Just to make things worse, even within this allowable range, a shift of temperature too far one way or the other will significantly impact the quality of the resulting crystalline structure, so the actual temperature variation within the recommended quench temp range an excellent blacksmith will aim for is more like ± 10˚C.
In the modern world with easily-controlled gas fires, consistent electric blowers, and reliable infrared thermometers, this target can be hit through training and diligent attention, but not that long ago it was seen as a supernatural achievement performed in the dark of night by powerful wizards. I kid thee not.
Compare this range of quenching temps to those for Blue Label steel with an acceptable quenching temperature range of 760~830°C, or 70°C of range, a 75% increase over White Label steel. That’s huge.
Let’s next consider the recommended tempering temperatures.
For White Label steel, Hitachi’s recommended tempering temperatures are 180~220°C, or 40°C of range. Blue Label steel’s temperatures are 160~230°C, or 70°C of range, once again, a 75% greater safety margin.
The practical temperature range for quenching and tempering Blue Label steel is still quite narrow, but this increase in the allowable margin of error makes the job a lot easier, such that Blue Label Steel is much less risky to heat-treat successfully than White Label steel.
Judging and maintaining proper temperatures during forging, quenching and tempering operations is where all blacksmiths, without exception, fail when they first begin working plain high-carbon steel. The guidance of a patient master, time and perseverance are necessary to develop the knack. Experience matters.
I hope the discussion this far at least partially brings into focus the challenges these two steels present to the blacksmith.
If you seek greater light and knowledge, please look online to find similar data for many of the popular high-alloy tool steels. Comparing those numbers to White Label steel and Blue Label steel will help you understand why mass-producers of tools, with their lowest-possible-cost mindset, minimal quality control efforts, and virtually untrained workforce of peasant farmers, former lawn-care professionals, and aspiring fast-food restaurant workers prefer them for making the sharpened screwdrivers foisted off by the boatload on uninformed consumers as chisels nowadays.
Warping & Cracking
A huge advantage of chrome and tungsten additives is that they reduce warping and cracking significantly. This matters because a blacksmith using a plain high-carbon steel like White Label steel must anticipate the amount of warpage that will occur during quenching, and then shape the chisel, knife, or plane blade in the opposite direction so that the blade straightens out when quenched. This exercise requires a lot of experience to get right consistently, making White Label steel totally unsuitable for mass-production.
Steel is a magical material. When yellow hot, the carbon dissolves and disperses relatively freely within the iron matrix. Anneal the steel by heating it and then slowly cooling it and the carbon molecules will migrate and gather into relatively isolated clumps with little crystalline structure leaving the steel soft.
But if the steel is heated to the right temperature and suddenly cooled by quenching, the carbon is denied the time and freedom available to it during the slower annealing process, instead becoming locked into the iron matrix forming a hard, rigid crystalline structure. This rigid iron/carbon crystalline structure has a significantly greater volume than pure iron, which is why the blade wants to warp when quenched.
Adding chrome and tungsten and other chemicals reduces this tendency to warp.
Sword blades are an interesting example. A Japanese sword blade is typically shaped either straight or curved towards the cutting edge before quenching, but during quenching the blade warps and curves without encouragement from, and despite the efforts of, the blacksmith. The skill and experience required to accurately anticipate the degree of warpage generated and the resulting curvature of the blade, and then compensate while shaping the blade before quenching to achieve the desired curvature post-quench is not something one learns in just a few months or even years.
A Japanese swordsmith with a blade made from high-carbon Tamahagane steel poised for quenching. Notice how straight the blade is. He has invested weeks of work into this blade to this point and a misjudgment or even bad luck in the next second can waste it all. Not a job for the inexperienced or timid.After quenching, the resulting warpage is dramatic, but according to plan. The swordsmith must anticipate this distortion and shape the blade to compensate prior to the quench if he is to avoid unfortunate results. Notice the mud applied to the blade before quenching to control the formation of crystalline structures, achieve differential hardness, and control warping. Tool blacksmiths are faced with the same challenges on a smaller scale but more frequently.
High-alloy Steels
Unlike Tamahagane, however, modern high-alloy commercial steels contain large amounts of chemicals such as chrome, tungsten, molybdenum, vanadium, etc., with the result that tools made from these steels warp less, and exhibit far fewer shrinkage cracks.
Aogami Super is another HML product listed in the table and flowchart above. It’s an interesting steel, containing more carbon than both White Label steel and Blue Label steel and a lot more tungsten than regular Blue Label steel. Consequently, it is even more expensive. Aogami Super was originally developed as a high-speed tool steel especially resistant to wear. There are much better steels available for this role now, but Aogami Super is still hanging in there.
But all is not blue bunnies and fairy farts because high-alloy steels have some disadvantages too.
Those who hype high-alloy steels always praise to the heavens the “wear-resistant” properties chrome and tungsten additives afford. When the subject is woodworking handtool blades, however, please understand the meaning of “wear resistant” to include “not very sharp,” and “a bitch to sharpen by hand.”
Tungsten makes the steel warp less and expands the heat-treat and tempering temperature ranges significantly leading to fewer defects during production. But the addition of tungsten also produces larger, tougher crystals that simply can’t be made as sharp as White Label No.1, and that makes the blade much more difficult, unpleasant, and time consuming to sharpen, all while wasting more expensive sharpening stone material in the process.
White Label steel has no additives other than carbon. It does not need additives to compensate for or to dilute impurities because its production begins with exceptionally pure pig iron, and carefully tested and sorted scrap metal. Both White Label and Blue Label steels, if properly hand-forged and heat treated by an experienced blacksmith with high quality standards, will have many more and much smaller carbide clumps distributed more evenly throughout the iron crystalline matrix producing a ” fine-grained” steel of the sort coveted since ancient times.
On the subject of scrap metal, this is not necessarily a negative thing. In fact, nearly all tool steels available nowadays contain high percentages of scrap metal content because, environmental and sustainability matters aside, it’s simply too cost-effective to ignore. Careful sourcing and testing are the keys to using scrap metal advantageously.
Performance Differences
I hope Gentle Reader found our little excursion back in time in the tardis, and the chemical information presented above, interesting, but it may not have clearly answered your questions about the performance differences between these steels, and when presented a choice, which one you should purchase. Your humble galley slave has been asked and answered these questions hundreds of times, and while only you can decide which steel is best for you, I will be so bold as to share with you the viewpoint of the Japanese blacksmith and woodworking professional.
Long story short, in the case of planes and chisels, the typical choices of steel are still White Label No.1, White Label No.2 or Blue Label No.1. BTW, I have been informed that Hitachi is no longer producing these steels and consequently they will not be available much longer.
If you are dealing with honest blacksmiths and honest/knowledgeable retailers with experience actually using, not just talking about and selling, tools, you will have observed that a specific plane blade, for instance one made from Blue Label steel, will cost less than the same blade made from White Label steel, despite Blue Label steel being a more costly material.
At C&S Tools a 70mm White Label No.1 steel plane blade cost 77% more than one made from Blue Label No.1. This means that the blacksmith’s average cost in terms of his labor (overhead, forging and shaping costs being equal) is also around 77% greater than Blue Label steel, a direct reflection of his potential additional time expenditure and material wastage due to defects such as cracking or excessive warping. This a constant risk for the blacksmith making professional-grade blades, so he must include the expense of mitigation in his production costs if he is to continue to keep a roof over his family’s heads.
So the dishonesty of charging more for products forged from Blue Label or Aogami Super steel is repugnant to your humble servant and should be to Beloved Customers too. But I digress.
White Label steel simply warps and cracks more, but when failure occurs it only becomes apparent after all the work of laminating, forging, shaping and quenching are complete. Ruined steel cannot be reliably re-forged or re-used, so all the material and labor costs up to the point of failure are simply wasted like an expectation of honest news from CNN. It is not a material for careless people or newbies.
So if White Label steel blades are riskier to make, with more wastage, and therefore more expensive, what are the performance characteristics that make White Label steel blades a favorite with professional Japanese craftsmen?
First, properly made White Label steel blades can be made sharper. This makes the craftsman’s work go quicker and more precisely. But don’t forget that this additional sharpness is entirely dependent on the user’s sharpening skills and his willingness to maintain his blades at that higher level.
Second, properly forged White Label steel blades are quicker and more pleasant to sharpen, making it easier to routinely obtain the extra sharpness mentioned in the previous paragraph. That sums it up.
To some people, especially those that use edged tools professionally all day long, these differences matter a great deal; To others, not so much.
Is White Label steel worth the extra cost? I think so, but the performance differential is not huge, and only someone with advanced sharpening skills will be able to take full advantage of the difference. For most people on a tight budget, or in the case of woodworking situations where sharpness is not critical, and sharpening speed and pleasure are not driving factors, then a less-expensive Blue Label steel blade is perhaps a better choice. It absolutely makes a fine tool that does a great job of cutting wood.
The Wise Man’s Q&A
Let’s shovel some more BS out of the way by performing the mandatory experiment of taking a hypothetical high-quality White Label steel blade and a hypothetical high-quality Blue Label steel blade, sharpening them identically using the best stones and advanced techniques, test them to cut some wood, and then consider the answers to the following two important questions:
Question 1: Will the additional sharpness obtainable from a White Label steel plane blade, properly sharpened and installed in a perfect body, create a smoother, shinier finish surface on wood than a Blue Label steel blade?
Answer 1: Definitely no; But since the blade started out a little sharper, it will cut wood a little better, a little longer. These results will depend on the skills of the user, of course.
Question 2: In the case where edge-retention, cutting speed, and cutting precision are more important than a shiny finish, which absolutely applies to chisels and knives, will the additional sharpness of a properly made and proficiently sharpened White Label steel blade improve a woodworking tool’s cutting speed, edge-retention, precision and control?
Answer 2: Absolutely yes; On condition that the user possesses and exercises the skills necessary to achieve and maintain that extra degree of sharpness. There is a reason sharpening has always been the first essential skill in woodworking.
These are the reasons why we don’t even offer chisels made from Blue Label steel, or even White Label No.2 with its lower-carbon content, and resulting reduced hardness.
But whether plane blade, chisel or knife, a key point to understand is that a properly forged and heat-treated blade made by an experienced professional blacksmith from simple White Label steel will always be quicker and more pleasant to sharpen than one made of Blue Label steel with its added sticky chrome and hard tungsten. To the professional that has the need for the additional sharpness, possesses the skills necessary to produce and maintain it, and counts the cost of his time and sharpening stones, that’s a difference many find fully justifies the extra cost.
I daresay many of our Beloved Customers agree.
A Technical Example
You may find the metallurgical technical terms below difficult to follow, but perhaps an example with pretty pictures will help bring things into focus. Please see this informative article by Niigata Prefecture’s Prefectural Central Technical Support Center. If you input the URL into Google and use the translate feature a decent English-language version may magically appear. Or not. Some of the key results are copied below.
The steel being tested in the study outlined below is White Label No.2 steel (row 2 on page 4 of the Hitachi catalogue pdf). They heat-treated seven samples, tested their hardness, and listed the results. In each case, the quench temp varied from 750˚~900˚C (1382˚~1652˚F) in water, but the tempering temp was kept constant at 180˚C (356˚F).
The best results can be seen in Figure 4 below at a tempering temperature of 775˚C (1427˚F) producing the finest, most uniform crystalline (Austentite) structure. Lower temps are not as good. Higher temps are worse. A 25˚ variation one way or the other made a big difference.
So let’s examine how the crystalline structure changes with different temperatures as seen in the photos below.
The white stuff visible in the photographs is Ferrite (iron), while the black stuff is spherical carbide (Cementite). When Ferrite and Cementite meld, a desirable hard crystalline structure called Martensite is formed, although there are several steps in between we will not touch on. This subtle molecular change is the essence of the ancient Mystery of Steel, and the keystone to modern civilization.
Fig.1 shows the steel before heat treatment begins. Notice how the soft iron Ferrite and spherical carbon Cementite are isolated from each other indicative of little crystalline structure and a soft metal. No significant Martensite is visible.
Fig.1: Pre-heat-treat condition of Shirogami No.2 steel.
The graph in Fig.2 below shows Vickers Hardness on the vertical axis and quench temperature (with a 20 minute soak) on the horizontal axis. Notice how hardness makes a big jump between 750˚C and 775˚C. This 25˚ range is the sweet spot.
Fig.2: Vickers Hardness vs. Quench Temp
Fig. 3 below shows the crystalline structure at a quench temp in water of 750˚C, after a 20 min. soak, followed by tempering at 180˚C for one hour, followed by air cooling. This is 10˚C below the manufacturer’s recommended quench temp. Notice how the iron Ferrite and spherical carbon Cementite are mixing, forming some gray-colored Martensite, but there are still big lakes of Ferrite visible. Better, but not yet good.
Fig. 3: Quench Temp = 750˚C, 10˚C less than the recommended quench temp
Fig. 4 below shows the crystalline structure at a quench temp in water of 775˚C, after a 20 min. soak, followed by tempering at 180˚C for one hour, followed by air cooling. Notice how the iron Ferrite and spherical carbon Cementite are well-mixed forming pretty grey Martensite, indicating that this is close to the ideal quench and tempering protocol; The sweet spot. The crystalline structure shows few lakes of iron Ferrite or islands of spherical carbon. This organization is typical of durable, hard, fine-grained steel. A mere 25˚C increase in quench temp has yielded a large improvement.
Fig.4: Quench Temp = 775˚C. Well within the recommended quench temp.
Fig. 5 below shows the crystalline structure at a quench temp in water of 800˚C, after a 20 min. soak, followed by tempering at 180˚C for one hour, followed by air cooling. This is still within the quench temp range recommended by Hitachi. Notice how the Ferrite and spherical carbon Cementite are still fairly well-mixed, but the dark spherical carbon is becoming a bit more isolated from the Ferrite forming more, darker groupings. While the Martensite formed is still quite adequate, the performance of this steel may not be as ideal as that in Fig. 4. Notice also that the hardness of the steel has dropped slightly.
Fig.5: Quench Temp = 800˚C. Max recommended quench temp.
Fig. 6 below shows the crystalline structure at a quench temp in water of 825˚C, after a 20 min. soak, followed by tempering at 180˚C for one hour, followed by air cooling. Notice how the crystalline structure has become less uniform than in Fig 5 after only a 25˚ increase in quenching temp.
Fig.6: Quench Temp = 825˚C. 25˚C greater than the manufacturer’s recommended quench temp. The crystalline structure is clearly inferior to Fig.5
Fig. 7 below shows the crystalline structure at a quench temp in water of 850˚C, after a 20 min. soak, followed by tempering at 180˚C for one hour, followed by air cooling. This time, a mere 25˚ increase in quenching temp has resulted in significant degradation in the uniformity of the crystalline structure as well as reduced hardness.
Fig.7: Quench Temp = 850˚C. The crystalline structure has degraded further.
Fig. 8 below shows the crystalline structure at a quench temp in water of 875˚C, after a 20 min. soak, followed by tempering at 180˚C for one hour, followed by air cooling. Once again, significant degradation in the uniformity of the crystalline structure and loss of Martensite is apparent.
Fig.8: Quench Temp = 875˚C. The crystalline structure has once again degraded further. This result is not acceptable in a quality blade, but the margin for error in terms of temperature differential is small.
Fig. 9 below shows the crystalline structure at a quench temp in water of 900˚C, after a 20 min. soak, followed by tempering at 180˚C for one hour, followed by air cooling. Gentle Reader will notice the many white “tissues” that have developed in addition to tempered martensite. The fibrous-appearing white stuff is considered retained Austenite, a formation that can later be converted into hard Martensite with some effort. Once again, just a 25˚ increase in quenching temp has resulted in significant degradation in the uniformity of the crystalline structure as well as reduced hardness.
Fig.9: Quench Temp = 900˚C. The crystalline structure has obviously become less uniform. Not acceptable.
Clearly, Shirogami No.2 steel is a very good tool steel, but it’s sensitivity to heat-treatment technique, and the necessity for knowledge, experience and care in working it are also clear.
Takeaway
What should Gentle Reader glean from this technical presentation?
The first thing to understand is that plain, high-purity, high-carbon steel that has been skillfully forged, quenched and tempered will exhibit the finest, most evenly-distributed hard carbides in a uniform crystalline steel structure mankind can economically produce. Such steel will become sharper than any other metal from which a practical chisel or plane blade can be forged.
This fact has not changed since ancient times, regardless of the hype and marketing of the mass-producers who can at best achieve comparatively mediocre results using modern high-alloy steels.
The second thing to understand is that, while it is not difficult to make high-carbon steel hard, nor to temper it to make a durable product, producing a uniform, durable crystalline structure that will become very sharp, will be especially resistant to dulling, and can be sharpened quickly requires serious skills of the sort that only result from many years of study under a master, and dogged commitment to quality control, especially temperature control and timing. In your humble servant’s opinion this makes chisels, plane blades and handsaws hand-forged from the high-quality high-carbon steels discussed in this article worthy of consideration by professional woodworkers who need sharp blades and have the skills necessary to maintain them properly.
If steel is the lock, then the crystalline structure the blacksmith creates in high-carbon steel through his skill, diligence and dedication is the key to the Mystery of Steel. It’s a lock and key mankind has been using since ancient times, a combination that is the foundation of our modern, extremely wealthy civilization. But it’s only been a handful of decades since we developed the technology that made it possible to really understand why the key opens the lock. Rejoice, Gentle Reader, for you live in technologically enlightened times!
I hope this discussion has been more helpful than confusing.
YMHOS
A cross-section of the Eidai tatara furnace (also pictured at the top of this article) with human-powered blowers to right and left forcing air into the fire at the furnace’s base. The red-hot furnace contains satetsu as the first layer resting on charcoal with the fire below. More layers of satetsu and charcoal are added as the process moves forward. The heat of the supercharged burning charcoal makes the iron more-or-less liquid, absorbing carbon (too much carbon, actually), and causing it to settle to the bottom of the furnace as Tamahagane, but it does not drop into what appears to be a void below. The complicated subgrade structures and combination of materials shown have several purposes, foremost of which is to provide a solid foundation for the furnace even when subjected to high heat. They also prevent groundwater from infiltrating below the furnace where it would otherwise rob heat complicating temperature control, as well as providing escape paths for any moisture below the furnace.
If you have questions or would like to learn more about our tools, please click the “Pricelist” link here or at the top of the page and use the “Contact Us” form located immediately below.
Please share your insights and comments with everyone in the form located further below labeled “Leave a Reply.” We aren’t evil Google, fascist facebook, or thuggish Twitter and so won’t sell, share, or profitably “misplace” your information. If I lie may my all my Martensite turn to mush.
A Rusted Plane Blade by Hatsukuni. What did it do to deserve such horrible neglect?
“How dull it is to pause, to make an end, To rust unburnish’d, not to shine in use! As tho’ to breathe were life!”
Alfred Lord Tennyson, Ulysses
Between damaged tools and guns, corrosion prevention has been a high priority for your humble servant over the years motivating me to purchase many corrosion-prevention products and test them in various climates. After scaling mountains of hype and fording floods of BS I think at last I have something of value, perhaps even the genuine article, to share with Gentle Readers.
While by no means comprehensive, in this article your humble servant will address three common causes of corrosion in steel woodworking tools, as well as some methods of prevention. The three causes are: Corrosion due to sharpening, corrosion due to handling, and corrosion due to storage.
But first, to help Gentle Reader understand the basis for the measures I will recommend below, allow me to explain my sharpening philosophy.
Tool Philosophy
The word “philosophy” is of Greek origin and means the “love of wisdom.” I won’t flatter myself that I developed any original wisdom about maintaining tools, because the truth is I stole most of what I know from better men and the rest came ipso facto from my own screw-ups. Shame is the best teacher.
Professional craftsmen have no choice but to constantly maintain and repair the tools of their trade, but necessary or no, clients and employers often resent the time the craftsmen they hire spend maintaining tools during the work day. After all, they are paying them to make a product, not to fiddle with tools, at least that’s how most Clients look at it.
Imagine you hired a contractor with an excavator to dig a septic field and hole for a septic tank for you, but until his work is completed, the plumbers, riggers, truck drivers, and laborers hired by the hour to install the tank and field have little to do but stand by twiddling their thumbs. Now imagine the man decides he must change the oil of his excavator and grease the fittings before he can actually start digging, and proceeds to do this necessary maintenance in front of you and the other workmen who are also getting paid by the hour.
Machinery maintenance is part of the job, no doubt, but the operator should have been done it beforehand at a time and place that would not delay the project and everyone else’s work. Is this analogy always relevant? Perhaps not, but in the eyes of the Client paying the money, relevance be damned, it’s daylight robbery!
The perceptive craftsman will strive to understand his Client’s perspective if he wants to be trusted with profitable repeat work.
Therefore, I don’t sharpen, fettle, or repair my tools at the jobsite anymore than is absolutely necessary, and never in front of the Client or employer. This is not some feel-good yuppy-zen BS, but a serious, concrete work philosophy with physical and financial consequences. It was taught to me by experienced craftsmen in America and Japan, all since retired to the big lumberyard in the sky, who knew what they were about. It has served me well.
So how do I keep working when blades dull, planes stop shaving, power tools stop spinning, and bits stop biting? The most reliable solution is to have multiple saws, planes and chisels in the types/sizes critical for that day’s work, and even extra bits and power tools on-hand whenever possible, so that if a particular chisel or plane becomes too dull to get the job done, or a bit breaks, or a circular saw, for instance, goes tits-up, I need only pause work long enough to retrieve a sharp, ready to rock-n-roll replacement from my toolbox or tool bag.
This means I must purchase, sharpen, fettle and carry around more tools than I am likely to use during that workday. But since I don’t carry my tools in my “pocketses”, and they are partners that earn their keep, I do not consider it wasted money. In fact, this philosophy has resulted in tool-maintenance habits that I believe ultimately save me time and money while improving my work efficiency all while reinforcing my Client’s or employer’s confidence in me, just as the old boys I try to emulate said they would.
Of course, after a few days of continuous work I will have accumulated multiple blades that need sharpening, so if I am to keep making sawdust I must sharpen them in batches of 5~10 at a time. And because I sharpen in batches, as do professional sharpeners, I have given great thought over the years to maximizing positive results such as speed, sharpness achieved, and economical use of stones while minimizing negative results such as rusted steel. I humbly encourage Gentle Reader to give these matters just a few seconds of consideration. What have you got to lose besides steel?
Corrosion Prevention: Wet Sharpening
The bevel of the Hatsukuni blade shown above. An iron pixie’s joy.
The corrosion risk to tools when sharpening is caused by residual water in the scratches, cracks and crevices of the blade, as well as accumulated chlorine from tap water, promoting rust, especially at the very thin cutting edge. Yes, that’s right, I’m more worried about corrosion dulling the cutting edge than of it creating unsightly red spots elsewhere on the blade.
When sharpening a batch of blades in my workshop, after a blade is done on the final finish stone, I dry it with a clean rag or paper towel, apply a few drops of Corrosion Block, smear it around on the blade to ensure a complete coating, and set it aside to draw water out of the pores and seal the steel. It works.
Corrosion-X is another good, but stinkier, product. Neither is good enough long-term, however.
After the blades have sat for a while, usually at the conclusion of the batch, I wipe off the CB and apply CRC 3-36. This is a paraffin-based corrosion preventative that floats out water. Paraffin won’t evaporate or wick-off and is the best product I have found to prevent rust developing on a clean, moisture-free surface.
CRC 3-36 sprays on easily and soaks into everything, and if allowed to dry, will give good long-term protection, as in years. It’s especially good for saw blades because it gets deep into the teeth. But you don’t want to apply it to anything even a little wet with water because paraffin may seal it in promoting rust. Ergo, Corrosion Block first.
Boeshield T-9 is another well-known paraffin wax-based corrosion preventative, but it’s more for electrical equipment and doesn’t stop pore rust as well, IMHO.
There are many rust-prevention products on the market, so I am not suggesting CRC3-36 is the best, only the one I prefer, partly because The Mistress of the Blue Horizons doesn’t scream bloody murder if it wafts into her holy chambers from the grubby workshop. If I use Corrosion-X, however, she bars the door with her trusty broom, bayonet fixed and leveled at my genital area, and makes me strip off my stinky clothes before she’ll let me back into the house. My love is a gentle flower… ! With sharp knives…! But I digress.
This system works fine for short-term purposes, and even for long-term storage if I wrap the tool in newspaper or plastic to protect the coating.
When sharpening in the field, or if I will be using the tool right away, I don’t bother with spray products, but just strop the blade on a clean cloth or the palm of my hand to generate friction heat, apply some oil from my oilpot, and call it good.
If you don’t own and use an oilpot already I won’t call you an idiot, but I still remember the time long ago when that word was directed at me by someone I respected for not making and using one. He was right.
A useful trick I learned from professional sword sharpeners in Japan is to use chlorine-free, slightly alkaline water for sharpening. I mix Borax powder with distilled water in a plastic lab bottle to use to keep stones wet and to wash blades when sharpening. Washing soda works too. A little lye added to sharpening water will also increase its pH. Using such water will not entirely prevent corrosion, but it certainly slows it way down. Test it for yourself.
Corrosion Prevention: Handling
We sometimes pull out a chisel, saw, or plane blade to gaze upon it. They are lovely creatures, after all, and deserve our adoration. There are two things to be aware of when doing this, however.
Recall that the adult human body is comprised of approximately 60% water, some of which is constantly leaking out of our skins mixed with oils and salts. When you touch bare steel with your hands, skin oils, sweat, and the salt contained in sweat stick to the steel and will cause rust. It’s only a matter of how quickly and deeply.
The solution is to avoid touching bare steel you will later store away with bare fingers, and if you do touch the blade, wipe it clean and apply some oil from your oilpot or spray can right away before returning it to storage.
Gentle Reader may be unaware, but there can be no doubt that harsh words not only hurt the tender feelings of quality tools, but can directly damage them. How do I know that rude language offends steel tools, you say? Well, I have ears don’t I? In addition, over the years I learned a thing or two from professional Japanese sword sharpeners and evaluators, who are even more obsessed with rust than your paranoid humble servant, no doubt because of the high financial and historical costs of corrosion in rare and expensive antique weapons.
With the gift to the entire world of the Wuhan Flu from Dr. Anthony Fauci (aka Mr. Fake Science) and his Chinese research team, we have all become more aware of the human tendency to constantly spew droplets of bodily fluids, often containing nasty bugs, into the air around us sometimes with unpleasant consequences. A handsaw can’t catch the Fauci Flu, but fine droplets may find their way to the steel surface when we talk to them or around them. Corrosion ensues.
In Japan it is considered rude to speak when holding a bare sword. Indeed, it is SOP to require viewers who will get close to a bare blade to grip a piece of clean paper between their teeth to confirm the mouth is indeed closed and not spewing droplets of spit onto the blade.
I am not exaggerating the cumulative long-term damage fingerprints and moisture droplets expelled from human mouths and noses cause to steel objects. Any museum curator can confirm.
How does this all apply to woodworking tools? If Gentle Reader takes a tool out of storage and either talks to it, or to humans around it, please wipe it clean, apply oil, and rewrap it unless you will be using it immediately. It’s the only polite thing to do.
Tools deserve respect. Perhaps I’m superstitious, but I’m convinced that if we avoid rudely smearing salty sweat or spraying globs of spittle that would cause our tools to turn red and go away, they in turn will be less inclined to cause us to leak red sticky stuff. Some tools are vindictive if offended, donchano, and many of them can bite.
Corrosion Prevention: Storage
The air on this earth contains dust and moisture. Dust often contains abrasive particles harder than steel as well as salts and other corrosive chemicals. We must keep these particles and chemicals away from our tools.
Air also contains moisture that, given access and a temperature differential, can condense on steel tool blades causing condensation rust.
Your humble servant discussed these matters in length in earlier articles about toolchests, but a critical criteria of proper storage is to prevent dust from landing on tools, and to prevent the tools from exposure to airborne moisture and temperature differentials. A closed, tightly sealed, clean container, cabinet, toolchest or toolbox is better for tool storage than pegboards or shelves.
If Gentle Reader does not already have such a tool container of some sort, I urge you to procure or make one.
Tool Rolls
The tool roll at the far left is leather. Notice the rust stains on the roll and the rusted chisel. The cotton canvas tool roll in the center is newer. Notice the rust stains. The 5 chisels in the far right photo were stored in this tool roll for years. Notice the rust. The owner of these tools thought his cloth tool roll was adequate since he just used the chisels for work. The damage is far worse than just cosmetic, however. Wasted time and money. And what does this say about the man?
Your humble servant owns and uses canvas tool rolls because they are handy for transporting tools such as chisels, files, rasps and saws to and from jobsites, but they have limitations of which Gentle Reader should be aware.
The first problem with tool rolls is that they appear to protect the cutting edges of chisels and saws, but that is only wishful thinking because the delicate and dangerous cutting edges are only hidden behind a thin layer of fabric. Guess what happens if you drop a cloth tool roll of sharp chisels onto a concrete slab.
If you bump a tool roll of chisels against another tool, then brush your hand against the now exposed but hidden cutting edges while digging in your toolbox, red sticky stuff may get everywhere. Oh, the humanity! Will this wanton bloodshed never end!?
Do tool rolls protect tools against corrosion? No, in fact they can make it much worse because fibers in contact with steel, especially organic fibers such as cotton, can wick moisture to the steel producing corrosion. Please see the photos above.
Leather tool rolls can be especially bad in some cases because of residual tanning chemicals.
I’m not saying don’t use tool rolls, only to be aware of their limitations and use them wisely.
As mentioned above, I do use fabric tool rolls in the field. The trick to preventing rusted blades is to insulate them from direct contact with the canvas, so I make little plastic liners from the hard but flexible plastic used for theft-proof retail product packaging that fit into the pockets. Just a strip of plastic cut wide enough to fit into the pocket tightly and folded in half. Besides preventing rusty blades (chisel crowns will still rust) these little liners make it much faster and easier to insert blades into the pockets without cutting the tool roll, and to keep the blades from cutting their way out of the tool roll once inserted. The price is right too.
Canvas tool wraps are convenient for transporting handsaws, but they too provide limited protection. I wrap my saw blades in thin polyethylene sheet foam to help protect the teeth, isolate the blade from direct contact with cotton fabric, and add some insulation.
If you need to use tool rolls for long-term storage, I recommend you clean the tools, coat them with a paraffin-based rust-prevention product like CRC3-36, and wrap them full-length in plastic wrap before inserting them into the tool roll’s plastic-lined pockets.
If tools are faithful and profitable servants, indeed extensions of our hands and minds, don’t they deserve more from us while they are in our care than a rusty, pitted, neglected fate like the plane blade pictured above?
YMHOS
Our erstwhile apprentice from the clothing-optional workshop has dropped a chisel into the water while sharpening it, and laments the inevitable corrosion. Being bald as a bowling ball, I’m desperately jealous of her long, curly tresses, but I suppose they must get in the way when sharpening. The sacrifices we make for art…
If you have questions or would like to learn more about our tools, please click the “Pricelist” link here or at the top of the page and use the “Contact Us” form located immediately below.
Please share your insights and comments with everyone in the form located further below labeled “Leave a Reply.” We aren’t evil Google, fascist facebook, or the IT department of the Democrat Congress of the USA and so won’t sell, share, or profitably “misplace” your information. If I lie may crickets be my only friends.
Stanley “Stan the Man” Musial, one of baseball’s greatest players and most consistent hitters.
Used to be that bats had thick handles and a big barrel. Then they found it’s not the size of the bat that gets the home run – it’s the speed with which you can swing it.
I think I had the smallest handle around. When I got my bats, I even trimmed them down. I used to scrape them. Some years later when I started getting older, I used to start with a 33 and in the summer it got down to 31 and then probably in September got down to 30.
Stan Musial
In the previous 6 posts in this series we guided Gentle Reader in creating a drawing of a high-performance, minimalist handle to fit your gennou head and body closely.
The handle in this drawing may not fit your body and the way you work perfectly at first; It may require adjustment, but it is a good place to start.
Keep this drawing so you can remember what you based the original design on to help you analyze and record improvements for your next new-and-improved handle.
With the initial design complete and recorded in your drawing, the next step in this epic adventure of love, lust and sawdust is to select a stick of wood. Oh joy!
Your humble servant will not be so forward as to recommend a specific wood Gentle Reader should use. Instead, let’s consider some performance criteria first.
The quotes above by Stan the Man Musial, a famous baseball player and coach that made a career swinging wood fast and with great precision, are especially relevant to the subject of gennou handles.
Please remember that, just like a baseball bat, a slender hammer handle is almost always superior to a fat one, and its length requires experimentation and adjustment to get right. And of course, being a minimalist, relatively slender instrument, it must be made from a piece of wood that can handle the forces that will act on it.
Strength & Toughness
Hammer handles are subject to relatively high impact forces during use which produce stresses and vibration, so the wood must be not only strong, as in resistant to compression, tension and bending forces, but tough. It must also have properly oriented grain.
Softer woods are easy to work and feel good in the hand, but the tenon of a gennou handle made from a soft wood such as pine, cedar, poplar or maybe even cherry, for example, will often loosen quickly as thousands of impact forces over time crush the cells.
In addition, since the fit between tenon and eye must be very tight indeed, the process of driving a properly-sized tenon into the eye will not be easy. Your humble servant has broken more than one handle while attempting this. The last instance was a few years ago with a gennou handle I made from Chinese mulberry, a wood cherished in Japan for fine cabinetry work and of which I am unreasonably fond due to it’s dramatic grain, its golden color when freshly cut, and the purplish-brown color it changes to over time. I suspected it might be too weak for the job, but tried anyway. A sad waste of time and beautiful wood.
BTW, if you have the opportunity to use mulberry wood for cabinet or joinery work, by all means give it a try. I think you will be pleasantly surprised especially as the item made from the wood ages.
Chinese Mulberry Wood
The material you ultimately select must be both strong and tough, but it is important to understand the difference between strength and toughness when considering materials.
The term “tough” in engineering parlance means a material has the ability to absorb energy and/or forces without permanently deforming or breaking. A tough wood will still deform and bend, but when the forces that caused it to deform/bend are removed, it will return to its original shape instead of being permanently bent or breaking. In the case of a handle, if it is tough, it will flex somewhat and return to its original shape all without rupturing.
Gentle Readers are, without exception, highly intelligent, possessing a refined eye and therefore will of course be tempted to use beautiful, dark exotic hardwoods such as ebony, rosewood, bubinga, wenge, kingwood, snakewood, etc.. These are fine woods that make beautiful handles, but I don’t recommend them for a first handle due to their high cost and the likelihood that Gentle Reader will want to replace the first handle you make, and maybe even the second and third, as your skills and understanding of the handle that best suits body and working style improves with time and experience.
And while they may have beautiful color, sexy figure, and great compressive strength, many exotic woods like ebony and rosewood are very strong in compression, but sometimes lack adequate toughness in some (but not all) cases, and crack easily. And the extra weight of such dense woods is seldom an advantage.
Your humble servant has used them successfully, and so won’t suggest they can’t make fine handles, but I simply urge Gentle Reader to be cognizant of the higher risk of failure. If you choose to use an exotic hardwood, please be especially careful of runout, a subject we will discuss below.
Friction
If you consider the vibration and angular acceleration forces acting on the gennou’s head and handle, you will understand the wisdom of choosing a wood that has a high coefficient of friction. Take my word that it is embarrassing to have the head slip off the handle mid-swing even if none of your bench dogs are watching.
Oily woods like teak lack adequate friction to keep head and handle attached, in my experience. Bocote is another wood that tends to allow Murphy to slip the head off and create unplanned openings in gypboard walls. (ツ)
Stability
Another important performance criteria to consider when selecting a species of wood is that it be stable and exhibit minimal expansion/contraction with humidity changes.
If the wood forming the tenon connecting handle to head shrinks too much when the ambient humidity decreases, the head will of course loosen.
If the tenon swells too much when ambient humidity increases, the wood cells may be crushed inside the unblinking steel eye causing the tenon to lose the ability to spring back to its original dimensions when humidity again increases, eventually resulting in a loose head. To make matters worse, the handle will then loosen up even more when the humidity drops again. Murphy does backwards somersaults and clicks his thorny heels at the apex while cackling with demented glee when this occurs.
This detrimental plastic deformation is the big downside to kigoroshi in hardwoods. Let he who has ears to hear listen.
I encourage you to use a wood with a low tangential/radial expansion/contraction ratio.
The traditional way to deal with tangential/radial expansion/contraction in tool handles such as hammers and axes is to orient the rings of winter wood in the tenon in the long axis of the hammer head/eye. I don’t think this matters much with small hammers with small eyes, but it can make a difference in larger hammer heads with long eyes.
Limb Wood
It’s tempting to use limb wood or orchard trimmings to make handles, especially if the grain’s curvature matches the intended design. And leaving some of the natural bark in the grip area can be interesting too. In fact, there was a period a few years back here in Japan when, probably due to the kezuroukai effect, many people were making handles from mountain cherry wood with the shiny dark-red bark left attached in the grip area.
This is a grand idea, especially if it means you can procure good wood for free. But for heaven’s sake don’t use such wood until it is well-seasoned and stable or you may find your wall has a new dent and your bench dog and his fleas have fled, or your bench kitty has started muttering to the iron pixies skulking in your shop about your parentage and the size of the bus you rode to elementary school. Cats are like that, you know.
Wood Grain and Runout
Many fail to understand or choose to willfully ignore the contents of this section, but I adjure Gentle Reader to not be a chuckle head.
Grain runout is an important factor to take into account when selecting a piece of wood for a handle. A good definition of runout is as follows:
“Runout refers to the orientation of wood cells being other than parallel to the edge (face) of the board. Often difficult to detect visually, severe runout can be detrimental to strength and resistance to vibration and impact forces.”
When a board’s annual rings do not remain within the boundaries of a given pattern, be it straight or curved, the locations where the grain exits the pattern’s boundaries are called “runout.” This is an engineering term used in structural design that is applicable to selecting handle wood. In this case, it has nothing to do with the rotation of wheels and gears. Cracks tend to begin at runout locations and propagate quickly. Excessive runout can significantly reduce the ultimate strength of a board, especially when subjected to the impacts and bending forces of the sort tool handles experience.
In the case of a hammer handle, these potentially destructive forces are of greatest magnitude nearest the eye, and tend to make the handle crack along the leading edge and back edge of the handle, so we need to reduce the lines in the grain running-out and exiting the handle near the eye and at the back and front of the handle.
There are those who will dispute this structural reality, but they have done neither the engineering studies nor the destructive testing that would give their opinions value, and are herewith directed to proceed posthaste to a pharmacy to procure the salve Mifune Toshiro recommended to the tattooed criminals in the movie “Yojimbo” before educating them about pain.
Whatever wood you use, and this is extremely important, you want the grain runout to be minimal, especially in the tenon and neck. Ideally, the grain will exhibit zero runout through the tenon and neck and be curved to match the handle shape. In other words, the ideal stick of wood will have a high-percentage of fibers that are continuous from eye to butt. Such wood can be found but it may take time and effort and eye strain to select. Using riven wood is a traditional way to reduce runout and provide maximum strength. On the other hand, some gradual runout in the grip area is usually acceptable.
Here is wisdom: The key to judging runout is to not examine just the board, but more importantly the individual stick of wood you are considering using for a handle after it has been cut into a rectangular cross-section in preparation for layout because only when you can see all four sides the handle’s entire length will you be able to reliably judge runout. Murphy will make a fool of you if you let him.
The following link may be informative on the subject of runout: Link 1
Useful Woods
In Japan, the best traditional woods for tool handles are said to be Soraki and Ushikoroshi, both domestic ornamental bushes with white wood and plain-jane grain which are no longer grown commercially and are difficult to obtain. We have a few sticks in-stock for interested parties.
A Hiroki head with a Ushikoroshi wood handle
Nowadays Japanese White Oak is the standard handle wood in Japan. It is denser, stronger and whiter in color than its American and European counterparts, but the grain is quite plain.
Hickory is recognized world-over as the best generally-available material for handles, but it’s grain and color are boring. It should be easy for Gentle Readers to procure since it is sold as replacement tool and axe handles in most hardware and home centers.
Black Persimmon Planks
Other reliable options are Ash, the various species of White Oak, Maple, and Birch, etc..
I have made several handles from Black Persimmon, a fruitwood in the ebony family, yellowish in color but with a dramatic, smoky black grain. Black Persimmon has been highly prized in Japan for hundreds of years as a wood for high-end cabinetry. The grain and color are unique.
Since around 1900, American Persimmon was considered the best wood for golf club heads because of its toughness, the “pop” it gave the ball on impact, and its relative light weight compared to its toughness. It makes a great gennou handle. I am told it is still available in some areas.
A Kosaburo Classic-profile head with a Black Persimmon handleA Kosaburo Modern-profile head with a Black Persimmon handle
I have also made handles from American Osage Orange, a dense, stringy wood used for bows and musical instruments that makes an extremely good handle, at least once the scary neon orange color mellows through exposure to sunlight. I highly recommend it, especially if you can get it for free, which shouldn’t be too difficult in the US Midwest where it was once used extensively for fenceposts and still grows like weeds around old fence lines.
Just make sure it has reached equilibrium moisture content before making a handle from it.
Top: A 100monme Hiroki Yamakichi head with a new and shockingly-colored American Osage Orange handle. Bottom: A 60monme Kosaburo Classic-profile head with a mellowed American Osage Orange handle.
Maple can make an excellent handle too. I used a stick of highly-figured tiger stripe maple for the daruma gennou handle below, and another piece of Maple with only a little figure for the smaller daruma gennou further below.
A 80monme Hiroki Daruma head with a tiger maple handle (side view)A 80monme Hiroki Daruma head with a tiger maple handle (face)A 60monme Hiroki Daruma head with a tiger maple handle (side view)A 60monme Hiroki Daruma head with a tiger maple handle (face view)
In the next post in this series we will layout our handle in preparation for making sawdust.
YMHOS
Stan the Man Musial. Please notice the skinny bat he used with great success.
If you have questions or would like to learn more about our tools, please click the “Pricelist” link here or at the top of the page and use the “Contact Us” form located immediately below, or email us directly at Covingtonandsons@gmail.com.
Please share your insights and comments with everyone in the form located further below labeled “Leave a Reply.” We aren’t evil Google, fascist facebook, or the IT department for the DNC and so won’t sell, share, or profitably “misplace” your information. If I lie may all my hammer handles split!

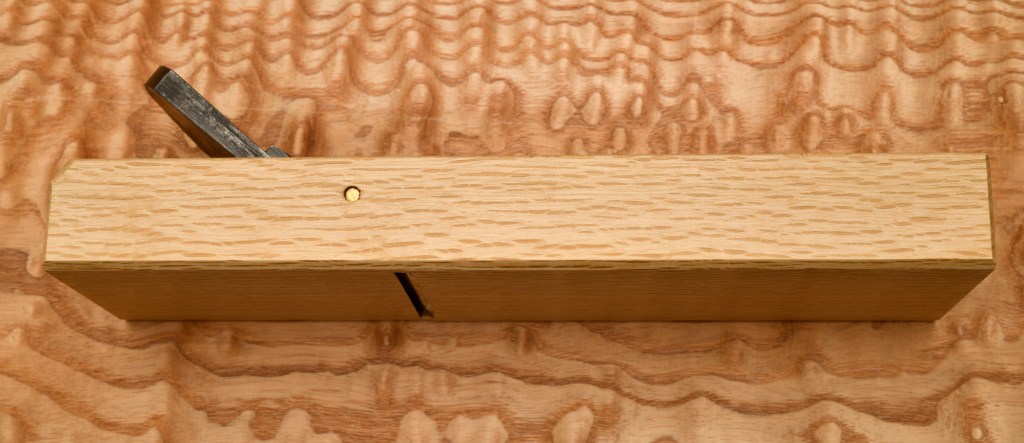


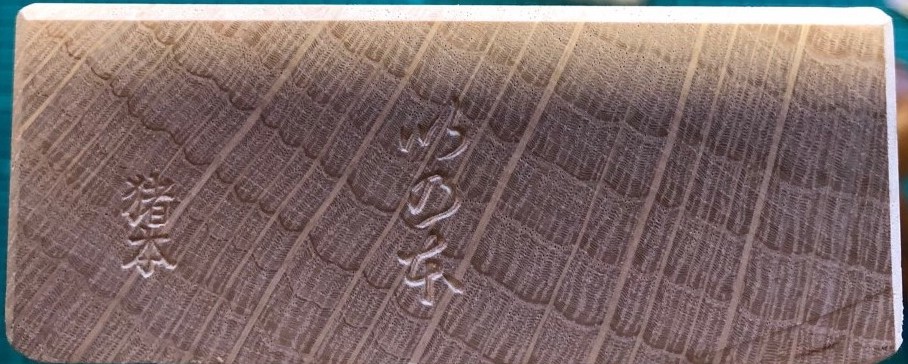


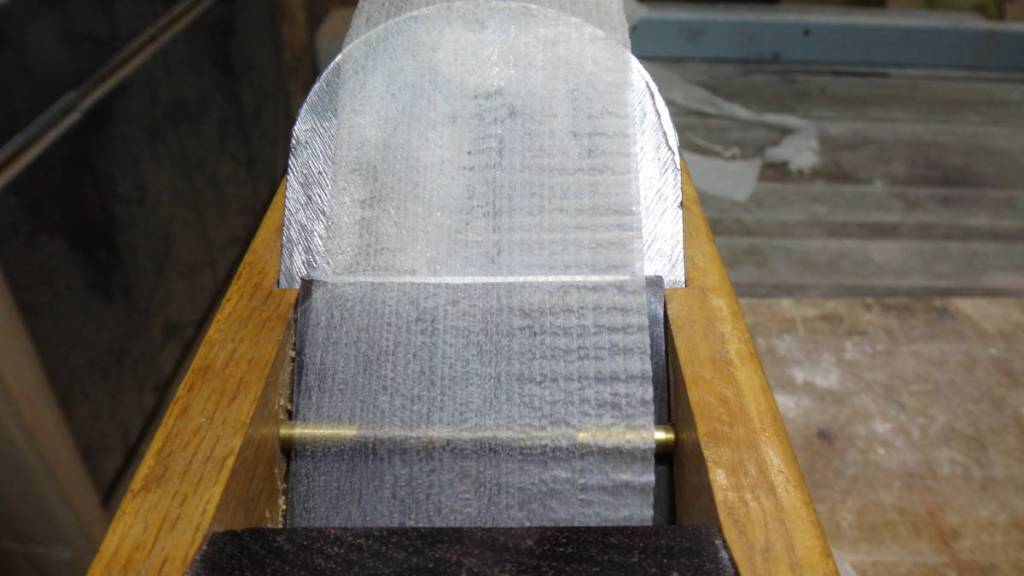


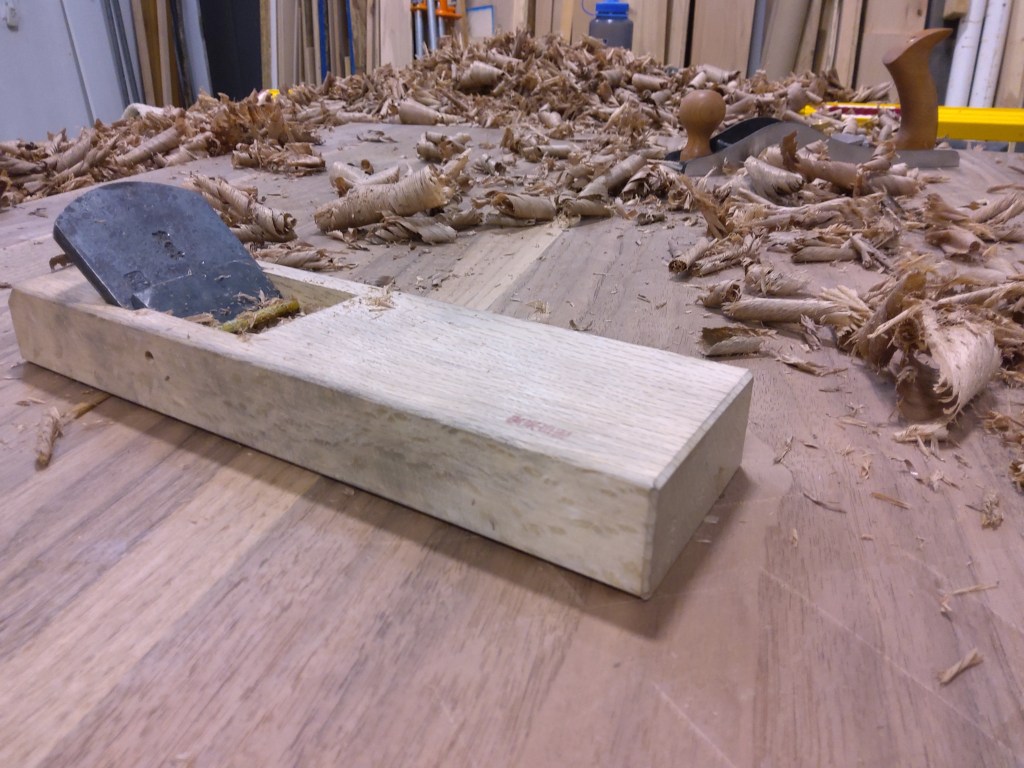
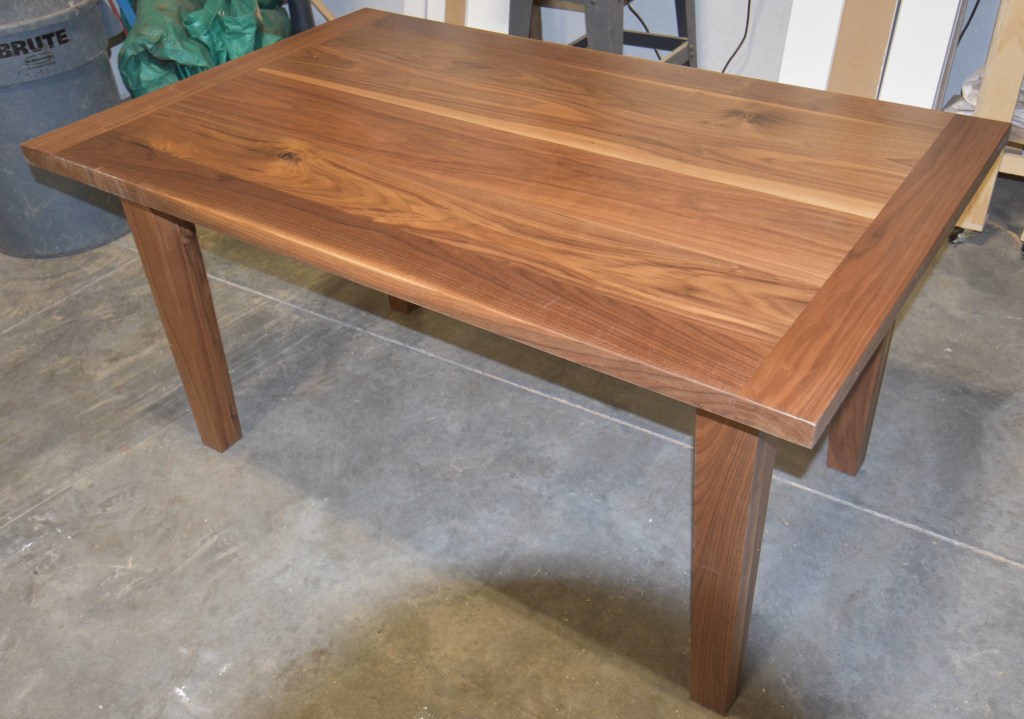
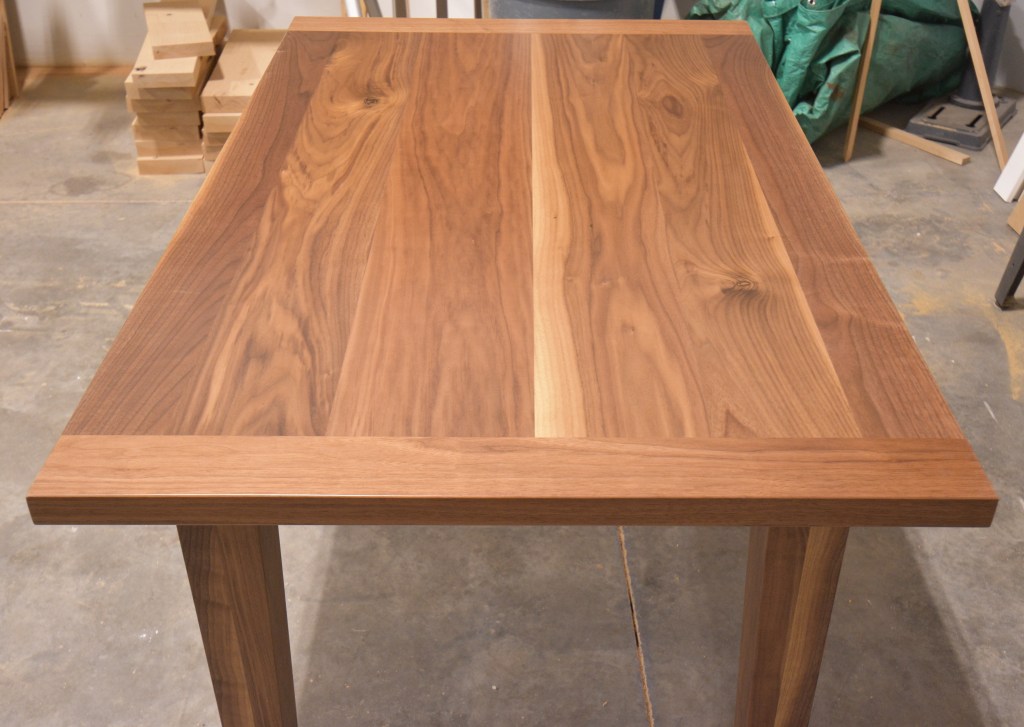


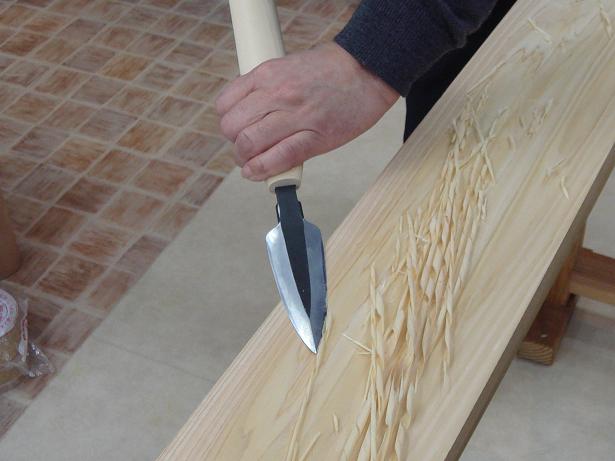

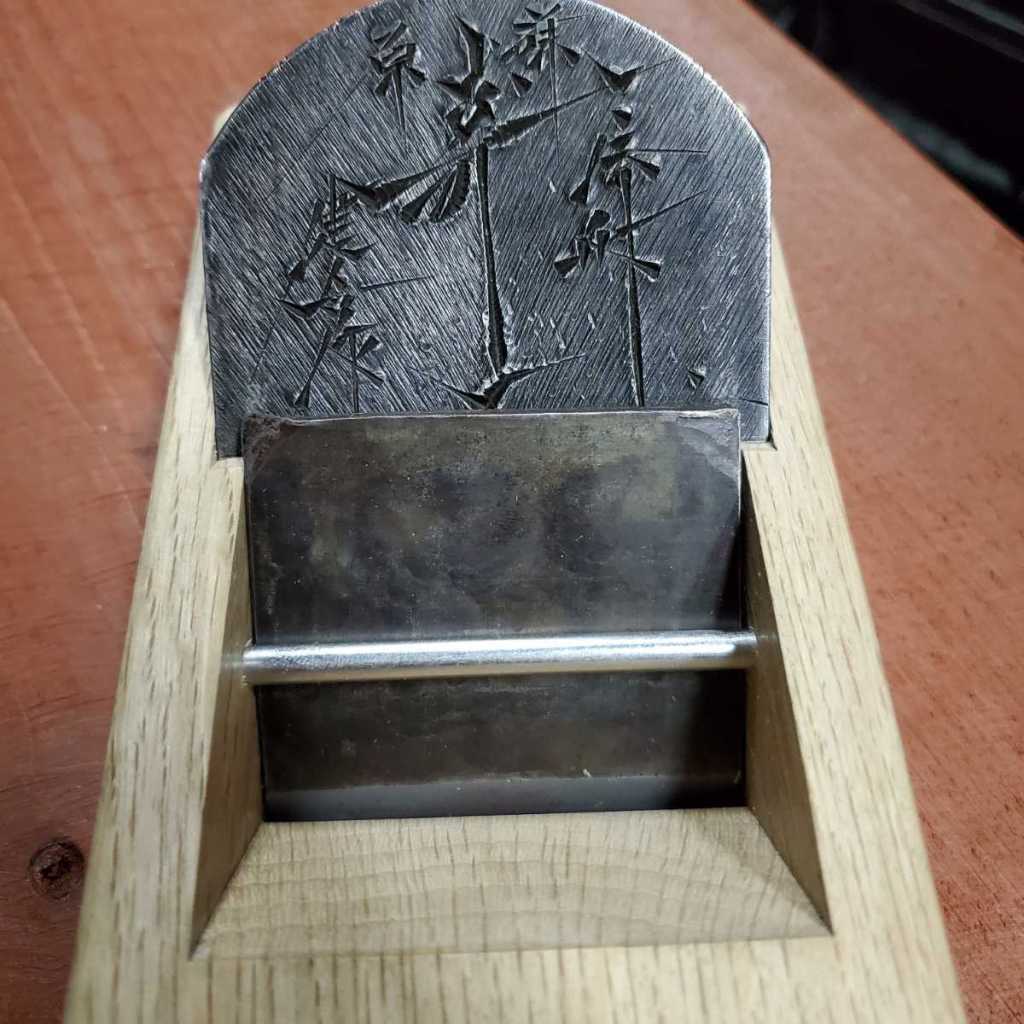
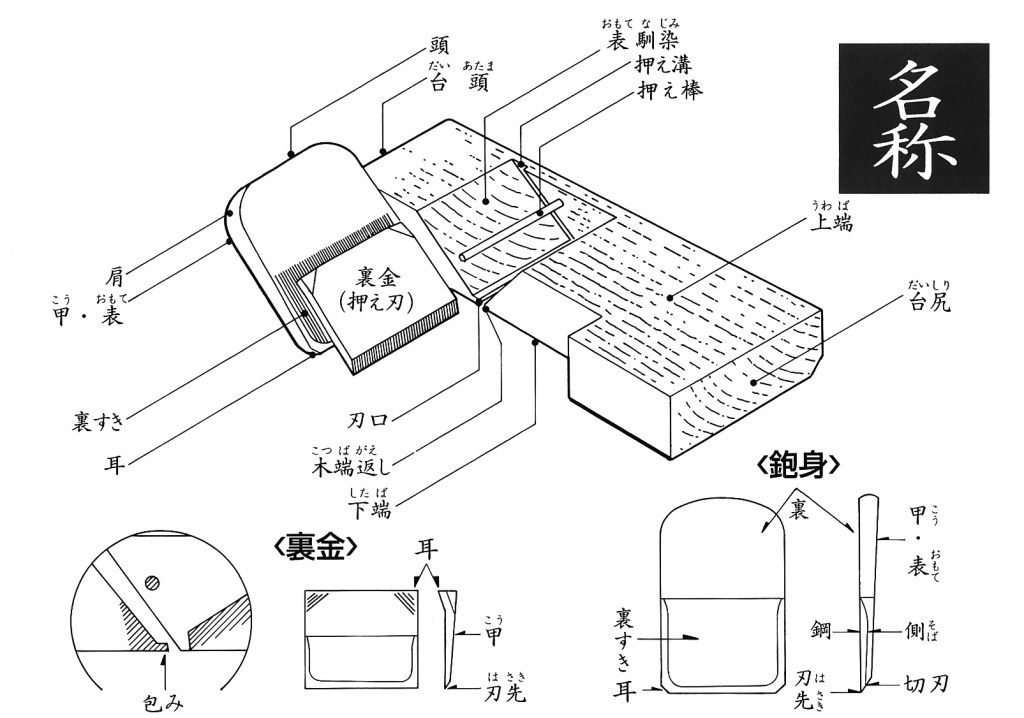


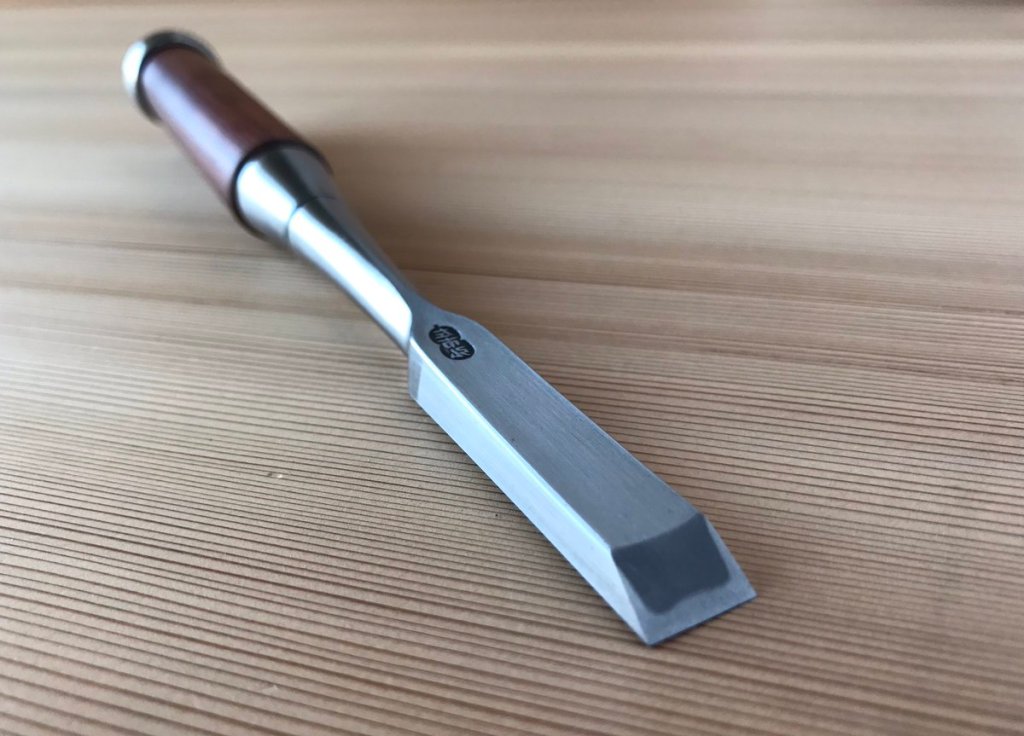

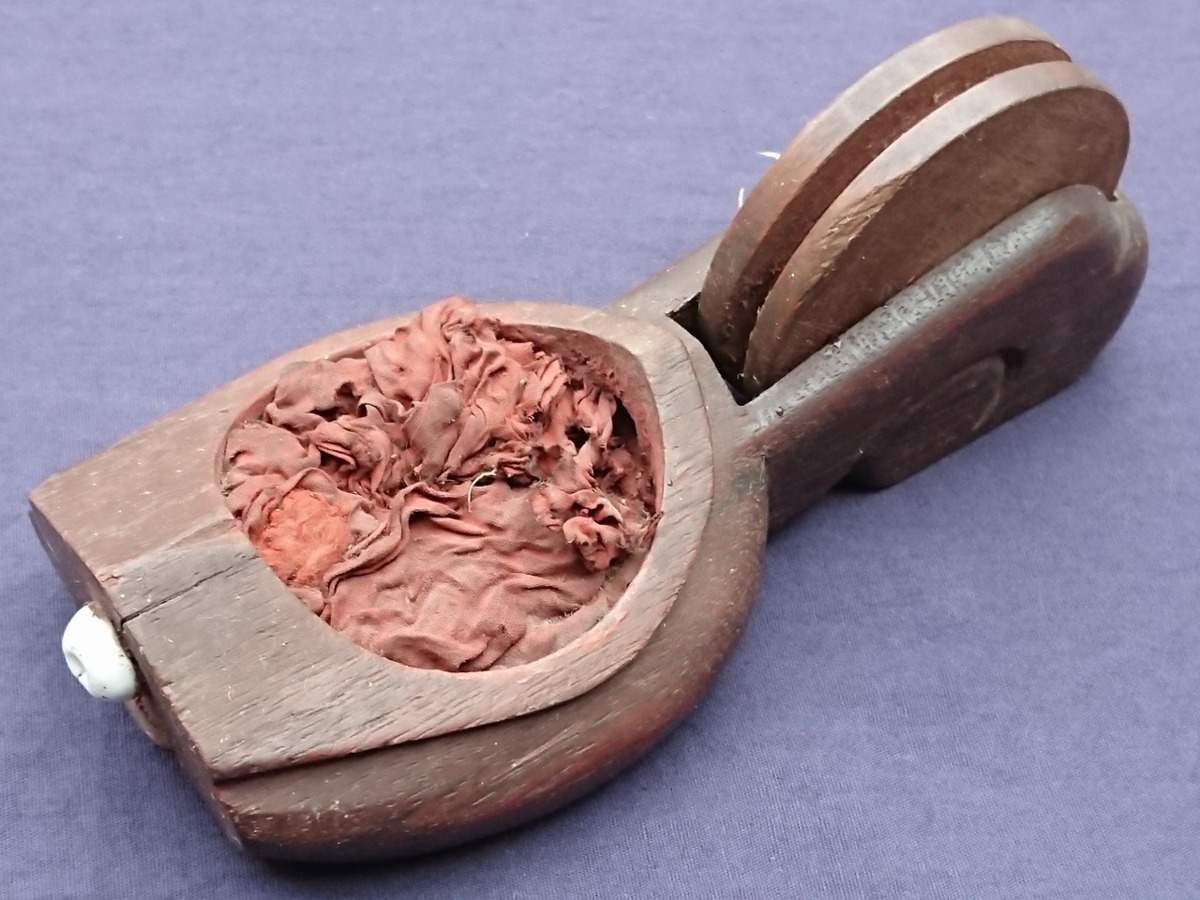


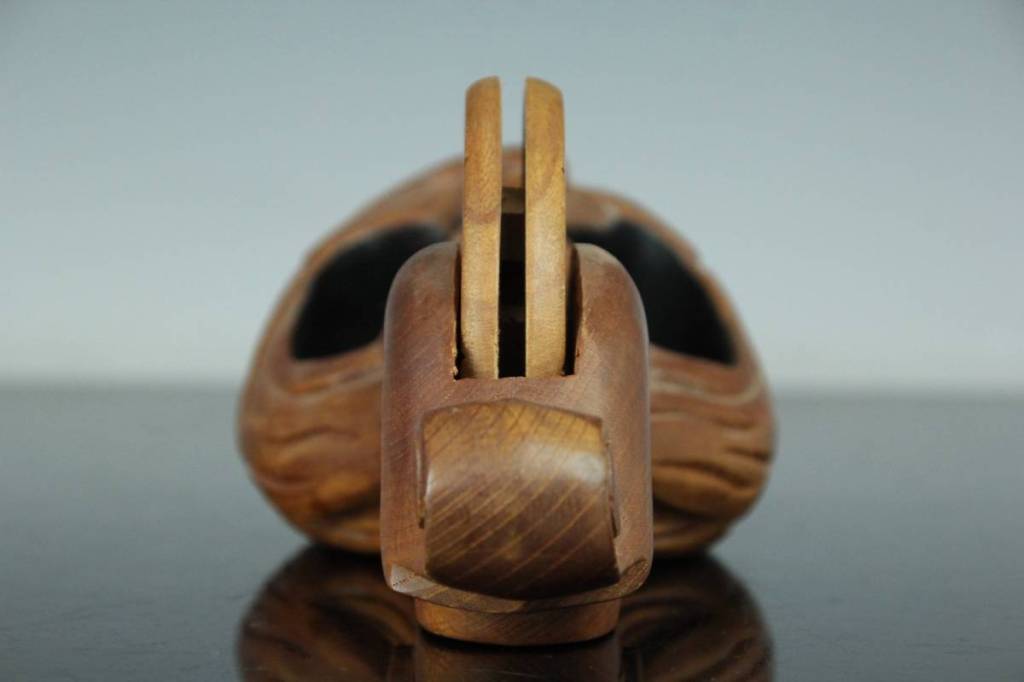

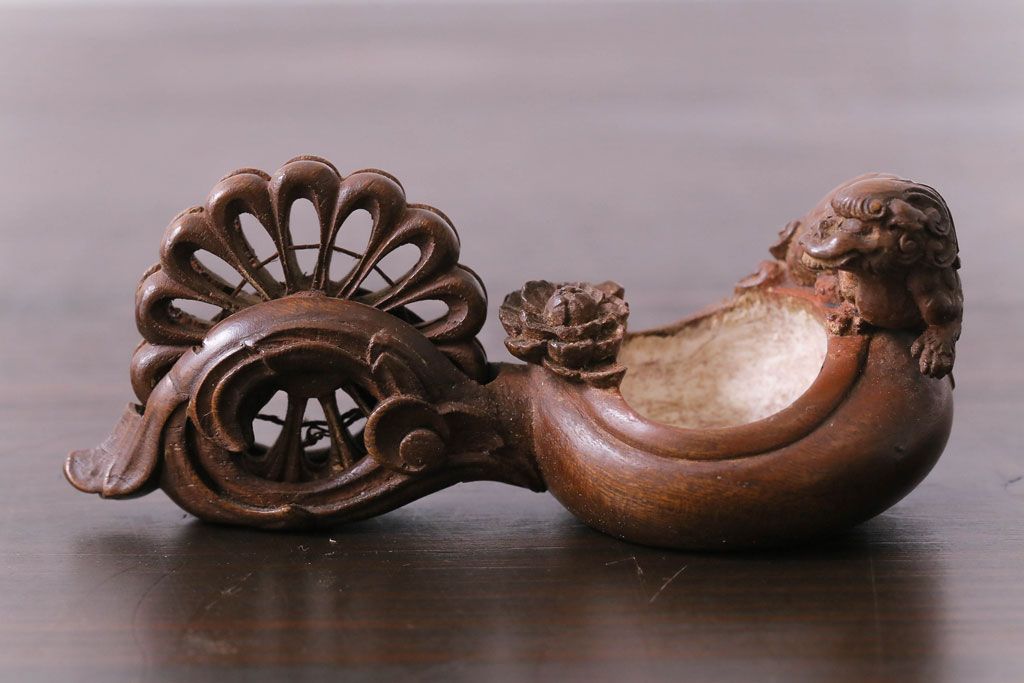
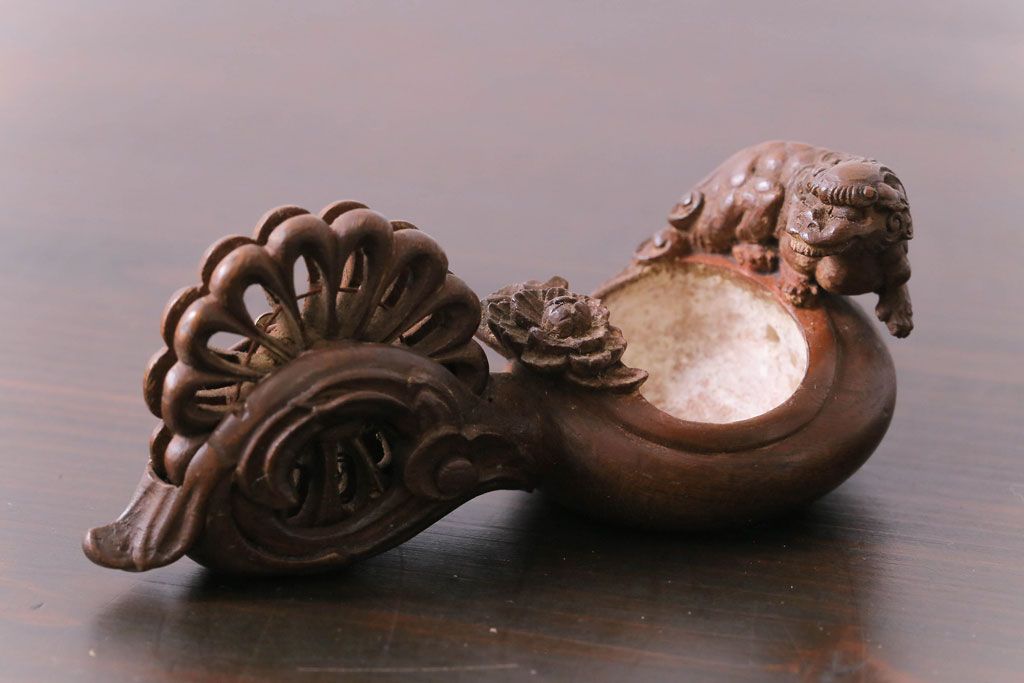


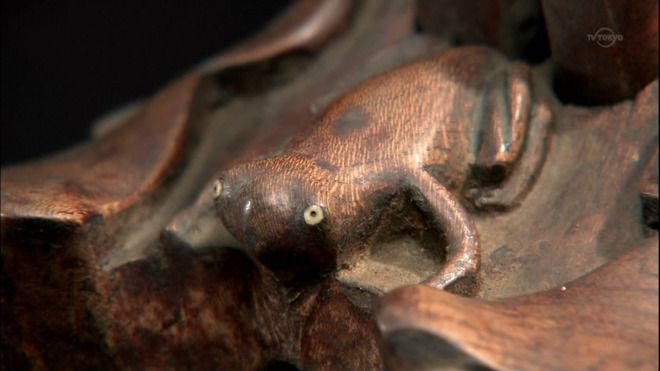


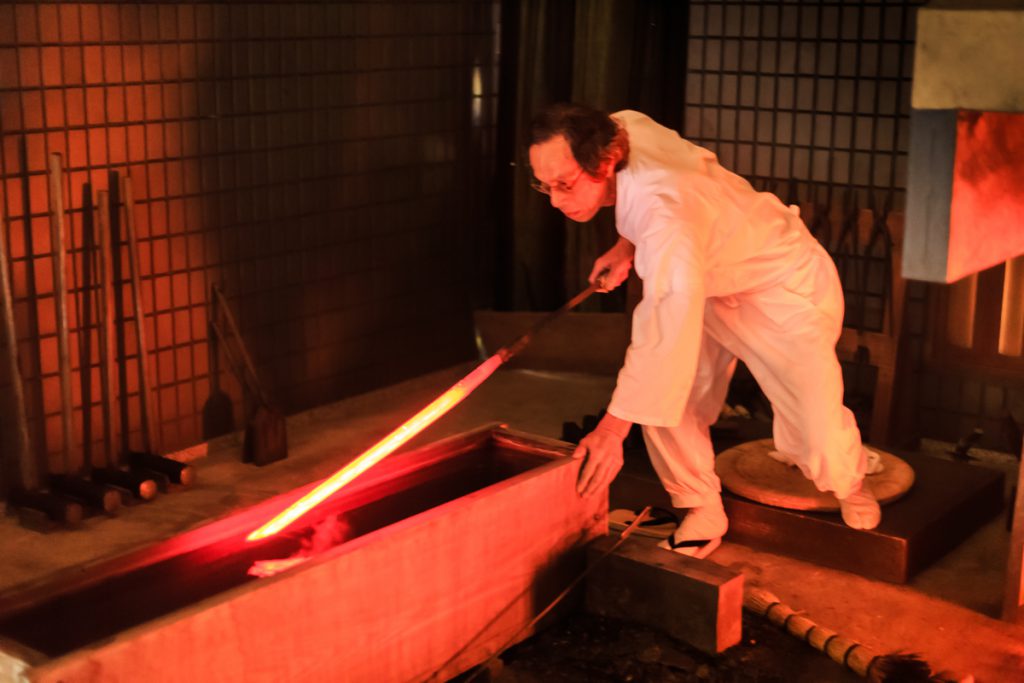


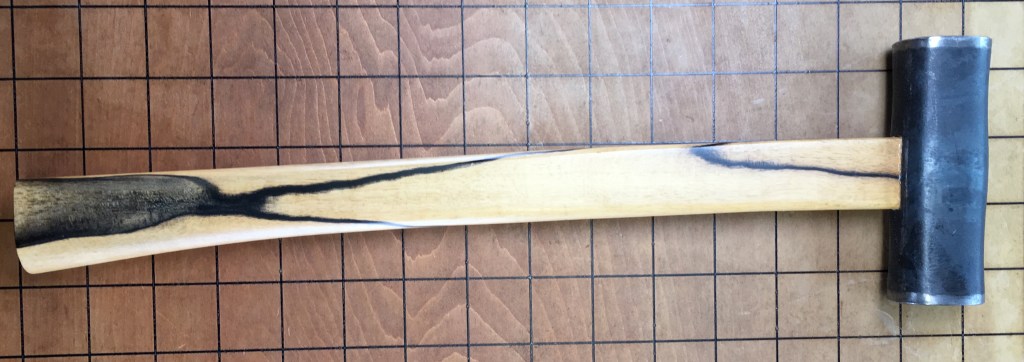


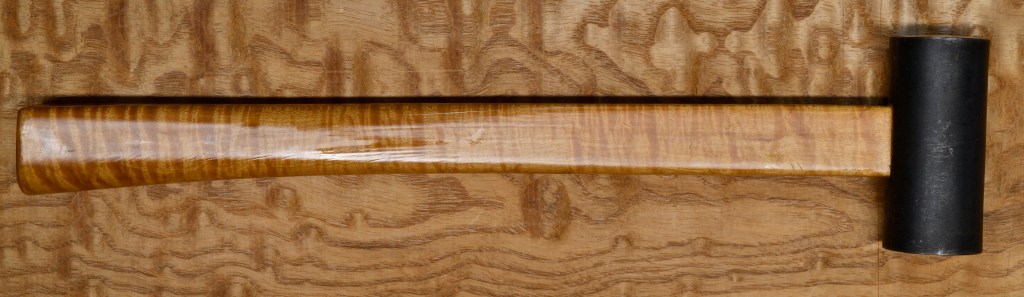


Leave a comment