
I am but mad north-north-west. When the wind is southerly, I know a hawk from a handsaw.
William Shakespeare – Hamlet
Every woodworker worth his salt uses handsaws. Your most humble and obedient servant doesn’t mean to impugn those who use machines exclusively to perform all sawing activities, I am sure they are all fine folk; I wish them health, happiness, and hundreds of fat children, but they are more machine operators than craftsmen in wood, in my un-exalted opinion.
Saws are important tools deserving of protection, but which we need to access quickly, betimes a difficult performance criteria to satisfy. Saws have wide metal “plates” that collect dust and condensation and develop rust. And sharp teeth, shorter but much like those of the frumious bandersnatch of literary fame, that catch, cut and scratch things, and that are easily damaged in turn through contact with other metal tools. How best to store this prickly fellow in a chest filled with other burbling tools?
In this post we will examine the challenges involved in storing saws, and the solution I learned from an dusty old book hidden in a Japanese university library far back in the mists of time.
Saw Storage Performance Criteria
High-carbon steel is without doubt the best material for handsaws, but it rusts. Rust produces a rougher surface increasing friction, and if it progresses will cause deep pitting, damaging the teeth forever and permanently impairing cutting efficiency
We can apply oil to the plate and teeth to prevent/reduce rust, but oil attracts dust which often contains hard particles that dull teeth, not to mention chemicals that accelerate rust. Therefore, a good storage solution must protect saws not only from dings, but from dust and temperature swings that invite condensation and rust.
Clearly the exposed saw rack published in woodworking magazines ad nauseam as DIY projects for amateurs is easy to access and great for displaying handsaws for worship and veneration (especially grand are those with twin candlestick holders (ツ)), but they are not a good long-term storage solution because, while the saws are in plain view convenient for daily worship, they are also exposed to dust and temperature swings that encourage condensation corrosion.
One traditional solution is to mount saws to the underside of a toolchest’s lid. I have tried this method before but long ago concluded it takes up too much real estate I need for other tools. And the saws still collect some dust in this location anyway.
I especially dislike one traditional solution, namely nailing a sawtill in the bottom of the toolchest up against the front wall, because it makes the saws difficult to see, a pain to retrieve, and more importantly, limits the travel distance and ultimately the width of the all-important trays. Codswallop!

Some may insist that the internal sawtill is the only valid “traditional” method. To all the self-appointed Time Lords and Holy Arbiters of Everything Traditional that look down their patrician noses at the solution I selected I respond that there are other traditional designs they may have not seen before. Perhaps they need to… I dunno… do something crazy like… put down their congac snifters and visit different libraries?
After months of deliberation I decided I needed a sawtill that is an enclosed, sealed, insulated space in itself, one that can be removed to serve as an independent toolchest most of the time but will still fit inside the toolchest when necessary, will contain many saws, not just five or six, and is at a convenient height where I can clearly see and easily retrieve/replace them. These criteria are what attracted me to this extremely intelligent design illustrated in copperplate in an old bug-chewed British book in the University of Tokyo Library. I modified the design considerably, especially the lid and the drawer, but there is nothing new under the sun.
The Execution
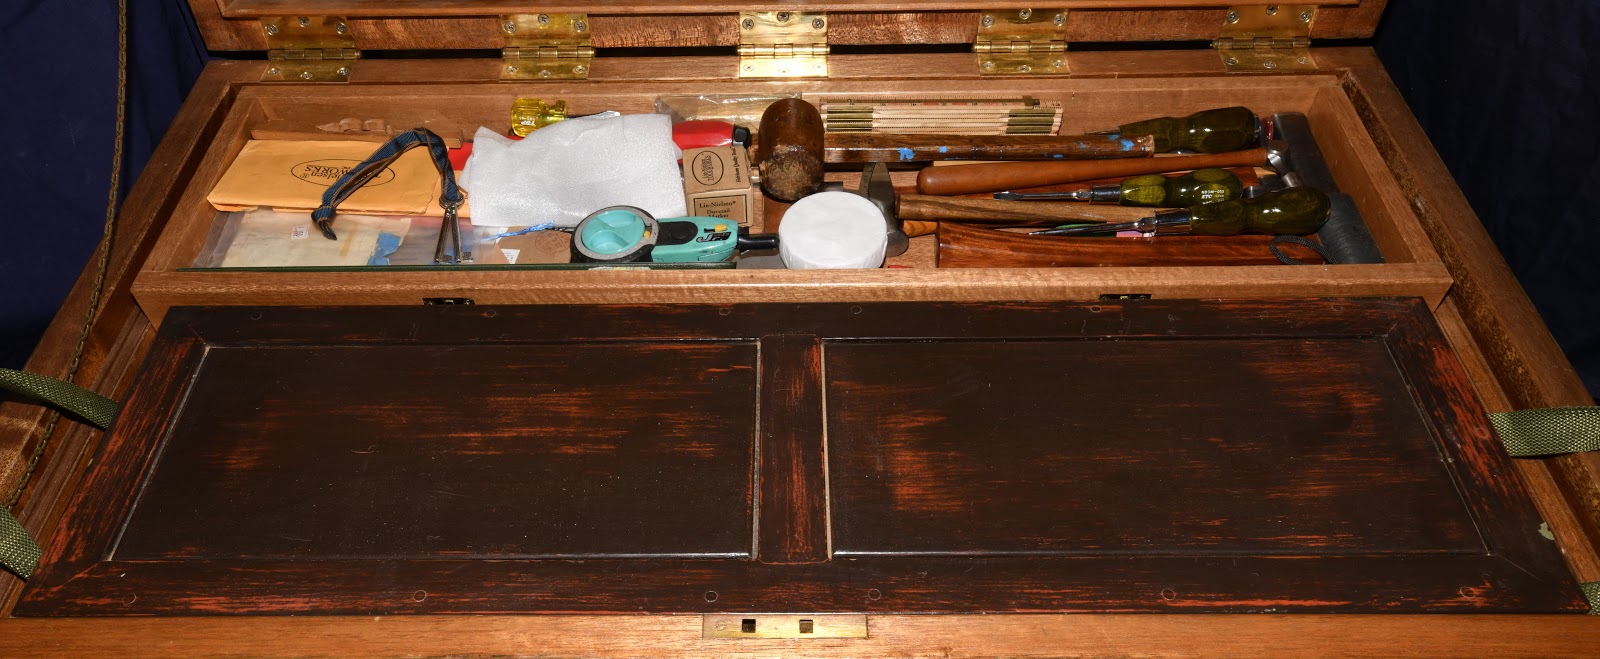
My sawtill nests inside the toolchest, as you can see from the photo above. In this location the lid can be closed without interference. Saws in the top compartment can be accessed, but not the saws in the bottom drawer. Tools in the top tray and those mounted inside the lid are also easily accessible, but those in the 2nd and 3rd tray and in the dungeon are not accessible without removing either the sawtill or the trays. This may seem to be a serious flaw, but au contraire, mes amis!
When the toolchest is at home in my workshop, the sawtill spends no time inside the toolchest. Instead I take advantage of its greatest virtue, set it off to the side, and use it as an independent toolchest dedicated to saws. In my current workshop it sits on the ledge of a bay window located 1 foot from the mothership. In other workshops I rested it on sawhorses. It is a very intelligent and flexible solution.
Do I need candlesticks? They would be nice….
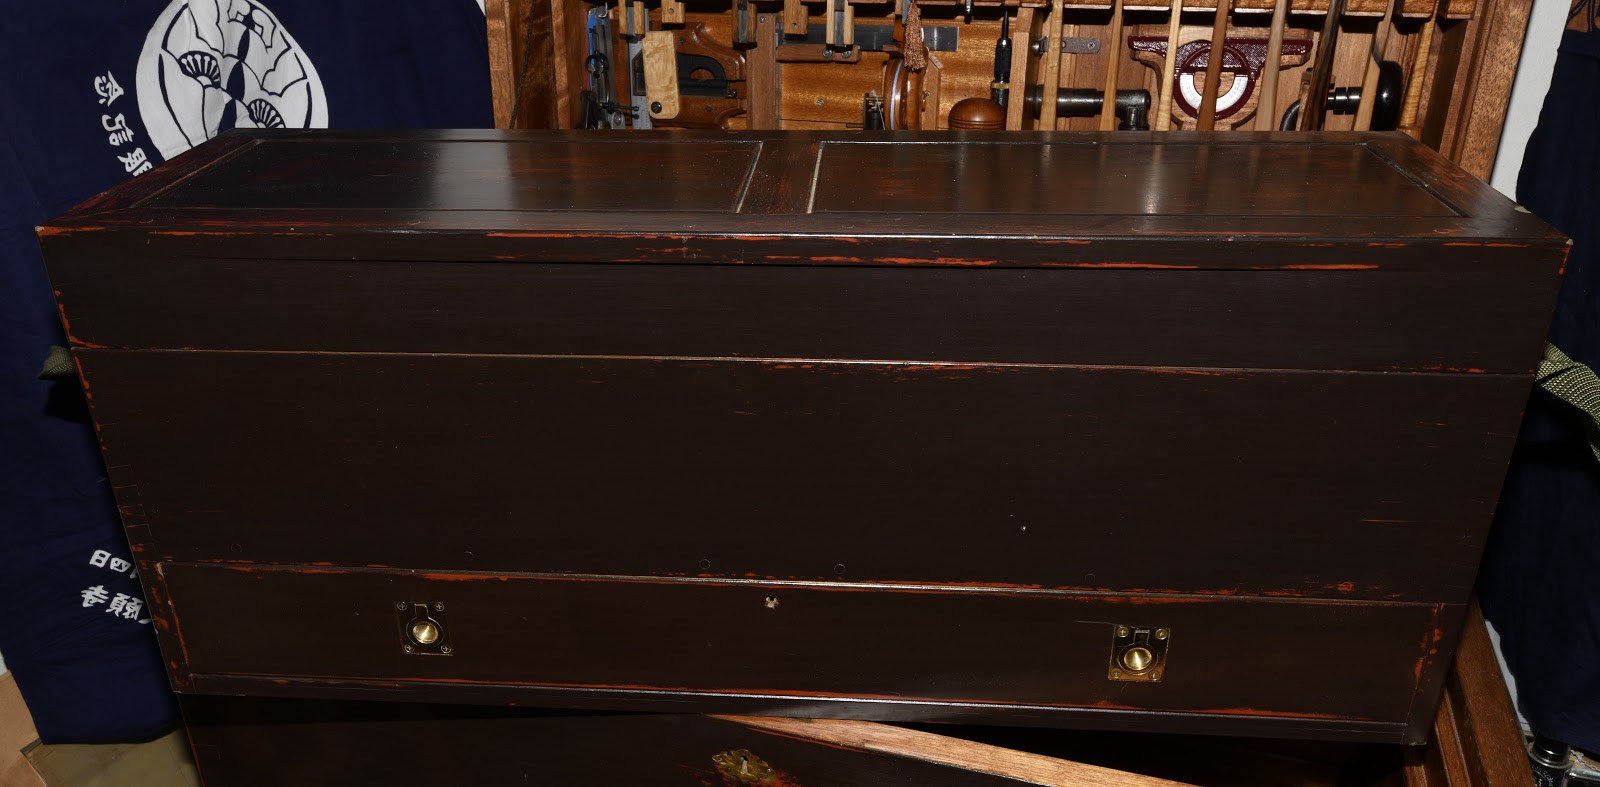
Like the toolchest proper, the sawtill is made from solid medium-density Honduras mahogany joined with dovetails. The lid, central horizontal divider, and bottom are all solid-wood frame-and-panel construction. Like the toolchest, the sawtill’s lid has deep vertical sides to add stiffness and prevent warping, but unlike the toolchest, nothing is mounted inside the lid. A wooden lip projects down from the lid aligning it to the base and sealing it tightly when closed.
When open, the saw handles in the top compartment protrude above the sawtill’s sides making them easy to see, remove, and replace without fiddling around. This is supremely important.
Due to this construction, neither drawer nor lid have ever warped or become sticky.
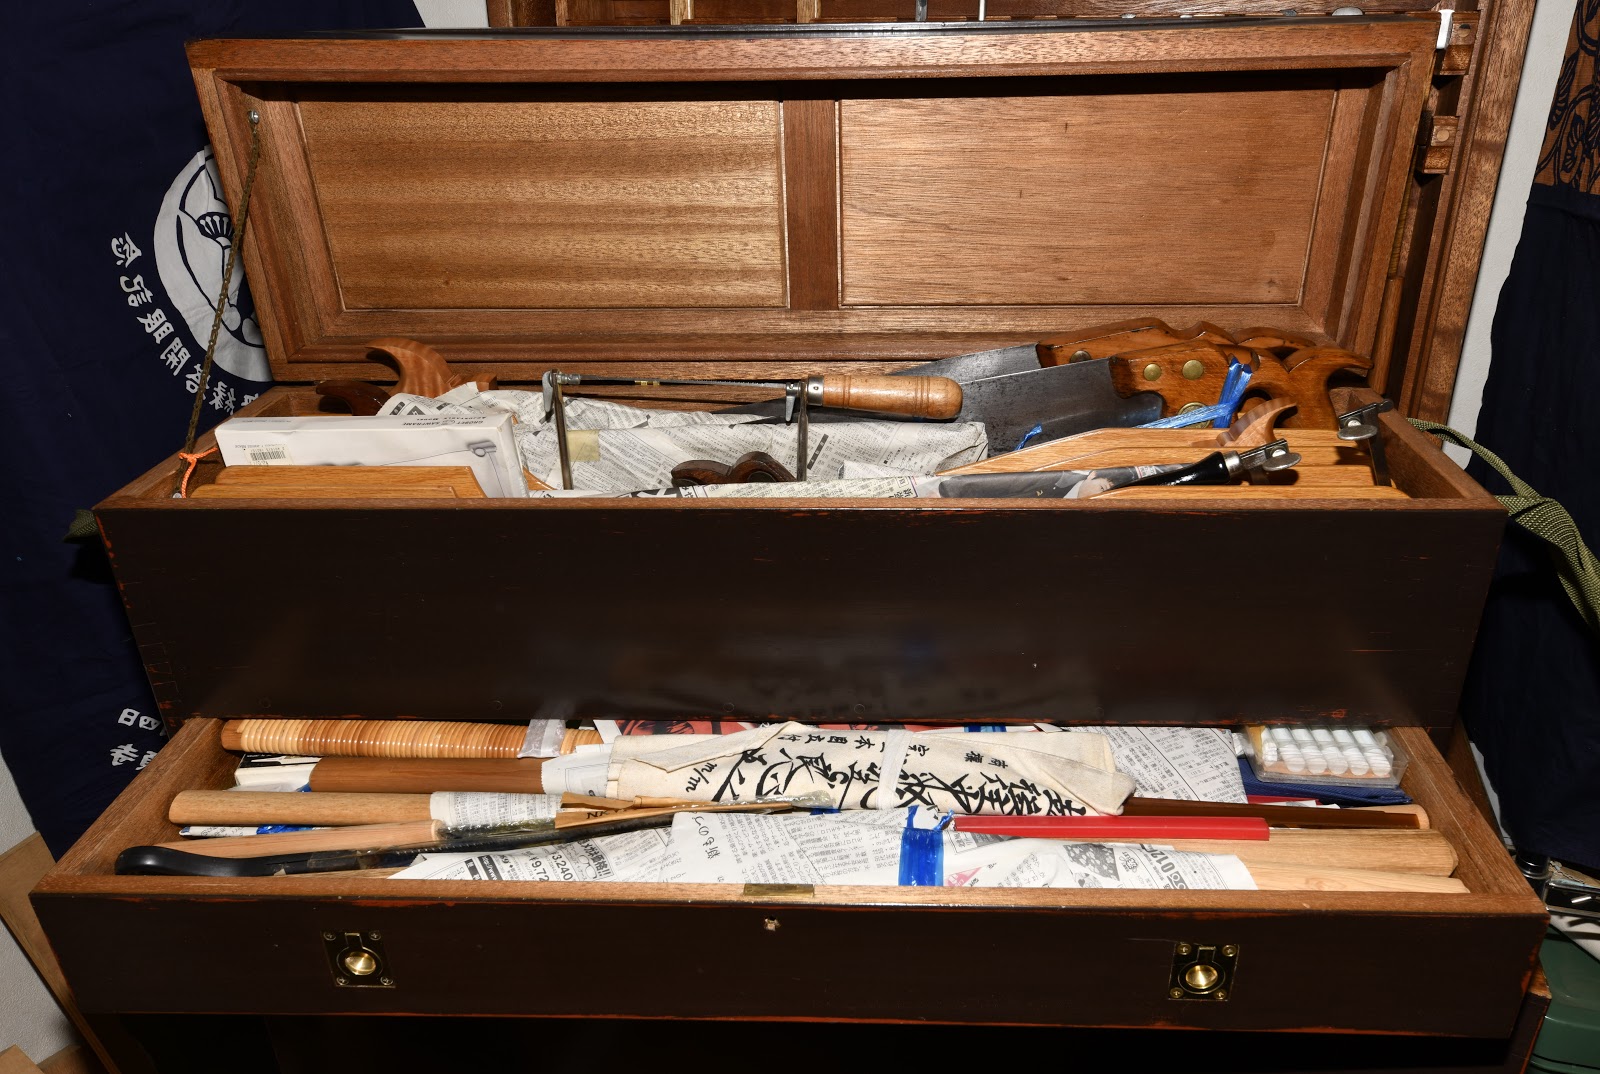

The top compartment is sized to house 8-26” Disston No.12 saws, or a mixture of Western and larger Japanese saws. The drawer underneath will hold a dozen Japanese saws along with files and other saw-related tools.
The sawtill’s width is a hair narrower than Moby Dick’s sliding trays, and its overall height with lid closed is the same as the combined height of the three trays so it rests neatly on the bottom tray’s ledge and nestled inside the space created when the three trays are slid to the back. The toolchest’s lid can be closed with the sawtill in this position securely locking it in place.
Dividers
When this saw till was new I installed two thin boards in the top compartment, one across each end, with the classic slits & slots cut into them to retain saws, but I soon found this arrangement to be sub-optimal. I later replaced them with the five lengthwise plywood dividers visible in the photo above creating individual compartments for saws. These compartments provide more storage options, make it quicker to access/replace saws without banging and sawing each other, and make it possible to wrap the saws in anti-corrosion cloth or paper for additional protection during long-term storage and transit. I would never go back to slits & slots.
Although it may have compromised the sawtill’s elegance and violated the eternal tenets of beauty exemplified by the Wonderful Liberace, I didn’t mount candelabra to it. Pray tell, an unforgivable omission?
In the next post in this series we will examine the finishes used. I think you will find this especially interesting. Until then, I have the honor to remain
YMHOS

If you have questions or would like to learn more about our tools, please click the “Pricelist” link here or at the top of the page and use the “Contact Us” form located immediately below.
Please share your insights and comments with everyone in the form located further below labeled “Leave a Reply.” We aren’t evil Google, fascist facebook, or trashy Tik-Tok and so won’t sell, share, or profitably “misplace” your information, not even if Joe Biden and his bloody-handed buddies in the Chinese Communist Party ask nicely. If I lie may my mattress be as prickly as sawteeth.


Other Posts in this Series:
- Toolchests Part 1 – And Away We Go
- Toolchests Part 2 – History
- Toolchests Part 3 – Pros & Cons
- Toolchests Part 4 – Goals & Objectives
- Toolchests Part 5 – Formulating Performance Criteria
- Toolchests Part 6 – Key Performance Criteria Solutions 1 – Durability & Longevity
- Toolchests Part 7 – Key Performance Criteria Solutions 2: Sealing, Insulation, Security, Portability & Tie-down
- Toolchests Part 8 – Under the Lid
- Toolchests Part 9 – Trays
- Toolchests Part 10 – The Dungeon
- Toolchests Part 11 – The Bottom
- Toolchests Part 12 – The Sawtill
- Toolchests Part 13 – Finishes
- Toolchests Part 14 – Repairability

Please Leave a Reply