
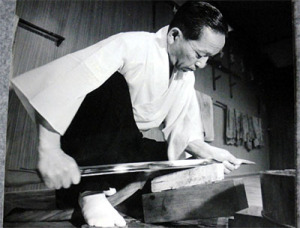
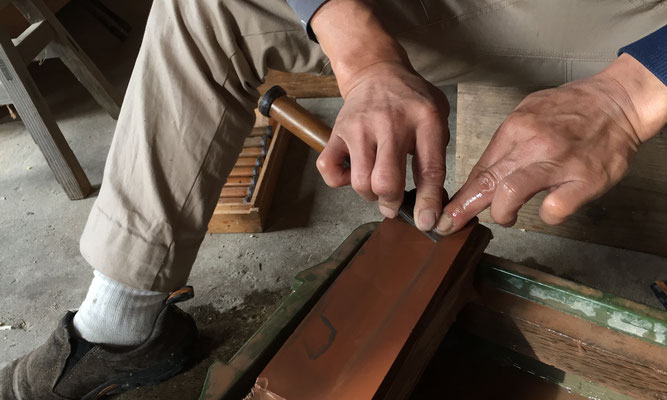
Our thoughts flow to our hands; our tools become as part of our bodies, the blade of our bodies.
Tsunekazu Nishioka, Temple Carpenter, Horyuji Temple Restoration, Nara Japan.
In the first post in this series, we examined the two main categories of Japanese chisels: the tatakinomi designed to be struck with hammer, and the tsukinomi used to pare wood without using a hammer. Beginning with this post we will shift our focus to several varieties of tsukinomi.
If you need to cut precise joints in wood, then you need both striking and paring chisels.
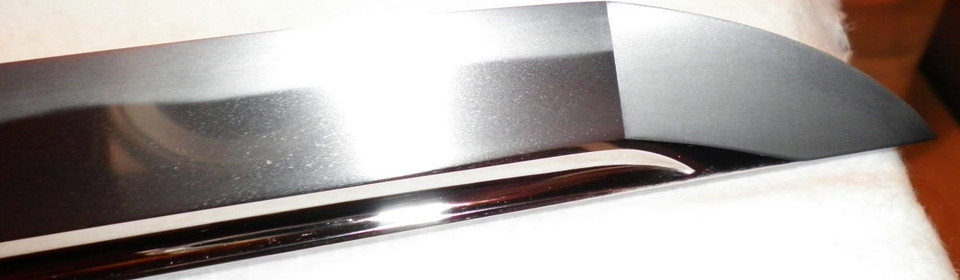
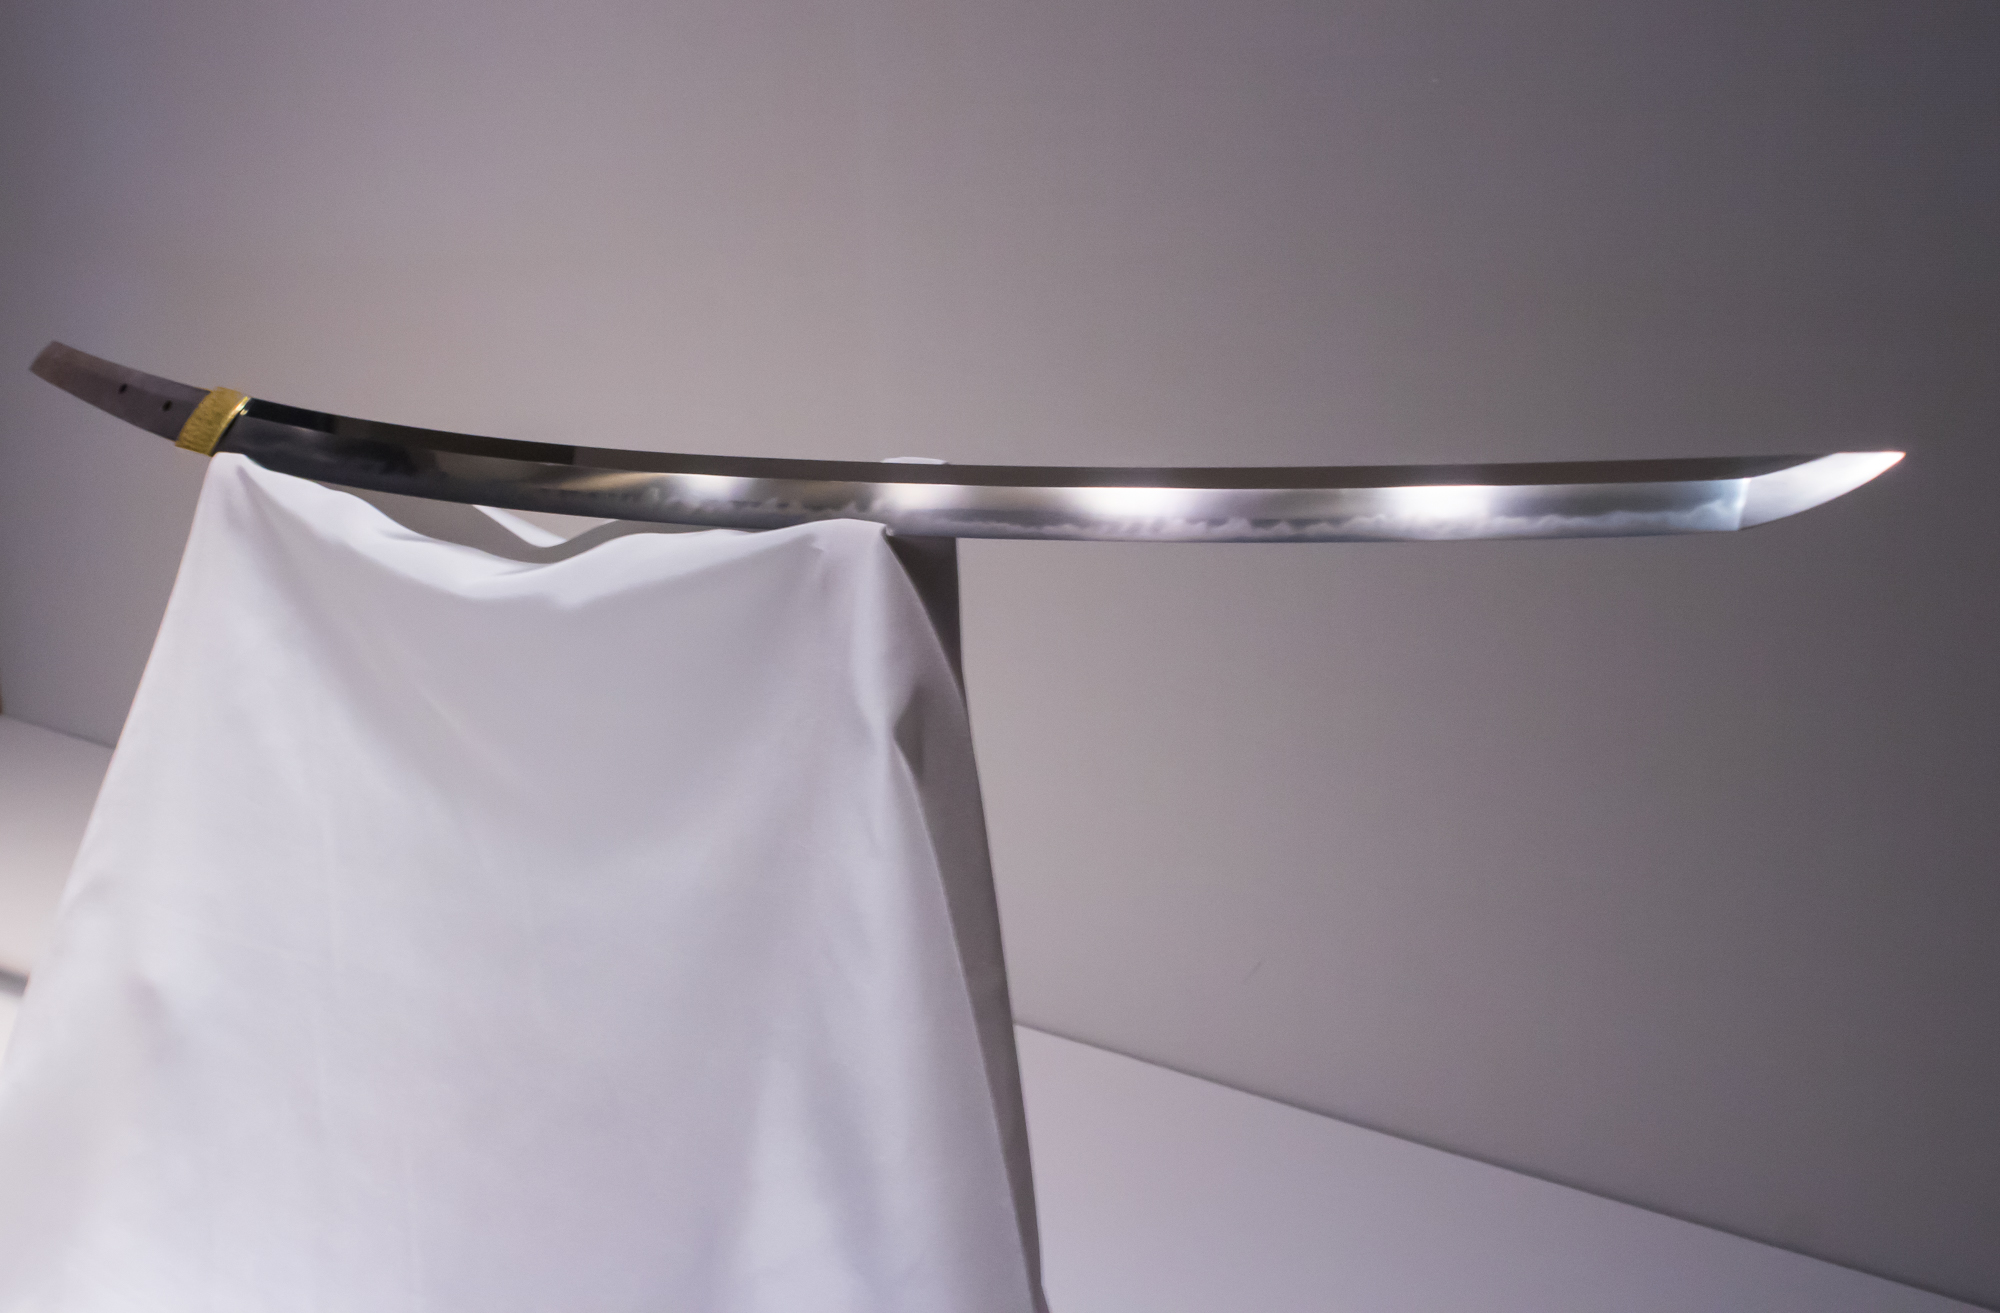
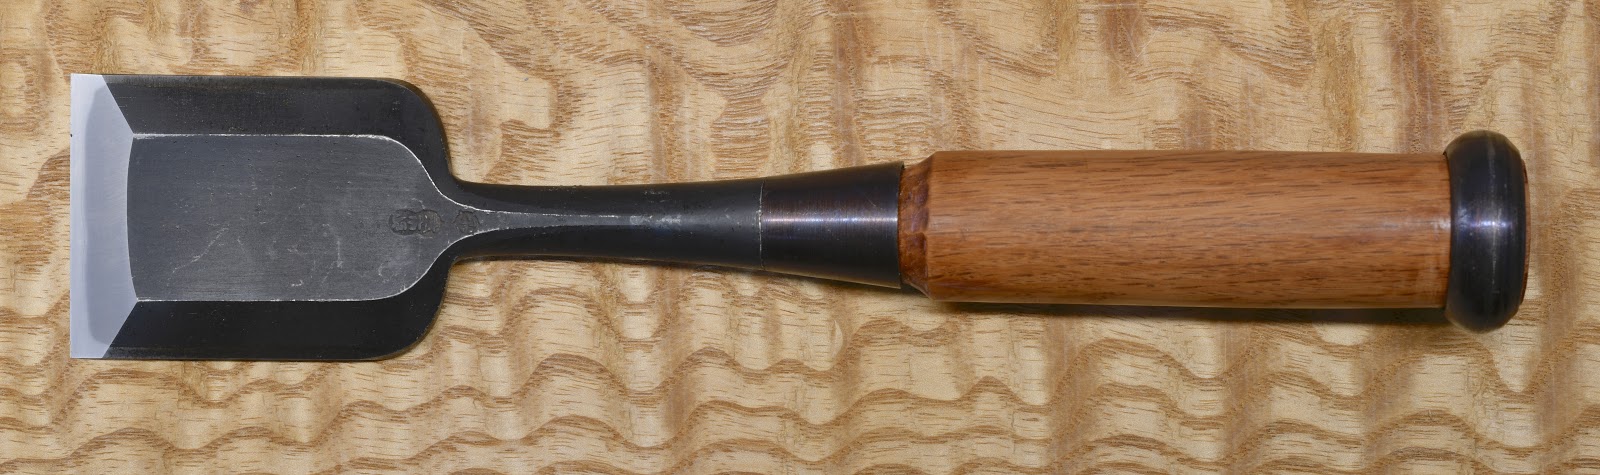
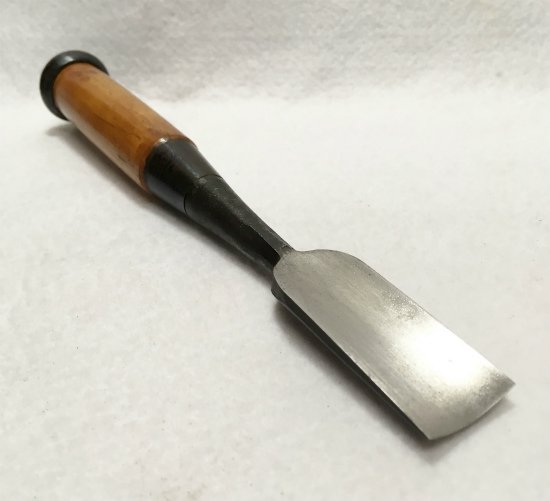
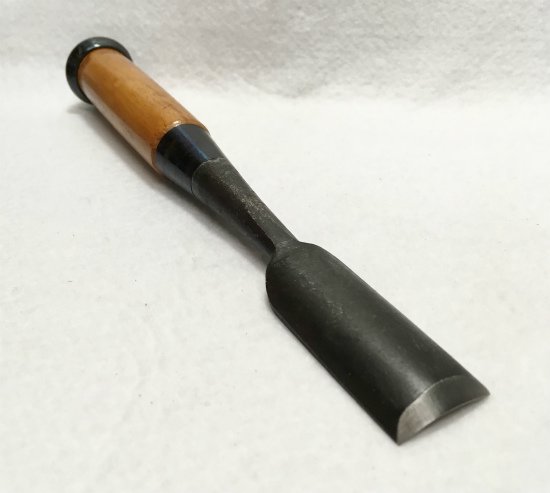
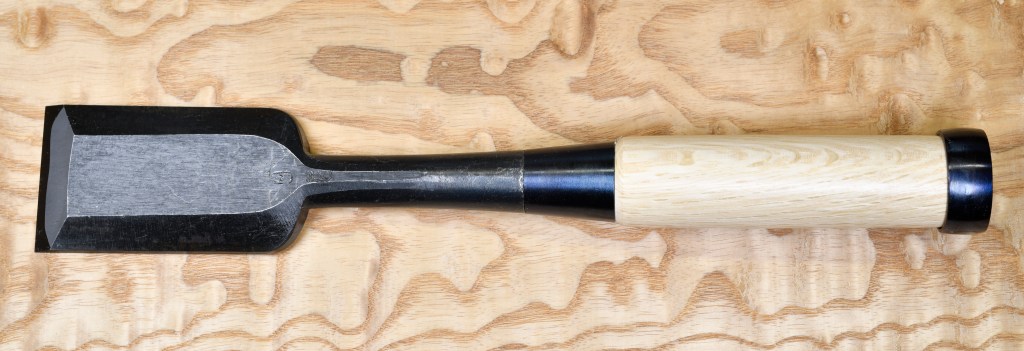
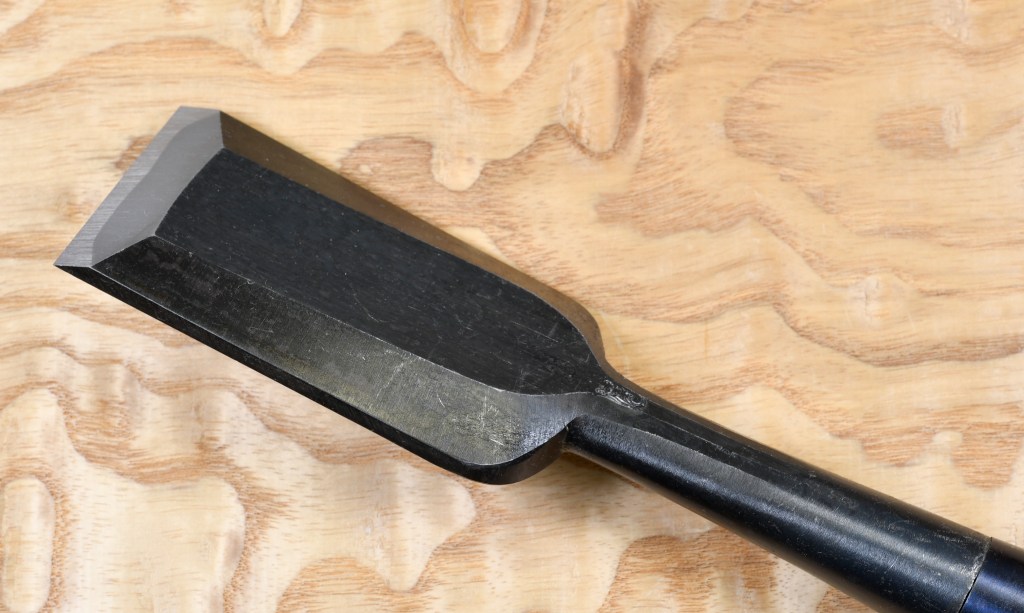
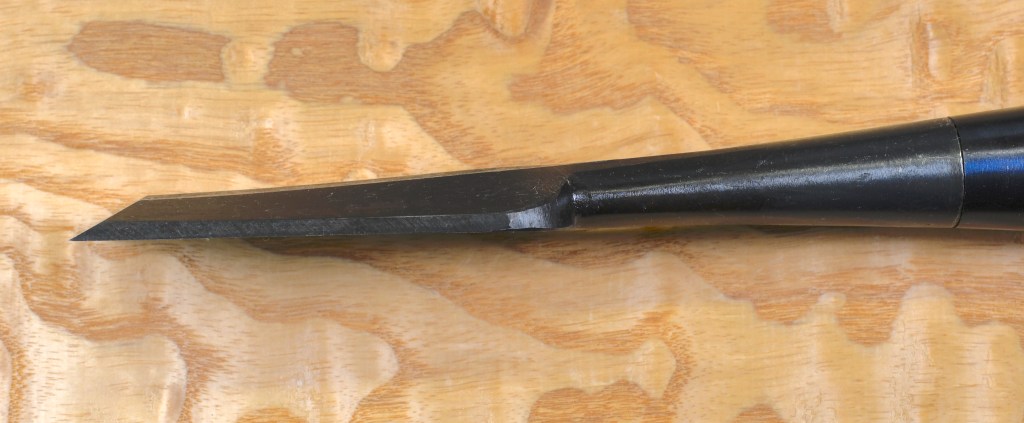
The most popular variety of tsukinomi is the mentori usunomi (面取り薄鑿)which translates to “beveled thin chisel.” The name is appropriate as the blade is long and thin and the neck gently tapered.


Description
Just as with oiirenomi, the blades of tsukinomi can be made with different profiles, such as the stiffer rectangular cross-section of the kakuuchi, or the more triangular cross-section of the shinogi usunomi.
The mentori usunomi has a streamlined cross-section similar to the mentori oiirenomi with two bevels ground into the right and left sides of the blade’s face, flowing over the shoulders and feathering into the neck.
An atsunomi or oiirenomi can pare joints, of course, but the steel crown and mushroomed wood fibers on the handle’s end make them uncomfortable for using hours on end.
In comparison, lacking the steel crown and mushroomed handle, the usunomi is more comfortable to use. More importantly, the blades and handles of these chisels are longer and lighter in weight providing superior angular control for precision paring operations.
Western paring chisels by comparison are even thinner and have longer blades than Japanese paring chisels. There can be no denying they do a fine job. But Japanese paring chisels like the usunomi have a few potential advantages worth considering.
The most significant advantage is that the steel cutting edges of Japanese paring chisels are much harder. The paring chisels our blacksmiths forge are around 65~66 HRc in hardness, whereas Western paring chisels are usually around 55 HRc. A Western style paring chisel with its thin blade of uniform steel hardened to 65 HRc would easily snap in half in practical use.
This extra-hard lamination is hand-forged by our blacksmith from Hitachi Metal’s Yasugi Shirogami No.1 steel (aka “White Label Steel”), an exceptionally pure high-carbon steel that makes possible an edge that stays sharper longer, with the result that, given the same number of sharpening opportunities and time in a given workday, a professional-grade usunomi will help you do more hours of high-quality work than a softer blade.
For craftsmen that use their tools to feed their families this higher-level of performance is not something to be sniffed at.
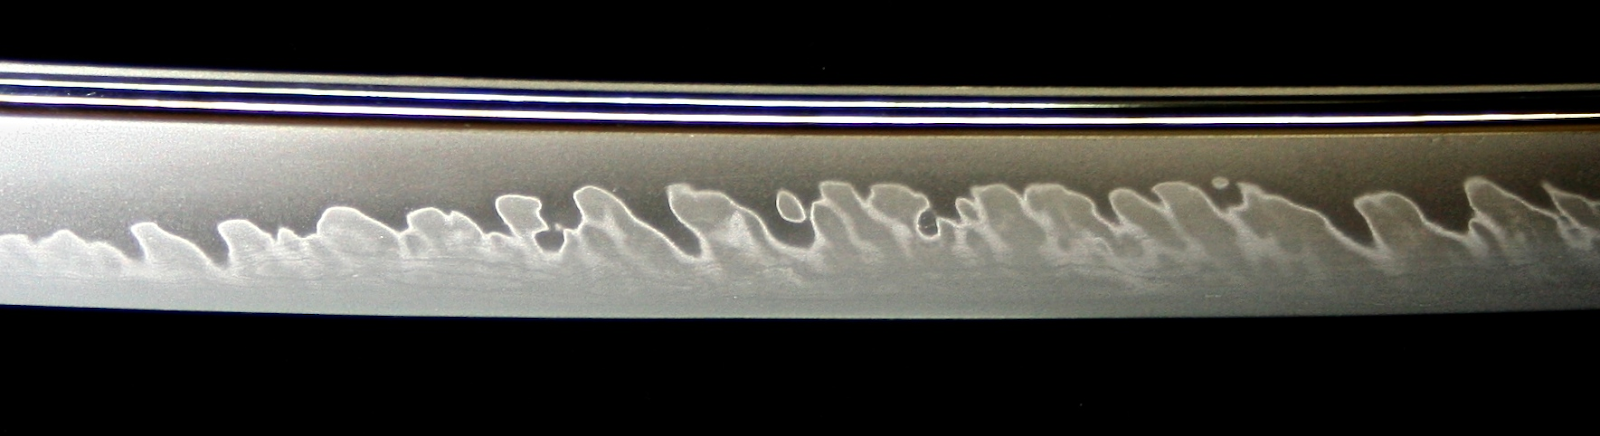
The second advantage of the Japanese paring chisel is their hollow-ground ura which makes it easier to maintain a flat bearing surface, especially important in the case of the hard steel used in our chisels. If you haven’t used Japanese chisels, this claim may sound unlikely. But please recall that there are narrow lands surrounding the ura, all in the same plane, that create a flat bearing surface to guide the chisel.
Usage
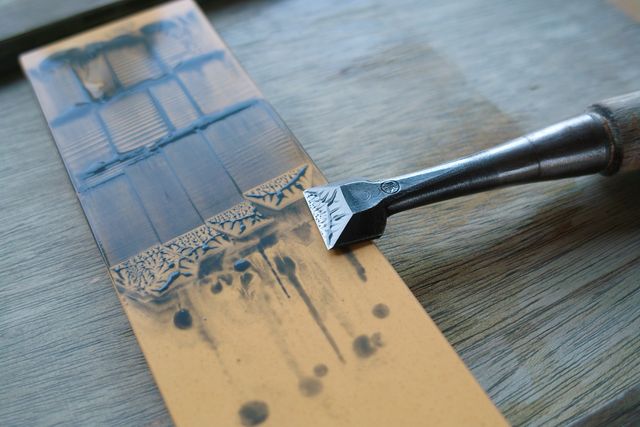
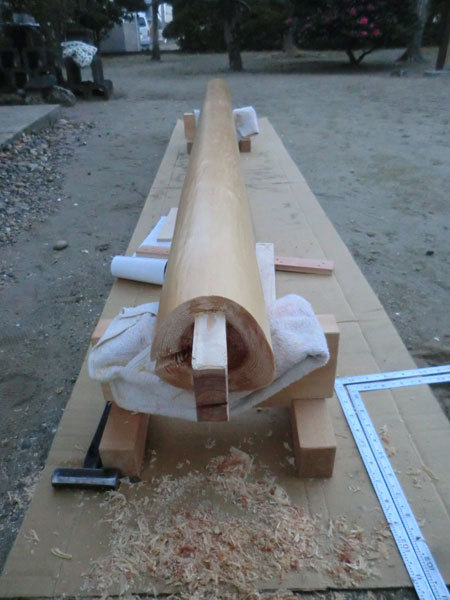
This tool is well-suited to reaching into narrow mortises and other wood joints to clean and pare surfaces roughed out by axe, adze, saw and tatakinomi to precise tolerances.
It excels at trimming mortise side walls and end walls. And shaving tenon cheeks and shoulders to precise dimensions without causing spelching or cutting too deeply as shoulder planes are wont to do is a piece of cake.
In addition, the longer blade and flat face of the usunomi make it ideal for paring angles, such as 45° mitres, in combination with wooden guide blocks or jigs.
The usunomi may be struck with the heel of the hand, but never with a hammer or mallet. The slender neck, thin blade, and un-reinforced handle will simply not accept such abuse gracefully.
Chisels intended to be struck with a hammer typically perform best with a cutting edge bevel of 27~30°. Any shallower and the hard steel at the cutting edge may chip instantly dulling the tool. However, the cutting edges of usunomi along with other tsukinomi are not normally subjected to the high stresses chisels motivated with hammers must endure, so the cutting efficiency can be increased by lowering the angle to 24° or so without creating problems, depending of course, on nature of the wood you need to pare and the type of paring you intend. For instance, paring end the grain of maple may require a steeper angle than when paring the long grain of pine.
If you have used long-bladed Western chisels hard for a few years, you will have no doubt experienced your chisel’s flat becoming somewhat rounded over after many sharpenings. This occurs because, for various reasons, the center portion of the blade’s flat is abraded at a slower rate when being sharpened than the blade’s perimeter, resulting in distortion regardless of whether you keep your stones perfectly flat or not.
Obviously, a chisel with a flat that is banana-shaped lengthwise and crosswise is not ideal for paring flat surfaces, but there is a bigger problem. Namely, it is simply more difficult and time-consuming to create a sharp edge on a blade with a curved flat than one with a true flat. A flat like this begs for amateurish tricks using rulers, etc.. of the sort professionals would be embarrassed to use. A friend once scathingly described these techniques as “training wheels.” Oh my.
The ura on the Japanese chisel is specifically designed to deal with this shortcoming, and it does a great job of it.


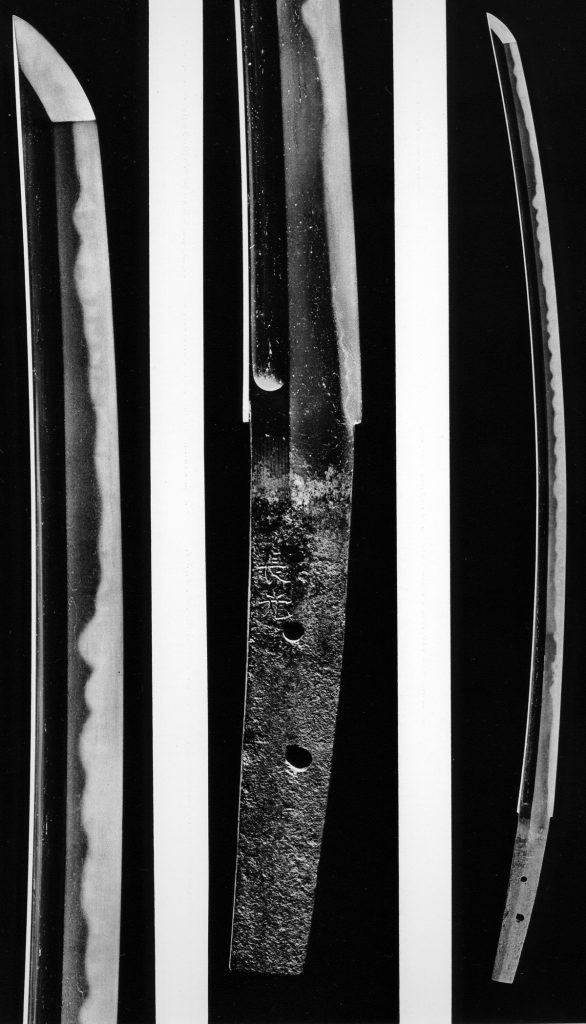
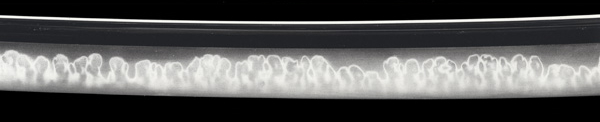
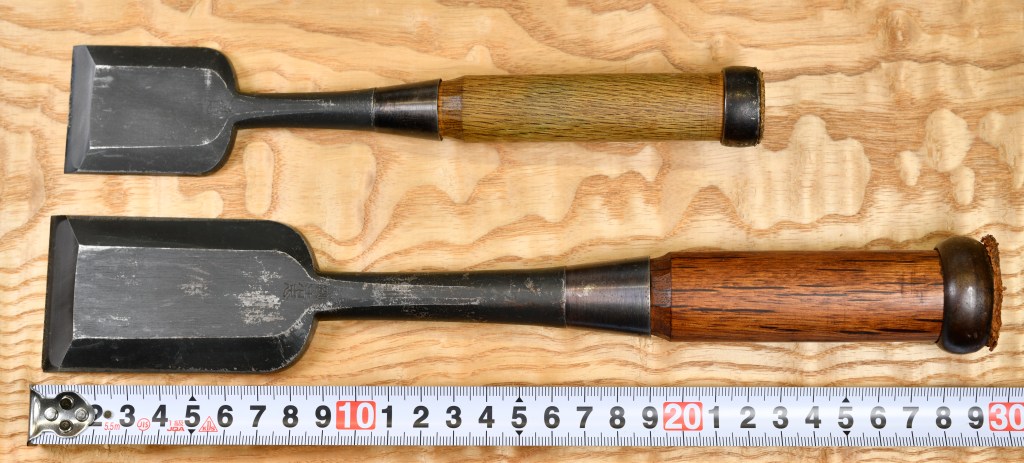
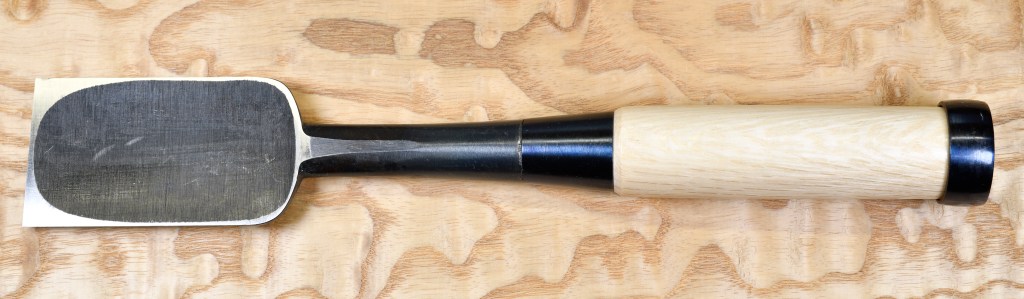
The 30mm usunomi in the photo above has an ura with three hollow-ground areas instead of one. This detail is called a ” mitsuura” ミツ浦 meaning ”triple ura.” It has the advantage of providing a larger bearing surface than the standard ura does, one that is helpful when used with wooden jigs for paring to precise angles, for instance. It also helps the ura index better when paring large surfaces, especially with chisel blades wider than 24mm.
Some people prefer chisels with the mitsuura detail for their appearance. I admit mitsuura look sexy, but I am not a fan of using this detail unless it is truly necessary because of the downsides I will not deal with in this already overlong post.
If I can liken the atsunomi to a shire horse, then the usunomi is a falcon. Both are beautiful powerful animals, but just as one wouldn’t use a draught horse to chase down a rabbit, or a peregrine to pull a plow, neither oiirenomi nor atsunomi are as effective as the usunomi for paring and cleaning joints.


The usunomi is one of those tools that is a pleasure to use.
Among woodworking tools, the usunomi is special: as it becomes part of your hand, you will discover that neither the blade nor your hand but your mind is shaping the wood.
YMHOS
If you have questions or would like to learn more about our tools, please click the see the “Pricelist” link here or at the top of the page and use the “Contact Us” form located immediately below, or email us at Covingtonandsons@gmail.com
Please share your insights and comments with everyone by using the form located further below labeled “Leave a Reply.” We aren’t evil Google, fascist facebook, or thuggish Twitter and so won’t sell, share, or profitably “misplace” your information. If I lie may a shire horse polish his hooves on my back.


Links to Other Posts in this Series
- The Varieties of Japanese Chisels Part 1 – The Main Categories
- The Varieties of Japanese Chisels Part 2 – The Mentori Oiirenomi (面取追入鑿)
- The Varieties of Japanese Chisels Part 3 – The Shinogi Oiirenomi (鎬追入鑿)
- The Varieties of Japanese Chisels Part 4 – Kakuuchi Oiirenomi (角打追入鑿)
- The Varieties of Japanese Chisels Part 5 – High-Speed Steel Oiirenomi (HSS 追入鑿)
- The Varieties of Japanese Chisels Part 6 – The Mortise Chisel (Mukomachi Nomi 向待鑿)
- The Varieties of Japanese Chisels Part 7 – The Nihon Mukomachi Nomi (二本向待鑿)
- The Varieties of Japanese Chisels Part 8 – The Atsunomi (厚鑿)
- The Varieties of Japanese Chisels Part 9 – The Uchimaru Nomi Gouge (内丸鑿)
- The Varieties of Japanese Chisels Part 10 – The Sotomaru Nomi Incannel Gouge (外丸鑿)
- The Varieties of Japanese Chisels Part 11 – The Tsuba Nomi Guard Chisel (鍔鑿)
- The Varieties of Japanese Chisels Part 13 – The Shinogi Usunomi 鎬薄鑿 Paring Chisel
- The Varieties of Japanese Chisels Part 14 – Kote Nomi (鏝鑿Trowel Chisel)
- The Varieties of Japanese Chisels Part 15 – Ootsuki Nomi 大突き鑿
- The Varieties of Japanese Chisels Part 16 – High-speed Steel Atsunomi
- The Varieties of Japanese Chisels Part 17 – Sokozarai Chisel
- The Varieties of Japanese Chisels Part 18 – The Hantataki Chisel


ingenhovenarchitects.jpg)


Leave a comment