Sharpening Part 20 – Flattening and Polishing the Ura

Shall I compare thee to a summer’s day?
Thou art more lovely and more temperate:
Rough winds do shake the darling buds of May,
And summer’s lease hath all too short a date;
Sometime too hot the eye of heaven shines,
And often is his gold complexion dimm’d;
And every fair from fair sometime declines,
By chance or nature’s changing course untrimm’d;
But thy eternal summer shall not fade,
Nor lose possession of that fair thou ow’st;
Nor shall death brag thou wander’st in his shade,
When in eternal lines to time thou grow’st:
   So long as men can breathe or eyes can see,
   So long lives this, and this gives life to thee.

William Shakespeare, Sonnet 18

Your most humble and obedient servant began this post with the elegant sonnet quoted above, indisputably one of the most beautiful pieces of poetry ever written in the English language, instead of the usual pithy proverbs of Red Green, that towering Canadian Philosopher-Handyman and erudite Leader of Possum Lodge, just to show Gentle Readers how refined we at C&S Tools can be when no one is watching (ツ). But sadly we must now pause all such elegant distractions for a time to focus on the nuts-and-bolts of how to true the ura of a Japanese woodworking blade, the first step in making it sharp.

This tutorial is rather wordy because Beloved Customers sometimes find the task of managing the ura difficult at first. Indeed, while truing the ura of Japanese chisels and planes is a simple task, it’s one many get wrong the first time, occasionally resulting in emotional damage to both blade and it’s owner. I know it almost drove me non compos mentis the first few times I tried, but now that my psychiatric team has stumbled onto the right mix of meds, and Doctor Alonzo has released your humble servant from that unflattering canvas straight jacket, Beloved Customers have the opportunity to learn from my mistakes. Rejoice!

This is the first article in the series where we actually turn steel to mud, so let’s get to it.

Important General Principles

All standard chisel blades and plane blades, whether Japanese or Western, need to have a planar “flat,” as it’s called in Western chisels or “ura,” in the case of Japanese chisels and planes opposite the bevel. When sharpening such blades it’s ideal for these areas be in contact with sharpening stones over their full width, and ideally, full length. Perfection is not necessary, however, so don’t let yourself become obsessive; That way lies madness.

A few lost souls mistakenly assume (just before they go barking mad) that the lands surrounding the hollow-ground uratsuki must be perfectly planar for the chisel to function, but such is not the case. Granted, it does make it easier to sharpen the blade, but it need not be achieved immediately, especially since a planar ura can be easily obtained gradually over multiple sharpening sessions.

If Beloved Customer’s chisel does not have a fully-planar set of lands surrounding the hollow-ground uratsuki when new, understand that it may be a hand-forged, hand-shaped, hand-sharpened tool with imperfections, and perhaps not a CAD-CAM designed, mass-produced, chisel-shaped, sharpened screwdriver. If so, please understand that this is not an aberration but is normal. However, if such natural irregularities distract to the point your eye starts twitching like that of Chief Inspector Dreyfus after spending time with Inspector Clouseau, perhaps hand-forged tools are not your cup of tea.

Procuring Perfect Tools

The previous sentence may seem to suggest that we at C&S Tools prefer to not provide our humble tools to perfectionists, but that is not the case. Rather, we insist Beloved Customers seeking the perfect chisel, plane, saw or knife adjust their expectations for perfection to match their expectations for financial outlay and fabrication time. What conditions? First, multiply your tool budget at least tenfold (seriously) and set aside that budgeted amount in hard cashy money, maybe in a thick roll in your sock drawer. You see, unlike your unworthy servant who many assume works for free, craftsmen with the skills required to produce perfect tools, and who are willing to invest their valuable time in doing so, are in high demand and do not work for free. If this seems steep, then perfection is not for you.

Next, plan your order carefully, and perhaps commission drawings. Not as easy as it sounds, mayhap.

Finally, steel yourself to wait a minimum of two years for the work to be completed, for you see, while many desire perfect tools and are willing to pay the price, you don’t need toes to count the number of overworked craftsmen that can actually forge them nowadays.

Oh yes, I almost forgot one thing. In the case of our Perfect Tool Blackmith, he has an unusual condition, one based on valid reasons I cannot disclose, that the recipient be a working professional craftsman, not an amateur, hobbyist or collector.

An option to having a perfect chisel custom-forged new is to seek out a genuine Hidari-no-Ichihiro chisel because the Yamazaki brother’s products, though very expensive back in the day and more expensive now, were pretty close to perfect in shape and appearance. But beware counterfeits.

On the other hand, the tools we sell to our regular Beloved Customers are extremely practical, they look OK, perform just as well as Perfect Tools, cost a helluvalot less, and most importantly they are waiting on our shelves right now quivering in anticipation of an airplane ride to new masters who will feed them oodles of yummy wood. So which do you think is is better? A perfect prima donna safe queen of a tool that takes years to procure and is too precious to use hard, or a reasonably-priced, hard-working, hand-forged, high-performance, eager but perhaps less than perfect tool you can have right away?

Working With the Imperfect Ura

In any case, please be aware that a chisel with an imperfect ura (nearly all of them have some problems when new) can be perfected over time and will work just fine as-is if you are patient, remain aware of the blades tendencies, and compensate using your eyes and hands accordingly. After all, the chisel only does what you direct it do, so please direct the blade instead of just going along for the ride while drinking adult beverages and smokin wacky-tabaccy in the back seat with Murphy. 〜(シ) 〜

If the plane formed by the ura’s lands is concave, the chisel will tend to undercut the end walls of a mortise, not difficult to avoid with some caution of the sort one must always exercise.

On the other hand (the one with 6 fingers) if the plane is convex, the chisel will tend to scoop away from the end walls of a mortise. All things considered, however, concave is far better than convex.

But whether concave or convex, such irregularities always exist to some degree from time to time in all chisels made by humans and sharpened by hand. It’s the craftsman’s job to manage his tools. Of course, this means we must strive to create and maintain a reasonably flat ura, so let’s consider some practical time-proven solutions that avoid wasting a lot of time, stone and steel, and at the same time don’t prematurely wear out the hollow-ground uratsuki in the process.

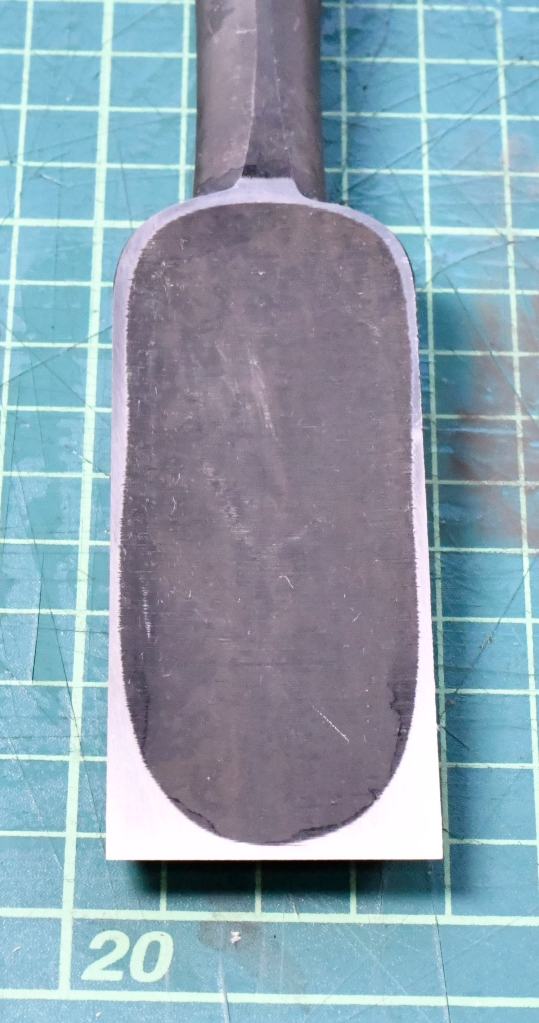
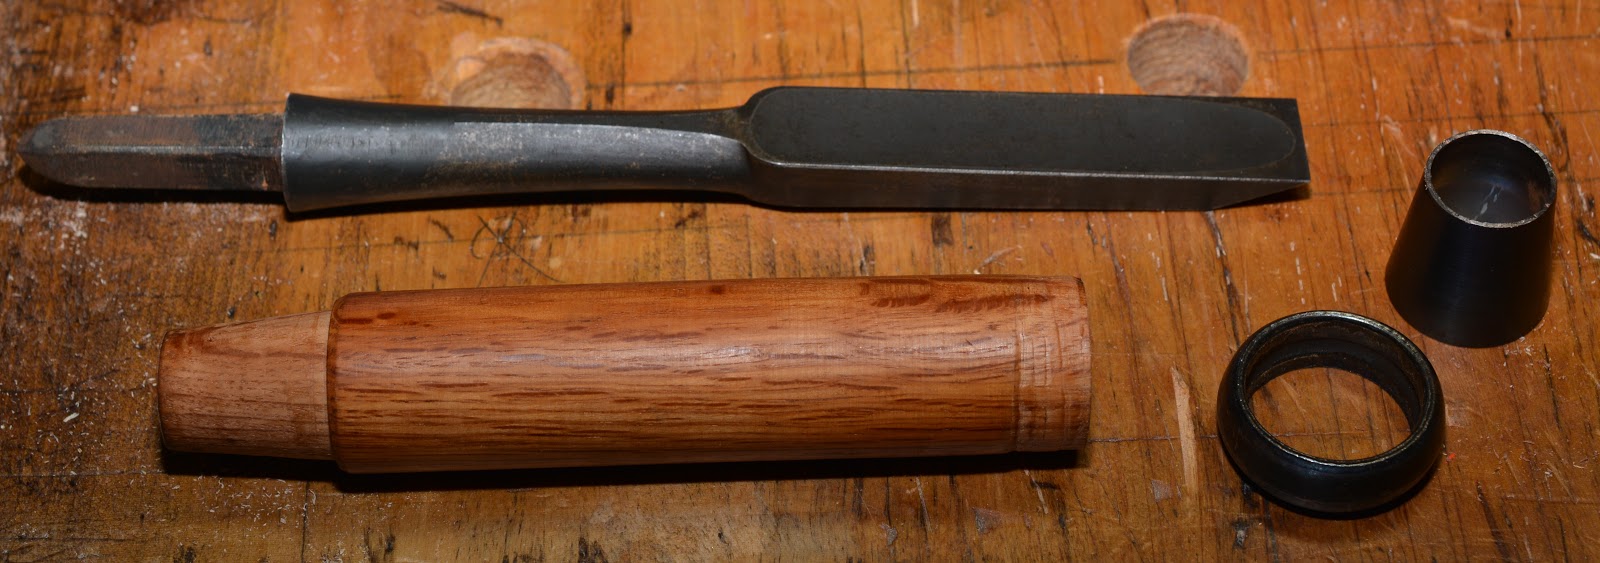
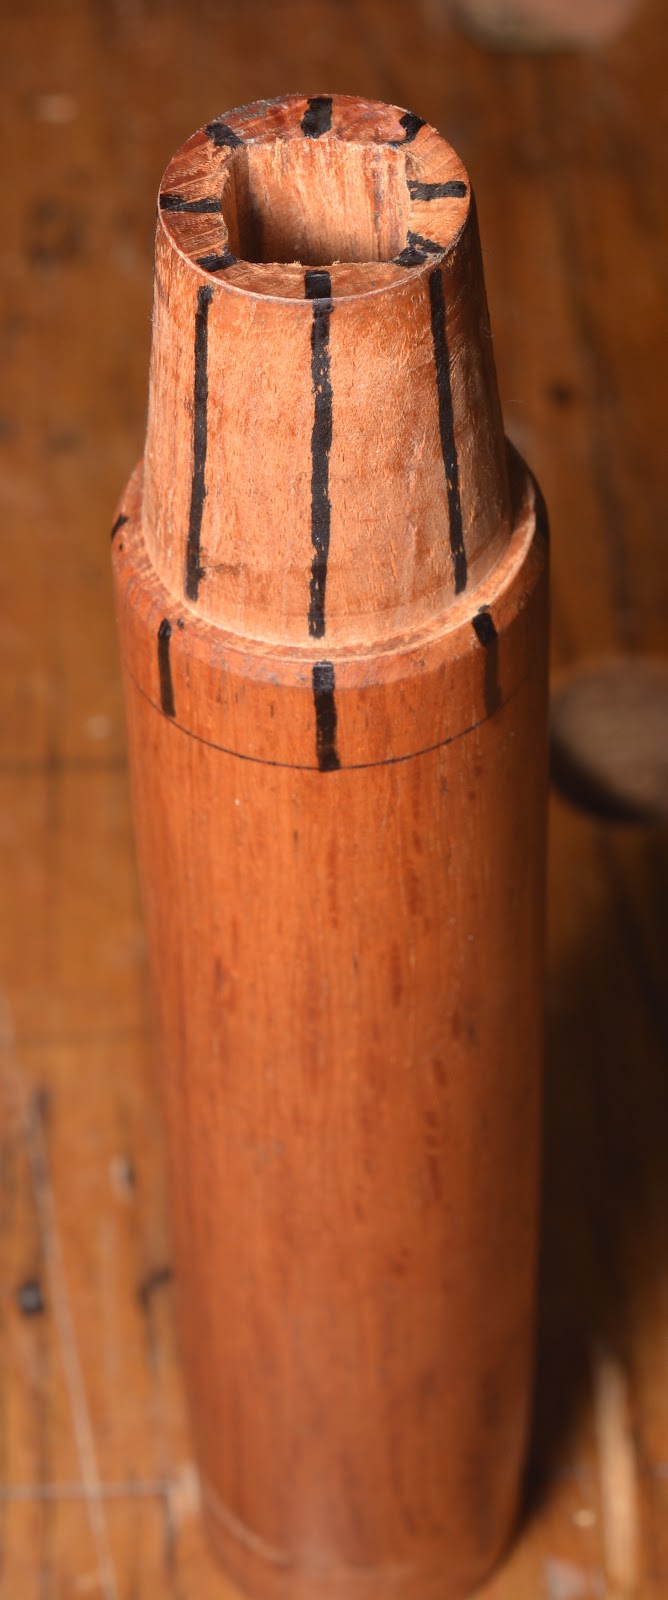
Let us begin by observing that the surface area (square millimeters) of the hard steel encompassed within the lands at the ura that we need to eventually make planar can be divided into four areas:

  • The land immediately adjacent and parallel to the cutting edge (aka “itoura”);
  • The land where the neck meets the blade, also kind sorta parallel to the cutting edge;
  • The two skinny side lands, (aka “ashi” meaning “leg”) are more-or-less parallel with the blade’s long axis and located on the right and left sides of the hollow-ground area called the uratsuki;

    All four lands are necessary to the chisel’s function, but the one that matters most when sharpening and cutting is the last couple of millimeters at the itoura touching the cutting edge. Please make sure you understand this.

    While some people fixate on it, the land near the neck matters least of the four.

    The side lands are important bearing surfaces for aligning the chisel in the cut, but they are less important than the cutting edge land, the itoura. If you like your chisels and planes, prefer they remain as easy as possible to sharpen, and intend to use them for a long time, it’s important to understand that working the ura over-agressively on rough stones is the quickest way to wear the side lands down prematurely, thereby making the uratsuki shallower quicker, gradually defeating the subtle genius of the design of Japanese woodworking blades before their time. We want to maintain the ura as deep, long and wide as reasonably possible for as long as reasonably possible.

    Allow me to explain this further. As we inevitably grind away on the skinny side lands they will become gradually wider while the hollow-ground uratsuki becomes gradually shallower, with the result that the amount of hard steel we must sharpen/polish will gradually increase, which is inconvenient in so many ways. Sadly, too many people make their chisel’s side lands fat as a sumo wrestler soon after purchasing a chisel in their anal-retentive quest for the totally flat ura. Makes me wanna cry.

    The cost-efficient and time-efficient solution is to focus on the important itoura, and make small corrections to the ura’s three other lands over multiple sharpening sessions thereby saving valuable time as well as expensive stones and steel while preserving the ura as long as possible. How to do this? Focus all your attention on the most important area, the itoura, and patiently plan on accomplishing the job over 5~10 sharpening sessions, using the chisel between each sharpening session.

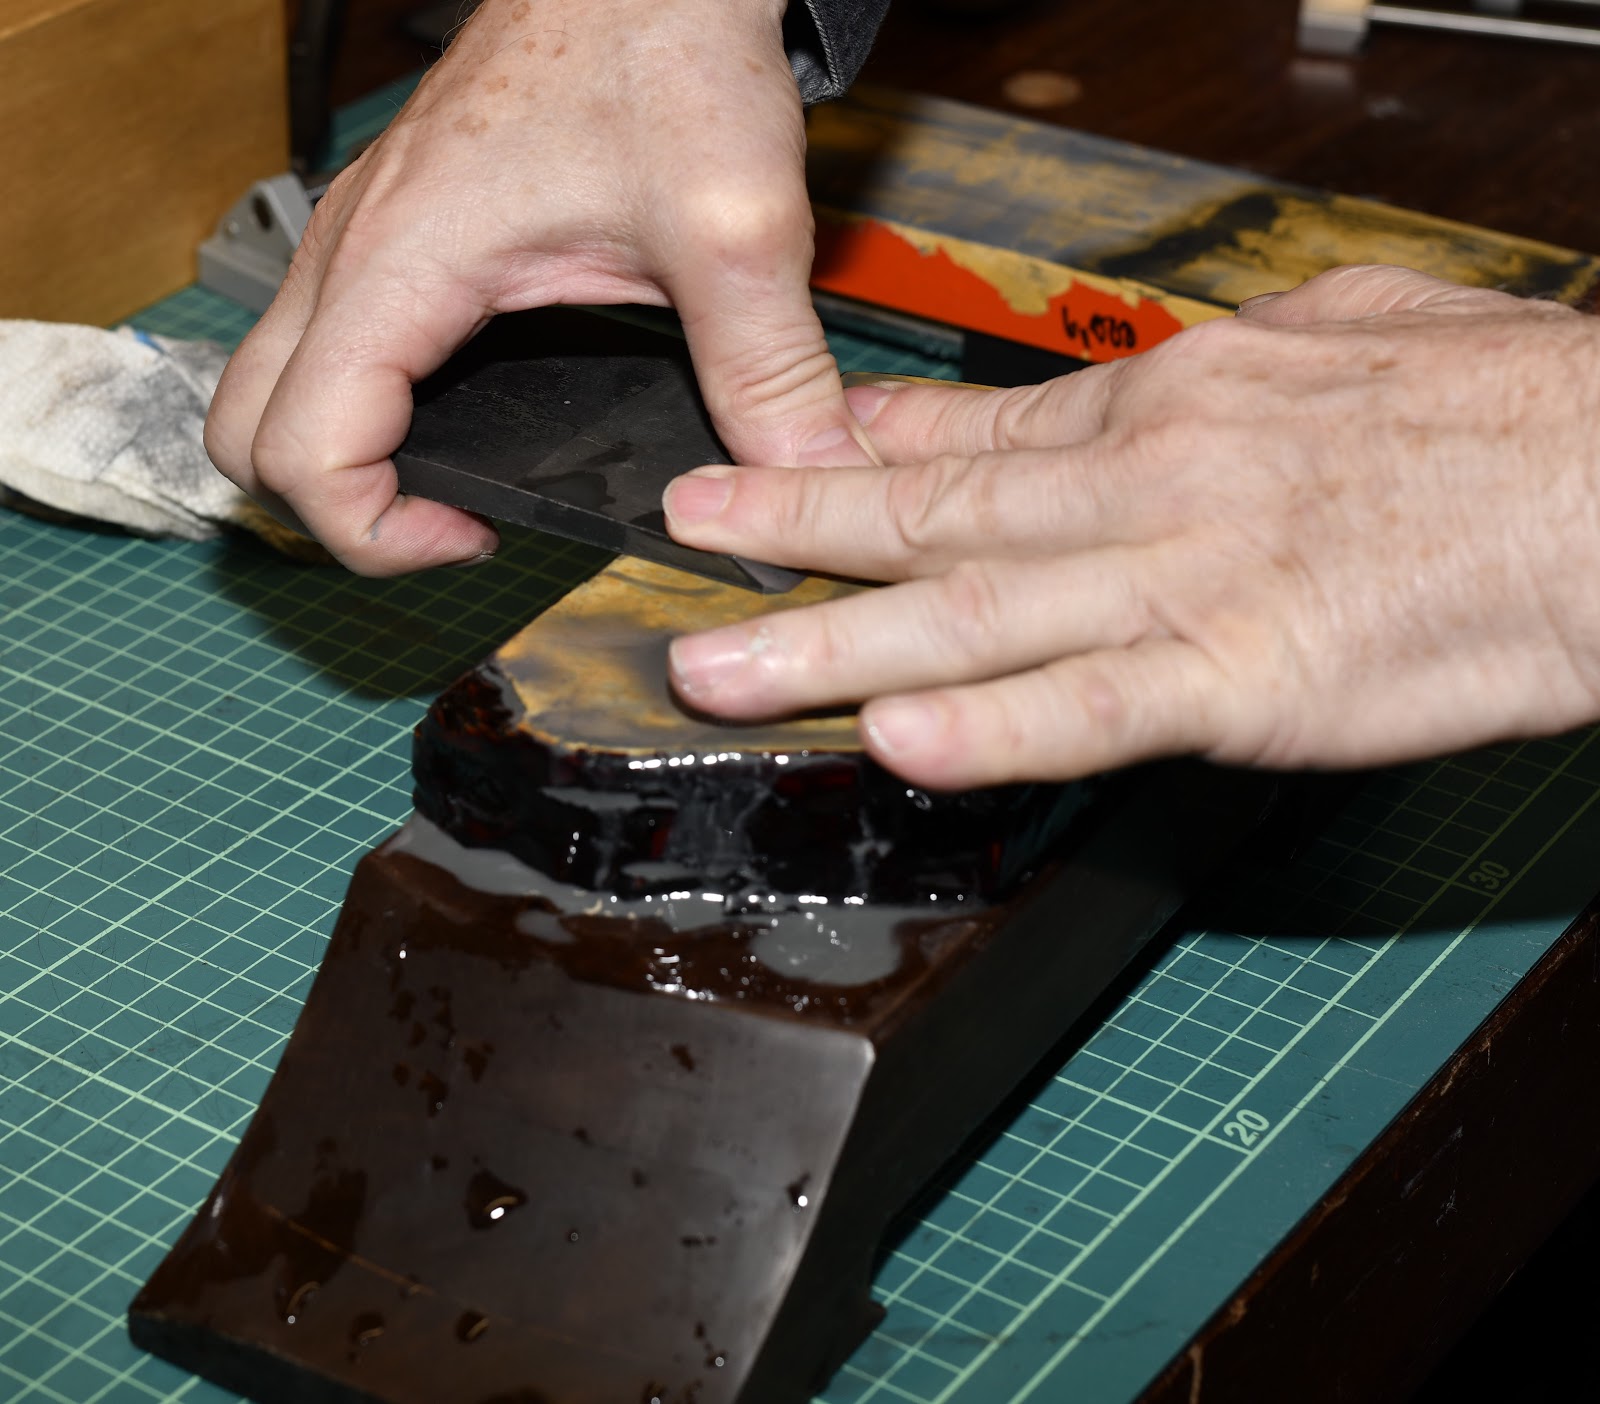
    Don’t attempt to correct/polish the ura full-length from cutting edge to neck at first, instead work only the area behind the cutting edge on the stones (which must be flat). To do this, focus finger pressure nearest the cutting edge only. An effective approach is press down on the land nearest the cutting edge while moving the blade on the stones, while the rest of the blade hangs off the stone.

    In other words, while pressing down with the fingertip(s) on the face of the blade (the surface opposite the ura with the brand on it) as near as possible to the cutting edge, move the last 5~15mm of the blade onto and off of the stone in a back-and-forth diagonal motion concentrating abrasion where it is needed most. This requires the ability to sense the balance of the blade on the stone, and to apply fingertip pressure where it is needed most. Wow, imagine that.. real hand skills.

    If you don’t have these skills now, they are easy to develop with concentration and practice, but it doesn’t happen by accident, and if left unleashed and unmuzzled, your impatient, careless inner badger will try to make a mess of things.

    During each subsequent sharpening session, increase the width of the area you work on the stones a tiny bit until the entire ura is flat and can be worked on the stones.

    Through this technique and over multiple sharpening sessions, you will notice the ura’s lands will gradually become planar while only the lands nearest the cutting edge increase in width. Honest.

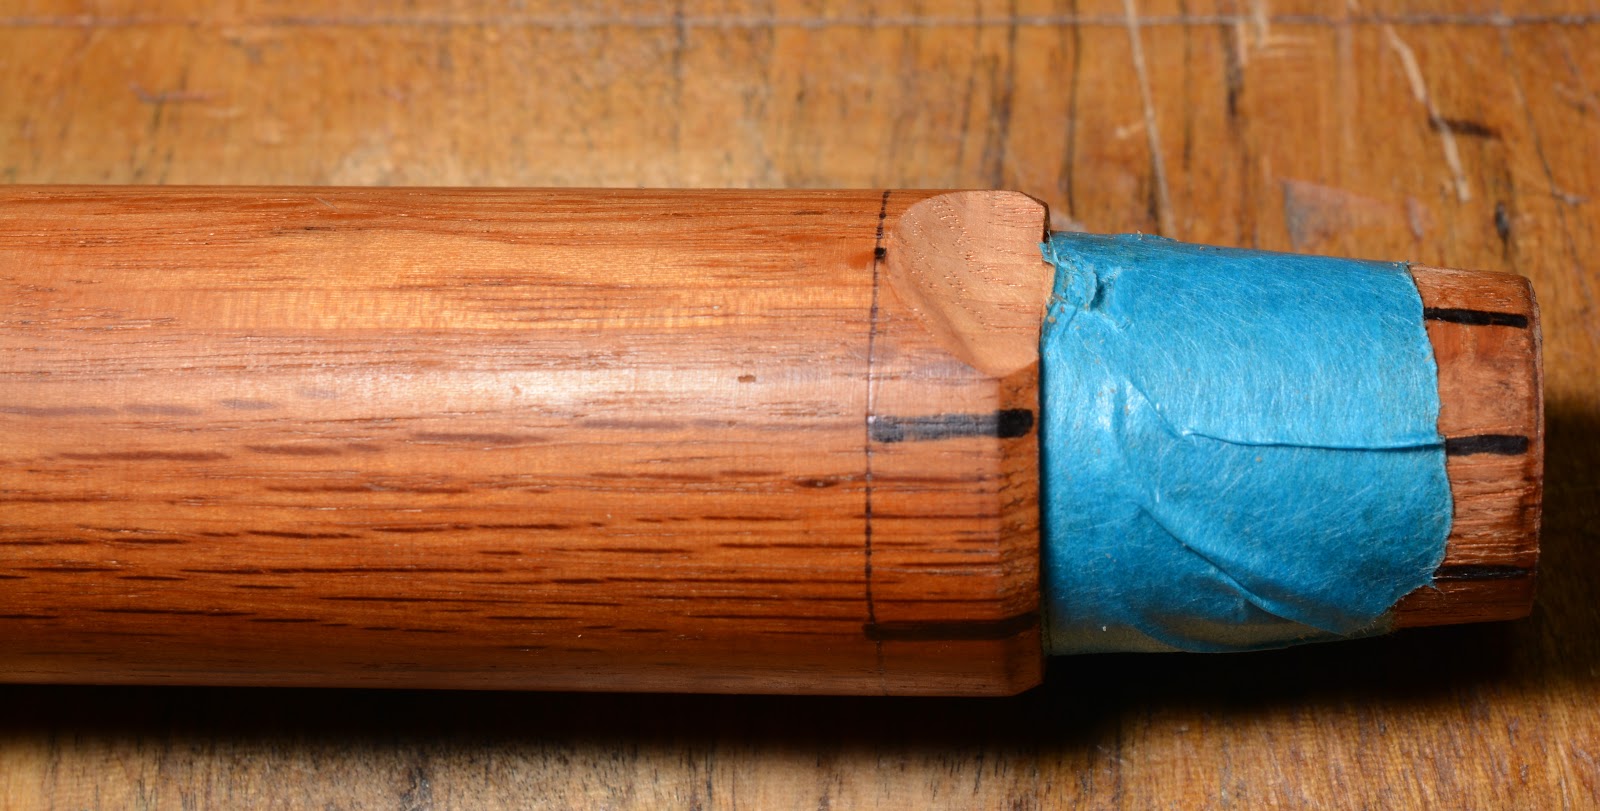
    It helps to apply either marking pen ink or machinist’s blue to the blade to confirm whether or not you are applying pressure where it is need most and that abrasion is proceeding as desired.

    It is human nature to want to rely on the flatness of the ura’s lands to keep the blade flat on the stone, and therefore we tend to apply pressure at the midpoint of the back so that the pressure on the ura’s land is even at all points of contact. This feels good; It feels stable.

    But if you consider the narrow width (and small area) of the hard steel exposed at the side lands compared to the lands at the ito-ura cutting edge and the corners of the blade, you will see why this technique will wear the skinny side lands quickly and prematurely.

    Allow me to restate an important point: The goal is to focus hand/finger pressure nearest the cutting with much less pressure focused on the sides lands thereby preserving them, and the depth of the ura, as long as possible. This technique will also save time and expensive steel. It is an advanced skill, but one Beloved Customer should aim to perfect.

    Once the ura of your chisel is flat and true, you should not need to true it again unless the blade needs major repairs.

    With much use, the itoura will dissapear, and the bevel must be tapped-out (“uradshi”) and the ura re-flattened (“uraoshi”) to restore it. I won’t delve into the subject of “tapping out” the ura of plane blades in this post but a detailed explanation can be found in Part 30 of this series.

    A detailed example follows.

    Evaluate the Ura

    The first step in flattening or truing an ura is to evaluate its condition. Don’t start grinding away willy nilly without first checking it and making a plan. If you find you cannot stop yourself, don’t walk but run to the nearest pharmacy and buy a bucket of the medicine discussed in part 19 in this series about maintaining sharpening stones.

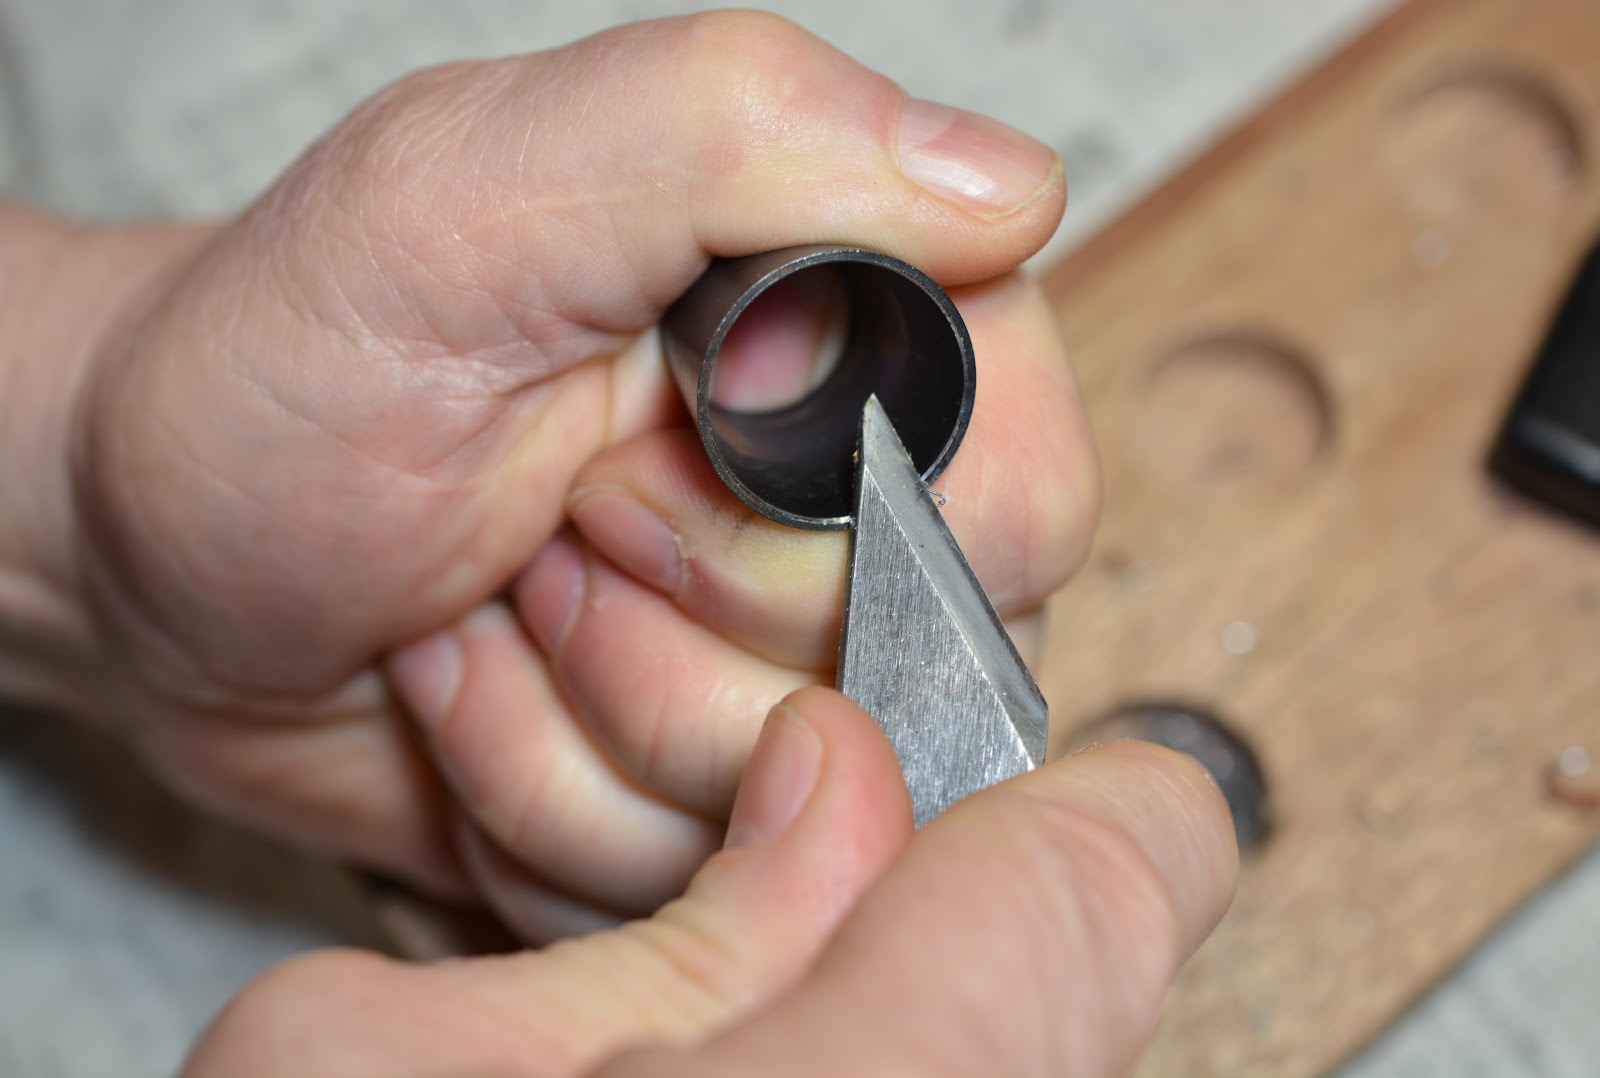
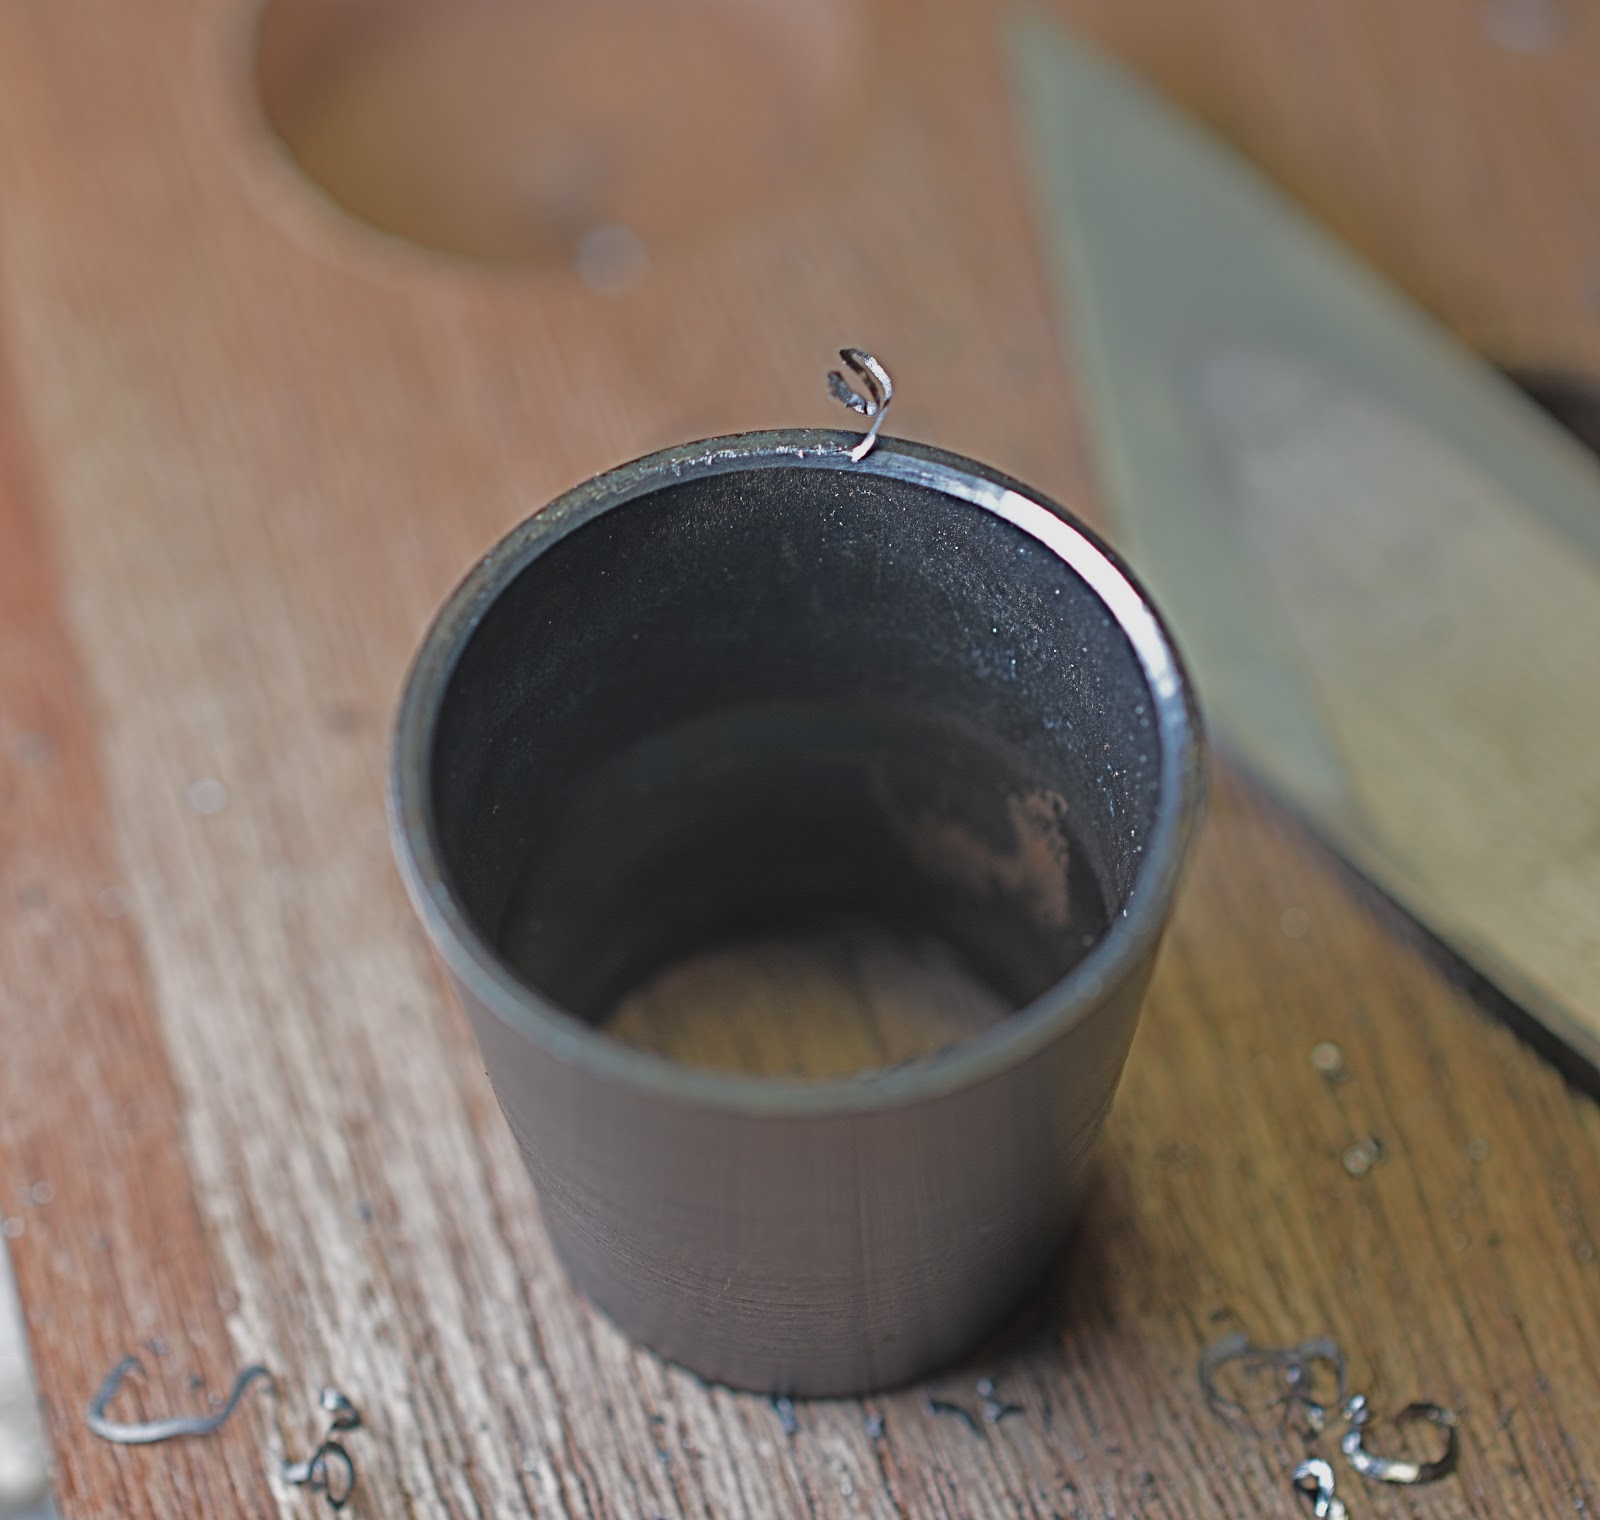
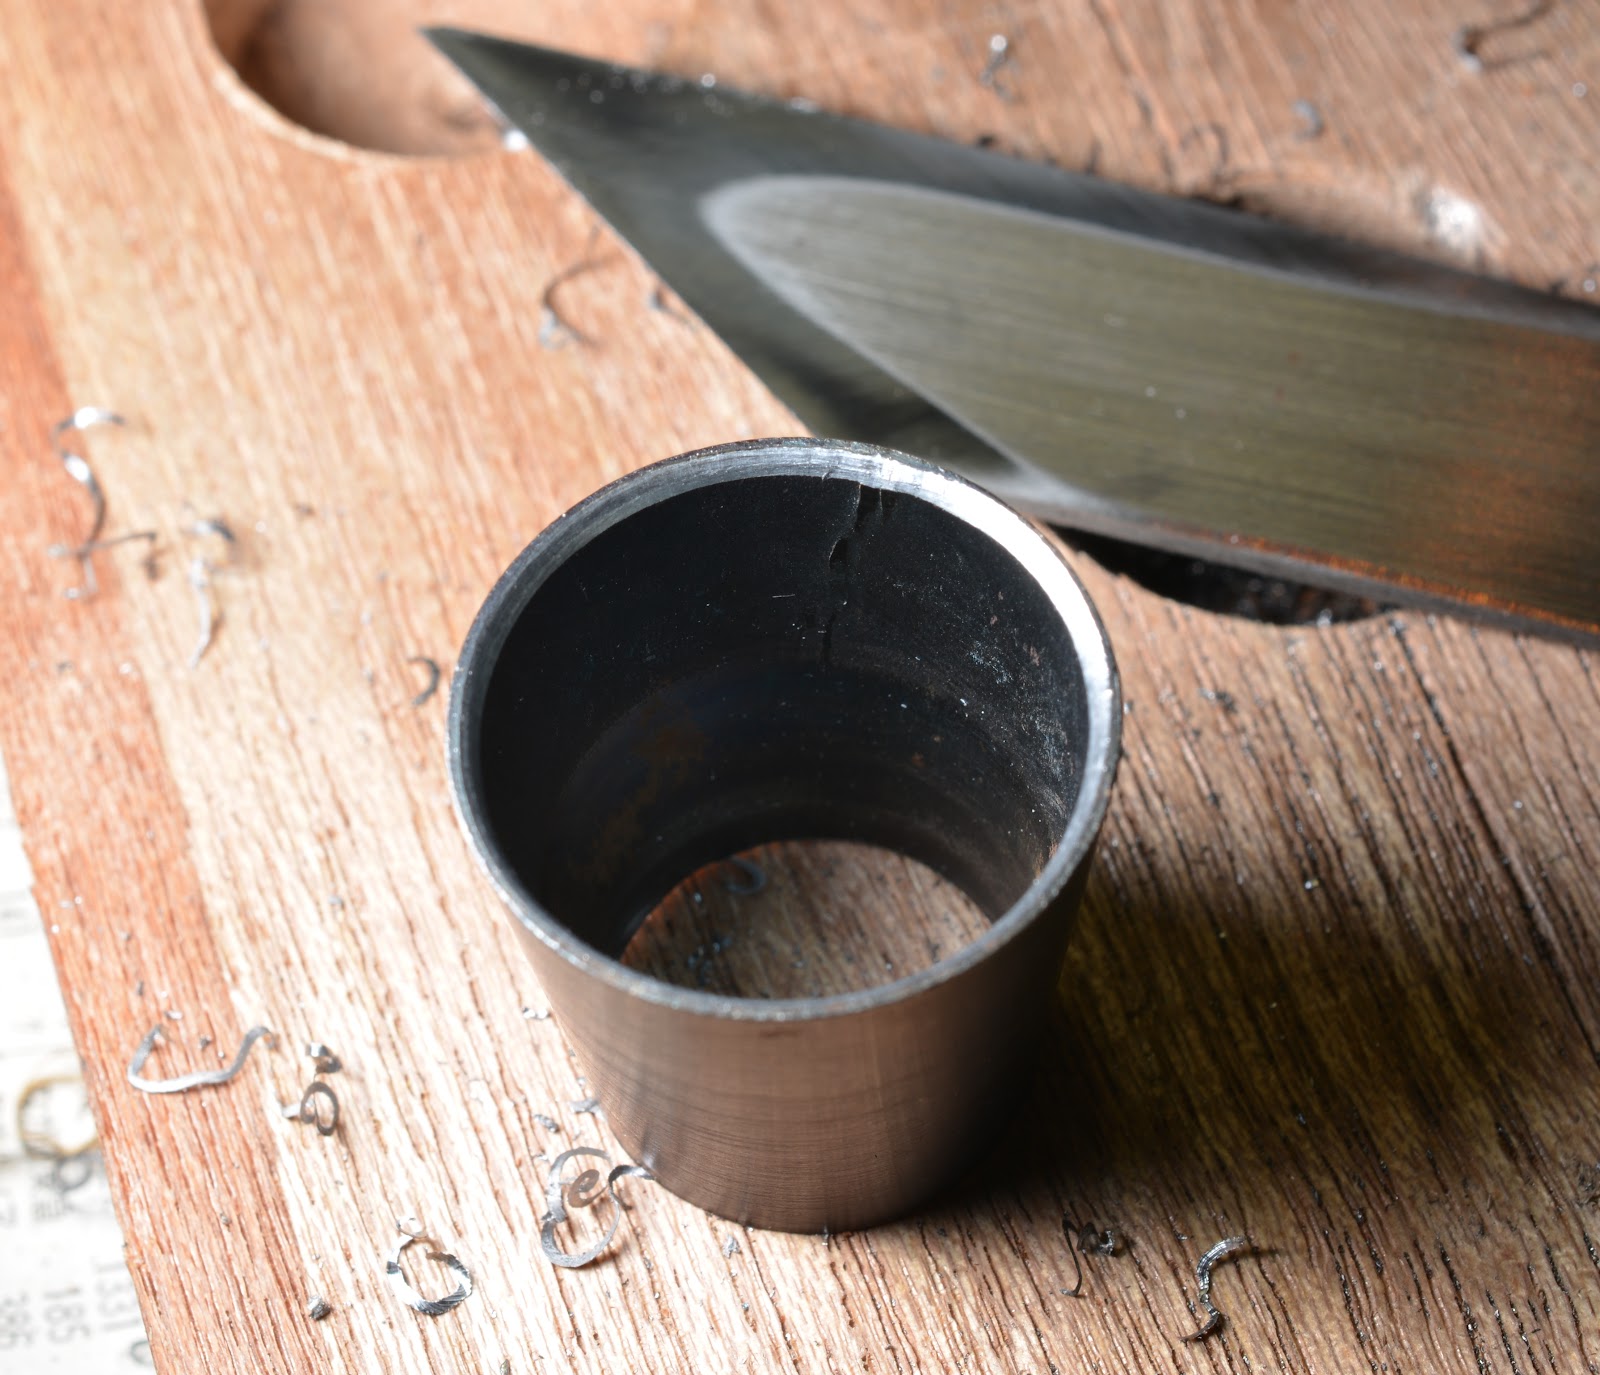
    There are several ways to check the ura’s condition. A thin straightedge works well in most cases. A thick straightedge may be easier to keep stable on the ura, but it will shut out too much light making observation difficult. Place the straightedge edge-down on top of the full length of the side lands all the way to the cutting edge. Keep the straightedge touching the land; Don’t let it span the hollow-ground uratsuki. Hold the straightedge and blade up to a strong light source and look for light passing between them. This technique is quick and dirty and will suffice in most cases, but does not tell you a lot about twist.

    Use a straightedge to check the right and left lands for flatness. It doesn’t do any good to span the hollow-ground urasuki, so don’t bother. These photos are taken from above for clarity, but you want to hold the blade and straightedge together up to a strong light to observe any light showing between them indicating a gap. I am using a small square, but a simple small straightedge is more convenient. This takes a bit of coordination so be careful not to drop a chisel on your toe. I’ve done this once or twice before. Monkey meet football.
    This is a 30mm Sukemaru atsunomi, a famous brand and an excellent and powerful chisel hand-forged by Mr. Usui from Shirogami No.1 Steel. It’s in pretty good shape, but can benefit from a little truing as can most new chisels and plane blades.

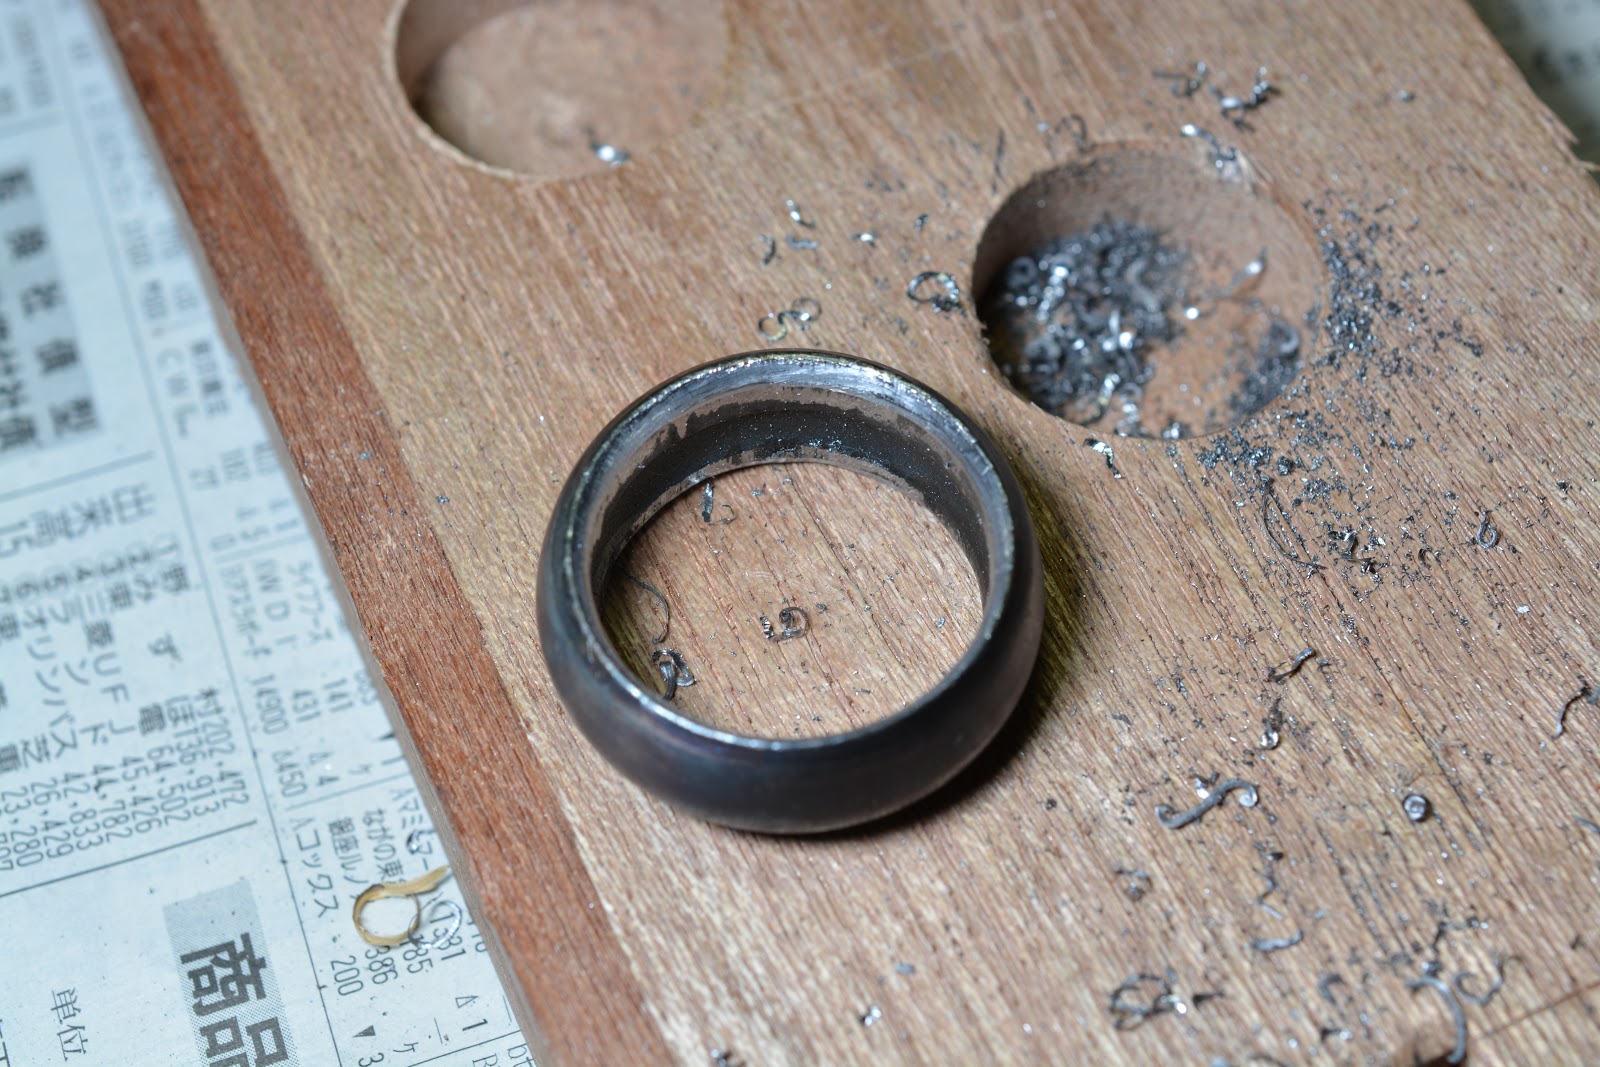
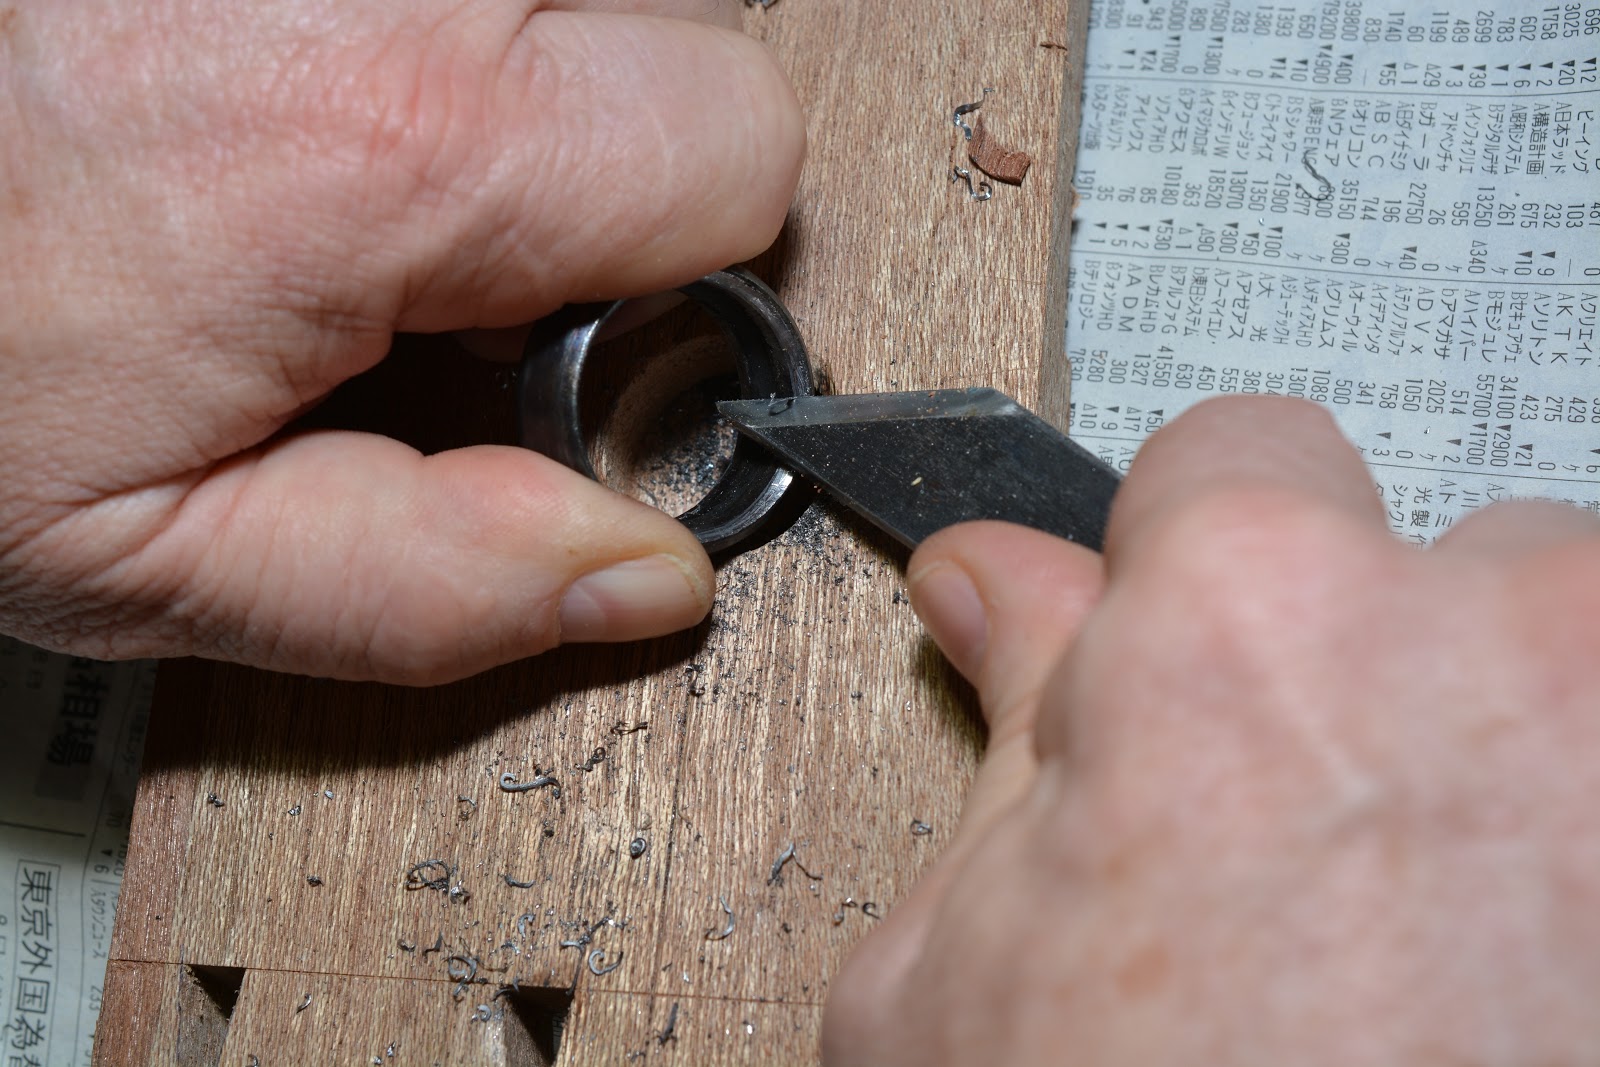
    Another method to check the ura for planar is to paint the shiny lands with dark marking pen ink or Dykem liquid, apply a tiny bit of fine sharpening stone mud to a piece of flat glass, like the piece mentioned in Part 17, and rub the blade’s flat or ura over the glass. The high spots will become obvious. If the ura is banana shaped (convex), mark the high spot with your marking pen. More often than not, the ura of chisels will be generally flat, but sometimes the last 2mm or so of the cutting edge will be curved upwards towards the chisel’s face.

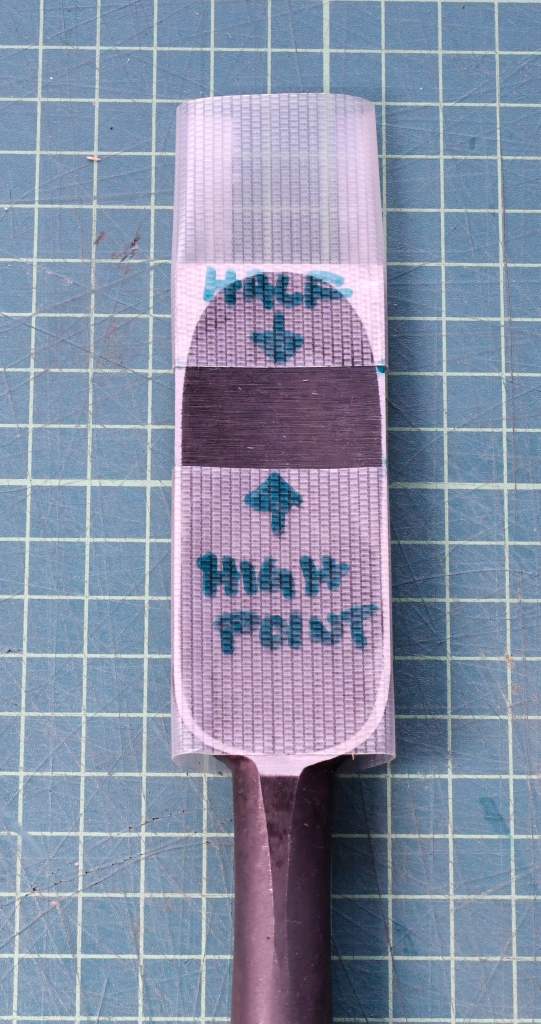
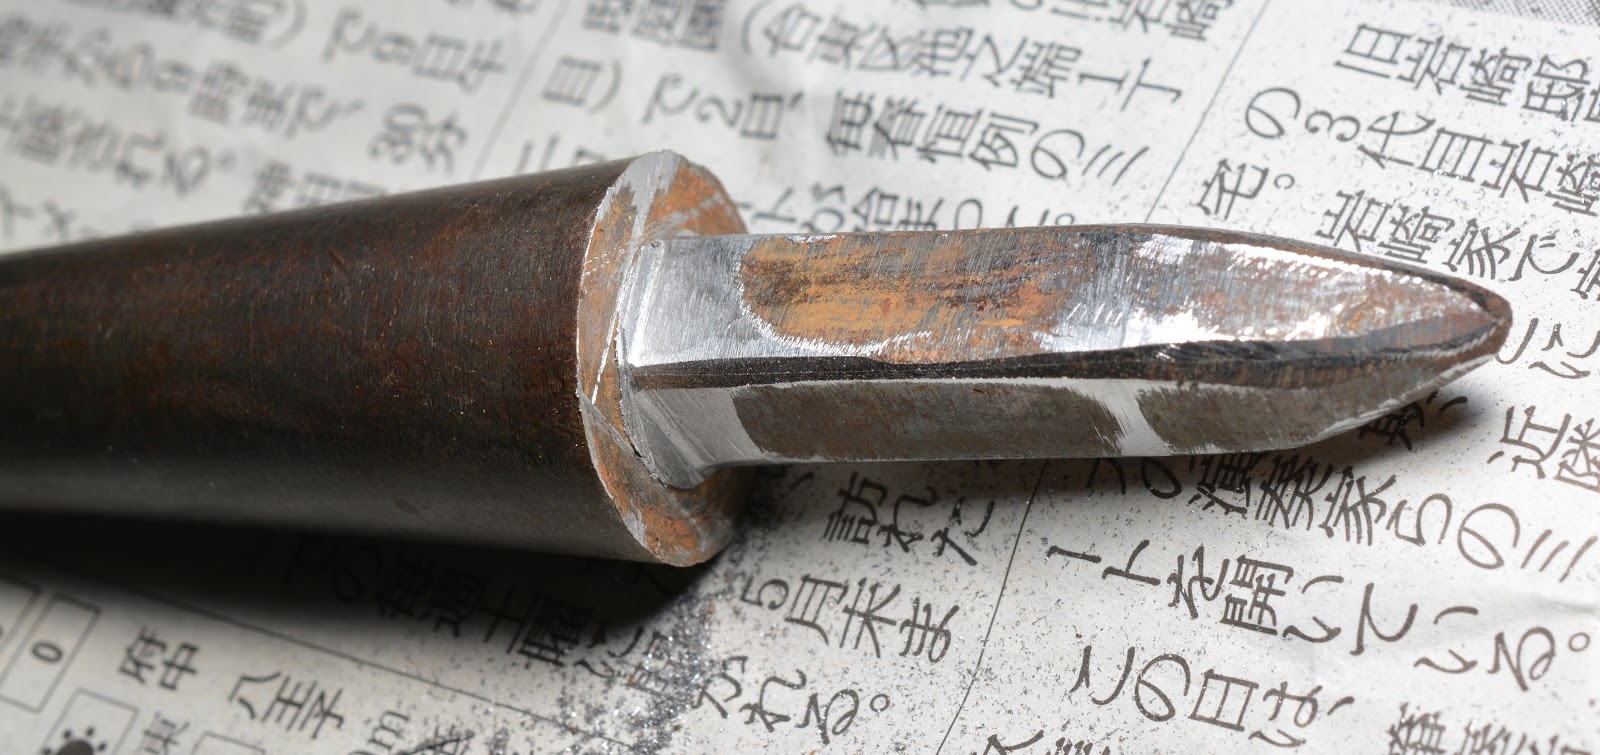
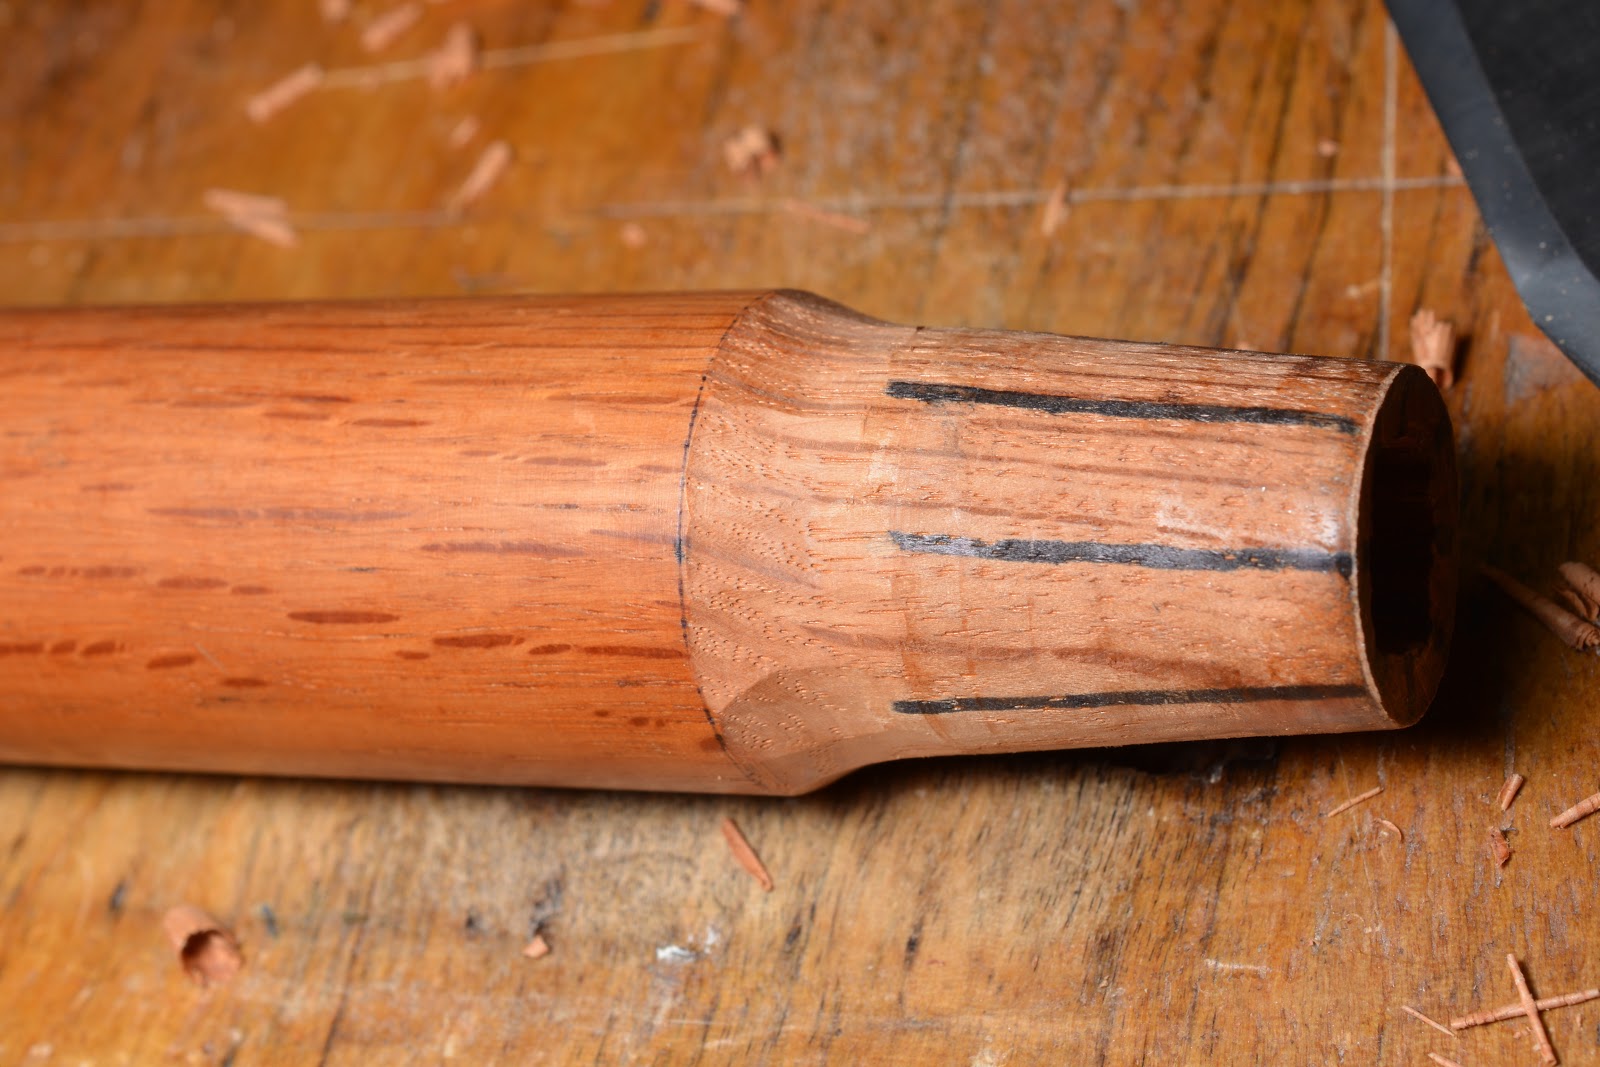
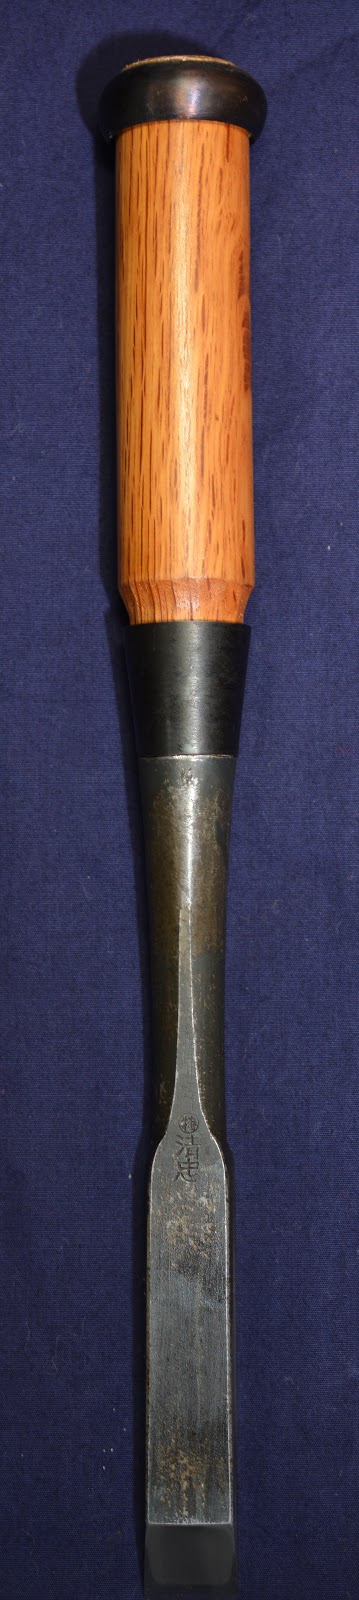
    I learned two things from my examination of this atsunomi. First, there is a high spot (convex) at the skinny land on one side located approximately 1/2 to 5/8 the blades’ distance from the cutting edge. The land on the other side seems a little low. Hmm, curious. This is a bit unusual, but it happens when a blade warps during heat treat, which Shirogami steels tends to do frequently.

    The second problem I observed was that the last 3~4mm of the itoura land at the cutting edge curves downward away from the ura just a tiny bit, enough to cause problems.

    I next must formulate a plan to resolve these problems with a minimum of time and effort and without making things worse.

    Make a Plan

    The temptation to start grinding away immediately will be powerful. But… I must… resist… the… stupidity impulse!!

    If it becomes too much, I’ll take a coffee cup or three of the medicine mentioned in the previous post and slather it on my head forcefully. Don’t hold back, for Pete’s sake, rub it in really good now. Some say my excessive use of this medicine is why I am as bald as an egg, but I prefer to believe it is caused by the high-intensity psychic waves radiating from my gigantic brain (ツ). Thank goodness for my aluminum foil skull cap with its artfully protruding copper wires or the radiating light might blind airline pilots passing overhead!

    But getting back to practical matters, a useful plan must have goals and objectives. In this case the goal is a perfectly planar ura, but if this goal is difficult to achieve quickly there is an objective you achieve immediately in any case, one that may make it possible to achieve the larger goal over multiple routine sharpening sessions without any special effort.

    As I keep harping, to make a chisel or plane work well, you need a sharp, flat bevel and a sharp flat area right at the thin land (itoura) adjacent the cutting edge. This is where the cutting occurs and the area I need to keep sharp, so I will make creating this flat area the first objective in my plan, and then determine the steps to achieve it. I make certain every step in my plan and every stroke I make on the stones gets me closer to this objective, not further away. This means working smart, ruthlessly calming my inner badger (you know, that nearsighted, short-legged snuffling beast that just keeps digging) and repeatedly stomping my stupidity impulse into the ground. Frequent applications of idiot ointment help too.

    If the blade is arched (concave), touching at two points, one near the neck of the chisel blade, or head of the plane blade, and at the other at the cutting edge, and not in between, all is well. I recommend you leave a blade like this as-is because after a few sharpening sessions the ura will become flat and twist-free without any special effort, and the blade will become very sharp and be entirely functional (assuming the faces of your stones are flat).

    If the blade is wavy (rare) or banana-shaped (convex), your plan needs to take those details into account.

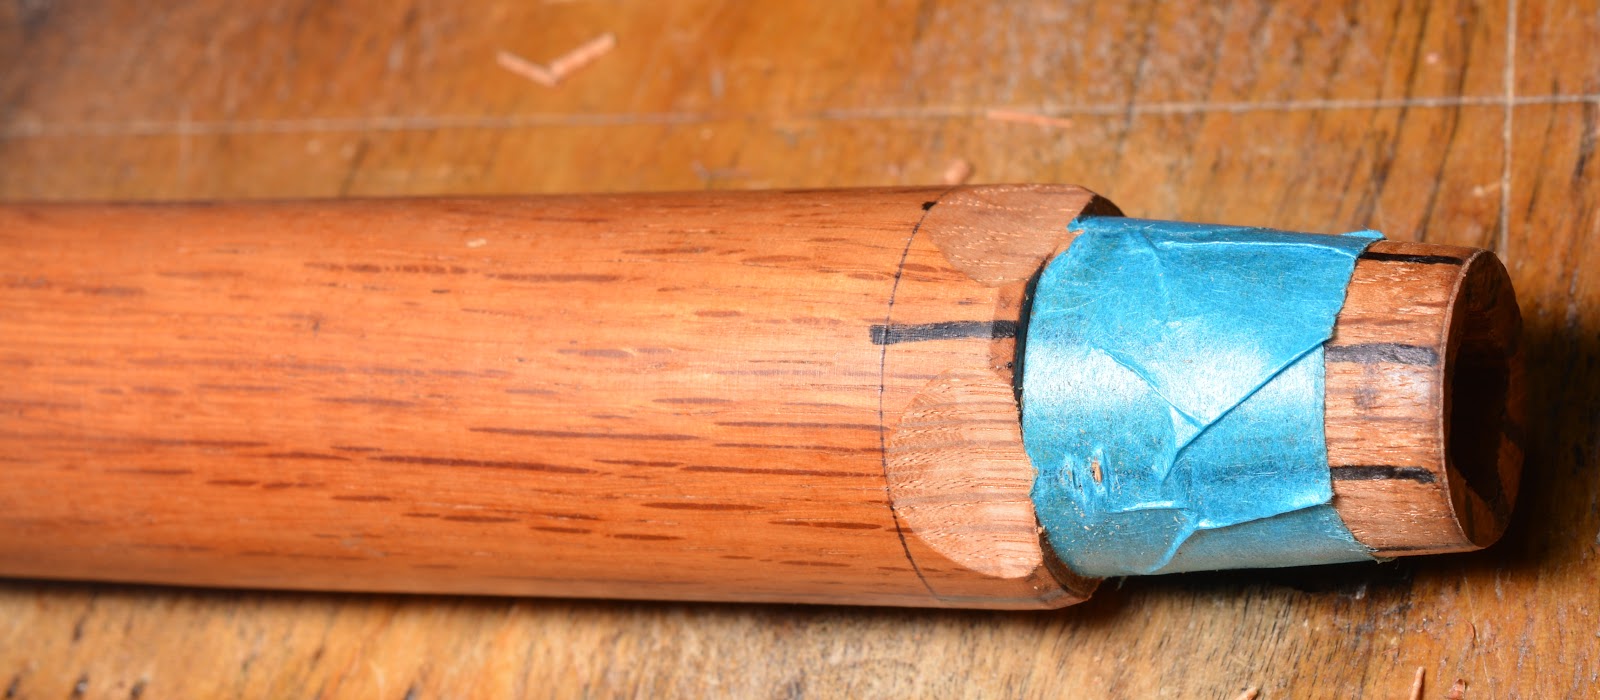
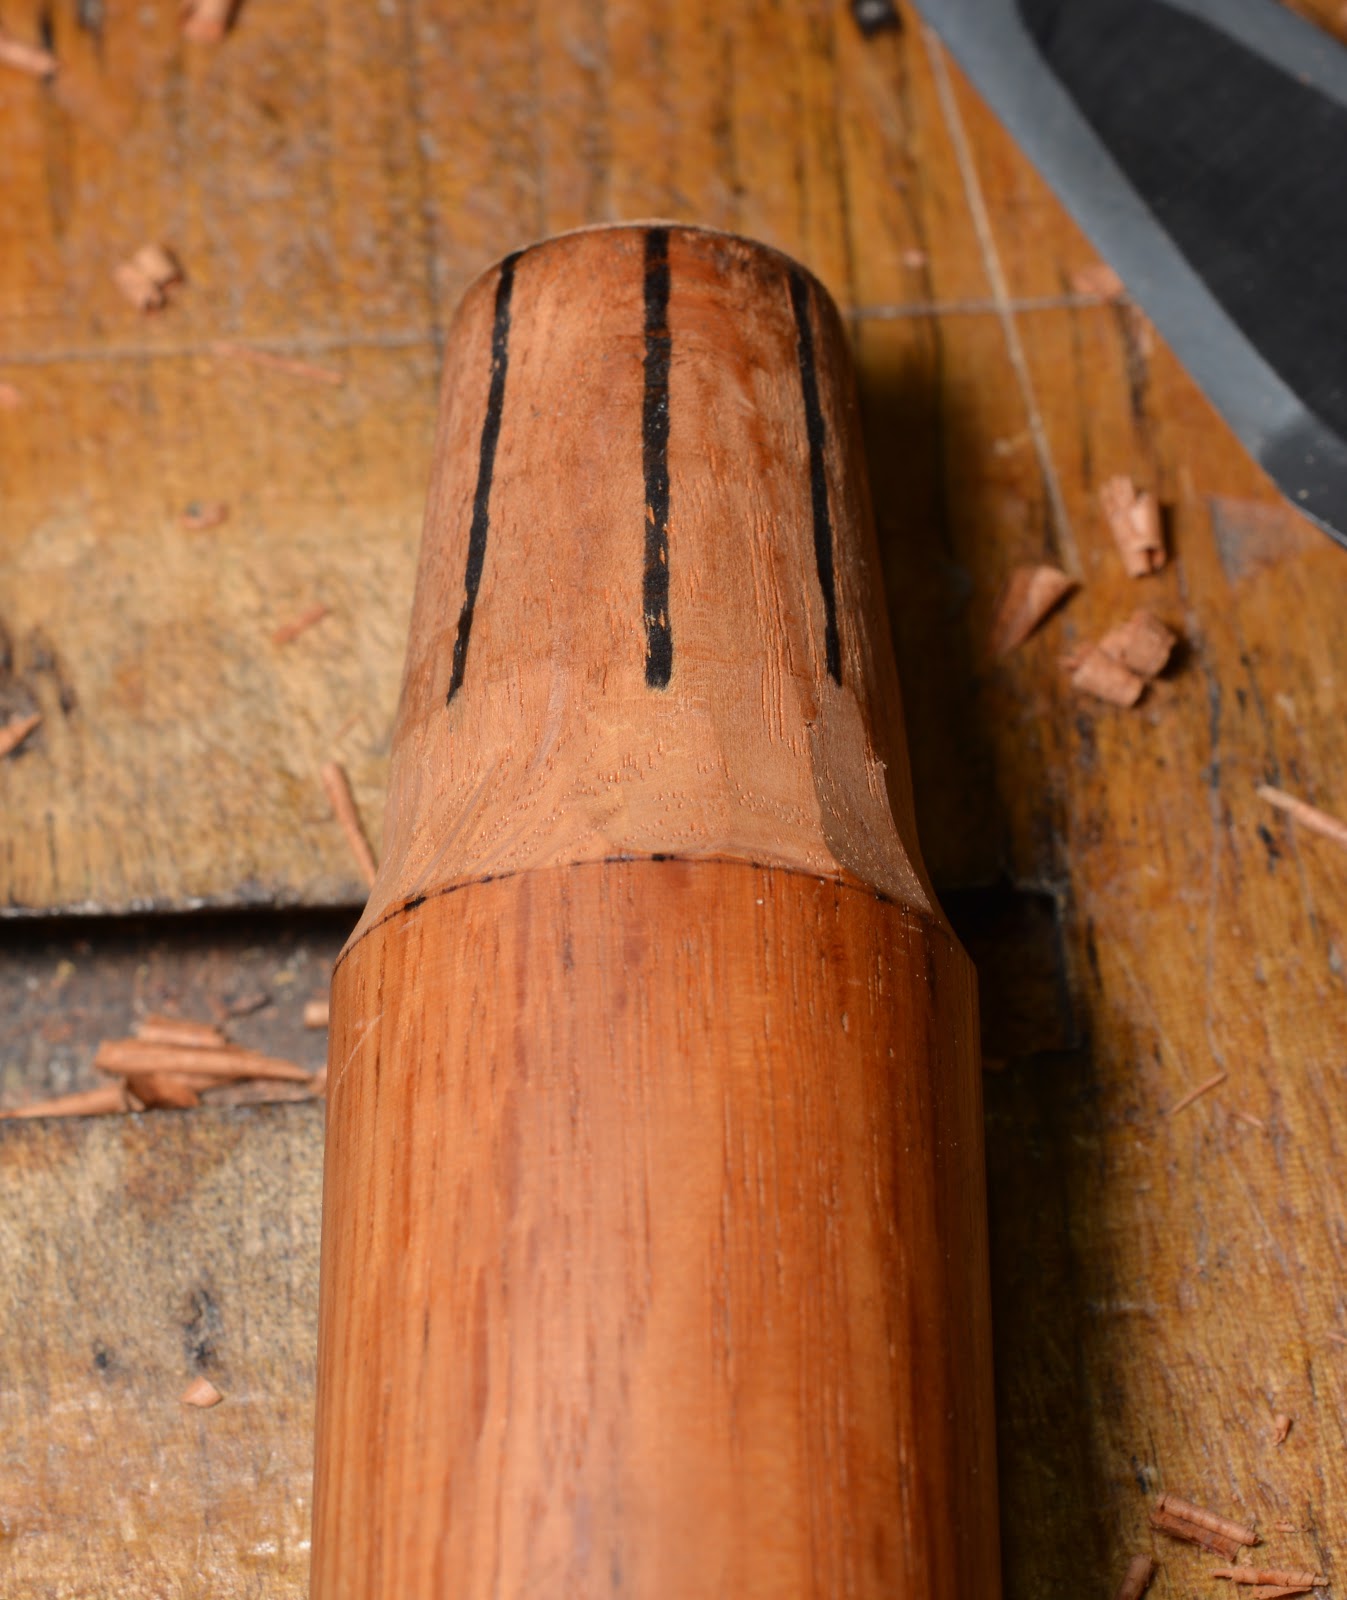
    In this example I located the highest point of the bulging area at the ura and marked a line across it with my marking pen. I then measured halfway between this line and the cutting edge and made another line. which I will call the “focus line.” It is here where I need to focus the most pressure when grinding down the ura, NOT the entire length of the blade, despite what my inner badger demands.

    The purpose of doing all this prissy planning and layout work is to protect the right and left side lands from being wasted unnecessarily. Newbies and those with poor badger control often insist on working the entire length of the blade on the stones, but this is illogical and ignores three points.

    The first point often overlooked or ignored is that the majority of the metal I need to waste is usually located to the right and left of the itoura land nearest the cutting edge, not the full length of the blade, so there is little benefit to grinding the entire ura.

    The second point is that the side lands are thin as a blade of grass and will abrade very quickly with almost no effort. Besides, without using large plates and stones, it is very difficult to work the blade’s full length accurately without wearing steps into the side lands anyway.

    The third point often ignored is that it makes no sense at all to try to grind down the land nearest the neck since the plane of the ura hinges on this land anyway. Best to leave it alone and focus my efforts where they will make a useful improvement.

    Plane blades don’t even have a land near the head, so the futility of working the entire ura on plane blades is even more obvious than for a chisel.

    Work the Plan

    The traditional Japanese tool used to flatten and/or correct ura is a smooth steel lapping plate called a kanaban, meaning “metal plate.” To use it, carborundum powder and water are placed on the plate, and the blade is lapped. This is not a difficult process at all, but there is a tendency for the blade’s perimeter to be ground more than the interior areas as the grit is forced in between the kanaban and the blade’s perimeter. To avoid this tendency, and to speed the process up, I prefer to use diamond plates or diamond stones instead of kanaban.

    Whatever plan you developed, and whichever tool you selected for this job, the time has come to work the plan. Do you need more idiot-b-gone medicine? A bigger coffee cup?

    First, color the ura’s perimeter lands with a marking pen or Dykem to help you see where the ura is being ground down. Don’t ever guess.

    Place the most pressure on the focus line selected above. Move the blade back and forth (not side to side) onto and off of the diamond plate, diamond stone or kanaban with the cutting edge and the focus line always touching the diamond plate or kanaban. Don’t go past the high point for now. Be careful to not grind a notch into the narrow side lands where they meet the edge of the diamond plate or kanaban. Most people make this mistake at first. Please don’t you make it more than once.

    Grind the ura down so the line at the highest point and the cutting edge is fairly flat.

    Work the blade on and off the edge of the diamond plate using short strokes and without going much past the highest point marked earlier. This works because the right and left side lands are thin and can be abraded in just a few strokes. I have moved my fingers to reveal the lines, but in actuality my fingers will press down hard on the focus line while working the blade.
    Using a stick to apply more pressure to the blade. I am holding the end of the stick and the chisel’s handle together in my right hand. This is simply illustrating a technique. This chisel did not actually require this sort of aggressive attention.
    The same stick technique works even better for plane blades and makes it easier to apply pressure right behind the cutting edge. When doing this, however, be sure to work the blade both forward and backward while moving it right and left, on and off the plate’s edge to avoid digging a trench into the narrow side lands.

    Remember, the narrow lands at the sides of the hollow-ground urasuki will abrade down quickly. And the rest of the ura can be gradually flattened during subsequent sharpening sessions using regular sharpening stones. It doesn’t need to be made perfect immediately. What matters most is the steel on the itoura land right at the cutting edge.

    The high spot on the side land near the top of the photo has been relieved after just a few passes on the #400 diamond plate. The side lands are now both in fair condition, and the land behind the cutting edge (itoura) needs just a little more work.
    After a few more passes on the diamond plate, the itoura is in good shape. Please observe that the side land at the bottom of the photo is not in full contact, but the opposite side is. This is will not impact the blade’s performance, and will work itself out during future sharpening sessions without special attention.
    Flattening my stones before using them. Notice I am using two 1,000 grit stones to save time and stones. Don’t neglect flattening your stones, whether you use waterstones, novaculite stones, coticule, or even sandpaper.
    Working the ura on the flat 1000 grit waterstone. Did I mention it is flat? Notice that I am working on and off the stone, not side to side, to save the right and left lands. Just a few strokes are required. I am now focusing pressure nearest the cutting edge. Some but not all strokes are full length. The goal is simply to remove the deep scratches on the itoura left by the diamond plate. All other deep scratches can be left alone for now and removed during future sharpening sessions a little at a time.
    The ura after polishing on the flat 1000 grit waterstone. At this point the ura is in good shape. Notice how the land at the photo’s left is wider that elsewhere. This increase in width developed because this location was the high spot on this convex ura. Notice how the land on the right side is not even touching the plane in one area. What you should take away from this photo is the realization that if I had focused my efforts on this high location first and ignored the downward curvature of the land nearest the cutting edge, I would have wasted a lot more time and valuable metal only to shorten the useful life of this excellent chisel. Do you see the benefit of carefully checking the ura’s condition, making a plan with clear goals and objectives, and then working the plan? Did the medicine work? Next, we’ll work on the bevel, make a tiny burr, polish it off by making a few strokes alternating from bevel to ura, and be ready for the finishing stone.
    Working the bevel on the flat 1,000 grit waterstone. Notice the mud piling up in front of the blade indicating the extreme cutting edge is in contact with the stone. I am applying pressure only on the push stroke to prevent the stone from rocking and developing a “bulging bevel,” A honing jig is not necessary.
    The bevel after working on the 1,000 grit waterstone. No jigs were used. No “tricks” involving rulers were used. A silly, inefficient “micro-bevel” was neither wanted nor needed. The bevel is perfectly flat. Flattening the ura and polishing both ura and bevel to this level took less than ten minutes. When the purchaser of this blade eventually dulls the edge, he should not need to spend more than 2~3 minutes to sharpen it once his gear is ready, assuming he is able to sharpen freehand.

    This flattening process is seldom required except on new blades.

    Polish a blade’s ura up to the level of your finest finishing stone once, and don’t touch it with rougher stones again unless it is absolutely necessary, or further gradual flattening is required. This means that in normal sharpening sessions you must remove all the damage at the cutting edge by abrading the bevel with the rougher stones, and only when the bevel is ready for the finish stone, do you work on the flat or ura, alternating from bevel to flat/ura until all defects, burrs, and even visible scratches are polished away.

    If you condition the flat (ura) side of the blade correctly, and keep it polished, you should not need to work it on anything but your finish stone until it is time to tap out and grind the ura or back in the case of plane blades. Therefore, the bevel side of the blade is where we spend most of our time and effort.

    Now that the ura is in good shape, we will look at sharpening the other side of the wedge, the blade’s bevel, in the next post in the series. In the meantime, keep yer stick on the ice.

    YMHOS

    If you have questions or would like to learn more about our tools, please click the “Pricelist” link here or at the top of the page and use the “Contact Us” form located immediately below.

    Please share your insights and comments with everyone in the form located further below labeled “Leave a Reply.” We aren’t evil Google, fascist facebook, or thuggish Twitter and so won’t sell, share, or profitably “misplace” your information. If I lie may an elephant caress me with his toes.

    ← Back

    Thank you for your response. ✨

    Warning
    Warning
    Warning
    Warning
    Warning.

    Leave a comment

    Setting Up Japanese Chisels

    A 48mm Oiirenomi chisel by the Yamazaki brothers (RIP) under the brandname Hidari no Ichihiro, one of Japan’s most famous and excellent chisel blacksmiths

    Introduction

    This article contains information for the Beloved Customers of C&S Tools to reference when setting up their new chisels.


    All of C&S Tools’s chisels are professional-grade, hand-forged tools intended for the professionals among our Beloved Customers that will use them to make products for their customers, and require excellent lifetime service of their tools under daily working conditions.

    By publishing these instructions C&S Tools is not suggesting our chisels are incomplete or require work by the purchaser before they can be used. To the contrary, our chisels are entirely usable and will provide fine service when new as-is without performing the procedures described below. Indeed the condition in which we supply them is standard for tools sold in Japan, where they were handmade.

    Some may find these procedures to be too heavy a burden of time and effort. If, Beloved Customer, you don’t require professional levels of performance and durability, then there is no need to bother with these setup procedures. But please don’t tell anyone that we at C&S Tools agree with the abuse of chisels through amateurish techniques like kigoroshi, or soaking handles in water, or micro-bevels, or using grinders. BS is piled so widely, deeply, and fragrantly on the internet that there is no need to add more.

    It is certain that these setup procedures will ensure your chisel’s handles will endure hundreds of thousands of hammer blows and provide trouble-free service for many decades. They may also help your chisels perform more efficiently. And they will protect your warranty. The choice is yours.

    Which Chisels Require Setup?

    There are several general categories and many types of Japanese chisels. Your humble servant will delve into this subject in greater detail in future posts, but the two general classifications are Tatakinomi (叩鑿)meaning “striking chisel,” which are designed to be motivated with a steel hammer to cut larger quantities of wood, and Tsukinomi (突き鑿), which translates directly to “thrusting chisel,” the equivalent of “paring chisel” in the Western tradition, and are designed to be pushed by hand for paring operations. The setup measures described herein are not entirely irrelevant, but are normally unnecessary for tsukinomi or other paring chisels.

    Tatakinomi, including oirenomi (bench chisels), hantatakinomi (very similar to oiirenomi but a bit larger, probably the size the more popular oiirenomi evolved from), atsunomi (oiirenomi on steroids), and mukomachinomi (mortise chisels) are the focus of this post.

    Why Should I Setup My Chisels?

    C&S chisels are professional-grade tools, not mass-produced, consumer-grade, chisel-shaped Chinese screwdrivers. They will serve you best if you treat them in a professional manner, including performing proper setup.

    In fact, Japanese tatakinomi chisels are designed and manufactured assuming the end user will perform some setup work before using them in accordance with Japanese tradition. It was not that long ago that craftsmen in Japan purchased chisels as components and made the handles themselves. Accordingly, until fairly recently the tradition has been for the competent craftsman to not “purchase” but rather “make” his tools to his own preferences, or at least those of his master. Even today chisels and handplanes purchased from retailers in Japan are mostly usable when brand new, but still require some modifications and tuning by the end user to achieve their potential, even though most customers are unaware of this fact nowadays. In this case, Beloved Customer, that is your job.

    Performing these setup procedures will probably help your chisels perform a little better and will absolutely ensure the handles last longer. And by avoiding the slow deformation resulting from heavy usage over many years that often creeps in when proper setup is neglected, you will preserve your reputation as a professional woodworker in the eyes of other professionals.

    The Example

    The example chisel we will use in this article and pictured below is a variety of tatakinomi called an Atsunomi.

    It was forged by a famous Japanese blacksmith named Shimamura Kosaburo (RIP) who used the brand Kiyotada, written 清忠, meaning “pure and faithful.” A founding member of the Tokyo Chisel Guild, during his lifetime Mr. Shimamura was lauded by experts in the fields of blacksmithing and metallurgy as the finest chisel blacksmith in Japan. Although my experience is limited, I agree with their assessment.

    Kiyotada Brand Atsunomi Chisel in brand-new unused condition prior to setup

    The Purpose of these Procedures

    Unlike western chisels, the wooden handles of Japanese tatakinomi chisels are designed to be struck with a steel hammer. These impact forces tend to cause the handle to mushroom and even split, but the crown or hoop (called the “katsura” or “sagariwa” in Japanese) installed at the far end of the handle combined with the coned ferrule (called “kuchigane” in Japanese) installed at the blade end of the handle contain and compresses the wood fibers preventing this damage. Even then, the impact forces of steel hammers do crush and break fibers at the handle’s end such that over decades of hard use the handle will gradually become shorter.

    In order for the crown to continue to protect the handle from splitting as the handle becomes shorter, it must be able to travel down the handle in tiny increments without gouging and/or splitting the handle. A primary goal of these procedures is to ensure the crown can move without damaging the handle.

    Occasionally your steel hammer may strike the end of the handle a bit off-center impacting the mild-steel crown. After this occurs a few thousand times the crown may mushroom preventing it from traveling smoothly down the handle without gouging it. Another goal of these procedures, therefore, is to prevent, or at least minimize, this deformation of the crown thereby avoiding damage to both handle and hammer. Of course, if Beloved Customer notices such deformation developing in one of his faithful chisel’s crowns, please use a file to refresh/increase the crown’s chamfer before it gets excessive.

    The kuchigane mentioned above is a truncated metal cone or ferrule that fits between the handle and blade. Written 口金 in Chinese characters (which translates to “mouth metal” ) this bit of mild steel is key to the handle design of Japanese chisels because it serves to keep the hammer’s impulse forces from splitting the handle by compressing the tapered end of the handle against the tang under great pressure. And when installed properly it also improves the flow of impact forces from a steel handle to the cutting edge while at the same time minimizing unpleasant harmonic vibrations. This is a genius-level design feature critical to the wooden handle’s durability.

    But if the fit between the kuchigane, the blade’s tang, and the wooden handle is a bit off, strange harmonics may develop causing skittish behavior. Also, if the fit between handle and kuchigane permits the kuchigane to ride-up and dig into the handle after many hammer strikes the handle will become gouged and weakened.

    Therefore two additional goals of these procedures are (1) to ensure the handle, ferrule and tang fit properly to provide efficient transfer of impact forces acting on the blade; and (2) to ensure the kuchigane will not damage the handle during the hard work to which professionals routinely subject their chisels.

    The following pictures show what these measures will help avoid.

    Split Handle
    Mushroomed Crown and Handle Crack
    A mushroomed crown and resulting damage to the handle. A crown exhibiting this type of deformation ends up dancing around loose on the handle without protect it from splitting. Indeed, if not remedied, the crown itself may eventually gouge and even split the handle

    Tools and Materials Needed for Performing Setup

    • Masking tape
    • Fine point marking pen or ball pen
    • Sharp knife for cutting wood
    • Sharp knife or de-burring tool for de-burring and chamfering mild steel (an inexpensive kiridashi kogatana with an edge sharpened to 45 degrees shaves metal faster and cleaner than a file)
    • Rat-tail file or chainsaw file (can also be used for deburring)
    • Flat mill file
    • Pliers
    • Block of hardwood for driving off crowns
    • Wet/Dry sandpaper (220, 320, 600 grit)
    • Satin varnish or polyurethane and thinner
    • Gas stove or propane torch (optional; outdoors use)
    • Silk cloth (optional)

    Disassembly

    Mark Orientation of Handle to Blade

    Step 1: Safety first. You will need all your fingers for this process, and sticky red stuff on everything is unsightly, so please tape some cardboard around the cutting edge to ensure your digits remain firmly attached to your hands.

    Step 2: Mark the blade’s orientation on handle. Place a mark or arrow on the end of the handle in line with the flat of the blade to help you reassemble the handle in the same orientation. If you are setting-up multiple chisels at the same time, write the blade width or other designation on the handle’s end to avoid confusion later.

    Step 3: Separate the blade from handle. If the process of removing the crown did not loosen the blade, hold the blade in one hand and strike the kuchigane against the corner of a wooden workbench or block of wood. The best locations to strike the kuchigane are at points in line with the corners of the square tang, as seen in the photos of the bare tang below. Notice how the tang’s flats are aligned with the top and bottom of the blade.

    Strike each corner twice, then shift the point of impact 90° and repeat. The goal is to gradually rattle the handle off the blade’s tang, so don’t be shy. If the blade and handle still refuse to separate, expand the kuchigane and shrink the wood using a heat gun or by placing the kuchigane nearly (but not quite) touching a hot incandescent light bulb for a few hours. Do not place the chisel in an oven!

    Rap the Kuchigane on the edge of your workbench or a piece of wood to separate it from the handle and tang. You can see the gap at the top of the kuchigane where it is beginning to separate from the handle. Be persuasive!

    Step 4: Remove the crown (hoop). Now that the blade and handle are separated, grip a block of hardwood tight against the handle in one hand, with one end butting up against the crown, and strike the opposite end of the block with a hammer. Work the block around the crown and repeat until the crown comes off.

    Remove the Crown
    A view of the end of the handle where the crown was previously installed. Notice the compression lines produced in the wood when the crown was first installed. The inside of the hoop needs to be cleaned up and the end chamfered to prevent the hoop from gouging the handle, obviously, but this sort of tight fit is desirable.

    Step 5: Disassemble the handle and kuchigane. If you are setting-up multiple chisels at the same time be sure to mark/label each chisel’s components to ensure they can be matched for reassembly. I usually write the blade’s width on the handle’s end with a marking pen and scratch it inside the kuchigane and crown with a pointed scribe.

    The Chisel’s Four Component Parts

    True the Tang and Shoulder

    Step 6: True the Tang and Shoulder: The tang and neck/shoulder should meet at a clean 90° angle, however a slight filet is acceptable. The shoulder should be clean and flat. If necessary, true it up carefully with a flat file, but be careful to only true the shoulder without filing gouges into the tang. Also, use the file to remove burrs and gross irregularities on the tang as necessary. Please remember that the tang will always be hidden, so please don’t weaken it by trying to file it to perfection.

    The tang before cleanup
    The tang after cleanup

    As you can see in the photo above, the tang does not need to be perfect, just free of big irregularities, burrs and sharp corners that might cause the fit between handle and tang to loosen after hard pounding,

    When you are done, there should not be a pronounced gap between the shoulder and kuchigane when the chisel is assembled.

    Prepare the Kuchigane (Ferrule)

    Step 7: Check the Kuchigane: Check the blade end of the handle with the kuchigane in place. If it is a sloppy fit, adjust the handle using knives, files, and sandpaper as necessary.

    Step 8: Flatten the End of the Kuchigane: Flatten each end of the kuchigane with a flat file without removing more material than is absolutely necessary. Be sure the ends are in planes perpendicular to the kuchigane’s centerline. I usually accomplish this by holding the kuchigane in one hand and running it back and forth over the surface of a wider file.

    Kuchigane before chamfering

    Step 9: Chamfer the Kuchigane: Chamfer the inside of the kuchigane’s wide end (not narrow end) with a knife or round file. Shave or file a a 45° chamfer 1/2 to 2/3 the thickness of the kuchigane’s wall on the inside corner of the kuchigane’s wide end. An inexpensive kiridashi kogatana knife or deburring tool with a blade angle of around 40 degrees will easily shave the mild steel used for crowns and kuchigane and works quicker and cleaner than a file. Please don’t cut yourself.

    A stopped hole drilled into a board works well to secure parts when deburring and chamfering them. Vise grips also work well for securing crowns if you pad the jaws to keep them from gouging the parts, but such clamping tools tend to deform kuchigane, so please exercise caution.

    Allow me to repeat: Be extremely careful not to cut yourself. They may be beautiful and very useful, but many chisels and knives are cold vampiric geniuses that fear neither sunshine nor spaghetti sauce and want to cut you, so beware! Hold parts in a way the blades absolutely can’t bite you no matter how hard they try. A severed tendon can be a life-changing surprise.

    Kuchigane after chamfering

    Step 10: Refinish the Kuchigane: If you decide to refinish the kuchigane, remove the existing chemical bluing with sandpaper at this time.

    Prepare the Crown (Hoop)

    The Crown Before Deburring and Chamfering

    Step 11. Chamfer the Crown: Chamfer both inside corners (top and bottom edges) to a nice round 45° angle with a knife or a rat tail file. This step is very important.

    The crown after chamfering. This step is critical.

    Step 12. Debur the crown: Debur and clean up the crown’s inside surface. However, be careful to not remove too much metal or the crown may fit too loosely.

    Deburred, Chamfered, Filed and Sanded Crown

    Step 13: Clean the crown’s exterior surfaces: Lightly file and sand the crown’s exterior surfaces to remove major irregularities. However, there is little point in trying to make these surfaces perfectly smooth since they will get banged up by hammers.

    Prepare the Handle

    Step 14: Check the Depth of the Tang Hole. If the hole in the handle which receives the tang is too shallow, the pointy end of the tang will bottom-out and can cause the handle to split. Measure it’s depth with piece of wire or a stick. If it is not deeper than the length of the tang, drill the hole just a tad deeper.

    Step 15: Check/Adjust Blade Alignment. With the kuchigane removed, insert the tang into the handle correctly oriented, and sight down the handle. If the handle and blade do not line up properly, you may need to correct the misalignment.

    To do so, first try fitting the blade to the handle in a different orientation (90˚). If this does not improve things, make thin slips of wood the width of the tang’s flat and fit one into the hole before inserting the blade. Slips made of cardstock, manila folder, or cotton typewriter paper work well too. If you feel a lot of resistance when inserting the tang, attach the kuchigane to prevent splitting.

    Thinner or thicker slips can be inserted if more correction is necessary, but there is a point where too many slips will make it impossible to insert the tang without splitting the handle. In this worse case scenario, shave the hole a bit wider with a chisel or other slender piece of steel sharpened as a scraper to permit adequate shimming. Be careful to remove the absolute minimum amount of wood.

    Step 16: Check/Adjust Crown Fit. It is acceptable for the crown to leave a shallow ring depression in the handle, but if the crown digs deeply into the handle, shave or sand the handle to ensure the crown will not gouge it.

    The Handle’s Coned End Before Fitting. The step or shoulder turned into the handle is visible.

    Step 17: Prep the Shoulder. Most chisels have a shoulder turned into the handle where the kuchigane terminates, making for a smooth, attractive transition between kuchigane and handle. This is most pronounced in chisels made in Western Japan. However, if the kuchigane butts tightly up against this shoulder, over time the force of the hammer can drive the kuchigane into this shoulder damaging the handle.

    Relieving this shoulder with scallops will provide some room for smooth movement of the kuchigane over time. To do this, first mark a line around the handle where the kuchigane ends. Then remove the kuchigane.

    Step 18. Place a Guide Around the Handle: Wrap a piece of paper or light cardboard 3/16″ to 1/4” above the line of the shoulder, secure it with tape, and using it as a guide, mark another line around the handle with a fine-point marking pen, ball pen, or knife. When done, remove the kuchigane and paper.

    Step 19: Mark the Handle: Use a pen, pencil or marking pen to mark the cone at diagonals across the tang hole and extend these marks to the line you made in the previous step. This will leave four lines 90° apart. Now make similar marks at the flats of the tang and extend the lines. There should now be eight lines separated by 45°.

    Step 20: Cut the Scallops: Wrap masking tape around the cone as shown in the picture below to protect the cone from cuts which might weaken it. With a very sharp knife or chisel, make four cuts in small increments centered on one of the lines and forming a concave scallop between the two adjacent lines. Repeat for the other four lines. These curved scallops should transition smoothly into the wooden cone, but should not cut into it. This may not be as easy to accomplish as it seems. If done properly, the scallops should appear uniform and attractive, but perfection is neither attainable nor desirable in a handmade tool. Finally, shave off the ridge between the scallops creating a total of sixteen scallops at 22.5°.

    Finish the Handle

    Some people prefer a handle without any finish, while others like a shiny finish.

    Hand sweat tends to react with the tannic acid in Japanese White Oak handles turning them a dirty-looking grey. Japanese Red Oak, as in the handle in the pictures above, does not discolor as much.

    Whether you refinish the handle, leave it as-is, or sand it bare is your choice. It makes no difference to the chisel’s performance.

    Step 21: Sand the Handle. At this point, you can either (1) Not sand the handle (unless it is damaged), and varnish the scallops and any areas shaved at the crown end of the handle to match the existing handle finish; (2) Sand off the existing finish entirely to bare wood; or (3) Refinish the entire handle.

    Step 22: Apply a Finish: This step is applicable if you decide to apply a finish to the handle. Sweat may cause Japanese White Oak, a wood commonly used for chisel handles, to discolor, so a light finish (not a thick glossy finish) is appropriate in your humble servant’s opinion. The following is the method I recommend. First, sand off any remaining finish on the handle. Apply a coat of satin varnish or polyurethane diluted 100% with thinner. Allow as much of this mixture to soak into the wood’s fibers as possible. Rub the wet varnish mixture forcibly into the wood using wet-or-dry sandpaper. Thinned varnish will penetrate further into the wood than straight varnish, and the pressure of sanding will force it deeper into the fibers than just capillary action could achieve. In addition, sanding will create a wood/varnish slurry filling the grain.

    Allow this mixture of varnish and wood dust to dry without wiping it off. It will look terrible, but never fear. Repeat these steps for a second coat and allow to dry. Apply a third coat, sand lightly, and then wipe off the varnish slurry with a cloth.

    When dry, the result will be a non-slip surface free of lathe marks that does not appear to have any finish, but that will protect the wood from sweat and moisture. If a little bit of visible surface finish is desired, a final single coat of thinned varnish can be applied. To ensure the previously cut scallops remain nice and crisp, do not sand them.

    Warning: Do NOT apply finish to the crown end of the handle because the finish will make the wood fibers too stiff to deform properly. If you want to go the extra mile, a bit of melted paraffin wax or beeswax allowed to soak into the end of the handle will protect it from water and make it more resilient over time than just bare wood.

    Finish the Kuchigane and Katsura

    This is an optional cosmetic step, but will make your chisel more attractive. There are several ways of finishing the metal of the kuchigane and crown:

    Heat Bluing: Simply heat the kuchigane and crown on a stove until it is blue-black. Do not heat the blade! This is an ancient steel-finishing technique, indeed one routinely used to colorize plate armor in medieval times. Not very durable, but it looks cool.

    Oil Black: Coat the metal with motor or transmission oil and heat it until the oil is burnt off. This method makes a lot of stinky smoke, so don’t do it indoors. Fairly durable. Do not heat the blade!

    Gun Blue (chemical bluing): Brownells’ cold blue formula works well. Birchwood Casey also makes a convenient chemical bluing product. Looks nice, but not very durable.

    Rust Blue or Rust Black: These are classic, beautiful steel finishes that are much more durable than chemical or heat bluing. However, the process requires dangerous chemicals, a fine-bristle stainless-steel brush and time. A description of the process is not possible here.

    Burnt Silk Finish: This is one of my favorite finishing methods because it is quick and easy and looks good. Simply heat the metal parts over a flame, and using pliers so you don’t burn yourself of course, wipe the metal in a wad of scrap silk. An old silk necktie works fine. The silk protein will char, coating the metal with a carbon finish with an interesting texture. Wipe the metal quickly but thoroughly to prevent globs of melted silk from sticking to the metal. Don’t do this inside the house because the smoke will set off the smoke alarm and the stink will endure for weeks. SWMBO will not be pleased. Do not heat the blade!

    Reassemble the Chisel

    If this is a new chisel, it may be convenient to true the blade’s ura and sharpen it before final assembly. These tasks are a little easier with the handle removed.

    Step 23: Install the Crown: To begin assembly, hold the handle in the air by one hand and drive on the crown using a wooden, plastic or rawhide mallet, not a steel hammer. You should always remove your wrist watch before wacking chisels if you want it to keep working. A word to the wise.

    There is a specialty tool for this job, essentially a steel cone that fits over the crown, which you strike with a hammer. If you enjoy spending money on heavy tools that take up space and are seldom-used, then you must have one. But a hammer works just as well and can do many more tasks.

    Once the crown is flush with the handle, angle the handle and strike the crown with your wooden mallet or steel hammer at an angle driving it further onto the handle. You only need to be drive it down far enough so the top of the crown is below the end of the handle by 1/16”. More is wasteful. Then strike the edges of the handle projecting beyond the crown at an angle with a steel hammer to lightly mushroom over the corners of the handle securing the crown in place. Do not soak the handle in water, for Pete’s sake!

    Soaking the handle in water prior to fitting the crown is a method preferred by handlemakers and wholesalers that fit hundreds of crowns a day. They will soak 50 handles at a time in a shallow pan of water to soften the ends making it easier to mushroom. Convenient for them, but bad for the chisel because the water will also cause the wood to swell, and when it later dries and shrinks, the crown may become loose over time. Your handle deserves better.

    Step 24: Install the Kuchigane: Fit the kuchigane to the handle lightly and insert the blade’s tang oriented according to the marks you made previously. Tap the end of the handle to lightly seat the blade, but allow enough room so the kuchigane can be rotated by hand. Rotate the kuchigane to minimize any gaps between it and blade’s shoulder.

    If you see any big gaps, lightly file the kuchigane to match the blade’s shoulder.

    If any part of the handle projects past the kuchigane’s mouth, carefully shave it off with a sharp knife.

    Step 25. Seat the Blade: With both crown and kuchigane now installed on the handle, finish seating the blade by holding the chisel by the handle in the air and striking the end squarely with a mallet or hammer until it seats tightly. Don’t cut yourself!

    Voila!

    Step 26. Final Check and Adjustment of Kuchigane to Shoulder Fit: Now that the chisel is assembled, there is one last check to make. The fit between the blade’s shoulder and the narrow end of the kuchigane need not be perfect (perfection is unattainable for mere mortals) but it does need to be fairly uniform because most of the impulse energy from the hammer flows through this tiny interface. Therefore, if there is a big gap, or if half the kuchigane on one side, for instance, is not contacting the shoulder, the flow of impact forces will not be smooth and the chisel will feel “skittish.” Examine this fit for gaps and irregularities, and correct them by filing the kuchigane. You will need to loosen the blade and handle enough to insert a small file, but you don’t necessarily need to completely disassemble the chisel.

    Congratulations! Your chisel is now setup for professional use.

    Use the Right Hammer

    When cutting wood with a tatakinomi, please use a hammer with a flat face, such as a Japanese gennou, to strike your chisel. A hammer with a domed or convex face, as are almost all hammers sold outside Japan nowadays, may damage the chisel’s handle after enough strikes. Ergonomics aside, a ball peen hammer or claw hammer with its face ground flat will work just as well as a Japanese hardware-store gennou.

    And while we are on the subject of hammer faces, I recommend you smooth and even polish your hammer face so it will strike cleaner and reduce the wear on your chisel handles, counterintuitive as that may seem. Slipping will not be a problem, trust me.

    I encourage you to select a hammer weight that balances well with the weight and blade width of your chisel, the type of wood and type of cutting you plan to do, and your body and style of work. This decision will make a difference in the precision and speed of your work, the energy you expend, and the stress on your joints.

    The standard range of weights for gennou hammers for carpentry work in Japan is 100mome to 120monme (375gm (13oz) to 450gm (16oz), perfect for driving nails, general carpentry work, and motivating atsunomi. However, many find a lighter-weight head, perhaps in the neighborhood of 60~80 monme ( 236gm (8.3 oz) to 300gm (11 oz)), works better with smaller chisels, such as oiirenomi, for furniture and joinery work.

    I also encourage you to make a handle for your hammer that suits your body and style of work.

    This article is already too long so I won’t go into details, but suffice it to say that commercial hammer handles are a one-size-fits-nobody design that confuses the hand, is non-aerodynamic (I bet you never thought about air-drag in relation to hammer handles), transmits excess vibration to your joints, and ignores obvious ergonomics causing the head to impact the chisel off-center and out-of-kilter. There is a better way, and you will love the results.

    We will dive head-first down that rabbit hole, screaming like a banshee on fire, in future posts!

    Kosaburo Gennou Head and Black Persimmon Handle

    Rust Prevention & Storage

    If set up properly, a quality set of Japanese chisels will endure decades of hard daily use with no maintenance beyond oiling and sharpening.

    You should store your chisels where they will be protected from weather, water, sudden temperature changes, dust, fly-specs, spilled beer, and paint overspray. Convenient though it may be to store chisels in an exposed rack or bare on a shelf, unless your workshop is a temperature and humidity controlled cleanroom, or you use chisels stored this way nearly everyday and clean and oil them frequently, such storage methods are guaranteed to reduce their useful lifespan and will waste your sharpening efforts and sharpening stones sure as eggses is eggses.

    I recommend you make a wooden chisel box with a lid to store your chisels. I am preparing an article on how to design and make a chisel box, and will post it on the blog when it is ready.

    After every use, oil the blade to prevent rust. An aburatsubo or oilpot is a critical accessory for chisels, and is easily made. You can find details here.

    A Final Note

    Since we wrote this tutorial ten years or so ago, we have frequently received questions from Beloved Customers and Gentle Readers about the fact that the chisel setup procedures described herein differ in important ways from those taught by most retailers of Japanese tools in the USA and Europe, as well as those expounded in videos on NoobTube, or posted on the woodworking internet forums.

    This Final Note is intended to dispel confusion among Beloved Customers and Gentle Readers on these points.

    The Question

    So why is are the techniques presented in this tutorial so different from those found online?

    When asked this question, your humble and obedient servant is often tempted to respond that the questioner should perform the “Big Spoon Quality Test.” This QC technique involves taking a big, heaping spoonful of the online advice in question, then holding one’s nose and swallowing it down, yes, all the way down, …. keep swallowing now, no don’t upchuck, and afterwards deciding for oneself if it is fragrant wisdom or stinky BS. As the saying goes: “the proof is in the pudding,” or was it “laughter is the best medicine?” I forget.

    In any case, while such a hasty reply would be hilariously entertaining, it would also be crude. Fortunately, your humble servant is nothing if not exquisitely refined, so I will instead try to provide a more detailed and tasteful explanation below instead.

    The Long Answer

    Yes, Virginia, we have seen the various online videos about setting-up Japanese chisels. The creators of most of them are simply parroting instructions that some long-gone employee of a wholesaler, probably some soft-handed office worker who had never used a chisel professionally, heard from another guy working at a chisel factory assembling hundreds of chisels everyday as quickly as possible from cheap parts, some of which may have been imported from China.

    Some of Gentle Reader are now saying to yourselves: “Wait just one frickin minute there! What do you mean, “made in China!?” Please take a deep breath, smell the napalm, and realize that too many of the components assembled into products in advanced countries are actually made in China at low cost. Poor quality is the natural consequence of procurement policies intended to maximize profits, all other considerations be damned. The components used in C&S Tools’s chisels, however, are all made in Japan of quality materials and to reasonable tolerances.

    Here’s the problem: Imagine a chisel handle and/or crown manufactured to such careless tolerances that one must beat the heck out of the handle with a hammer (kigoroshi) crushing the wood’s cells to reduce the handle’s diameter enough so the poorly-matched crown or ferrule will fit.

    Now ask yourself two questions: (1) How difficult can it be to control the tolerances of wooden handles and mild steel rings? And (2) will permanently crushing the hardwood handle’s cells improve its durability and/or longevity?

    Or imagine, if you possibly can (difficult, we know), a handle and its crown or ferrule so poorly matched that one must swell the wood with water to get the crown or ferrule to stay attached long enough to ship the chisel overseas. Is your mind not boggled yet?

    Do you think such poor manufacturing tolerances or either of these ham-handed techniques make for a better chisel, one that will provide good long-term service in the real world? Sadly, this is the grade of chisel with which the PooTube “Creators” and the so-called “experts” on the slimy orc-infested woodworking forums have hands-on experience.

    The manufacturers of these shoddy tools provide zero warranties. Their products disappear into overseas markets where consumers are accustomed to being deceived as a matter of course, and the quality of most of their competitor’s products in the local markets, essentially sharpened Chinese-made screwdrivers, are of even poorer quality, so there is no backlash, only profits.

    If any of this sounds to you like proper quality control or good value for the consumer, then there’s some swamp land located next to an abandoned chrome plating plant in North Korea, shovel-ready for resort development, that’s for sale at an amazingly low price. We read about it on an internet forum, so it must be true. All you have to do is send US$3,000 in small unmarked bills via FedEx to a private P.O. Box in Abuja, Nigeria belonging to Prince Musa Adebayo. It’s a limited time offer, so you’d better hurry ( ͡° ͜ʖ ͡°)

    Most of our Beloved Customers are not new to Japanese tools. They have bought the sizzle before, found the flavor revolting, and came to us for real bacon. They want honest handmade tools that meet the rigorous demands of advanced Japanese professional woodworkers. That is what C&S Tools routinely delivers.

    The Short Answer

    Let’s wrap this up by concisely answering the original question.

    First, we promote different chisel setup techniques because the tools our Beloved Customers need to setup are different from those with which the “Creators” on Gooble’s SpewTube and the trolls on the internet forums are accustomed. They are made by true craftsmen, not unskilled factory workers using Chinese components.

    Our craftsmen are Japanese gentlemen living and working in Japan using crowns, ferrules, and handles made by them to reasonable tolerances, attached to the highest-quality hand-forged blades, also made by real Japanese blacksmiths working in their own smithies. Kigoroshi and water soaks are not necessary to setup these chisels, and will in fact harm them.

    Second, because our Beloved Customers selected C&S Tools, we assume they are more advanced woodworkers than the easily-deceived amateurs that typically buy the hardware store-grade mass-produced chisels commonly available outside Japan, and therefore actually want to do initial setup in accordance with the highest standards, not the lowest. It’s their choice, of course, but it would be unimaginably irresponsible of your humble servant to advocate lesser techniques just to match the posers on GuberLube.

    And third, unlike the wholesalers and distributors that peddle hardware store-grade tools overseas at inflated prices, we take our warranty seriously, and therefore actually care about the performance and longevity of the tools we sell. We need our Beloved Customers to set them up properly using the advanced techniques we promote because we have a reputation to protect and a direct financial interest in customer satisfaction.

    Five Potential Solutions

    We hope this explanation clears up the original question. In addition, the following list describes five solutions to the other problems we touched on above. Sorry, but you’re on your own with Prince Musa’s real estate deal:

    1. Purchase only high-quality tools made to reasonable tolerances from quality materials by genuine professional craftsmen and blacksmiths that have long-term relationships and reputations that might be damaged by shoddy quality, not mass-production factories filled with low-wage workers.
    2. Buy chisels and other edged handtools only from retailers (like C&S Tools) that both offer and honor a full international warranty on materials and workmanship, one that doesn’t require you to expend additional funds to benefit from. Good luck finding anyone else;
    3. Beware the posers on Yoogle’s GoobTube (or is it Toogle’s YoobGube? We forget) who profit financially from spinning a pound of BS into 7 click-bait-filled minutes of visual entertainment, all without any responsibility for the accuracy, completeness or honesty of their representations;
    4. Beware the howls of the pustulous trolls and the chittering of the execrable orcs scuttling about in the fetid darkness of the internet woodworking forums;
    5. And last but not least, always remember the most reliable litmus test for veracity: “Money Talks and BS Walks” (see point 2 listed above).

    Or, you can always try the big spoon test described above, for after all is said and done, bitter lessons stick best (ツ).

    YMHOS

    Related Articles

    If you have questions or would like to learn more about our tools, please click the “Pricelist” link here or at the top of the page and use the “Contact Us” form located immediately below.

    Please share your insights and comments with everyone in the form located further below labeled “Leave a Reply.” We aren’t evil Google, fascist facebook, or thuggish Twitter and so won’t sell, share, or profitably “misplace” your information. If I lie may orcs nest under my bed.

    ← Back

    Thank you for your response. ✨

    Warning
    Warning
    Warning
    Warning
    Warning.

    Leave a comment