Sharpening Part 29 – An Example

The expectations of life depend upon diligence; the mechanic that would perfect his work must first sharpen his tools.

Confucius

In this article in our series about sharpening Japanese woodworking blades your always humble and obedient servant will try to bring all the information provided in previous articles together into a single practical example. That does not mean the entire contents of those articles are repeated here, however, so please refer to the previous articles if things become confusing. I have provided some links in the text, and provided links to all the articles at the end.

But before we dive into our practical example, I would like to create some context.

Paying Debts

The purpose of this blog, as I have mentioned before, is not to sell stuff or attract clicks but to help our Beloved Customers increase their knowledge and improve their skills in maintaining and using the high-quality hand-forged professional-grade woodworking tools we purvey.

Another purpose is to pay a debt of the kind that can’t be recorded on paper, only in the heart.

In this series of posts I have carefully NOT promised quick and easy results, nor have I given abbreviated explanations or promoted dumbed-down techniques tailored to fit neatly within the publishing parameters of a book, magazine article, or a pretty little video. This is because the series is not about me, or my skills, or what I think is best, or selling stuff but rather helping our Beloved Customers obtain real long-term results and life-long skills of the sort expected of professional Japanese woodworkers. And since I can’t instruct them directly, our Beloved Customers must truly understand the principles and techniques so they can train themselves. Fragmentary instructions and short-cuts would be far easier to write about, but risk creating more confusion than progress.

I share many experiences in common with most of our Beloved Customers, but I’ve also had some unusual experiences working with and being mentored by extremely accomplished Japanese professional craftsmen including sword sharpeners, tool sharpeners, carpenters and joiners. None of those gentlemen charged me a notched nickle for their instruction. Likewise, I have never sought compensation for teaching others those same techniques. And so we come to the other reason for this series, namely to pay those gentlemen back for the time they spent and the kindness they showed me.

So gird up your loins, recall the information and techniques presented in the previous 28 articles in this series, and let’s sharpen a blade.

Removing Damage and Correcting the Bevel

I will not even try to deal with all the possible starting points for sharpening a woodworking blade, but in this example we shall assume a starting point of the lands surrounding the hollow-ground area at the blade’s ura being already flat, planar, and polished. If your blade is not in this condition, follow the instructions at the end of this section. We shall also assume the edge has a small chip that must be removed first. These conditions will cover 80% of sharpening jobs.

Richard Kell 625-3000 Brass Bevel Gauge

If the blade’s cutting edge bevel angle is where you want it to be, the bevel is already flat, and the blade isn’t damaged, please skip to Step 11 below.

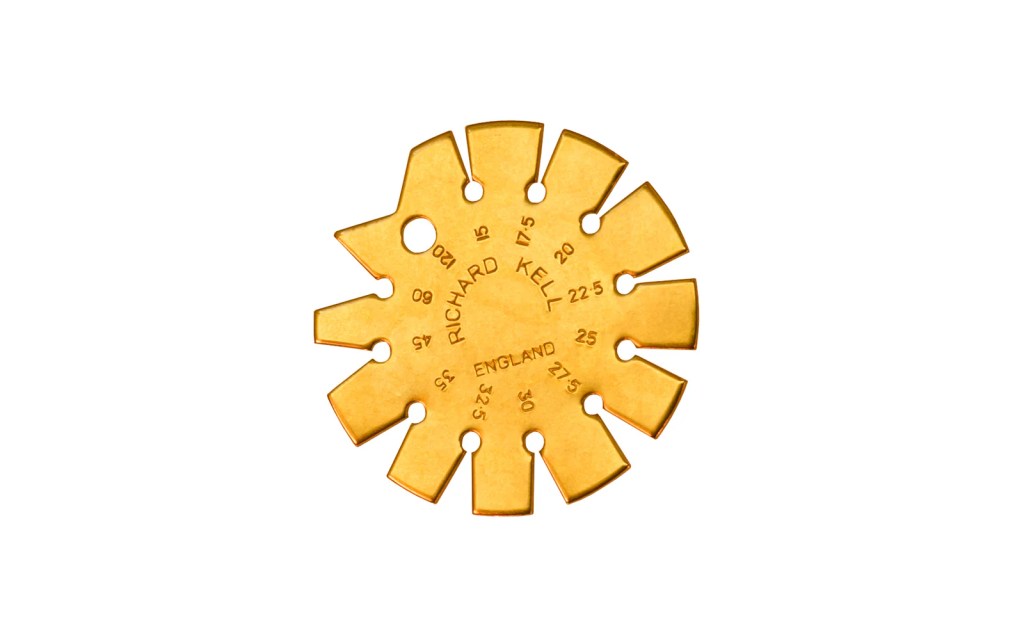
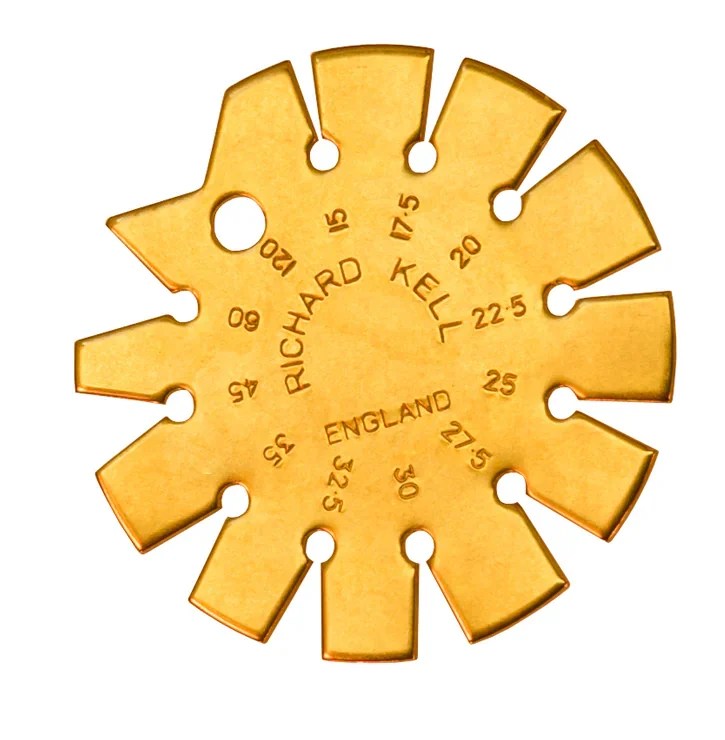
1. Examine the Bevel Angle: Check the bevel angle with your bevel angle gauge. 27.5° ~ 30° for plane blades, 27.5° ~ 35° for oirenomi and atsunomi. No less than 24° for paring chisels.

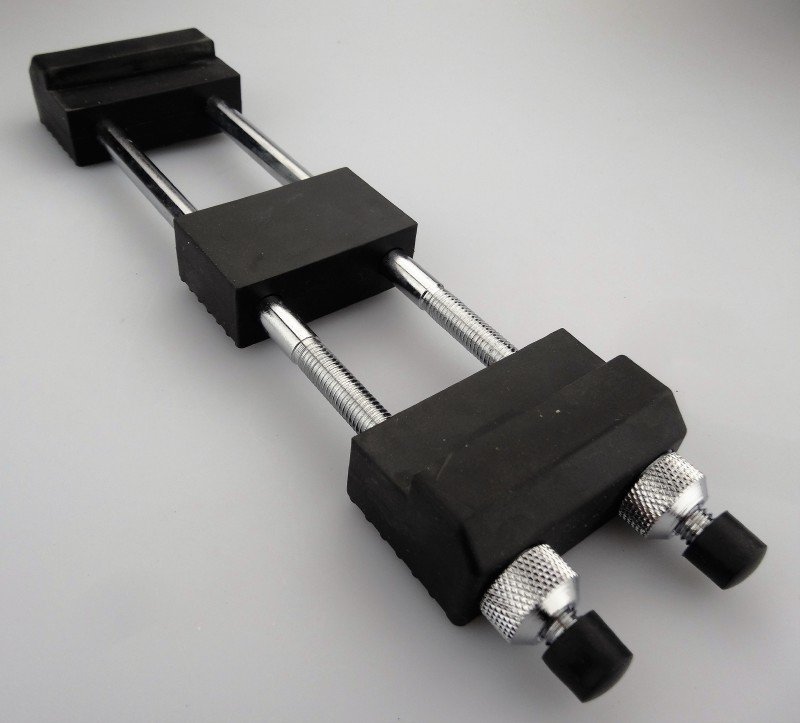
2. Correct the Bevel Angle: If, based on your check in the previous step and the blade’s actual performance, you determine the bevel angle needs to be adjusted, correct the bevel angle using your 400~800 grit diamond plate or diamond stones or FLAT carborundum stones either free-hand or using a honing jig like the Lie-Nielson product, the Eclipse jig, or whatever catches your fancy. If you use a honing jig, you may want to add a drop of oil to the moving parts before they get wet. Be careful to avoid making a skewed or curved (cambered) cutting edge unless that is specifically what you need.

3. Examine the Edge: Examine the blade by eye and touch. Stroke the cutting edge with your thumb (over and away from the edge not towards the cutting edge!) to confirm its condition, and run a fingernail along its length to check for defects as described in the previous post in this series. Your fingerprints will snag on any rolls or burrs, and your fingernail will detect irregularities invisible to the eye. Assuming there is some minor damage, go the next step. If there is no damage, the bevel is in good shape, and the blade is just dull, skip to step 11 below.

4. Remove Damage: Remove chips and dings from the cutting edge by standing the blade, cutting edge down, on a flat 1000 grit stone, with ura facing away from you, tilted a few degrees from vertical towards you, and pull the blade towards you without applying downward pressure. Usually one or two light strokes will suffice. The goal is to remove damage by creating a flat at the cutting edge. Examine the flattened edge with eye, fingertip, and fingernail to see if the chip or defect has been removed. Repeat until it’s gone. Don’t overdo it. Whatever you do, don’t allow the blade to become skewed! This method takes a bit of courage the first time, but it is the quickest, surest, and most economical way to get the job done.

5. Clean the Blade: Carefully clean grit and mud from the blade and the honing jig’s wheel (if you use one) to prevent contaminating the next stone. This is important.

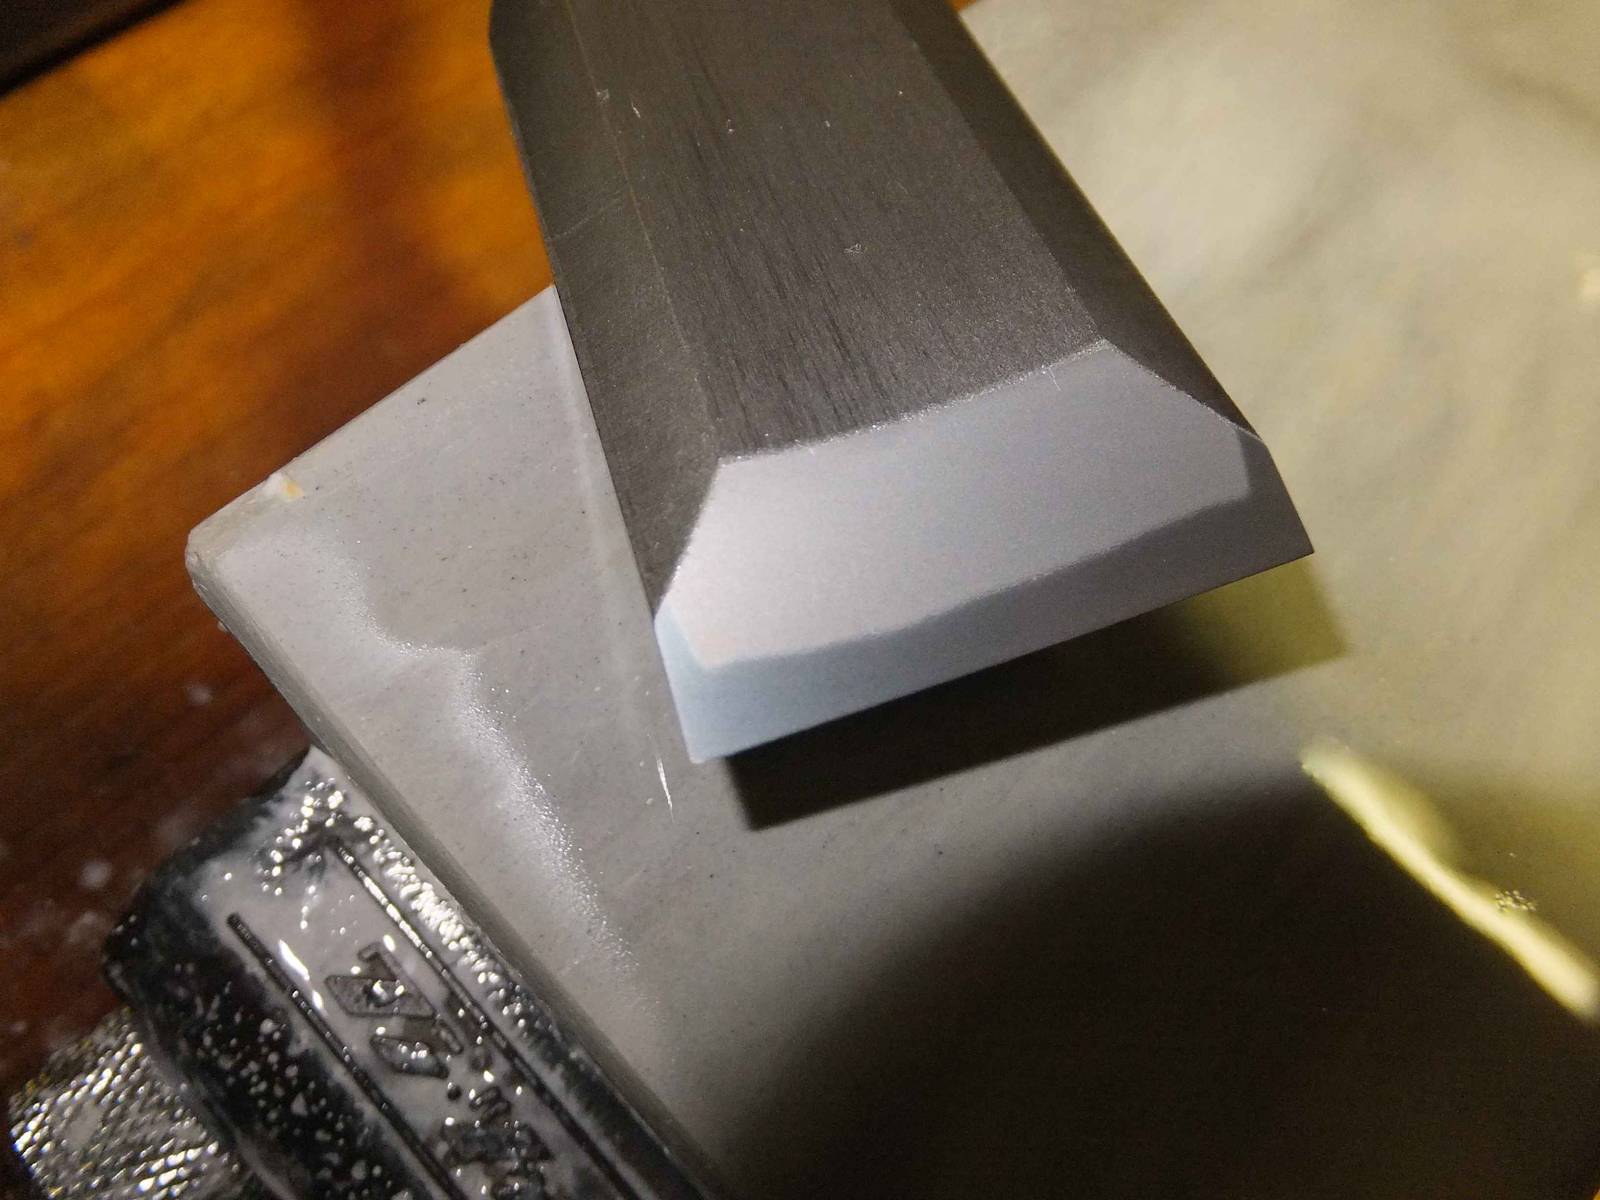
6. Check and Color the Bevel: Check the bevel frequently to confirm full contact. You might blacken the bevel with a marking pen or Dykem to make it easier to monitor progress. This step is worth repeating between stones because it is helpful in monitoring what you cannot see otherwise.

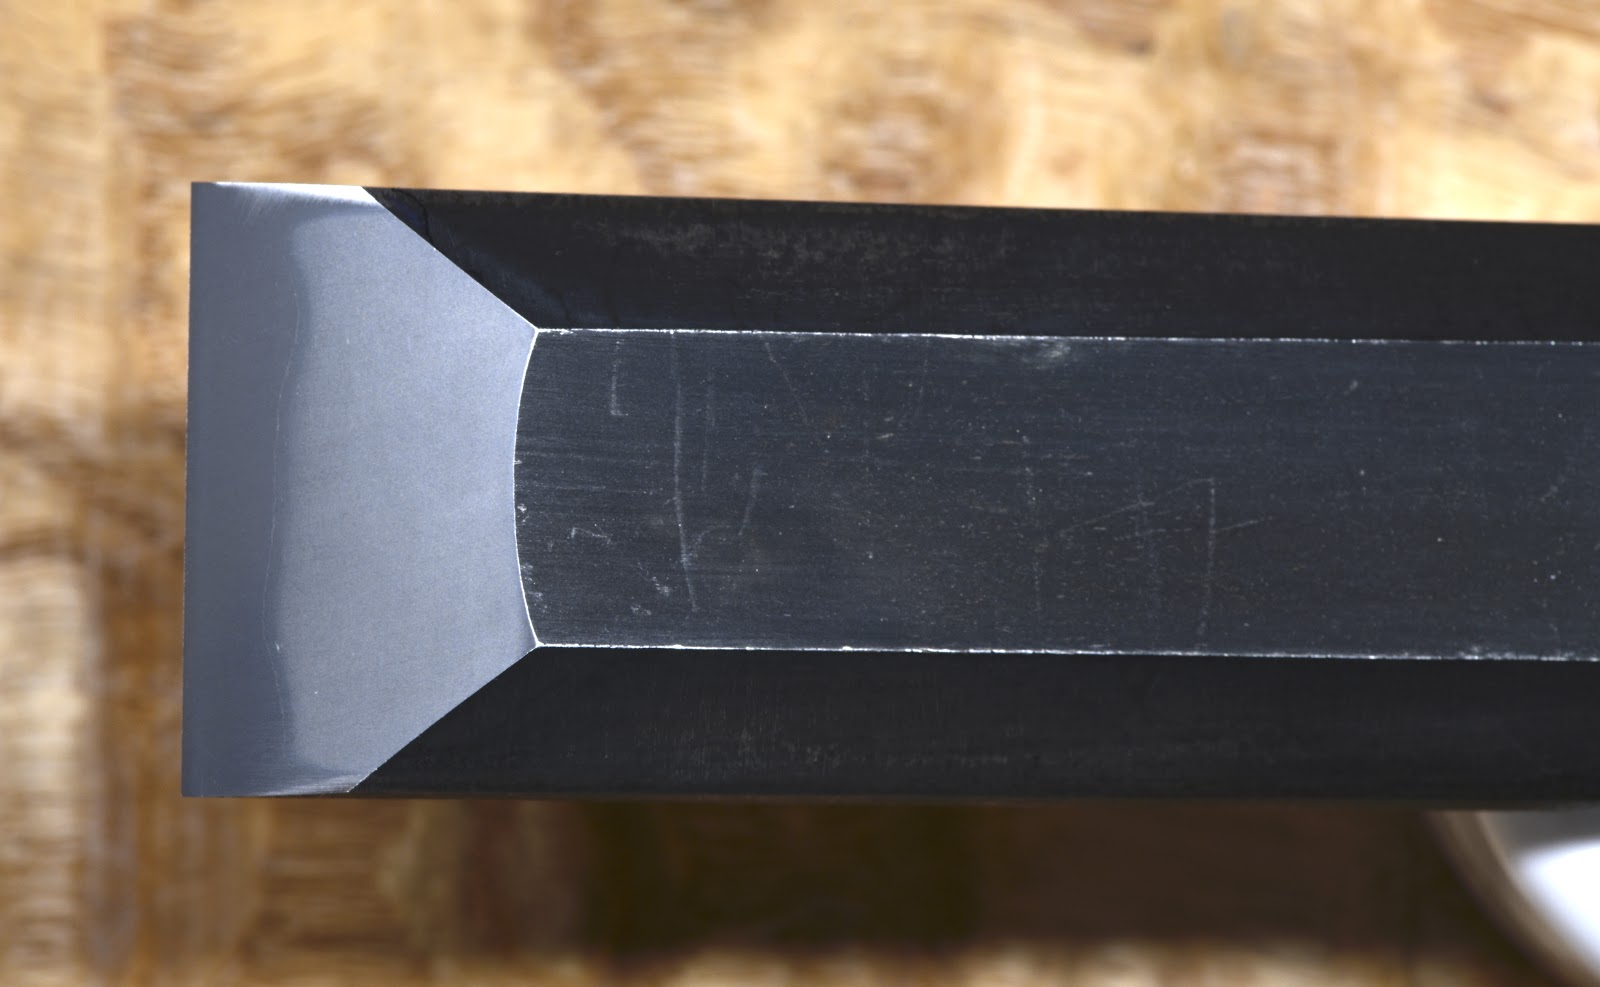
7. Sharpen on the Rough Stone: This is the most important stone in the process. Now that all the damage has been removed and the bevel is flat and in good shape, we need to abrade the bevel until the flat we made in step 4 is gone and we have created a minuscule, tiny, clean burr. Sharpen the blade’s bevel on your roughest diamond plate or FLAT carborundum stone. If sharpening freehand, take short strokes. Always use the entire face of the stone, including corners, edges and ends as described in the previous post in this series. Turn the stone end-for-end frequently to compensate for your natural tendency to work some areas of the stone harder than others. Watch the edge carefully to make sure the width of the flat made at the cutting edge in Step 4 above gradually decreases in width evenly along the cutting edge’s length. If the flat becomes narrower at one corner than the other, apply extra pressure at the wider side, or hang the corner of the blade’s narrower side off the stone for a few strokes to correct. Stop when the flat is gone, and a clean, uninterrupted, but barely detectable burr is created. With practice, you should be able to do this without a honing jig. When using all the stones and plates in this process, keep them wet at all times, and add water as necessary. If the stone becomes dry, not only will it clog and stop cutting efficiently, but friction may cause localized heating of the thin metal at the cutting edge softening it. Remember, you’re violently tearing metal from an extremely thin cutting edge. You cannot see it and your fingers cannot feel it but this destruction heats up metal at that thin edge, so cool it down with water.

8. Check the Burr: Your fingertip will feel the burr long before your eye can see it. Stop when you have a small, uniform burr without interruptions the full width of the blade. Confirm this with your fingernail. Anything beyond this is just wasting metal and stones. With practice, this process will go very quickly, and you can move onto the next stone while the burr is barely detectable.

9. Create Skewed Scratches: When you have a uniform burr, work the blade sideways, or at an angle, on the stone to create diagonal scratches on the bevel removing the straight-on scratches the stone produced.

10. Clean the Blade: Wipe and wash the blade (and the honing jig’s wheel, if you are using one) to remove grit and mud. This is very important to prevent contamination of finer-grit stones. 

At the conclusion of step 10, the bevel will be flat, uniform, and at the correct angle. The flat you created on the cutting edge during step 4 above will be gone, and you will be able to just detect a full-width tiny burr using your fingers. 

For the next steps, keep the blade attached to the honing jig if you used one in the previous steps. Otherwise, sharpen freehand if you can. Don’t let the honing jig become a crutch that slows you down and prevents you from developing control.

Normal Sharpening Procedures

This is where the sharpening process normally starts when the blade is not damaged and the bevel is in good shape but only needs to be sharpened. It usually does not include a honing jig which can only slow things down.

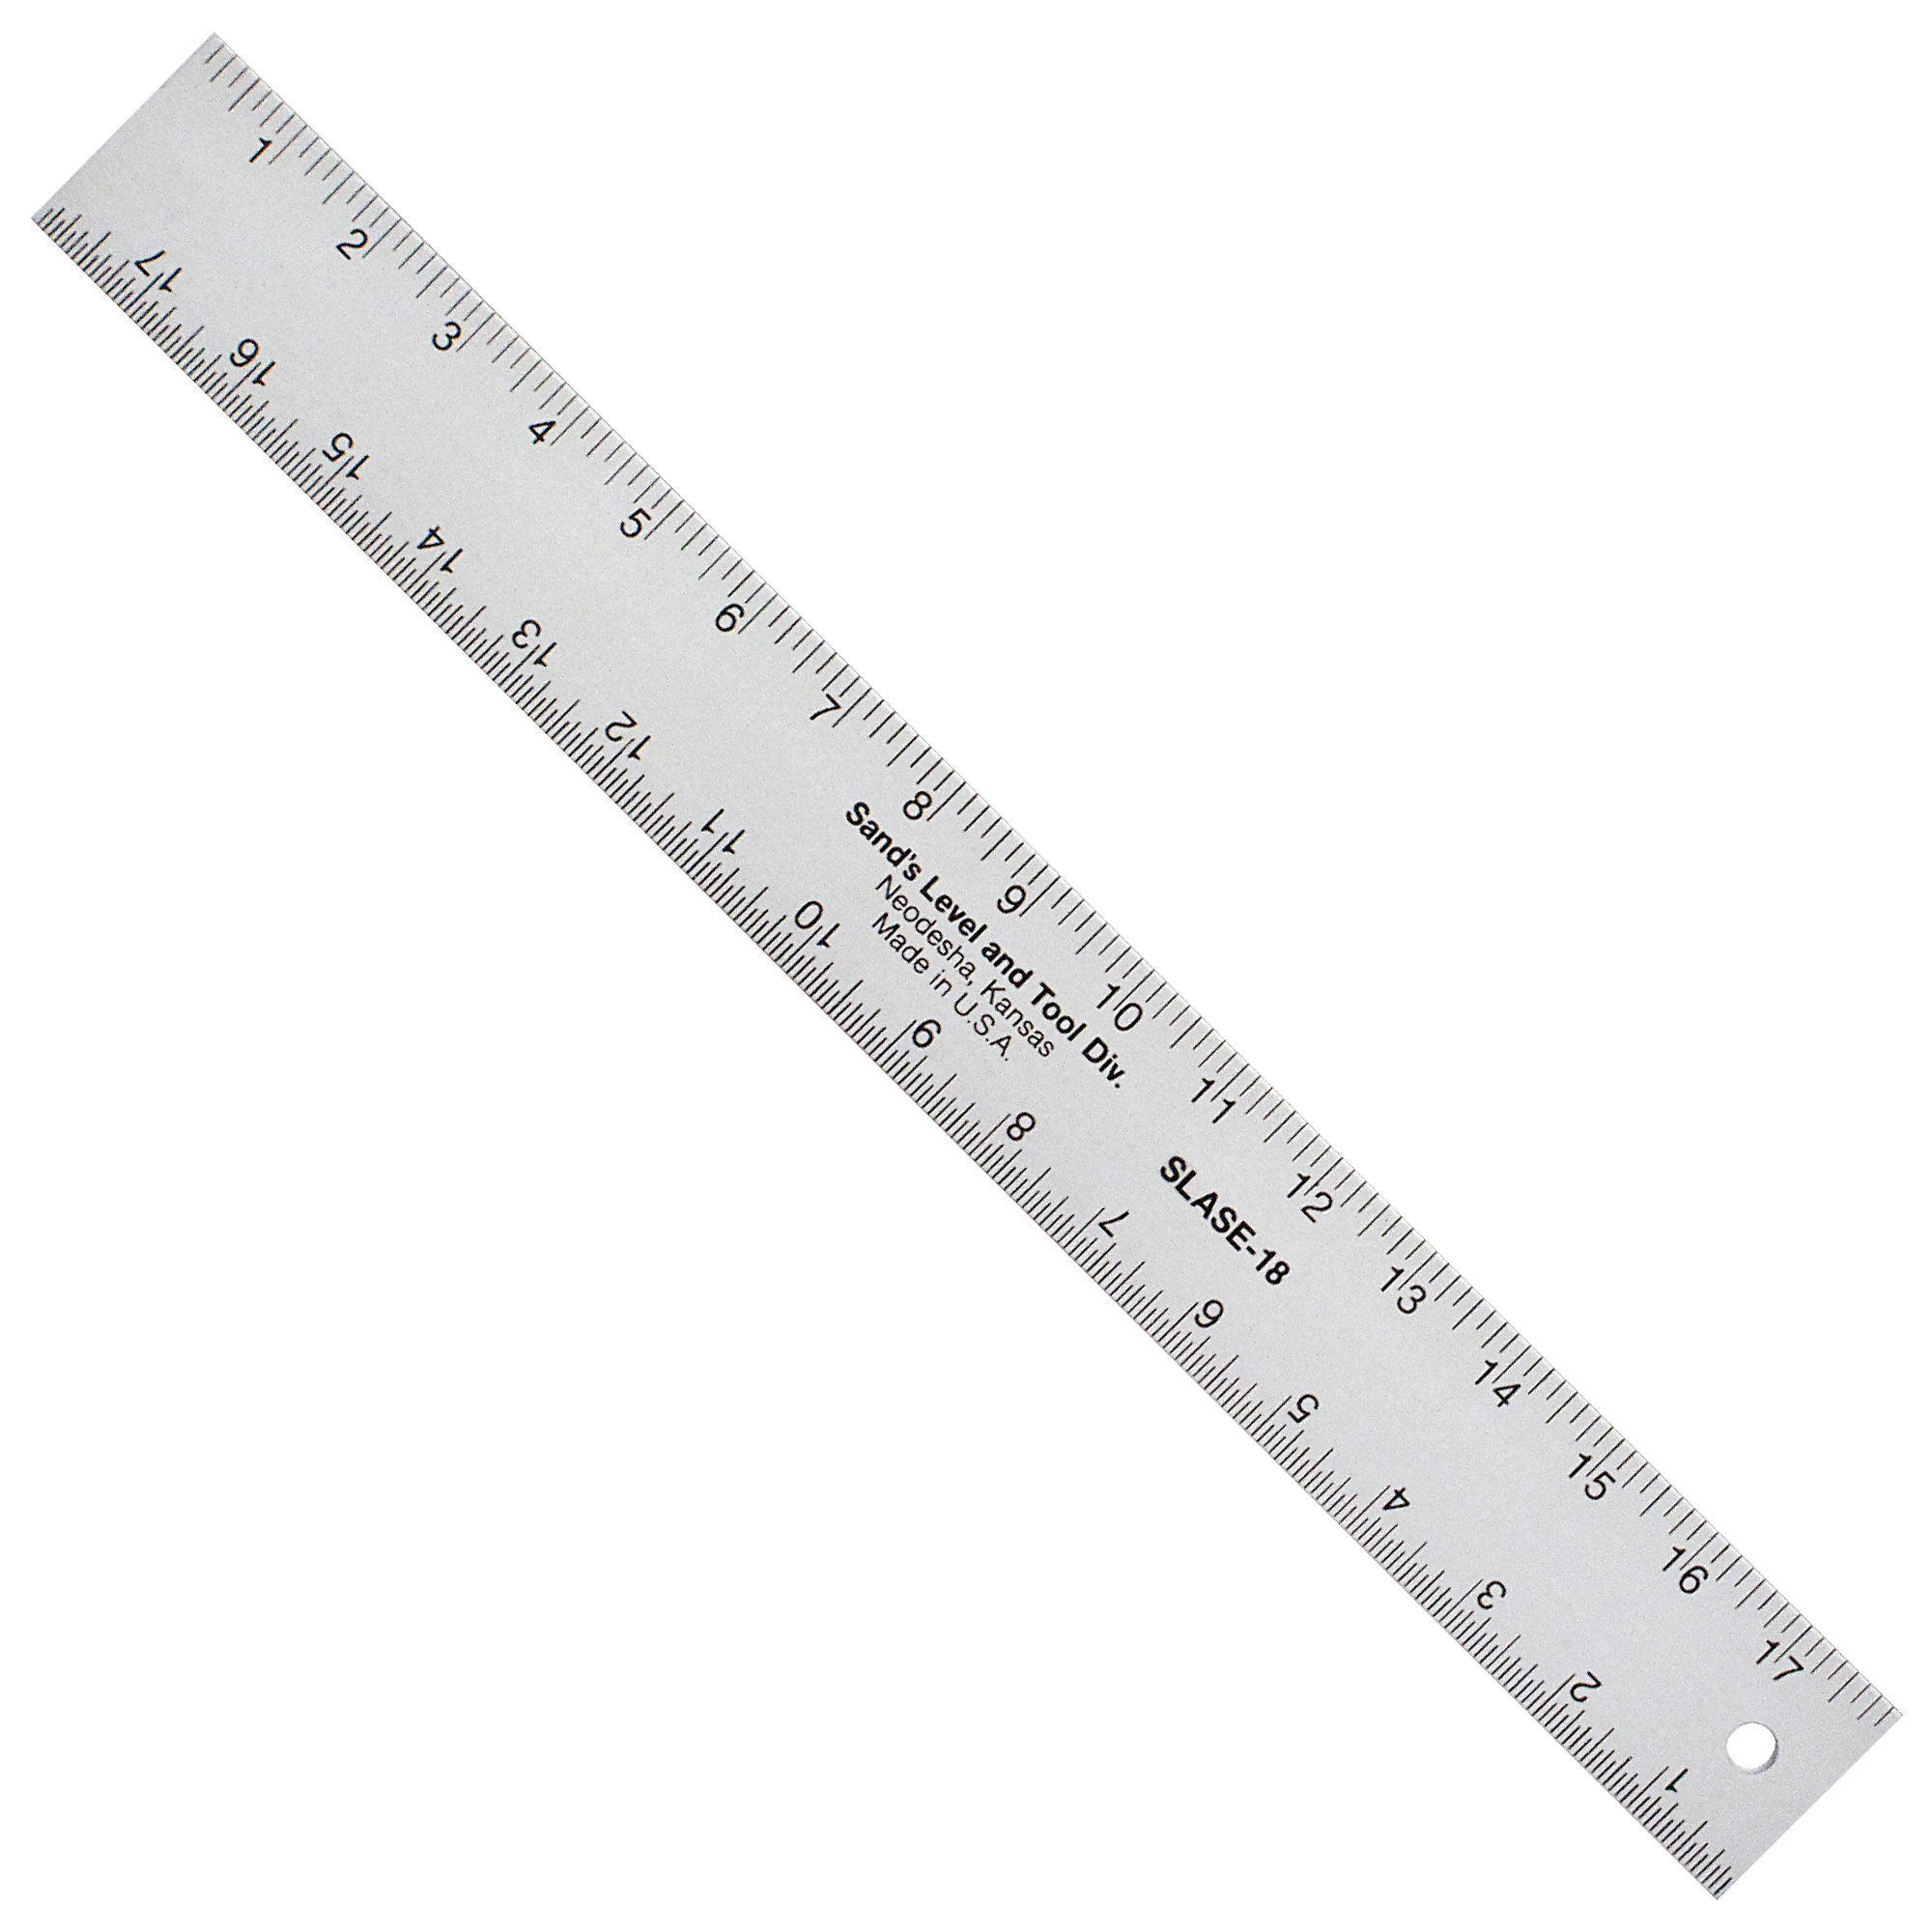
11. Check and True the Medium-Grit Stone: You may decide to use more than one medium grit stone. I mostly use a 1000 grit at this stage, but may use a 2,000 grit stone as well. Whatever stone you use, it must be clean and flat. As described in previous posts, you need to check the flatness of your stones frequently with a stainless steel straightedge. To do this, wash any mud off the stone and pad (don’t rub) the stone’s face dry with a lint-free clean cloth or paper towel. Hold the stone up to a light source, place the straightedge along the stone’s length, across its width, and across diagonals to check for light leaking between stone and straightedge. Make a pencil mark, such as a line or circle, on high spots using a wide carpenter’s pencil. Once you understand if and how the stone’s face is distorted, flatten it using whatever method you prefer, a diamond plate/stone, a specialized truing block, or my preferred method, another stone of the same grit. If you use my method you won’t need to worry about grit contamination and can save time and money by truing two stones at the same time. Six of one, half-dozen of the other.

12. Sharpen on the Medium-Grit Stone(s): Work the blade’s bevel on your medium-grit stone in short strokes using the stone’s entire face from side to side, end to end, and corner to corner, turning the stone end-for-end frequently and being careful to avoid rocking the blade. A bulging bevel is bad news, Bubba. You will know you are done with this stone when all the diagonal scratches from the previous stone, especially at the extreme edge, have been removed. The burr may or may not have evaporated by now, so check with your fingerprints and fingernail. If it still remains, it should be just barely detectable. If it is still big, you need a few more strokes on this stone to shrink it. Using a loupe at this point will be informative. End your work on this stone by creating some new diagonal scratches on the bevel erasing all the previous straight scratches.

You may want to repeat this step using another medium-grit stone, such as 2,000 grit, to save wear on your finishing stones. Either way is fine.

13. Clean the Blade: Wipe and wash the blade (and the honing jig’s wheel, if you are using one) to remove grit and mud. This is especially important at this stage in the sharpening process. Remove the honing jig at this point if you have been using one.

14. Polish on the Finishing Stone: Move onto your finishing stone, usually a 6,000~10,000 grit synthetic stone. This may not or may not be the final finishing stone you choose to use. Be sure it is flat, uncontaminated with grit from rougher stones, and wet. You may want to use your nagura stone to create a slurry from the stone’s corners and edges that will accelerate the polishing process. Be sure to keep the blade’s bevel in close contact with the stone’s surface on both the push and pull strokes. When all the diagonal scratches from the previous stones are gone, you are done with this stone. If there is still a burr left after the medium-grit stone, it should have evaporated by now. If not, the burr was probably too big to begin with and your technique needs refinement.

15. Examine the Bevel: Take a good look at the polished bevel. Are there still scratches left from the previous stone? This may be because you did not remove all the scratches from previous stones. Or it could be because this stone or previous stones in the series were contaminated with dust or rougher grit. If so, you should figure out why and correct the cause before the next sharpening session.

16. Polish the Bevel Using the Final Finishing Stone: This step may not be necessary, depending on the time available, the degree of sharpness required, and your inclinations. This extra polish probably won’t make a significant difference in the cutting tool’s cutting performance so is often abbreviated during a busy work day. If you use a natural finishing stone or a 10,000+ grit finishing stone, this is the time to use it. Simply repeat the process in step 14 above, but be sure to apply light pressure, keep the stone at least a little wet, and sharpen on both the push and pull strokes. The final finishing stone serves a polishing function, and because it’s grit is so fine, it lacks the ability to distort the bevel badly, so you can take longer strokes and polish the blade on both the forward and return strokes.

17. Polish the Ura: With the bevel polished as finely as you intend it to become, polish the ura on the final finishing stone only. Place the last 1/2” of blade’s length on the stone’s edge (the stone MUST be flat) with the cutting edge parallel with the stone’s length, and the rest of the blade hanging off the stone but supported by your right hand. Press down on the bevel with two or three fingers of your left hand. Be sure to apply even pressure with these fingers. These fingers press down only and do not move the blade. The right hand pushes the blade back and forth and onto and off-of the stone. Take light strokes focusing pressure on the extreme cutting edge, but without lifting the blade’s head.

18. Polish the Bevel (Again): After several strokes on the ura, polish the bevel.

19. Alternate Between Ura and Bevel: Go back and forth polishing the ura and bevel, but keep in mind that you want to limit the number of strokes on the ura side (assuming it’s already highly polished as discussed above).

20. Examine the Edge: Check the full length of the cutting edge frequently with your eyes, fingertips and fingernail. The burr should be gone entirely. The edge should be sharp, and absolutely smooth. All the rougher scratches from previous stones should have disappeared. I make a final sharpness test by shaving an ultra-thin slice of skin from a callous on a finger allowing my bones to sense the degree of sharpness. This method is much more accurate than shaving hair off the arm. If you try it please don’t draw blood.

21. Clean, Dry and Oil: After you are done sharpening the blade, rinse it with clean water or sharpening solution (Item 5 in Post 17) and wipe it dry on a clean cloth or paper towel. You may want to strop it lightly on a soft clean cloth (or the palm of your hand, if you are confident in your abilities) to remove hidden water. I recommend applying a spray liquid rust preventative to the blade that displaces moisture, such as CRC Industries’s 3-36 or WD-40. CRC3-36 is paraffin based, floats water out of the blade’s nooks and crannies, and leaves a film that will prevent corrosion long term. However, please note that, while WD-40 is readily available, very convenient and displaces moisture, it evaporates entirely and is therefore not adequate for long-term corrosion protection. If you are going to use the blade right away, a little oil from your oilpot is cheap, convenient, and will do the job just fine.

With practice, and assuming you have not let your stones become too distorted, this entire process from Step 1 should take no more than 10~15 minutes. This assumes the blade is chipped or damaged and you need to correct the bevel or use a honing jig. Honing jigs slow the process down but are convenient when using rough stones and coarse diamond plates.

If the blade is in good shape and just needs normal sharpening, the goal should be 5 minutes from the medium grit stone in step 11. If you can’t do it that quickly right away, don’t rush, just practice and get a little quicker each time: Remember the turtle with the sail: Festina Lente: Slow is smooth; Smooth is fast.

Note: If you are sharpening a new blade, or the ura needs to be trued and/or repaired, work the ura on all the stones used in the steps above, but be careful to limit the number of strokes on the rougher stones to the absolute minimum. Also, instead of keeping just 1/2” of the blade’s length on the stones, move it diagonally in and out towards the blade’s center to prevent the stones from digging grooves into the lands at the right and left of the ura. Use special care during this process.

I recommend covering at least your finishing stone with something when you are not using it to protect it from contaminating dust. I simply wrap mine in a sheet of newspaper. It doesn’t take any time or money. Some stones prefer to read the sports pages, others prefer current affairs or the fashion page. Mine seem to like the funny pages. Just ask them.

Conclusion

I am confident the techniques described in this series of posts will prove useful if sharp tools matter to you. Your tools may not talk much, but if you train yourself in these techniques I promise they will sing their appreciation.

I trust the gentlemen that taught and mentored me would be pleased with the content in this series of articles, although I doubt they have time for reading nowadays. I’ll make the introductions, so let’s ask them when we meet again in the big lumberyard in the sky.

In the next and final article in this series, we will consider how to restore a worn-out ura in a plane (and maybe even a chisel) blade. Is there no end to the excitement? Until then, I have the honor to remain,

YMHOS

If you have questions or would like to learn more about our tools, please click the see the “Pricelist” link here or at the top of the page and use the “Contact Us” form located immediately below.

Please share your insights and comments with everyone in the form located further below labeled “Leave a Reply.” We aren’t evil Google, fascist facebook, or thuggish Twitter and so won’t sell, share, or profitably “misplace” your information. If I lie may Mama Shishi bite my head off.

Leave a comment

Sharpening Part 21 – The Bulging Bevel

This is what a flat bevel looks like. So sweet.

For everybody in their busy lives, you need to invest in sharpening your tools, and you need to invest in longevity.

Ryan Holmes

In the previous article in this series about sharpening tools we looked at why and how to true the ura, the hollow-ground area on Japanese chisel and plane blades. This post will focus on the opposite side of the cutting edge: the bevel. This discussion is relevant to all plane and chisel blades, not just Japanese tools.

Preface

Before we dive in, your humble servant must clarify something.

Beloved Customers and Gentle Readers that have been blessed with the opportunity to learn about tools from accomplished Japanese craftsmen, as was I, or that have figured them out on their own, and consequently find this or other of our articles boring, should remember that the primary purpose of these scribbles is to provide instruction to our Beloved Customers, some of whom have not had similar opportunities.

These Beloved Customers are located in many countries and range in experience from newbies to professional woodworkers, so it would be unkind to dumb the explanation down to make it easy for newbies to follow but useless to professionals. The inverse is also true. The result is more comprehensive explanations than advanced and impatient Beloved Customers sometimes find enjoyable. Life is a bowl of cherries and half of it’s pits. I humbly request your kind indulgence on behalf of those who may benefit from extra words.

Investing in Longevity

The quote above by Mr. Holmes is applicable to the all the principles of sharpening I have described so far in this series. He is a computer dude, not a building contractor, joiner or furniture maker, but it is no coincidence he chose to use handtool terminology: it is encoded in human DNA.

His first point is a self-evident admonition, but what about this “investing in longevity” stuff? By definition, an investment is an expenditure of time, resources and/or effort intended to produce a return greater in value than the expenditure. Then how do we go about investing in the longevity of our chisels and planes, and what return should we expect?

While simply grinding sharp edges on our tools helps with making things from wood, I don’t see it as an investment in tools. Rather, if we train ourselves in professional sharpening techniques, and use those techniques to maintain our tools so they function more efficiently and last longer, we can hope to obtain a quantifiable real-world ROI.

The investment your humble servant encourages you to make, therefore, is not in stuff or lucre but in yourself, in your own skills.

The Pros and Cons of the Bulging Bevel

The “bulging bevel,” as I call it, is a deformation too frequently seen in plane, chisel and knife blades. It is simply a cutting edge bevel that is protruding and convex instead of flat. In most cases a bulging bevel can make it difficult to properly sharpen a blade adequately, so it deserves our attention.

Most bulging bevels are born unintentionally and are harmful, but indeed some are hatched with a purpose in mind. Let’s examine the pros and cons, and throw in some half-baked scientific results just for fun. 

The geometry of the bulging bevel is clearly superior in a few applications such as carving chisels and knives used in a gouging or scooping motion where a rounded bevel provides better control in the cut. Another valid application is chisels used for cutting large and deep mortises where a rounded bevel helps pop out waste easier. Only timber framers cut these kind of mortises, however, and most of them use machines to at least rough out the mortises nowadays.

Hidari no Ichihiro 42mm Oiirenomi. Nothing obese about this sweetheart’s bevel.

Our Beloved Customers are, without exception, extremely intelligent people, so right now some are no doubt saying to themselves: “Self,” (that’s what BCs call themselves when they silently cogitate matters of great weight) does a rotund bevel make my blades sharper or duller?” Let us consider some scientific results.

Experimental Results

When I was a grad student in Japan, a fellow student wrote his thesis on the efficacy in plane blades of the bulging bevel versus the flat bevel in plane blades. He developed experiments, fabricated testing apparatus, and used scientific methodology and microscopic photography yielding indisputable results. We repeated some of his experiments, discussed his research, pored over photographs and fondled shavings late into the evenings at his lab in Building 11 at the University of Tokyo’s Hongo campus as I drank coke and he drank sake. I’m not sure he made it home some evenings.

The conclusion he reached was that, from the viewpoint of the wood, and based on the classic sharpness test of cutting rag typing paper, there is no difference in the cutting performance between flat and bulging bevels, so long as two conditions are met: (1) Both flat bevel and bulging bevel are sharpened to the same angle and same degree of sharpness where they meet the test medium (paper); and (2) The bulge is not so large as to interfere with the cut. The “same degree of sharpness” condition in proviso 1 is critical to this discussion.

Let’s examine the cutting edge closely. It’s effective scope is only the last few microns (μ) or so of the blade’s width at the extreme edge. 1μ = one millionth of a meter. A human hair is 90μ in diameter. We need to precisely repair and polish this narrow strip of steel using our sharpening stones, but remember that working anything beyond this strip contributes nothing to making the blade cut well.

Here’s an important point that can be learned from a careful examination: Given the same number of strokes to the same blade on the same stones over the same amount of time, it is difficult to make a bulging bevel as sharp as a flat bevel, unless one spends the time to use a sharpening machine and jigs as my grad school friend did during his research.

But the most important point, and one I want you to grasp violently with both hands, at least two legs, and all your teeth is that the time expended and amount of stone consumed when sharpening to a set level of sharpness at the last critical microns of a bulging bevel’s cutting edge is huge compared to a flat bevel. Sharpening using machines and/or honing jigs takes even longer.

In addition to time and cost, another factor we must consider is certainty, because if we are going to invest the time and stones to sharpen a tool, we need to be sure it will consistently achieve approximately the same level of sharpness every time. Unfortunately, the sharpness of the bulging bevel is often uncertain because, instead of guiding the blade to ensure consistent contact between steel and stone at the critical location on the cutting edge, the shape of the bulging bevel causes us to waste a significant number of strokes and time on polishing an irrelevant mound of metal that does nothing to make the blade sharper, but is simply in the way. Not convinced yet? 

Consider the undeniable fact that, despite your best efforts, this miserable lump causes the blade to rock around on the stone’s surface like a boat over ocean swells, with the result that, given a fixed number of strokes, a high percentage of those strokes end up polishing the bulge instead of the cutting edge. This is important because, once again, the last few microns of the blade is the only part that actually does any cutting, not the bulge. 

Please don’t misunderstand. I’m not saying that you can’t create a fiendishly sharp edge on a blade with an obese bevel. I’m also not saying that, within reasonable parameters, a convex bevel cuts less efficiently or dulls quicker than the same blade with a flat bevel. It absolutely doesn’t, as my fellow student’s research showed. Allow me to restate and summarize the facts so there is no confusion.

  1. It takes longer to create a given level of sharpness at the extreme cutting edge of a bulging bevel than a flat bevel, all else equal;
  2. It consumes more sharpening stone to achieve a given level of sharpness at the extreme cutting edge of a bulging bevel compared to a flat bevel, all else equal; and  
  3. There is greater uncertainty about the actual degree of sharpness achieved at the blade’s extreme cutting edge when sharpening a bulging bevel by hand compared to a flat bevel, all else equal. 

If you doubt these statements, you must arrive at the truth yourself.

Buy or borrow a quality loupe or microscope with enough magnification to detect the scratches left by your usual finishing stone. Start with a dull blade with a truly flat bevel, sharpen it freehand using a pre-determined number of strokes, and observe the scratches at the last few microns of the cutting edge with your microscope. Then test the blade’s sharpness with your skin or fingernail. Next, repeat this test with a dull blade with a rounded bevel using the exact same sharpening tools and procedures and the exact same number of strokes. No deviations. Once again, observe the scratches and test the sharpness. My grad school friend and I performed this side-by-side experiment at the University of Tokyo several times, with consistent results. Actually, it was a bet and I won. He had to buy the drinks and snacks for a month.

The Causes of Bevel Obesity

Besides pernicious pixies, the most common cause of bevel bulge is simple carelessness, which Beloved Customer can take steps to avoid once you realize the causes.

It is human tendency to try to stabilize the blade’s bevel on the stone while sharpening by applying more pressure on the rear half of the bevel, resulting in the rear half of the bevel (which is all soft jigane in the case of Japanese plane blades, and mostly soft jigane in the case of chisels) being abraded quicker than the front half (which contains the harder steel lamination), causing the bevel angle to gradually decrease or even become rounded. Even the best craftsmen make this mistake sometimes.

To avoid this tendency, train yourself to focus pressure on the front half of the bevel closest to the cutting edge. At first, you may overbalance and dig the cutting edge into the stone a few times, but with practice and attention, it will become second nature. It is almost a meditative process. Every professional woodworker worth his salt must learn this skill.

There is nothing wrong with making mistakes when learning a muscle memory skill like freehand sharpening, but too many people can’t be bothered to learn, and then become frustrated when their skills don’t improve immediately. In the end, they become defensive, twist themselves into knots defending their inadequate techniques, and eventually adopt the self-justifying position that sharpness is overrated. Patience, grasshopper.

BTW, don’t forget to use your handy dandy brass bevel gauge to both check the bevel angle while sharpening and to keep those piratical pixies away.

Hidari no Ichihiro 30mm Atsunomi. What ignorant, smelly savage would grind multiple bevels on this work of art?

Another cause of the tumescent bevel is the use of secondary bevels or micro-bevels. We’ll look at these aberrations in the next article in this series.

To make multiple bevels work one almost must use a sharpening or honing jig of some sort. Many allow sharpening jigs to become a substitute for real sharpening skills they didn’t bother to learn. Such jigs can become, in effect, training wheels those who rely on them never grow out of. How amateurish.

Conclusion

I encourage you to “invest in longevity” with regards to your tools in three ways:

  1. First setup your planes and chisels properly so they will provide you with long, reliable and efficient service. Setting up chisels improves not only their longevity but in many cases their performance too, strange though it may seem. I will post articles about setting up and maintaining Japanese planes in the future.
  2. Second, true the ura of your plane and chisel blades efficiently without reducing their useful lifespan needlessly, as described in previous posts; and
  3. Third, invest in yourself by developing and honing the hand skills necessary to sharpen your blades quickly and efficiently while consuming only the absolute minimum of valuable time, steel and stone.
Image result for image of mandalorian helmet

Please master the ancient and bedrock-basic skill of freehand sharpening. All it takes is an understanding of correct principles, followed by concentration and practice; The rest will follow. I promise. “This is the way.”

We will look at other causes of bevel obesity in the next post in this series on science over barbarism.

YMHOS

If you have questions or would like to learn more about our tools, please click the “Pricelist” link here or at the top of the page and use the “Contact Us” form located immediately below.

Please share your insights and comments with everyone in the form located further below labeled “Leave a Reply.” We aren’t evil Google, fascist facebook, or thuggish Twitter and so won’t sell, share, or profitably “misplace” your information. If I lie may my eyeballs drip orange slime.

Leave a comment

Other Relevant Articles

The Challenges of Professional-grade Japanese Chisels

Sharpening Part 18 – The Nagura Stone

A Tsushima Black Nagura stone 55x55x55mm

In the previous article in this series your unworthy servant listed some of the tools and accouterments necessary for sharpening Japanese tools using waterstones. In this article we will examine one especially useful stone mentioned previously: the Nagura. I know, it sounds like the name of some evil thing that crawled out of a mountain cave in Angmar in Middle Earth, but if you don’t have this little stone, you should get one.

The Nagura Stone

Nagura stones have been used in Japan for millennia, but they are not unique to Japan. For instance, the Coticule stones of Northern Europe have been used with nagura-equivalent stones since before Roman times. And I would not be surprised if the same tradition existed elsewhere too, they are so useful.

Mikawa Nagura Stone

There are several varieties of Nagura stones mined in Japan, the two most popular being the grey/black Tsushima stone pictured above and the softer white Mikawa stone pictured below. I use a soft white Mikawa Nagura stone for my straight razor.

The black Tsushima variety is cut from sedimentary stone on the ocean floor near Tsushima in Nagasaki Prefecture, located midway between Japan’s Kyushu island and South Korea. I believe it to be the best for general usage so I will discuss this stone in particular.

Like all Japanese natural stones, Tsushima Black Nagura are mined from sedimentary deposits created by airborne volcanic ash being sifted by distance and wind and filtered by waves and tides by the time they reach the ocean floor. But they have not been subjected to the metamorphic weight and heat that makes harder stones, and are relatively soft and permeable. They also tend to crack in the same plane they were laid down in, especially if subjected to wet/dry and/ or freeze/ thaw cycles, so special measures are necessary to protect them.

The Job of the Nagura Stone

The Nagura stone is typically used to perform five tasks.

1. Cleaning Finishing Stones: Finishing stones always become contaminated with pixie dust and grit from rougher stones. A 10,000 grit stone with 1,000 grit particles mixed in is much less than 10,000 grit effective. If you think a stone is contaminated, wash it well with a scrub brush and clean water then work the surface with a clean Nagura stone to loosen and float up the contaminate particles, then wash off the slurry. The stone will be clean.

2. Removing Clogging: Similar to 1 above, the Nagura stone is effective at unclogging dried slurry and metal swarth from the sharpening stone’s surface helping it get back to work sooner.

3. Truing Stone Surfaces: Finishing Stones need to be trued occasionally, usually the corners and edges. Use the Nagura periodically to knock these high spots down. The resulting slurry can be used for your normal sharpening process without it all going to waste. This is wisdom.

4. Reducing Startup Time: Time is money. Waterstones abrade most efficiently when they have a slurry worked up, but it can take time to get decent slurry started on some stones, especially hard ones, and with some blades, especially those with soft jigane. Use the Nagura to quickly bring up this necessary slurry saving time and money. If you focus on the corners and perimeter of your stones, which tend to be high anyway, it will contribute to truing the stone as mentioned in 2 above.

5. Reducing the Average Particle Size in the Slurry: Nagura grit is quite fine. You can add Nagura slurry to a stone (by rubbing the stone to create slurry at corners and edges, BTW) to reduce the average grit size of the slurry making a stone create finer scratches and a better polish on your blades. For instance, adding Nagura slurry to a 8,000 grit stone makes it function more like a 9,000-10,000 grit natural stone without the bulk and weight of an additional full-size stone.

Using the Nagura Stone

Nagura stones are just as useful when sharpening with synthetic sharpening stones as they are with natural stones. In fact, they may be even more useful with synthetic stones since they tend to be harder and synthetic stone slurry containing nagura particles more closely approximates the performance of natural stones.

Nagura stones are easy to use. Simply wet the large stone and rub the small stone on its surface. You may need to add additional drops of clean water while doing this. The goal is to wear down the high spots on the large stone while at the same time producing a slurry mixture from both stones to use when sharpening blades.

The key is to pay attention, use your handy dandy stainless steel ruler to identify the high spots, maybe mark them with a pencil, and use the nagura on those areas first. Don’t be a ninny and rub the nagura all over the sharpening stone’s face willy nilly like you’re washing your pet goat. Make a plan. Work the plan. Develop good habits and speed will follow.

If the large stone is already perfectly flat, and you need to produce a starting slurry, work the ends and corners of the large stone with the nagura in anticipation of those areas becoming high in the near future. That’s a good boy.

Protecting the Tsushima Nagura Stone

Nagura stones are fragile. To avoid water penetration between the sedimentary layers and the cracks that may result, it is wise to use the side of the stone that was in a horizontal plane when it was formed. It is also wisdom to use only one surface of the stone and to coat the stone’s other 5 sides with paint to prevent water infiltration and cracking, and to keep skin oils from penetrating. Traditionally, natural urushi lacquer made from an irritating tree sap has been used for this purpose in Japan, but any high-solids urethane will do the job.

The Nagura stone is a subtle tool. As your sharpening skills improve the value of this tool will become apparent.

In the next article in this depraved series about sex, drugs and goat washing, we will discuss ways to maintain sharpening stones. Some people will be miffed. Others will be thrilled. Goats will be indifferent. What about you?

YMHOS

If you have questions or would like to learn more about our tools, please click the “Pricelist” link here or at the top of the page and use the “Contact Us” form located immediately below.

Please share your insights and comments with everyone in the form located further below labeled “Leave a Reply.” We aren’t evil Google, fascist facebook, or thuggish Twitter and so won’t sell, share, or profitably “misplace” your information. If I lie may all my sharpening stones sprout clumps of sand.

Leave a comment

Sharpening Part 17 – Gear

Do what you can, with what you have, where you are.

Theodore Roosevelt

Sharpening can be a stuff-intensive process, and since portability is always a factor in your humble servant’s case, I strive to reduce the number of accouterments to the barest minimum. The following is a list of some gear, besides sharpening stones, that I am confident will prove useful whether in Beloved Customer’s workshop or the jobsite.

I will first list the gear needed for general sharpening either in the workshop or the field. At the end of this article that I have listed a minimal set of gear for use specifically in the field where space and weight might make it inconvenient to carry the heavier/bulkier general set of sharpening gear.

A General Set of Sharpening Gear

The following is a list of tools and equipment I think are indispensable for sharpening Japanese woodworking tools in general and in many, but not all, circumstances. I have not included some tools that may be necessary for doing “uradashi,” i.e. “tapping out” the hollow-ground urasuki of Japanese plane blades. So here we go.

  1. Sharpening Stones
  2. Stone Base or Holder: A wooden base with a wedge to secure stones is the old standby for supporting sharpening stones above the benchtop or ground, but repeated wetting and drying and the resulting expansion and contraction may compromise a wooden base over time. For my synthetic stones I have come to prefer the commercial bases with twin metal rods and rubber feet. They are unromantic, but are durable, stable, non-slip, grip the stone tightly without breaking it, and work well anywhere. If you decide to make and use a wooden base, I highly recommend Ipe wood because it is stable, unaffected by water, won’t rot, and bugs hate it.
Washing powder storage square plastic buckets in 2L 5L 8L 10L 15L 18L 20L

2. Soaking bucket for stones: A medium size plastic or steel mop bucket (not the heavy industrial unit with rollers) is best for soaking stones because they are durable, and their more or less square/rectangular shape is superior to round buckets for leaning stones on end against the inside walls. You don’t want to stack the stones on top of each other if you can avoid it. Any durable bucket that doesn’t leak will work, but a tightly-fitting lid is a big advantage. You will need to soak all but your diamond plate and finishing stones in this bucket before each use. 

Related image

I soak my synthetic stones 365 days a year. I close the lid to prevent evaporation and to keep out mosquitoes and woke zombies, and add either washing soda, borax or a few drops of Simple Green ProD5 concentrate to the water to prevent bugs and algae from growing when I won’t be using the stones for a while. Simple Green is a better bug/algae killer, but Borax has the advantage of making the water slightly alkali which helps prevent rust in my blades during sharpening.

Some stones use a magnesium-based binder that can dissolve and weaken them if left soaking for long periods of time. Please refer to the manufacturer’s instructions.

3. Glass Plate: 9mm~12mm thick piece of float glass. This is used to true the faces of waterstones when they become distorted through use. The piece I use is 60mm x 30mm x 10mm. This plate can be used for many other purposes including checking the fettle of your plane’s soles. I leave this in my workshop. We will discuss how to use this in future posts in this series, God willing and the creek don’t rise.

4. Working Surface: If working outside, a Japanese craftsman will place his stone holder directly on the ground or concrete slab. A craftsman that works inside a shop will often have a wooden or plastic box with a board spanning the narrowest dimension forming a bridge. The stone rests on this bridge, often with a wet towel between board and stone to prevent slipping. This box, called a pond, catches water and mud dripping from the stones. The ideal situation is a board spanning a sink with a faucet of running water. When away from the workshop, I prefer to place a piece of fiberglass-reinforced rubber (EPDM) roofing membrane on a truck’s tailgate or stack of boards or gypboard at a jobsite. I can roll-up this lightweight, tough, and absolutely waterproof mat and stuff it into my toolbox for easy transport. In my workshop, I use a large plastic cutting mat placed on my workbench, but any waterproof non-slip surface will work. No need to get fancy. My stones and sharpening gear are stored under my workbench close at hand. 

5. Water Source: While sharpening, you will frequently need water to wet your stones and rinse blades. If you work at a sink, use the faucet. If you work outside, a garden hose works great. Some people, mostly knife sharpeners who seldom use stones finer than medium grit, will scoop water from their pond or bucket to wet their stones. However, since stone slurry drips into the pond, this water will always contaminate stones with the grit from rougher stones, making it difficult to remove all the scratches left by the previous stone. To avoid this contamination, always use clean water for wetting and rinsing. 

Some people prefer a spray bottle to add water, but spray bottles wet things I prefer to keep dry, so a better choice, in my humble opinion, is a plastic bottle such as a dishwashing soap bottle or a plastic lab wash bottle with a bent tube coming out the top. Almost any plastic squeeze bottle will work.

Tap water contains chlorine in all but backward countries, and chlorine accumulates and accelerates rust, so I use distilled water in my wash bottle, and add washing soda or borax to adjust the water’s PH, a technique I learned from sword sharpeners. 

Some people add just a bit of liquid lye to their water to adjust the PH. This chemical can be purchased from industrial cleaning supply companies. Too much will damage your skin, so be careful. Also good for keeping Iron Pixies in the shadows.

6. Sharpening Station and/or Sharpening Pond: I don’t use a sharpening pond, and don’t believe them to be essential, but several practical options are illustrated below.

余暇のある時や休日だけに出現するものであるにせよ、専用の研ぎ場があるというのは工作をするものにとって幸せなことです。自分なりに工夫を重ねながら研究を深めてゆくのは、何よりも楽しみを感じさせてくれるでしょう。
A bridge placed over a sink forms the ideal sharpening station. Professional workshops frequently use this classic arrangement. Flush the drain well. You may need to remove the sink’s P trap and clean sharpening stone mud out of it annually.
Plastic boxes placed inside a wooden box make a portable sharpening pond and stone storage box. There are dozens of variations on this theme possible.
Related image
Perhaps the best solution in my experience (short of a dedicated sink) is a plastic box to catch water, with another plastic box nested inside containing sharpening accoutrements such as a wash bottle, brush, abrasive powders, an oiler, and nagura stone. This equipment, along with the sharpening stones, 2 bases and stainless steel straightedge pictured, can be stored inside the box and the lid closed for ease of transport and to keep out pixie dust. This is an inexpensive and extremely practical solution, but be sure to use a quality box made of high-impact plastic.
Image result for straightedge

7. Stainless steel straightedge: Use this to check stones for flatness and wind, and cutting edges for straightness. Don’t use a plain steel one unless you want to give the iron pixies skulking under your workbench great joy. The thinner the better. The thick blades used in combo squares are difficult to use in less than ideal light

8. Wiping materials: You will need something to clean and dry your blades during sharpening sessions. Rags work well for wiping and drying blades, and can be washed and reused, but be careful to avoid cross-contamination. Paper towels are most effective and convenient in my experience, but they cost money and make garbage. Decisions, decisions…

The classic Japanese “Baby Turtle” brush with palm-fibre bristles.

9. Scrub brush: A clean stone is a happy stone, as are bases, buckets and glass plates, all of which have grooves and scratches and holes where grit can hide. Scrub brushes are great for digging out this contaminating grit. Palm fiber brushes are ideal because the bristles are fine and grit does not get embedded into the bristles as much as plastic brushes.

The Lie-Nielson Honing Guide. An excellent if expensive tool.

10. Honing Guide: This tool is optional. I hesitate to recommend these jigs because they can easily become a crutch preventing Beloved Customer from becoming proficient at freehand sharpening. However, these types of jigs make it much easier and quicker to shape blades to the desired angle on rough stones, especially when correcting a double-bevel or bulging bevel to a more useful single, flat bevel. Eclipse-style honing guides work well. The die-cast versions are inexpensive. Lie-Nielson makes a terribly expensive version machined from stainless steel that I am fond of. Jigs won’t work for all blades, but it is worth having one.

tzushimanagura8_4
A Tsushima Nagura Stone

11. Nagura Stone: More details will be included in next post in this series.

12. Bevel Angle Gauge: I’ve mentioned this tool in previous articles in this series, but list it here because it is critical. Use it to check the bevel angles of your chisels and planes during every sharpening session to ensure they don’t become too low weakening your cutting edges and inviting premature chipping. It can be made of any material that resists corrosion such as plastic, aluminum, stainless steel, or brass, my favorite because brass repels pernicious pixies.

Richard Kell bevel gauge
A compact and effective brass bevel angle gauge by Richard Kell

Minimal Set of Sharpening Gear

Sometimes, especially when working at remote jobsites, weight and/or space may impose physical limits on the tools we can carry with us. The following is a list of the minimal set of sharpening tools I bring in these situations.

1. Sharpening Stones

2. Stone Base: At the jobsite the stability this tool provides becomes more critical than ever, but if an ultra-light set of tools is needed, then it can be eliminated by placing the stone directly on a rubber sheet.

3. Soaking Container: There are many potential solutions for soaking stones in a minimalist or ultra-light situation, but I will describe just a few here. If clean water is available at the jobsite (water coming from a newly-installed pre-flush plumbing system may not be clean, and immediately post-flush it may contain lots of chlorine used to sterilize the pipes and fittings), then the minimalist solution I employ is to use a dry plastic bucket to carry tools, including sharpening gear, to and from the jobsite. I then add water to one bucket in the morning. Another option is to scrounge a joint compound bucket or paint bucket and leave it at the jobsite. But unless I have a gang box or other trustworthy tool lockup available at the jobsite, I still may need to transport at least one wet sharpening stone to and from the jobsite each day. The ultra-light solution I sometimes employ is to carry my waterstone(s) in a durable plastic container with a watertight lid, such as the thinner (6cm) rectangular containers by Tupperware. Water can be added at the jobsite to keep the stone(s) soaked and ready to rock-n-roll. And with the lid closed, dirt and dust can’t get in. An even lighter option is a heavy plastic bag. I place the stone(s) in the bag and carry it in my tool bag. At the jobsite, I can add water and close the bag with a thick rubber band to soak the stone(s). But be forewarned that these bags will not protect the stones, and the stones will make holes in the bag at the worst possible time.

4. Working Surface: I use the fiberglass-reinforced rubber roofing membrane described above. Tough and absolutely waterproof, it also works great for sitting on and even spreading out one’s lunch at the jobsite when more refined facilities and servants are unavailable (ツ).

5. Water Source: Clean water is necessary even in the field to wet the stones and to wash mud off tools. To save space, I use a small plastic squeeze bottle with a tightly closing lid that originally contained ketchup. If clean water is available at the jobsite, I carry it in my toolbag empty.

6. Stainless Steel Straightedge: See Item 7 above. I use a thin, flexible, lightweight one in the field.

7. Wiping Materials: A clean cotton rag and a some folded paper towels work well.

8. Scrub Brush: I always bring my “Baby Turtle” scrub brush. It’s lighter in weight than a plastic brush and comes in handy for tasks beyond sharpening too.

9. Nagura Stone: Just in case I need to get an extra-fine finish.

10. Brass Bevel Angle Gauge (on a red string around my neck)

The selection of stones I use at the jobsite will depend on the work planned for that particular day, but the minimal set is a 400 grit diamond plate/stone, a 1,000 grit synthetic waterstone, and a 6,000 or 8,000 grit synthetic finishing stone. If I anticipate a lot of sharpening, and if weight is not critical, I will bring two 1,000 grit stones to ensure I have 4 flat sharpening surfaces ready to rock-n-roll first thing thereby reducing the need to spend time flattening stones at work. I can also use them to flatten each other. If I need to do some fine finish planing, such as when doing door modifications/installations, I will bring a 10,000 grit synthetic waterstone. And of course I always carry a Tsushima Black Nagura stone.

In the next post in this romantic series of adventures in sharpening will focus on the important Nagura stone. Stay tuned for muscled thews and busted bodices!

YMHOS

If you have questions or would like to learn more about our tools, please click the “Pricelist” link here or at the top of the page and use the “Contact Us” form located immediately below.

Please share your insights and comments with everyone in the form located further below labeled “Leave a Reply.” We aren’t evil Google, fascist Facebook, or thuggish Twitter and so won’t sell, share, or profitably “misplace” your information. If I lie may the fleas of a thousand camels infest my armpits.

Leave a comment

Sharpening Part 16 – Pixie Dust

Related image

Ashes to ashes, dust to dust, if the women don’t get you then the whiskey must.

Carl Sandburg

In the previous article in this series of articles about sharpening the blades of Japanese woodworking tools we examined sharpening stones, the minimum set your humble servant recommends, those I typically use, and the most important stone in any set.

In this edition we will shift our focus to things that can go wrong when sharpening, including supernatural influences.

Dust Contamination

As I mentioned in the previous post in this series I almost never take a 10,000+ grit synthetic finishing stone or natural finishing stone to jobsites. This decision is based on personal observation under practical conditions: Jobsites are rough and dirty places, and stones are fragile. 

Iron Pixies are rabid fans of Lingerie Football. Don’t hang posters or watch games in your workshop if you want to avoid crowds of the tiny beer-guzzling fiends.

Even if Murphy is drunk and the resident Iron Pixies are distracted watching Lingerie Football on the boob tube (pun intended), airborne dust at the jobsite will always instantly degrade an expensive 12,000 grit rated stone to an effective 4,000 grit or less, making a fragile, expensive, ultra fine-grit stone pointless. How clean is your workplace? Something to think about. Seriously.

This is not just a theory that sprouted from my overactive imagination like a dandelion on a dung pile, but is scientifically verifiable. Give it try.

Get out your microscope or high-power loupe. Place a clean glass slide near where you will be sharpening. 120 minutes later, examine the slide and count the dust specks. How did they get there? Dust is in the air quite naturally, but vehicular and foot traffic kick up lots more.

Most of those dust specs are larger and some are just as hard as the grit that makes up your finishing stone. Imagine what happens to your blade when those pieces of relatively large, hard grit get mixed into the stone slurry, or become embedded into the stone’s surface. Not a pleasant thought.

Related image

Dust contamination even has historical precedence. Japanese sword sharpeners traditionally do their best work during the rainy season when there is less dust in the air to contaminate their stones. 

Professionals that polish pianos, stone, glass and jewels are also sticklers for eliminating dust contamination.

Just design and build a few cleanrooms for picky customers with SEMs (scanning electron microscopes), or with lens coating equipment, or who make pharmaceuticals and you will get an education about dust and the problems it creates quickly.

What dust do we find at construction job sites or workshops? First, assuming we are working at a building project, there are exterior sources of dust. Unlike a house, the doors and windows are usually open to gain maximum circulation, even when dusty landscaping operations are ongoing and trucks carrying materials and garbage are running everywhere kicking up clouds of dust.

Second, unless you have the jobsite entirely to yourself, there are usually other trades inside the building grinding, sanding, cutting and walking around kicking dust up into the air too. The most pernicious dust on the jobsite is drywall and joint compound. This white fluffy dust appears harmless, but it contains tiny granite silica particles harder than steel, and even bits of glass fiber, that float around and settle on everything. They are a health hazard that has put more than one person in the hospital with respiratory problems. They will contaminate your sharpening stones sure as eggses is eggses.

Sandpaper, sanding discs, grinders and angle grinders in operation also spray millions of tiny hard particles everywhere, many of which float in the air and can travel some distance before settling, especially inside an enclosed building or workshop.

Does your business or home workshop have a large door facing a public road with cars and trucks going back and forth near it? Do people with muddy boots come in and out? Are dirty pallets with piles of dirt hidden on the bottom boards offloaded inside? Do you use sanders or grinders in your workshop?

If you are sharpening outside, or at a dusty jobsite, or inside a dusty workshop, and especially if you regularly use sanders and grinders there, I recommend the following procedures before you use fine-grit stones:

  1. Try to locate your sharpening area away from foot traffic, grinding and sanding operations, and dusty areas;
  2. Sweep and vacuum the surrounding floors well, since it is the movement of feet that billows settled dust back up into the air in indoor spaces, and wait at least 15 minutes after sweeping for the dust to settle before sharpening;
  3. Wet the surrounding ground or floor with water to keep the dust down (this makes a big difference);
  4. Wrap a clean cloth or a sheet of clean newspaper around your fine stone when you are not using it for more than a couple of minutes to prevent airborne dust from settling on it;
  5. Scrub your fine stone under running water with dishwashing soap (neutral PH) and a clean natural-bristle brush before each use to remove dust and embedded grit.
Richard Kell bevel gauge
A compact and effective brass bevel angle gauge & talisman by Richard Kell

And for heaven sake, even if you can’t take your benchdogs with you everywhere, at least have a brass bevel angle gauge in your toolkit, and use it every time you sharpen because, not only will it help you do a better job of sharpening but it will keep the pernicious pixies at bay. In fact, whenever I undertake a serious sharpening job I hang my Richard Kell Solid Brass Bevel Angle Gauge around my neck from a red string as a talisman; brass because it contains no iron for pixies to covet, and the zinc & copper alloy that is brass tastes bad and gives them terrible wind; and a red string because all tribes of the fae strongly dislike that color.

The following are few references regarding silica and construction dust: Silica-Safe.org Center for Disease Control. Makes you want to wear a respirator in bed.

YMHOS

The legal team hard at work digging up dirt. Everyone of the buggers is a Harvard graduate, of course.

If you have questions or would like to learn more about our tools, please click the “Pricelist” link here or at the top of the page and use the “Contact Us” form located immediately below.

Please share your insights and comments with everyone in the form located further below labeled “Leave a Reply.” We aren’t evil Google, fascist facebook, or thuggish Twitter and so won’t sell, share, or profitably “misplace” your information. If I lie may the fleas of a thousand camels infest my armpits.

Leave a comment

Sharpening Part 15 – The Most Important Stone

Orders are nobody can see the Great Oz! Not nobody, not nohow! 

Gatekeeper, Emerald City

Many people high-center on this question: “What is the best way to sharpen my tools?”

Your humble, unworthy servant was hesitant to publish this series of articles about sharpening because, beginning with this one, I must write about tools and techniques that are blasphemous to many people’s sharpening religion. Some of those people will doubtless become emotional. As Benny Franklin once famously said: “Ça ira, ça ira.”

The objective of this article is to help our Beloved Customers properly maintain, sharpen and use the blades they purchase from us. But it isn’t a sharpening tutorial; that will be a future post.

We will examine the process of sharpening woodworking tools using mostly waterstones. We will touch on the motivations, goals and priorities related to sharpening you should consider, the minimum set of sharpening stones your humble servant recommends, and my suggestion for the most important stone in your arsenal, one you must be proficient in using.

Motivations

You might have noticed from my previous posts that I like to understand motivations. Am I cynical? Perhaps, but where there are smoke and lights in evidence and money to be made, there is almost always someone behind the curtains spinning dials and pumping pedals. Oooh, pretty lights!

Anyone who does anything has a motive for doing it, and knowing that motive can help us evaluate the validity, and sometimes even the honesty, of what they do, say and write on a particular subject. How can we best ascertain the motivations of those advocating various sharpening methods and related accoutrements? Here are some simple questions you might want to ask: Are the promotions or promoters touting sharpening stones or other stuff they might profit from? Are they selling books on sharpening? Do they teach classes on sharpening? Do they have “sponsors” or “patrons” that supply them, at no cost or with large discounts, stones, diamond paste, sandpaper, sharpening machinery, and/or honing contraptions in exchange for promoting those goods? Are they “influencers” (yes, that’s a real vocation in the NoobTube World) who are compensated for clicks? Do they publish reviews on products they receive for free? You see the pattern.

Regardless of their business model or motivations, many people give good advice, but many are shills, while some are pretenders, and their advice will be colored accordingly. Caveat emptor, Skippy.

And then there is the most obvious motivation. After all, it doesn’t cost even $20 to make a Mechaultrasuperfine Ninja-purple Gold-dust-infused Musashi Walk-on-Waterstone that retails for $650. And have you calculated the long-term equivalent cost of diamond paste and abrasive films? Somebody’s making serious cash.

Just once I’d like to cross the road without having my motives questioned…

Whatever stones you select, I urge you to find a good balance of performance vs cost vs time vs sustainability, with sustainability referring to both the amount of landfill-stuffing the selected process creates as well as its long-term effect for good or ill on your blades. This 4-variable calculus depends not only on the characteristics of the stones and blades you use, but on your sharpening skills too, so it may take years to find the inflection points if you take a scientific approach. The quadratic formula does not yield useful results, sorry to say.

At one time or another I have tried and tested many popular sharpening “systems” including those that rely on jigs, machinery, sandpaper, plastic films, stick, liquid, paste, and powdered abrasives, buffers, strops and even superflat ceramic plates. I enjoy the adventure of learning new things. They all get the job done, and all have serious merits, but to reduce the time and brain damage involved in this calculus, a wise man will learn from no-nonsense professionals, people who have been down the road before and actually use tools to feed their families, and who have no conflict of interest, be it stones, books, or clicks. That’s what I finally did, long before there was a publicly-accessible internet, and I think it worked out well. But I need to issue a disclaimer before we go further.

Disclaimer

Here it is in red letters.

I say what I believe and believe what I say, even if it offends the “gurus” of sharpening. I buy their books and DVDs, watch their YouTube videos, and try their sharpening techniques and even the “tricks” they recommend, so I like to think I am not a “frog in a well,” as the Japanese saying goes. If I don’t know something, I will say so. I am not a liberal college kid to be offended if you disagree with me, but I ask you to not become orcish.

Please note that we do not now and have never received goods, discounts, or financial compensation of any kind from anyone in exchange for modifying our opinion about sharpening tools and techniques.

I have personally taught many people how to sharpen tools over the years, but have never received a red cent for my time and haven’t used those training sessions as an excuse to sell stuff.

I have never done a product review.

I have never written a book or magazine article or even a blog post with advertiser support.

Please note that the document you are currently reading cost you nothing, was written and paid for by C&S Tools alone, and that there are no banners, commercials, or outside links on any of the pages in this blog. No SEO strategy at all. If Evil Google brought you here, it was not at our bidding.

We want to help our Beloved Customers, mostly professional woodworkers who already possess a certain level of skill, to level-up those skills. C&S Tools has no commercial incentive to mislead, and will not do so. But we do have a profit motive.

Remember, we have a 100% guarantee on the materials and workmanship of the tools we sell, so our sole financial motivation, and the very reason for this blog, is to help our Beloved Customers understand the tools we sell, and to become proficient in sharpening, maintaining, and using them so they won’t mistake a lack of skill and/or experience on their part as a problem with the tool. All most professionals really need is a little guidance. We want skillful, ecstatic customers because they become repeat customers. And we do hate to disappoint.

This image has an empty alt attribute; its file name is tenor.gif
The Marketing Department

Goals, Objectives and Priorities

I mentioned 4 variable calculus above. Actually, it’s more like 5 variable calculus, the fifth variable being your goals and objectives for sharpening. Let’s examine those in more detail.

If satisfying curiosity are among your goals, then by all means try all the stones, sandpaper, films, pastes, jigs, contraptions, and machines available and methodically test them until they wear away to dust. It simplifies the calculus, but the cost and time required to reach a final conclusion may become a heavy burden.

If beautiful blades, zen-like sharpening experiences, and improved hand-soul coordination are high among your objectives (they’re included in mine), then you will want to try natural finishing stones. I heartily recommend them to those who have reached a certain level of skill with synthetic stones and are willing to roll the bones. The ante may be costly.

The performance of the sharpening system you select, including the following factors, are things you should include in your calculations:

  • Time efficiency: How long does it take you to produce an adequately sharp edge starting from a dull/chipped one? How fiddly is the process? For this calculation you will need to determine how much your time is worth. Remember, while you may enjoy sharpening, from the professional’s viewpoint, time spent sharpening is non-productive time because, during the period you are working on tools, your hands, eyes, and mind cannot work on the stuff you contracted to deliver to your Customer;
  • Cost efficiency: How many billable hours and expensive supplies/tools/equipment must you expend to obtain an adequate cutting edge? For this calculation you will need to determine the cost of time, consumables (stones, sandpaper, film, paste, powder, beer, Prozac) and equipment (grinders, jigs, plates, widgets, etc.) expended in producing an adequate cutting edge long-term. Even if you are not getting paid for your woodworking, your time still has value. And don’t forget to depreciate the cost of stuff. This is where synthetic waterstones shine in comparison to the many other sharpening systems out there, IMHO.
  • Cutting efficiency: How well and how long does the sharpened blade cut? For this calculation you need to determine what defines an “adequate cutting edge” for you. For instance, given the same abrasives and expending the same amount of time to sharpen two blades, the blade with a rounded bevel, or even multiple bevels, is seldom as sharp as the blade with a simple flat bevel, as can be readily confirmed using a powerful loupe or microscope to examine the last few microns of the blade’s effective cutting edge (more on this subject in Part 21 of this series). Does the sharpening system you are testing tolerate or even promote bulging bevels or multiple bevels? Get out your loupe before your inner troll makes you say things you will regret.

If curiosity, pleasure and beauty are lower priority than practical performance in your list of objectives, then I suggest you focus on synthetic waterstones and the bedrock basics, at least for now:

  1. Obtain a minimum set of basic synthetic stones, or adapt what you already have;
  2. Learn how to use them skillfully;
  3. Practice those skills until they seep into your bones.

It is not an expensive process, but neither is it the instant short-term sort of thing the Gurus of Sharpening offer in their books and DVDs and classes through their tricks and gimmicks. It takes real skills that will serve you and your tools well for your entire life. And it all starts with the minimum set of stones.

The Goldilocks Set

Oh my goodness, just look at the time! I really must be going.

Sharpening stones are expensive consumables that disappear a little with every stroke. If you need more than 5 minutes to sharpen a plane or chisel blade that was not chipped or damaged, then you may be spending too long, and wasting your time and stones, so it’s important to determine the bare minimum set of stones that work best for you.

The Goldilocks set I recommend includes the following 4~5 stones/plates:

  1. A Rough Stone: 400~800 grit rough diamond plate/stone or two carborundum stones;
  2. Medium Stones: Two 1,000 grit waterstones (I will get into the reasons for having two stones of the same grit in another post);
  3. A Finish Stone: 6,000~8,000 grit waterstone.

Please also note that, while I use them in my workshop, I don’t consider 10,000+ grit synthetic finishing stones or natural fine-finishing stones essential tools, nor do I take them to jobsites. This decision is based on simple practical experience: Jobsites are rough and dirty places, and stones are fragile. 

The sharpening stones I normally use in the shop include a few beyond the minimum set described above. This set includes more stones, but the idea is that this finer gradation creates a better-quality cutting edge while consuming less of my expensive finishing stones. Useful natural stones can be pricey:

  1. One 400~800# diamond plate or two rough carborundum stones (only occasionally necessary);
  2. Two 1000# Waterstones (usually necessary, but sometimes I skip it);
  3. Two 2000# Waterstones;
  4. One 6000# stone (fine enough for quickly finishing chisels and most planes);
  5. Two natural stones for finish planes and push chisels, or just for fun (a 10,000# synthetic stone works just as well).

Which Brand of Synthetic Stone?

I have had good luck with the Imanishi “Bester” brand waterstones. Imanishi seems to be inactive so I have been forced to research other brands. The best alternative I have found so far is the “Hibiki” brand waterstones by Naniwa, but I have no doubt there are others that work just as well.

Naniwa also makes an interesting and effective diamond stone they call their “Shrimp Brand,” and which is mistakenly (?) translated as “Lobster Brand” in the US and Europe. Not a “diamond plate,” mind you, but a diamond-impregnated sintered product that works much better than the usual plates with diamond particles electronically attached to steel plates. This diamond stone is comprised of a 1mm layer of diamond grit in a vitrified (baked) matrix affixed to an aluminum plate. The sintered layer is quite hard and won’t dish out easily. More importantly, these plates cut faster, smoother and longer than the diamond plates your humble servant has previously experienced.

It is especially useful for uraoshi of plane blades.

The important thing is to keep it wet in-use. If it becomes clogged with metal swarth, use a nagura stone to clean the surface and get back to work.

The Most Important Stone

Everyone focuses like a laser on the finishing stone, the final stone in the process, but when sharpening a particular blade, the most important stone is really the first stone you use in the series, be it a 400 grit diamond stone or a 2,000 grit waterstone. 

A conventional diamond plate

You may find this whole discussion passing strange, so I will explain. The roughest stone (or diamond stone, depending on the amount of steel that must be wasted and your available time and budget) you begin the sharpening process with builds the foundation of your cutting edge by performing the following two critical tasks:

  1. Removing damage at the cutting edge; and
  2. Shaping/flattening the bevel at the cutting edge.

Only a rough stone (400~1000 grit) can accomplish the first task efficiently. If the truth of this statement is not self-evident, I won’t even try to convince you. Do the comparisons yourself: count strokes, time, and cost, measure angles, and peep at scratches through a high-power loupe. An opinion based on anything less is just hot air and is less convincing than a Southern California politician’s protestation of not routinely receiving bribes from the many drug cartels that ship product through that hell-hole.

In addition, your roughest stone is also the most efficient tool for shaping the bevel and cutting edge, if it needs to be adjusted. Until these two critical tasks are completed, none of the subsequent finer stones can accomplish anything efficiently, and the faster and more precisely these two tasks are accomplished the sooner one can stop sharpening and get back to making wood chips and shavings.

The role of all the finer stones in the sharpening sequence is simply to replace the deeper scratches left by the preceding rougher stone with progressively finer scratches. And since this work is done using more expensive, less-abrasive and slower-working stones, it is most cost/time-efficient to accomplish this task as quickly as possible.

If you knock out the two foundational tasks listed above using your rough stone/plate well, then you can accomplish the subsequent polishing work at minimum cost and maximum speed. Screw it up and your stones will prematurely turn to mud and your blades will hate you.

Please be sure you understand the meaning of the previous five paragraphs. They are the heart of this article, and should be the foundation of your sharpening process.

So how does this work in real life? If the blade is chipped, dinged, or needs shaping, then I start repairing and reshaping the cutting edge’s foundation with my diamond stone. A 400~800 grit carborundum stone, if very flat and kept flat, will work too, but remember that many carborundum stones, especially those permeable by water, can become dished-out quickly.

If my blade is only dull, but not damaged, and the bevel is in good shape, I start with a flat 1,000 grit synthetic stone.

If the blade is starting to lose its edge, but is not damaged and still cuts, I start the process with a flat 2,000 grit stone. Notice the word “flat” is used a lot in this article, and not by accident.

The objective, again, is to create an adequately sharp edge in the minimum amount of time and cost by starting the sharpening process with the cheapest, most aggressive stone appropriate to the blade’s condition for the heavy wasting and shaping jobs thereby creating a bevel and cutting edge which you can then quickly polish to the final cutting edge using the more expensive, finer-grit stones. Wow, that’s a mouthful!

I want to make one thing perfectly clear before ending this post. Except for a few special situations, I don’t recommend using secondary bevels or micro-bevels except in special circumstances because, like training wheels on a bicycle, they are not an efficient long-term solution. In fact, they are a short-cut that has stunted many people’s sharpening skills.

We will return to this subject later, but in the meantime, I have the honor to remain,

YMHOS

The Great and Powerful Oz has spoken!

If you have questions or would like to learn more about our tools, please click the “Pricelist” link here or at the top of the page and use the “Contact Us” form located immediately below.

Please share your insights and comments with everyone in the form located further below labeled “Leave a Reply.” We aren’t evil Google, fascist facebook, or thuggish Twitter and so won’t sell, share, or profitably “misplace” your information. If I lie may my only companions be fleas and biting flies

Sharpening Part 13 – Nitty Gritty

“The true mystery of the world is the visible, not the invisible.” 

Oscar Wilde

In this post we will dig into a few important nitty gritty points about sharpening stones everyone needs to know. Perhaps Beloved Customer already knows all these points, but please ready your shovel because there may be at least one buried surprise.

A Wood Shavings-Eye View

When seen under high-magnification, the surface of a sharpening stone looks like millions of densely-packed stones embedded in a flat field. The smaller the stones, the finer the grit.

As the blade is pushed and pulled over these stones, they scratch and tear metal from the blade’s surface leaving behind scratches corresponding to the size of these small stones. This violence needs to continue until the blade’s ura and bevel form a clean intersection of two planes.

A view of a blade sharpened with 1200 grit diamond plate showing the furrows left by individual pieces of grit

Seen under high-magnification, the cutting edge is jagged where these furrow-like scratches terminate at the cutting edge. To some degree, it may even look like a serrated sawblade. Some blades, like kitchen knives and swords, are used in a slicing motion to cut soft materials like meat and vegetables and enemy arms, and their performance benefits from a serrated cutting edge more than a highly-polished edge, and so do not need to be highly polished on fine-grit sharpening stones. 

Plane and chisel blades, however, are used to cut wood, a material typically harder than foodstuffs, mostly in a straight-on approach, not in a slicing motion. In this situation, a rough, serrated cutting edge is weaker than a highly polished edge because the jagged edges are projecting out into space like the teeth of a handsaw blade, and are relatively unsupported and more easily damaged than a highly-polished blade with smaller, more uniform scratches terminating more cleanly at the cutting edge. 

Therefore, in order to produce a sharp durable blade, we must make the microscopic cutting edge smoother and more uniform by using progressively finer grit stones to produce shallower and narrower scratches, and a thin, uniform cutting edge.

But how fine is fine enough? There is a curious phenomenon related to friction that is applicable to cutting edges, and is useful to understand. 

The Friction Paradox

Imagine a cube of heavy, polished stone with its downward flat face resting on the level, flat surface of a larger slab of similar stone. Let’s say it takes some specific measure of force pushing horizontally on the top stone cube to overcome the static force of friction between the two stone surfaces in order to get the cube moving. 

If we gradually increase the degree of polish between the two contact faces and measure the force required to start the top cube moving at each progressively higher level of polish, we will find the force decreases with each increment of increased polish, at least for a time. This is at least partially because the irregularities between the two surfaces (asperities) do not interlock as deeply when the surfaces become more polished. 

However, at some point, more polishing brings the surfaces of the two stones into such intimate contact that the molecular attraction between them, and therefore the force necessary to move the cube, actually increases. 

The same phenomenon occurs with tool blades. If you sharpen and polish your blades past a particular point, the friction and heat produced during the cut between blade and wood will increase, as will the energy that must be expended, while the resulting quality of the cut and durability of the cutting edge will not improve significantly. Of course, the time and money invested in stones spent sharpening past this point will be mostly wasted.

The Inflection Point

The inflection point where additional polishing yields increased friction with little improvement in cut quality will depend on your tool and the wood you are cutting, but you can get a pretty good idea of where it is if you pay attention over time. While the sharpening stone manufacturers turn red in the face and salesmen froth at the mouth and spray spittle in anger when I say it, in my well-informed opinion there is little practical gain, beyond self-satisfaction, to be had from sharpening chisels or planes past 6,000~8,000 grit, making this range of grit an inflection point in my mind. What about you?

Conclusion

I encourage Beloved Customer to conduct your own experiments to determine the practical inflection point in the case of your planes and wood you cut. Many who figure this out save themselves significant amounts of time and money sharpening over the long-term.

To those Gentle Readers that love sharpening more than woodworking, and enjoy putting money in the pockets of sharpening stone manufacturers more than keeping it for themselves, I apologize for pointing out the icky floater in the punch bowl. But you probably would have it noticed it eventually anyway, if only from the taste difference.

I will touch more on this important point in the next exciting installment in this scientificish adventure.

YMHOS

The Repentant Mary Magdalene by Canova

If you have questions or would like to learn more about our tools, please click the “Pricelist” link here or at the top of the page and use the “Contact Us” form located immediately below.

Please share your insights and comments with everyone in the form located further below labeled “Leave a Reply.” We aren’t evil Google, fascist facebook, or thuggish Twitter and so won’t sell, share, or profitably “misplace” your information. If I lie may frogs infest my boots.

Leave a comment

Sharpening Part 12 – Skewampus Blades, Curved Cutting Edges, and Monkeyshines

A famous wood carving of 3 monkeys located at Nikko Toshogu Shrine post re-construction that illustrates a famous saying originating in China that also works as a pun in the Japanese language. From right to left: See no evil; Speak no evil; Hear no evil (見えざる、聞かざる、言わざる).

Even monkeys fall from trees (猿も木から落ちる)

Japanese saying

Ideally, a tool blade will have absolutely uniform dimensions: the right thickness and taper, perfect cross-sections, uniform curvature, straight edges and flat surfaces. However, professional grade Japanese tools are not made on CNC machines, but are hand forged with dimensional imperfections. Indeed, imperfections are part and parcel of all human endeavors. Most imperfections don’t matter; Sometimes they make the tool better, sometimes they need to be remedied.

Beloved Customer may not notice that the blade or cutting edge of one of your chisels or planes is “skewampus,” and not understand why these irregularities produce cutting results that are less than ideal. You may blame those poor results on the presence of pernicious, predatory pixies, your technique in using the tool or even on the irregular grain of the wood you are working, when the real problem is the shape of the blade’s cross-section, or perhaps your unintentionally sharpening the blade with a skew. We will examine some of these problems in this installment in our series of romance and monkeyshines.

We will also look at the curved or “cambered” cutting edge profile in plane blades, the benefits and undesirable results it can produce, and how to incorporate this blade profile intelligently into your woodworking repertoire.

Many people, like monkeys in trees, learn bad habits from their friends and teachers. We hope this article will help you understand what’s going on with your woodworking blades, and how to better shape and sharpen them intelligently instead of just monkeying around. Please be sure to BYOB (bring your own bananas).

A serious craftsman doing Fine Woodworking in a Pixie-free workshop (notice the strategically-placed boots).

Dealing With Skewampus Blades

Skewampus is an interesting word I learned from my mother. I am told it is a combination of the word “Cattywampus” meaning “in disarray,” and “askew.” I think it is the perfect word for describing the ailments some blades suffer.

While less than ideal, it is not unusual for the thickness of a chisel blade’s cross section to vary slightly across its width, with one side being thicker than the other, forming an irregular quadrilateral cross section. This irregularity is frequently found in plane blades too. Since there is more steel on the thicker side of such a blade, unless care is taken, it will abrade differentially and tend to develop a skew during sharpening.

As discussed in previous articles in this series, Japanese plane and chisel blades are formed by laminating a layer of hard steel to a much softer body made of low-carbon steel or iron. If the lamination exposed at the cutting edge is not uniform, all else equal the area of the blade with more hard steel touching the sharpening stone will abrade slower than areas with less exposed hard steel such that the cutting edge will tend to become skewed during sharpening. Perfection is neither attainable nor necessary, but the uniformity of the lamination is an important detail to observe when purchasing Japanese tools.

Likewise, plane and chisel blades that are not uniformly heat-treated but that exhibit differential hardening across the bevel’s width will tend to become skewed during sharpening as one side of the bevel abrades quicker than the other. This problem is more common than you might imagine, especially in the case of inexpensive tools where appearance and low price are given priority over quality.

Anyone that has experience bidding high-dollar construction projects will understand the adage “the most profitable job may be the one you lose.” Cheap tools are much the same way: that low-cost chisel or plane may look good on paper and even during the unboxing ceremony, but if you count your time worth anything, if you dislike headaches, and if real-world performance matters to your bottom line, then such a tool is often disastrous. Caveat emptor, Skippy.

A chisel or plane blade that has an irregular cross section or a skewed cutting edge often works just fine for many cutting operations. However, when cutting mortises, a chisel blade with a skewed cutting edge or irregular cross section will tend to drift to the side gouging the mortise’s walls and ruining tolerances. If you find that your mortise walls are gouged, or that tolerances are poor, check your chisel blade’s shape, and correct any deformities. It usually isn’t difficult to do.

Like all human work spaces, Japan’s smithies are not immune from pixie infestation despite annual blessings by Shinto priests and periodic offerings of salt, rice, and wine to the spirits. I will refer you to this previous post and another wherein we discussed supernatural predators and described some antidotes for the pixie pox. But the deformities we are examining in this post are more often the natural result of the human eye misreading temperature gauges, or the hand misjudging hammer blows or the non-judicious use of grinder wheels rather than precocious pixies at play.

If your blade’s deformity is not excessive, you can compensate by applying a little extra pressure on the blade’s thicker side while sharpening it. 

It is interesting how a little off-center pressure on a blade being sharpened over many strokes can change its shape. Many people unintentionally deform their cutting edges by not paying attention to the amount and location of the pressure their fingers apply, or by skewing the blade. A word to the wise.

Another potential solution is to skew the blade in relation to the direction of travel when sharpening the bevel. This works because the leading corner of a blade held in a skewed orientation on the sharpening stones is abraded quicker on the stones than the trailing corner. But once again, inattention causes many people to skew their blades when moving them around on their sharpening stones unintentionally creating, instead of intentionally correcting, skewed cutting edges. BTW, there’s nothing wrong with skewing the blade when sharpening so long as you are aware of the distortion this practice can produce and compensate accordingly. Another word to the wise.

If these methods don’t compensate adequately, you may want to grind and lap a chisel blade to a more uniform cross-sectional shape. A chemical bluing solution used afterwards will help conceal the shiny metal exposed by this operation if your chisel objects to shiny spots. Some of them can be quite vain, you know.

A chisel with a an adequately uniform lamination and cross-section, and nice polish.

Cutting Edge Profiles

Many people have access to electrical jointers and planers, but relatively few have industrial equipment with the capacity to dimension wide boards such as tabletops. And of course architectural beams and columns are typically too long and heavy to dimension with most stationary electrical equipment.

The choices available to most people for dimensioning such materials therefore are either handheld electrical power planers and/or sanders, or axes, adzes and hand planes. Powerplaners, sanders, axes and adzes are beyond the scope of this article, but we will look at hand planes.

I need more than one plane? You can’t be serious!

Although the very idea gives some woodworkers vapors (I don’t mean gas), an efficient craftsman will have multiple planes with cutting edges honed to profiles matched to specific operations. It doesn’t take many but it does take more than one, unless results don’t matter.

Everyone that dimensions larger pieces of lumber by hand needs a plane with a wide mouth and a curved or “cambered,” cutting edge called a “scrub plane” in the West, and “arashiko kanna” in Japan.

This variety of plane excels at hogging a lot of wood quickly when the craftsman needs to significantly reduce the thickness of his lumber.  If the blade is narrow, curvature is deep, and the mouth is wide this plane will hog wood quickly, but leave a deeply rippled surface, often with bad tearout.

One might also have a second arashiko, essentially a jack plane with a wider blade with a shallower curvature for the next steps in the dimensioning process. Such a plane will not hog wood as quickly, but it will produce a surface that is closer to flat and smoother with less tearout. You can see the advantage of having two arashiko planes, or a scrub plane and a jack plane, with different cutting edge profiles when dimensioning lumber.

Many Beloved Customers use electrical-powered planes to dimension lumber before turning it into furniture, doors, chairs, or sawdust, etc. and are aware that planers always leave tiny ripple-like scalloped cuts on the wood’s surface, often with some tearout, that is unacceptable as a final surface. A hand-planed finish is far superior, but it doesn’t make sense to remove any more than the bare minimum of wood necessary to remove this washboard.

A finish plane, in fact, is the perfect tool for removing these ripples and producing a smooth, uniform, even shiny surface on condition that the plane is sharp, has a fine mouth, is set to a fine cut, the chipbreaker is tuned and set properly, the blade profile is appropriate for the width of the wood to be finished, and the wood does not have too many large knots. In one or two passes such a plane can easily remove all the ripples and leave the wood clean and shiny without changing its thickness much at all.

Assuming the wood is cooperative and one knows how to sharpen and setup their plane properly, blade profile frequently remains a key factor many fail to grasp. Obviously, the curved cutting edge of a scrub plane cannot produce the perfectly flat surfaces required for joining two pieces of wood together, nor a smooth surface. On the other hand, the corners of a perfectly straight blade will leave clearly visible steps or unsightly tracks on the surface of a board wider than the blade, which is not a problem when rough-dimensioning a board, but is not ideal for joined surfaces and painful to look at if the board’s surface is to be left with just a planed finish.

So how do we solve this conundrum? When finish planing, the professional approach is to use two finish planes each with a different cutting edge profile.

The first type of finish plane has a perfectly straight cutting edge used to plane pieces narrower than the blade’s width. Since the blade’s corners are not riding on the wood but are straddling either side of the board while cutting, they won’t leave tracks or ridges, and the finished surface will be truly flat, perfect for joinery.

The second type of finish plane found in the professional’s toolchest has a curved cutting edge, or more correctly, curved just at the right and left corners to prevent it from leaving tracks and ridges when planing boards wider than the blade. Nearly all the cutting edge is left straight, but creating this tiny amount of curvature at the right and left corners causes them to smoothly disappear into the plane’s mouth so no tracks are made and any ridges are nearly impossible to see or feel. In other words, the corners of the cutting edge never touch the surface of the board, and so don’t leave discernible tracks or ridges. The finer the cut made the smaller any ridges created will be. Indeed, where a high-quality surface is required, the final cut with the finish plane will produce shavings thin enough to see one’s fingerprints through.

You may want to reread the previous two paragraphs to make sure you understand what these two cutting edge profiles are and what they can accomplish before you read further.

Naturally, a professional doing high-quality work needs at least two finish planes, one with a straight cutting edge used to produce flat, precisely-dimensioned surfaces on wood narrower than the blade’s width, and another finish plane with a cutting edge very slightly curved at the corners used to finish surfaces wider than the plane blade.

There are those that advocate using a curved blade, sometimes dramatically “cambered,” as some call this shape, for all applications. Those who advocate this sloppy technique twist themselves into knots justifying tricks to approximate flat surfaces using such blades. I have no doubt this is an ancient technique, but I suspect it is a sad practice that sprung from the carelessness of some craftsmen in flattening their sharpening stones, and with time this bad habit became a tradition in some quarters. I strongly suspect fans of this strange way of doing business habitually sand all visible surfaces anyway so tracks and ridges are not a problem for them. But the fact remains that perfectly flat, track/ridge-free surfaces work best for joinery.

Tradition and “monkey see monkey do” are a useful place to start, but as his skill level increases, the thoughtful craftsman will eventually seek to confirm the validity of the traditions he has been taught. I urge Beloved Customer to get started early.

Sadly, too many people never notice the strange instruction label pasted to their boot’s sole, nor that smelly stuff sloshing around inside.(ツ)

Mommy monkey teaching baby monkey bad habits. When will they ever learn?

Conclusion

As we come to the end of this article allow your humble servant to leave Beloved Customer with a word or two of advice about two bedrock basic skills you should master.

First, learn how to keep your sharpening stones flat. This will save you much grief.

And second, learn how to sharpen your blades to have a straight cutting edge. Everything else will flow naturally from these skills. Your blades deserve it. We will talk more about these subjects in the future.

In this article, we have discussed 12 serious points about plane and chisel blades and how to use and improve them all but a few woodworkers in the West are unaware of, or ignore, but which are common knowledge among professional Japanese woodworkers in advanced trades. While condensed, it is enough information to fill a book. But in return for this river of knowledge all your humble servant requests is the bananas you have in your back pocketses right now (BYOB, remember?). You didn’t sit on them did you?

The next installment in this simian soap opera of sharpening will focus less on monkeyshines, and more on stones and techniques. Please stay tuned. Until then, I have the honor to remain,

YMHOS

Oh my! I can’t wait to read more!!

If you have questions or would like to learn more about our tools, please click the “Pricelist” link here or at the top of the page and use the “Contact Us” form located immediately below.

Please share your insights and comments with everyone in the form located further below labeled “Leave a Reply.” We aren’t evil Google, fascist facebook, or thuggish Twitter and so won’t sell, share, or profitably “misplace” your information. If I lie may fresh boils burst forth on my nose daily.

Leave a comment