
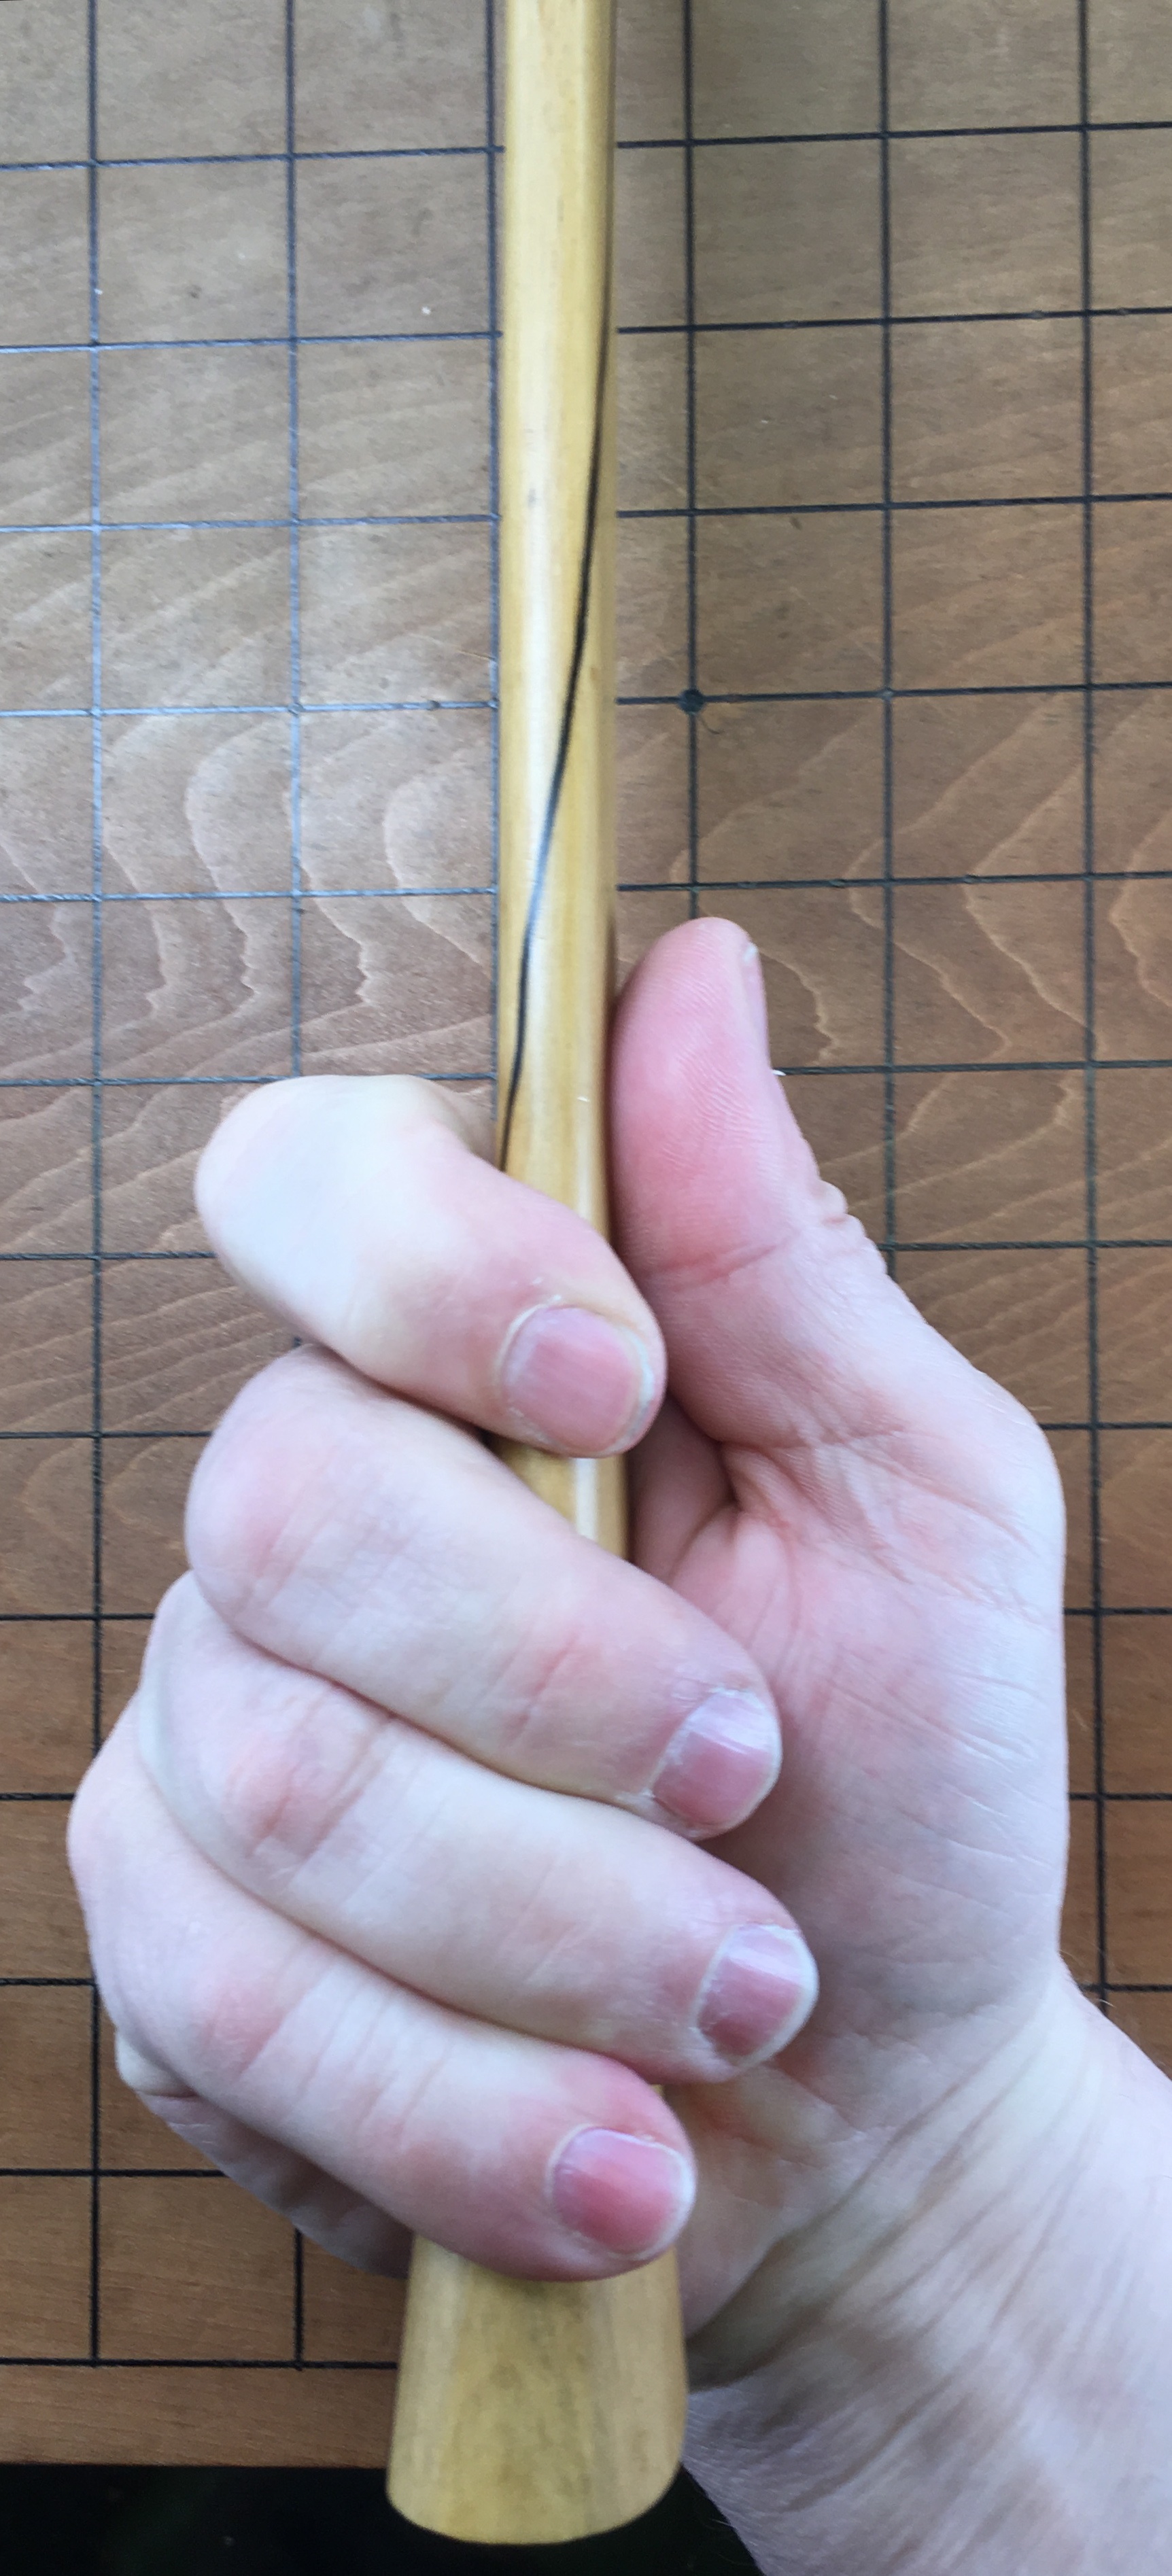
Used to be that bats had thick handles and a big barrel. Then they found it’s not the size of the bat that gets the home run – it’s the speed with which you can swing it.
I think I had the smallest handle around. When I got my bats, I even trimmed them down. I used to scrape them. Some years later when I started getting older, I used to start with a 33 and in the summer it got down to 31 and then probably in September got down to 30.
Stan Musial
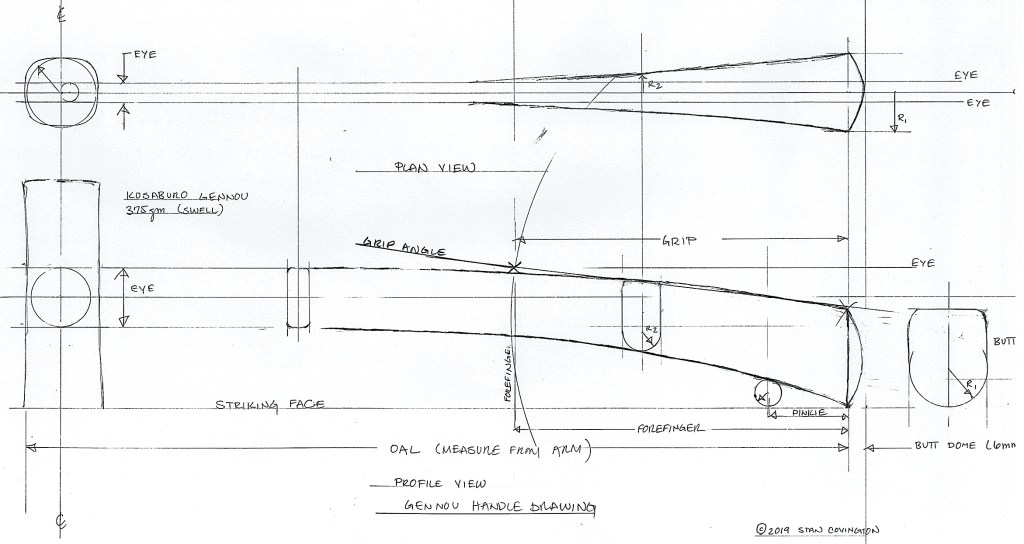
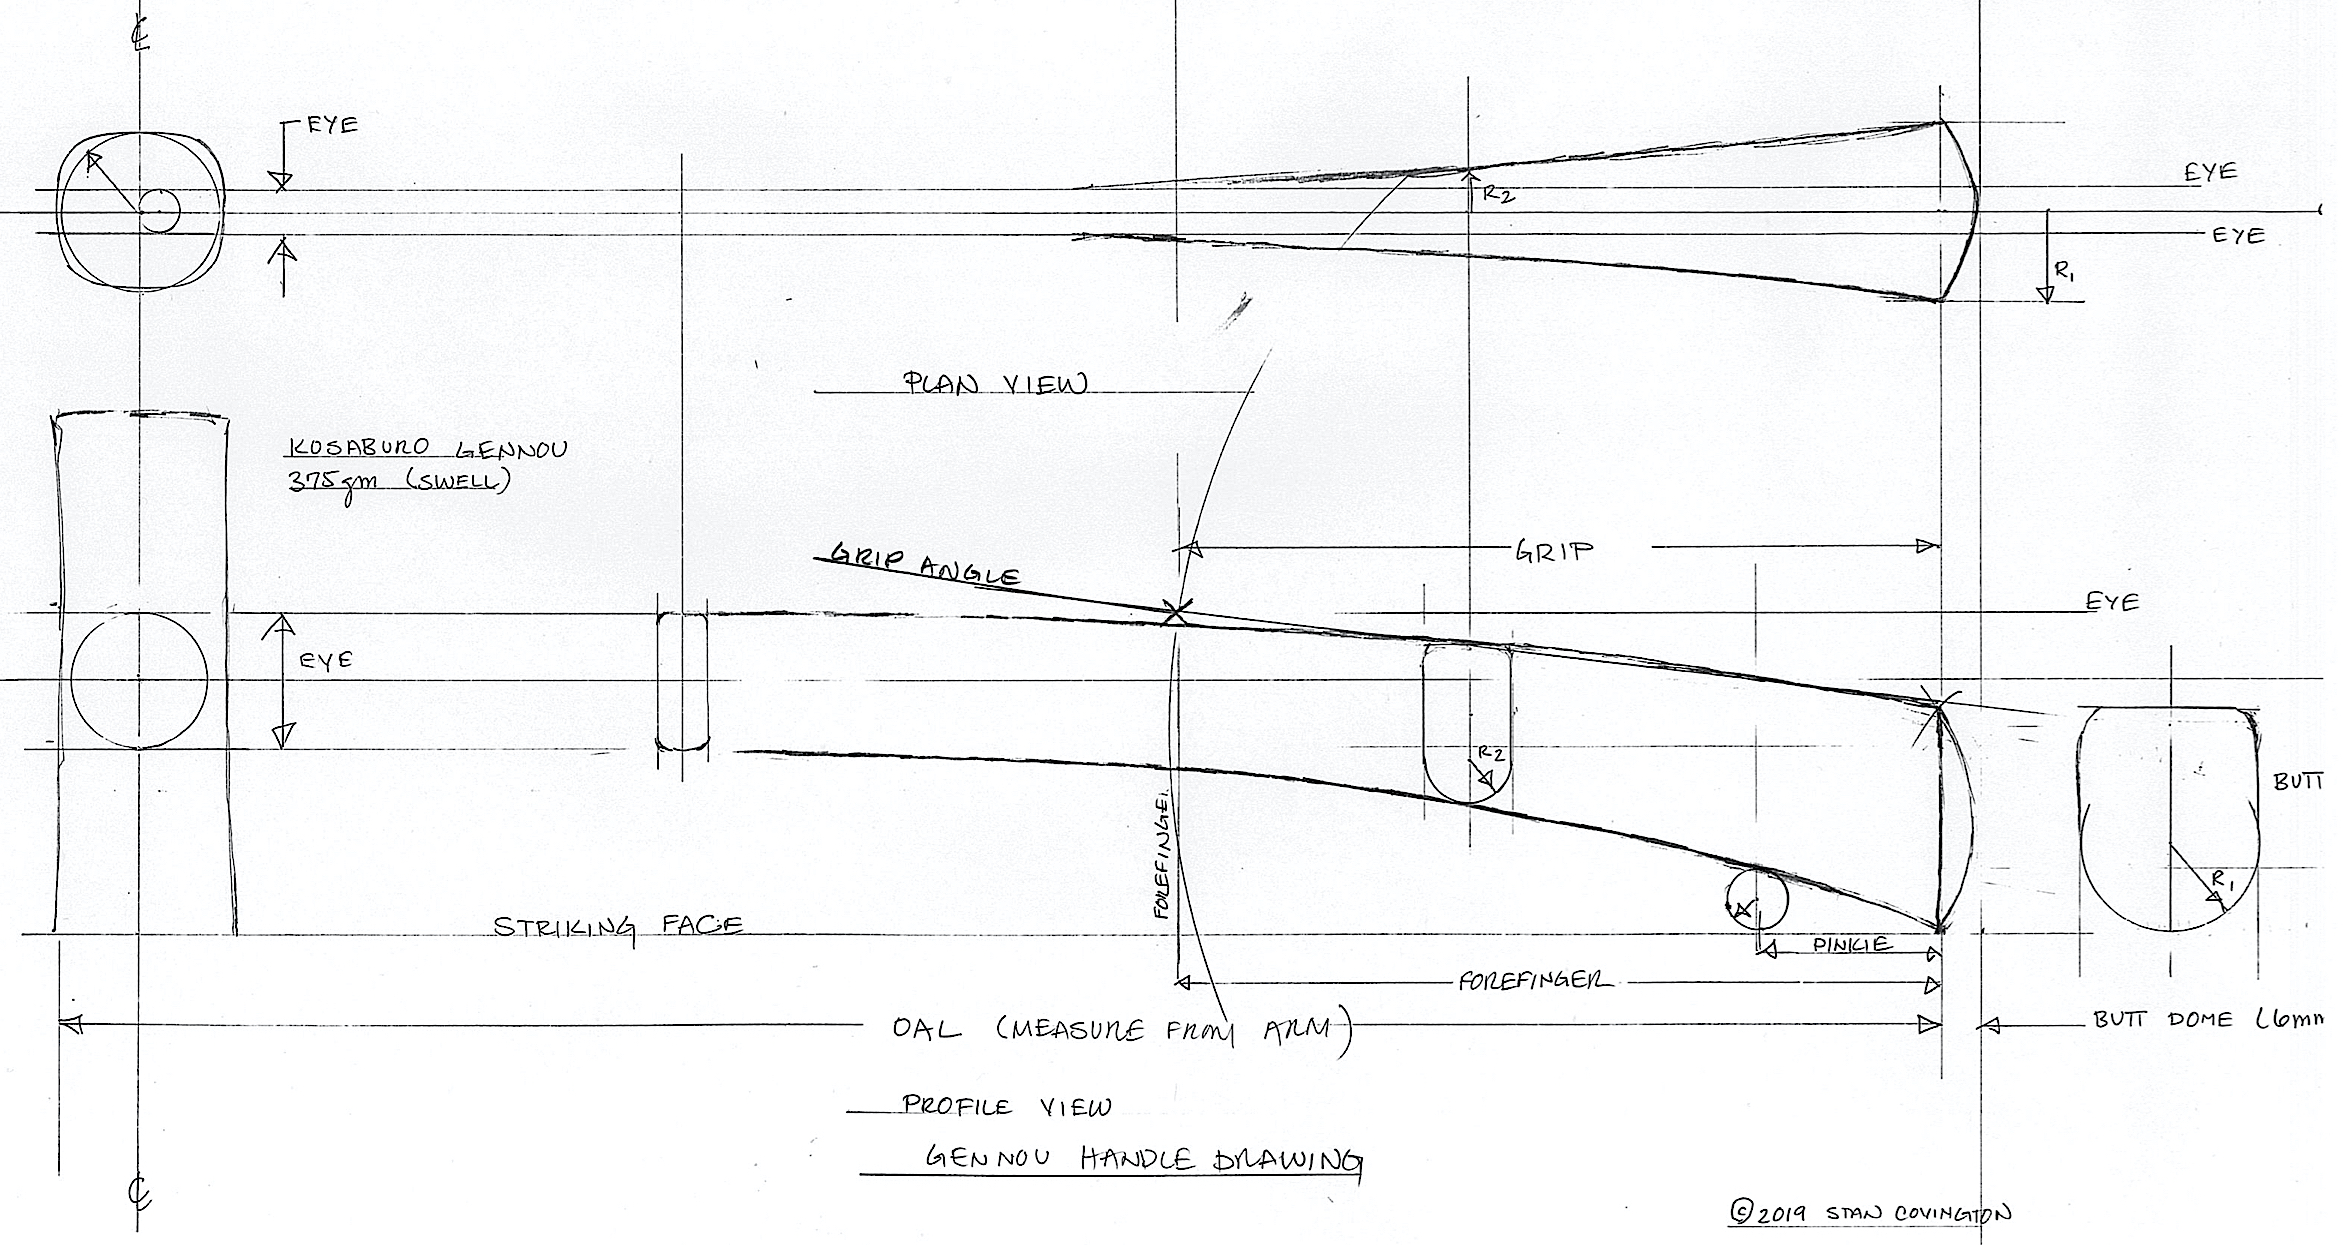
In the previous 6 posts in this series we guided Gentle Reader in creating a drawing of a high-performance, minimalist handle to fit your gennou head and body closely.
The handle in this drawing may not fit your body and the way you work perfectly at first; It may require adjustment, but it is a good place to start.
Keep this drawing so you can remember what you based the original design on to help you analyze and record improvements for your next new-and-improved handle.
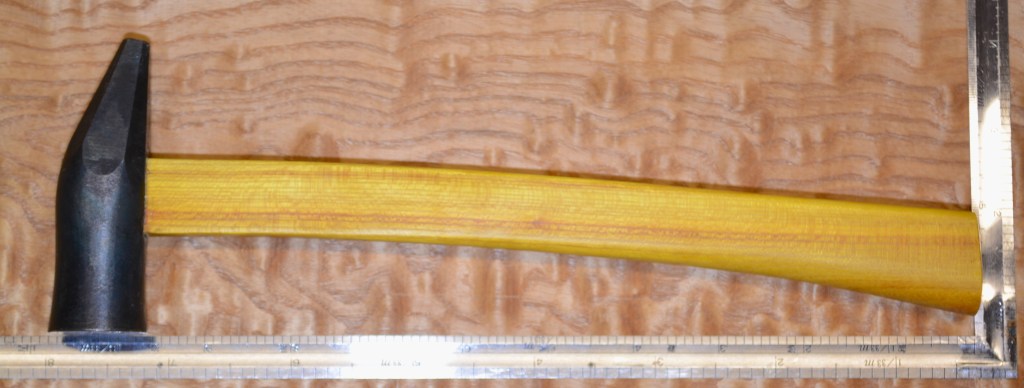
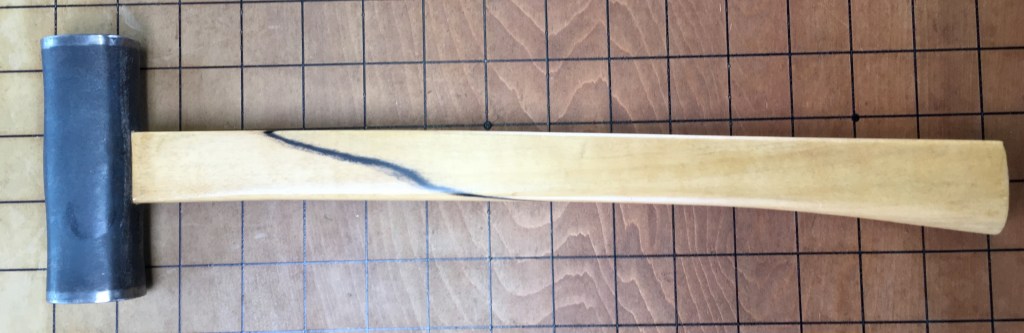
With the initial design complete and recorded in your drawing, the next step in this epic adventure of love, lust and sawdust is to select a stick of wood. Oh joy!
Your humble servant will not be so forward as to recommend a specific wood Gentle Reader should use. Instead, let’s consider some performance criteria first.
The quotes above by Stan the Man Musial, a famous baseball player and coach that made a career swinging wood fast and with great precision, are especially relevant to the subject of gennou handles.
Please remember that, just like a baseball bat, a slender hammer handle is almost always superior to a fat one, and its length requires experimentation and adjustment to get right. And of course, being a minimalist, relatively slender instrument, it must be made from a piece of wood that can handle the forces that will act on it.
Strength & Toughness
Hammer handles are subject to relatively high impact forces during use which produce stresses and vibration, so the wood must be not only strong, as in resistant to compression, tension and bending forces, but tough. It must also have properly oriented grain.
Softer woods are easy to work and feel good in the hand, but the tenon of a gennou handle made from a soft wood such as pine, cedar, poplar or maybe even cherry, for example, will often loosen quickly as thousands of impact forces over time crush the cells.
In addition, since the fit between tenon and eye must be very tight indeed, the process of driving a properly-sized tenon into the eye will not be easy. Your humble servant has broken more than one handle while attempting this. The last instance was a few years ago with a gennou handle I made from Chinese mulberry, a wood cherished in Japan for fine cabinetry work and of which I am unreasonably fond due to it’s dramatic grain, its golden color when freshly cut, and the purplish-brown color it changes to over time. I suspected it might be too weak for the job, but tried anyway. A sad waste of time and beautiful wood.
BTW, if you have the opportunity to use mulberry wood for cabinet or joinery work, by all means give it a try. I think you will be pleasantly surprised especially as the item made from the wood ages.

The material you ultimately select must be both strong and tough, but it is important to understand the difference between strength and toughness when considering materials.
The term “tough” in engineering parlance means a material has the ability to absorb energy and/or forces without permanently deforming or breaking. A tough wood will still deform and bend, but when the forces that caused it to deform/bend are removed, it will return to its original shape instead of being permanently bent or breaking. In the case of a handle, if it is tough, it will flex somewhat and return to its original shape all without rupturing.
Gentle Readers are, without exception, highly intelligent, possessing a refined eye and therefore will of course be tempted to use beautiful, dark exotic hardwoods such as ebony, rosewood, bubinga, wenge, kingwood, snakewood, etc.. These are fine woods that make beautiful handles, but I don’t recommend them for a first handle due to their high cost and the likelihood that Gentle Reader will want to replace the first handle you make, and maybe even the second and third, as your skills and understanding of the handle that best suits body and working style improves with time and experience.
And while they may have beautiful color, sexy figure, and great compressive strength, many exotic woods like ebony and rosewood are very strong in compression, but sometimes lack adequate toughness in some (but not all) cases, and crack easily. And the extra weight of such dense woods is seldom an advantage.
Your humble servant has used them successfully, and so won’t suggest they can’t make fine handles, but I simply urge Gentle Reader to be cognizant of the higher risk of failure. If you choose to use an exotic hardwood, please be especially careful of runout, a subject we will discuss below.
Friction
If you consider the vibration and angular acceleration forces acting on the gennou’s head and handle, you will understand the wisdom of choosing a wood that has a high coefficient of friction. Take my word that it is embarrassing to have the head slip off the handle mid-swing even if none of your bench dogs are watching.
Oily woods like teak lack adequate friction to keep head and handle attached, in my experience. Bocote is another wood that tends to allow Murphy to slip the head off and create unplanned openings in gypboard walls. (ツ)
Stability
Another important performance criteria to consider when selecting a species of wood is that it be stable and exhibit minimal expansion/contraction with humidity changes.
If the wood forming the tenon connecting handle to head shrinks too much when the ambient humidity decreases, the head will of course loosen.
If the tenon swells too much when ambient humidity increases, the wood cells may be crushed inside the unblinking steel eye causing the tenon to lose the ability to spring back to its original dimensions when humidity again increases, eventually resulting in a loose head. To make matters worse, the handle will then loosen up even more when the humidity drops again. Murphy does backwards somersaults and clicks his thorny heels at the apex while cackling with demented glee when this occurs.
This detrimental plastic deformation is the big downside to kigoroshi in hardwoods. Let he who has ears to hear listen.
I encourage you to use a wood with a low tangential/radial expansion/contraction ratio.
The traditional way to deal with tangential/radial expansion/contraction in tool handles such as hammers and axes is to orient the rings of winter wood in the tenon in the long axis of the hammer head/eye. I don’t think this matters much with small hammers with small eyes, but it can make a difference in larger hammer heads with long eyes.
Limb Wood
It’s tempting to use limb wood or orchard trimmings to make handles, especially if the grain’s curvature matches the intended design. And leaving some of the natural bark in the grip area can be interesting too. In fact, there was a period a few years back here in Japan when, probably due to the kezuroukai effect, many people were making handles from mountain cherry wood with the shiny dark-red bark left attached in the grip area.
This is a grand idea, especially if it means you can procure good wood for free. But for heaven’s sake don’t use such wood until it is well-seasoned and stable or you may find your wall has a new dent and your bench dog and his fleas have fled, or your bench kitty has started muttering to the iron pixies skulking in your shop about your parentage and the size of the bus you rode to elementary school. Cats are like that, you know.
Wood Grain and Runout
Many fail to understand or choose to willfully ignore the contents of this section, but I adjure Gentle Reader to not be a chuckle head.
Grain runout is an important factor to take into account when selecting a piece of wood for a handle. A good definition of runout is as follows:
“Runout refers to the orientation of wood cells being other than parallel to the edge (face) of the board. Often difficult to detect visually, severe runout can be detrimental to strength and resistance to vibration and impact forces.”
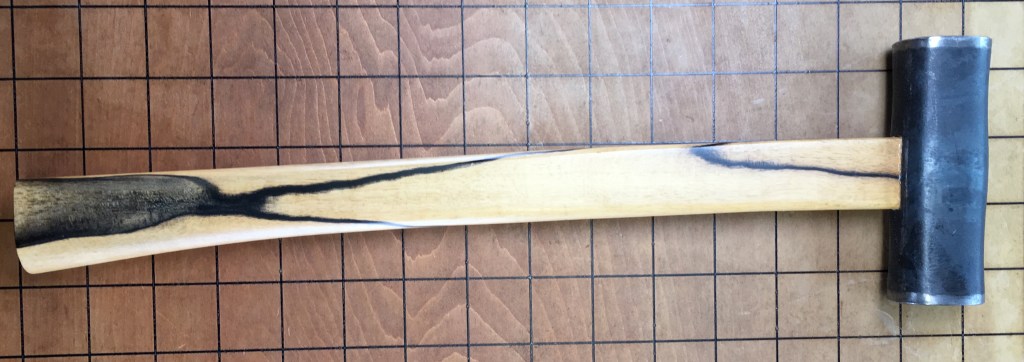
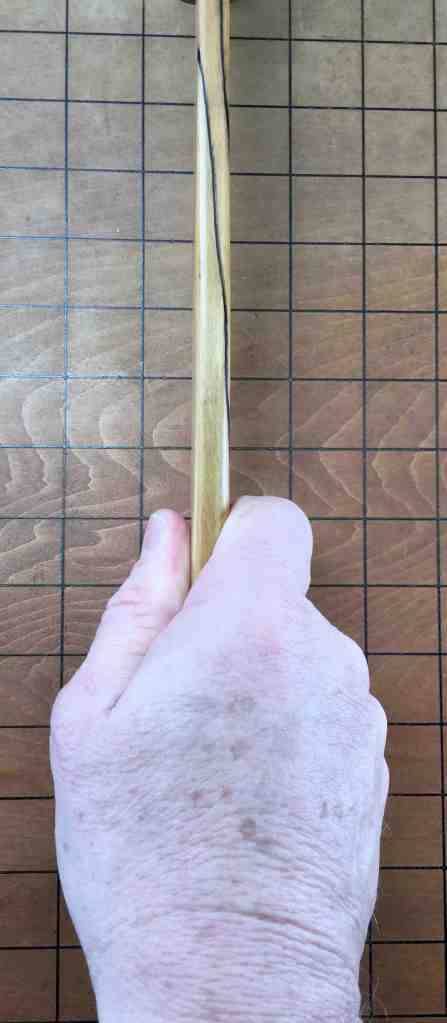
When a board’s annual rings do not remain within the boundaries of a given pattern, be it straight or curved, the locations where the grain exits the pattern’s boundaries are called “runout.” This is an engineering term used in structural design that is applicable to selecting handle wood. In this case, it has nothing to do with the rotation of wheels and gears. Cracks tend to begin at runout locations and propagate quickly. Excessive runout can significantly reduce the ultimate strength of a board, especially when subjected to the impacts and bending forces of the sort tool handles experience.
In the case of a hammer handle, these potentially destructive forces are of greatest magnitude nearest the eye, and tend to make the handle crack along the leading edge and back edge of the handle, so we need to reduce the lines in the grain running-out and exiting the handle near the eye and at the back and front of the handle.
There are those who will dispute this structural reality, but they have done neither the engineering studies nor the destructive testing that would give their opinions value, and are herewith directed to proceed posthaste to a pharmacy to procure the salve Mifune Toshiro recommended to the tattooed criminals in the movie “Yojimbo” before educating them about pain.
Whatever wood you use, and this is extremely important, you want the grain runout to be minimal, especially in the tenon and neck. Ideally, the grain will exhibit zero runout through the tenon and neck and be curved to match the handle shape. In other words, the ideal stick of wood will have a high-percentage of fibers that are continuous from eye to butt. Such wood can be found but it may take time and effort and eye strain to select. Using riven wood is a traditional way to reduce runout and provide maximum strength. On the other hand, some gradual runout in the grip area is usually acceptable.
Here is wisdom: The key to judging runout is to not examine just the board, but more importantly the individual stick of wood you are considering using for a handle after it has been cut into a rectangular cross-section in preparation for layout because only when you can see all four sides the handle’s entire length will you be able to reliably judge runout. Murphy will make a fool of you if you let him.
The following link may be informative on the subject of runout: Link 1
Useful Woods
In Japan, the best traditional woods for tool handles are said to be Soraki and Ushikoroshi, both domestic ornamental bushes with white wood and plain-jane grain which are no longer grown commercially and are difficult to obtain. We have a few sticks in-stock for interested parties.

Nowadays Japanese White Oak is the standard handle wood in Japan. It is denser, stronger and whiter in color than its American and European counterparts, but the grain is quite plain.
Hickory is recognized world-over as the best generally-available material for handles, but it’s grain and color are boring. It should be easy for Gentle Readers to procure since it is sold as replacement tool and axe handles in most hardware and home centers.
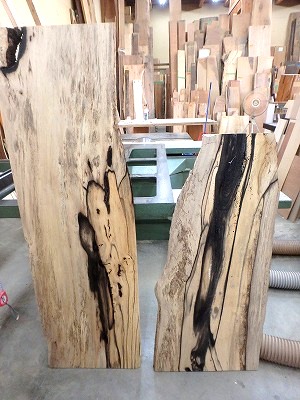
Other reliable options are Ash, the various species of White Oak, Maple, and Birch, etc..
I have made several handles from Black Persimmon, a fruitwood in the ebony family, yellowish in color but with a dramatic, smoky black grain. Black Persimmon has been highly prized in Japan for hundreds of years as a wood for high-end cabinetry. The grain and color are unique.
Since around 1900, American Persimmon was considered the best wood for golf club heads because of its toughness, the “pop” it gave the ball on impact, and its relative light weight compared to its toughness. It makes a great gennou handle. I am told it is still available in some areas.

I have also made handles from American Osage Orange, a dense, stringy wood used for bows and musical instruments that makes an extremely good handle, at least once the scary neon orange color mellows through exposure to sunlight. I highly recommend it, especially if you can get it for free, which shouldn’t be too difficult in the US Midwest where it was once used extensively for fenceposts and still grows like weeds around old fence lines.
Just make sure it has reached equilibrium moisture content before making a handle from it.

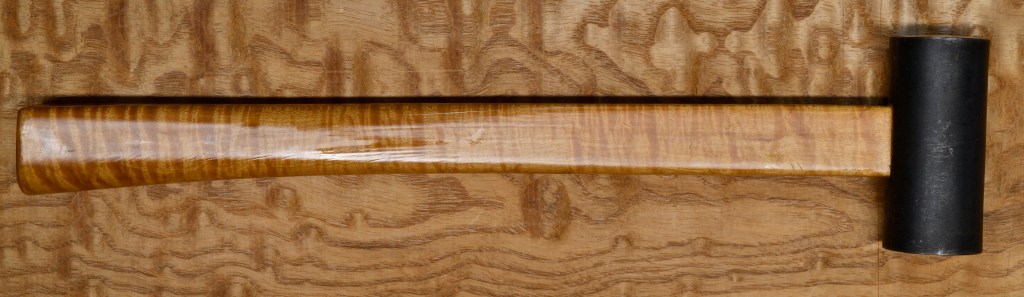
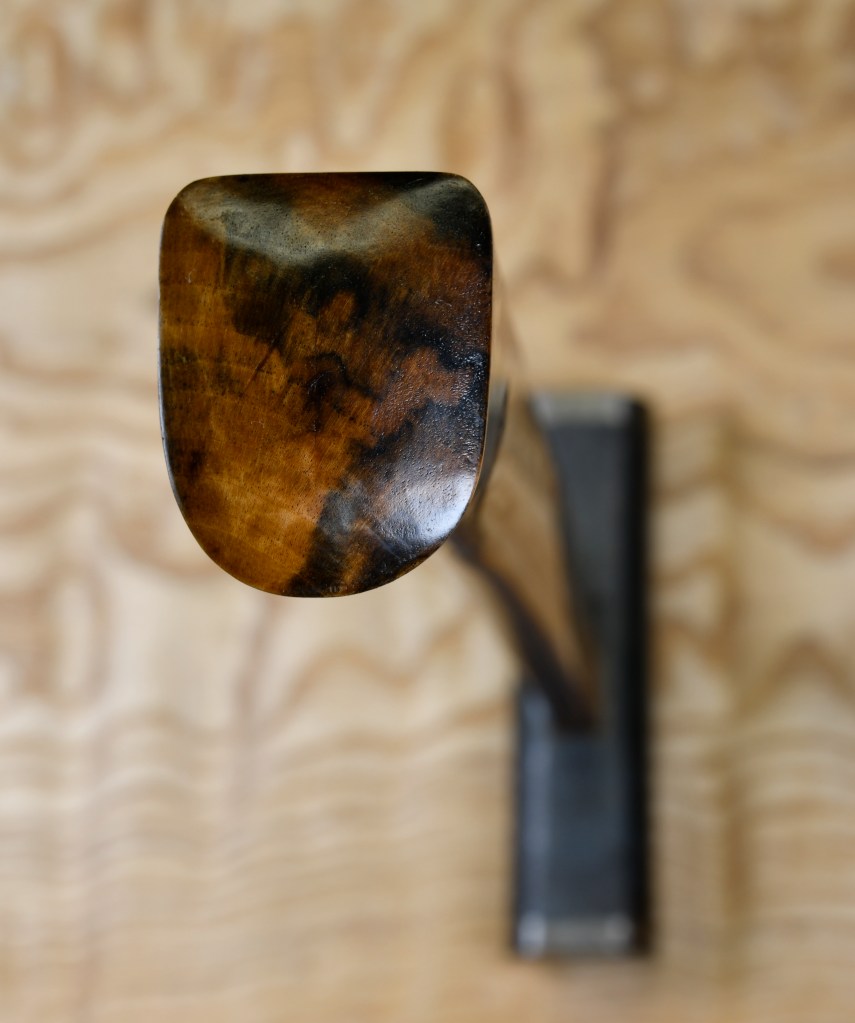
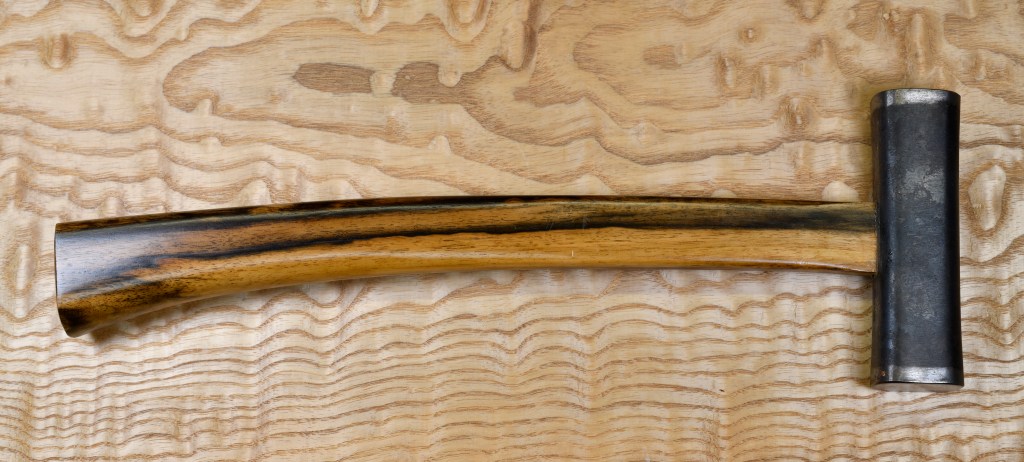
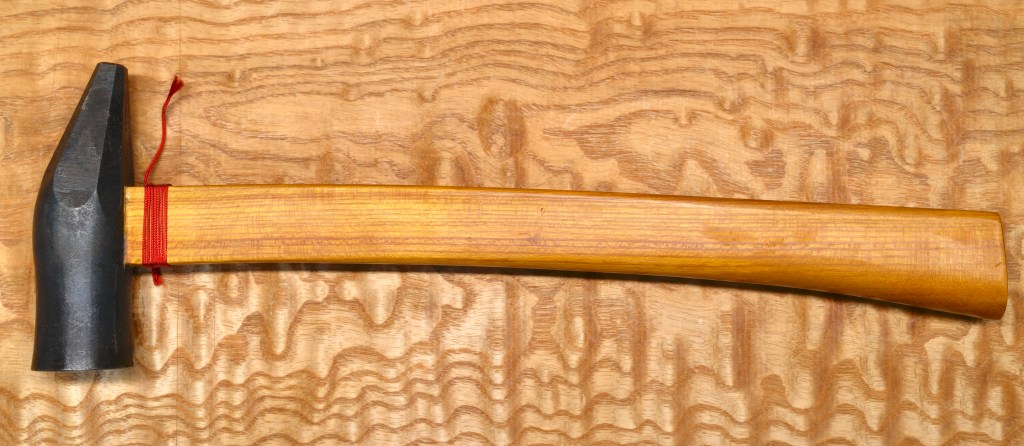
Maple can make an excellent handle too. I used a stick of highly-figured tiger stripe maple for the daruma gennou handle below, and another piece of Maple with only a little figure for the smaller daruma gennou further below.


In the next post in this series we will layout our handle in preparation for making sawdust.
YMHOS

If you have questions or would like to learn more about our tools, please click the “Pricelist” link here or at the top of the page and use the “Contact Us” form located immediately below, or email us directly at Covingtonandsons@gmail.com.
Please share your insights and comments with everyone in the form located further below labeled “Leave a Reply.” We aren’t evil Google, fascist facebook, or the IT department for the DNC and so won’t sell, share, or profitably “misplace” your information. If I lie may all my hammer handles split!


All Posts in The Japanese Gennou Hammer & Handle Series
- Part 1 – Introduction
- Part 2 – Ergonomics
- Part 3 – What is a Gennou?
- Part 4 – The Varieties of Gennou: Kataguchi, Ryoguchi & Daruma
- Part 5 – Kigoroshi
- Part 6 – The Ergonomic Anaya
- Part 7 – The Unblinking Eye
- Part 8 – Head Style & Weight
- Part 9 – Factory vs. Hand-forged Gennou Heads
- Part 10 – Laminated Gennou Heads
- Part 11 – Decorative Gennou Heads
- Part 12 – The Drawing: Part 1/6
- Part 13 – The Drawing: Part 2/6
- Part 14 – The Drawing: Part 3/6
- Part 15 – The Drawing: Part 4/6
- Part 16 – The Drawing: Part 5/6
- Part 17 – The Drawing: Part 6/6
- Part 18 – Wood Selection
- Part 19 – Laying-out the Handle
- Part 20 – Making Sawdust
- Part 21 – Installing the Head
- Part 22 – Tasting the Pudding
- Part 23 – Finishing the Job


 ,
,


Please Leave a Reply