Protecting Natural Sharpening Stones

Groucho Mark

Outside of a dog, a book is man’s best friend. Inside of a dog it’s too dark to read.

Groucho Marx

Natural sharpening stones are wonderful things. At least the good ones are. Finding one that works well with our blades and sharpening style is a thrilling experience and a source of long-term joy. Such an excellent stone can be hard to find and will often be expensive, but whether dirt cheap or worth rubies, it will be delicate and need protection.

In a previous article we looked at how to select a natural Japanese sharpening stone: Sharpening Part 14 – Natural Sharpening Stones

In this article we will examine some methods to ensure your natural sharpening stone provides you long reliable service. Your humble servant suggests you read this article aloud to your favorite stone to gauge its reaction. If you pay close attention, you may even see it wiggle just a tiny bit with gleeful anticipation, especially when you get to the parts about calligraphy, color selection, and skirts. Stones can be very fashion conscious, you know.

The Weaknesses of Natural Stones

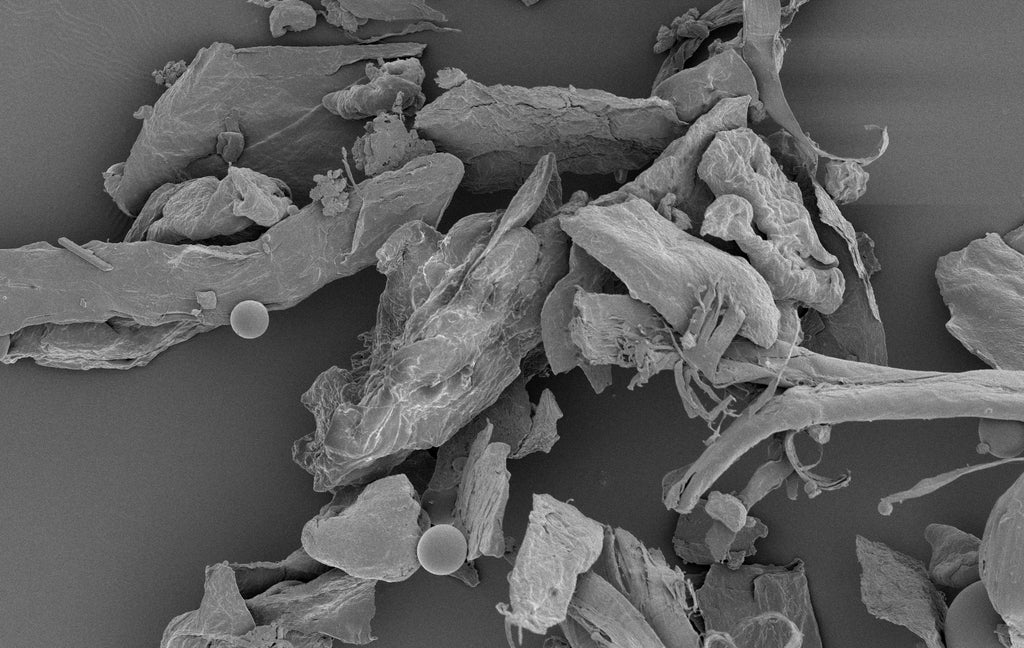
The first thing to keep in mind is that Japanese natural stones are pieces of sedimentary layers that formed on the bottom of the ocean, essentially red-hot dust violently spewed high into the atmosphere by volcanoes, sifted and sorted by wind and waves and distance, and laid down on the seabed like pages in a book. They have defects even if you can’t see them. They naturally have top and bottom surfaces as well as side/end surfaces where the layers are exposed. Water tends to soak in-between these layers exposed at side and end surfaces sometimes causing the layers to separate and even crack in heartbreaking fashion.

Combined with the relative softness of the mineral particles, this structure makes most Japanese natural sharpening stones fragile.

The Stone Base: Objectives and Materials

So what can we do to avoid and/or mitigate these risks to our precious stones to ensure they are happy and will last a long time?

My first Ipe stone base. You can see the grooves on the surface cut for decking purposes.

The most important thing you can do to protect your stone is to make a durable base, and to attach your stone firmly to it. The base provides several benefits:

  1. Seals the stone’s underside from water penetration, reducing the potential for separation and cracking;
  2. Provides structural support reducing the risk of cracking, especially as the stone becomes thinner;
  3. Makes the stone easier to handle, reduces the chances of dropping it, and protects it to some degree from bangs, dings and chipping;
  4. Makes the stone more stable in use.

There are several options for materials from which to make a base. Probably the best material on paper is high-chromium stainless steel. I have never made a metal base but some friends have.

Most people, including me, choose to make their stone bases from wood; It’s the classic choice, but it has some downsides. For instance, it can warp, crack, rot and bugs might turn it into both home and dinner. So if you select wood be sure to choose a suitable species and develop a base design that sidesteps these shortcomings.

Most woods will work. I enjoy experimenting, so at various times I have made and used stone bases made from White Oak, Hinoki, Alaskan Cedar, Honduras Mahogany, Teak, and Ipe. Alaskan Cedar is an excellent wood for this purpose, but the best wood so far has been Ipe. It’s amazing: dense, but tough; It absorbs very little water and won’t crack or rot; Once stable, it doesn’t warp. At all. Bugs hate it. I love it.

File:Roppongi-Mori-Tower-01.jpg
Roppongi Hills Mori Tower Building, Tokyo

So how did I learn about Ipe? An architect specified Ipe to deck an exterior engawa at a balcony on a commercial project I managed some years back, so I decided I had better investigate this material on the Client’s behalf. What I found in various installations in Tokyo and Yokohama was eye opening. A good example is the Ipe decking installed at Roppongi Hills Mori Tower in Tokyo. This building was completed in 2003. I worked out of a Client’s offices in this building off and on for 5 years.

The exterior wooden deck at RH is exposed to more nasty weather conditions than a postman, not to mention heavy foot traffic, but although it has turned grey, it has not split, warped, or rotted. The screws are still tight, and the surface shows very little wear despite several thousand people walking across it each day. Tough stuff.

The Viewing Deck at the top of Roppongi Hills Mori Tower in Tokyo. The deck around the perimeter is planked with Ipe wood. The photo below is a closeup of this durable material, installed in 2002. The building is 238 meters (781 ft) tall with a floor space area of 379,408 square meters (4,083,910 sq ft) in the tower portion, making it one of the largest buildings in the world.

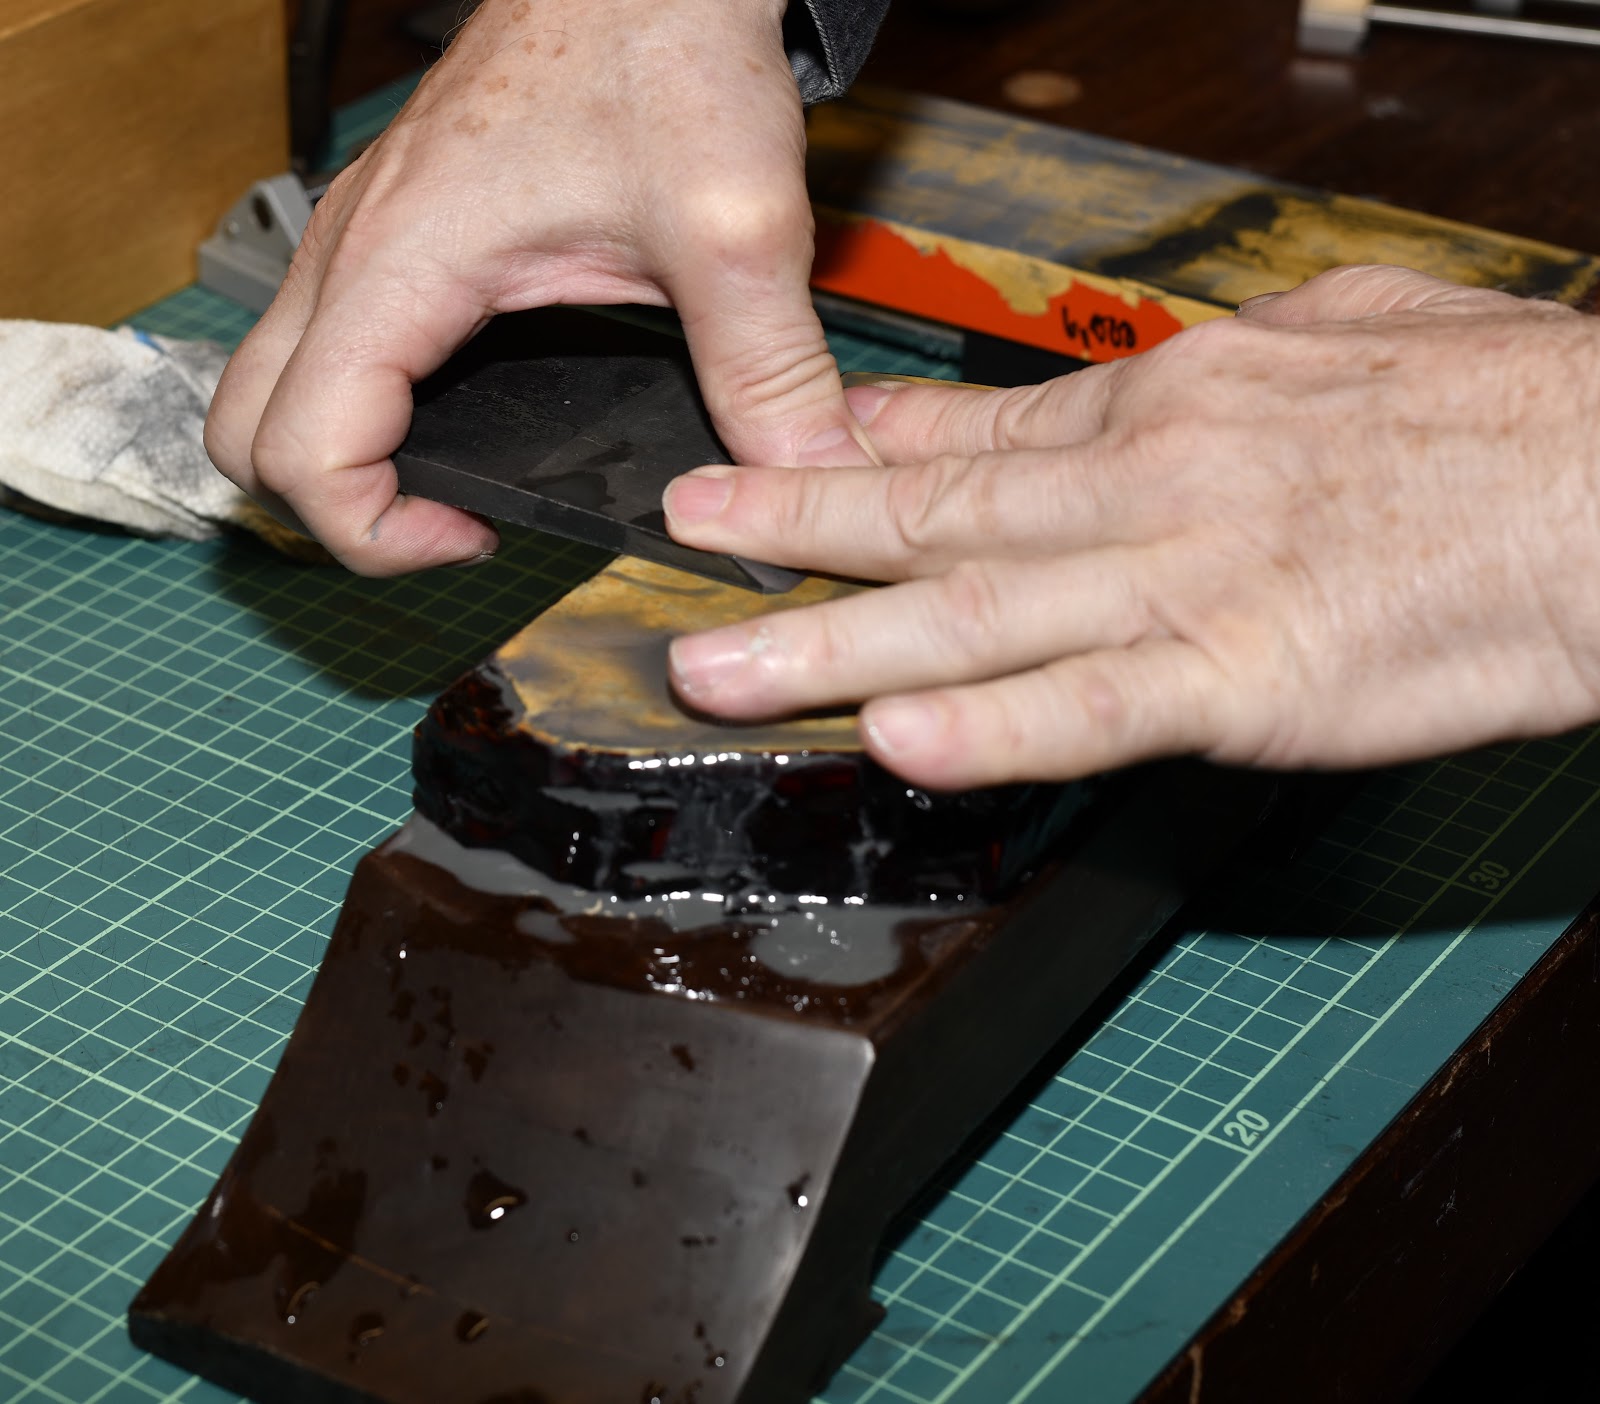
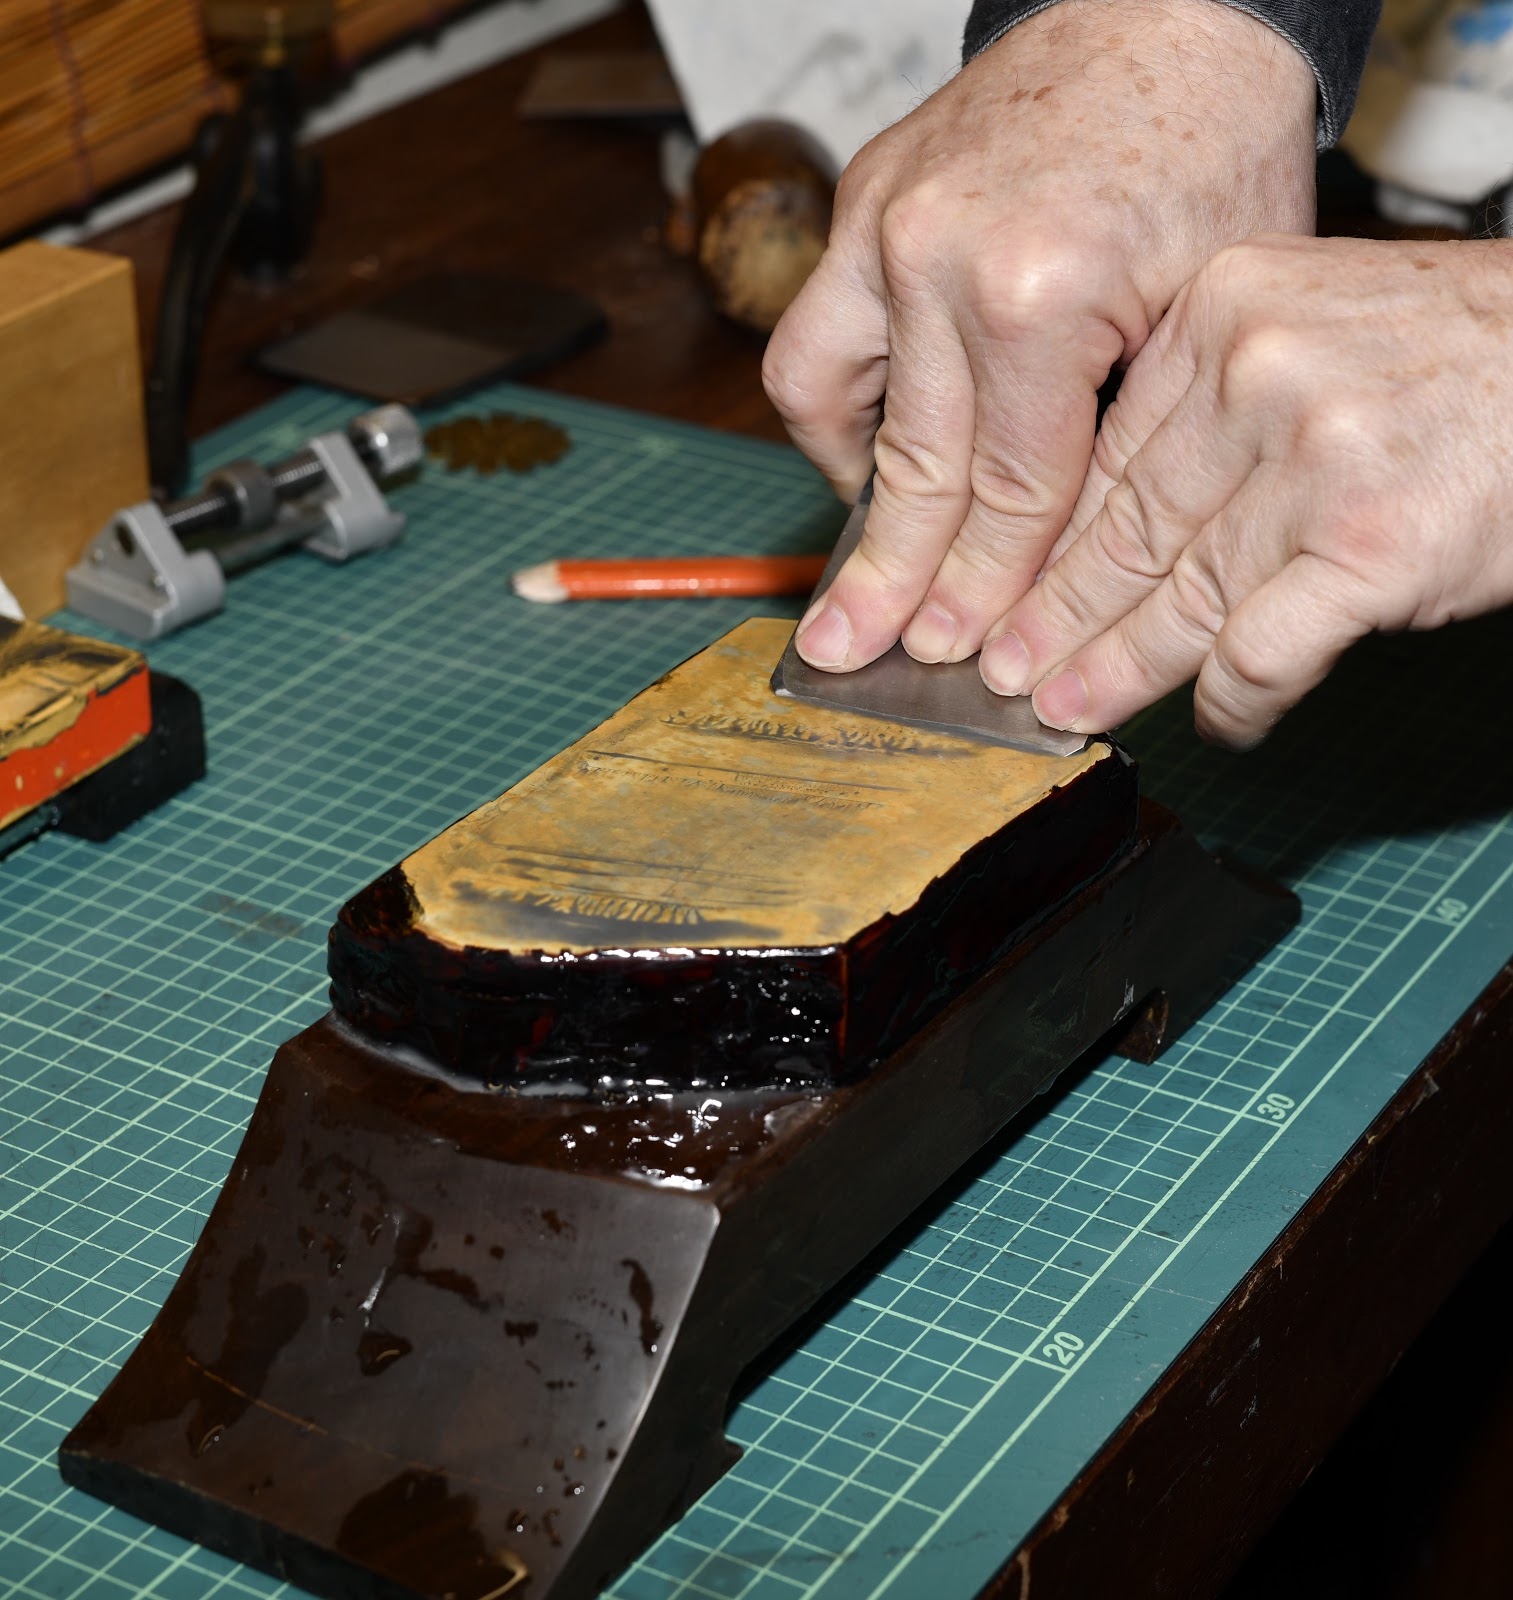
So around 2010 when I bought my last replacement stone, I bummed a couple of decking cutoffs a local lumberyard had been using as stickers directly on the ground for years. The wood was wet and muddy, but still in good shape. I laminated them together to make the base pictured above. It has been better than any I made before that time.

A few years ago, I did another building with an exterior Ipe deck, this time in Yokohama. The decking subcontractor had mixed in two very dark, almost black pieces of Ipe that didn’t match and at all. At first glance I thought they were ebony. I had the subcontractor replace them for aesthetic reasons. Instead of throwing the boards away (they were already cut to irregular lengths), I scrounged them and made a second base for my favorite natural stone. Once again, excellent performance. Testing is complete.

The Stone Base: Design and Fabrication

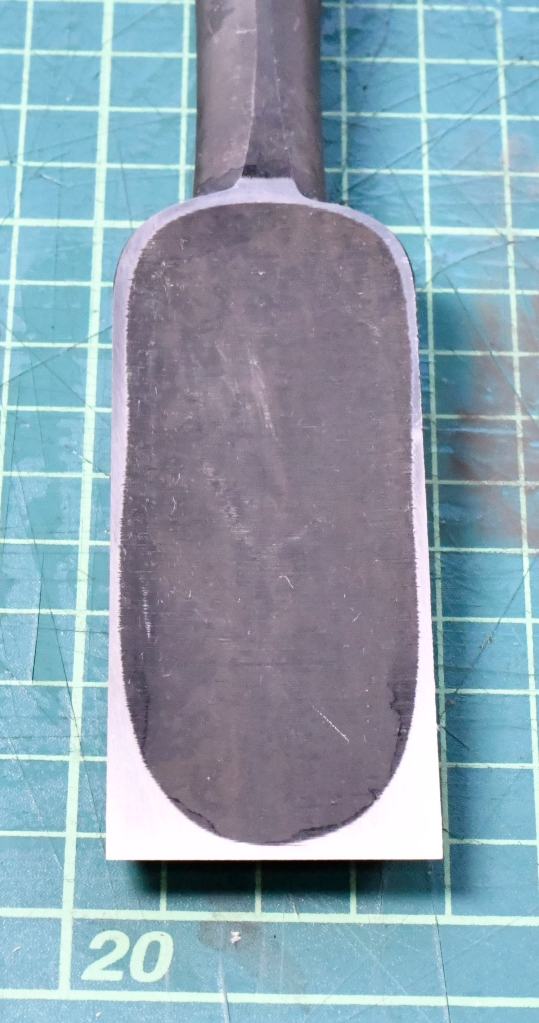
Before you start cutting wood for your base, first flatten the bottom of your stone. It doesn’t need to be perfect, but you want at least 75% contact. A carborundum stone or diamond plate will work fine, but a cheaper and easier option is to rub the underside of the stone on a section of concrete sidewalk wet with running water from a garden hose. Be careful to choose a place with low foot traffic because the concrete can become polished and quite slippery as a result.

Depending on the shape of the stone, you may want to grind off rough spots and projections on the sides and ends too. Be careful when you do this to prevent spalling and other damage.

If the stone has visible cracks, let the stone dry in a warm dry location for a few days, then apply masking tape to both sides of the crack, and carefully soak a few drops of super glue deep inside. Hopefully this will prevent the crack from promulgating further.

Now that you have the stone’s final dimensions, make the base. Whatever wood you choose, select quartersawn pieces if possible for maximum stability against warpage, or laminate the base if not. Regarding dimensions, it needs to be thick enough to resist flexing much when pressure is applied during sharpening, and long enough to remain stable when pushed back and forth. Shape the ends so water runs off. Thicker is usually better than thinner.

Stone bases in Japan are typically made with a raised foot at each end as seen in the two examples here. These feet have several purposes. First, compared to a flat board, they help keep the base stable on uneven surfaces by spanning irregularities. I promise it’s very irritating to have the base rock in use. Second, they make it easier to correct wind in the base if it warps a little. And third, if the feet are laminated to a flat base, the difference in the grain helps to reduce potential warpage. It really does.

You can make the base as attractive or as utilitarian as you like, but avoid creating too many nooks and crannies for stone mud to collect in. The base pictured above retains the beaded profile cut into the wood’s upper surface to drain water from a deck, and it does drain water away from the stone effectively, but mud tends to collect in between the grooves. Not a fatal flaw, but it takes a few extra seconds with a brush to clean.

Be sure to chamfer or round-over all the edges and corners

Place the stone in the exact position on the base you want it to remain forever and mark the stone’s perimeter on the base.

Sand the wood directly underneath where the stone will rest. Don’t sand with the grain, but diagonally to create a cross-hatched rough surface. Completely remove any dust and wipe well with acetone or lacquer thinner.

Apply masking tape to the wood base at the outside of the stone’s outline.

Place the stone right side up on a flat surface and wrap, bend and fold a single strip of thin cardboard or manila file folder paper tightly around the stone’s sides and ends and secure it in place with masking tape to form both a skirt that seals tightly against the surface, and a reservoir to contain the epoxy used to glue the stone to the base.

Mix up some 2-part epoxy, enough the fill the reservoir at the stone’s underside plus a little extra. You want the epoxy to be thick, not runny. Any epoxy that will allow plenty of working time will do.

Force a little epoxy deep into the wood grain and sandpaper scratches with a small spatula or wood stick. Next apply the same epoxy to the bottom of the stone with your little spatula, and forcefully drive it into the nooks and crannies.

Pour the remaining epoxy into the reservoir you created at the bottom of the stone all the way to the brim.

Without letting the epoxy harden or flow out, flip the stone over and set it in the prepared position on the base in precise alignment with the masking tape outline you created earlier. Wiggle the stone a little to work any air bubbles out, and push the stone down hard until you sense it is contacting the wood.

Once the epoxy starts to set and become rubbery, but before it hardens, run a razor knife carefully around the stone’s perimeter cutting just a tiny bit into the wooden base, and then peel up and remove the masking tape and any epoxy squeeze-out. Be warned: this will be an armor-plated, DMV-style nightmare to cleanup later if you wait until the epoxy sets hard.

After the epoxy sets, finish the base with whatever material appeals to you. I soak mine in polyurethane thinned 100% and wet sand several times. I then wipe off any PU that remains on the surface. I guarantee you that any finish material you apply that remains on the wood’s surface will fail and look nasty after a few years of use.

I also like to apply a thin coat of Titebond Type III glue to the underside of the feet and base just for good measure. Does it make a difference? I dunno, but I’m a belt, suspenders, and full-harness kinda guy.

My second Ipe stone base. Naturally black as ebony and almost as heavy. I wanted an unusual but subtle shape, one that could not be produced by power tools, so I made the far ends straight, transitioning into a radius at the base’s top surface. This stone is an irregular shape but it does wonderful things to steel. I’m sharpening a Keisaburo 70mm blade using all the stone’s surfaces.

The Stone: Protecting and Reinforcing the Sides

It’s important to limit water from soaking into the stone’s sides along the sedimentary layers to prevent separation. In Japan it’s SOP to paint the sides with natural urushi lacquer, a toxic tree-sap that loves water and doesn’t easily chip. This material may be difficult to obtain outside of Japan or China, I fear.

Another option is an extremely high-solids (aka “goopy”) natural urethane paint made from cashew tree sap called “Cashew.” The material is used extensively in Japan as a replacement for nature urushi lacquer because it is less expensive, much easier to use, and more resistant to UV ray degradation. It’s made in Thailand and sold in Japan, but it may be difficult to obtain outside Japan. Or you can just use a commercial high-solids urethane.

To use Cashew or polyurethane, clean the stone and let it dry thoroughly. I mean really super dry.

Thin the Cashew or PU 10:1 with the special thinner Cashew sells, or high-quality professional-grade mineral spirits. The crap sold at Home Despot sucks.

Apply a coat of this thin finish with a brush and let it dry. It should dry quickly. Repeat at least 5 times. The mixture will soak into the stone to form a tight bond, seal cracks and pores, and serve as a primer for subsequent coats.

Whatever finish you use, it is best to apply the manufacturer’s recommended primer, or at least a thinned initial coat of the same finish to the stone’s sides and ends so it will penetrate thoroughly into the cracks and crevices further reinforcing the stone. Subsequent coats should adhere well to this primer coat if applied before it cures entirely.

Any color will work. I have a habit of painting any tools I might take to a demonstration or jobsite orange. It seems to stunt darwinian leg growth. Besides, orange was the color of the first GC I worked for back in Las Vegas many moons ago and it brings back pleasant memories. They painted everything orange.

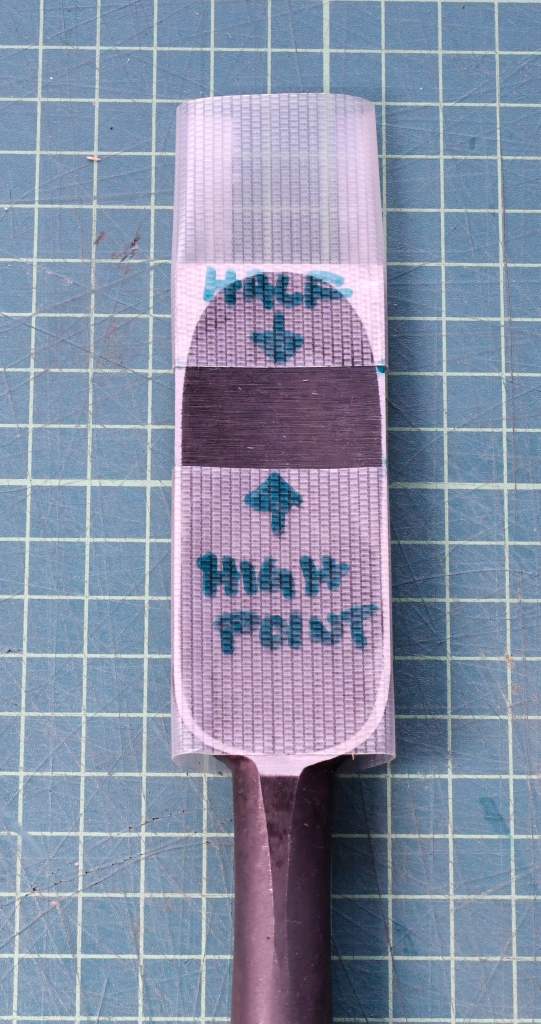
One other thing some people do to reinforce their stones is to apply a strip or two of washi paper (traditional Japanese paper made from mullberry tree fibers) to the sides and ends using urushi lacquer, or whatever material they used for the stone. Despite being paper, washi is made from continuous fibers and is surprisingly strong.

Some people go so far as to use washi with printed images or calligraphy on it, and apply a clear coat of Cashew over the top so the printing is visible. I have never done this before, but it does look interesting.

Here is a link to a blog by an artist named Mr. Kobayashi about his sharpening tools with some photos of pretty stone bases. It is written in Japanese, but the pictures are informative. Not sure how well Google Translate would work.

The Stone: Storing & Transporting

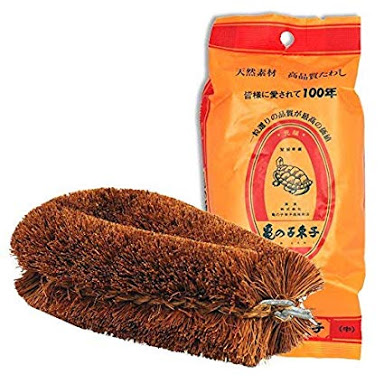
Finally, I recommend you wrap your natural stone and its base in clean cloth or newspaper immediately after each sharpening session, while it is still wet, to protect it from dust and dings. After it has dried, store it in a box with a lid. A wooden box is nice, but a plastic one is more practical.

Here’s a link to a video about making a simple traditional Japanese tool box from softwood. If you haven’t made one of these before, they can be fun and quite useful. They guy in the video uses mostly powertools, and the construction is basic, but it’s all that’s really needed. This style of box was once standard among all construction trades in Japan but you don’t see them much nowadays because the plastic ones are more durable and much better suited to loading/stacking onto construction vehicles.

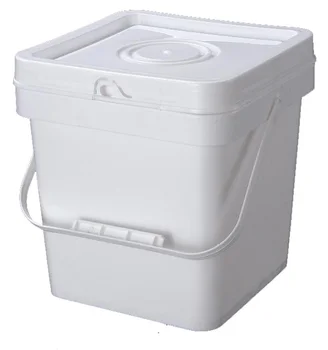
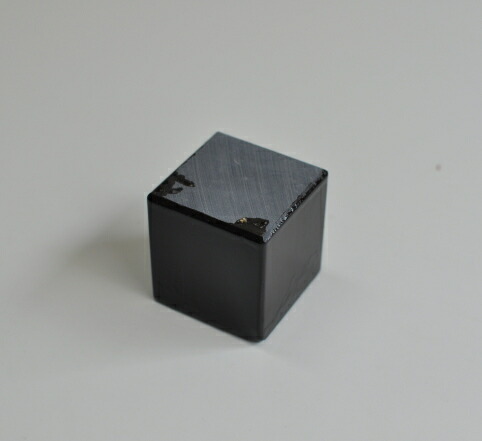
The high-impact plastic box pictured below is one I use for my sharpening stones. Manufactured by Reese in Japan, it has “Tool Box” heat stenciled into the side. Tougher than boiled owl and stackable, these containers will keep the contents dry no matter how hard it rains so long as the water level stays below the lower lip of the lid. Spring clips at each end do a great job of keeping the lid closed and attached even if the box tumbles off the back of a moving truck onto the road. The road rash will be bad, but the tools will stay inside. The problem is the truck following too closely behind…. Don’t ask me how I know. (ಥ_ಥ)

A Reese brand toolbox. Made of high-impact plastic, these boxes are tough as boiled owl. Rainwater can’t get in, but water vapor can get out. And because they have a standardized footprint, they are stackable so they ride well in the bed of construction vehicles. Just make sure they are strapped down (ツ). This type of portable toolbox has almost entirely replaced the traditional wooden carpenter’s box for practical reasons.

YMHOS

If you have questions or would like to learn more about our tools, please use the questions form located immediately below. Please share your insights and comments with everyone in the form located further below labeled “Leave a Reply.” We aren’t evil Google or incompetent facebook and so won’t sell, share, or conveniently and profitably “misplace” your information.

Go back

Your message has been sent

Warning
Warning
Warning
Warning
Warning.

Leave a comment

Sharpening Part 21 – The Bulging Bevel

This is what a flat bevel looks like. So sweet.

For everybody in their busy lives, you need to invest in sharpening your tools, and you need to invest in longevity.

Ryan Holmes

In the previous article in this series about sharpening tools we looked at why and how to true the ura, the hollow-ground area on Japanese chisel and plane blades. This post will focus on the opposite side of the cutting edge: the bevel. This discussion is relevant to all plane and chisel blades, not just Japanese tools.

Preface

Before we dive in, your humble servant must clarify something.

Beloved Customers and Gentle Readers that have been blessed with the opportunity to learn about tools from accomplished Japanese craftsmen, as was I, or that have figured them out on their own, and consequently find this or other of our articles boring, should remember that the primary purpose of these scribbles is to provide instruction to our Beloved Customers, some of whom have not had similar opportunities.

These Beloved Customers are located in many countries and range in experience from newbies to professional woodworkers, so it would be unkind to dumb the explanation down to make it easy for newbies to follow but useless to professionals. The inverse is also true. The result is more comprehensive explanations than advanced and impatient Beloved Customers sometimes find enjoyable. Life is a bowl of cherries and half of it’s pits. I humbly request your kind indulgence on behalf of those who may benefit from extra words.

Investing in Longevity

The quote above by Mr. Holmes is applicable to the all the principles of sharpening I have described so far in this series. He is a computer dude, not a building contractor, joiner or furniture maker, but it is no coincidence he chose to use handtool terminology: it is encoded in human DNA.

His first point is a self-evident admonition, but what about this “investing in longevity” stuff? By definition, an investment is an expenditure of time, resources and/or effort intended to produce a return greater in value than the expenditure. Then how do we go about investing in the longevity of our chisels and planes, and what return should we expect?

While simply grinding sharp edges on our tools helps with making things from wood, I don’t see it as an investment in tools. Rather, if we train ourselves in professional sharpening techniques, and use those techniques to maintain our tools so they function more efficiently and last longer, we can hope to obtain a quantifiable real-world ROI.

The investment your humble servant encourages you to make, therefore, is not in stuff or lucre but in yourself, in your own skills.

The Pros and Cons of the Bulging Bevel

The “bulging bevel,” as I call it, is a deformation too frequently seen in plane, chisel and knife blades. It is simply a cutting edge bevel that is protruding and convex instead of flat. In most cases a bulging bevel can make it difficult to properly sharpen a blade adequately, so it deserves our attention.

Most bulging bevels are born unintentionally and are harmful, but indeed some are hatched with a purpose in mind. Let’s examine the pros and cons, and throw in some half-baked scientific results just for fun. 

The geometry of the bulging bevel is clearly superior in a few applications such as carving chisels and knives used in a gouging or scooping motion where a rounded bevel provides better control in the cut. Another valid application is chisels used for cutting large and deep mortises where a rounded bevel helps pop out waste easier. Only timber framers cut these kind of mortises, however, and most of them use machines to at least rough out the mortises nowadays.

Hidari no Ichihiro 42mm Oiirenomi. Nothing obese about this sweetheart’s bevel.

Our Beloved Customers are, without exception, extremely intelligent people, so right now some are no doubt saying to themselves: “Self,” (that’s what BCs call themselves when they silently cogitate matters of great weight) does a rotund bevel make my blades sharper or duller?” Let us consider some scientific results.

Experimental Results

When I was a grad student in Japan, a fellow student wrote his thesis on the efficacy in plane blades of the bulging bevel versus the flat bevel in plane blades. He developed experiments, fabricated testing apparatus, and used scientific methodology and microscopic photography yielding indisputable results. We repeated some of his experiments, discussed his research, pored over photographs and fondled shavings late into the evenings at his lab in Building 11 at the University of Tokyo’s Hongo campus as I drank coke and he drank sake. I’m not sure he made it home some evenings.

The conclusion he reached was that, from the viewpoint of the wood, and based on the classic sharpness test of cutting rag typing paper, there is no difference in the cutting performance between flat and bulging bevels, so long as two conditions are met: (1) Both flat bevel and bulging bevel are sharpened to the same angle and same degree of sharpness where they meet the test medium (paper); and (2) The bulge is not so large as to interfere with the cut. The “same degree of sharpness” condition in proviso 1 is critical to this discussion.

Let’s examine the cutting edge closely. It’s effective scope is only the last few microns (μ) or so of the blade’s width at the extreme edge. 1μ = one millionth of a meter. A human hair is 90μ in diameter. We need to precisely repair and polish this narrow strip of steel using our sharpening stones, but remember that working anything beyond this strip contributes nothing to making the blade cut well.

Here’s an important point that can be learned from a careful examination: Given the same number of strokes to the same blade on the same stones over the same amount of time, it is difficult to make a bulging bevel as sharp as a flat bevel, unless one spends the time to use a sharpening machine and jigs as my grad school friend did during his research.

But the most important point, and one I want you to grasp violently with both hands, at least two legs, and all your teeth is that the time expended and amount of stone consumed when sharpening to a set level of sharpness at the last critical microns of a bulging bevel’s cutting edge is huge compared to a flat bevel. Sharpening using machines and/or honing jigs takes even longer.

In addition to time and cost, another factor we must consider is certainty, because if we are going to invest the time and stones to sharpen a tool, we need to be sure it will consistently achieve approximately the same level of sharpness every time. Unfortunately, the sharpness of the bulging bevel is often uncertain because, instead of guiding the blade to ensure consistent contact between steel and stone at the critical location on the cutting edge, the shape of the bulging bevel causes us to waste a significant number of strokes and time on polishing an irrelevant mound of metal that does nothing to make the blade sharper, but is simply in the way. Not convinced yet? 

Consider the undeniable fact that, despite your best efforts, this miserable lump causes the blade to rock around on the stone’s surface like a boat over ocean swells, with the result that, given a fixed number of strokes, a high percentage of those strokes end up polishing the bulge instead of the cutting edge. This is important because, once again, the last few microns of the blade is the only part that actually does any cutting, not the bulge. 

Please don’t misunderstand. I’m not saying that you can’t create a fiendishly sharp edge on a blade with an obese bevel. I’m also not saying that, within reasonable parameters, a convex bevel cuts less efficiently or dulls quicker than the same blade with a flat bevel. It absolutely doesn’t, as my fellow student’s research showed. Allow me to restate and summarize the facts so there is no confusion.

  1. It takes longer to create a given level of sharpness at the extreme cutting edge of a bulging bevel than a flat bevel, all else equal;
  2. It consumes more sharpening stone to achieve a given level of sharpness at the extreme cutting edge of a bulging bevel compared to a flat bevel, all else equal; and  
  3. There is greater uncertainty about the actual degree of sharpness achieved at the blade’s extreme cutting edge when sharpening a bulging bevel by hand compared to a flat bevel, all else equal. 

If you doubt these statements, you must arrive at the truth yourself.

Buy or borrow a quality loupe or microscope with enough magnification to detect the scratches left by your usual finishing stone. Start with a dull blade with a truly flat bevel, sharpen it freehand using a pre-determined number of strokes, and observe the scratches at the last few microns of the cutting edge with your microscope. Then test the blade’s sharpness with your skin or fingernail. Next, repeat this test with a dull blade with a rounded bevel using the exact same sharpening tools and procedures and the exact same number of strokes. No deviations. Once again, observe the scratches and test the sharpness. My grad school friend and I performed this side-by-side experiment at the University of Tokyo several times, with consistent results. Actually, it was a bet and I won. He had to buy the drinks and snacks for a month.

The Causes of Bevel Obesity

Besides pernicious pixies, the most common cause of bevel bulge is simple carelessness, which Beloved Customer can take steps to avoid once you realize the causes.

It is human tendency to try to stabilize the blade’s bevel on the stone while sharpening by applying more pressure on the rear half of the bevel, resulting in the rear half of the bevel (which is all soft jigane in the case of Japanese plane blades, and mostly soft jigane in the case of chisels) being abraded quicker than the front half (which contains the harder steel lamination), causing the bevel angle to gradually decrease or even become rounded. Even the best craftsmen make this mistake sometimes.

To avoid this tendency, train yourself to focus pressure on the front half of the bevel closest to the cutting edge. At first, you may overbalance and dig the cutting edge into the stone a few times, but with practice and attention, it will become second nature. It is almost a meditative process. Every professional woodworker worth his salt must learn this skill.

There is nothing wrong with making mistakes when learning a muscle memory skill like freehand sharpening, but too many people can’t be bothered to learn, and then become frustrated when their skills don’t improve immediately. In the end, they become defensive, twist themselves into knots defending their inadequate techniques, and eventually adopt the self-justifying position that sharpness is overrated. Patience, grasshopper.

BTW, don’t forget to use your handy dandy brass bevel gauge to both check the bevel angle while sharpening and to keep those piratical pixies away.

Hidari no Ichihiro 30mm Atsunomi. What ignorant, smelly savage would grind multiple bevels on this work of art?

Another cause of the tumescent bevel is the use of secondary bevels or micro-bevels. We’ll look at these aberrations in the next article in this series.

To make multiple bevels work one almost must use a sharpening or honing jig of some sort. Many allow sharpening jigs to become a substitute for real sharpening skills they didn’t bother to learn. Such jigs can become, in effect, training wheels those who rely on them never grow out of. How amateurish.

Conclusion

I encourage you to “invest in longevity” with regards to your tools in three ways:

  1. First setup your planes and chisels properly so they will provide you with long, reliable and efficient service. Setting up chisels improves not only their longevity but in many cases their performance too, strange though it may seem. I will post articles about setting up and maintaining Japanese planes in the future.
  2. Second, true the ura of your plane and chisel blades efficiently without reducing their useful lifespan needlessly, as described in previous posts; and
  3. Third, invest in yourself by developing and honing the hand skills necessary to sharpen your blades quickly and efficiently while consuming only the absolute minimum of valuable time, steel and stone.
Image result for image of mandalorian helmet

Please master the ancient and bedrock-basic skill of freehand sharpening. All it takes is an understanding of correct principles, followed by concentration and practice; The rest will follow. I promise. “This is the way.”

We will look at other causes of bevel obesity in the next post in this series on science over barbarism.

YMHOS

If you have questions or would like to learn more about our tools, please click the “Pricelist” link here or at the top of the page and use the “Contact Us” form located immediately below.

Please share your insights and comments with everyone in the form located further below labeled “Leave a Reply.” We aren’t evil Google, fascist facebook, or thuggish Twitter and so won’t sell, share, or profitably “misplace” your information. If I lie may my eyeballs drip orange slime.

Go back

Your message has been sent

Warning
Warning
Warning
Warning
Warning.

Leave a comment

Other Relevant Articles

The Challenges of Professional-grade Japanese Chisels

Sharpening Part 20 – Flattening and Polishing the Ura

Shall I compare thee to a summer’s day?
Thou art more lovely and more temperate:
Rough winds do shake the darling buds of May,
And summer’s lease hath all too short a date;
Sometime too hot the eye of heaven shines,
And often is his gold complexion dimm’d;
And every fair from fair sometime declines,
By chance or nature’s changing course untrimm’d;
But thy eternal summer shall not fade,
Nor lose possession of that fair thou ow’st;
Nor shall death brag thou wander’st in his shade,
When in eternal lines to time thou grow’st:
   So long as men can breathe or eyes can see,
   So long lives this, and this gives life to thee.

William Shakespeare, Sonnet 18

Your most humble and obedient servant began this post with the elegant sonnet quoted above, indisputably one of the most beautiful pieces of poetry ever written in the English language, instead of the usual pithy proverbs of Red Green, that towering Canadian Philosopher-Handyman and erudite Leader of Possum Lodge, just to show Gentle Readers how refined we at C&S Tools can be when no one is watching (ツ). But sadly we must now pause all such elegant distractions for a time to focus on the nuts-and-bolts of how to true the ura of a Japanese woodworking blade, the first step in making it sharp.

This tutorial is rather wordy because Beloved Customers sometimes find the task of managing the ura difficult at first. Indeed, while truing the ura of Japanese chisels and planes is a simple task, it’s one many get wrong the first time, occasionally resulting in emotional damage to both blade and it’s owner. I know it almost drove me non compos mentis the first few times I tried, but now that my psychiatric team has stumbled onto the right mix of meds, and Doctor Alonzo has released your humble servant from that unflattering canvas straight jacket, Beloved Customers have the opportunity to learn from my mistakes. Rejoice!

This is the first article in the series where we actually turn steel to mud, so let’s get to it.

Important General Principles

All standard chisel blades and plane blades, whether Japanese or Western, need to have a planar “flat,” as it’s called in Western chisels or “ura,” in the case of Japanese chisels and planes opposite the bevel. When sharpening such blades it’s ideal for these areas be in contact with sharpening stones over their full width, and ideally, full length. Perfection is not necessary, however, so don’t let yourself become obsessive; That way lies madness.

A few lost souls mistakenly assume (just before they go barking mad) that the lands surrounding the hollow-ground uratsuki must be perfectly planar for the chisel to function, but such is not the case. Granted, it does make it easier to sharpen the blade, but it need not be achieved immediately, especially since a planar ura can be easily obtained gradually over multiple sharpening sessions.

If Beloved Customer’s chisel does not have a fully-planar set of lands surrounding the hollow-ground uratsuki when new, understand that it may be a hand-forged, hand-shaped, hand-sharpened tool with imperfections, and perhaps not a CAD-CAM designed, mass-produced, chisel-shaped, sharpened screwdriver. If so, please understand that this is not an aberration but is normal. However, if such natural irregularities distract to the point your eye starts twitching like that of Chief Inspector Dreyfus after spending time with Inspector Clouseau, perhaps hand-forged tools are not your cup of tea.

Procuring Perfect Tools

The previous sentence may seem to suggest that we at C&S Tools prefer to not provide our humble tools to perfectionists, but that is not the case. Rather, we insist Beloved Customers seeking the perfect chisel, plane, saw or knife adjust their expectations for perfection to match their expectations for financial outlay and fabrication time. What conditions? First, multiply your tool budget at least tenfold (seriously) and set aside that budgeted amount in hard cashy money, maybe in a thick roll in your sock drawer. You see, unlike your unworthy servant who many assume works for free, craftsmen with the skills required to produce perfect tools, and who are willing to invest their valuable time in doing so, are in high demand and do not work for free. If this seems steep, then perfection is not for you.

Next, plan your order carefully, and perhaps commission drawings. Not as easy as it sounds, mayhap.

Finally, steel yourself to wait a minimum of two years for the work to be completed, for you see, while many desire perfect tools and are willing to pay the price, you don’t need toes to count the number of overworked craftsmen that can actually forge them nowadays.

Oh yes, I almost forgot one thing. In the case of our Perfect Tool Blackmith, he has an unusual condition, one based on valid reasons I cannot disclose, that the recipient be a working professional craftsman, not an amateur, hobbyist or collector.

An option to having a perfect chisel custom-forged new is to seek out a genuine Hidari-no-Ichihiro chisel because the Yamazaki brother’s products, though very expensive back in the day and more expensive now, were pretty close to perfect in shape and appearance. But beware counterfeits.

On the other hand, the tools we sell to our regular Beloved Customers are extremely practical, they look OK, perform just as well as Perfect Tools, cost a helluvalot less, and most importantly they are waiting on our shelves right now quivering in anticipation of an airplane ride to new masters who will feed them oodles of yummy wood. So which do you think is is better? A perfect prima donna safe queen of a tool that takes years to procure and is too precious to use hard, or a reasonably-priced, hard-working, hand-forged, high-performance, eager but perhaps less than perfect tool you can have right away?

Working With the Imperfect Ura

In any case, please be aware that a chisel with an imperfect ura (nearly all of them have some problems when new) can be perfected over time and will work just fine as-is if you are patient, remain aware of the blades tendencies, and compensate using your eyes and hands accordingly. After all, the chisel only does what you direct it do, so please direct the blade instead of just going along for the ride while drinking adult beverages and smokin wacky-tabaccy in the back seat with Murphy. 〜(シ) 〜

If the plane formed by the ura’s lands is concave, the chisel will tend to undercut the end walls of a mortise, not difficult to avoid with some caution of the sort one must always exercise.

On the other hand (the one with 6 fingers) if the plane is convex, the chisel will tend to scoop away from the end walls of a mortise. All things considered, however, concave is far better than convex.

But whether concave or convex, such irregularities always exist to some degree from time to time in all chisels made by humans and sharpened by hand. It’s the craftsman’s job to manage his tools. Of course, this means we must strive to create and maintain a reasonably flat ura, so let’s consider some practical time-proven solutions that avoid wasting a lot of time, stone and steel, and at the same time don’t prematurely wear out the hollow-ground uratsuki in the process.

Let us begin by observing that the surface area (square millimeters) of the hard steel encompassed within the lands at the ura that we need to eventually make planar can be divided into four areas:

  • The land immediately adjacent and parallel to the cutting edge (aka “itoura”);
  • The land where the neck meets the blade, also kind sorta parallel to the cutting edge;
  • The two skinny side lands, (aka “ashi” meaning “leg”) are more-or-less parallel with the blade’s long axis and located on the right and left sides of the hollow-ground area called the uratsuki;

    All four lands are necessary to the chisel’s function, but the one that matters most when sharpening and cutting is the last couple of millimeters at the itoura touching the cutting edge. Please make sure you understand this.

    While some people fixate on it, the land near the neck matters least of the four.

    The side lands are important bearing surfaces for aligning the chisel in the cut, but they are less important than the cutting edge land, the itoura. If you like your chisels and planes, prefer they remain as easy as possible to sharpen, and intend to use them for a long time, it’s important to understand that working the ura over-agressively on rough stones is the quickest way to wear the side lands down prematurely, thereby making the uratsuki shallower quicker, gradually defeating the subtle genius of the design of Japanese woodworking blades before their time. We want to maintain the ura as deep, long and wide as reasonably possible for as long as reasonably possible.

    Allow me to explain this further. As we inevitably grind away on the skinny side lands they will become gradually wider while the hollow-ground uratsuki becomes gradually shallower, with the result that the amount of hard steel we must sharpen/polish will gradually increase, which is inconvenient in so many ways. Sadly, too many people make their chisel’s side lands fat as a sumo wrestler soon after purchasing a chisel in their anal-retentive quest for the totally flat ura. Makes me wanna cry.

    The cost-efficient and time-efficient solution is to focus on the important itoura, and make small corrections to the ura’s three other lands over multiple sharpening sessions thereby saving valuable time as well as expensive stones and steel while preserving the ura as long as possible. How to do this? Focus all your attention on the most important area, the itoura, and patiently plan on accomplishing the job over 5~10 sharpening sessions, using the chisel between each sharpening session.

    Don’t attempt to correct/polish the ura full-length from cutting edge to neck at first, instead work only the area behind the cutting edge on the stones (which must be flat). To do this, focus finger pressure nearest the cutting edge only. An effective approach is press down on the land nearest the cutting edge while moving the blade on the stones, while the rest of the blade hangs off the stone.

    In other words, while pressing down with the fingertip(s) on the face of the blade (the surface opposite the ura with the brand on it) as near as possible to the cutting edge, move the last 5~15mm of the blade onto and off of the stone in a back-and-forth diagonal motion concentrating abrasion where it is needed most. This requires the ability to sense the balance of the blade on the stone, and to apply fingertip pressure where it is needed most. Wow, imagine that.. real hand skills.

    If you don’t have these skills now, they are easy to develop with concentration and practice, but it doesn’t happen by accident, and if left unleashed and unmuzzled, your impatient, careless inner badger will try to make a mess of things.

    During each subsequent sharpening session, increase the width of the area you work on the stones a tiny bit until the entire ura is flat and can be worked on the stones.

    Through this technique and over multiple sharpening sessions, you will notice the ura’s lands will gradually become planar while only the lands nearest the cutting edge increase in width. Honest.

    It helps to apply either marking pen ink or machinist’s blue to the blade to confirm whether or not you are applying pressure where it is need most and that abrasion is proceeding as desired.

    It is human nature to want to rely on the flatness of the ura’s lands to keep the blade flat on the stone, and therefore we tend to apply pressure at the midpoint of the back so that the pressure on the ura’s land is even at all points of contact. This feels good; It feels stable.

    But if you consider the narrow width (and small area) of the hard steel exposed at the side lands compared to the lands at the ito-ura cutting edge and the corners of the blade, you will see why this technique will wear the skinny side lands quickly and prematurely.

    Allow me to restate an important point: The goal is to focus hand/finger pressure nearest the cutting with much less pressure focused on the sides lands thereby preserving them, and the depth of the ura, as long as possible. This technique will also save time and expensive steel. It is an advanced skill, but one Beloved Customer should aim to perfect.

    Once the ura of your chisel is flat and true, you should not need to true it again unless the blade needs major repairs.

    With much use, the itoura will dissapear, and the bevel must be tapped-out (“uradshi”) and the ura re-flattened (“uraoshi”) to restore it. I won’t delve into the subject of “tapping out” the ura of plane blades in this post but a detailed explanation can be found in Part 30 of this series.

    A detailed example follows.

    Evaluate the Ura

    The first step in flattening or truing an ura is to evaluate its condition. Don’t start grinding away willy nilly without first checking it and making a plan. If you find you cannot stop yourself, don’t walk but run to the nearest pharmacy and buy a bucket of the medicine discussed in part 19 in this series about maintaining sharpening stones.

    There are several ways to check the ura’s condition. A thin straightedge works well in most cases. A thick straightedge may be easier to keep stable on the ura, but it will shut out too much light making observation difficult. Place the straightedge edge-down on top of the full length of the side lands all the way to the cutting edge. Keep the straightedge touching the land; Don’t let it span the hollow-ground uratsuki. Hold the straightedge and blade up to a strong light source and look for light passing between them. This technique is quick and dirty and will suffice in most cases, but does not tell you a lot about twist.

    Use a straightedge to check the right and left lands for flatness. It doesn’t do any good to span the hollow-ground urasuki, so don’t bother. These photos are taken from above for clarity, but you want to hold the blade and straightedge together up to a strong light to observe any light showing between them indicating a gap. I am using a small square, but a simple small straightedge is more convenient. This takes a bit of coordination so be careful not to drop a chisel on your toe. I’ve done this once or twice before. Monkey meet football.
    This is a 30mm Sukemaru atsunomi, a famous brand and an excellent and powerful chisel hand-forged by Mr. Usui from Shirogami No.1 Steel. It’s in pretty good shape, but can benefit from a little truing as can most new chisels and plane blades.

    Another method to check the ura for planar is to paint the shiny lands with dark marking pen ink or Dykem liquid, apply a tiny bit of fine sharpening stone mud to a piece of flat glass, like the piece mentioned in Part 17, and rub the blade’s flat or ura over the glass. The high spots will become obvious. If the ura is banana shaped (convex), mark the high spot with your marking pen. More often than not, the ura of chisels will be generally flat, but sometimes the last 2mm or so of the cutting edge will be curved upwards towards the chisel’s face.

    I learned two things from my examination of this atsunomi. First, there is a high spot (convex) at the skinny land on one side located approximately 1/2 to 5/8 the blades’ distance from the cutting edge. The land on the other side seems a little low. Hmm, curious. This is a bit unusual, but it happens when a blade warps during heat treat, which Shirogami steels tends to do frequently.

    The second problem I observed was that the last 3~4mm of the itoura land at the cutting edge curves downward away from the ura just a tiny bit, enough to cause problems.

    I next must formulate a plan to resolve these problems with a minimum of time and effort and without making things worse.

    Make a Plan

    The temptation to start grinding away immediately will be powerful. But… I must… resist… the… stupidity impulse!!

    If it becomes too much, I’ll take a coffee cup or three of the medicine mentioned in the previous post and slather it on my head forcefully. Don’t hold back, for Pete’s sake, rub it in really good now. Some say my excessive use of this medicine is why I am as bald as an egg, but I prefer to believe it is caused by the high-intensity psychic waves radiating from my gigantic brain (ツ). Thank goodness for my aluminum foil skull cap with its artfully protruding copper wires or the radiating light might blind airline pilots passing overhead!

    But getting back to practical matters, a useful plan must have goals and objectives. In this case the goal is a perfectly planar ura, but if this goal is difficult to achieve quickly there is an objective you achieve immediately in any case, one that may make it possible to achieve the larger goal over multiple routine sharpening sessions without any special effort.

    As I keep harping, to make a chisel or plane work well, you need a sharp, flat bevel and a sharp flat area right at the thin land (itoura) adjacent the cutting edge. This is where the cutting occurs and the area I need to keep sharp, so I will make creating this flat area the first objective in my plan, and then determine the steps to achieve it. I make certain every step in my plan and every stroke I make on the stones gets me closer to this objective, not further away. This means working smart, ruthlessly calming my inner badger (you know, that nearsighted, short-legged snuffling beast that just keeps digging) and repeatedly stomping my stupidity impulse into the ground. Frequent applications of idiot ointment help too.

    If the blade is arched (concave), touching at two points, one near the neck of the chisel blade, or head of the plane blade, and at the other at the cutting edge, and not in between, all is well. I recommend you leave a blade like this as-is because after a few sharpening sessions the ura will become flat and twist-free without any special effort, and the blade will become very sharp and be entirely functional (assuming the faces of your stones are flat).

    If the blade is wavy (rare) or banana-shaped (convex), your plan needs to take those details into account.

    In this example I located the highest point of the bulging area at the ura and marked a line across it with my marking pen. I then measured halfway between this line and the cutting edge and made another line. which I will call the “focus line.” It is here where I need to focus the most pressure when grinding down the ura, NOT the entire length of the blade, despite what my inner badger demands.

    The purpose of doing all this prissy planning and layout work is to protect the right and left side lands from being wasted unnecessarily. Newbies and those with poor badger control often insist on working the entire length of the blade on the stones, but this is illogical and ignores three points.

    The first point often overlooked or ignored is that the majority of the metal I need to waste is usually located to the right and left of the itoura land nearest the cutting edge, not the full length of the blade, so there is little benefit to grinding the entire ura.

    The second point is that the side lands are thin as a blade of grass and will abrade very quickly with almost no effort. Besides, without using large plates and stones, it is very difficult to work the blade’s full length accurately without wearing steps into the side lands anyway.

    The third point often ignored is that it makes no sense at all to try to grind down the land nearest the neck since the plane of the ura hinges on this land anyway. Best to leave it alone and focus my efforts where they will make a useful improvement.

    Plane blades don’t even have a land near the head, so the futility of working the entire ura on plane blades is even more obvious than for a chisel.

    Work the Plan

    The traditional Japanese tool used to flatten and/or correct ura is a smooth steel lapping plate called a kanaban, meaning “metal plate.” To use it, carborundum powder and water are placed on the plate, and the blade is lapped. This is not a difficult process at all, but there is a tendency for the blade’s perimeter to be ground more than the interior areas as the grit is forced in between the kanaban and the blade’s perimeter. To avoid this tendency, and to speed the process up, I prefer to use diamond plates or diamond stones instead of kanaban.

    Whatever plan you developed, and whichever tool you selected for this job, the time has come to work the plan. Do you need more idiot-b-gone medicine? A bigger coffee cup?

    First, color the ura’s perimeter lands with a marking pen or Dykem to help you see where the ura is being ground down. Don’t ever guess.

    Place the most pressure on the focus line selected above. Move the blade back and forth (not side to side) onto and off of the diamond plate, diamond stone or kanaban with the cutting edge and the focus line always touching the diamond plate or kanaban. Don’t go past the high point for now. Be careful to not grind a notch into the narrow side lands where they meet the edge of the diamond plate or kanaban. Most people make this mistake at first. Please don’t you make it more than once.

    Grind the ura down so the line at the highest point and the cutting edge is fairly flat.

    Work the blade on and off the edge of the diamond plate using short strokes and without going much past the highest point marked earlier. This works because the right and left side lands are thin and can be abraded in just a few strokes. I have moved my fingers to reveal the lines, but in actuality my fingers will press down hard on the focus line while working the blade.
    Using a stick to apply more pressure to the blade. I am holding the end of the stick and the chisel’s handle together in my right hand. This is simply illustrating a technique. This chisel did not actually require this sort of aggressive attention.
    The same stick technique works even better for plane blades and makes it easier to apply pressure right behind the cutting edge. When doing this, however, be sure to work the blade both forward and backward while moving it right and left, on and off the plate’s edge to avoid digging a trench into the narrow side lands.

    Remember, the narrow lands at the sides of the hollow-ground urasuki will abrade down quickly. And the rest of the ura can be gradually flattened during subsequent sharpening sessions using regular sharpening stones. It doesn’t need to be made perfect immediately. What matters most is the steel on the itoura land right at the cutting edge.

    The high spot on the side land near the top of the photo has been relieved after just a few passes on the #400 diamond plate. The side lands are now both in fair condition, and the land behind the cutting edge (itoura) needs just a little more work.
    After a few more passes on the diamond plate, the itoura is in good shape. Please observe that the side land at the bottom of the photo is not in full contact, but the opposite side is. This is will not impact the blade’s performance, and will work itself out during future sharpening sessions without special attention.
    Flattening my stones before using them. Notice I am using two 1,000 grit stones to save time and stones. Don’t neglect flattening your stones, whether you use waterstones, novaculite stones, coticule, or even sandpaper.
    Working the ura on the flat 1000 grit waterstone. Did I mention it is flat? Notice that I am working on and off the stone, not side to side, to save the right and left lands. Just a few strokes are required. I am now focusing pressure nearest the cutting edge. Some but not all strokes are full length. The goal is simply to remove the deep scratches on the itoura left by the diamond plate. All other deep scratches can be left alone for now and removed during future sharpening sessions a little at a time.
    The ura after polishing on the flat 1000 grit waterstone. At this point the ura is in good shape. Notice how the land at the photo’s left is wider that elsewhere. This increase in width developed because this location was the high spot on this convex ura. Notice how the land on the right side is not even touching the plane in one area. What you should take away from this photo is the realization that if I had focused my efforts on this high location first and ignored the downward curvature of the land nearest the cutting edge, I would have wasted a lot more time and valuable metal only to shorten the useful life of this excellent chisel. Do you see the benefit of carefully checking the ura’s condition, making a plan with clear goals and objectives, and then working the plan? Did the medicine work? Next, we’ll work on the bevel, make a tiny burr, polish it off by making a few strokes alternating from bevel to ura, and be ready for the finishing stone.
    Working the bevel on the flat 1,000 grit waterstone. Notice the mud piling up in front of the blade indicating the extreme cutting edge is in contact with the stone. I am applying pressure only on the push stroke to prevent the stone from rocking and developing a “bulging bevel,” A honing jig is not necessary.
    The bevel after working on the 1,000 grit waterstone. No jigs were used. No “tricks” involving rulers were used. A silly, inefficient “micro-bevel” was neither wanted nor needed. The bevel is perfectly flat. Flattening the ura and polishing both ura and bevel to this level took less than ten minutes. When the purchaser of this blade eventually dulls the edge, he should not need to spend more than 2~3 minutes to sharpen it once his gear is ready, assuming he is able to sharpen freehand.

    This flattening process is seldom required except on new blades.

    Polish a blade’s ura up to the level of your finest finishing stone once, and don’t touch it with rougher stones again unless it is absolutely necessary, or further gradual flattening is required. This means that in normal sharpening sessions you must remove all the damage at the cutting edge by abrading the bevel with the rougher stones, and only when the bevel is ready for the finish stone, do you work on the flat or ura, alternating from bevel to flat/ura until all defects, burrs, and even visible scratches are polished away.

    If you condition the flat (ura) side of the blade correctly, and keep it polished, you should not need to work it on anything but your finish stone until it is time to tap out and grind the ura or back in the case of plane blades. Therefore, the bevel side of the blade is where we spend most of our time and effort.

    Now that the ura is in good shape, we will look at sharpening the other side of the wedge, the blade’s bevel, in the next post in the series. In the meantime, keep yer stick on the ice.

    YMHOS

    If you have questions or would like to learn more about our tools, please click the “Pricelist” link here or at the top of the page and use the “Contact Us” form located immediately below.

    Please share your insights and comments with everyone in the form located further below labeled “Leave a Reply.” We aren’t evil Google, fascist facebook, or thuggish Twitter and so won’t sell, share, or profitably “misplace” your information. If I lie may an elephant caress me with his toes.

    Go back

    Your message has been sent

    Warning
    Warning
    Warning
    Warning
    Warning.

    Leave a comment

    Sharpening Part 19 – Maintaining Sharpening Stones

    砥石の面直しについて :鑿研ぎ練習 番外編_e0248405_17182931.jpg

    Give me six hours to chop down a tree and I will spend the first four sharpening the axe.

    Abraham Lincoln

    Sharpening stones must be maintained if they are to perform effectively. Abe Lincoln’s quote above is especially relevant to this subject.

    There is a lot of hogwash taught as holy gospel on this subject, so in this article your humble servant will suggest some more or less traditional methods that both work well, and are cost-effective. Do with them as you will.

    Key Principles

    Let’s begin with a few basic but critical principles about sharpening that Beloved Customer should understand and use:

    1. For the majority, but not all, applications, your blades need to meet the following standards:
      • Flat back/ura: perfection is not necessary but it must be flat enough for you to be able to consistently polish the last few millimeters of steel at the ito-ura (flat adjacent the cutting edge) on your finishing stone;
      • Flat bevel, for the same reason mentioned above;
      • Straight cutting edge (except when a curved cutting edge is required).
    2. All Stones get out of tolerance with use. Working a steel blade on a sharpening stone of any kind, whether waterstone, novaculite, coticule or carborundum, wears the stone a little bit with each stroke, creating a dished-out, twisted surface to one degree or another, even if you can’t detect the distortion with Mark-1 eyeball. Therefore, you need to develop the habit of frequently checking the flatness of your stones when in use and truing them when necessary;
    3. Despite what many imagine, a hollowed-out stone cannot reliably maintain a blade with a planar ura, a flat bevel, and a straight cutting edge, but it can damage the blade being sharpened.

    The Rule of Seven applies, so reread these three critical points three times, click your heels three times, and ask the gods of handsaws to help you remember them.

    Albrecht Dürer - Melencolia I - Google Art Project ( AGDdr3EHmNGyA).jpg
    Melencolia I by Albrecht Dürer 1514
    What are the angel and her little buddy pondering? Sharpening, no doubt.

    Pretty simple stuff, right? I apologize if Beloved Customer already knows these things, but you would be surprised how many people know them but still ignore them, and then wonder why their blades won’t behave. Iron Pixies? Nah. Perhaps Mifune Toshiro said it best in Akira Kurosawa’s movie Yojimbo when he quoted the old Japanese proverb: “There’s no medicinal cure for foolishness” (馬鹿に付ける薬はない).

    Toshirô Mifune in Yôjinbô (1961)
    A scene from Akira Kurosawa’s classic movie Yojimbo (1961), the inspiration for the later spaghetti westerns beginning in 1964 and even the more recent TV show The Mandalorian. In this scene, the nameless loner anti-hero is warning off some hired ruffians who have bragged about their judicial tattoos, and the death sentences hanging over their heads, and informed him they aren’t afraid of him or the pain of being cut. The hero responds with the proverb “There’s no medicine for a fool,” then tests their resolve by cutting 3 of them. Ouchy! A hard lesson easily avoided. BTW, if you have tattoos and visit Japan, best to keep them covered since they have an old and indelible association with criminal organizations and judicial branding. On the other hand, if you enjoy being mistaken for a lowlife, violent, thieving piece of scum, by all means show off your ink.

    Here’s the scene on YouTube. Please don’t watch it if you are squeamish. Never call the Man With No Name’s bluff.

    Yôjinbô (1961)
    The Man With No Name (aka Kawabatake Sanjuro played by Mifune Toshiro) pondering the interesting financial opportunities awaiting him in the troubled little post town. His older swordsmith friend (Tono Eijiro) bitterly objects to his plans. The old boy was right.

    Although it has only happened once or twice in my recollection (my saintly wife of the jaundiced eye may disagree (ツ)), on those few occasions when I have made a stupid mistake I have been known to ask subordinates to fetch a large bucket of “Idiot Salve” for me from the drugstore. The jury is still out on the effectiveness of this ointment, but I would like some credit for writing this entire article without applying any.

    But I digress.

    Obviously, if every stroke wears the stone a little, then we must constantly check our stones with a stainless steel straightedge for flatness (length and width) and wind (diagonals) as we use them. It takes 3 seconds. Even if your stones are brand new, you may find distortions. Time spent checking is not wasted if it results in improvement, which it usually does. This is the heart of quality control, and is applicable to everything in life.

    Truing Stones

    When your check reveals the stone is out of tolerance, you need to flatten/true it. Don’t put it off.

    There are many ways to get this job done. Some people advocate using diamond plates to flatten stones. Others insist that sandpaper is best. And then there are the specialty flattening stones. It ain’t rocket surgery. All these methods work, but are unnecessarily costly and time consuming in my humble opinion. The following is the procedure I use. I know it sounds weird. I didn’t invent it but I’ve used it for many decades and highly recommend it. Give it a try, Beloved Customer, before you dismiss it.

    • Always have two of each of your rougher stones soaked and ready to go when you start sharpening, space and weight permitting. This means 2 – 1,000 grit stones, and 2 – 2,000 grit stones in my case. If you use your tools, owning these extra stones is never wasted money and can improve your efficiency. For instance, beginning the day with two flat 1000 grit stones (the grit your humble servant uses the most) ready to rock n roll means I have 4 flat faces to use before I absolutely must stop work and true them.
    • If the blade is damaged, for instance chipped or dinged, begin with a rougher stone or diamond plate, whatever you have that will waste metal quickly and easily while keeping the blade’s bevel flat. Don’t waste time frikin around with medium-grit stones when steel must be removed.
    • If your blade is not damaged, begin the sharpening process with a fresh, flat stone, for instance 1,000 grit if the blade is fairly dull, or 2,000 grit if it’s just partway to dull. Turn the stone end-for-end halfway through the estimated number of required strokes and continue sharpening. This is important to keep your stones true. Yes, you need to keep track of your strokes, at least approximately. This will become second nature with practice.
    • Occasionally check the stone for dishing and wind using your thin stainless steel straightedge. With practice you will develop a sense of the stone’s condition without the need to use a straightedge, but check each stone frequently while you’re developing your advanced sharpening skills. Stop using the stone when the distortion becomes noticeable. 
    • Switch the distorted stone with your flat stone of the same grit and continue sharpening. 
    • When both stones of the same grit become distorted to the same degree, cross-hatch the faces of both with a carpenter’s pencil, then rub them against each other under running water if possible, or while frequently adding water if running water is not available. Take short strokes and be careful to apply even pressure to the stones. This requires self-control, switching the stones end for end frequently, and making an effort to apply even pressure with your hands, and is more difficult than it sounds until you get used to doing it. The friction and water will wear the high spots down, I promise.
    • Monitor the pencil marks to track progress.
    • Check with a straightedge frequently, and stop when both stones are flat, or maybe even a tiny bit convex. 

    With practice, and if you don’t let your stone’s condition get out of hand, this process should take only a few seconds, but it will ensure you are always working on flat stones.

    If you think this technique is slower than using a diamond plate, specialty flattening stone, or sandpaper, you may be overlooking a key point, namely, that using this method one can flatten the faces of two stones at the same time, in the same time period, and with the same hand movements. It may be slower than flattening a single stone with a diamond plate, but it is definitely quicker than using the same diamond plate to true two stones one at a time. Think about it.

    It’s also cheaper because diamond plates are costly, and wear out. The specialty flattening stones are not cheap, and they too wear out. Both methods can contaminate stones, in my experience. And sandpaper sheds the most contaminating grit, and is the most expensive method long-term. No-brainer.

    Now you have two stones of the same grit on-hand that are flat, free of contamination, and ready to rock-n-roll without wasting time or money on diamond plates, sandpaper, or special flattening tools. These are four fresh, flat surfaces to use before you need to take time away from your paying job. And if you pay attention when sharpening, and take care to use each stone’s entire face, the time between sharpening sessions can be increased while saving significant amounts of cashy money.

    Truing Stones Using a Glass Lapping Plate

    Finishing stones seldom require flattening, but the same procedure can be used when necessary. A better solution is to the use the float-glass lapping plate described next.

    If you need to get a stone extra flat, rub the stone on the  ⅜~1/2” (9~12mm) or thicker plate glass mentioned in the previous post. You can often bum scrap pieces of suitable glass from glass stores or contractors. Dumpster diving behind a glazing shop may prove useful if you are careful and don’t cut your arm off. Don’t forget to remove the sharp corners and edges with a carborundum stone or you might end up like the annoying guy in the video linked to above.

    To turn the plate glass into a lapping plate, aggressively roughen one side with a carborundum stone or diamond plate, and clean it thoroughly using a scrub brush, soap and running water to remove every trace of glass and stone particles. Then clean your brush and scrub the glass again.

    The scratches you just made will turn it into an inexpensive and efficient lapping plate. Trust me. Just wet the glass and rub the stone on it while rinsing frequently. Try to use the entire surface of the plate, not just the center. And be sure to apply uniform pressure to the stone.

    If a stone becomes grossly distorted, you can use a rougher stone or diamond plate to true it. Even a concrete sidewalk and garden hose will do the job. However, if you do this, remember that there is no way to avoid contaminating the finer stone with embedded grit from the rougher stone or concrete. This embedded grit must be dealt with before using the stone.

    To remove the offending stone particles, scrub the stone’s faces, sides and ends with a rough bristle brush under running water. Finish by polishing the stone’s face with a nagura stone, and rinsing well.

    You should also use your nagura stone frequently to dress and true the faces of your finishing stones.

    And for Pete’s sake, don’t forget to maintain the edge chamfers on your stones and keep them free of contamination and pixies too.

    As with all things, moderation is best. It can be be time-consuming and expensive to keep one’s sharpening stones perfectly flat, but perfect stones are not especially better for general woodworking than a pretty-flat stone.

    Beware! For the rabbit-hole of perfect flatness is dark and deep, and sleepless nights and gibbering insanity afflict many who strive to plumb its furthest depths.

    Rough Stone vs. Finer Stone

    Here is an important factoid you should remember: A stone trued using a rougher stone or diamond plate will be effectively of rougher grit than its designation until its surface is worn smooth again. And it will wear faster too. But if you use identical grit stones (same brand is best) to true each other, the effective grit of each will remain unchanged.

    Reread the last paragraph three times, click your heels three times, and do that prayer thing again. Namu Amida Butsu.

    Conclusion

    It’s important to keep ones’ stones flat and free of wind, and it’s not difficult or time-consuming to accomplish. In this article we looked at inexpensive traditional ways to effectively flatten and maintain our sharpening stones long-term. Give them a try.

    Now that our stones are looking good, in the next post in this series of hogwash refutation we will be ready to consider how to use them to flatten and polish the ura of our blades. Y’all come back now y’hear.

    YMHOS

    Related image
    I don’t want to hear no more cracks about hogwash. You said to clean the stones, didn’cha!?

    If you have questions or would like to learn more about our tools, please click the “Pricelist” link here or at the top of the page and use the “Contact Us” form located immediately below.

    Please share your insights and comments with everyone in the form located further below labeled “Leave a Reply.” We aren’t evil Google, fascist facebook, or thuggish Twitter and so won’t sell, share, or profitably “misplace” your information. If I lie may a family of hogs move into my shorts.

    Go back

    Your message has been sent

    Warning
    Warning
    Warning
    Warning
    Warning.

    Leave a comment

    Sharpening Japanese Woodworking Tools Part 1

    Sharpening Part 18 – The Nagura Stone

    A Tsushima Black Nagura stone 55x55x55mm

    In the previous article in this series your unworthy servant listed some of the tools and accouterments necessary for sharpening Japanese tools using waterstones. In this article we will examine one especially useful stone mentioned previously: the Nagura. I know, it sounds like the name of some evil thing that crawled out of a mountain cave in Angmar in Middle Earth, but if you don’t have this little stone, you should get one.

    The Nagura Stone

    Nagura stones have been used in Japan for millennia, but they are not unique to Japan. For instance, the Coticule stones of Northern Europe have been used with nagura-equivalent stones since before Roman times. And I would not be surprised if the same tradition existed elsewhere too, they are so useful.

    Mikawa Nagura Stone

    There are several varieties of Nagura stones mined in Japan, the two most popular being the grey/black Tsushima stone pictured above and the softer white Mikawa stone pictured below. I use a soft white Mikawa Nagura stone for my straight razor.

    The black Tsushima variety is cut from sedimentary stone on the ocean floor near Tsushima in Nagasaki Prefecture, located midway between Japan’s Kyushu island and South Korea. I believe it to be the best for general usage so I will discuss this stone in particular.

    Like all Japanese natural stones, Tsushima Black Nagura are mined from sedimentary deposits created by airborne volcanic ash being sifted by distance and wind and filtered by waves and tides by the time they reach the ocean floor. But they have not been subjected to the metamorphic weight and heat that makes harder stones, and are relatively soft and permeable. They also tend to crack in the same plane they were laid down in, especially if subjected to wet/dry and/ or freeze/ thaw cycles, so special measures are necessary to protect them.

    The Job of the Nagura Stone

    The Nagura stone is typically used to perform five tasks.

    1. Cleaning Finishing Stones: Finishing stones always become contaminated with pixie dust and grit from rougher stones. A 10,000 grit stone with 1,000 grit particles mixed in is much less than 10,000 grit effective. If you think a stone is contaminated, wash it well with a scrub brush and clean water then work the surface with a clean Nagura stone to loosen and float up the contaminate particles, then wash off the slurry. The stone will be clean.

    2. Removing Clogging: Similar to 1 above, the Nagura stone is effective at unclogging dried slurry and metal swarth from the sharpening stone’s surface helping it get back to work sooner.

    3. Truing Stone Surfaces: Finishing Stones need to be trued occasionally, usually the corners and edges. Use the Nagura periodically to knock these high spots down. The resulting slurry can be used for your normal sharpening process without it all going to waste. This is wisdom.

    4. Reducing Startup Time: Time is money. Waterstones abrade most efficiently when they have a slurry worked up, but it can take time to get decent slurry started on some stones, especially hard ones, and with some blades, especially those with soft jigane. Use the Nagura to quickly bring up this necessary slurry saving time and money. If you focus on the corners and perimeter of your stones, which tend to be high anyway, it will contribute to truing the stone as mentioned in 2 above.

    5. Reducing the Average Particle Size in the Slurry: Nagura grit is quite fine. You can add Nagura slurry to a stone (by rubbing the stone to create slurry at corners and edges, BTW) to reduce the average grit size of the slurry making a stone create finer scratches and a better polish on your blades. For instance, adding Nagura slurry to a 8,000 grit stone makes it function more like a 9,000-10,000 grit natural stone without the bulk and weight of an additional full-size stone.

    Using the Nagura Stone

    Nagura stones are just as useful when sharpening with synthetic sharpening stones as they are with natural stones. In fact, they may be even more useful with synthetic stones since they tend to be harder and synthetic stone slurry containing nagura particles more closely approximates the performance of natural stones.

    Nagura stones are easy to use. Simply wet the large stone and rub the small stone on its surface. You may need to add additional drops of clean water while doing this. The goal is to wear down the high spots on the large stone while at the same time producing a slurry mixture from both stones to use when sharpening blades.

    The key is to pay attention, use your handy dandy stainless steel ruler to identify the high spots, maybe mark them with a pencil, and use the nagura on those areas first. Don’t be a ninny and rub the nagura all over the sharpening stone’s face willy nilly like you’re washing your pet goat. Make a plan. Work the plan. Develop good habits and speed will follow.

    If the large stone is already perfectly flat, and you need to produce a starting slurry, work the ends and corners of the large stone with the nagura in anticipation of those areas becoming high in the near future. That’s a good boy.

    Protecting the Tsushima Nagura Stone

    Nagura stones are fragile. To avoid water penetration between the sedimentary layers and the cracks that may result, it is wise to use the side of the stone that was in a horizontal plane when it was formed. It is also wisdom to use only one surface of the stone and to coat the stone’s other 5 sides with paint to prevent water infiltration and cracking, and to keep skin oils from penetrating. Traditionally, natural urushi lacquer made from an irritating tree sap has been used for this purpose in Japan, but any high-solids urethane will do the job.

    The Nagura stone is a subtle tool. As your sharpening skills improve the value of this tool will become apparent.

    In the next article in this depraved series about sex, drugs and goat washing, we will discuss ways to maintain sharpening stones. Some people will be miffed. Others will be thrilled. Goats will be indifferent. What about you?

    YMHOS

    If you have questions or would like to learn more about our tools, please click the “Pricelist” link here or at the top of the page and use the “Contact Us” form located immediately below.

    Please share your insights and comments with everyone in the form located further below labeled “Leave a Reply.” We aren’t evil Google, fascist facebook, or thuggish Twitter and so won’t sell, share, or profitably “misplace” your information. If I lie may all my sharpening stones sprout clumps of sand.

    Go back

    Your message has been sent

    Warning
    Warning
    Warning
    Warning.

    Leave a comment

    Sharpening Part 17 – Gear

    Do what you can, with what you have, where you are.

    Theodore Roosevelt

    Sharpening can be a stuff-intensive process, and since portability is always a factor in your humble servant’s case, I strive to reduce the number of accouterments to the barest minimum. The following is a list of some gear, besides sharpening stones, that I am confident will prove useful whether in Beloved Customer’s workshop or the jobsite.

    I will first list the gear needed for general sharpening either in the workshop or the field. At the end of this article that I have listed a minimal set of gear for use specifically in the field where space and weight might make it inconvenient to carry the heavier/bulkier general set of sharpening gear.

    A General Set of Sharpening Gear

    The following is a list of tools and equipment I think are indispensable for sharpening Japanese woodworking tools in general and in many, but not all, circumstances. I have not included some tools that may be necessary for doing “uradashi,” i.e. “tapping out” the hollow-ground urasuki of Japanese plane blades. So here we go.

    1. Sharpening Stones
    2. Stone Base or Holder: A wooden base with a wedge to secure stones is the old standby for supporting sharpening stones above the benchtop or ground, but repeated wetting and drying and the resulting expansion and contraction may compromise a wooden base over time. For my synthetic stones I have come to prefer the commercial bases with twin metal rods and rubber feet. They are unromantic, but are durable, stable, non-slip, grip the stone tightly without breaking it, and work well anywhere. If you decide to make and use a wooden base, I highly recommend Ipe wood because it is stable, unaffected by water, won’t rot, and bugs hate it.
    Washing powder storage square plastic buckets in 2L 5L 8L 10L 15L 18L 20L

    2. Soaking bucket for stones: A medium size plastic or steel mop bucket (not the heavy industrial unit with rollers) is best for soaking stones because they are durable, and their more or less square/rectangular shape is superior to round buckets for leaning stones on end against the inside walls. You don’t want to stack the stones on top of each other if you can avoid it. Any durable bucket that doesn’t leak will work, but a tightly-fitting lid is a big advantage. You will need to soak all but your diamond plate and finishing stones in this bucket before each use. 

    Related image

    I soak my synthetic stones 365 days a year. I close the lid to prevent evaporation and to keep out mosquitoes and woke zombies, and add either washing soda, borax or a few drops of Simple Green ProD5 concentrate to the water to prevent bugs and algae from growing when I won’t be using the stones for a while. Simple Green is a better bug/algae killer, but Borax has the advantage of making the water slightly alkali which helps prevent rust in my blades during sharpening.

    Some stones use a magnesium-based binder that can dissolve and weaken them if left soaking for long periods of time. Please refer to the manufacturer’s instructions.

    3. Glass Plate: 9mm~12mm thick piece of float glass. This is used to true the faces of waterstones when they become distorted through use. My current plate is 600mm x 300mm x 10mm, a bit on the small size. Beside truing waterstones it is useful for many other purposes including checking the fettle of your plane’s soles. I won’t tell the heartbreaking tale of what happened to the last one I took into the field, but rest assured I leave it in the workshop now. We will discuss how to use this tool in future posts in this series, God willing and the creek don’t rise.

    4. Working Surface: If working outside, a Japanese craftsman will place his stone holder directly on the ground or a concrete slab. A craftsman that works inside a shop will often have a wooden or plastic box with a board spanning the narrowest dimension forming a bridge. The stone rests on this bridge, often with a wet towel between board and stone to prevent slipping. This box, called a pond, catches water and mud dripping from the stones. The ideal situation is a board spanning a sink with a faucet of running water. When away from the workshop, I prefer to place a piece of fiberglass-reinforced rubber (EPDM) roofing membrane on a truck’s tailgate or stack of boards or gypboard at a jobsite. I can roll-up this lightweight, tough, and absolutely waterproof mat and stuff it into my toolbox for easy transport. In my workshop, I use a large plastic cutting mat placed on my workbench, but any waterproof non-slip surface will work. No need to get fancy. My stones and sharpening gear are stored under my workbench close at hand. 

    5. Water Source: While sharpening, you will frequently need water to wet your stones and rinse blades. If you work at a sink, use the faucet. If you work outside, a garden hose works great. Some people, mostly knife sharpeners who seldom use stones finer than medium grit, will scoop water from their pond or bucket to wet their stones. However, since stone slurry drips into the pond, this water will always contaminate stones with the grit from rougher stones, making it difficult to remove all the scratches left by the previous stone. To avoid this contamination, always use clean water for wetting and rinsing. 

    Some people prefer a spray bottle to add water, but spray bottles wet things I prefer to keep dry, so a better choice, in my humble opinion, is a plastic bottle such as a dishwashing soap bottle or a plastic lab wash bottle with a bent tube coming out the top. Almost any plastic squeeze bottle will work.

    Tap water contains chlorine in all but backward countries, and chlorine accumulates and accelerates rust, so I use distilled water in my wash bottle, and add washing soda or borax to adjust the water’s PH, a technique I learned from sword sharpeners. 

    Some people add just a bit of liquid lye to their water to adjust the PH. This chemical can be purchased from industrial cleaning supply companies. Too much will damage your skin, so be careful. Also good for keeping Iron Pixies in the shadows.

    6. Sharpening Station and/or Sharpening Pond: I don’t use a sharpening pond, and don’t believe them to be essential, but several practical options are illustrated below.

    余暇のある時や休日だけに出現するものであるにせよ、専用の研ぎ場があるというのは工作をするものにとって幸せなことです。自分なりに工夫を重ねながら研究を深めてゆくのは、何よりも楽しみを感じさせてくれるでしょう。
    A bridge placed over a sink forms the ideal sharpening station. Professional workshops frequently use this classic arrangement. Flush the drain well. You may need to remove the sink’s P trap and clean sharpening stone mud out of it annually.
    Plastic boxes placed inside a wooden box make a portable sharpening pond and stone storage box. There are dozens of variations on this theme possible.
    Related image
    Perhaps the best solution in my experience (short of a dedicated sink) is a plastic box to catch water, with another plastic box nested inside containing sharpening accoutrements such as a wash bottle, brush, abrasive powders, an oiler, and nagura stone. This equipment, along with the sharpening stones, 2 bases and stainless steel straightedge pictured, can be stored inside the box and the lid closed for ease of transport and to keep out pixie dust. This is an inexpensive and extremely practical solution, but be sure to use a quality box made of high-impact plastic.
    Image result for straightedge

    7. Stainless steel straightedge: Use this to check stones for flatness and wind, and cutting edges for straightness. Don’t use a plain steel one unless you want to give the iron pixies skulking under your workbench great joy. The thinner the better. The thick blades used in combo squares are difficult to use in less than ideal light

    8. Wiping materials: You will need something to clean and dry your blades during sharpening sessions. Rags work well for wiping and drying blades, and can be washed and reused, but be careful to avoid cross-contamination. Paper towels are most effective and convenient in my experience, but they cost money and make garbage. Decisions, decisions…

    The traditional Japanese “Baby Turtle” brush with coconut husk fiber bristles.

    9. Scrub brush: A clean stone is a happy stone, as are bases, buckets and glass plates, all of which have grooves and scratches and holes where grit can hide. Scrub brushes are great for digging out this contaminating grit. Coconut palm fiber brushes are ideal because the bristles are fine and grit does not get embedded into the bristles as much as plastic brushes.

    The Lie-Nielson Honing Guide. An excellent if expensive tool.

    10. Honing Guide: This tool is optional. I hesitate to recommend these jigs because they can easily become a crutch preventing Beloved Customer from becoming proficient at freehand sharpening. However, these types of jigs make it much easier and quicker to shape blades to the desired angle on rough stones, especially when correcting a double-bevel or bulging bevel to a more useful single, flat bevel. Eclipse-style honing guides work well. The die-cast versions are inexpensive. Lie-Nielson makes a terribly expensive version machined from stainless steel that I am fond of. Jigs won’t work for all blades, but it is worth having one.

    tzushimanagura8_4
    A Tsushima Nagura Stone

    11. Nagura Stone: More details will be included in next post in this series.

    12. Bevel Angle Gauge: I’ve mentioned this tool in previous articles in this series, but list it here because it is critical. Use it to check the bevel angles of your chisels and planes during every sharpening session to ensure they don’t become too low weakening your cutting edges and inviting premature chipping. It can be made of any material that resists corrosion such as plastic, aluminum, stainless steel, or brass, my favorite because brass repels pernicious pixies.

    Richard Kell bevel gauge
    A compact and effective brass bevel angle gauge by Richard Kell

    Minimal Set of Sharpening Gear

    Sometimes, especially when working at remote jobsites, weight and/or space may impose physical limits on the tools we can carry with us. The following is a list of the minimal set of sharpening tools I bring in these situations.

    1. Sharpening Stones

    2. Stone Base: At the jobsite the stability this tool provides becomes more critical than ever, but if an ultra-light set of tools is needed, then it can be eliminated by placing the stone directly on a rubber sheet.

    3. Soaking Container: There are many potential solutions for soaking stones in a minimalist or ultra-light situation, but I will describe just a few here. If clean water is available at the jobsite (water coming from a newly-installed pre-flush plumbing system may not be clean, and immediately post-flush it may contain lots of chlorine used to sterilize the pipes and fittings), then the minimalist solution I employ is to use a dry plastic bucket to carry tools, including sharpening gear, to and from the jobsite. I then add water to one bucket in the morning. Another option is to scrounge a joint compound bucket or paint bucket and leave it at the jobsite. But unless I have a gang box or other trustworthy tool lockup available at the jobsite, I still may need to transport at least one wet sharpening stone to and from the jobsite each day. The ultra-light solution I sometimes employ is to carry my waterstone(s) in a durable plastic container with a watertight lid, such as the thinner (6cm) rectangular containers by Tupperware. Water can be added at the jobsite to keep the stone(s) soaked and ready to rock-n-roll. And with the lid closed, dirt and dust can’t get in. An even lighter option is a heavy plastic bag. I place the stone(s) in the bag and carry it in my tool bag. At the jobsite, I can add water and close the bag with a thick rubber band to soak the stone(s). But be forewarned that these bags will not protect the stones, and the stones will make holes in the bag at the worst possible time.

    4. Working Surface: I use the fiberglass-reinforced rubber roofing membrane described above. Tough and absolutely waterproof, it also works great for sitting on and even spreading out one’s lunch at the jobsite when more refined facilities and servants are unavailable (ツ).

    5. Water Source: Clean water is necessary even in the field to wet the stones and to wash mud off tools. To save space, I use a small plastic squeeze bottle with a tightly closing lid that originally contained ketchup. If clean water is available at the jobsite, I carry it in my toolbag empty.

    6. Stainless Steel Straightedge: See Item 7 above. I use a thin, flexible, lightweight one in the field.

    7. Wiping Materials: A clean cotton rag and a some folded paper towels work well.

    8. Scrub Brush: I always bring my “Baby Turtle” scrub brush. It’s lighter in weight than a plastic brush and comes in handy for tasks beyond sharpening too.

    9. Nagura Stone: Just in case I need to get an extra-fine finish.

    10. Brass Bevel Angle Gauge (on a red string around my neck)

    The selection of stones I use at the jobsite will depend on the work planned for that particular day, but the minimal set is a 400 grit diamond plate/stone, a 1,000 grit synthetic waterstone, and a 6,000 or 8,000 grit synthetic finishing stone. If I anticipate a lot of sharpening, and if weight is not critical, I will bring two 1,000 grit stones to ensure I have 4 flat sharpening surfaces ready to rock-n-roll first thing thereby reducing the need to spend time flattening stones at work. I can also use them to flatten each other. If I need to do some fine finish planing, such as when doing door modifications/installations, I will bring a 10,000 grit synthetic waterstone. And of course I always carry a Tsushima Black Nagura stone.

    In the next post in this romantic series of adventures in sharpening will focus on the important Nagura stone. Stay tuned for muscled thews and busted bodices!

    YMHOS

    If you have questions or would like to learn more about our tools, please click the “Pricelist” link here or at the top of the page and use the “Contact Us” form located immediately below.

    Please share your insights and comments with everyone in the form located further below labeled “Leave a Reply.” We aren’t evil Google, fascist Facebook, or thuggish Twitter and so won’t sell, share, or profitably “misplace” your information. If I lie may the fleas of a thousand camels infest my armpits.

    Go back

    Your message has been sent

    Warning
    Warning
    Warning
    Warning
    Warning.

    Leave a comment

    Sharpening Part 16 – Pixie Dust

    Related image

    Ashes to ashes, dust to dust, if the women don’t get you then the whiskey must.

    Carl Sandburg

    In the previous article in this series of articles about sharpening the blades of Japanese woodworking tools we examined sharpening stones, the minimum set your humble servant recommends, those I typically use, and the most important stone in any set.

    In this edition we will shift our focus to things that can go wrong when sharpening, including supernatural influences.

    Dust Contamination

    As I mentioned in the previous post in this series I almost never take a 10,000+ grit synthetic finishing stone or natural finishing stone to jobsites. This decision is based on personal observation under practical conditions: Jobsites are rough and dirty places, and stones are fragile. 

    Iron Pixies are rabid fans of Lingerie Football. Don’t hang posters or watch games in your workshop if you want to avoid crowds of the tiny beer-guzzling fiends.

    Even if Murphy is drunk and the resident Iron Pixies are distracted watching Lingerie Football on the boob tube (pun intended), airborne dust at the jobsite will always instantly degrade an expensive 12,000 grit rated stone to an effective 4,000 grit or less, making a fragile, expensive, ultra fine-grit stone pointless. How clean is your workplace? Something to think about. Seriously.

    This is not just a theory that sprouted from my overactive imagination like a dandelion on a dung pile, but is scientifically verifiable. Give it try.

    Get out your microscope or high-power loupe. Place a clean glass slide near where you will be sharpening. 120 minutes later, examine the slide and count the dust specks. How did they get there? Dust is in the air quite naturally, but vehicular and foot traffic kick up lots more.

    Most of those dust specs are larger and some are just as hard as the grit that makes up your finishing stone. Imagine what happens to your blade when those pieces of relatively large, hard grit get mixed into the stone slurry, or become embedded into the stone’s surface. Not a pleasant thought.

    Related image

    Dust contamination even has historical precedence. Japanese sword sharpeners traditionally do their best work during the rainy season when there is less dust in the air to contaminate their stones. 

    Professionals that polish pianos, stone, glass and jewels are also sticklers for eliminating dust contamination.

    Just design and build a few cleanrooms for picky customers with SEMs (scanning electron microscopes), or with lens coating equipment, or who make pharmaceuticals and you will get an education about dust and the problems it creates quickly.

    What dust do we find at construction job sites or workshops? First, assuming we are working at a building project, there are exterior sources of dust. Unlike a house, the doors and windows are usually open to gain maximum circulation, even when dusty landscaping operations are ongoing and trucks carrying materials and garbage are running everywhere kicking up clouds of dust.

    Second, unless you have the jobsite entirely to yourself, there are usually other trades inside the building grinding, sanding, cutting and walking around kicking dust up into the air too. The most pernicious dust on the jobsite is drywall and joint compound. This white fluffy dust appears harmless, but it contains tiny granite silica particles harder than steel, and even bits of glass fiber, that float around and settle on everything. They are a health hazard that has put more than one person in the hospital with respiratory problems. They will contaminate your sharpening stones sure as eggses is eggses.

    Sandpaper, sanding discs, grinders and angle grinders in operation also spray millions of tiny hard particles everywhere, many of which float in the air and can travel some distance before settling, especially inside an enclosed building or workshop.

    Does your business or home workshop have a large door facing a public road with cars and trucks going back and forth near it? Do people with muddy boots come in and out? Are dirty pallets with piles of dirt hidden on the bottom boards offloaded inside? Do you use sanders or grinders in your workshop?

    If you are sharpening outside, or at a dusty jobsite, or inside a dusty workshop, and especially if you regularly use sanders and grinders there, I recommend the following procedures before you use fine-grit stones:

    1. Try to locate your sharpening area away from foot traffic, grinding and sanding operations, and dusty areas;
    2. Sweep and vacuum the surrounding floors well, since it is the movement of feet that billows settled dust back up into the air in indoor spaces, and wait at least 15 minutes after sweeping for the dust to settle before sharpening;
    3. Wet the surrounding ground or floor with water to keep the dust down (this makes a big difference);
    4. Wrap a clean cloth or a sheet of clean newspaper around your fine stone when you are not using it for more than a couple of minutes to prevent airborne dust from settling on it;
    5. Scrub your fine stone under running water with dishwashing soap (neutral PH) and a clean natural-bristle brush before each use to remove dust and embedded grit.
    Richard Kell bevel gauge
    A compact and effective brass bevel angle gauge & talisman by Richard Kell

    And for heaven sake, even if you can’t take your benchdogs with you everywhere, at least have a brass bevel angle gauge in your toolkit, and use it every time you sharpen because, not only will it help you do a better job of sharpening but it will keep the pernicious pixies at bay. In fact, whenever I undertake a serious sharpening job I hang my Richard Kell Solid Brass Bevel Angle Gauge around my neck from a red string as a talisman; brass because it contains no iron for pixies to covet, and the zinc & copper alloy that is brass tastes bad and gives them terrible wind; and a red string because all tribes of the fae strongly dislike that color.

    The following are few references regarding silica and construction dust: Silica-Safe.org Center for Disease Control. Makes you want to wear a respirator in bed.

    YMHOS

    The legal team hard at work digging up dirt. Everyone of the buggers is a Harvard graduate, of course.

    If you have questions or would like to learn more about our tools, please click the “Pricelist” link here or at the top of the page and use the “Contact Us” form located immediately below.

    Please share your insights and comments with everyone in the form located further below labeled “Leave a Reply.” We aren’t evil Google, fascist facebook, or thuggish Twitter and so won’t sell, share, or profitably “misplace” your information. If I lie may the fleas of a thousand camels infest my armpits.

    Go back

    Your message has been sent

    Warning
    Warning
    Warning
    Warning
    Warning.

    Leave a comment

    Sharpening Part 15 – The Most Important Stone

    Orders are nobody can see the Great Oz! Not nobody, not nohow! 

    Gatekeeper, Emerald City

    Many people high-center on this question: “What is the best way to sharpen my tools?”

    Your humble, unworthy servant was hesitant to publish this series of articles about sharpening because, beginning with this one, I must write about tools and techniques that are blasphemous to many people’s sharpening religion. Some of those people will doubtless become emotional. As Benny Franklin once famously said: “Ça ira, ça ira.”

    The objective of this article is to help our Beloved Customers properly maintain, sharpen and use the blades they purchase from us. But it isn’t a sharpening tutorial; that will be a future post.

    We will examine the process of sharpening woodworking tools using mostly waterstones. We will touch on the motivations, goals and priorities related to sharpening you should consider, the minimum set of sharpening stones your humble servant recommends, and my suggestion for the most important stone in your arsenal, one you must be proficient in using.

    Motivations

    You might have noticed from my previous posts that I like to understand motivations. Am I cynical? Perhaps, but where there are smoke and lights in evidence and money to be made, there is almost always someone behind the curtains spinning dials and pumping pedals. Oooh, pretty lights!

    Anyone who does anything has a motive for doing it, and knowing that motive can help us evaluate the validity, and sometimes even the honesty, of what they do, say and write on a particular subject. How can we best ascertain the motivations of those advocating various sharpening methods and related accoutrements? Here are some simple questions you might want to ask: Are the promotions or promoters touting sharpening stones or other stuff they might profit from? Are they selling books on sharpening? Do they teach classes on sharpening? Do they have “sponsors” or “patrons” that supply them, at no cost or with large discounts, stones, diamond paste, sandpaper, sharpening machinery, and/or honing contraptions in exchange for promoting those goods? Are they “influencers” (yes, that’s a real vocation in the NoobTube World) who are compensated for clicks? Do they publish reviews on products they receive for free? You see the pattern.

    Regardless of their business model or motivations, many people give good advice, but many are shills, while some are pretenders, and their advice will be colored accordingly. Caveat emptor, Skippy.

    Just once I’d like to cross the road without having my motives questioned…

    And then there is the most obvious motivation. After all, it doesn’t cost even $20 to make a Mechaultrasuperfine Ninja-purple Gold-dust-infused Musashi Walk-on-Waterstone that retails for $650. And have you calculated the long-term equivalent cost of diamond paste and abrasive films? Somebody’s making serious cash.

    Whatever stones you select, I urge you to find a good balance of performance vs cost vs time vs sustainability, with sustainability referring to both the amount of landfill-stuffing the selected process creates as well as its long-term effect for good or ill on your blades. This 4-variable calculus depends not only on the characteristics of the stones and blades you use, but on your sharpening skills too, so it may take years to find the inflection points if you take a scientific approach. The quadratic formula does not yield useful results, sorry to say.

    At one time or another I have tried and tested many popular sharpening “systems” including those that rely on jigs, machinery, sandpaper, plastic films, stick, liquid, paste, and powdered abrasives, buffers, strops and even superflat ceramic plates because I enjoy the adventure of learning new techniques.

    In your humble servant’s experience all these techniques get the job done, and all have serious merits, but to reduce the time and brain damage involved in this calculus, I believe a wise man will learn from no-nonsense professionals, people who have been down the road before and actually use tools to feed their families, and who have no conflict of interest, be it stones, books, or clicks. That’s what I finally did, long before there was a publicly-accessible internet, and I think it worked out well. But I need to issue a disclaimer before we go further.

    Disclaimer

    Here it is in red letters.

    I say what I believe and believe what I say, even if it offends the “gurus” of sharpening. I buy their books and DVDs, watch their YouTube videos, and try their sharpening techniques and even the “tricks” they recommend, so I like to think I am not a “frog in a well,” as the Japanese saying goes. If I don’t know something, I will say so. I am not a liberal college kid to be offended if you disagree with me, but I ask you to not become orcish.

    Please note that we do not now and have never received goods, discounts, or financial compensation of any kind from anyone in exchange for modifying our opinion about sharpening tools and techniques.

    I have personally taught many people how to sharpen tools over the years, but have never received a red cent for my time and haven’t used those training sessions as an excuse to sell stuff.

    I have never done a product review.

    I have never written a book or magazine article or even a blog post with advertiser support.

    Please note that the document you are currently reading cost you nothing, was written and paid for by C&S Tools alone, and that there are no banners, commercials, or outside links on any of the pages in this blog. No SEO strategy at all. If Evil Google brought you here, it was not at our bidding.

    We want to help our Beloved Customers, mostly professional woodworkers who already possess a certain level of skill, to level-up those skills. C&S Tools has no commercial incentive to mislead, and will not do so. But we do have a profit motive.

    Remember, we have a 100% guarantee on the materials and workmanship of the tools we sell, so our sole financial motivation, and the very reason for this blog, is to help our Beloved Customers understand the tools we sell, and to become proficient in sharpening, maintaining, and using them so they won’t mistake a lack of skill and/or experience on their part as a problem with the tool. All most professionals really need is a little guidance. We want skillful, ecstatic customers because they become repeat customers. And we do hate to disappoint.

    This image has an empty alt attribute; its file name is tenor.gif
    The Marketing Department

    Goals, Objectives and Priorities

    I mentioned 4 variable calculus above. Actually, it’s more like 5 variable calculus, the fifth variable being your goals and objectives for sharpening. Let’s examine those in more detail.

    If satisfying curiosity are among your goals, then by all means try all the stones, sandpaper, films, pastes, jigs, contraptions, and machines available and methodically test them until they wear away to dust. It simplifies the calculus, but the cost and time required to reach a final conclusion may become a heavy burden.

    If beautiful blades, zen-like sharpening experiences, and improved hand-soul coordination are high among your objectives (they’re included in mine), then you will want to try natural finishing stones after you have achieved a certain level of skill in sharpening using synthetic stones. I heartily recommend them to those who are willing to roll the bones. The ante may be costly.

    The performance of the sharpening system you select, including the following factors, are things you should include in your calculations:

    • Time efficiency: How long does it take you to produce an adequately sharp edge starting from a dull/chipped one? How fiddly is the process? For this calculation you will need to determine how much your time is worth. Remember, while you may enjoy sharpening, from the professional’s viewpoint, time spent sharpening is non-productive time because, during the period you are working on tools, your hands, eyes, and mind cannot work on the stuff you contracted to deliver to your Customer;
    • Cost efficiency: How many billable hours and expensive supplies/tools/equipment must you expend to obtain an adequate cutting edge? For this calculation you will need to determine the cost of time, consumables (stones, sandpaper, film, paste, powder, beer, Prozac) and equipment (grinders, jigs, plates, widgets, etc.) expended in producing an adequate cutting edge long-term. Even if you are not getting paid for your woodworking, your time still has value. And don’t forget to depreciate the cost of stuff. This is where synthetic waterstones shine in comparison to the many other sharpening systems out there, IMHO.
    • Cutting efficiency: How well and how long does the sharpened blade cut? For this calculation you need to determine what defines an “adequate cutting edge” for you. For instance, given the same abrasives and expending the same amount of time to sharpen two blades, the blade with a rounded bevel, or even multiple bevels, is seldom as sharp as the blade with a simple flat bevel, as can be readily confirmed using a powerful loupe or microscope to examine the last few microns of the blade’s effective cutting edge (more on this subject in Part 21 of this series). Does the sharpening system you are testing tolerate or even promote bulging bevels or multiple bevels? Get out your loupe before your inner troll makes you say things you will regret.

    If curiosity, pleasure and beauty are lower priority than practical performance in your list of objectives, then I suggest you focus on synthetic waterstones and the bedrock basics, at least for now:

    1. Obtain a minimum set of basic synthetic stones, or adapt what you already have;
    2. Learn how to use them skillfully;
    3. Practice those skills until they seep into your bones.

    It is not an expensive process, but neither is it the instant results the Gurus of Sharpening promise in the books and videos they profit from, the classes they teach, and the tricks and gimmicks the promote. It takes real skills that will serve you and your tools well for your entire life. And it all starts with the minimum set of stones.

    The Goldilocks Set

    Oh my goodness, just look at the time! I really must be going.

    Sharpening stones are expensive consumables that disappear a little with every stroke. If you need more than 5 minutes to sharpen a plane or chisel blade that was not chipped or damaged, then you may be spending too long, and wasting your time and stones, so it’s important to determine the bare minimum set of stones that work best for you.

    The Goldilocks set I recommend includes the following 4~5 stones/plates:

    1. A Rough Stone: 400~800 grit rough diamond plate/stone or two carborundum stones;
    2. Medium Stones: Two 1,000 grit synthetic waterstones (I will get into the reasons for having two stones of the same grit in another post);
    3. A Finish Stone: 6,000~8,000 grit synthetic waterstone.

    Please also note that, while I use them in my workshop, I don’t consider 10,000+ grit synthetic finishing stones or natural fine-finishing stones essential tools, nor do I take them to jobsites. This decision is based on simple practical experience: Jobsites are rough and dirty places, and fine-grit stones are fragile. 

    The sharpening stones I normally use in the shop include a few beyond the minimum set described above, but the idea is that this finer gradation creates a better-quality cutting edge while consuming less of my expensive finishing stones. Useful natural stones can be pricey:

    1. One 400~800# diamond plate or two rough carborundum stones (only occasionally necessary);
    2. Two 1000# Waterstones (usually necessary, but sometimes I skip it);
    3. Two 2000# Waterstones;
    4. One 6000# stone (fine enough for quickly finishing chisels and most planes);
    5. Two natural stones for finish planes and push chisels, or just for fun (a 10,000# synthetic stone works just as well).

    Which Brand of Synthetic Stone?

    I have had good luck with the Imanishi “Bester” brand waterstones. Imanishi seems to be inactive so I have been forced to research other brands. The best alternative I have found so far is the “Hibiki” brand waterstones by Naniwa, but I have no doubt there are others that work just as well.

    Naniwa also makes an interesting and effective diamond stone they call their “Shrimp Brand,” and which is mistakenly (?) translated as “Lobster Brand” in the US and Europe. Not a “diamond plate,” mind you, but a diamond-impregnated sintered product that works much better than the usual plates with diamond particles electronically attached to steel plates. This diamond stone is comprised of a 1mm layer of diamond grit in a vitrified (baked until it melds) ceramic matrix affixed to an aluminum plate. The sintered layer is quite hard and won’t dish out easily. More importantly, these plates cut faster, smoother and longer than the diamond plates your humble servant has previously experienced.

    It is especially useful for uraoshi of plane blades.

    The important thing is to keep it wet in-use. If it becomes clogged with metal swarth, use a nagura stone to clean the surface and get back to work.

    The Most Important Stone

    Everyone focuses like a laser on the finishing stone, the final stone in the process, but when sharpening a particular blade, the most important stone is really the first stone you use in the series, be it a 400 grit diamond stone or a 2,000 grit waterstone. 

    A conventional diamond plate

    You may find this whole discussion passing strange, so I will explain. The stone (or diamond stone, depending on the amount of steel that must be wasted and your available time and budget) you begin the sharpening process with builds the foundation of your cutting edge by performing the following two critical tasks:

    1. Removing damage from the cutting edge; and
    2. Shaping/flattening the bevel at the cutting edge.

    Only a rough stone (400~1000 grit) can accomplish the first task efficiently. If the truth of this statement is not self-evident, I won’t even try to convince you. Do the comparisons yourself: count strokes, time, and cost, measure angles, and peep at scratches through a high-power loupe. A contradictory opinion based on anything less is just hot air and is less convincing than a Southern California politician’s protestation of not routinely receiving bribes from the many drug cartels that ship product through that hell-hole.

    In addition, the roughest stone you use in the series is also the most efficient tool for shaping the bevel and cutting edge, if it needs to be adjusted. Until these two critical tasks are completed, none of the subsequent finer stones can accomplish anything efficiently, and the faster and more precisely these two tasks are accomplished the sooner one can stop sharpening and get back to making wood chips and shavings.

    The role of all the finer stones in the sharpening sequence is simply to replace the deep scratches left in the blade by the preceding rougher stone with progressively finer scratches. And since this polishing work is done using more expensive, less-abrasive and slower-working stones, it is most cost/time-efficient to accomplish this task as quickly as possible.

    If you knock out the two foundational tasks listed above using the roughest stone stone/plate in the series quickly and precisely, then you can accomplish the subsequent polishing work at minimum cost and maximum speed. Screw it up and your time and money will be wasted, your stones will prematurely turn to mud, and your blades will hate you.

    Please be sure you understand the meaning of the previous five paragraphs. They are the heart of this article, and should be the foundation of your sharpening process.

    So how does this work in real life? If the blade is chipped, dinged, or needs shaping, then I start repairing and reshaping the cutting edge’s foundation with my diamond stone. A 400~800 grit carborundum stone, if very flat and kept flat, will work too, but remember that many carborundum stones, especially those permeable by water, can become dished-out in two shakes of a lamb’s tail, and if such a distorted stone is used used on a blade, it can quickly create a mess resembling a Chinese restaurant’s garbage dumpster.

    If my blade is only dull, but not damaged, and the bevel is in good shape, I start with a flat 1,000 grit synthetic stone.

    If the blade is starting to lose its edge, but is not damaged and still cuts, I start the process with a flat 2,000 grit stone. Notice the word “flat” is used a lot in this article, and not by accident.

    The objective, again, is to create an adequately sharp edge in the minimum amount of time and cost by starting the sharpening process with the cheapest, most aggressive stone appropriate to the blade’s condition for the heavy wasting and shaping jobs thereby creating a bevel and cutting edge which you can then quickly polish to the final cutting edge using the more expensive, finer-grit stones. Wow, that’s a mouthful!

    I want to make one thing perfectly clear before ending this post. Except for a few special situations, I don’t recommend making secondary bevels or micro-bevels because, like training wheels on a bicycle, they are not an efficient long-term solution. In fact, they are a short-cut that has stunted many people’s sharpening skills.

    We will return to this subject later, but in the meantime, I have the honor to remain,

    YMHOS

    The Great and Powerful Oz has spoken!

    If you have questions or would like to learn more about our tools, please click the “Pricelist” link here or at the top of the page and use the “Contact Us” form located immediately below.

    Please share your insights and comments with everyone in the form located further below labeled “Leave a Reply.” We aren’t evil Google, fascist facebook, or thuggish Twitter and so won’t sell, share, or profitably “misplace” your information. If I lie may my only companions be fleas and biting flies

    Go back

    Your message has been sent

    Warning
    Warning
    Warning
    Warning
    Warning.

    Leave a comment

    Sharpening Part 14 – Natural Sharpening Stones

    The finest, softest natural stone your humble servant routinely uses. Black Cashew natural urethane paint (made from cashew nuts) has been applied to the bottom and sides to retard water infiltration and prevent de-lamination in this sedimentary stone. It is a joy to use, and all my blades simply wriggle with joy when it’s their turn for a ride.

    Advice is a dangerous gift, even from the wise to the wise, and all courses may run ill.

    J.R.R. Tolkien

    We receive a lot of inquiries about natural finishing stones, so your humble servant wanted to share some accumulated thoughts and experiences about them with Beloved Customer. Perhaps they will be useful.

    To begin with, natural Japanese stones are a lot of fun, and can create a beautiful, cloudy finish on a blade’s bevel. They truly make my heart sing, wild thing.

    I believe that blades finished with a natural stone tend to stay sharper a little longer compared to synthetic stones, but can’t prove it. Despite my fondness for them, I want to make it clear that natural stones are not magic, and are not critical to doing good work.

    It is interesting to note, however, that while top-quality natural stones are expensive, if judged by the amount of steel they can sharpen, they are actually no more costly than the better synthetic stones. But they can be more of a gamble.

    Geologists believe (they weren’t around at the time to witness the event, although they like to pretend they were) that natural sharpening stones typical to Japan were created when particles of volcanic dust fell from the sky, were sorted, and sifted by winds and waves, and settled onto the sea floor eventually becoming sedimentary stone. Sounds likely.

    Being natural, they carry the inherent and potentially expensive risk of internal defects, such as weakness between sedimentation layers, cracks, and contamination such as hard particles of sand concealed inside. Even if you find one that seems perfect in every way, the bones never stop rolling because you never know what lurks inside.

    This stone is a medium hardness natural finishing stone I regularly use.
    The stone is epoxied to a base made of Ipe wood. The purpose of this exceptionally hard and rigid base is to: (1) Protect the stone from dings; (2) Reinforce the stone against cracking; (3) Provide a longer, more stable footing in-use; and (4) To span irregularities on the surface being used for sharpening, which often includes the ground in the Japanese tradition. The stone’s sides are coated with a natural urethane called Cashew, a product of the cashew nut tree, to prevent water from soaking into the stone’s sides potentially causing cracks and delamination. The bright orange color is to ensure pesky pixies do not talk the stone into sprouting legs and walking away when outside the workshop. They can be persuasive when talking to stones, donchano.

    Your foolish servant erred with his first purchase of a natural stone, one recommended by a hardware store owner in Sendai many years ago. I fear he intentionally foisted a low-quality stone on me that a person more experienced with natural sharpening stones would have rejected. This stone “drags” steel, a phenomenon where the stone deposits hard clumps on the blade that then gouge the stone’s surface and leaves rough spots on the blade. It’s impossible, BTW, to judge a stone’s propensity for this pixieish behavior by eyeball alone.

    I learned a bitter and expensive lesson about both natural stones and salesmen that day. I still use that stone for sharpening axes and gardening tools and as a door prop, but the real reason I keep it around is as a reminder of my foolishness.

    After that disastrous adventure, I became more careful, pay less attention to what people say or even write, and distrust salemen like thin ice over a rushing river. Consequently, I don’t give a rodent’s ruddy fundament about most people’s opinions on the subject of sharpening stones. Nearly all who claim expertise talk and write about things they only partially understand. Many have a conflict of interest. Still others seek justification of their poor decisions.

    Nor I do care about the region or mountain or mine a stone came from, or its designation or color. A word to the wise a stone seller near Kyoto whispered into my shell-like ear some years ago: Even the best mines produce mostly waste.

    And because of the impossibility of evaluating stones long-distance, and considering Gildor’s wise words quoted above, I am hesitant to give advice about what stones to buy or where to buy them. But I will tell you what I do when buying a stone:

    1. I examine the stone for cracks and signs of irregularities and impending separation at its sides (not all defects are fatal);
    2. I flip it with my fingertips and listen to the sound it makes. Yes, a good stone sounds different from a bad stone;
    3. I take the stone in my hand, close my eyes, and feel it with my ki 気. Does it feel sound and happy?;
    4. I touch my fingertip to my tongue, wet the stone just a bit, and smell it. Does the moisture soak into the stone quickly, or is the stone too dense? Is the smell clean or muddy?
    5. I touch it to my teeth (an ancient technique for detecting the fineness and consistency of a stone’s abrasive qualities);
    6. I put a plane blade I know well to the stone, take a few strokes, and like a bow on violin strings, I feel the friction and listen to the music made;
    7. I examine the scratches the stone leaves on the blade’s jigane and hagane using a loupe. 

    None of these critical tests can be conducted long-distance. BTW, if you think any of them are pointless, then I know where you can get a good deal on some swamp land in North Korea with its own lake perfect for a condo development. Well, actually its a settlement pond for a chrome plating factory, but the effluent discharge was recently brought up to 1876 standards so there is no pesky vegetation, or endangered fish or wildlife to deal with, and the price is right!

    I have two natural stones I use regularly nowadays. One is of medium hardness suitable for most every straight blade. The other, pictured below, is very soft, and easily damaged, but creates a beautiful foggy finish on the steel. 

    I love my natural finishing stones, the feel of using them, their smell, the music they make and the pretty finish they produce on my blades. They are part of the romance unique to Japanese blades. I believe the stones I use now and their sisters worn to slivers in past decades were worth every penny I paid for them, but I recognize this is an emotional rather than practical viewpoint, and difficult to defend economically.

    Don’t misunderstand: your humble servant is not suggesting you should not try natural sharpening stones, only that you carefully evaluate them in-person beforehand, and buy from a reputable dealer that offers a reliable warranty (please don’t ask for recommendations). And just to prove I am neither troll nor curmudgeon, I will give you the same advice about purchasing natural sharpening stones that a wise old man shared with me a long time ago, advice that has passed Gildor’s test.

    • Rule 1: Don’t trust your eyes alone when judging a stone’s origin, designation, appearance, or performance (see the five tests listed above): always try a blade on the stone before purchasing it to make sure it works for you and your blade;
    • Rule 2: Don’t buy a stone from someone you don’t trust and who won’t give you a reliable 30 day warranty to provide time to check the stone carefully for suitability and defects. Remember, the combination of stone and blade is much like a marriage where the softer (but actually granularly harder) stone smooths and polishes the harder blade. If the two don’t work well together, then even lawyers can’t make it right, but a warranty may help reduce the damage;
    • Rule 3: Don’t whine if the stone disappoints: roll the dice and smile at the spots they show you. Besides, hoes, axes, and hedge shears need sharpening love too.

    On the other hand, if you have the stomach for Rule 3 and don’t mind risking your money, then the first two Rules can perhaps be ignored. I grew up in Sin City and know that can be fun too. You pays your money and you takes your chances; Baby needs a new pair of shoes!

    Finally, if and when you find the perfect natural sharpening stone, I advise you to protect that lovely thing from damage to ensure it serves you long and reliably. The link below is to an article on this very subject: Protecting Natural Sharpening Stones

    YMHOS

    Ancient Roman or Norse dice in a pose worthy of gambling.

    If you have questions or would like to learn more about our tools, please click the “Pricelist” link here or at the top of the page and use the “Contact Us” form located immediately below.

    Please share your insights and comments with everyone in the form located further below labeled “Leave a Reply.” We aren’t evil Google, fascist facebook, or thuggish Twitter and so won’t sell, share, or profitably “misplace” your information. If I lie may I always roll snake eyes.

    Go back

    Your message has been sent

    Warning
    Warning
    Warning
    Warning.

    The Ancient Art of Hand Forging

    Those who hammer their guns into plows, will plow for those who do not. 

    Thomas Jefferson

    Hand forging is an ancient blacksmithing technique that, from the viewpoint of cutting tool performance, has been almost entirely replaced in modern times, but never surpassed. Understanding a little bit about this technique and its history is helpful in understanding what a good blade should be.

    Before motor-powered machinery and gas-fired forges, steel was very expensive. It took a lot of expertise, fuel, manpower and endless hammering over long periods of time to turn rocks into useable pieces of steel, an economical reality that shaped civilization for millenia. International economics aside, all steel was of necessity hand-forged back then.

    This is not an efficient process compared to drop forging or press shaping. It consumes more time and fuel, and requires more labor, skill and experience. It is contrary to modern mass-production methodology. It’s a job for a trained blacksmith who demands a fair wage, not a seasonal factory worker in Bümfüq Guangzhou intent on earning enough cash to put a new corrugated sheetmetal roof on his family hovel in the countryside.

    In the final analysis, hand-forging is both unprofitable for corporations and too expensive for consumers who actively value low cost and appearance above performance. No wonder it’s as Dead as Disco.

    You may recall people talking about how they prefer to use hand-forged antique chisels and planes because they are superior. Those old tools certainly don’t look superior to modern tools, and they aren’t cheap. But are they superior? And if so, why?

    The essence of hand forging is using hammer, tongs, anvil and forge (charcoal/gas fired) to violently shape the metal during a series of heating and cooling cycles. The combination of hammer impacts and repeated heat cycles (heating, cooling, reheating) breaks the relatively isolated, large clumps of carbide crystals into uncountable small crystals, distributing them more evenly throughout the steel’s matrix, producing the sharper, more durable, and most desirable “fine-grained” steel.

    The properties of this steel are what make it valuable.

    A “Tatara” furnace in Japan used to create a “bloom” of “Tamahagane” steel from “satetsu” which translates to “sand iron.” This is the traditional steel that was used throughout Japanese history prior to the importation of Western steel from England in the 1860’s
    A clump of Tamahagane (“Jewel Steel”) as it is sold from the bloom furnace. It contains lots of voids and impurities that make this material entirely unusable in modern tool-manufacturing processes.
    Related image
    A clump of Tamahagane early in the forging process. Most of this material will be lost as waste before a useful piece of steel is born.
    After the Blacksmith hammers the raw clumps of Tamahagane hundreds of times, he then forms it into numerous small flat steel patties, which he breaks into the pieces shown in this photo in preparation for forge-welding them into a single larger piece of steel that he can then forge into a blade.

    Let’s examine some of these coveted properties. The first is is that it is tougher than steel of lesser quality, meaning it is less likely to fracture due to crystalline defects. In the case of swords or knives it means the blade can cut and chop without breaking when subjected to stresses that would destroy a blade made of lower-quality steel.

    The second and third ways fine-grained steel is superior is related to the first. The consistent crystalline structure with its finer carbide crystals distributed more uniformly throughout the matrix results in a cutting edge that can be made sharper, and that will retain that sharpness longer than steel of lesser quality. Of course, realizing this performance depends on the quality of the materials employed, and the skill and diligence of the blacksmith.

    Many antique tools were made during a time when steel was expensive, and hand-forging was the only way to shape it. In fact, in the case of critical tools such as swords, this process included forging and reforging clumps of impure iron, folding and refolding the resulting mass into itself hundreds of times to remove impurities and adjust the carbon content, typically resulting in the a loss of 75+% of the original material’s mass. That’s a lot of material and manpower tossed onto the ash pile.

    I call these tools critical not just because of their important functions but because of the implied warranty that went with them. For instance, if such a blade failed in battle, the blacksmith’s implied warranty went beyond financial compensation and involved the loss of his body parts at the hands of his vindictive customer’s surviving family members. How’s that for an “extended warranty?”

    But any decent steel cutting tool was time consuming and expensive to produce. Until quite recently, blacksmiths did not have tools such as infrared temperature gauges, oxygen sensors, or hardness testers. All they had were their hands and Mark 1 Eyeball, so it took many years of training under a master for a blacksmith to learn how to make a good blade and survive.

    Quality control was a big problem back then, but the blacksmiths in Scheffield, Philly, Solingen, Fukuoka and elsewhere still managed to make excellent blades of all varieties with fine-grain steel as the customer demanded. Most of those surviving blades are superior to what is manufactured in the West today. Certainly better than anything made in Chinese factories.

    Drop-hammer forging parts in China

    Unfortunately, it is impossible to judge a piece of steel’s crystalline structure with the naked eye, a fact mass producers exploit nowadays to make huge profits selling low-quality tools made from scrap at relatively high profits based solely on the tool’s appearance as it hangs on the hardware store wall encased in its impermeable armor of clear plastic. Lower-quality tools became widely acceptable once a generation or two of consumers that knew the value of cutting tools hand-forged from high-carbon steel left for the big lumberyard in the sky to be replaced by more urbanized generations that valued low cost and appearance more than performance.

    Sadly, while the quality, consistency, and workability of steel as a material has greatly improved, the ancient technique of hand-forging has been abandoned throughout most of the world, skilled blacksmiths are almost extinct, and blade performance has suffered as a direct result.

    Hand forging is still practiced by some blacksmiths in Japan, where the greater quality and performance this technique provides are still highly appreciated by craftsman obsessed with performance. Accordingly, our chisel and plane blades are made from modern high-quality high-purity steel produced by Hitachi metals instead of the much more expensive and difficult to work traditional Tamahagane. However, our blacksmiths hand-forge every single blade in their one-man forges through a minimum of three heats to form a fine-grain steel with the characteristics noted above that Japanese professional woodworkers demand.

    鉋の製造工程
    A composite photo of Nakano Takeo forging a plane blade.

    YMHOS

    If you have questions or would like to learn more about our tools, please click the “Pricelist” link here or at the top of the page and use the “Contact Us” form located immediately below.

    Please share your insights and comments with everyone in the form located further below labeled “Leave a Reply.” We aren’t evil Google, fascist facebook, or thuggish Twitter and so won’t sell, share, or profitably “misplace” your information. If I lie may a baku caress me with his toes


    Go back

    Your message has been sent

    Warning
    Warning
    Warning
    Warning
    Warning.