“The true mystery of the world is the visible, not the invisible.”
Oscar Wilde
In this post we will dig into a few important nitty gritty points about sharpening stones everyone needs to know. Perhaps Beloved Customer already knows all these points, but please ready your shovel anyway because there may be at least one buried surprise to unearth.
A Wood Shavings-Eye View
When seen under high-magnification, the surface of a sharpening stone looks like millions of densely-packed stones embedded in a flat field. The smaller the stones, the finer the grit.
As the blade is pushed and pulled over these stones, they scratch and tear metal from the blade’s surface leaving behind scratches corresponding to the size of these small stones. This violence needs to continue until the blade’s ura and bevel form a clean intersection of two planes.
A view of a blade sharpened with 1200 grit diamond plate showing the furrows left by individual pieces of grit
Seen under high-magnification, the cutting edge is jagged where these furrow-like scratches terminate at the cutting edge. To some degree, it may even look like a serrated sawblade. Some blades, like kitchen knives and swords used in a slicing motion to cut soft materials like meat and vegetables and enemy arms, benefit from a serrated cutting edge more than a highly-polished edge, and so do not need to be highly polished on fine-grit sharpening stones.
Plane and chisel blades, however, are used to cut wood, a material typically harder than foodstuffs, mostly in a straight-on approach, not in a slicing motion. In this situation, a rough, serrated cutting edge is weaker than a highly polished edge because the jagged edges are projecting out into space like the teeth of a handsaw blade. Being relatively unsupported, the pointy parts of this serrated edge are more easily damaged than a highly-polished blade with smaller, more uniform scratches terminating more cleanly at the cutting edge.
Therefore, in order to produce a sharp durable blade, we must make the microscopic cutting edge smoother and more uniform by using progressively finer grit stones to produce shallower and narrower scratches, and a thin, uniform cutting edge.
But how fine is fine enough? There is a curious phenomenon related to friction that is applicable to cutting edges, and is useful to understand.
The Friction Paradox
Imagine a cube of heavy, polished stone with its downward flat face resting on the level, flat surface of a larger slab of similar stone. Let’s say it takes some specific measure of force pushing horizontally on the top stone cube to overcome the static force of friction between the two stone surfaces in order to get the cube moving.
If we gradually increase the degree of polish between the two contact faces and measure the force required to start the top cube moving at each progressively higher level of polish, we will find the force decreases with each increment of increased polish, at least for a time. This is at least partially because the irregularities between the two surfaces (asperities) do not interlock as deeply when the surfaces become more polished.
However, at some point, more polishing brings the surfaces of the two stones into such intimate contact that the molecular attraction between them, and therefore the force necessary to move the cube, actually increases.
The same phenomenon occurs with tool blades. If you sharpen and polish your blades past a particular point, the friction and heat produced during the cut between blade and wood will increase, as will the energy that must be expended, while the resulting quality of the cut and durability of the cutting edge will not improve significantly. Of course, the money invested in stones and time spent sharpening past this point will be mostly wasted.
The Inflection Point
The inflection point where additional polishing yields increased friction with little improvement in cut quality will depend on your tool and the wood you are cutting, but you can get a pretty good idea of where it is if you pay attention over time. While the sharpening stone manufacturers turn red in the face and salesmen froth at the mouth and spray spittle in anger when I say it, in my well-informed opinion there is little practical gain, beyond self-satisfaction, to be had from sharpening chisels or planes past 6,000~8,000 grit, making this range of grit an inflection point in my mind. What about you?
Conclusion
I encourage Beloved Customer to conduct your own experiments to determine the practical inflection point in the case of your planes and wood you cut. Many who figure this out save themselves significant amounts of time and money sharpening over the long-term.
To those Gentle Readers that love sharpening more than woodworking, and enjoy putting money in the pockets of sharpening stone manufacturers more than keeping it for themselves, I apologize for pointing out the icky floater in the punch bowl. But you probably would have it noticed it eventually anyway, if only from the taste difference.
I will touch more on this important point in the next exciting installment in this scientificish adventure.
YMHOS
The Repentant Mary Magdalene by Canova
If you have questions or would like to learn more about our tools, please click the “Pricelist” link here or at the top of the page and use the “Contact Us” form located immediately below.
Please share your insights and comments with everyone in the form located further below labeled “Leave a Reply.” We aren’t evil Google, fascist facebook, or thuggish Twitter and so won’t sell, share, or profitably “misplace” your information. If I lie may frogs infest my boots.
A famous wood carving of 3 monkeys located at Nikko Toshogu Shrine post re-construction that illustrates a famous saying originating in China that also works as a pun in the Japanese language. From right to left: See no evil; Speak no evil; Hear no evil (見えざる、聞かざる、言わざる).
Even monkeys fall from trees (猿も木から落ちる)
Japanese saying
Ideally, a tool blade will have absolutely uniform dimensions: the right thickness and taper, perfect cross-sections, uniform curvature, straight edges and flat surfaces. However, professional grade Japanese tools are not made on CNC machines, but are hand forged and so may include some dimensional imperfections. Indeed, imperfections are part and parcel of all human endeavors. Most imperfections don’t matter; sometimes they make the tool better, sometimes they need to be remedied.
At sometime in Beloved Customer’s woodworking career you may experience one of your blades producing less than ideal, “skewampus” results. These poor results may reflect the influence of predacious, pernicious or perhaps even perfidious pixies. Perhaps you don’t acknowledge the existence of supernatural pests and instead blame the trouble on your technique in using the tool, or even on the irregular grain of the wood you are working. But if not pixies, please consider that the real culprit may be the shape of the blade’s cross-section, or perhaps your unintentionally sharpening the blade with a skew. We will examine some of these problems in this installment in our series on romance and monkeyshines.
We will also look at the curved or “cambered” cutting edge profile in plane blades, the benefits and undesirable results it can produce, and how to incorporate this blade profile intelligently into your woodworking repertoire.
Many people, like monkeys in trees, learn bad habits from their friends and teachers. We hope this article will help you understand what’s going on with your woodworking blades, and how to better shape and sharpen them intelligently instead of just monkeying around. Please be sure to BYOB (bring your own bananas).
A serious craftsman doing Fine Woodworking in a pixie-free, clothing-optional workshop (notice the strategically-placed boots).
Dealing With SkewampusBlades
Skewampus is an interesting word I learned from my mother. I am told it is a combination of the word “Cattywampus” meaning “in disarray,” and “askew.” I think it is the perfect word for describing the ailments some blades suffer.
While less than ideal, it is not unusual for the thickness of a chisel blade’s cross section to vary slightly across its width, with one side being thicker than the other, forming an irregular quadrilateral cross section. This irregularity is frequently found in plane blades too. Since there is more steel on the thicker side of such a blade, unless care is taken, it will abrade differentially during sharpening and tend to develop a skew.
As discussed in previous articles in this series, Japanese plane and chisel blades are formed by laminating a layer of hard steel to a much softer body made of low-carbon steel or iron. If the lamination exposed at the cutting edge is not uniform, all else equal, the area of the blade with more hard steel touching the sharpening stone will abrade slower than areas with less exposed hard steel such that the cutting edge will tend to become skewed during sharpening. Perfection is neither attainable nor necessary, but the uniformity of the lamination is an important detail to observe when purchasing and sharpening Japanese tools.
Likewise, plane and chisel blades that are not uniformly heat-treated but that exhibit differential hardening across the bevel’s width will tend to become skewed during sharpening as one side of the bevel abrades quicker than the other. This problem is more common than you might imagine, especially in the case of inexpensive tools where appearance and low price are given priority over quality control.
Anyone that has experienced bidding high-dollar construction projects will understand the adage “the most profitable job may be the one you lose.” Cheap tools are much the same way: that low-cost chisel or plane you buy on PeeBay may look good in online photos and even during the unboxing ceremony, but if you count your time worth anything, if you dislike headaches, and if real-world performance matters to your bottom line, then such tools are often prove disastrous. Caveat emptor, Skippy.
A chisel or plane blade that has an irregular cross section or a skewed cutting edge often works just fine for many cutting operations. However, when cutting mortises, a chisel blade with a skewed cutting edge or irregular cross section will tend to drift to the side gouging the mortise’s walls and ruining tolerances. If you find that your mortise walls are gouged, or that tolerances are poor, check your chisel blade’s shape, and correct any deformities. It usually isn’t difficult to do.
Like all human work spaces, Japan’s smithies are not immune from pixie infestation despite annual blessings by Shinto priests and periodic offerings of salt, rice, and wine to the spirits. I will refer you to this previous post and another wherein we discussed supernatural predators and described some antidotes for the pixie pox. But the deformities we are examining in this post are more often the natural result of the human eye misreading temperature gauges, or the hand misjudging hammer blows or the non-judicious use of grinder wheels rather than precocious pixies at play.
If your blade’s deformity is not excessive, you can often correct or compensate by applying a little extra pressure on the blade’s thicker side while sharpening it.
It’s interesting how a little off-center pressure on a blade being sharpened over many strokes can change its shape. Many people unintentionally deform their cutting edges by not paying attention to the amount and location of the pressure their fingers apply, or by skewing the blade on their stones. A word to the wise.
On the other hand, purposefully skewing one’s blade in relation to the direction of travel when sharpening the bevel can be useful in gradually and economically correcting a skewed cutting edge. This works because the leading corner of a blade held in a skewed orientation on the sharpening stones is abraded quicker than the trailing corner. But once again, inattention causes many people to skew their blades when moving them around on their sharpening stones unintentionally creating, instead of intentionally correcting, skewed cutting edges. BTW, there’s nothing wrong with skewing the blade when sharpening so long as you are aware of the distortion this practice can produce and compensate accordingly. Another word to the wise.
If these methods don’t mitigate adequately, you may want to grind and lap a chisel blade to a more uniform cross-sectional shape. A chemical bluing solution used afterwards will help conceal the shiny metal exposed by this operation if your chisel objects to shiny spots. Some of them can be quite vain, you know.
A chisel with a nicely uniform lamination and cross-section, and pretty polish produced using a natural finishing stone.
Cutting Edge Profiles
Many people have access to electrical jointers and planers, but relatively few have industrial equipment with the capacity to dimension wide boards such as tabletops. And of course architectural beams and columns are typically too long and heavy to dimension with most stationary electrical equipment.
The choices available to most people for dimensioning such materials therefore are either handheld electrical power planers and/or sanders, or axes, adzes and hand planes. Powerplaners, sanders, axes and adzes are beyond the scope of this article, but let’s consider hand planes.
I need more than one plane? You can’t be serious!
Although the very idea gives some woodworkers vapors (I don’t mean gas), an efficient craftsman will have multiple planes with cutting edges honed to profiles matched to specific operations. It doesn’t take many but it does take more than one, unless results don’t matter.
Everyone that dimensions larger pieces of lumber by hand needs a plane with a wide mouth and a curved or “cambered,” cutting edge called a “scrub plane” in the West, and “arashiko kanna” in Japan.
This variety of plane excels at hogging a lot of wood quickly when the craftsman needs to significantly reduce the thickness or width of his lumber. If the blade is narrow, curvature is deep, and the mouth is wide this plane will hog wood quickly, but it will often leave a deeply rippled surface, often with bad tearout.
One might also have a second arashiko, essentially a jack plane with a wider blade with a shallower curvature for the next steps in the dimensioning process. Such a plane will not hog wood as quickly, but it will produce a surface that is closer to flat and smoother with less tearout. You can see the advantage of having two arashiko planes, or a scrub plane and a jack plane, with different cutting edge profiles when dimensioning lumber.
Many Beloved Customers use electrical-powered planes to dimension lumber before turning it into furniture, doors, chairs, or sawdust, etc. and are aware that planers always leave tiny ripple-like scalloped cuts on the wood’s surface, often with some tearout, that is unacceptable as a final surface. A hand-planed finish is far superior, but it doesn’t make sense to remove more than the bare minimum of wood necessary to remove this washboard.
A finish plane, in fact, is the perfect tool for removing these ripples and producing a smooth, uniform, even shiny surface on condition that the plane is sharp, it has a fine mouth, its set to a fine cut, its chipbreaker is tuned and set properly, the blade profile is appropriate for the width of the wood to be finished, and the wood does not have too many large knots. In one or two passes such a plane can easily remove all the ripples and leave the wood clean and shiny without changing its thickness much at all.
Assuming the wood is cooperative and one knows how to sharpen and setup their plane properly, blade profile frequently remains a key factor many fail to grasp. Obviously, the curved cutting edge of a scrub plane cannot produce the perfectly flat surfaces required for joining two pieces of wood together, nor a smooth surface. On the other hand, the corners of a perfectly straight blade will leave clearly visible steps or unsightly tracks on the surface of a board wider than the blade, which is not a problem when rough-dimensioning a board, but is not ideal for joined surfaces and painful to look at if the board’s surface is to be left with just a planed finish.
So how do we solve this conundrum? When finish planing, the professional approach is to use two finish planes each with a different cutting edge profile.
The first type of finish plane has a perfectly straight cutting edge used to plane pieces narrower than the blade’s width. Since the blade’s corners are not riding on the wood but are straddling either side of the board while cutting, they won’t leave tracks or ridges, and the finished surface will be truly flat, perfect for joinery.
The second type of finish plane found in the professional’s toolchest has a curved cutting edge, or more correctly, curved just at the right and left corners to prevent it from leaving tracks and ridges when planing boards wider than the blade. Nearly all the cutting edge is left straight, but creating this tiny amount of curvature at the right and left corners causes them to smoothly disappear into the plane’s mouth so no tracks are made and any ridges are nearly impossible to see or feel. In other words, the corners of the cutting edge never touch the surface of the board, and so don’t leave discernible tracks or ridges. The finer the cut made the smaller any ridges created will be. Indeed, where a high-quality surface is required, the final cut with the finish plane will produce shavings thin enough to see one’s fingerprints through.
You may want to reread the previous two paragraphs to make sure you understand what these two cutting edge profiles are and what they can accomplish before you read further.
Naturally, a professional doing high-quality work needs at least two finish planes, one with a straight cutting edge used to produce flat, precisely-dimensioned surfaces on wood narrower than the blade’s width, and another finish plane with a cutting edge very slightly curved at the corners used to finish surfaces wider than the plane blade.
There are those that advocate using a curved blade, sometimes dramatically “cambered,” as some call this shape, for all applications. Those who advocate this sloppy technique twist themselves into knots justifying tricks to approximate flat surfaces using such blades. I have no doubt this is an ancient technique, but I suspect it is a sad practice that sprung from the carelessness of some craftsmen in flattening their sharpening stones, and with time this bad habit became a tradition in some quarters. I strongly suspect fans of this strange way of doing business habitually sand all visible surfaces anyway so tracks and ridges are not a problem for them. But the fact remains that perfectly flat, track/ridge-free surfaces work best for joinery.
Tradition and “monkey see monkey do” are a useful place to start, but as his skill level increases, the thoughtful craftsman will eventually seek to confirm the validity of the traditions he has been taught. I urge Beloved Customer to get started early.
Sadly, too many people never notice the strange instruction label pasted to their boot’s sole, nor that smelly stuff sloshing around inside.(ツ)
Mommy monkey teaching baby monkey bad habits. Will they ever learn?
Conclusion
As we come to the end of this article allow your humble servant to leave Beloved Customer with a word or two of advice about two bedrock basic skills you should master.
First, learn how to keep your sharpening stones flat. This will save you much grief.
And second, learn how to sharpen your blades to have a straight cutting edge. Everything else will flow naturally from these skills. Your blades deserve it. We will talk more about these subjects in the future.
In this article, we have discussed 12 serious points about plane and chisel blades and how to use and improve them all but a few woodworkers in the West are unaware of, or ignore, but which are common knowledge among professional Japanese woodworkers in advanced trades. While condensed, it is enough information to fill a book. But in return for this river of knowledge all your humble servant requests is the bananas you have in your back pocketses right now (BYOB, remember?). You didn’t sit on them did you?
The next installment in this simian soap opera of sharpening will focus less on monkeyshines, and more on stones and techniques. Please stay tuned. Until then, I have the honor to remain,
YMHOS
Oh my! I can’t wait to read more!!
If you have questions or would like to learn more about our tools, please click the “Pricelist” link here or at the top of the page and use the “Contact Us” form located immediately below.
Please share your insights and comments with everyone in the form located further below labeled “Leave a Reply.” We aren’t evil Google, fascist facebook, or a Minnesota congresswoman and so won’t sell, share, or profitably “misplace” your information. If I lie may icky boils burst forth on my nose daily.
Pixie, kobold, elf, and sprite,All are on their rounds tonight;In the wan moon’s silver ray, Thrives their helter-skelter play.
Joel Benton
Iron Pixies
Beloved Customer, have you ever placed a tool down, only to later discover it has vanished into thin air? Do your tools ever become inexplicably dull or corroded within what seems like just a few days after cleaning and sharpening them? If so, you may have an Iron Pixie infestation without realizing it.
Respected fairyologists theorize that, unlike their timid brethren frolicking in forests, or their blingy cousins infesting Hollywood, New York, and Washington DC who delight in tricking the mass media, film industry and corrupt politicians into constantly making greedy, immoral, lecherous, hypocritical fools of themselves, Iron Pixies (genus Fatum Ferrum), do not fear iron or iron alloys. Indeed, besides pilfering and concealing tools that contain iron, they love nothing more than to use their corrosive powers to return this metal to its natural state through the thermodynamic chemical process known as “rubeum, et conversus abibo” (turn red and go away).
These piratical pixies become especially joyful if the owner of the pilfered tool is unable to find it after much frantic searching and he is eventually forced to buy a replacement. Only when they see the replacement tool will pernicious pixies permit the owner to locate the pilfered tool, usually in a deplorably rusty, chipped and paint-covered condition. Nasty, vicious little pests!
We’ll come back to the supernatural impacts of these maniacal monsters on woodworking tools, but first let’s examine some more mundane details about sharpening blades, and a few things that typically go wrong with them.
The Ideal Bevel Angle
There is such a thing as an “ideal bevel angle” for each blade in each cutting situation, one that cuts the wood quickly, cleanly, with minimum force expenditure and that keeps the blade effectively sharp for the maximum amount of cutting possible, but determining this angle is not an easy calculation since it is difficult and expensive to actually observe what is happening at the cutting edge from a shaving’s-eye-view.
For example, a steep 60° bevel angle on a chisel will support the cutting edge thoroughly and will be durable, but it will pound the wood more than cut it wasting time and energy and damaging the wood unnecessarily. On the other hand, a 15° angle will cut very nicely, thankee kindly, but the blade is certain to chip and dull quickly. A balance is necessary.
This balance will depend on many factors including hardness and abrasiveness of the wood you are cutting at any time (e.g. Sugar Pine versus Ipe), the quality and nature of your chisel blade, the type of cut you are making (low-pressure surface paring versus high-pressure deep mortises), and the care you take to protect the cutting edge. Yes, technique matters.
Determining the ideal bevel angle is ultimately a trial and error process the diligent craftsman will perform until it is second nature, but the following are some general guidelines to get Beloved Customer started.
Most Japanese woodworking tools, including plane blades and striking chisels (oiirenomi, atsunomi, mukomachinomi, etc.) perform well in most construction and furniture woods with the standard 27.5°~30° bevel angle. This is a good compromise, acute enough to cut most wood efficiently without too much friction, while still providing adequate support to the thin cutting edge to avoid chipping. Indeed, this is the bevel angle we insist Beloved Customers maintain as a condition of our warranty.
But as Captain Barbosa advised, these are only guidelines. For example, 35° is often a superior bevel angle for chisels when quickly cutting mortises in harder woods or planes shaving tropical hardwoods.
When cutting very soft woods, such as Kiri (Paulownia Tomentosa), similar to balsa wood, a 22~24° bevel angle may work best, however.
Paring chisels (tsukinomi), when used properly, are subject to less violent impact forces than striking chisels, and can usually handle a 24° bevel angle. But for most woods, a professional-grade Japanese plane or chisel blade will likely experience chipping if the angle is much less.
There are many variables and potential solutions one might consider, but your humble servant recommends starting your experiments with a 27.5~30° bevel angle for plane and chisel blades.
If Beloved Customer finds that your blade chips or dulls quicker than you think it should, increase the angle gradually until it calms down. This can result in a double-bevel blade, one difficult to sharpen freehand. In this case, your humble servant fully supports using a honing jig, at least until you achieve a flat bevel wide enough and stable enough to sharpen freehand. But don’t handicap yourself by relying solely on honing jigs forever because they can become like training wheels on a bicycle: slow, awkward and childish.
Mercurial Bevel Migration
There is a strange, almost supernatural phenomenon many woodworkers experience, the first evidence of which is a plane or chisel blade that previously held a sharp edge a long time suddenly and inexplicably dulling sooner than before, or heaven forfend, chipping. Even professionals with many years of experience occasionally see their tools exhibit this nasty behavior.
Some craftsmen faced with this demonic dilemma begin to question their sanity, even asking themselves: “Has heaven turned its face against me? Where to flee to escape this curse? Do I need a witch doctor or a shrink? Is cranial surgery my only hope?” In past centuries and millennia craftsmen more aware than us modern folk of the dangers of pernicious pixies drew strange hex symbols on their walls or inlaid stone or brass circles and pentagrams into their floors to exorcise them from their workshop. No, the origins of those floor decorations are not just decorative, indeed they have a long history in Europe and America of fending off supernatural pests and bad juju.
An old barn with hex symbols on the exterior walls.
Unfortunately, more than one blacksmith has been falsely accused of poor workmanship when the fault actually lay with the tool’s owner unwittingly allowing Iron Pixies to run amok. If this happens to your tools, please use the methods described below to purge any pestilent pixies within the perimeter of your woodworking palace.
Beloved Customers would be wise to consider all possible causes of Mercurial Bevel Migration (MBM), including those unrelated to any infernal fiends that may or may not be skulking in your lumber stacks.
But if not pesky pixies, what else could cause this maniacal metallurgical malfeasance? Never fear, Beloved Customer, there is another possible explanation, one that can be resolved without drilling holes in one’s skull, or paying for years of expensive psychotherapy, or consuming mind-altering mushrooms, or conducting stinky ceremonies involving burning sage and spirit drums, or placing small bowls of blood and milk around your workshop, or enduring the pain of tattoo needles, or even the simple ritual described in the postscript below.
The more likely cause is simply that it’s human nature when sharpening chisels and plane blades with their tail-heavy construction to apply more pressure to the bevel’s rearward half (farthest from the cutting edge) abrading the softer iron jigane body more than the harder high-carbon steel cutting layer. Eventually, as the soft jigane wears away, the bevel angle will gradually decrease to the point where the cutting edge loses support becoming fragile and causing dismay.
Once you are aware of this tendency and take preventative measures (and assuming you don’t have an iron pixie infestation), all should be well.
Next let’s examine some measures to get rid of both this bad habit and trixy pixies.
Pixie Predation Prevention & Pacification
If you suspect the presence of iron pixies, you should perform the Covington Pixie Detection Test (CPDT). A reliable method is described in the next section below.
In any case, and because prevention is better than Prozac, you should begin your efforts by creating a workshop environment unfriendly to pixies. The following is a partial list of measures your humble servant has found to be effective.
Brass bench dogs are an effective pixie repellent
Cleanliness: Clean bench surfaces and sweep the floors daily. Vacuum and wet-mop workshop floors at least twice a year during the winter and summer solstices (approximately June 21 and December 21);
Add more lighting: Iron Pixies fear light because it reveals them to their enemies;
Keep a pair of boots near the door into the workshop: Pixies are deathly afraid of boots, especially when they contain the feet of sharp-eyed human children, but just the sight of boots will usually prevent them from entering a space;
Keep brass benchdogs in your workshop. Expert fairyologists insist, and I agree, that having a brass bench dog (remember, Iron Pixies do not fear iron or steel or even the IRS) or two on hand will repel Iron Pixies to the workshop’s dark recesses and keep their nasty claws away from tools. The deterrent effect of bench cats is unclear, but if you decide to rely on one, be sure it bothers to stay awake;
Welcome spiders: Although this may seem to contradict No. 1 above, Iron Pixies fear spiders, especially daddy longlegs, who delight in tangling them in their webs and tickling them to expiration.
Make regular offerings to the gods of handsaws. More on this subject in a future article.
A compact and effective brass bevel angle gauge by Richard Kell
A more mundane but sure way to prevent MBM is to make or buy and frequently use a bevel angle gauge. This is very important!
Aluminum, stainless steel or even plastic gauges will work of course, but brass or bronze are more effectual at purging perfidious predatory pixies because copper is toxic and zinc gives pixies noisome gas. Be sure to store it close to your valuable steel tools to help repel the vicious little bastards.
Here’s the important thing: Once you have this tool, use it to check your blades during each sharpening session to ensure you are maintaining the correct bevel angle instead of allowing it to decrease incrementally over repeated sharpening sessions. Make this a firm habit. More on this important subject in future posts.
Here’s another important thing: Remember to measure the bevel angle at the blade’s far right or far left edges because the hollow-ground uratsuki of Japanese blades makes it difficult to correctly measure the angle if you check it elsewhere.
Pixie Detection Methods
A serious pixie infestation in a toolchest located in a clothing-optional workshop. Notice the absence of bench dogs, brass bevel-angle gauges and boots in this image. Pure madness, indeed an invitation to disaster!
Iron Pixies are secretive creatures most people never see, but if you suspect you have an infestation, a detection test is called for.
While there are many proven methods to test for pixie infestation, the least expensive non-toxic method to test for pixie infestation is the Covington Pixie Detection Test (CPDT). The execution is simple, but it requires some skill and confidence in one’s abilities.
To the perform the CPDT, sharpen a plane blade, and while doing so, attempt to “stick it” on the stone as shown in the photo below. This phenomenon is evidence the stone and the blade are in such perfect contact that the suction between the blade and the stone’s wet surface is strong enough to support the cantilevered weight of the blade. It can only be achieved when localized sources of natural chaos, of which iron pixies are a prime example, are firmly under control.
No, this is not a trick photo with concealed supports, superglue, or photoshop enhancements. This blade, hand-forged by Mr. Nakano Takeo, is supported only by the bevel which is “stuck” to the wet stone’s surface. This is a rite of passage those who wish to become proficient in sharpening must eventually accomplish, iron pixies or no. Not recommended for potato chip-thin Bailey-style plane blades.
Assuming your blade, stones, and skill level are up to the task, if you are unable to accomplish this marvelous feat even after many attempts, the likelihood of an infestation of peevish pixies nearby is high. In that case, use the preventative measures listed in the section above, or the banishment ritual described in the postscript below. You should also flatten your sharpening stones (especially the rough and medium grit stones) and make sure your blade’s bevel is perfectly flat, for bulging bevels are the pernicious pixie’s playground. (Aha! Iambic pentameter!)
Fair warning: If you stubbornly persist in your efforts to “stick” a plane blade before purging the area of pixies, they may go berserk to prevent this sublime event from occurring. If that happens, Katy bar the door!
Infernal Pixies! You Shall Not Pass!!
In the next stage of our adventure, we will examine some of the health ailments blades commonly suffer. High cholesterol in chisels? Planes with pneumonia? Or just toolish hypochondria? Stay tuned to find out more.
YMHOS
Postscript: Pixie Catch-and-Release
A few tender-hearted Beloved Customers and Gentle Readers, sick and tired of their precious tools rusting to dust and being stolen, have asked your humble servant for advice about live-catching the Iron Pixies they sense scuttling around in the dark and dusty places of their workshop and then releasing them back into the wild. I can only share my meager experience.
While the concern gentle souls have for the welfare of natural creatures is laudable, it is decidedly misplaced because pixies are not natural creatures like squirrels, cows or even tax collectors (there are some who contend the later are closer to trolls than natural beings, but that is a scurrilous rumor promulgated by tax accountants). But I digress.
Gentle Readers should note that Iron Pixies are not natural beings, but rather supernatural creatures from the land of Faerie that choose to leave their native plane of existence to inhabit workshops in our mortal world for the simple malevolent joy of ruining iron and steel tools and inducing mental anguish in mortals. We may catch them and we may crush them, but few have the ability to banish them entirely from our world, contrary to the claims of The Learned Society of York Magicians, the only documented exception being Mr. John Uskglass and perhaps, it is rumored, an obscure magician named Mr. Jonathan Strange.
My point is that, since we mortals have no access to the supernatural environment from whence pixies hale, we cannot “release” them back into their natural environment at all, but can only strive to make our workshops less attractive places for them to pursue the malevolent mischief they love.
Your humble servant has not researched all methods of trapping pixies and so can offer no certain advice. However, if you are determined to design and deploy such a live-trap, remember that iron pixies are exceptionally clever and can easily avoid and certainly destroy most any trap, especially if it has metal parts.
Bench cats have been known to frighten pixies away, but most are just too damn lazy to keep at it. And no matter how you cook them, and regardless of the hot sauce used, iron pixies always taste like old garbage dumpster wheels and are almost as hard to chew, so scrumptiousness is never sufficient incentive for our feline masters.
I have experienced moderate success banishing iron pixies from my humble workshop, at least temporarily, using a combination of the techniques listed above and the following ancient ritual.
To perform a pixie banishment rite, you will need a few things, chief of which are at least one small, quick, sharp-eyed, strong-lunged child that still believes in Santa Clause, and a pair of large, leather work boots. Never steel-toed boots, mind you, no steel at all!
The more children the better. You may need to borrow boots from friends and family. Don’t forget the Santa Clause thing.
Open one door leading directly to the outside just a crack. Not too far, only 1~2 inches.
Help your sharp-eyed children put the boots on their little feet in your workshop where the pixies can observe (this forewarning visibility is important), being sure the boots can’t accidentally slip off.
Direct said child (or children) to march around your workshop in three circuits widdershins (counter-clockwise) while stomping their boots loudly and screeching “Pixies Flee!!” (ear protection may be necessary).
Have each circuit end at the partially-open door or window whereupon each child should toss a small piece of steel or iron, such as a nail, screw or nut, through the opening while shouting this same spell as loudly as they can.
You should lead the way and set the example, of course.
Nothing scares pixies as much as small children stomping close by in big boots while screeching loud magical commands. Seeing iron or steel then fly through an opening to the outside will usually drive them away.
A word to the wise: Incentive must be provided to the child (or children) for the ceremony to succeed because, as Jeffy Chaucer famously wrote: the “Labourer is worthy of his hire.” Chocolate or other sweets work fine. The child’s mother may object to this form of incentive pay, but carrot sticks provide neither sufficient energy nor adequate motivation to small children in my extensive experience. Besides, who ever heard of fruits and vegetables helping magic? Codswallop!
All the same, best to do it when Loving Mother is away if you think she might degrade the ritual through nagging about nutrition or cavities.
Some Faeriologists have suggested that a variation of this ritual is also effective at driving hidden monsters from under beds and out of closets in residences. Indeed, such a ceremony has been an annual traditional ritual in most households in Japan since ancient times.
For banishing demons and monsters from living spaces in the Japanese tradition, open all doors and windows during daylight hours on February 4th, and, while screaming “Demons Depart!!,” members of the household, including children of course, should each toss a handful of dried beans through each open door and window to the outside, closing them tightly afterwards. Apparently demons like beans. Boots are not worn indoors in Japan.
Children may be small, but they have an important role in protecting the home and family and your tools too. It’s a father’s duty to let them know it and show them how. And they deserve magical chocolate!
YMHOS
The scene of a conversation between your humble servant and a small child regarding pixie purging. Do you think the jewels in my wig are too much?
If you have questions or would like to learn more about our tools, please click the “Pricelist” link here or at the top of the page and use the “Contact Us” form located immediately below.
Please share your insights and comments with everyone in the form located further below labeled “Leave a Reply.” We aren’t evil Google, fascist facebook, or thuggish Twitter and so won’t sell, share, or profitably “misplace” your information. If I lie may pixies gnaw my bones every hour I live.
Chisel “Ura.” This feature includes the hollow-ground uratsuki in the center (black color), the upper and lower skinny lands called “ashi” (bright steel), the less-important land at the neck (bright steel), and the supremely important “ito-ura,” the narrow bright steel land located immediately behind, and which comprises on-half of, the cutting edge. By any calculation, a genius design.
If a craftsman wants to do good work, he must first sharpen his tools.
Confucius, The Analects
We talked about the Ura in the previous article in this series (Part 9).
It is a defining detail in most Japanese woodworking blades, and one we must understand if we are to efficiently sharpen them, so in this post we will examine this important feature in more detail.
What is the Ura?
Japanese plane and chisel blades have a unique and intelligent design feature at what is called the “flat” on Western plane and chisel blades, and is called the “Ura” (pronounced oo-rah) in Japan.
Ura translates into the English language as “bay,” as in a protected area where the sea meets the shore. At the center of the ura is a hollow-ground, depressed area in the hard steel hagane layer called the “uratsuki,” meaning the ura hollow.
In the photos on this page the uratsuki is left black from the forge, but some prefer this to be polished bright. Your humble servant prefers the natural, old-fashioned, black oxide finish, not because of my exquisite fashion sense (fashion is my life, after all!), but because the unpolished, oxidized surface can tell us much about what the blade experienced during the quenching process, and perhaps even the quality of the blacksmith’s work.
On the other hand, while a polished ura is by no means a hallmark of shoddy workmanship, it’s an undeniable fact that polishing the uratsuki polished ura hides all this information.
The ura is neither an accident nor a fashion statement, but serves two distinct purposes.
The first purpose of this design is to make that it easier and quicker to keep the four bright steel lands on this face of the blade planar. But why is that a matter of concern? If you pay attention when sharpening your wide Western chisel and plane blades lacking the details of the Japanese uraura, you will notice that, after many sharpening sessions, the blade’s flat, which was once planar, tends to become convex with a high point at the flat’s center making it difficult to keep the extreme cutting edge, especially the corners of the blade, in close contact with the sharpening stone. Yikes!
This doesn’t occur because you don’t know how to sharpen your blades, or because of pernicious pranks by pesky Pixies, but simply because your sharpening stones/platens/paper tend to abrade the blade’s perimeter more aggressively than the center. The resulting curvature makes it more difficult and time consuming to accurately polish, and thereby sharpen, the flat’s extreme cutting edge. Major buzzkill.
Because of the most excellent ura, Japanese woodworking blades are quickly fettled initially and tend to stay planar without a second thought for many years of hard use, an important benefit if you count your time worth anything.
The second purpose of the ura is to reduce the square inches or square millimeters of hard steel you must polish during each sharpening session. As you can see from the photo above, the four shiny perimeter lands are all that touches the sharpening stone. Compare this with the central black area which doesn’t touch the stone at all. That’s a lot of hard steel you don’t have to deal with.
Besides making the job easier, this detail saves a lot of time when sharpening and helps one’s expensive sharpening stones last longer. Time is money and stones ain’t cheap, as my old foreman scolded me many times (lovingly, I’m sure).
Even if you don’t use your tools to make a living, you should at least recognize that time spent sharpening is time making wooden objects lost.
The Downside Of the Ura
A worn-down multiple-ura chisel
Despite my poetic praise, the ura detail is not all blue bunnies and fairy farts, because it does have one unavoidable downside: Over many sharpening sessions the Ura unavoidably becomes gradually shallower, and the lands surrounding the Ura on four sides become correspondingly wider. Nothing lasts forever except regrets and taxes.
It is not uncommon to see old chisels and plane blades with the hollow-ground area of the ura almost disappeared. You can postpone this day by sharpening your blades wisely. However, in the worst case where the ura disappears entirely, you will still be left with an entirely usable Western-style flat, so not all is lost.
In future articles in this series we’ll consider how to keep our lands as skinny as possible as long as possible, and how best to keep uratsuki as deep as possible as long as possible.
In the case of plane blades, unless the plane’s ura is subjected to a brutal sharpening regime, the land that forms the cutting edge (called the “ito ura” meaning “strand” as in a flat area on a riverside, in Japanese) tends to gradually become narrower, and even disappear entirely after numerous sharpenings. Of course, when this happens, the blade loses its cutting edge, and the land must be restored by “uradashi” (oo-rah-dah-she) aka “tapping out” or bending the cutting edge towards the ura side, and then grinding it flat to form a new ito-ura land. Tapping out a blade requires some caution, but is not difficult. We will discuss the how-to of this aspect of blade maintenance in a later article in this series.
In the case of chisels, which have smaller and shallower ura compared to wider plane blades, the land at the cutting edge does not typically require tapping out, although it’s certainly possible to tap out wider chisel blades. Narrow chisel blades, on the other hand, are difficult to tap out without damaging them due to the rigidity produced by the hard steel layer (detailed in the previous post in this series) wrapped up the blade’s sides.
Mitsuura Chisels
Ichimatsu Nomi Ura (by Kiyotada). After many years of hard use, the multiple ura (aka “mitsuura”) on this oft-sharpened chisel used to pare precision joints has become shallower and the planar lands have become wider. Still entirely useful, it now takes more effort to sharpen than when new.Spearpoint Mitsuura chisels made by Sukemaru using EDM technology. Sadly, Mr. Usui no longer produces them.
Some chisels are made with multiple ura, typically called “mitsuura” meaning “triple ura.” Mitsuura chisels are more difficult to sharpen than chisels with a single ura because the total area of hardened steel that must be polished is comparatively larger. The ura of mitsuura chisels also tend to wear-out quicker than single-ura chisels because each individual uratsuki is shallower in depth than standard uratsuki. They look cool, but I am not a fan of multiple ura except in a few specific applications.
In the next stage of our journey into the mist-shrouded world of sharpening hard steel blades, we will wander through the metaphysical realms of the “Fae.” A word of caution: Be sure to have a brass bench dog in your pocket when you leave the well-lighted pathways and accept neither food nor drink from anyone’s hand until we return, not even a cheeseburger with fries. ☜ (◉▂◉ )
YMHOS
If you have questions or would like to learn more about our tools, please click the “Pricelist” link here or at the top of the page and use the “Contact Us” form located immediately below.
Please share your insights and comments with everyone in the form located further below labeled “Leave a Reply.” We aren’t evil Google, fascist facebook, or the CCP and so won’t sell, share, or profitably “misplace” your information. If I lie may I drown in my own uratsuki.
Our customers outside of Japan frequently need some information to help them select the best wood for their chisel handles. In this article your most humble and obedient servant will describe the woods available and the advantages and disadvantages of each to help you make an informed decision.
The chisels we sell all have wooden handles in several varieties of wood, the two most common being Japanese White Oak and Japanese Red Oak. Let’s look at White Oak first.
Japanese White Oak
Japanese White Oak tree
Japanese White Oak (JWO) is very similar to American White Oak in that it is closed grain, dense, and has medullary rays. The color is a little whiter than the American or European varieties, and in fact, it’s significantly denser and stronger than either. It holds up well to being struck with steel hammers.
JWO is not a slick wood when dry and does not become slippery when wet, important characteristics in a tool handle where staying attached to the blade and staying secure in a sweaty hand while being pounded on are part of the job.
Like White Oak everywhere, it contains tannic acid. In fact, bark and chips from this wood have been used since before written history to tan leather because this chemical converts animal skins that would otherwise rot into durable leather. Tannin, which is the base word of both tanning and tannic acid, comes from the medieval Latin word tannāre, a derivative of tannum (oak bark), from which the tannic acid compound is derived.
Tannic acid can react with some people’s sweat causing the wood to turn a dirty grey color. This tendency is not strong among the Japanese people, but it is among many Caucasians, including me.
This discoloration in no way weakens or harms the wood, it just makes it look dirty.
JWO generally has a bland, indistinct grain with few flecks, not a problem for a tool handle or plane block, but less than ideal for furniture.
Usunomi paring chisel with Japanese White Oak handle
Japanese Red Oak
Japanese Red Oak acorns
Japanese Red Oak (JRO) is as different from American Red Oak as the “the moon and a mud turtle,” as they say over here. It is a much more useful wood.
Similar to JWO, Japanese Red Oak is closed grain and also has medullary rays. It contains much less tannic acid, and ranges in color from a dark red (difficult to obtain nowadays) to a pinkish red.
JRO has been prized in Japan for tool and weapon handles since forever. Indeed, JRO is the preferred wood for the bokken wooden swords used in the martial arts. The better grades are denser than White Oak with a more interesting grain. Unfortunately, the redder grades of Red Oak have become difficult to obtain.
Japanese Red Oak tree
As with Japanese White Oak, Red Oak is not a slick wood when dry and does not become slippery when wet.
There are unscrupulous people that dye other varieties of oak a dark red color to jack up the price. We don’t deal with such slimy people and our JRO handles are all authentic. Caveat emptor, baby.
JRO has the advantage of discoloring less than JWO over time and tends to look cleaner longer. It makes a more attractive handle.
Japanese Red Oak tree
The downside to the JRO generally available nowadays is that it is a little less dense than White Oak. I consider Japanese Red Oak to be the perfect wood for paring chisels, and Japanese White Oak the perfect wood for atsunomi chisels. Either wood works fine for the smaller oiirenomi bench chisels.
Kotenomi paring chisel with Japanese Red Oak handle
Gumi
Gumi (Elaeagnus multiflora or cherry silverberry) is more a hedgewood or bush than tree. It has historically been cultivated primarily for the fruit it bears. It is stronger than Japanese White Oak, but lighter in weight. It has a distinctive yellow color that some people find attractive. I don’t get the attraction, but must admit it has a striking appearance.
With fewer commercial applications nowadays, gumi has become a more expensive material, one that makes a fine, durable handle. My handlemaker is no longer able to procure this wood so we don’t offer Gumi handles for our chisels.
Ebony and Rosewood
Ebony and Rosewood make elegant, durable, well-balanced handles for paring chisels, which are never struck with hammers and therefore unlikely to crack. But material costs are quite high. They are also custom order items that take some time to fabricate. Atsunomi and other types of tatakinomi with ebony or rosewood handles look great. And in the case of amateurs that buy such chisels (from other sources) just to collect and/or admire, I have nothing to say. But we sell professional-grade tools to be used on real-world jobsites and in workshops by serious craftsmen for serious cutting, not to become safe queens. Using ebony or rosewood handled oirenomi or other varieties of tatakinomi to do real work is like wearing Jimmy Choo stilletto heels to a construction site.
Yes, Jimbo makes elegant shoes. And if your ensemble is well thought-out, a steel-toe version of his heels will make your legs look mahvelous dahling, simply mahvelous. Sadly, they will neither last long nor get the job done. Other workers will mock you behind your back. And Murphy will arrange for embarrassing things to happen at the worst possible time.
Well…. that was not part of my cunning plan!
For warranty reasons, we do not sell tatakinomi of any kind with handles of ebony or rosewood. They are too easily and irreparably cracked/damaged if struck with a steel hammer. Professionals will not purchase, and we will not sell, such silly tools.
Customs Duties
While it has not been a problem so far, importation of some exotic hardwoods such as Brazilian rosewood into the United States can be a problem, according to the guitar makers I know and information on the infallible internet (ツ). If you order handles made from these woods, please be aware that you become the responsible importer once such materials cross into the jurisdiction of your local Customs Office. They may confiscate your tools or levy fines. The risk is all yours. That said, it has not been a problem so far.
Not encouraging, I know, but customs services worldwide are in the business of making literally tons of money every hour by taxing the entire world using their absolute authority within their bailiwick, backed up by lots of scary guns. The most profitable income source for governments, as you know, is not taxes but making and circulating money (literally manufacturing money), followed by customs fees. Thus it has always been; Thus it will always be.
On the other hand, we have experienced difficulties with customs in only two countries, namely Spain, which is notorious for once charging confiscatory import duties on the gunpowder and cannonballs brought into Spain by Great Britain to free that country from Napolean’s armies during the French occupation. Spanish customs is famous as a criminal racket.
Australia was brutally difficult on one occasion, but that incident may have been driven more by dazzling public employee incompetence rather than proper enforcement of the country’s importation laws.
Conclusion
For standard oirenomi and other tatakinomi intended to be struck with a steel hammer, either White Oak or Red Oak are entirely adequate and cost-effective. White Oak is a little stronger, but its appearance does not improve with use or age. Red Oak is not quite as dense and strong, but it is sufficient for these chisels and looks better over time.
For wider Atsunomi and Mukomachinomi (mortise chisels) which will see heavy use, White Oak is the best choice due to its higher density and superior strength.
For usunomi and other paring chisels not intended to be struck with a steel hammer, Red Oak is the best choice, IMO, but White Oak will perform just as well. Gumi is not an option with C&S Tools. Rosewood looks beautiful and feels nice (if you don’t have allergies to Rosewood), but are expensive and require lead time.
YMHOS
If you have questions or would like to learn more about our tools, please use the
If you have questions or would like to learn more about our tools, please click the “Pricelist” link here or at the top of the page and use the “Contact Us” form located immediately below.
Please share your insights and comments with everyone in the form located further below labeled “Leave a Reply.” We aren’t evil Google, fascist facebook, or thuggish Twitter and so won’t sell, share, or profitably “misplace” your information. May my square become a triangle if I lie.
A piece of hot high-carbon steel, which will become the cutting edge, has been placed on the orange-hot low-carbon steel body of a knife as part of the “forge-welding” process. An acidic flux powder has been placed in-between and on the metals in preparation for laminating them together into a single blade.
Men are like steel. When they lose their temper, they lose their worth.
Chuck Norris
While Beloved Customers are of course familiar with the features of the high-quality woodworking blades we purvey, some Gentle Readers may have little knowledge of the important details essential to Japanese woodworking tools. So in this article we will try to remedy that by examining some simple historical points common to woodworking blades around the world, as well as some details that make Japanese blades unique.
Your humble servant believes an understanding of these basic facts will aid Beloved Customer’s sharpening efforts, or will at least tickle Gentle Reader’s interest in Japanese blades. Please comment and let me know your thoughts.
Laminated Bi-Metal Construction
As discussed in previous articles in this series, before technological advances in the 1850’s, steel was difficult to make and expensive. Consequently, it was standard practice not only in Japan but everywhere, including Europe and the United States, to reduce production costs by minimizing the amount of precious steel used in producing all types of edged tools including axes, scythes, handplanes and chisels etc.. This was achieved by laminating smallish pieces of high-carbon steel to softer and much cheaper wrought-iron bodies through a process called “forge welding.” The photo at the top of this article shows the blacksmith placing the piece of high-carbon steel on the softer iron body of a blade prior to beating the hell out of it as part of the forge-welding process.
Most chisel and plane blade blacksmiths in Japan continue to employ this lamination technique even today, not because of some navel-gazing infatuation with the archaic, but because it has serious advantages.
The best Japanese plane and chisel blades are generally comprised of a layer of very hard high-carbon steel called “hagane” (鋼) in Japanese, forge-welded to a softer low-carbon/no-carbon iron body called “jigane” (地金). We discussed both of these metals in the previous two articles in the series hereand here.
Here is the key point to understand: When a blade made from a lamination of high-carbon steel and iron (or low-carbon steel) is quenched, the sudden temperature change causes the high-carbon steel layer to become hard, even brittle, while the softer low/no carbon layer is unaffected and remains soft.
A 30mm Hidarino Ichihiro Atsunomi, approximately 12″ OAL.
Why go to so much trouble? One advantage of this construction is that it allows the cutting edge to be made much harder than is possible in the case of an non-laminated blade therefore staying sharper longer in use than can be expected of a softer blade. But why does lamination make this possible? Consider the absolute fact that a chisel blade made of uniform material heat-treated to a uniform hardness of, say, HRC65 might cut very well, and stay sharp a long time, but it will always break in use. Not just chip, but actually break in half. The softer low/no carbon jigane layer supports and protects the hard high-carbon steel layer preventing it from rupturing. Such durability is a huge advantage.
Another benefit of laminated construction is ease of sharpening. Remember, the harder a piece of steel is, and the larger its area, the more work it takes to abrade it. But in the case of a laminated blade, the amount of hard-steel exposed at the bevel the user must abrade is just the relatively thin strip of shiny metal seen in the chisel photos above and below. Please also recall that the grey low/no carbon jigane layer is relatively soft and melts away on the sharpening stones without much effort.
So the laminated construction of hard hagane to soft jigane produces a blade that is tough but at the same time hard, one that will become very sharp and stay sharp a relatively long time thereby improving work quality and productivity while at the same time needing less time, effort, and stone to sharpen.
BTW, this is not a blacksmithing technique that was discovered only in Japan. Indeed it was once standard procedure for making high-quality cutting tools worldwide, but it has been discarded and forgotten over the last 100 years almost everywhere else because it costs more to accomplish, it requires real trained blacksmiths to perform (not just factory workers), and because most consumers can’t tell the difference, fools that they are.
A relatively few, highly-skilled Japanese blacksmiths continue to employ this ancient and clearly superior technique despite the difficulty and decreased profitability, but only because their professional Japanese woodworking customers demand it. At least, that is, for a little while longer. A word to the wise.
A 42mm Hidarino Ichihiro Oiirenomi
Laminated Blades in the West
If you have examined antique plane blades with wooden bodies you may have noticed many have blades stamped ” Warranted Cast Steel”
Despite being designated “cast steel” in England and America in past centuries, unlike Conan’s Daddy’s sword, or the orc blades made in the bowels of Isengard, plane, chisel and saw blades with this mark were not “cast” by pouring molten metal into a mold to form a blade. Rather the process to make the steel involved melting iron ore in a crucible and pouring it into molds “casting” a strip, bar, or ingot of high-carbon steel which was then forged to make the blade, hence the name.
This became possible only when the technology required to reliably and fully melt steel to a more-or-less liquid state on an industrial scale was developed. Such steel was also called “Crucible Steel” after the crucible container used to melt iron ore.
This technology was widely used in the United States and Europe through the 1870’s. In fact, one steel mill is said to have been producing crucible steel until the 1960’s. Toolmanbloghas an interesting summary on cast steel.
With few exceptions, these European plane blades have a thin piece of high-carbon steel forge-welded to a soft wrought iron body, very similar to Japanese plane blades. I have reused a couple of these antique blades to make Krenovian-style planes and testify of their excellent cutting ability.
Chisels were also once made in Europe using this same lamination technique, although fewer examples remain extant.
Axes, hatchets, and many farming implements were also mass-produced up until the 1920’s in the US using a variation of this same technique with a “bit” of steel forming the cutting edge laminated to or sandwiched inside a body of low-carbon steel or wrought iron. Axes are still made this way in Japan. It’s a proven technique with a lot of advantages, but it does require a skilled blacksmith to pull off successfully, and customers that appreciate the improved performance.
The point I am trying to make is that blades made using forge-welded laminated technology were the very best available in Europe and the United States for many centuries.
Here is a link to a blog post by Paul Sellers where he praises the old chisels and laments the new.
U-Channel Construction
A closeup of the 42mm Hidarino Ichihiro Oiirenomi showing the lamination line between the steel cutting layer and low-carbon steel body of the bladeThe same 42mm Hidarino Ichihiro Oiirenomi. Notice the hard-steel lamination wrapped up the blade’s sides to add rigidity.A 30mm Hidarino Ichihiro Atsunomi, approximately 12″ OAL. Notice the hard steel lamination forming the cutting edge at the bevel. This is a beautiful lamination.A beautiful hand-filed (not sanded) shoulder detail typical of Yamazaki-san’s work
The shape of the hard steel cutting layer laminated to the softer low-carbon steel (or wrought iron) body of chisels was historically a simple flat plate in Western blades. This is still the case for Japanese plane blades, axes, and farming implements. But if you imagine Japanese blacksmiths would be satisfied with such a simple design for all applications, you don’t know them well.
If Beloved Customer will carefully consider the blades pictured in the four photographs above, you will notice the lighter-colored hard steel lamination wrapped up the chisel’s sides forming a “U channel” of hardened steel adding necessary rigidity and strength. This is a critical detail for Japanese chisels intended to be struck with a hammer. Interestingly, Japanese carving chisels are not typically made this way, and are consequently structurally weaker.
Plane blades are not subjected to the high loads chisels experience and so would not benefit from this structural detail.
The Ura
A view of the ura face of an atsunomi chisel. Just to be clear, the entire surface, including the full width of the blade from the cutting edge to where the neck begins, is called the “ura.” The black area in the center is made of hard, high-carbon steel, but is hollow-ground forming a depressed area called the “uratsuki.” The four shiny areas at the perimeter form a single plane. I call these “lands.” The longish lands to each side of the uratsuki (located at top and bottom in this photo) are called “ashi,” meaning legs, but I will call them “side lands.” The land right up against the cutting edge is the most important of the four because it forms one-half of the cutting edge. It’s called the “itoura,” meaning “thread-land.”
Japanese chisel and plane blades, among others, typically have a hollow-ground depression called the “Ura” (pronounced “ooh/rah”) which translates to “ocean” or “bay,” located at what is called the “flat” on Western blades. Notice the polished hard steel lamination extending from the cutting edge to several millimeters up the neck. The black area encompassed by these shiny lands is the same hard metal, but it has been hollow-ground to form the swamped “uratsuki.”
This clever and effective design detail is unique to Japanese tools to the best of your humble servant’s knowledge. We will look at this design detail more in the next article in this series.
The Point
What does any of this have to do with sharpening? These design details cleverly turn potential disadvantages into distinct advantages you need to understand when sharpening Japanese woodworking blades.
For instance, the layer of high-carbon steel laminated into our chisels and planes is usually 65~66 HRc in hardness. Western blades are made of a single uniform piece of steel heat-treated to approximately 50~55 HRc to make the tool softer/tougher thereby limiting breakage while sacrificing the longevity of a blade’s sharp edge, the most important performance criteria in a quality cutting tool, IMHO. The extra hardness of the Japanese blade helps it stay sharper longer, an important benefit if your time is worth anything. This is good.
But if the entire blade were made of a solid piece of this extra-hard steel, it would a royal pain in the tukus to sharpen, I guarantee you. It would also break. Oh my, that would be bad.
The softer low-carbon/no-carbon steel or iron jigane body, however, is much softer and easily abraded making it possible to keep the hard steel layer thin, and therefore easily abraded, while protecting it from breaking. This is good.
Unlike the blade’s bevel, however, the ura (or “flat” as it is called in Western chisels) is all one-piece of hard steel. Without the hollow-ground uratsuki depression, you would need to abrade all that hard steel at one time to initially flatten and regularly sharpen the blade, a necessity I guarantee would ruin your mellow mood even if you consumed massive quantities of controlled substances with the fervor Beldar and Prymaat exhibit when sucking down triple-ply toilet tissue. But with the addition of the ura detail, we only need to abrade the perimeter planar lands (the shiny areas in the photos above) surrounding the ura. This is exceedingly good.
The ura with its lands surrounding the “uratsuki” depression makes it easier and quicker to not only sharpen the blade, but also to keep the “flat” planar (in a single plane). Without the ura, such a hard blade would be difficult to maintain planar and frustrating to sharpen. With the addition of the ura, however, the blade is genius.
An important skill to learn when sharpening Japanese blades is how to maintain the lamination and ura effectively. We will discuss this subject more in future posts, including the final article in this series.
Conclusion
If you didn’t learn at least three new things from this post then you are either very smart or weren’t paying attention. ¯\_(ツ)_/¯
In the next installment in this bodice-ripping tale of romance and derring-do we will examine the hollow-ground “Ura” in more detail. It’s important enough to deserve a special post.
YMHOS
It is not my intention to be fulsome, but I confess that I covet your skull.” ― SirArthur Conan Doyle, The Hound of the Baskervilles
If you have questions or would like to learn more about our tools, please click the “Pricelist” link here or at the top of the page and use the “Contact Us” form located immediately below.
Please share your insights and comments with everyone in the form located further below labeled “Leave a Reply.” We aren’t evil Google, fascist facebook, or thuggish Twitter and so won’t sell, share, or profitably “misplace” your information. If I lie may I cough up a hairball during every meal.
The fissured and cracked jigane of a 70mm plane blade forged by Usui Kengo, another Niigata blacksmith (RIP). Notice the rod which retains the chipbreaker is non-existent, replaced by two short stubs. An elegant detail in this plane body by Ito-san (Soh 宗).
If you can’t explain it to a six year old, you don’t understand it yourself.
Albert Einstein
In the previous article about sharpening Japanese woodworking tool blades we looked primarily at the nature of the hard high-carbon steel used in making woodworking blades. In this post your humble servant will try to dispel some of the confusion that surrounds the other metal used in making most Japanese knives, axes and woodworking blades, namely the soft low-carbon/no-carbon steel called “Jigane” (地金). I hope this brief explanation will improve Beloved Customer’s understanding of some Japanese tools and aid your sharpening efforts.
Sources of Jigane
Most Japanese woodworking blades, and many knives, are comprised of a thin piece of hard high-carbon steel, discussed in your humble servant’s previous article in this series, forge-weld laminated to a larger and thicker piece of softer low-carbon steel or wrought iron called “Jigane” (jee/gah/neh 地金) in Japanese, which translates directly to “ground metal.”
We will discuss this bi-metal lamination more in the next post in this series, but for now take my word that it is essential to the performance of many types of Japanese cutting tools nowadays, and for many centuries was also critical to manufacturing cutting tools in America and Europe as well.
The best jigane material for plane blades is said to be scrap iron salvaged from the boilers of old trains, boats, and factories, etc. having been subjected to thousands of heating and cooling cycles during their decades of service driving out most of the carbon, indeed making the iron very soft to the point of weakness.
The most desirable jigane for plane blades is therefore called “tired” iron, named so because it is not only soft, but because it looks weak and exhibits a visible grain along with cracks and imperfections which those well-versed in Japanese plane blades covet.
A pile of jigane, probably old salvaged structural steel. Looks like boards of old wood, but it ain’t.
Wrought Iron Production
Nowadays, this very low-carbon steel, also known as “ wrought iron,” is not produced in any volume for several reasons. First, demand is just too low to make it worthwhile to manufacture. Hand-forged ornamental iron is the only commercial usage besides Japanese tools of which your humble servant is aware, relatively microscopic markets. In fact, a constant complaint from ornamental iron producers is the difficulty of working the relatively hard material available to them nowadays.
The second reason is that steel production processes have changed drastically in the last 150 years. For instance, it used to be that steel began as iron ore, basically rocks, which were crushed, melted and refined into wrought iron, an intermediate product of steel production. Indeed, at the time this low-carbon product was much less expensive to produce than high-carbon steel and so was used for everything from the boilers, bridges, trains, ships and anchor chains mentioned above to axes, chisels, farming implements, machinery, what’s called “miscellaneous metals” in the construction industry, and of course plane blades. There are still a few surviving structures around that were made using this weaker material.
Nowadays, things are different. With high temperatures more easily attainable than they were prior to the 1850’s, manufacturing techniques have advanced to the point that carbon is incorporated into the steel automatically entirely eliminating the low-carbon wrought iron intermediate product.
Also, scrap metal has become critical to steel manufacturing processes nowadays. Remember what happened to steel prices worldwide when bloody-handed China was buying up huge volumes of scrap metal worldwide for its Olympic infrastructure building projects?
I think we can agree that this energy-efficient cost-reducing recycling of natural materials is a very good thing. But it does have a tiny downside, namely that most commercial scrap metal available in any useful volume today has been cycled through the modern steel-manufacturing process many times and already contains not only high levels of carbon, relatively speaking, but alloys such as chrome, molybdenum, and nickel from previous melting pots. Indeed, undesirable chemicals such as phosphorus, sulfur and silica tend to be high in typical scrap metal, not much of a problem for use in the construction, automotive, and shipping industries but a serious problem for tool steels.
In summary, wrought iron simply isn’t made anymore because it is neither an intermediate product nor a profitable one.
Japanese blacksmiths making high-quality plane blades nowadays mostly use wrought iron recycled from old anchor chains, old iron bridges, or other recycled structural components. If you see a hole in a plane blade, like the extra-wide plane blade pictured below, it once housed a rivet. Yes, structural steel was once connected with hot rivets instead of bolts. Hi-tensile modern bolts are decidedly better if less romantic.
A plane blade with an old rivet hole in its face, probably from an old iron bridge that once stood in Yokohama and which was recycled many years ago.
Plane Blades
A plane blade by Ogata-san in his “Nami no Hana” series using a special version of Swedish Asaab K-120 steel. Notice not only the fissures and defects, but also the striations and grain typical of soft, tired “wrought iron.”
Mr. Takeo Nakano (see his photo below) makes our plane blades. He is a kind, unassuming man in the best tradition of Japanese craftsmen with the outward appearance of a sedentary grandfather, but when using hammer and tongs at his forge within his dark and smoky smithy, his posture and visage resemble that of an intense Vulcan reinforcing the steel gates barricading the world of light against a demon onslaught. Oh my!
Like nearly all the plane blacksmiths in Niigata, he uses scrap iron obtained in a single lot many years ago from an iron bridge that was dismantled in Yokohama Japan.
Mr. Nakano at home
I am told that most of the jigane used for plane blades in Hyogo Prefecture is old recycled anchor chains from a ship knacker.
The back of the same Usui plane blade. Notice the cracks and voids visible in this excellent jigane exposed at the polished bevel. Very wabi-sabi. This jigane was once part of an iron bridge in the city of Yokohama, Japan.
In the case of plane blades, structural strength is not critical, so laminating a thin layer of high-carbon steel forming the cutting edge to a soft iron body is adequate. Indeed, the thicker the hard steel layer, the more time and effort it takes to sharpen the blade, so in a high-quality blade the thicknesses of the high-carbon steel layer and the soft jigane body will be carefully balanced to ensure the blade’s bevel rides the sharpening stones nicely and can be quickly abraded.
More inexpensive plane blades are forged using the same strip jigane used for chisels, a material harder than the ideal for plane blades.
Chisel Blades
In the case of chisels, while ease of sharpening is still important, the body and neck must be harder/stiffer to prevent them from bending, so a different, stiffer variety of jigane with a higher carbon content and fewer defects is used, and the steel layer is typically made thicker.
The jigane used by our chisel blacksmiths is a commercial product not produced anymore (thank goodness they have stockpiles) called “gokunantetsu” 極軟鉄 which translates directly to “extremely soft iron.” With a carbon content of 0.04~0.07%, a better description would be “very low carbon steel.” When heated and quenched, it doesn’t harden significantly.
The adventure will continue in the next exciting episode where we will bring it all together into a blade. Don’t forget to have popcorn and jujubes on-hand!
YMHOS
If you have questions or would like to learn more about our tools, please click the “Pricelist” link here or at the top of the page and use the “Contact Us” form located immediately below.
Please share your insights and comments with everyone in the form located further below labeled “Leave a Reply.” We aren’t evil Google, fascist facebook, or thuggish Twitter and so won’t sell, share, or profitably “misplace” your information. If I lie may the fleas of a thousand camels infest my crotch.
An Alchemist and his assistants working late at night in his workshop.
Behold, I have created the smith that bloweth the coals in the fire, and that bringeth forth an instrument for his work.
Isaiah 54:16 KJV
In the previous post we looked at some of the supernatural aspects of making and forging steel. In this post we will examine some alchemical aspects of woodworking blades, in the particular the iron and steel used to make them and the related chemistry of sharpness and sharpening.
This post could be very technical, but your humble servant has simplified the description of chemical processes to make it easier for the non-technical Gentle Reader to follow. Please bear with me.
The Alchemy of Mutating Iron to Steel
When carbon is combined with iron in the right proportion, steel is formed. This mutation is easily accomplished nowadays, but for most of human history it was a fiendishly difficult, chancy, expensive process. No wonder those who could accomplish the deed were attributed with magical powers.
But just mixing chemicals does not yield a useful cutting tool. No, the blacksmith must make the steel hard enough to hold a cutting edge, but tough enough to endure actual work. The catalyst for this mutation is heat. The ability to create a fire hot enough to melt iron was, until fairly recently on the scale of human history, the biggest hurdle to producing quality steel consistently.
If steel is heated to within a specific range of temperatures (difficult to measure by eye) and then suddenly cooled, crystalline structures containing small, very hard and relatively brittle crystals called carbides form within a softer matrix of iron. These hard carbides supported in this rigid crystalline structure are what do the serious job of cutting, not the softer matrix.
At the extreme cutting edge, this structure might be compared to a modern circular saw blade comprised of a relatively soft body to which is attached very hard tungsten carbide cutting tips.
A steel blade dulls when the crystalline structure either shatters, or the pressure and friction of cutting wears away or cracks the softer supporting matrix, allowing the carbides to be torn from the matrix leaving behind gaps of soft, blunt metal. The larger the carbide clumps are and the greater the distance between them, the more easily they are shattered and torn away, and the duller a blade becomes with each crystal’s failure.
In a low-quality blade, and given the same amount of carbon in a fixed volume of steel, the crystals will form into relatively large and isolated clumps separated by wide rivers and lakes of softer metal, as seen from the viewpoint of a carbide. The steel will crack along these weaker pathways when stressed, and when cutting, the softer material in these lakes and rivers will erode first, leaving the desireable carbide clumps unsupported and more vulnerable to failure.
A photograph of Shirogami No.2 high-carbon steel following heat treatment and tempering. In this case, the temperatures used were less than ideal resulting in the irregular crystalline structure shown. The black material is carbon, the grey material is converted steel, and the whitish areas are soft, unconverted iron, points of natural weakness and paths of failure in the steel blade, not acceptable in a high-quality hand-forged blade.The same steel shown above but following quenching and tempering using proper temperatures. The converted steel crystals are small and more evenly distributed. Islands of unconverted carbon and lakes of soft unconverted iron do not remain. This is a sample of ideal high-carbon steel, and is typical of the crystalline structure of the blades of our chisels, planes and kiridashi.
In a high-quality steel blade, by comparison, and given the same amount of carbon in a fixed volume of steel, the crystalline clumps are comparatively smaller and distributed more evenly throughout the matrix making it more resistant to erosion, and the carbide crystals more resistant to damage. Such steel is called “fine grained,” and has been highly prized since ancient times for its relative toughness and ability to become very sharp and stay sharp for a long time. This is the steel preferred by woodworking professionals in Japan and is the only kind found in our tools. Without exception.
Sadly, this crystalline structure is not visible to the naked eye, and anyone who says differently is trying to sell Beloved Customer something brown and smelly, probably with a side dish of flies.
Impurities and Alloys
Other than excellent and abundant water, endless forests, mountains overgrown with wonderful trees, and diligent people, the islands of Japan are poor in most of the natural resources critical to industrialization, including iron ore, coal, and petroleum. Prior to the mass importation of such resources after 1854, the best source of iron in Japan had been black sand (satetsu 砂鉄) found in rivers. The article at the following link details some of these traditional Japanese production methods: A Story of a Few Steels
Regardless of their source, all iron ores naturally contain impurities such as phosphorus, sulfur, or silicon to one degree or another. When these impurities exceed acceptable limits, they can weaken the steel, make it brittle or tend to warp badly, or make heat treating results inconsistent. They are often expensive to remove.
Nagasaki Bay, the only Japanese port open to Western traders between 1639 and 1854, with primarily only Dutch ships permitted entrance.
There are three approaches commonly used to minimize the negative effects of these difficult-to-remove impurities. The first is simple avoidance of the problem by employing iron ore and scrap metal free of excess amounts of these contaminants. Such ore and scrap are available, but they are not found everywhere and are relatively expensive. For centuries, the purest iron ore has been mined in Sweden.
The second approach is to add purer iron or carefully sorted and tested scrap steel to the melting pot thereby reducing the percentages of the harmful contaminants, a technique called “ solution by dilution.”
Nakaya Takijiro’s saw forge in the floor of his smithy, originally made by his master’s master’s master for forging swords
The third fix is to add chemicals such as chrome, molybdenum, nickel, tungsten, vanadium and even lead to the pot forming steel “alloys” to help overcome the detrimental effects of natural impurities, specifically those related to brittleness, warping and unpredictable heat treatment. Some additives will make the steel more resistant to abrasion and corrosion, or even easier to cast, drop-forge, or machine.
Some steel alloys have serious advantages over plain high-carbon steel in mass-production, for example reducing material costs by allowing the use of cheaper lower-grade iron ore and scrap metal, or improved working and heat-treating characteristics making it possible to achieve higher productivity with fewer rejects even when worked by low-skill workers.
But the addition of these chemicals is not all blue bunnies and fairy farts because edged tools made from high-alloy steels typically have some disadvantages too. For instance, additives like chrome, nickel, molybdenum, vanadium and especially tungsten are costly. And due to the crystalline structure that develops in many high-alloy steels, products simply cannot be made as sharp as plain high-carbon steel, and are more difficult and time-consuming to sharpen by hand.
Some manufacturers cite the higher costs of high-alloy steels to justify higher prices for their products. However, what they never say out-loud is that labor costs are much much less when using high-alloy steel because skilled workers are not necessary. And because high-alloy steels produce fewer rejects, quality control is easier, overall productivity is higher, warranty problems are fewer, and profitability is increased. Indeed, without high-alloy steels, manufacturers would need to train and hire actual skilled workers and professionals instead of uneducated seasonal workers thereby destroying the Wally World mass-production model that is the foundation of modern society. Egads! Walmart’s shelves would be bare!
Our blacksmiths are not part of the Wally World production model, but make only professional-grade tools for craftsmen that value ease of sharpening, edge retention, and cutting performance above corporate profits. They charge more for plain high-carbon steel blades than for high-alloy steel products because labor and reject costs are higher.
So if a manufacturer brags about the excellence of the high-alloy steels they are using, rest assured increased profits are their motivation, not improved cutting performance. Caveat emptor, old son.
Japanese Steels
Varieties
The best plane and chisel blades are made from plain, high-purity, high-carbon steel. In Japan, the very best such steel is made by Hitachi Metals mostly using Swedish pig iron and carefully tested industrial scrap (vs used rebar and old car bumpers), and is designated Shirogamiko No.1 (白紙鋼 1 号 White-label steel No. 1). They also make a steel designated Shirogami No.2 steel containing less carbon. Another excellent steel for plane and chisel blades is designated Aogamiko No.1 steel (青紙鋼 Blue-label steel).
Aogami steel, like Shirogami steel, is made from extremely pure iron, but a bit of chrome and tungsten are added to make Aogami steel easier to heat treat with less warping. Aogami can be made very sharp, but it is not quite as easy or as pleasant to sharpen as Shirogami. Some of the plain high-carbon Swedish steels are also excellent.
If worked expertly, these steels consistently produce the highest quality “fine-grained” steel blades.
Sharpening
Let’s compare the sharpening characteristics of these two steels. To begin with Shirogami steel is easy, indeed pleasant, to sharpen. It rides stones nicely and abrades quickly in a controlled manner.
Aogami steel, by comparison, is neither difficult nor unpleasant to sharpen, but it is different from Shirogami steel in subtle ways. It takes a few more strokes to sharpen, and feels “stickier” on the stones, but it will still produce fine-grain steel blades and performs well.
Inexperienced people lacking advanced sharpening skills typically can’t tell the difference between blades made from Shirogami, Aogami or Swedish steel and steels of lesser quality. But due to the difficulty of forging and heat treating Shirogami or other plain high-carbon steels, a blacksmith that routinely uses them will simply be more skilled and have better QC procedures than those whose skills limit them to using only less-sensitive high-alloy steels.
Professional Japanese woodworkers insist on chisel blades made from Shirogami No.1 steel. Some prefer Aogami No.1 for plane blades believing the edge holds up a bit better. At C&S Tools our plane blacksmith prefers to use Aogami because it is easier to work and more productive (especially in the case of carving chisels), but for a little extra they are happy to forge blades from Shirogami Steel.
I own and use Japanese planes made from Shirogami, Aogami, Aogami Super, Swedish steel, and a British steel called “Inukubi,” which translates to “dog neck,” a commercial steel imported to Japan from England (Andrews Steel) in the late 1800’s. Of these, Shirogami No.1 steel is my favorite. It’s a matter of personal taste.
Beware of a plane or chisel blacksmith that refuses to use plain high-carbon steel and tries to charge you more for blades made from Aogami or Aogami Super steel.
The Challenges of Working Plain High-Carbon Steel
What makes plain high-carbon steel so difficult to work, you ask? Your humble servant has never even forged a check much less a tool blade, but I will share with you what the blacksmiths I use and swordsmiths I know have told me in response to this question.
First, plain high-carbon steel is much more difficult to successfully heat treat because the range of allowable temperatures for forging and heat-treating is narrow. Heat it too hot and it will “burn” and be ruined. Quench it at too high or too low a temperature and it will not achieve the desired crystalline structure and/or hardness. Miss the appropriate range of temperatures and the blade may even crack, ruining it. Yikes! Please see the numbers and photos in the article linked to above.
Second, even if the temperatures are nuts-on, plain high-carbon steel has a nasty habit of warping and cracking during heat treating resulting in more rejects than alloy steels with additives such as chrome, tungsten or molybdenum. Strange as it may seem, when the crystalline structures that make steel useful form during quenching, they increase the blade’s volume. This change produces differential expansion causing the metal to warp, a troublesome characteristic that can be more or less controlled, or at least compensated for, by a skillful blacksmith, but it takes real skill, extra work, and a bit of luck. Not just any old Barney can do it consistently, so when working plain high-carbon steel, a blacksmith needs to know his stuff and pay close attention.
Other than wastage due to rejects, it doesn’t cost more to forge and heat-treat a blade made from plain high-carbon steel, but it takes serious skills and dedication to quality control to make a living working it for 5+ decades.
Let me give you an example of skill and experience as it relates to warpage management of plain high-carbon steel.
The photo below is of a swordsmith the instant before he quenches a glowing hot sword blade made of tamahagane, a traditional type of plain high-carbon steel made from iron sand, in a water trough. Notice the condition of his smithy: he is working in the middle of the night, the time when the best magicians and alchemists have always done the most difficult jobs because temperatures are easier to judge without inconsistent sunlight confusing things. His posture and facial expression are tense because he is about to roll the bones and, in the blink of an eye, either succeed in the most risky part of making a sword, or fail wasting weeks or months of work and thousands of dollars worth of materials. Notice how straight the glowing blade is before the plunge.
A Japanese swordsmith with a blade made from high-carbon Tamahagane steel poised for quenching. The blade is straight at this point in the process. He has invested months of work into this blade to this point and a misjudgment or even bad luck in the next second can waste it all. Not a job for the inexperienced or timid.
Note that the quantity of crystalline carbides formed in a Japanese sword during the quench is greatest nearest the hard cutting edge, and cause that area of the blade to expand and warp the most. The swordsmith therefore forges the blade straight before quenching it in expectation of it warping to the intended curvature when the crystalline structures at the cutting edge form, as seen in the photo below. This curvature is an intentional design feature that takes years of experience to achieve in a controlled manner.
After quenching, the resulting warpage is dramatic. The swordsmith must plan for this distortion and shape the blade accordingly prior to the quench if he is to avoid unfortunate results. Tool blacksmiths are faced with the same challenges on a smaller scale but more frequently. Notice the mud applied to the blade before quenching intended to control the formation of crystalline structures and achieve differential hardness. The patterns the swordsmith made in applying this insulating mixture heavily influence the limits of differential heating in the blade as well as the appearance of the “hamon” pattern that develops.
If the swordsmith intended to make a straight sword blade, he would have a forged a reverse curvature into the blade to compensate for the warpage that occurs during quenching. Plane and chisel blades exhibit similar but less dramatic behavior due in part to the moderating effects of the low/no-carbon lamination.
A photo of both sides of an antiqueJapanese sword with the warpage being an intentional design feature
The thinner the piece of steel being heat-treated, the more unpredictable the warpage developed and more likely the blade will be to develop fatal cracks. Within limits, simple warpage can be corrected to a limited degree in thin blades during the first few seconds after quenching and/or tempering by bending and/or twisting the blade while it is still hot and malleable. These techniques do not work well in the case of thicker plane and chisel blades, however, so experienced blacksmiths don’t rely solely on corrective measures but anticipate warpage beforehand and create a curve or twist in the opposite direction when forging the blade to compensate. This takes skill and experience, and even then, some rejects are unavoidable.
Chemical alloys like chrome, molybdenum, and tungsten greatly reduce warping and the risk of cracking, so their benefits are huge.
None of this is mystical, but tools made from plain high-carbon steels such as Shirogami steel require more skill and experience than those possessed by factory workers, much less Chinese peasants, so mass-production is nearly impossible, labor costs are higher, profit margins are smaller, and advertising budgets are non-existent. No wonder such tools get little attention from the shills in the woodworking press.
While modern chemistry has unveiled the mystery of steel, it has only been during the last 70 years or so that metallurgical techniques were developed making it possible to understand the Mystery of Steel, and the tools to scientifically control the Alchemy of Steel are even younger.
The manufacture and working of steel are still magical processes that are the foundation of modern civilization. Be not deceived: while computer nerds, ijits with MBAs, and governments grifters take all the credit, without mastery of the alchemy of steel, human life on the mudball we call home would be short and brutal.
If you have good sharpening skills but haven’t yet tried chisel or plane blades made from Shirogami, Aogami or Asaab K-120 Swedish steel, you’re missing a treat.
In the next article in this magical series we will examine the genius of the soft iron component found in quality Japanese woodworking blades. Whether cat, bat or owl, please explain the details to your familiar to prepare them for the excitement to come!
YMHOS
If you have questions or would like to learn more about our tools, please click the “Pricelist” link here or at the top of the page and use the “Contact Us” form located immediately below.
Please share your insights and comments with everyone in the form located further below labeled “Leave a Reply.” We aren’t evil Google, fascist facebook, or thuggish Twitter and so won’t sell, share, or profitably “misplace” your information. If I lie may everything I eat taste like mud.
“The most beautiful experience we can have is the mysterious. It is the fundamental emotion that stands at the cradle of true art and true science.”
Albert Einstein, The World as I See It
The blades we are considering in this series of articles about sharpening are made from iron and steel, so it makes sense to examine these materials from the viewpoints of sharpness and sharpening. But let’s begin by considering some of the interesting supernatural and legendary aspects of working these materials.
Steel Magic
Steel is a magical substance. Since ancient times, the blacksmiths that worked it were sometimes seen as gods, sometimes as wizards, and always as essential. Shaped by local traditions, the power blacksmiths possess to combine and shape the elements of earth, wind, water, fire and even spirit into the tools and weapons of everyman’s trade was seen as magical.
Even the blacksmith’s forge and anvil were seen as magical in and of themselves, and rituals incorporating them were widely believed to keep evil at bay, provide good luck and blessings, and even to cure ailments.
There were several extremely famous magical blacksmiths back in the mists of time. Please allow your humble servant the honor of presenting two of them.
Vulcan the God
Vulcan (aka Hephaestus to the Greeks), Roman god of fire and blacksmithing. Archaic relief from Herculaneum (National Archaeological Museum, Naples).
The bas-relief stone carving in the photo above is of Vulcan, the Roman god of fire and blacksmithing, also known as Hephaestus to the Greeks. This carving was excavated at Herculaneum, located in the shadow of Mount Vesuvius near Pompeii. Herculaneum was an ancient Roman town destroyed by volcanic pyroclastic flows in 79 AD. The word “volcano” comes from the word Vulcan, so a stone carving of Vulcan retrieved from a town totally destroyed by Vulcan’s namesake is tragically ironic in the extreme.
Die Schmiede des Vulkan (The Forge of Vulcan) by Velázquez, Diego (1599–1660) Museo del Prado, Madrid, Spain.
The painting by Diego Velázquez above is from a scene in the Roman poet Ovid’s Metamorphoses where the god Apollo visits the god Vulcan in his forge to tell him that Venus, Vulcan’s wife, is being naughty with Mars, the god of war. Apollo is on the far left and can be recognized by his crown of laurel and shining aura. Vulcan stands next to Apollo with a shocked and incredulous expression on his less-than-beautiful face (nice abs, but the ‘stache needs a lot of work). Vulcan’s assistants have stopped their work on a plate armor project (decidedly 15th century in style) astounded by both the sudden appearance of Apollo and the news he delivers.
Obviously, Venus and Vulcan were not a happy couple. Legend says that whenever Venus was unfaithful, Vulcan grew angry and beat hammer on anvil so fiercely that sparks and smoke rose up from the top of Mount Etna on the island of Sicily, under which he had built a forge, creating a volcanic eruption. You could say he blew his top (ツ).
Perhaps Apollo is sharing this tidbit of news just to help out his old buddy Vulcan, or perhaps his reason for snitching is malicious. Whatever the reason, I think it’s safe to assume people loved drama in the 1600’s too. Nothing new under the sun.
Your humble servant’s point is that Vulcan (Hephaestus) was not only worshiped in ancient Greece but had a presence in popular culture from before an Etruscan tribe drained the swamps that became Rome in the 10th century BC, to as late as the 1600’s. And I won’t even get into Trekkie lore. Now that’s an influential craftsman.
Wayland the Smith
Wayland the Smith (Vølund Smed) 1873 sculpture. Stockholm Sweden.
Wayland the Smith was another famous blacksmith, metalworker, and magician. He was said to be a Lord of the Elvish folk who learned his trade from either giants or dwarves.
While not as old as Vulcan in human history, Wayland’s legend survives throughout Europe, and the products of his forge were central to heroic traditions of many peoples and kingdoms long before the days of the Viking longboats.
He is credited in Norse, Germanic, and Anglo-saxon legends and literature with forging magical objects of great renown, including rings of power (no, Professor Tolkien didn’t invent the concept), the impenetrable coat of ring mail worn by Beowulf during his epic battle with Grendel, the magical sword named Gram that Sigurd used to slay the dragon Fafnir, and even King Arthur’s sword Excalibur. Not just scribblers, but even Alfred the Great, king of the Anglo-Saxons (c.886~899AD) on the island that would later become England, wrote of him.
The chains on the legs of the statue above probably represent his maiming and imprisonment on an island at the pleasure of an evil Norse king upon whom he took a bizarre revenge involving unconventional drinking bowls and jewelry. Is Wayland’s slavery one of the reasons blacksmiths have wrapped chains around their anvils since ancient times, or is the purpose just to secure the anvil and mute the bright ringing song they sing? Another mystery…
Wayland’s influence in modern times is not insignificant. For example, Leonardo Da Vinci’s fascination with flying machines was probably stimulated by the legends of Wayland building and using a winged contraption to escape his slavery. And unlike Daedalus’s deadly device in Greek legend, Wayland’s glue didn’t melt.
Daedalus (the bald nekid guy) and his son Icarus (the falling nekid guy) using wings to escape the island of Crete, home of labyrinths and monsters. Against his father’s advice, legend holds that Icarus flew too near the sun melting the wax securing the feathers that made the wings function. “Oops!” Murphy chortled in his glee.
The legends of Wayland the Smith were once deadly serious matters.
In a lighter vein, the writings of J.R.R. Tolkien, the author of the most popular works of written fiction in human history (no kidding), were influenced by these same legends.
The Blacksmith’s Shop
While some blacksmithing traditions such as those involving Vulcan and Wayland are decidedly pagan in origin, others fit well with Christianity. For example, the ring of the blacksmith’s hammer on his anvil was once believed to strengthen the chains that bind the devil in hell barring him and his demons from God-fearing folk’s hearths. In darker times in human history the blacksmith’s workshop was believed by many to be a safe haven from evil forces, one that Satan and his imps actively avoided.
The village smithy. Notice the horseshoe on the wall in the background, and its downward orientation. Due to the lack of char marks on the wall, we can tell this is not where the smith normally hangs horseshoes to cool. There is method to the madness.
Below is a download link to a charming story about why blacksmiths ring their anvils and how to make sure a horseshoe brings you luck at work and at home. I encourage you to read it.
If you have ever spent time in small one-man traditional smithies of the sort where our blacksmiths labor to produce the tools we provide to our Beloved Customers then you know the other-worldly atmosphere typical of such workplaces. Imagine wattle and daub walls and exposed, twisting, rough-hewn wooden roof beams blackened with 70+ years of soot, the compacted but lumpy dirt floor, the darkness of carefully-managed sunlight (the better to judge metal temperatures by eye), the bitter smells of charcoal fumes, straw ash, flux, hot steel and smoking oil; the roar of forced gas forges; the sounds of grinders and the dangerous leather belt systems that drive them; and finally the terrible racket and vibration of spring hammers and ringing anvils. A man that could work alone in a place like that 12 hours a day for 65 years is not afraid of your garden variety demon, no siree Bob.
It’s quite a sight to see a craftsman working in such an environment. They often start late in the morning to avoid noise complaints from the neighbors, and work until late at night doing heat treating when sunlight won’t interfere with the colors of the hot metal.
By noon their arms are black to the elbows and there are charcoal smudges are on their faces. The sight of a small, wizened 82 year-old man with strong sinewy arms scowling into the face of yellow-hot steel as he hammers the hell out of it is like a scene from Dante’s Inferno. Something of the ancient magic of Vulcan and Wayland can be felt in such places.
In the next post we will examine some alchemical aspects of the Mystery of Steel. Until then, I have the honor to remain,
YMHOS
Mr. Junichi Takagi, Japan’s last adze blacksmith, passed away April 2, 2019. A kind man, talented blacksmith and excellent sharpener. He will be missed especially since he had no apprentices and left no one to carry on his work.Mr. Takagi working on his wet grinder in August 2018.Mr. Nakajima’s Forge in Yoita, Nagaoka Japan. Unfortunately it was recently demolished following his retirement.Nakaya Takijiro’s forge, originally made for swords, now dedicated to forging handsaws.
If you have questions or would like to learn more about our tools, please click the “Pricelist” link here or at the top of the page and use the “Contact Us” form located immediately below.
Please share your insights and comments with everyone in the form located further below labeled “Leave a Reply.” We aren’t evil Google, thuggish Twitter or treacherous TikTok and so won’t sell, share, or profitably “misplace” your information. If I lie may fresh boils burst forth on my nose daily.
The gem cannot be polished without friction, nor man perfected without trials.”
Confucius
This post may not be as entertaining as previous ones in this series about sharpening Japanese woodworking tool blades: No swords or artwork or handsome Hollywood philosophers, I’m sorry to say. But with this addition to the series we will roll up our sleeves and get some work done.
Many Beloved Customers and Gentle Readers already know most of what is presented in this post, and of them your humble servant begs forgiveness, but it may be that careful Gentle Readers will stumble upon one or two gems among these scribbles.
You know the difference between the quality of work a sharp edge produces compared to that of a dull edge. The work goes quicker, cuts are clean, and finished surfaces are smooth, maybe even shimmering. Your tools are happy, singing and chirping as they cut away. But have you given thought to what a sharp edge really is?
In addition to the answer to this question, we shall also examine the naughty cutting edge that seems sharp fresh off the stones but suddenly and unexpectedly dulls after just a little use. Would it be useful to know how to detect such a cutting edge before it fails wasting your time and money?
Being in the construction industry, your humble servant would like to begin building this discussion on a firm foundation anchored in bedrock. So let’s get to digging.
The Basics
A cutting tool is essentially a wedge, with two flat sides meeting at an angle. Applying force causes the tool’s cutting edge to wedge apart and sever materials, be it wood, metal, meat or mushrooms.
The geometry of this wedge is critical to its performance. At one extreme, the angle could be 90°. It won’t be sharp, it will be hard to push, and it will crush and tear wood instead of cutting it cleanly, but it will be durable.
At the other extreme, the wedge might be made more acute, say 3°. Such an edge could be made extremely sharp indeed, but it would be too fragile to cut anything but whip cream for long. The point is that the sharp edge is a compromise, acute enough to cut well, but not so acute that cutting pressure and friction will make it dent, roll, wear away, crack or chip easily.
In a woodworking tool the wedge is incorporated into a blade as a beveled cutting edge. In an efficient tool this edge that will be thin enough to cut the intended material well, but at the same time resist dulling for a relatively long time. The words “well” and “long” in the previous sentence are where the magic lies. We will examine these important points in future posts in this series.
Wood Shaving’s Eye View
Ideally, the extreme edge of the ideal metal tool’s extreme cutting should be perfectly smooth and only a single molecule thick. In the real world, cutting edges are rougher and wider, but still manage to cut pretty well.
Examine a sharp cutting edge under a microscope, and you will see imperfections. A dull blade will look even worse of course, showing dents, rips, and even cracks.
The edge created by an 800 grit stoneStill sharp but starting to wearA dulled and dented knife blade
Using a blade wears away and damages the cutting edge rounding and flattening it, destroying the geometry that makes it an effective wedge. Sharpening is the process of (1) restoring the intended wedge geometry; and (2) removing defects from the meeting of the wedge’s sides by abrading metal from one or both sides down past any damage, leaving a relatively clean, uniform wedge with minimal defects. This is the sharp edge. It is what the wood experiences. It requires effort to achieve, but it ain’t rocket surgery.
The most difficult part of achieving the two objectives listed above is making nothing from something, in a place that cannot be seen. Now that’s a Zen koan if I ever heard one.
Building confidence in one’s ability to achieve results at the microscopic level is not easy. The key is to understand the goal, and to consistently follow reliable procedures. I will describe those goals and procedures in future posts in this series.
Edge Failure
The ideal cutting edge is uniformly sharp, but few edges in the real world meet these severe criteria at the microscopic level where it matters most. A blade may be sharp in some places, and dull in others. We have all experienced those irritating blades that cut well for a while and then dull quickly and suddenly.
One common cause of these inconsistencies and failures you should be aware of is a cutting edge that is sharp only because it has a defect called a burr. Burrs by themselves can be sharp indeed, but in the case of chisel, plane and knife blades they are thin, irregular, and fragile, and being relatively unsupported by the rest of the blade, can easily bend, roll over, or break off at the root suddenly and unpredictably creating a nasty dull edge in an instant. A truly sharp edge will not just feel sharp, but will stay sharp for a relatively long time because it is properly shaped and well supported, instead of being only temporarily sharp because of an irregular and fragile burr.
I call burrs a “defect” because they are, but creating a burr is an important step in making a sharp edge. The trick is to continue to refine the wedge after the burr is created until the burr melts away on the stones and the edge is as perfect as we can reasonably expect to make it. Stop the refinement work too soon, or fail to do it completely, and all or part of that unreliable burr may survive to suddenly plop a floater into your punchbowl.
So how does one tell if an edge is properly sharp and free of deceptive burrs without using a scanning electron microscope?
Do you remember ‘Nando’s philosophy described in my previous post? One must reverse the latin lover’s logic. Don’t rely on mahvelous appearance. Don’t rely on silly bar room stunts like shaving arm hair or telemarketing tricks like cutting strips of paper. Develop skills and train your senses other than eyesight to detect the shape of steel at the microscopic level. This may sound strange but it is possible because your nerve endings are microscopic and can sense the difference between a burr and a truly sharp edge.
I will save the explanation of detailed techniques for a future post, but for now, here are two essential techniques for sensing things too small to see: Use your fingerprints and the exquisitely fine nerves connected to them to detect the presence and size of burrs; Use your fingernails and the microscopic nerves connected to them to check the condition of the burr and determine when the blade is ready to move onto the next stone in the sharpening process. Please don’t cut yourself.
In the meantime, let’s have some pleasure before pain. Prepare to be amazed, Ladies and Germs, because in Part 6, coming soon, The Mystery of Steel will unfold before your very eyes! There will be marble relief carvings, bronze statues, oil paintings, gods and demons, death and destruction, and even a pagan soap opera about forbidden love. Oh my! We’re in negotiations for the movie rights now ♫꒰・‿・๑꒱ and need someone to play Vulcan. If anyone knows Spiderman’s agent, please have his people contact my people right away.
YMHOS
If you have questions or would like to learn more about our tools, please click the “Pricelist” link here or at the top of the page and use the “Contact Us” form located immediately below.
Please share your insights and comments with everyone in the form located further below labeled “Leave a Reply.” We aren’t evil Google, fascist facebook, or treacherous TikTok and so won’t sell, share, or profitably “misplace” your information. If I lie may all my donuts be infested with lawyers.


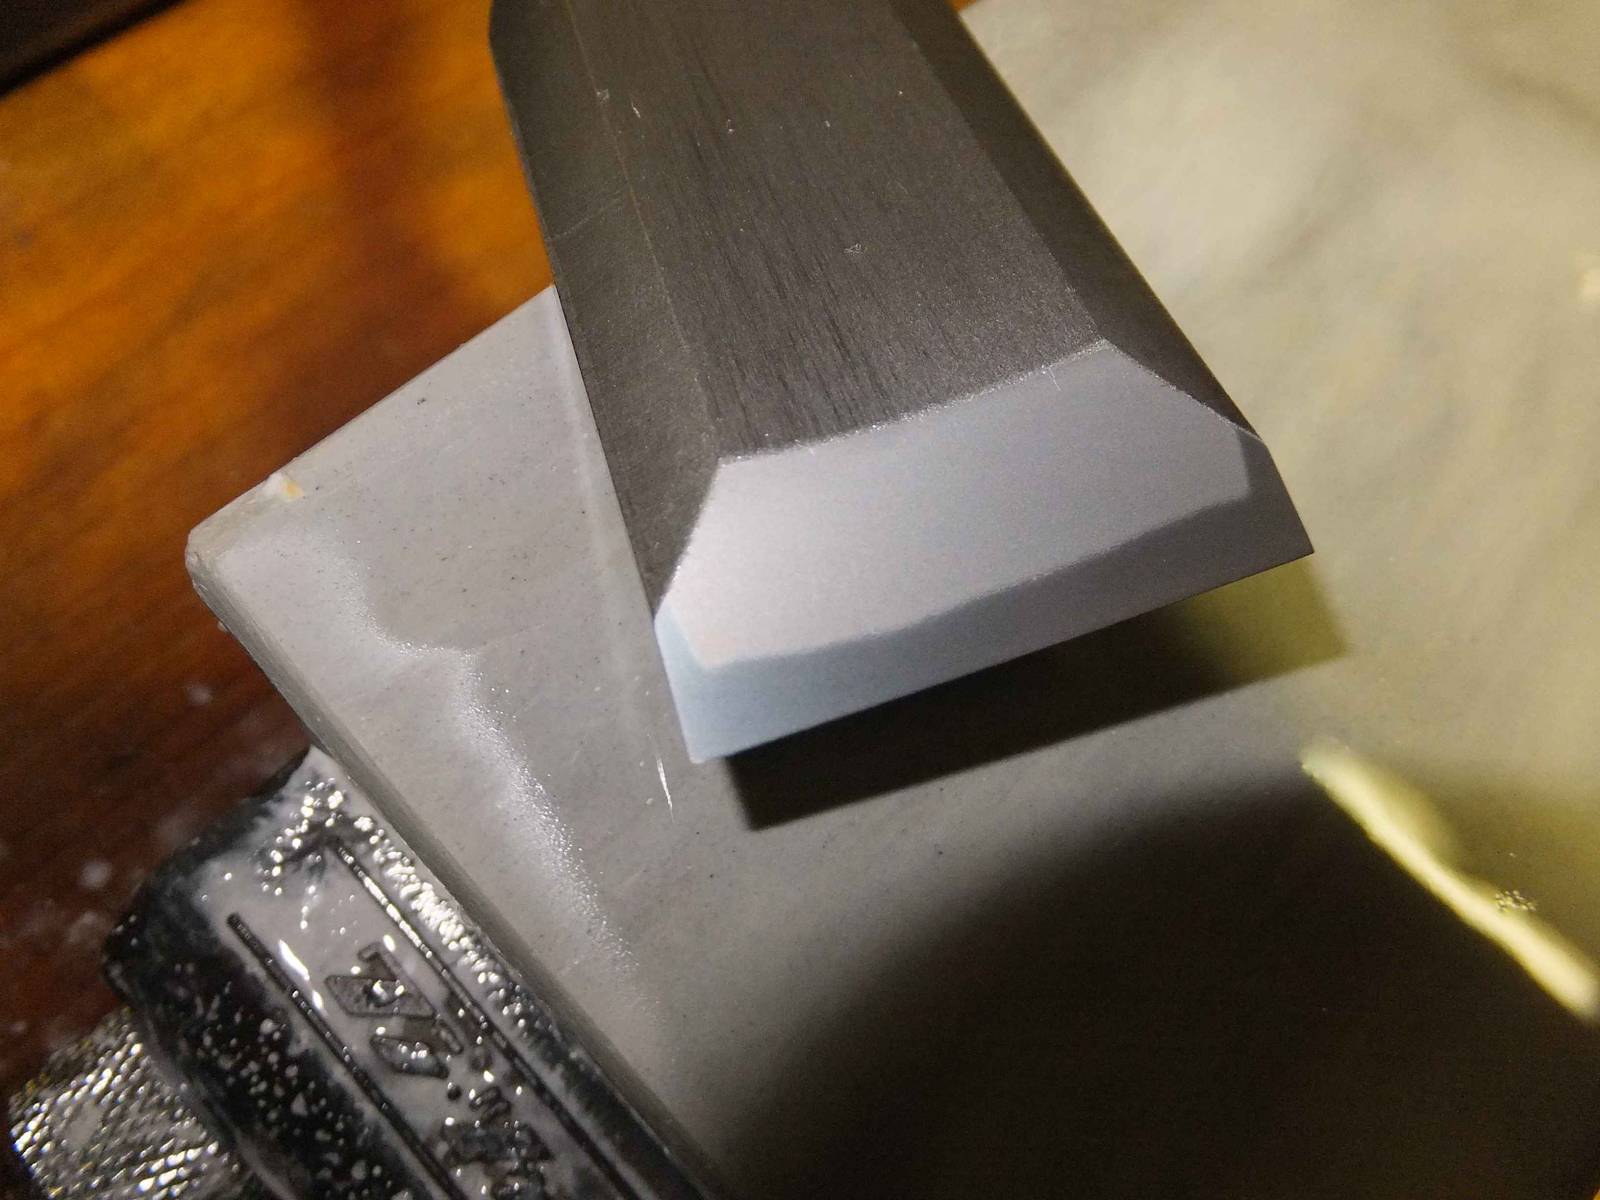


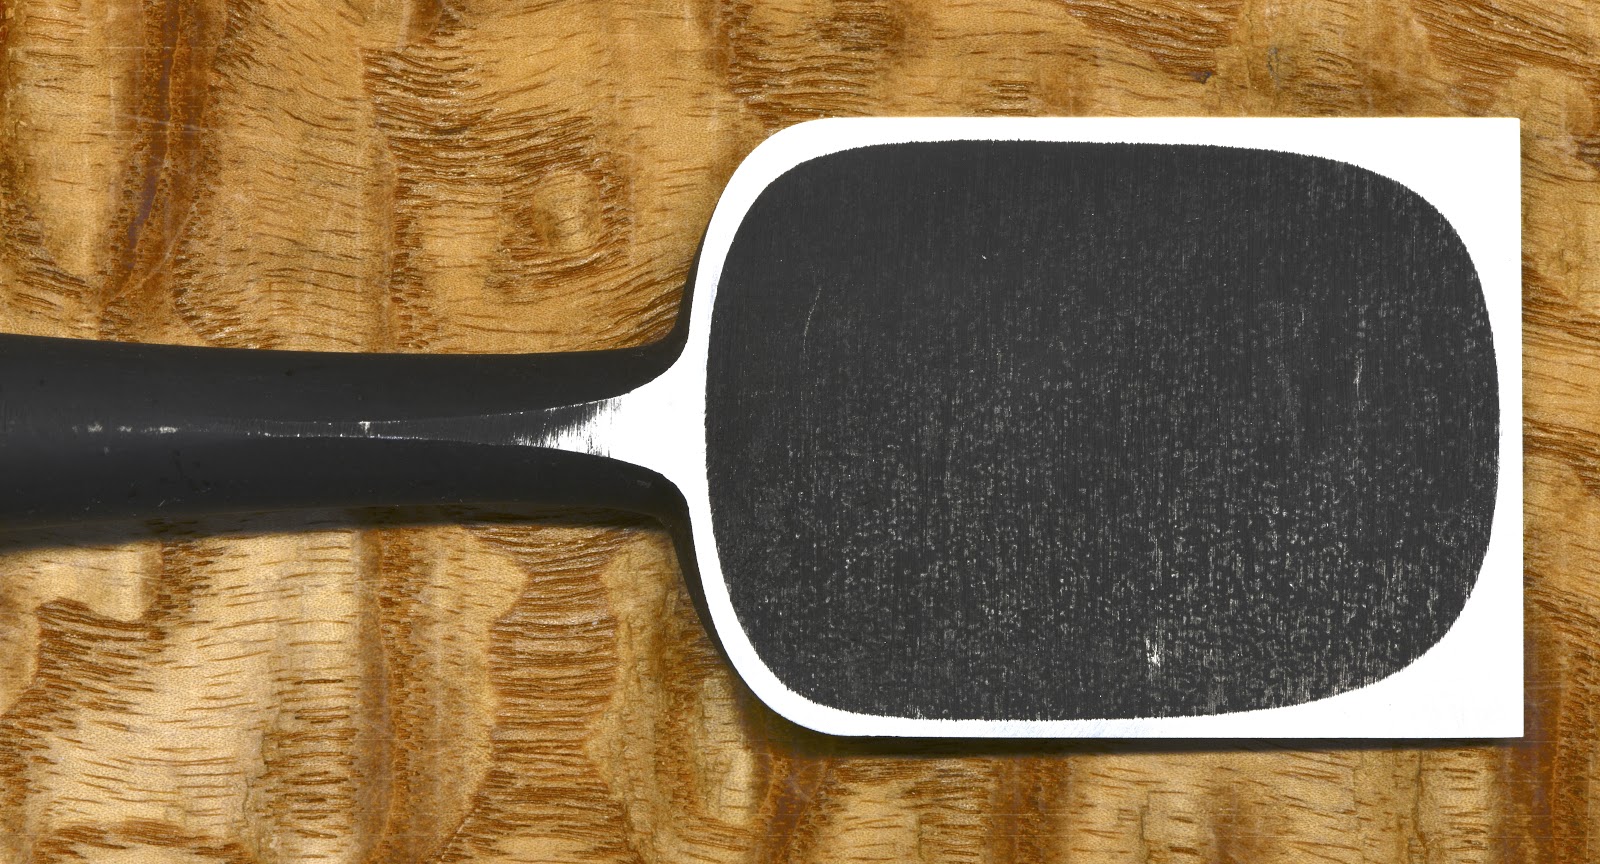


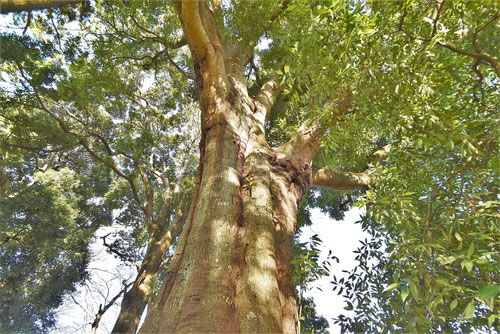

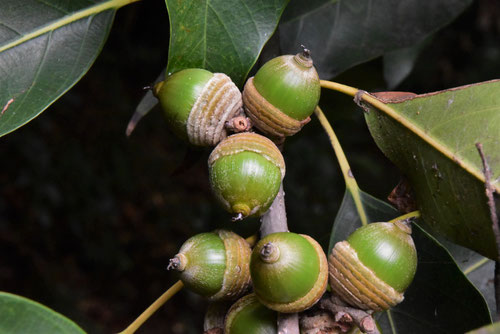

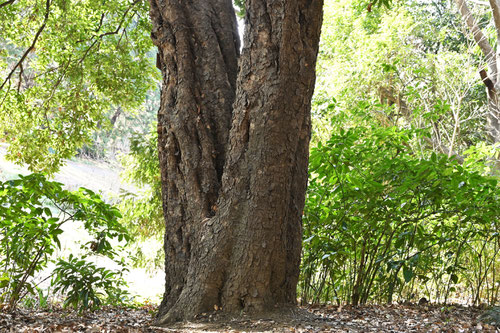


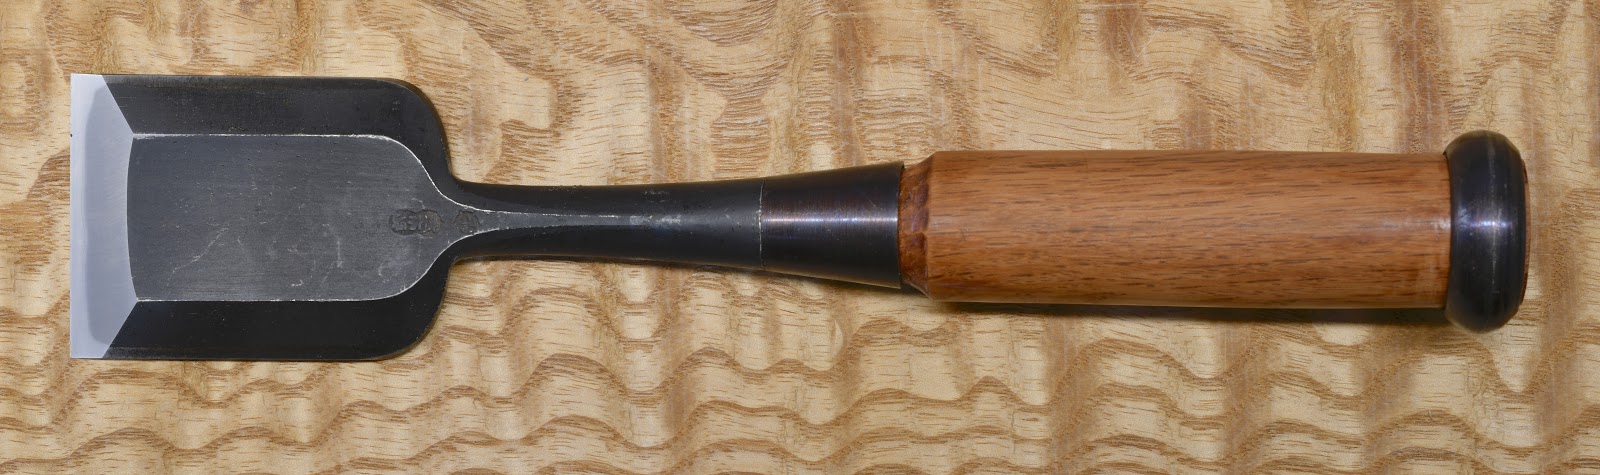

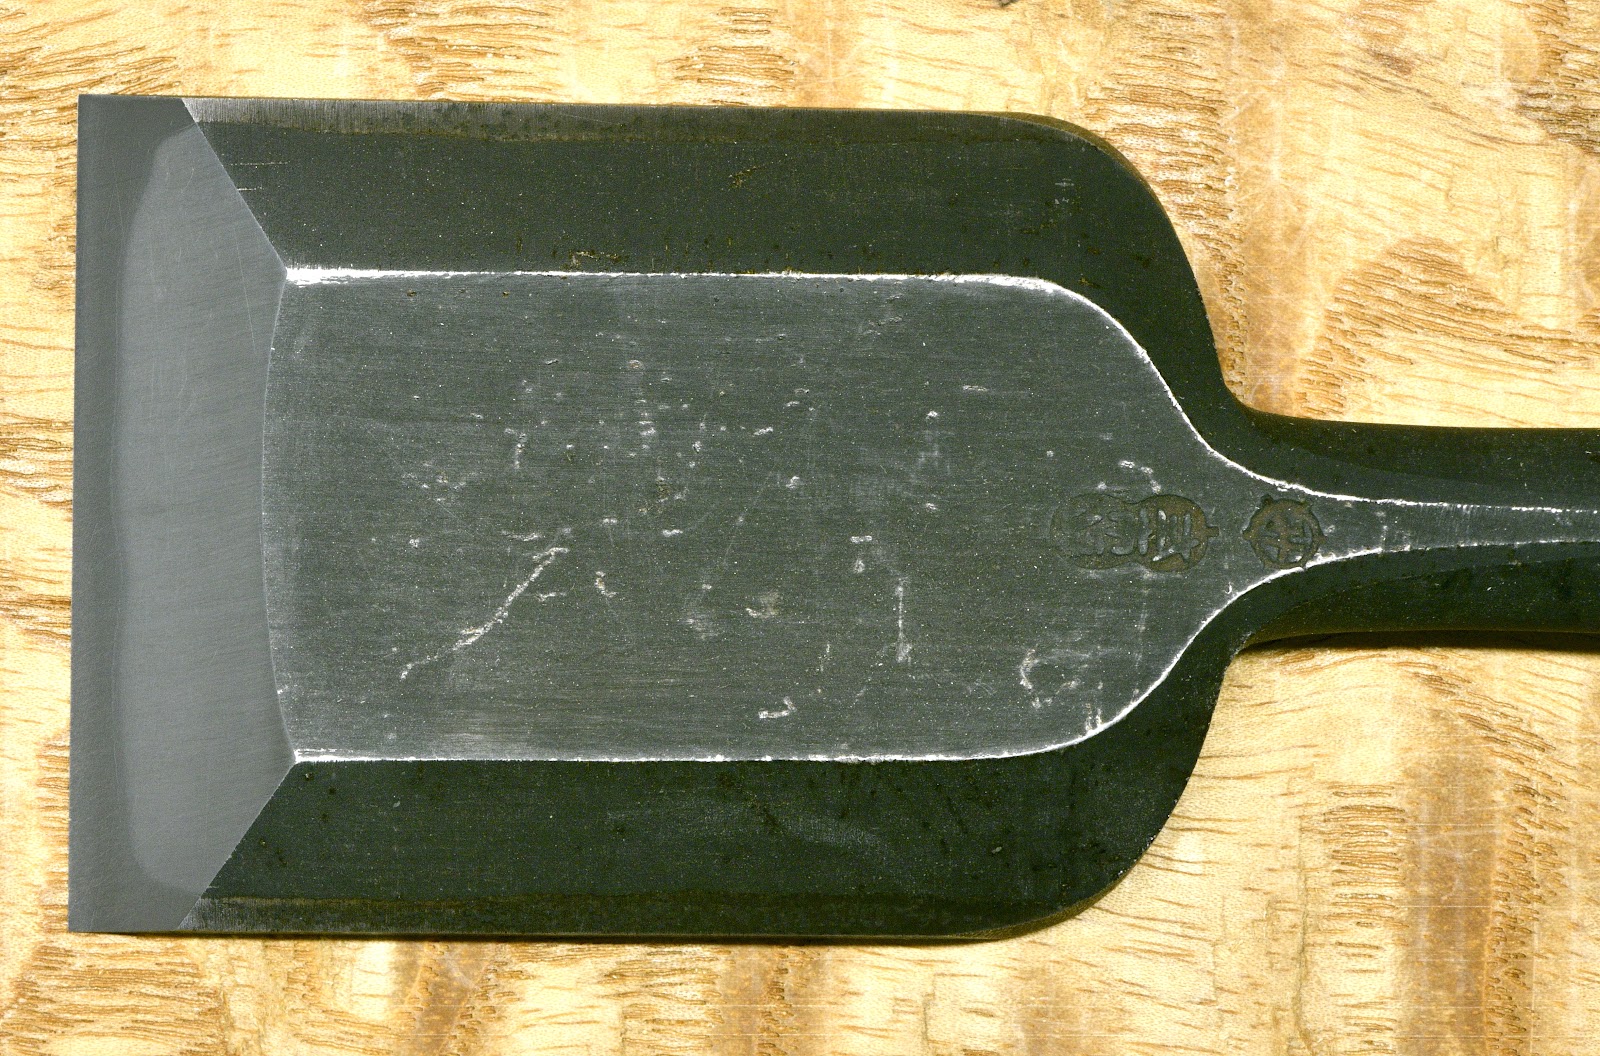
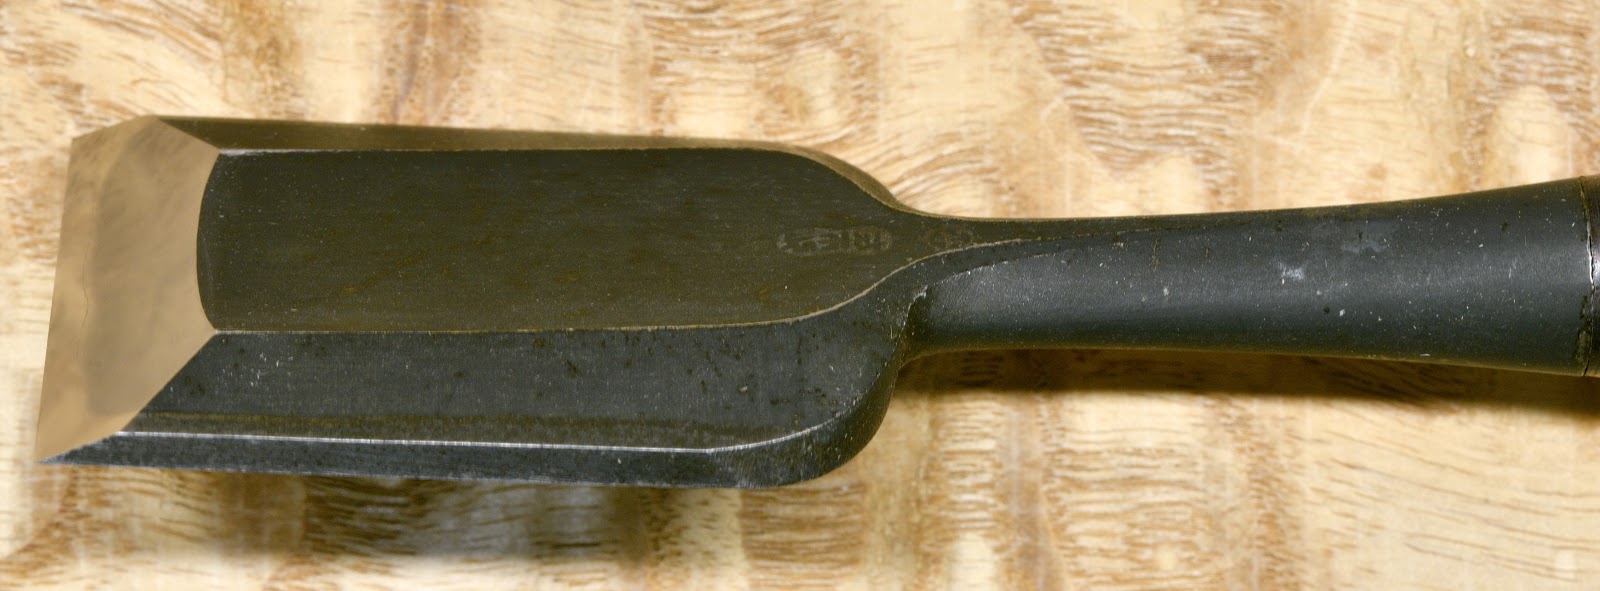
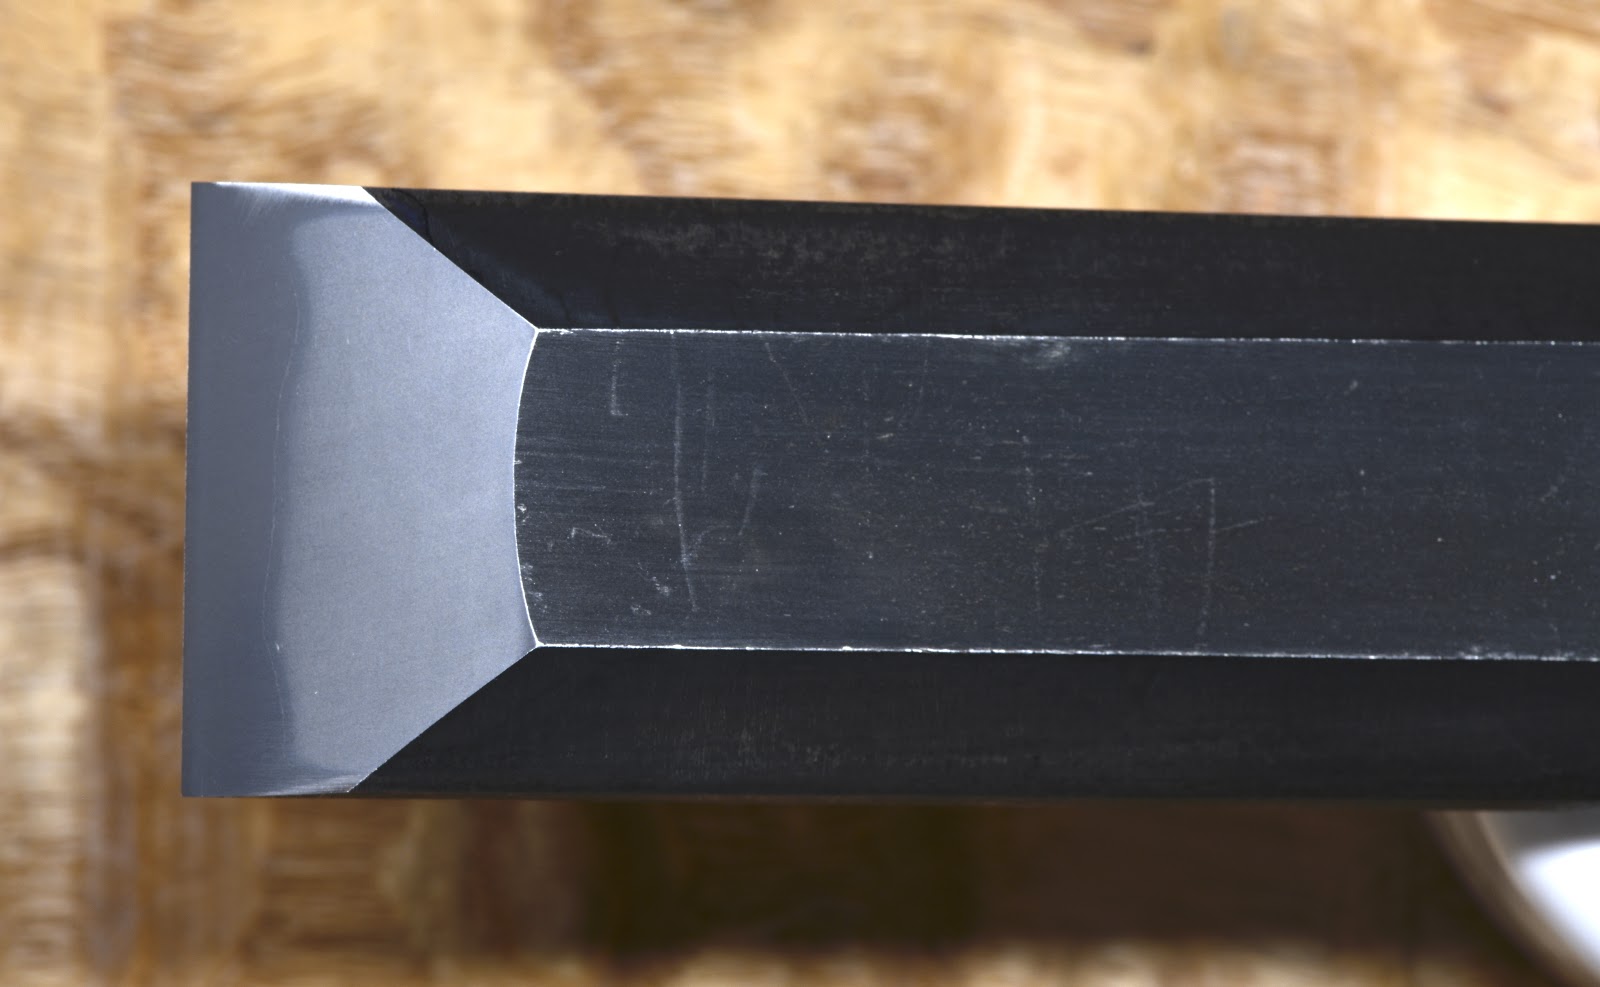
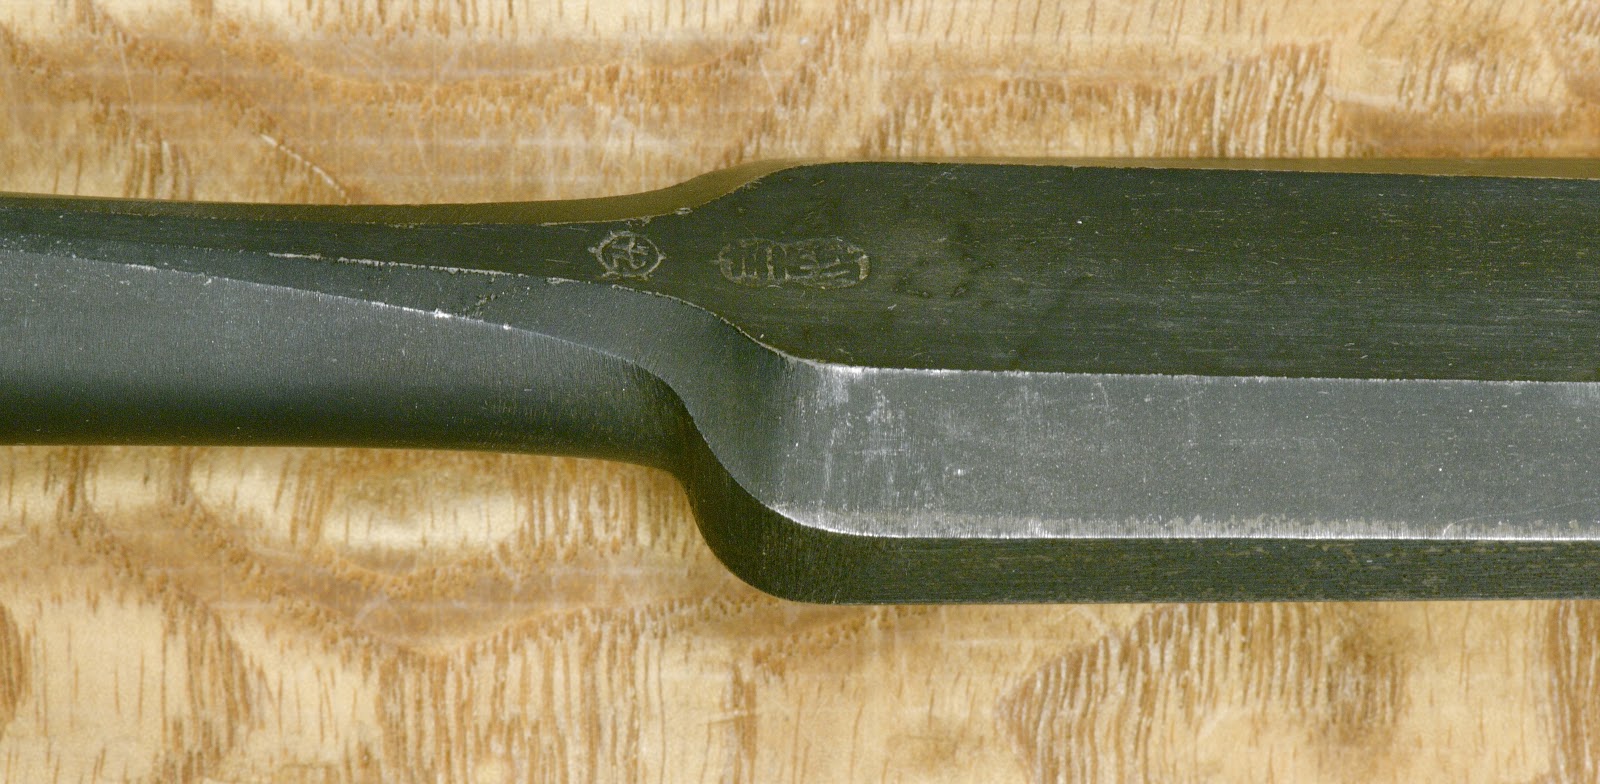
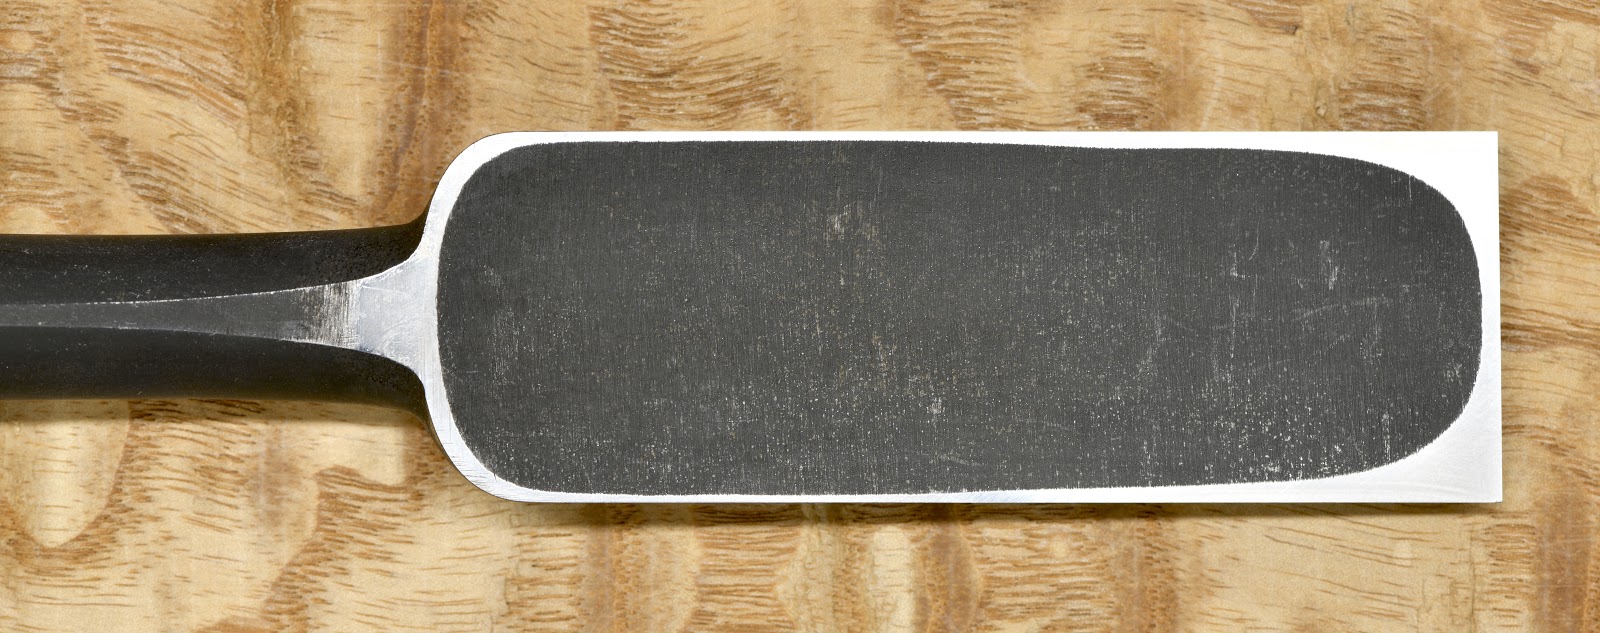


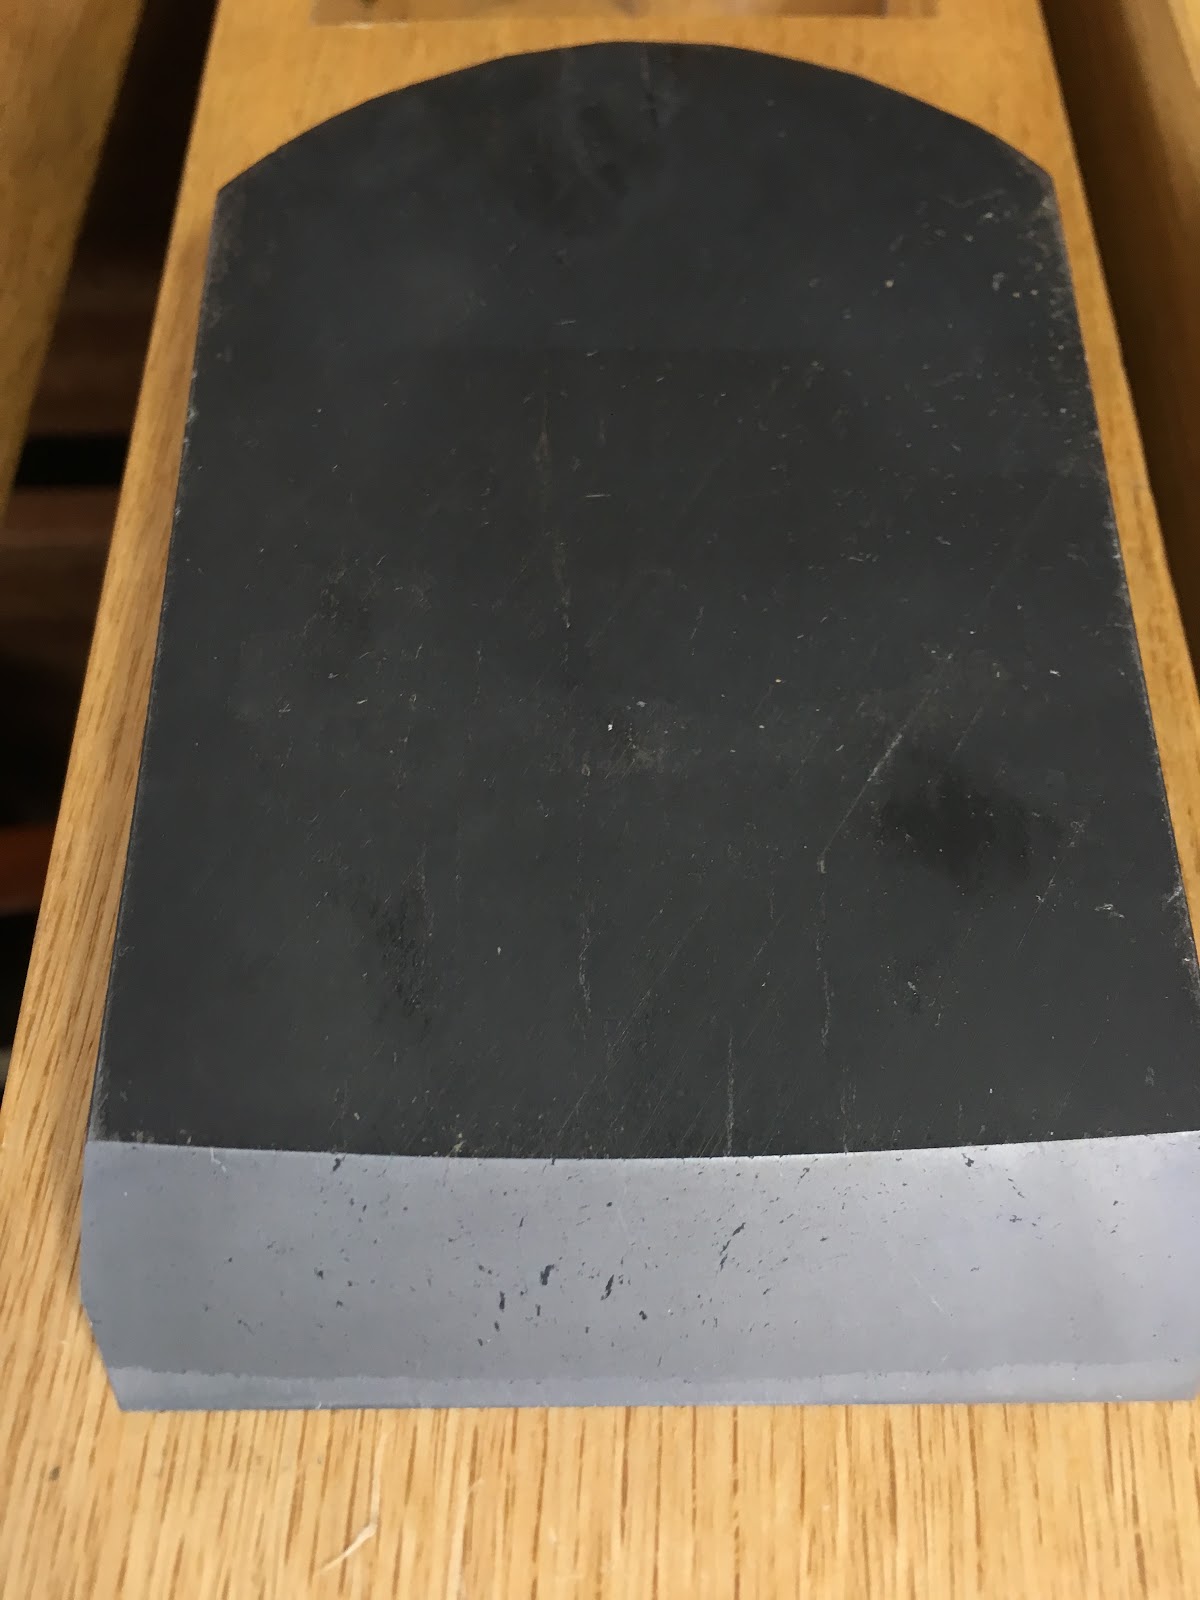


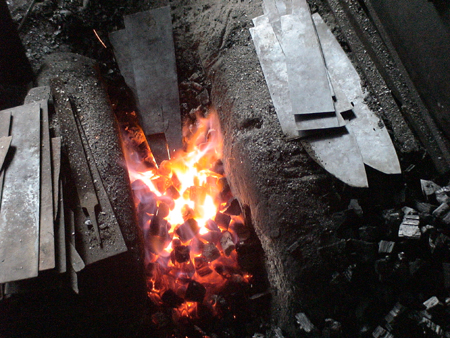


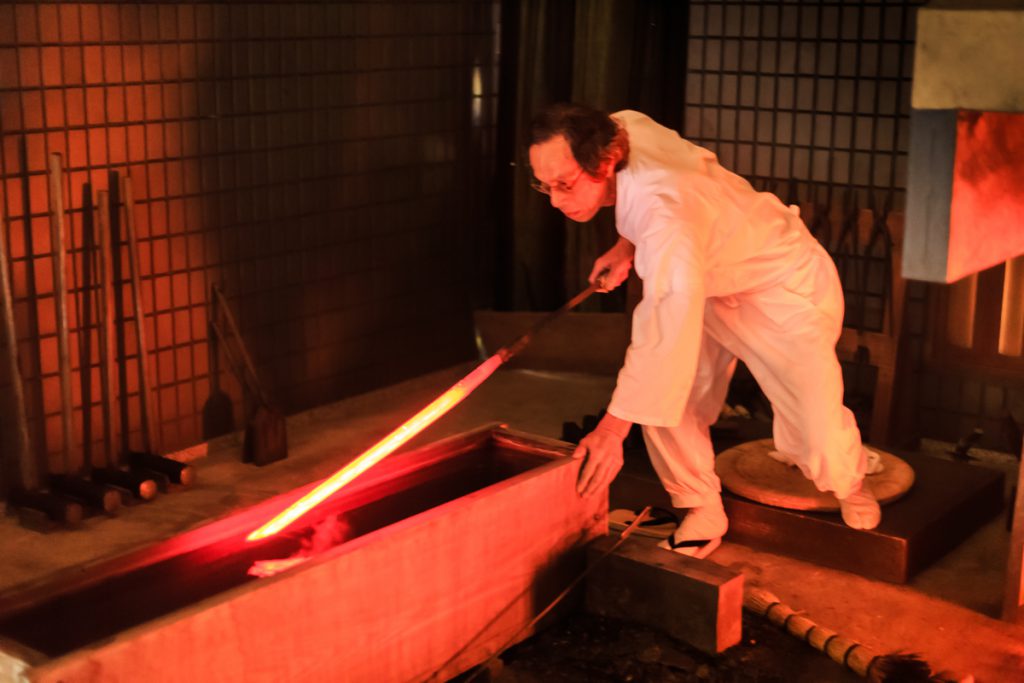


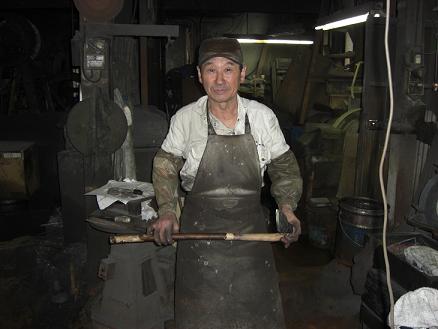


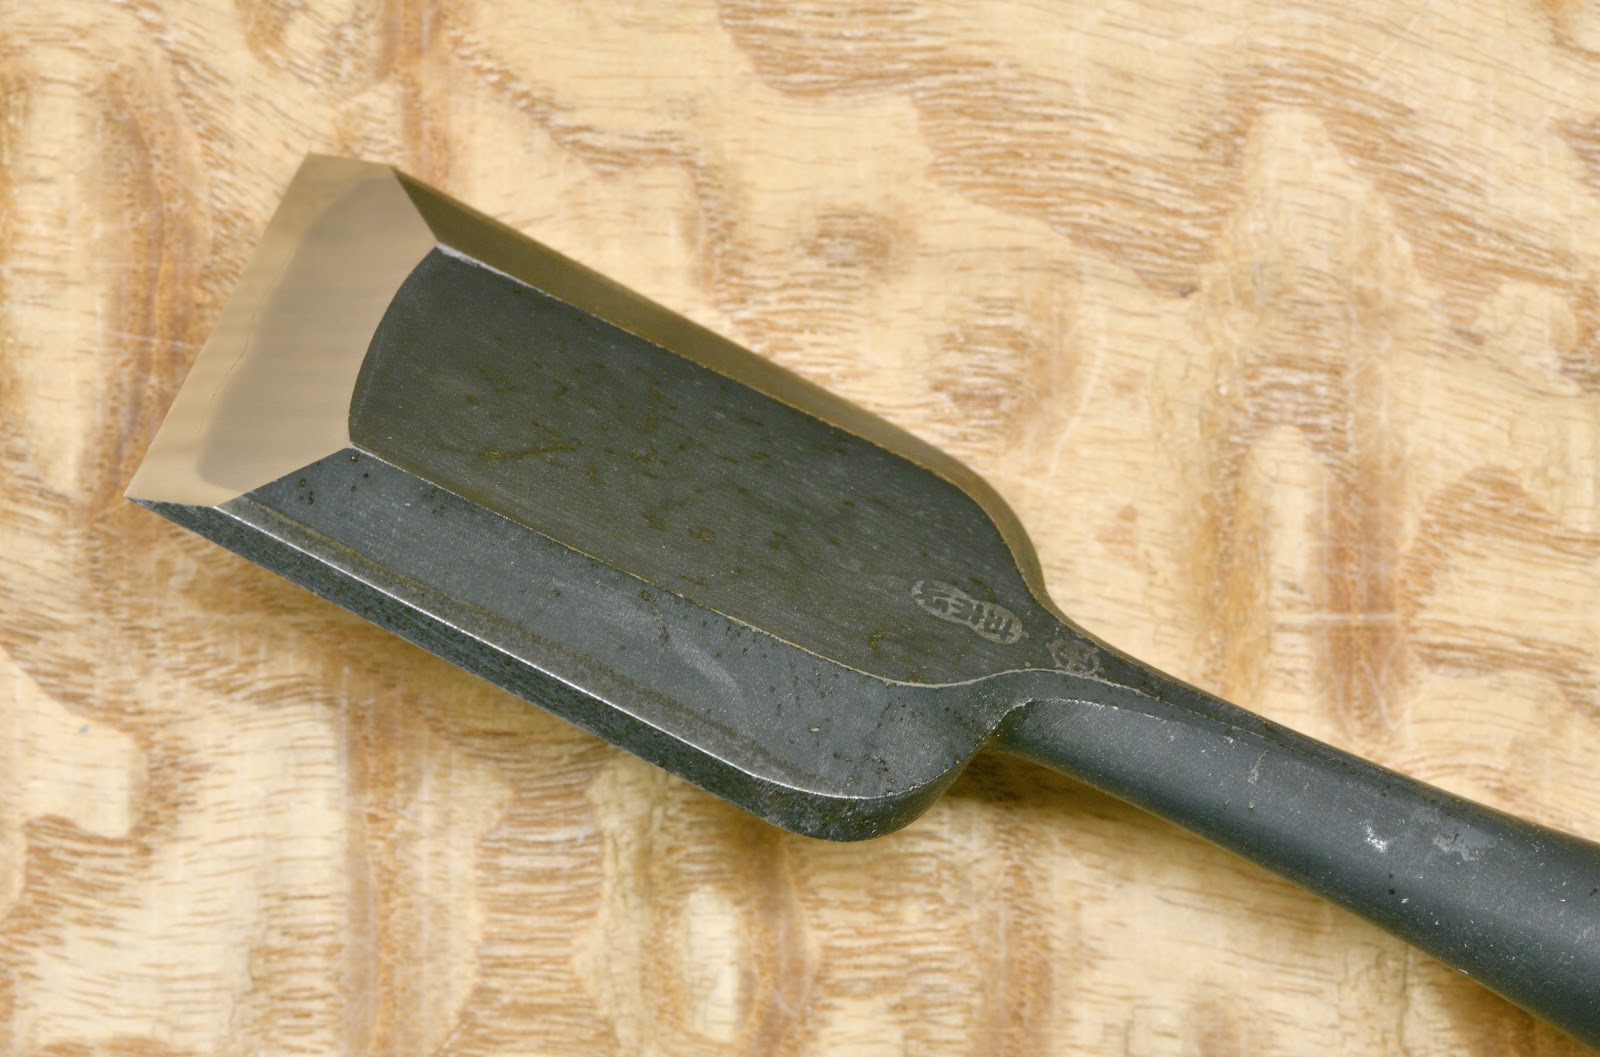

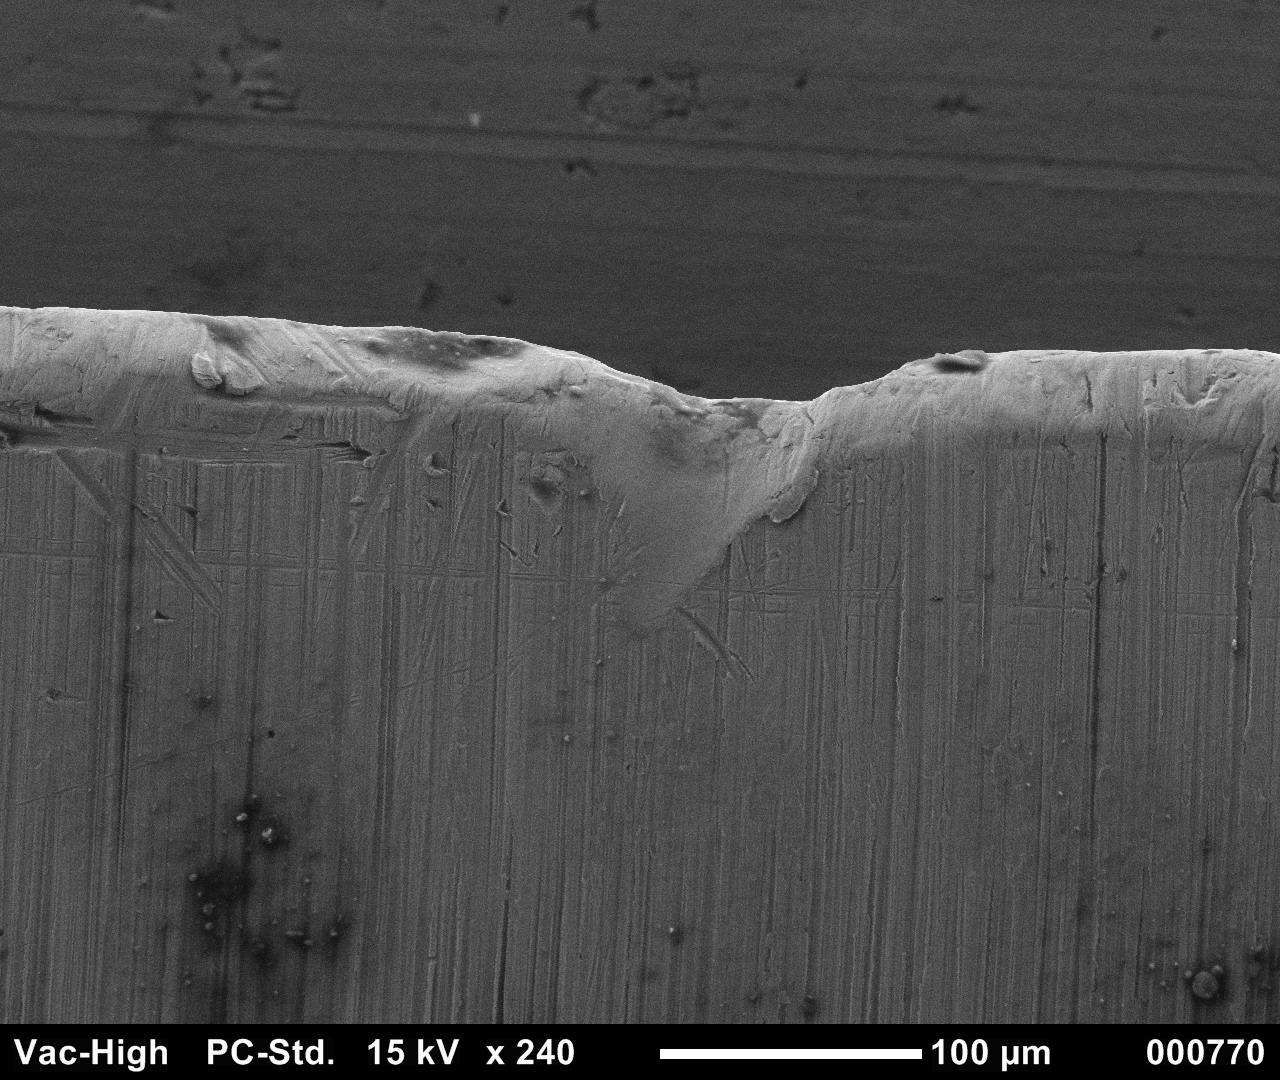

Leave a comment