
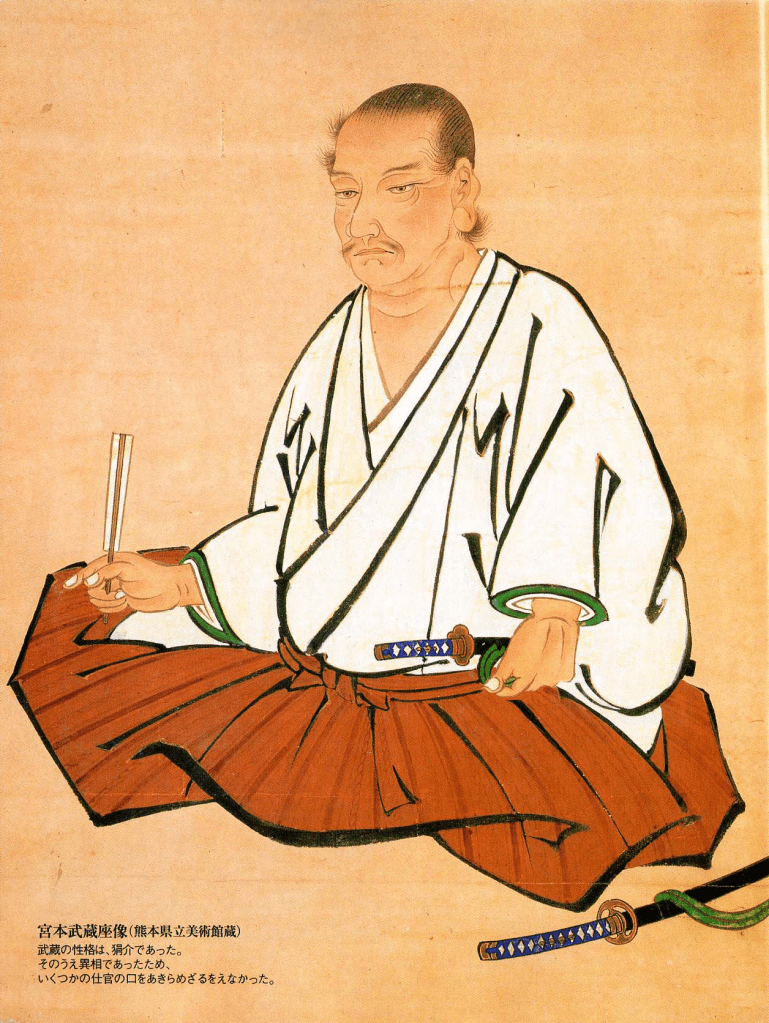
The way of the carpenter is to become proficient in the use of his tools, first to lay his plans with true measure and then perform his work according to plan. Thus he passes through life.
– Miyamoto Musashi, The Book of Five Rings
his is the sixth article in our series about Japanese handplanes. In previous installments we compared Western and Japanese planes and discussed how to tune and adjust the Japanese hiraganna plane. In this article your humble servant will be so bold as to explain how to setup and maintain the sole of the Japanese handplane.
The sole of a handplane is critical because it positions the blade’s cutting edge in relation to the board being worked making it possible to cut useful shavings of the desired thickness and length. Sometimes we want to cut thick shavings to quickly remove material from a board when flattening and/or dimensioning it, the job of the arashiko plane (荒仕子鉋). Sometimes we want to take ultra-thin shavings to create a flat, smooth, even shiny surface, the job of the finish, or shiage plane (仕上げ鉋). One plane cannot do it all, nor can a single type of sole setup.
In this article we will consider ways to setup the sole of a Japanese plane for Beloved Customer’s specific purpose. We will also examine ways to maintain the sole and the necessary tools.
Soleful Profiles
Besides keeping the cutting edge properly positioned to take shavings the handplane’s sole has another important role many overlook. We examined this in Part 5 of this series. In summary, to cut efficiently and minimize wasteful tearout on the surface of a board being planed, a contact strip approximately 3-6mm wide located directly in front of the mouth opening must apply uniform pressure on the surface of the board. This important principle is effective in the case of all handplanes of all countries made of all materials be they organic or metallic.
Indeed, depending on one’s skill with a handplane (there’s more than just pushing and pulling involved, after all), so long as this strip on the sole is applying even pressure to the board right up to the mouth opening, the rest of the sole can be pretty wonky and still yield good results with little or no tearout. And while this level of skill comes of experience, it all begins with understanding the aforementioned principle.
Beloved Customer is not doubt aware that the basic, standard sole configuration for handplanes is a simple flat surface free of wind. A little different from the adjustable bed of an electrical jointer, of course. While all handplanes wear and require constant maintenance regardless of their construction, wooden-bodied planes are softer than metal-bodied planes and tend to wear and warp more in use, the price we must pay for the advantages of the wooden body.
The wise man, therefore, will strive to discover ways to make the necessary task of truing the sole of his planes as easy as possible, a mindset clearly reflected in the Japanese version of the wooden bodied handplane giving it a huge advantage over its Western counterparts, at least in the hands of the thoughtful and diligent craftsman. Sadly, many newbies and all wood butchers poorly understand how the sole of the handplane works, or fail to set it up properly, or fail to maintain it properly blaming the plane when it stops working instead of themselves. So sad. So self-defeating.

Well-made Western planes ideally have a uniformly-flat sole. But is it really necessary to have the entire area of the sole in contact with the surface of the board being planed? Please consider this question in light of my earlier statement about the most important part of the sole being the contact strip directly in front of the mouth.
Japanese craftsmen decided long ago that it’s most efficient to relieve (remove) areas of the sole located between two or three critical contact points on the sole thereby making it much easier and quicker to true the soles of their planes, while at the same time significantly reducing friction, both significant advantages springing from a simple modification. This is much the same principle as the hollow-ground ura in the blades of Japanese planes, chisels and knives. The application of this principle results in two basic profiles to plane soles described below.
While lots of graphics would be nice, I beg Beloved Customer’s indulgence with the one I have available.
The Sole of the Arashiko Plane
The first and most common profile, illustrated below, is applicable to all planes intended for creating straight, flat surfaces, including the arashiko plane as well as the various types of jointer (nagadai) and shooting (suridai) planes. Finishing planes have a different sole profile described in the next section.
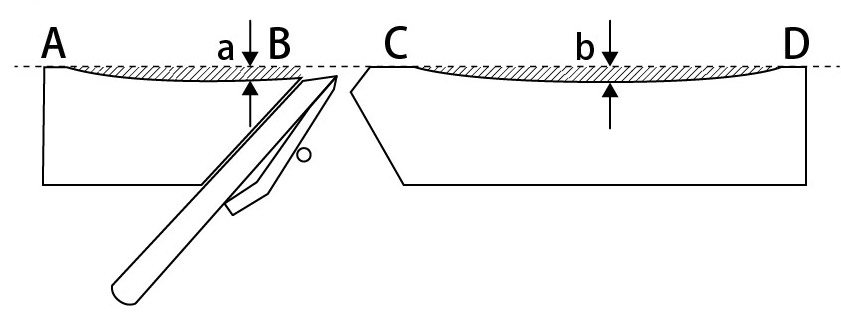
Contact area “C” is a strip of the sole located directly in front of the mouth and the full-width of the sole, and is the single most important detail of the sole. Contact area D is also a full-width contact strip located at the leading edge of the sole. And contact area A is located at the trailing edge of the sole. It’s very much a matter of personal preference, but a length of 6-10mm is typical for these contact areas.
The crosshatched areas in the drawing indicate where the sole has been scraped away leaving it hollow or “swamped.” These areas do not contact the surface of the board being planed. The precise shape of these swamped areas between A and B and C and D is unimportant, but it’s best if they are relatively uniform and approximately 0.2-0.5mm deep. Once again, personal preference.
Please note that point B, and the portion of the sole immediately behind the blade, is always relieved and never contacts the board being planed. This is important because if it does contact the board, vexing problems often result. Most people get this wrong at least once, or fail to perform proper maintenance allowing this swamped area to bottom-out whereupon the usual undignified weeping, wailing etc. ensues. You’ve been warned.
This arrangement gives the plane three supporting strips, and because the front and rear contact strips are located at the extreme ends of the plane, the full-length of the plane’s body will act as a jig so the plane will tend to shave off the tops of high spots and skip over low spots producing a straight/flat surface quicker and more precisely than a simple flat, planer (meaning “lying in a single plane”) sole typically will. You will notice the difference if you pay attention.
This arrangement also makes it very easy to adjust the sole to keep the critical contact strip in front of the mouth in tight contact with the board being planed.
Some people like to add another contact strip, or even two, between C and D. This works well tending to slow down wear on the sole, but it is a fiddly detail most people don’t bother with.
But as so much in life, not all is not blue bunnies and fairy farts for this arrangement of three or more contact strips tends to lift the cutting edge up and away from the surface being planed when they pass over even tiny irregularities on the board’s surface. This is hunky-dory in most cases, but once the board is as flat as we need it to be, this porpoising movement over every tiny irregularity, especially if the blade is set to take a fine shaving, can become counterproductive to producing a smooth, shiny surface. So how best to setup the sole when we need our plane to do more smoothing and finishing than truing and flattening?
The Sole of the Finishing Plane
I apologize for not having a pretty illustration, but Beloved Customers are, without exception, highly intelligent and intuitive souls (no pun intended) so I’m confident a simple written description of the difference between the sole of a finishing plane and the one described above will suffice.
That difference in the soles of these two types of plane is simply that the sole is entirely swamped from the heel of the plane (contact strip A) to the mouth opening. In other words, contact strips C & D remain unchanged but contract strip A is completely shaved away. That simple.
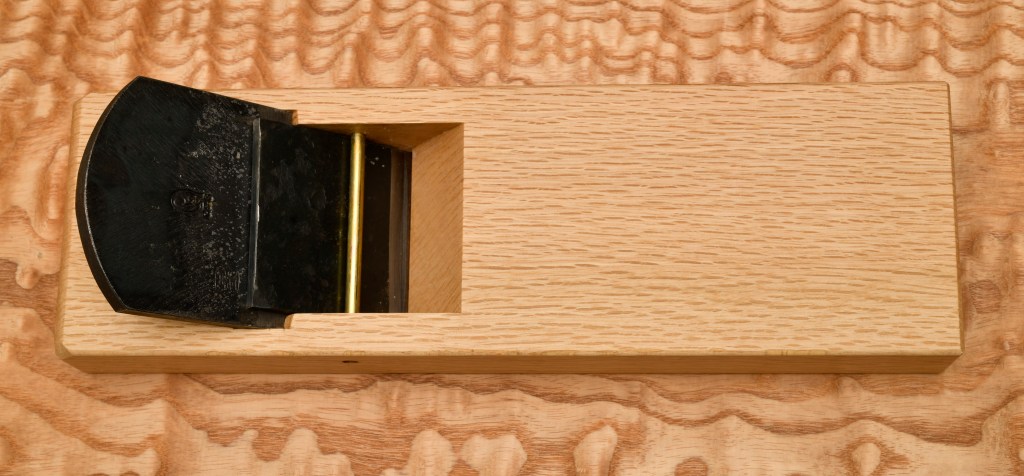
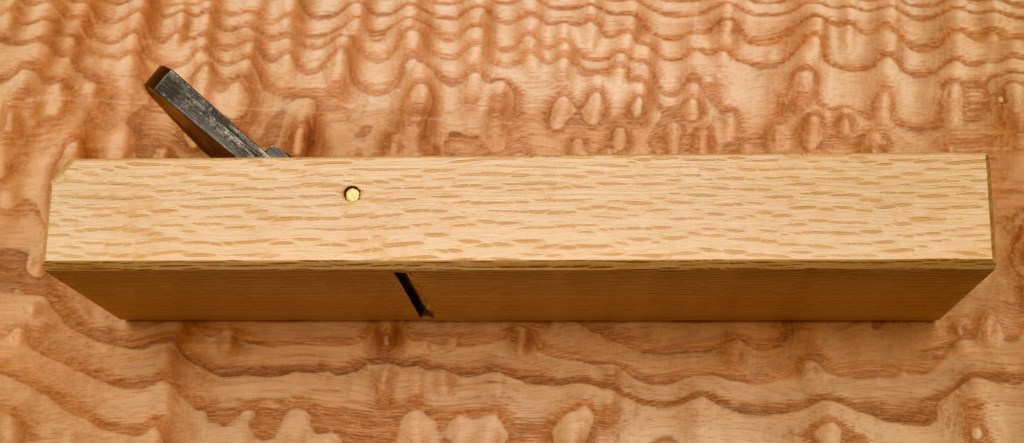
For example, the overall length of the dai (body) of the finishing plane body cut by Mr. Inomoto I have in my hand as I write this (gotta be careful to not drop it on my inkpot!) is 280mm. If setup as an arashiko or flattening plane, the effective planing distance would be the entire length of the plane’s sole. In this case, however, Mr. Inomoto has it set it up as a finishing plane so he has swamped/relieved the entire sole from the mouth opening to the heel (Point A to Point B), approximately 108mm. The effective length of the sole for purposes of flattening measured from toe to mouth therefore is 173mm, a 38% reduction.
Why bother with a measly 173mm you ask? Ah, Beloved Customer is especially perspicacious today!
Since the effective jig length of the sole is reduced 38%, and the cutting edge is located at the extreme tail end of that area, the cutting edge will tend to more closely follow irregularities in the board’s surface riding them up and down and in and out instead of bridging and porpoising over them allowing the blade to cut long, uniform shavings without the interruptions that would otherwise result from the sole riding the tops of residual irregularities in the board’s surface lifting the cutting edge up and out of contact with the board when we need it to more closely follow the contours of the board. It’s a genius concept that works well in application.
But of course that malevolent monster Murphy always insists on probing with his pointy purple pecker to defeat all good things, so if this arrangement stops working for you, be sure to check the following three details in your plane:
- Your blade is sharp;
- The 2 or three contact strips you have provided (more if you like multiple swamps) are truly planar (in the same plane);
- And most importantly, the contact strip in front of the mouth is flat and in uniform contact with the board being planed. I can’t stress too heavily the importance of this little patch of wood.
Here is Wisdom: When setting-up and maintaining the sole of a Japanese plane always always always give the contact strip in front of the mouth highest priority, while at the same time minimizing any shaving/scraping you do to it.
Why is your humble servant so irritatingly picky about minimizing shaving/scraping at this contact strip? More of that bloody, demon-chewed, hard-earned wisdom: While wear is inevitable, any scraping/shaving you do to this contact strip will open up the mouth further reducing the plane’s useful effectiveness at taking fine shavings (think about it). This isn’t so much a problem for an arashiko, truing, or jointer plane but it imposes a significant detriment to the quality of a finish plane’s work. So don’t diddle with the mouth contact strip more than is necessary unless you enjoy inletting replacement mouths.
Tools and Techniques for Sole Setup and Maintenance
You’ll need the following tools, at minimum, for initial setup and periodic maintenance of your Japanese hiraganna handplane:
- A sharp handplane that can cut a smooth, flat surface. For a 70mm handplane, you really need an 80mm handplane, but with care narrower planes can also do the job. Don’t let it become a chicken and egg problem.
- A scraper tool of sorts. I prefer a simple card scraper, an ancient and uniquely Western tool that the Kezuroukai has borrowed and made popular in Japan recently. You’ll need a burnishing tool of sorts to turn the burr. A wide chisel can also be used as a scraper, although it’s hard on the tool’s edge. I was taught to maintain a plane’s sole using either a chisels or the traditional “dainaoshi” plane, aka “tachiganna,” essentially a small scraper plane. These tools work well enough, but the card scraper works better IMHO. Over the years I’ve learned several tricks to improve the performance of these little planes from advanced Japanese joiners, but even then, the downside to the scraper plane compared to the card scraper or even a chisel is that the sides of the plane, and the koppagaeshi for that matter, obstruct the the view of the blade sometimes making me unsure exactly where the blade is shaving in relation to the critical mouth and the other contract areas. Also, it does not work as well when scraping the swamped areas with the grain because the longer body tends to create a flat surface which I don’t necessarily need. The result is that these scraper planes are used mostly to shave cross-grain across the width of the sole leaving a rougher surface. With a card scraper, on the other hand, I can always see the exact position of the blade at all times, and it shaves wood reliably both with the grain and cross-grain while leaving a smoother surface behind. It’s just a superior solution.
- A straightedge. The classic Japanese tool for this job is the wooden “shitaba awase jougi” 下端合定規. More on it below. A better more modern tool is the hardened, stainless steel, beveled-edged, notched precision straightedge made by Matsui Precision. This tool has the huge advantage of being able to check the sole for straight, flat and wind with the blade installed and its cutting edge projecting through the mouth the appropriate distance.
- Glass plate. A piece of minimum 3/8″ (10mm) thick float glass longer than the sole of your plane.
- A pencil.
- A small square.

Procedures
- Check the Sole: The first step is to use your straightedge to check that the sole is straight, flat and free of wind. Install the blade and chipbreaker with the cutting edge projecting through the mouth just as it will be when the plane is used. This is important because the wedging action of the blade can cause the body to warp slightly. If you don’t have a notched straightedge and don’t want to make one yourself, insert the blade so the cutting edge remains recessed in the mouth without projecting. 0.001″ is probably OK. Check the sole lengthwise, crosswise, and multiple diagonals.
- True the Sole: When initially setting-up or drastically redoing the sole of a wooden handplane, after making the checks listed in No. 1 above, you must make the sole absolutely flat and free of wind (twist) using your handplane and/or scraper and your precision straightedge. You may need to remove and reinstall the blade and chipbreaker several times to get this right. An alternate, but disgusting, technique is to use sandpaper and the float glass mentioned above supported on a stable, flat surface like the bed of a electric jointer or tablesaw to flatten the sole. Be sure to recess the cutting edge slightly. Don’t remove more wood than is absolutely necessary. Check for flatness and wind frequently.
- Layout the Contact Strips & Swamps: Use your pencil and square to layout the locations of the contact strips. Then use your pencil to crosshatch the areas to be swamped.
- Relieve the Swamp/Crosshatched Areas: With the blade and chipbreaker installed, use your scraper, chisel, or dainaoshi plane to scrape away the appropriate amount of wood from the hollow, swamped areas. Be careful to not let your metal tools touch the blade of your plane.
- Check the Sole: With the blade and chipbreaker installed but slightly recessed into the mouth, check how it feels on the supported plate glass. The plane should not rock or roll when you push down on its ends or corners, depending of course on the sole setup you chose and where you push. If it does rock rub a itsy bitsy teeny weeny bit of oil on the glass, place the plane sole-down on it, and move it around a few millimeters. Then check the oil transferred to the sole to determine areas of contact. It may help to add a little graphite from your pencil to the oil to make the contact areas show up better. The most important goal is uniform contact at the strip in front of the mouth.
- Refine the Sole: Use your scraper tool to carefully remove material preventing uniform, full-width contact at the mouth. If at all possible, accomplish this by removing material from the other contact strips first. Make only tiny adjustments while sneaking up on the final surface like a tiny, needle-clawed, big-eyed kitten stalking a grasshopper. This is important. During this process recheck the sole with your straightedge and glass plate frequently.

The Shitaba Awase Jogi 下端合わせ定規
The shitaba awase jougi is the first tool I was required to make for myself during training in Japan. This was once standard procedure in all woodworking trades.
It’s simply two sticks of wood, usually cut bookmatch from a single piece of stable, quartersawn soft wood, connected face to face with two dowels or dovetail tenons. If you shoot one edge of this tool with a jointer plane when the two halves are joined, then separate them and hold them up to a light source with their edges butted together, the gap between the two edges will reveal double the error. By rejoining the halves, carefully planing/scraping their edges, and frequently rechecking the gap, one can consistently create two high-precision straightedges that won’t damage your plane blade. The webpage at this link shows how to make one version. It’s a lifetime tool.
When using your plane, sure as eggses is eggses the time will come when you will discover it’s stopped working, usually right at the the most inconvenient time for Murphy will have his way. At that juncture weeping, wailing and gnashing of teethses may ensue! When this happens remain calm and consider the experience for what it is: another step on the path to mastery. Then gird up your loins, really tight so the boys start to complain, and simply follow the three steps listed above. All will be well, I promise.
In the next installment in this series of inklings about stealthy kittens and Murphy’s pointy purple poisonous pecker we will discuss how to use the Japanese handplane, a task many people unwittingly get wrong. Y’all come back know y’hear!
YMHOS


If you have questions or would like to learn more about our tools, please click the “Pricelist” link here or at the top of the page and use the “Contact Us” form located immediately below.
Please share your insights and comments with everyone in the form located further below labeled “Leave a Reply.” We aren’t evil Google, fascist facebook, or or the IT manager for HRC’s bathroom server farm, and so won’t sell, share, or profitably “misplace” your information. If I lie may all my swamps be infested with toxic, arrogant, bellowing, wart-covered bullfrogs, as is the US Congress.


Please Leave a Reply