
Woodworking minus patience equals firewood.
– Author Unknown
In the previous article in this series, we selected and prepared the wood for our gennou handle and layed-it out in accordance with our design drawings.
The next step in the process is to gather our tools and begin the fun work of making sawdust. Yeeehaaaa!
Tools
I prefer to use the following tools when making a gennou handle. You will need to have similar tools on hand for layout and fabrication, but the specific choice is entirely yours.
- Divider with sharp points (transferring dimensions and tenon layout);
- Sharp pencil (making pencil marks (ツ);
- Small try square (laying-out and checking tenon);
- Marking gauges (Titemark and kama kebiki. Marking tenon and centerlines) ;
- Marking knife (layout);
- Hozohiki rip saw and/or dozuki crosscut saw for cutting the tenon (in hardwood, a sharp hozohiki rip saw frequently makes both rip cuts and crosscuts cleaner and more precisely than a crosscut dozuki saw);
- A fine saw such as a fret saw or coping saw for making curved cuts;
- Auriou cabinet rasp (Lie-Nielson) (optional);
- Boggs-pattern flat-sole and curved-sole spokeshaves (Lie-Nielson. Optional but very handy and pleasant to use if you can tolerate A2 steel);
- Sandpaper;
- A board to support the handle-in-progess. I suggest dimensions of 300-400mm long x 50-60mm wide x 40-50mm thick, with a “V” groove cut full-length and a cross-stop inlet about 2/3 its length. The handle will rest, more-or-less securely in this groove, and be restrained at one end by the stop when using spokeshaves and rasps. This support board can be clamped in a vise, or clamped to a workbench with a C clamp. I also find it most efficient to place this board on my benchtop with the gennou handle resting in the v-groove with one end touching my chest, perhaps cushioned by a rag, and use rasps and spokeshaves pulled towards me to shape the wood.
Safety
I dislike safety nannies and never want to become one. But Gentle Readers of this humble website include everything from venerable old-timers to fresh newbies, so it would be unkind of me to write for the benefit of only accomplished woodworkers while ignoring the new guys. And since the operations described herein include sharp tools, and potentially harmful substances, please plan to work safely. The following webpages may help.
In addition, before you start making (and sucking into your pretty pink lungs) the millions of the tiny airborne wood particles that comprise sawdust, please check that the species is not dangerous in general, and that you do not have allergies in particular. The website at the link below might be useful.
The Tenon and the Unblinking Eye

Let’s start by cutting the tenon and fitting it to the gennou head’s eye.
You’ve already layed-out the tenon, so next use a fine precision rip saw like a 210mm hozohiki to cut the four cheeks being extremely careful, like a big-eyed kitten stalking a grasshopper, to stop short of the layout line. Be careful to work very precisely with your saw to not cut too deeply as any excess meat removed from the tenon, or sawcuts left in the tenon, will fatally weaken it. I’m not kidding!

I humbly confess to making this mistake more than once, ruining all my work to that point and wasting some nice wood. Indeed, it may be best to cut the shoulders shallow and trim with a chisel, once again being careful to not cut too deeply. Ruthless, merciless, unrelenting control of your coke-snorting inner-badger is critical!
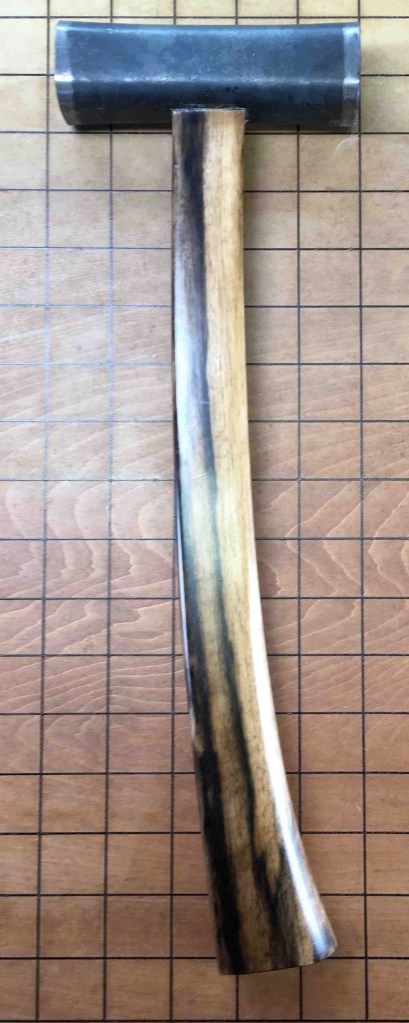
At this point, the handle is a chunky, graceless block with square edges, flat surfaces and a stubby tenon sticking out at one end. That’s alright. There’s no need to contour the handle yet.
Cut itsy-bitsy teeny-weeny chamfers on the end of the tenon to help guide it into the eye without cocking and binding. A big chamfer will benefit nothing and look ghastly.
Mark the reference face annotation on the corresponding tenon cheek because you don’t want to mistakenly force the tenon in bassackwards.
Test fit the tenon into the eye a few millimeters but without driving it all the way on. It should not start by hand pressure.
Although you shouldn’t have yet tried a full-length, full-power test fit, when you are satisfied that the tenon will fit into the eye of your gennou head without the tight fit shaving off much wood, and marked the reference faces, then tape the tenon with masking tape so you don’t accidentally knick or shave it. Don’t ask me why I know this risk exists.
With the tenon close to completion, let’s next shape the curved front, back and side surfaces to fit.
The Back and Front Edges

The tools you use don’t matter so long as when this step is complete the back edge is perpendicular to the reference face, the opposing side face, and is consistent with the layout lines.
Cut the back and front edges (surfaces parallel with the long axis of your gennou head) to your design profile using saws, rasps, knives and/or spokeshaves. The two guiding details in this process are the butt and the tenon, with the tenon being most important. These two surfaces should be shaped to smoothly connect the butt with the tenon, not the other way around.
However, leave the corners of the neck and handle area square for now to help guide you in shaping the critical back and side surfaces because, if you start rounding and smoothing edges and corners now, it often happens that the geometry which aligns the hammer’s face with chisel and nail will be compromised.
I recommend you cut outside the layout lines plus a millimeter or two because accidentally cutting deeper than your layout lines will not only disrupt the even flow of the design but may damage the structural integrity of this elegant, minimalist tool.
Do not shave the handle’s sides flush with the tenon yet, but leave them just a hair proud.
When done with the this, lightly remark the centerline and extended the eye’s lines.
The Sides
At this point in the process the right and left sides should still be flat and parallel, perpendicular at any point with the back surface, and have neat, square corners.
Use the paper/cardboard profile pattern from your design drawing to mark the handle’s layout on the back and front edges.
Just as with the back and front edges, cut the side surfaces using saws, rasps, knives and/or spokeshaves.
Although some prefer handles with a broken dogleg shape, I recommend you make the transition from tenon to butt gradual and smooth.
As you approach the final dimensions, be careful to avoid tearout or gouging in the neck area since removing these irregularities may require you to reduce thickness too much.
Do not cut or shave the sides flush with the tenon’s cheeks yet, but leave them just a hair proud.
Smoothing and Rounding
I find it most effective at this point to shape the back edge (opposite the flat striking surface of the head) flat with slighty relieved corners, not rounded-over corners. You can always change it later.
Some people like to make the back edge of the handle oval or egg-shaped, but I recommend you leave it flat at first and then adjust it to fit your hand as you use the gennou.
At this point your industrial-designer sensibilities will scream at you in a voice like a nazgul commanding you to round the the back surface entirely or to make it oval or egg-shaped, but while such surfaces might look better hanging on a peg in a hardware store, or in pictures in a magazine, or as an image on you facebook or Instagram page, and may even feel better when used to kill cockroaches, I promise you it is counterproductive when doing serious work.
Why? Because, despite what you may think, a flatter back surface does not bite into the hand in-use, but because of the greater surface area in contact with the hand it provides, it actually reduces the pressure of impact reaction forces on the hand reducing fatigue and bruising. More importantly, it helps with quickly and unconsciously indexing the striking face of the head correctly.
With the back edge where it needs to be, next round the front edge into the design profile. I prefer this surface to be more-or-less a perfect radius at any point in the handle area, but some guys feel an egg-shaped cross-section fits their fingers better. Six of one half-dozen of the other.
In any case, this surface must smoothly morph into a flat surface with slightly radiused corners in the neck area, and finally with no radius as it approaches the tenon. Yes, you read correctly: no radius.
I usually round-over the flat on the back edge right where my index finger wraps around to the side just a little to avoid developing a blister. But keep in mind that the only way to tell what small details works best for you is trial and error.
Doming the Butt

The butt should be flat with sharp edges at this point in the process.
You may find a domed butt strange, but it has both practical and aesthetic purposes.
Let’s consider the structural, practical purpose first. If the wood is adequately hard, and the tenon is not too skinny, you will need to pound on the butt like a son-of-a-gun dozens of times to get the tenon into the eye. That’s as it should be. Don’t start yet, but when the time comes you must be careful with the accuracy of your hammer strikes to avoid damaging the butt or breaking the tenon.
If the butt is flat with crisp edges, unless you have perfect aim with every swing, your hammer might chip or even split it. A domed butt, by comparison, directs impact forces of your hammer away from the edges of the butt and into the neck to help to prevent chipping. Likewise, a domed butt will also reduce damage to the handle over many years of hard service.
Moving on to aesthetics, a domed surface is more organic and, to my beauty-deprived sensibilities, more elegant than a flat one because straight lines seldom exist in nature, are boring to the eye, and are seldom aesthetically pleasing
A warning. Everyone has different opinions about what pleases the eye, as you know. Beauty is in the eye of the bean holder, or something like that, so I entirely understand if you dismiss the aesthetic reasons I’ve suggested. But please don’t ignore the practical, structural reasons if you want to avoid wasting your time and wood.
Assuming the butt is flat and its surface is more or less perpendicular to handle’s centerline, use a marking gauge set at ¼” to scribe a shallow line on the butt’s face (the part the will be domed), and around the butt’s sides (the handle’s sides and front and back edges). These lines will be the limit of the chamfer between the grip and the butt.
Next, mark a cross on the butt using the front and back edge’s centerline, and a perpendicular line parallel to the back edge. This cross will be useful in maintaining the centerline while profiling the butt.
Use a knife, chamfer plane, block plane, files or other tools to make a 45˚ chamfer up to the lines just scratched.
Next facet the butt using planes or a sharp kiridashi kogatana knife and remove all tearout and filemarks Try to keep it symmetrical if you can.
The butt can be left faceted (my preference) or smoothed using sandpaper later. That decision must be made before finishing the handles, but need not be made now.
Why might one elect to leave the butt faceted instead of smoothing and polishing it? I’ve done it both ways, and if I’m in a hurry, I sand it smooth and get it over. All commercial products nowadays are machine made and so smooth and symmetrical. And of course, a factory cannot facet a curved surface easily. A faceted butt sets my hammers apart from all commercial products while giving them the craftsman’s signature.
Fixing a Loose Head

So here’s the “I toljaso” in advance.
If you were not as careful and clever as big-eyed kitten stalking a grasshopper when fitting the tenon, you may find it becomes loose and the head begins to wiggle with the passing of a few seasons. A Sergent Elias moment!
I won’t say it out loud, but just between you, me and CCP, you can remedy a loose head by removing it and shimming the eye with quality high-rag-content typing paper. Don’t have any typewriter paper left in your bat cave? It may be your not using your IBM Selectric much nowadays. Are there alternatives?
Don’t tell the Secret Service I said so, but nothing works better for shimming a tenon than a strip cut from a dollar bill. Crane Stationary makes the best paper in the world, and by no coincidence, also makes the paper used in US currency.
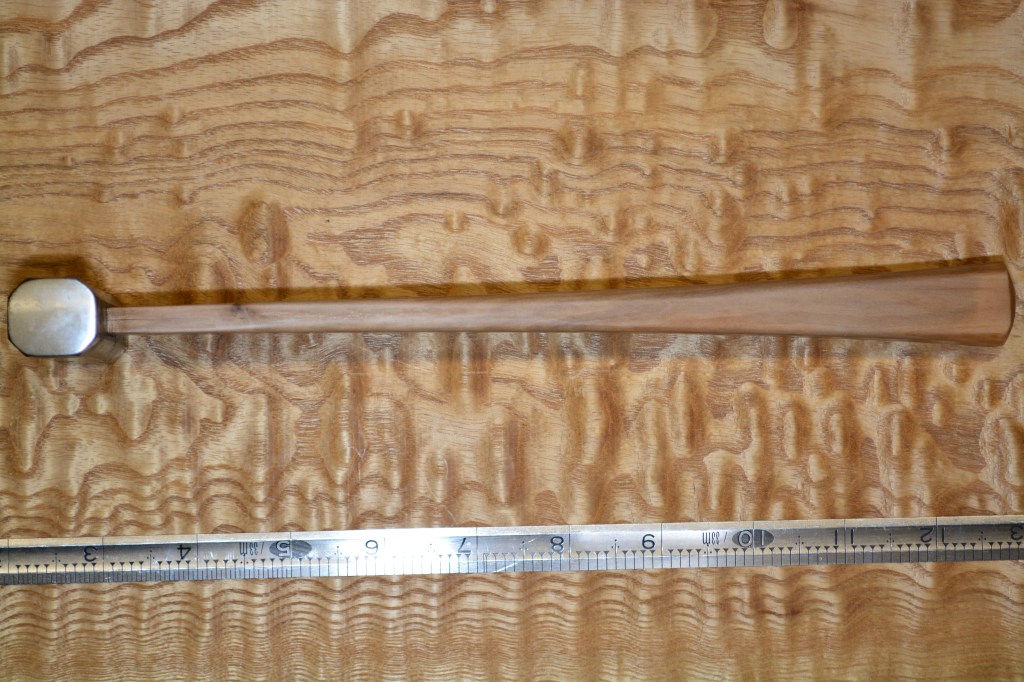
In the next few articles in this series we will attach the gennou head to the handle, apply a London Finish, and sample its performance. Yummy!
Until then, I have the honor to remain,
YMHOS

If you have questions or would like to learn more about our tools, please use the questions form located immediately below. To see a list of our tools and their pricing, or to contact us, please click the “Pricelist” link here or at the top of this page, or email us at Covingtonandsons@gmail.com.
Please share your insights and comments with all Gentle Readers in the form located further below labeled “Leave a Reply”
We see data miners and their bots as dastardly sneak thieves and so promise to never share, sell or profitably “misplace” your information for any reason. If I lie may my eyes become egg-shaped!


Previous Articles in The Japanese Gennou Hammer & Handle Series
- Part 1 – Introduction
- Part 2 – Ergonomics
- Part 3 – What is a Gennou?
- Part 4 – The Varieties of Gennou: Kataguchi, Ryoguchi & Daruma
- Part 5 – Kigoroshi
- Part 6 – The Ergonomic Anaya
- Part 7 – The Unblinking Eye
- Part 8 – Head Style & Weight
- Part 9 – Factory vs. Hand-forged Gennou Heads
- Part 10 – Laminated Gennou Heads
- Part 11 – Decorative Gennou Heads
- Part 12 – The Drawing: Part 1/6
- Part 13 – The Drawing: Part 2/6
- Part 14 – The Drawing: Part 3/6
- Part 15 – The Drawing: Part 4/6
- Part 16 – The Drawing: Part 5/6
- Part 17 – The Drawing: Part 6/6
- Part 18 – Wood Selection
- Part 19 – Laying-out the Handle
- Part 20 – Making Sawdust
- Part 21 – Installing the Head
- Part 22 – Tasting the Pudding
- Part 23 – Finishing the Job

Leave a comment