
Not all those who wander are lost.”
J.R.R. Tolkien, The Fellowship of the Ring
Introduction
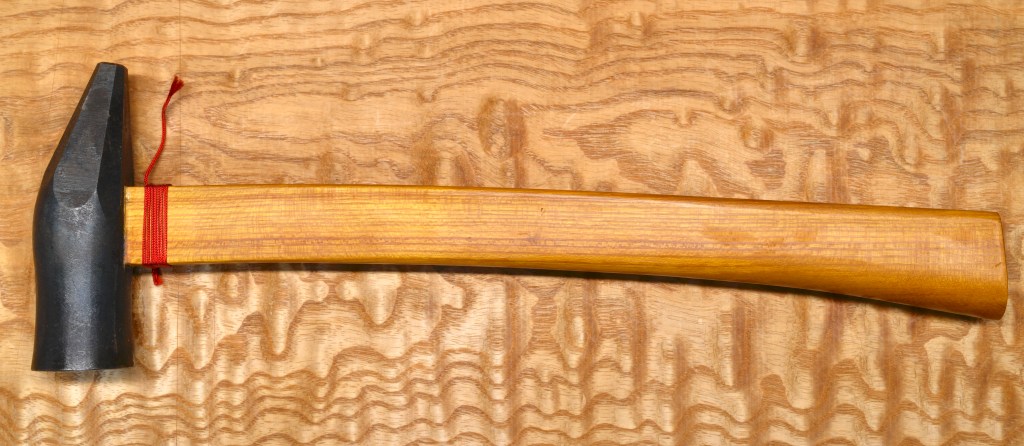
In previous articles in this frightfully sexually-charged series, Beloved Customer produced a design drawing for your gennou handle based on the parameters of your actual gennou head and your body. You should have also selected, or at least rolled out of bed onto the floor, bumped your head, partially opened one sticky eye, and seriously considered selecting, an appropriate stick of wood. Assuming you’ve procured said stick, let’s get to the layout.
Tools
There are as many ways to layout a hammer handle as Carter has pills, so I won’t insist you do it my way, nor will I dictate what tools you use, but after making dozens of gennou, hammer, axe and adze handles for myself and customers, I’m confident in recommending the following minimum set of tools:
- Divider with sharp points (for finding centers and transferring dimensions and lines from drawing to stick;
- Sharp pencil;
- Small try square;
- Marking gauges (Titemark and kama kebiki for quickly laying out centerlines and other details);
- Marking knife;
- Calipers (vernier, dial, or digital. For measuring internal dimensions of the eye, and precisely laying out the tenon)
- Handplanes (for dimensioning purposes).

Preparing the Stick
You need to prepare the stick or board you selected after bumping your head to have 6 flat, parallel, square sides. As far as dimensions go, we need it to be a little oversized, e.g. longer, wider and thicker than the maximum final dimensions shown in the drawing.
You can prep this board or stick using electrical tools, but if you can’t do it with handtools alone, I strongly encourage you to work on your basic skills. Not as flashy as a halfgainer with a twist of lemon while falling from the bed, but surprisingly few have these skills nowadays.
Looking back on the old texts, one of the first tasks assigned trainees in cabinetmaking technical schools and apprenticeships was making a number of sticks or boards with six precisely dimensioned, flat, wind-free, parallel, 90˚ sides just like this because this simple job combines many of the essential woodworking skills, readily makes mistakes apparent to encourage improvement of basic skills, and helps one’s develop an understanding of the material.
Your humble, bumbling servant too was once required to make several boards and sticks just like this using handsaws, handplanes, a trysquare and marking gauge in front of others before I was permitted to be taught more advanced skills. Powertools are fine, but if you haven’t done this before, now is the time to perfect your technique.
Layout
The following layout steps assume the stick has already been dimensioned as described above.
- Begin your layout by selecting and marking a flat and wind-free side of the selected board corresponding to a profile view on the drawing to be the “reference face.” You can write “RF” on it to avoid confusion. I just draw two quick lines in pencil at an angle across the board’s surface at both ends. Don’t forget to label this critical surface somehow so there will be no confusion moving forward.
- Plane the surface of the board that will form the handle’s back edge (seen from above in plan view) flat and perpendicular to this reference face. All further layout will be indexed from these two faces.
- Mark the maximum thickness of the handle on the surface opposite the reference face, as determined by the widest dimension of the butt, using a marking gauge against the reference face.
- Plane all the surfaces flat, free of wind, and where appropriate, planar. This needs to be done pretty precisely.
- Use a marking gauge to draw the appropriate centerlines on both sides, edges, ends of the board/stick.
- Use dividers to measure and layout the width of the eye, plus a little extra, centered on the centerline you just marked, and spin this around the eye, butt, back edge and front edge.
- Make paper, cardboard, or wood patterns based on your design drawing of the handle’s elevation and profile views. Paying close attention to minimize grain runout, especially in the tenon and neck area, position the patterns and mark the board accordingly.
- Using these cardboard patterns, carefully layout all the tenon’s dimensions on the board, measured from the reference face and back edge. Be sure to make the tenon a half-sheet of copy paper too large in width and thickness. This can be trimmed down later if the fit is too tight. Layout of the tenon is critical so don’t f* it up.
- Adjust the lines of the handle design to meet your requirements for beauty.
In the next post in this series we will begin making sawdust. Oh joy!
YMHOS

If you have questions or would like to learn more about our tools, please use the questions form located immediately below. To see a list of our tools and their pricing, or to contact us, please click the “Pricelist” link here or at the top of this page, or email us at Covingtonandsons@gmail.com.
Please share your insights and comments with all Gentle Readers in the form located further below labeled “Leave a Reply.”
We see data miners and their bots as dastardly sneak thieves and so promise to never share, sell or profitably “misplace” your information for any reason. If I lie may the heads of all my hammers fly away to Valinor!


All Posts in The Japanese Gennou Hammer & Handle Series
- Part 1 – Introduction
- Part 2 – Ergonomics
- Part 3 – What is a Gennou?
- Part 4 – The Varieties of Gennou: Kataguchi, Ryoguchi & Daruma
- Part 5 – Kigoroshi
- Part 6 – The Ergonomic Anaya
- Part 7 – The Unblinking Eye
- Part 8 – Head Style & Weight
- Part 9 – Factory vs. Hand-forged Gennou Heads
- Part 10 – Laminated Gennou Heads
- Part 11 – Decorative Gennou Heads
- Part 12 – The Drawing: Part 1/6
- Part 13 – The Drawing: Part 2/6
- Part 14 – The Drawing: Part 3/6
- Part 15 – The Drawing: Part 4/6
- Part 16 – The Drawing: Part 5/6
- Part 17 – The Drawing: Part 6/6
- Part 18 – Wood Selection
- Part 19 – Laying-out the Handle
- Part 20 – Making Sawdust
- Part 21 – Installing the Head
- Part 22 – Tasting the Pudding
- Part 23 – Finishing the Job

Leave a comment