In previous posts your humble servant wrote about a traditional Japanese handsaw called the bukkiri gagari. This rip saw was a standard tool prior to the proliferation of electrical-powered circular saws, but is no longer produced commercially anywhere and is seldom seen nowadays. Detailed information about this tool can be found at the following links:
For those who enjoy using their own internal power pack, this saw is as useful now as it was back in its heyday.
My first hands-on experience with the bukkiri gagari was an antique example I purchased in 1987 at an outdoor flea market held monthly adjacent Iidabashi station in Tokyo. Judging from the markings and patina, and after consulting with a specialist in antique tools, I concluded it was most likely forged around 1910 of a British tool steel called “Togo Steel” produced by the Andrews Steel mill of Sheffield, England and sold in Japan by the Kawai Steel Company. This steel was named after a famous Japanese Admiral who kicked Russki patootie in the Russo-Japanese War (1904 to 1905).
My old bukkiri gagari handsaw made of Togo steel with a kiri wood shumoku handle. A hard worker and good friend.
Despite a cracked tooth, this old saw served me well and without complaint for many years. When I sent it to Master Nakaya Takijiro for a routine sharpening one day, he also repaired the crack, trued the plate, and reworked the teeth all without being asked. He’s subsequently resharpened it for me several times, and with each ministration of his tiny files, its performance has improved incrementally. He’s a magician.
About 14 years ago I found myself suffering an insatiable itch for a bigger, newer more refined bukkiri gagari saw, so I visited Takijiro’s forge to procure some medicine. After much back and forth he agreed to reproduce of one of his own master’s saws, a style once very popular with temple carpenters (Miyadaiku 宮大工). The final product is a thing of great beauty and serious purpose.
Over the years Takijiro has been kind enough to forge a few bukkiri gagari saws for Beloved Customers, but the wait time has always been long. This article is about the latest order he completed recently, similar in shape to his Master’s old pattern. Photos can be seen at the link below.
Working alone and without any electrical equipment other than a motor to spin the flywheel of his spring hammer, a grinder, a fan to force-feed his forge, and a few bare lightbulbs overhead, it takes Takijiro a while to make these large saws, but he delivered on our latest order a few weeks ago. It included four sizes:
9-sun (九寸 240mm/ 9.4”),
Shakurei (尺0 270mm/10.6”)
Shakuni (尺二 310mm/12.2”)
Shakusan (尺三 330mm/13”)
The 330mm shakusan saw is the largest practical size for standard purposes IMHO, and the largest blade Takijiro can heat in his forge (originally built by his master for forging swords).
The smaller 240mm saw, called a kyusun (meaning “9 sun) in Japanese, is a handy size, especially for the workshop and workbench.
Takijiro makes these saws by hand from Hitachi Yasugi Shirogami No.2 (aka “white label” steel #2), a relatively pure high-carbon steel that makes an excellent saw blade, but which is difficult to work due to its marked tendency to warp and crack during heat treat. Unfortunately, Hitachi no longer produces this steel.
Of course, he used hammers and scrapers to apply a double-taper-grind to the blades, then hammer-tensioned and trued them. He also hand-cut, hand-sharpened, and set their teeth in a progressive pattern (increasing in size approaching the toe) specifically for ripping Western cabinet hardwoods.
Each saw has an angled handle in the style called “shumoku,” made of plain hinoki cypress wood.
This style of handle is seldom seen anymore, but it has several significant advantages. First, it makes the saw much shorter than one with the more common, straight stick handle, so it’s more convenient for carrying in the field and using in tight places such as construction projects. Second, the angled handle provides an improved grip for powerful two-handed cuts. And third, it makes the saw easier to use from various angles, such as on the workbench, and when making overhead cuts where a long, straight handle tends to get in the way, a common situation in construction work.
Each handle was shaped with handplanes and does not have an applied finish such as varnish or polyurethane.
Nakaya Takijiro Masayuki (“Takijiro”) is one of the last two or three master sawsmiths remaining in the waking world with the skills and willingness to make handsaws of this utility and quality, so this is a rare opportunity for discerning Beloved Customers to obtain one of his marvelous saws. They are a joy to use.
Contact us using the contact form below if you are interested in learning how to purchase one of these rare tools.
YMHOS
A carpenter carving decorative details into the “hana” or end of a hinoki wood beam.
If you have questions or would like to learn more about our tools, please click the “Pricelist” link here or at the top of the page and use the “Contact Us” form located immediately below.
Please share your insights and comments with all Gentle Readers using the form located further below labeled “Leave a Reply.” We aren’t evil Google, fascist facebook, or the Chinese Communist Party’s coordinator for blackmail, and so won’t sell, share, or profitably “misplace” your information. If I lie, may my all my saw teeth break.
“I see!” said the blind carpenter as he picked up his hammer and saw.
– Old wellerism.
n this article your most humble and obedient servant will be so bold as to do a show and tell of a matched pair of custom-forged Japanese handsaws of a type seldom seen nowadays.
In previous articles we examined similar saws, the famous Japanese dozuki handsaw, the tool that first brought attention to Japanese woodworking tools in North America, and the hozohiki handsaw, a rip version of the dozuki crosscut saw, identical in all aspects save the quantity and shape of their teeth.
The shaku (270mm) carpenter’s dozuki crosscut handsaw (handle not attached). The tape measure displays centimeters/millimeters on the lower scale and Japanese sun on the upper. Please notice the mysterious but intentional brown discoloration on the blade. This blade was shaped, beautifully finished, and tapered using a hand scraper called a “sen,” not grinder or sandpaper. The small dings visible on the plate’s surface are tiny hammer marks left by Takijiro when truing and tensioning the plate, an almost entirely forgotten skill nowadays, one at which Takijiro has not match.
As described in the pages linked to above, the dozuki is a crosscut saw specialized in, and named for, the task of cutting the shoulders of tenons quickly and precisely obviating the wasteful step commonly thought mandatory in the West of paring shoulders to final dimensions. It can perform many other crosscut tasks too, of course, but for making tenons it is indispensable.
Some of Takijiro’s scrapers (“sen”) on a rack in his forge (left). He uses these to scrape and shave steel from sawblades to taper and finish them A pile of shavings produced by his sen are seen on the right.
The hozohiki saw, on the other hand, is a rip saw, one that takes its name from its primary task of precisely and cleanly cutting tenon cheeks.
Because the quality and precision of the shoulders and cheeks of the tenons a craftsman cuts determines not only the quality of the products he makes, but also the ease and speed of assembly of his joinery efforts, the tasks these two handsaws are specialized in accomplishing are critical to the professional woodworker in making tight, beautiful joinery quickly.
So what’s the difference between a regular dozuki and the carpenter’s dozuki? Ah, another of those perspicacious questions with which Beloved Customer is constantly illuminating the world!
The shaku (270mm) carpenter’s Hozohiki rip handsaw (handle not attached).
Well, the carpenter’s dozuki is extraordinarily similar to the standard 210mm dozuki handsaw, essentially a thin, high-precision saw used by joiners, furniture makers, cabinetmakers and sashimonoshi for making joints requiring fairly shallow cuts, except in this case, the saw’s cutting edge is longer (270mm), the plate is accordingly wider, and it has more teeth.
Indeed, except for a few cuts in the larger components of furniture and cabinetry, few need to be very long or deep, so keeping the sawblade of the standard dozuki and hozohiki narrow and short not only saves steel, cost and time but makes the saw more rigid while retaining a thin blade.
On the other hand, carpenters, especially temple carpenters and architectural joiners, often need to make many extremely precise, clean cuts for the complicated, elegant joinery included in their customer’s projects. But because the members they need to work are frequently much larger than those used in other trades, a saw larger than the standard dozuki or hozohiki to make deeper, but no less precise, cuts is necessary. Ergo pergo ipso facto, the carpenter’s crosscut dozuki and rip hozohiki came into being somewhere back in the swirling mists of time.
But because only the most accomplished and trusted craftsmen are given the opportunity to do fine work in larger timbers, and because they are more expensive to forge, these big girl saws never gained the same degree of popularity as their daintier, more fashionable sisters.
A view of the kumimono and nijibari at the main entrance roof of a buddhist temple known as Shibamata Taisahkuten founded in 1629 in Tokyo. Constructed mostly from keyaki wood (zelkova), this is exactly the sort of work the saws presented herein are intended to execute.
As you can see in the photos, a piece of folded mild steel is attached to the back of these saws by friction to provide a higher degree of rigidity to the ultra-thin, tapered, hammer-tensioned blade, thereby improving the precision of the cuts it can make while with the same stone reducing the likelihood of the plate buckling, the bane of thin saws.
These backs are handmade and hand-filed from mild steel, and are finished in traditional burnt silk.
Backs are fine and necessary additions, but alas not all is blue bunnies and fairy farts because the back’s downside is that it physically limits the saw’s maximum depth of cut, a problem for some jobs. But by making the sawplate wider and the distance between the back and teeth greater, the carpenter’s dozuki, and its sister the carpenter’s hozohiki, are superior at cutting precise joinery in larger pieces of wood.
These saws are also used by joiners who perform high-end interior and architectural woodworking. For example, stairs, handrails, built-up moldings, fancy doors and windows, and coffered ceilings are a few types of work for which these saws are indispensable.
A temple interior with hand-planed and hand-carved beams, elbows, kaerumata, and coffered ceiling all of hinoki wood. Gorgeous work.
The saws shown in this article are a recently-completed matched set custom forged by Nakaya Takijiro for an exceptionally Beloved Customer. The nominal (versus actual) length of their cutting edge matches the traditional Japanese unit of measurement called a “shaku (approximately 12” = 0.33 meter), but the actual length of this type of saw varies by area and blacksmith. In this case, Master Takijiro forged the cutting edge 270mm (9-sun) long.
But what about the all-important teeth? Master Takijiro forges handsaws almost exclusively for elite Japanese craftsmen such as joiners, cabinetmakers, furniture makers, sashimonoshi and luthiers, etc., professionals who are very particular about their requirements for, and performance expectations of, their handsaws, especially the teeth.
Therefore, in accordance with tradition and Takijiro’s standard procedures, this Beloved Customer provided physical samples of the wood he uses most in his business, including, among other species, the North American varieties of maple, cherry, white oak, and black walnut.
After test-cutting these samples, Takijiro hand-filed the crosscut teeth of the dozuki saw at 18.4T/in., and the rip teeth of the hozohiki saw at 15T/in (non-progressive), and shaped them to quickly and precisely to best cut the samples provided, a big improvement over standard teeth specifications.
As of this scribbling these two toothy sisters should be gleefully winging their way to the USA to meet their new master. I only hope don’t they attract too much unwanted attention in US Customs by wiggling and giggling too impatiently! You know how young ladies can be (ツ)。
YMHOS
If you have questions or would like to learn more about our tools, please use the “Contact Us” form located immediately below. Please share your insights and comments with other Gentle Readers in the form located further below labeled “Leave a Reply.” We aren’t evil Google, incompetent facebook, or sketchy X and so won’t sell, share, or profitably “misplace” your information. If I lie may I suffer the fate of Simon the Zealot.
Simon the Zealot, Helsinki Cathedral. Notice the large saw.
Simon the Zealot (Acts 1:13). Notice the large two-man saw. Your humble servant does not recommend this application for safety reasons.
Everything in life is risk, from the minute you wake up in the morning and stick your tongue into a toaster.
Anon
Introduction
In this article your most humble and obedient servant will present an obscure fact about traditional Japanese handsaws I call the “Mystery of the Burnt Blade,” as well as a related psychedelic conundrum called “Black Light!”
I will also provide a brief description of how one of the last sawsmiths in the world hand-forges his custom handsaws, and explain how these two mysteries are linked to this ancient, even magical, process.
If you have a metallurgical psychologist’s hat, as I do, perhaps one made of aluminum foil, or better yet, brass with attached wires, bells or baubles, now is the time to secure it to your “seat of knowledge.”
In a world boiling-over with mysteries, however, prioritizing them is sometimes vexingly difficult. For example, is the “Meaning of Life” more important than “Were Bert and Ernie in Love?” Or is the question “When will the Entwives return from shopping at the mall?” weightier than “Are the four surviving Nazgul running just Shat Fransisco or all of Calipornia?”
Cogitating such mysteries has worn my thinking cap down to just a button and a bit of lint, but before I forget (I’m supposed to take some bitter little green pills for my memory, but keep forgetting) I would like to address the subject of this article. As mysteries go, it’s nowhere near as high on the priority list as the whereabouts of the Nazgul’s missing PAC funds, but nonetheless it still puzzles many. Being exceptionally perspicacious, Gentle Reader may find a worthwhile gem or two hidden among the rubble.
And the story goes something like this.
The Story
The curtain on this mystery doesn’t open on a moonless night, black and ragged as a Chicago politician’s soul, concealing a MacBethan circle of wart-covered witches chanting incantations while stirring a cauldron bubbling over purple flames.
Nor is the scene of this mystery a locked cell in a curiously vacated wing of Gotham’s Metropolitan Correctional Center where the guardsmen all nap cherubically, security cameras have all malfunctioned magically (perhaps due to a “Nox” spell?), and where a millionaire child nookie bookie has shuffled off his mortal coil by hanging himself with a bedsheet after breaking his own neck. Harry Houdini must be proud!
No, the curtain on this mystery opens of an early evening in Tokyo almost 40 years ago in front of a rickety old wooden building facing a busy street erected in the warm ashes produced by 174 B-29s on the nights of March 9th and 10th 1945 when the city and many souls burned brightly.
Gentle Reader, we find ourselves in front of the shop and residence of a small, pipe-smoking saw sharpener and his family. They live on its second floor, with a workshop on the ground floor adjoining a dirt-floored doma with a single rickety sliding door opening to the street. There’s space in the poorly lighted entry for perhaps three people who don’t despise each other to stand, but no more. The shop space doesn’t have shelves or glass cases, just teetering stacks of newspapers and magazines wrapped in twine crowding in from the walls permeated by the perfume of oil and steel filings. I don’t know about you, but it’s an atmosphere I love.
Prior to that time my experience with Japanese handsaws was limited to inexpensive hardware store products with bright shiny blades. I didn’t know much about who made them or how they were made, but they seemed to work OK. On the day of this mystery I was looking for a more specialized saw for ripping 6X6 timbers, one not sold by the average hardware store, so I visited the shop of this professional saw sharpener.
As I opened the rickety wood and glass sliding door and called a greeting the little saw sharpener came out from the back, kneeled seiza-style on the raised floor of his workspace, and smiled like a wood carving of a buddhist saint.
After introductions, I described the job I needed to do, the type of wood I had to cut, and the type of saw I thought would work best. He made a thoughtful face as he sorted through his stock of saws in his mind, bobbed his head decisively once, stood up, and without saying a word went into the back. He returned with a saw blade wrapped in newspaper.
When I unwrapped the blade (no handle) my heart sang as I gazed upon its unadorned, elegant lines and subtle beauty. I could feel the blade quivering with excitement at the prospect of being fed some yummy wood after a boring confinement in the back of the shop. It was a 300mm single-edged kataba rip saw with the brand “Nakaya Genji” hand-chiseled into the steel blade.
The saw sharpener told me it was made in Tokyo (yes there were still many sawsmiths living and working in Tokyo back then) by a reputable and skilled blacksmith, but not a famous one, that it was a hand-forged, top-quality working tool, one he had sharpened himself, and that he thought it would satisfy my requirements.
The only problem was cost, about thrice what I had budgeted, but pretending I knew what I was doing, I flexed the blade, held it up to the dim light to check the plate for untoward distortions, and the teeth for cavities. I even pressed my palm against them to check their sharpness. After all this posturing I agreed with the saw sharpener that it was a fine blade. With one reservation….
Mysterious Colors
A hozohiki rip saw hand-forged many years ago by Takijiro for your YMHOS
Now, at the time of my visit to the little saw sharpener’s curious shop I didn’t have enough experience or specialized knowledge to ask intelligent questions about the steel and techniques used to forge and tooth the saw, but although I was ignorant, my eyeballs were still not “fushiana” (“knot holes 節穴”), as the saying goes in Japanese, for they noticed something that wasn’t quite right.
What was this smudge on the saw’s face that shocked me but did not faze a professional saw sharpener? It was a localized discoloration at the center of the blade, a vaguely-shaped area golden brown in color, possibly indicative of the blade having been exposed to high temperatures, perhaps hot enough to soften the steel, a serious defect indeed in the case of chisel and plane blades.
The saw sharpener was not impressed in the least with my knothole’s perception, but exercising extreme patience, gave me a partial explanation.
As he clarified at the time, and as I was able to confirm in more detail during the intervening years, this area of color is commonly seen on the plates of quality saws made in Eastern Japan, which included Tokyo where I purchased the saw in question, but it is not commonly seen on saws made in Western Japan, which have simple bright steel blades instead. Likewise, inexpensive, mass-produced handsaws, including exchangeable-blade kaeba saws, never have this colorization. Ahah! The thot plickened.
C&S Tools’ hozohiki rip saw hand-forged by Nakaya Takijiro. Please notice the colorization.C&S Tools’ dozuki crosscut saw hand-forged by Nakaya Takijiro. Please notice the colorization.
So what I deduced from his comment was that this spot of color is neither strange nor suspicious, but is actually desirable, indeed seen as an indicator of quality, depending upon geography. Sound hinky to you? It did to me too.
An Historical Example
Years ago the following example was related to me by a reliable source with personal knowledge, and I while I am extremely fond of daring fashion statements, I have not seen it with my own knotholes and so won’t accept any bets about its veracity that involve a forfeit of wearing lady’s underwear on my head out in public again, so please don’t offer.
From 1639 to 1834 Japan was closed to foreign countries with the sole exception of Holland, and even then access was severely limited.
In the early 1800’s a Dutch doctor purchased a bunch of Japanese woodworking tools which he took back to Holland. Those tools recently returned to Japan and observers noted they had the same appearance as modern handsaws saws made in Eastern Japan, evidence that this colorization is not just a modern feature of Japanese handsaws.
How to Make a Traditional Japanese Handsaw
In order to explain the metallurgical roots of the Mystery of the Burnt Blade I humbly beg Gentle Reader’s kind indulgence as I relate the following summary of the process of making a hand-forged professional-grade handsaw in Eastern Japan as explained to me by Nakaya Takijiro Masayoshi, one for the few remaining master sawsmiths in the world. Any errors are the sole responsibility of your humble servant.
Takijiro posing in front of his forge.Takijiro applying a final polish to your humble servants bukkiri gagari saw. Two of his anvils are visible. Please notice the scraper marks and colorization of the blade
Steel Selection
Saw blades do not require high levels of carbon. Indeed, too much will make the teeth fragile. Shirogami Saw steel and Shirogami No.2 steel have been popular for many years, and Takijiro uses S-2, but he prefers Yellow Paper steel with its lower amount of carbon for the extra toughness it affords.
With materials now in hand, let’s get to smithing.
Cutting the Plate
The sawsmith first cuts the steel plates for a run of saws using manual shears. These are not embroidery shears held in one hand, but rather a hand-powered single-bladed mechanism operated while sitting on the floor.
Initial Forging
Using a gas/charcoal forge, springhammer, hand hammers, and rectangular steel anvil he then heats and shapes the plates.
At the conclusion of this stage the saw plate is an approximately saw shaped piece of thin steel, burnt in appearance and warped. The iron tang will be attached later by forge-welding.
Nakaya Takijiro forging a saw tangNakaya Takijiro’s forge set into the floor of his smithy.
Annealing/Normalization
The next step is to annealthe saw plate. Sometimes this process is called “normalizing.” While it involves heating and cooling the blade, instead of making the steel hard, it makes it as soft as possible.
The purpose of this step is to relieve stresses, create a uniform and relaxed crystalline structure in the steel, and to soften the steel to prevent cracking during forging.
Annealing and normalization are very similar processes, both performed by heating the steel to a specific “recrystallization” temperature”(about 750˚C or 1380˚F for Shirogami No. 2), and allowing it to “soak” at that temperature for a specific amount of time. In the case of annealing, steel is left in an oven while temperature is slowly reduced in accordance with a specific heat curve. But when performing normalization, the white-hot steel is removed from the forge/oven and allowed to cool at room temperature, a faster, more economical process.
The traditional Japanese annealing/normalization process Takijiro employs at this stage is technically not pure annealing, but neither is it simple normalization. He heats the blades and upon removing them from the forge immediately places them to soak and slowly cool overnight inside a sealed, but neither airtight nor temperature-controlled, container filled with rice straw ashes, a low-oxygen, high-carbon atmosphere.
This annealing/normalization process is hot and dirty work, unsuited to either impatient factory workers or to mass-production, one that it adds considerable time and cost to production while yielding few benefits purchasers nowadays can discern using Mark-1 Eyeball, as seen through the lens of what I call “Chinese Logic.“
Why Chinese logic, you say? Because the benefits it imparts to the crystalline structure of a steel blade are not only impossible to analyze without using an expensive SEM, but are difficult to check through conventional non-destructive quality control procedures, and impossible to judge from an illustration in a catalog (harking back to the Sears Catalog days) or a digital photo on the internet, all reasons why this critical step is always neglected by other than well-trained, dedicated craftsmen like the blacksmiths C&S Tools works with, who refuse to cut corners.
The next morning, the blades are removed from their resting place in the ash box. At this point they are still too hot to handle without gloves or tongs.
Cold-forging
Now that the saw plates are roughly shaped and annealed, the next step is to further refine their crystalline structure by forging them using hammer, tongs and anvil. Takijiro does not, however, heat the blades during this step.
During this stage Takijiro prefers to forge blades by hammer and hand two at a time, one stacked on top of the other. The position of the blades in the stack is changed frequently so approximately the same number of blows directly strike both faces of both blades. Not only does this save time, but it cushions and better distributes the force of the hammer blows.
He then repeats this process by hammering both sides of a single blade.
The purpose of all this violence is to “tighten up” (shimeru 締める) and improve the blade’s crystalline structure, the primary benefit of “hand-forging” tools and weapons. This is not possible in a mass-production situation.
Obviously, if this step is performed carelessly, or by untrained factory workers and without properly annealing beforehand, a blade will crack sure as eggses is eggses. Just another of those jobs not suited to the amateur.
Quenching
The purpose of quenching the blade, of course, is to create a rigid, hard, even brittle crystalline structure.
Quenching Step 1: Heat the blade in a gas/charcoal fire to 800 degrees beginning at the blade’s tang end.
Quenching Step 2: When the blade is properly heated, plunge it it into rapeseed oil (canola oil is genetically-modified rapeseed oil) cooling it quickly. For more details, please read The Story of a few Steels.
Forge-weld the Tang to the Blade
The next task is to attach the soft iron tang to the hard steel blade by lapping the tang over the blade, heating the lap, and hammering until the two pieces meld. This technique, called “forge welding,” is as old as blacksmithing but has not been standard practice in Japan for the past three or four decades having been entirely replaced by electrical welding.
Takijiro does not use a welder.
Performance-wise, a forge-welded tang is not superior to an electrically welded one, but since it’s a sure sign of a hand-forged sawblade and indicative of traditional craftsmanship, it’s a detail highly desired by those who know the difference.
A forge-welded tang identified by the curved line crossing the blade just above the “machi” step-down to the tang.
Tempering the Blade
Quenching makes the blade hard, but also brittle and quite useless as-is. The purpose of tempering therefore is to slightly break-down steel’s crystalline structure while reducing the amount of carbides, thereby making the blade flexible and much tougher.
Proper tempering also greatly improves a blade’s edge-retention performance. This is a key step in the Mystery of Steel, and in the case of Takijiro’s handsaws, is accomplished in four steps.
Tempering Step 1: Heat the blade to 300 °C (570˚F) beginning at the toe (tip) end of the blade, allowing the temperature increase to spread to the tang.
Tempering Step 2: Place the blade on the floor to air-cool.
Tempering Step 3: Reheat the blade to 400˚C (750˚F) beginning at the tang end of the blade, allowing the temperature increase to spread to the toe end.
Tempering Step 4: Place the blade on the floor to air-cool.
The portion of the blade near the forge-welded tang needs to be left a little softer for toughness and to allow the blacksmith to chisel his signature, one reason for the two-step process.
Removing Warpage from the Blade
Subjecting a thin piece of high-carbon steel to extreme violence by fire, hammer, and sudden cooling in oil during the operations described above will always make it warp, so it must next be straightened by the precise use of hammer, tongs and anvil. This is a task that requires patience and much experience. Once again, a task impractical if not impossible in a mass-production situation.
Adjusting the Thickness and Taper of the Blade.
Two customer ryouba saws, one made in Tokyo and the other Niigata, with handmade handles of larch wood. The colorization is especially dramatic, and although the blacksmiths are different, the color is nearly identical.
The faces of a true high-quality hand-forged saw blade are not tapered willy nilly, nor in the simple parallel planes typical of mass-produced ground-and-sanded blades. Instead it must be shaped in a “double-taper.” In the case of a kataba (single-edge) saw, the first taper is from the teeth to the blade’s back, meaning the blade is thickest at the teeth, becoming gradually thinner towards the back.
The second taper is the blade becoming thinner from tang to toe.
Combining these two tapers results not in the creation of two flat planes in the saw blade, but curved surfaces on both faces of the sawblade. Please make sure you understand this detail well.
Let’s examine this double-tapered surface in a bit more detail. A case in point is the more complicated double-edged ryouba saw. If we examine a cross-sectional cut across a high-quality ryouba sawblade’s width (perpendicular to the long axis of the blade), we will observe that the blade is thinnest at its long center axis and thickens moving outwards towards the teeth on both sides so that, as the blade cuts deeper into the wood, the gap between the blade and hairy sides of the cut increases.
If we next examine a cross-sectional cut through the length of the blade, we will see the plate is thickest at the tang-end and thinnest at the toe, such that as the blade is pulled towards the user, the portion of the blade cutting the kerf is always thinner than the kerf itself, thereby reducing friction and the tendency to bind and buckle. The combination of these two tapers on each face of a sawblade is what your humble servant calls a “double taper.”
Restating the previous paragraph, as result of this double-taper the thickness of the sawblade inside the kerf being cut measurably decreases as a stroke progresses, incrementally reducing the pinching forces acting on the blade in the kerf, as well as the friction of hairy wood fibers on the blade. The net result is that the energy necessary to motivate the blade is decreased, cutting precision is improved, and the blade is less likely to be damaged by buckling.
In the case of double-edged ryouba saws, this increase in thickness from the plate’s centerline to the teeth has limited usefulness, however, because, as the blade cuts into the wood deeper than its centerline, the blade gradually becomes thicker increasing friction in the kerf. This is one reason why some craftsmen, including your humble servant, prefer single-edged “kataba” saws over the more cost-effective and convenient ryouba saw.
These pinching/ friction forces can also be reduced, of course, by adding extra set to the teeth. But set is not all blue bunnies and fairy farts because, while it’s indeed effective at reducing pinching/friction forces acting on the blade in the direction of the blade’s width, it is not effective in the direction of the blade’s length, unless a large amount of set is added.
Applying minimal set matters because the greater the set, the more wood must be cut, the more time and energy must be expended, and the more cutting precision is reduced. Cheap saws and replaceable-blade saws lacking taper must have a humongous amount of applied set, BTW, an ungainly and wasteful feature despised by knowledgeable craftsmen.
A high-quality handsaw with a good double-taper will cut with less effort, in less time, without binding, and with greater control and precision than a plain, flat saw, even one with adequate set. Contingent, of course, on the skills and perception of the user.
I don’t know where this subtle idea was first developed, but I understand it has been used by advanced blacksmiths throughout the world for centuries. Why? because it works.
So how does the sawsmith impart double taper to a blade? It begins with having a vision of the finished blade in-mind when shaping and forging the blade with fire, hammer and tongs. But there are practical limits to the precision achievable with fire and hammer, so the master sawsmith will adjust the blade’s thickness using two-handed scrapers to shave steel from the plate.
Takijiro’s toolrack of two-handed sen scrapers.A pile of hardened steel shavings from a saw plate produced by Takijiro’s sen scrapers.
Although few know them and even fewer use them nowadays, scrapers were once tools found in every metal working shop around the world. In trained hands they are capable of achieving amazing precision, such that all metalworkers and even college students studying machinery engineering in the USA as late as the 1960’s were trained extensively in their use.
Expensive 3-axis CNC grinders can do the job, but conventional grinding and sanding equipment is unable to achieve the quality of taper that hand-scraping can.
The marks hand scrapers leave on a sawblade are obvious and very different from those left by grinders and sanders, and being the results of handwork, are something to look for when evaluating a saw. On the other hand, ground, sanded and polished blades are shinier and prettier than scraped blades, and if the polishing was done after tapering by hand with a scraper, I can find no fault with it.
But please be aware that extensive sanding and polishing contribute nothing to a saw’s performance, while on the other hand are highly effective at concealing grinding failures. More sizzle less bacon.
Caveat emptor baby.
Cut the Teeth
The sawsmith uses a hand-powered shear contraption with tooth-shaped blades (kinda sorta like the teeth in pinking shears) to cut (or punch) the teeth. The teeth produced during this step are quite rough.
Rough Filing
The sawsmith uses hand files to shape and refine the teeth cut in the previous step.
This first filing operation produces properly-shaped but not perfectly sharpened teeth.
Applying Set
Now that the teeth are properly shaped, the sawsmith applies right-left set to the teeth using an anvil and a special hammer. The following videos YouTube videos show the process, although at a much slower pace than real life.
The next step in the process is for the sawsmith to use a hammer, anvil and chisel to carve his legal, registered signature into the blade just above the tang, as seen in the photos in this article. This feature was perhaps borrowed from the sword world, but no one knows. In any case, it’s this unique signature and the way it was cut that witnesses the handmade nature of the saw as well as the name of the craftsman that made it.
Sometimes this brand name is easily read, but often the characters are stylized to the point of illegibility. For instance, not only your humble servant, but most Japanese are unable to read even one of the six characters in Takijiro’s signature. “The signature is the signature” he explains.
Sharpening
With the teeth shaped and set applied, the teeth are now ready for their final sharpening.
Traditionally, most blacksmiths simplify this step to a quick and dirty sharpening, but for an extra fee, they would send the blade to a professional sharpener for a more refined sharpening job called “Honmetate” (hohn/meh/tah/teh 本目立て). Takijiro, however, was trained by his master to a higher level of proficiency, and for the first 3 years of his apprenticeship was tasked with sharpening saws exclusively, skills that are wonderfully obvious in the performance of his saws. All of his saws receive honmetate by him.
I was unable to find a video showing a professional sharpening job on a cabinet-grade saw in-action, only jobs on larger saws, mostly for trimming apple trees. But while the tools and process are much the same, the skill and speed required to sharpen the numerous fine teeth of a dozuki crosscut saw are awe-inspiring.
The Answer to the Mystery of the Burnt Blade: Coloration (Irozuke 色付け)
In the Japanese language this final step in the saw making process is called “irozuke” (ee/ro/zoo/keh 色付け) which I’ve translated as “colorization.” In the Japanese language this translates directly to “apply color.” It’s also called kesho ( keh/sho) 化粧), which is the same word used for makeup, as in the gunk and powdered pigments women and actors apply to their faces.
In this step, the sawsmith uses a deformed truncated cone, simply a piece of sheet metal bent into a cone with the pointy end cut off and smashed into an oval shape.
He places the wide end of this cone in his forge, or on a gas stove, so the heat will rise and be funneled into an oval shape. He rests the sawblade on the narrower, upper end of the cone so it focuses heat onto a specific area of the blade. When the blade reaches the right temperature, as judged by color changes, he removes the blade and allows it to air-cool.
The answer to the Mystery of the Burnt Blade, therefore, is this “colorization.”
As described above, the first time your humble dogsbody saw a professional-grade handsaw in Tokyo I was shocked at the sight of the golden-brown spot of color on its blade. Since then, I’ve heard many suppositions for its existence, most pungent BS, but the true reasons for this additional step are threefold.
Colorization is the final step in the tempering process, one that slightly softens the steel in a critical spot to make the blade tougher. This is one application of “differential hardening” a technique of which blacksmiths are extremely fond, one that is important to a saw’s performance.
Second, the resulting differential hardness slightly reduces the blade’s springiness by damping the tendency in a thin hardened-steel plate to develop resonant harmonic vibration, a problem that inflicts many saws. Gentle Reader may have experienced this while using large Western panel saws when the blade tends to vibrate and quickly “waggle” right and left towards the end of the return stroke, movement that is not only distracting but wastes time and can harm precision. This characteristic too is important to those with the skills adequate to tell the difference.
And last, at least in Eastern Japan, colorization is clear evidence that the saw was properly forged without taking any shortcuts, much like an actress will take care in applying her makeup before a performance, except that, unlike bottle and powder makeup, colorization on a sawblade reveals instead of conceals. Oh yes, and it costs a hell of a lot less than Gucci Beauty‘s foundation gunk.
Theatrical makeup tastefully applied to a lady performer at the Beijing Opera. Were a trowel and sandpaper involved or just Photoshop?Colorization applied to a Japanese Kabuki actor. Obviously a different kind of theater.
The Black Light Mystery
I will conclude by relating another mystery about handsaws Master Nakaya Takijiro shared with me
According to Takijiro, scraping a sawblade by hand can reveal the quality of the forging and heat-treatment of a saw blade in ways no other methodology can, because shavings freshly scraped from an expertly-forged and heat-treated blade will, for a brief moment, exhibit a shiny black color, what he calls “black light” (kurobikari 黒光). On the other hand, shavings scraped from an inferior blade will always be plain bright steel.
A grinder is unable to provide this quality insight.
Conclusion
Despite the subject of this article being somewhat obscure, I pray it has has been informative.
Until we meet again, I have the honor to remain,
YMHOS
A cherry blossom lake in Shakujikoen Park in Tokyo
If you have questions or would like to learn more about our tools, please click the “Pricelist” link here to view our tools, and use the “Contact Us” form located immediately below.
Please share your insights and comments with everyone in the form located further below labeled “Leave a Reply.” We aren’t evil Google, fascist facebook, or the US Congress’s corrupt January 6th Committee and so won’t sell, share, or profitably “misplace” your information. If I lie may the Nazgul piss on my roses.
Perfection is a necessary goal, precisely because it is unattainable. If you don’t aim for perfection you cannot make anything great, and yet perfection is impossible.
Leonard (the cutter, not tailor) – The Outfit (2022)
We occasionally hear of people (not Beloved Customers, of course) complaining about Japanese chisels. Like much idle opinion expressed on the internet, this squirts and bubbles forth from a few vocal amateurs lacking real experience or skills, but it’s undeniable that, compared to the sharpened screwdrivers sold as chisels in Western countries nowadays, a little special knowledge, extra diligence and some actual hand skills are necessary to meet the challenges of professional-grade Japanese chisels.
In this article your humble servant will list some challenges one may face when first learning how to use and maintain Japanese chisels, and will suggest straightforward solutions for he who has ears to hear. But, because nothing except a movie studio executive’s reserves of morality exist in a vacuum, allow me to first provide some background about the way our hand-forged chisels are made, as well as the division of labor between the craftsmen involved, and explain how this influences modern attitudes among professional craftsmen.
Terminology & Relevant Links
The terminology used in this article may be unfamiliar to some, so to avoid confusion, allow me to immediately clarify four of them. In addition, the articles at the links below contain relevant information you may find useful.
“Ura” refers to the entire side of a Japanese chisel’s blade opposite the surface with the brand, not including the neck, of course.
“Uratsuki” is the hollow-ground depression at this same surface. This surface is tastefully black in our chisels. Others prefer this area to be polished.
“Lands” refers to the planar, polished surfaces at the ura surrounding the hollow-ground uratsuki on four sides.
“Itoura” is the most important of the four polished lands (itoura, side lands, and neck land) surrounding the uratsuki, being located immediately adjacent the cutting edge and forming one half of it. It’s important because, without it, the blade won’t cut.
The articles at the following links may prove informative, or at least amusing.
Beloved Customer has probably visited neither a modern tool factory nor a traditional chisel smithy, so a brief summary of the steps our blacksmiths employ in producing a hand-forged, high-quality, professional-grade chisels may provide useful insight.
Please note that the hardware store-grade Japanese chisels mass-produced for export that Westerners are accustomed to are not produced this way, and their performance suffers accordingly.
The Smithy
Our chisels are handmade by either single blacksmiths, or master & apprentice blacksmith shops, or father & son smithies using mostly old equipment, except for Mr. Usui of Sukemaru brand pictured below who works alone nowadays, has an engineering degree, and loves precision equipment.
Mr. Usui Forging an atsunomi chisel
Nakaya Takijiro (sawsmith) at his forge
Nakaya Takijiro’s forge, originally made for forging swords
Mr. Nakajima’s workshopMr. Nakajima, chisel blacksmith (ret.) in his workshop
Materials
The process begins with materials.
Nowadays, the blacksmith purchases processed iron and steel from wholesalers in ready-to-use strips. In the case of C&S Tools’ chisels, our blacksmiths use Hitachi Metal’s Shirogami No.1 steel exclusively along with a variety of low-carbon steel/iron called “gokunantetsu” 極軟鉄 meaning “extremely soft iron.” Neither of these products are currently being produced.
With materials in hand, the blacksmith will use his forge fired by gas and charcoal and fed forced air by an electric blower to help create the necessary atmosphere and high temperatures.
Just in case you are interested, the traditional Japanese hand-operated blacksmith’s bellows is a rectangular wooden box with a horizontal wooden rod penetrating one end attached to a flat wooden piston inside the box sealed with leather or cloth gaskets as shown in the photos below. Sometimes the box is lined with glass for smoother operation and a better air seal. The blacksmith, usually sitting on a cushion on the floor of his smithy, or on a stool in a pit near the forge, operates this contraption with his left hand or left foot (yes foot) while manipulating hot metal with hammers and tongs with his other hand(s). Several of our blacksmiths still have these old bellows gathering dust in their workshops, but none use them anymore.
Forging & Laminating
Quality Japanese woodworking chisels are hand-forged and of laminated construction.
On the other hand, low to medium-quality hardware store-grade chisels, which have replaced all but a very few of the quality chisels made in Japan nowadays, and comprise all the chisels produced for the export market, are not hand-forged by trained and experienced master blacksmith but are mass-produced by factory workers in cookie-cutter fashion with dies and presses using a lower-grade pre-laminated steel (aka “rikizai” or “fukugozai”) produced by steel mills, a commercial product originally developed for stamping out supermarket-grade kitchen knifes by the thousands. The steel used is Blue Label steel at best, but ordinarily a cheaper equivalent material such as common SK is used. This mass-production technique typically involves only a single “heat,” and is over in just two, at most three, stamps of large presses. BTW, you may want to consider this fact next time you pay hundreds of dollars for a mass-produced Japanese kitchen knife.
The resulting products look good in their colorfully printed plastic and cardboard containers, are inexpensive to make, and quite profitable, but the crystalline structure of their steel, an essential physical detail invisible to the naked eye, and one that determines a tool’s cutting and sharpening performance, is greatly inferior to the results the more traditional, labor-intensive techniques and highest-quality materials our blacksmiths employ routinely yield.
In the traditional method, the blacksmith heats, cuts, and shapes strips of iron and steel into the necessary components using the heat of his forge, an anvil, various tongs, chisels and shears.
He then forge-welds a slip of high-carbon steel to the low/ no carbon iron strip which will become the body of the chisel using his forge, an electric motor- powered spring hammer (or hydraulic hammer in one case), his anvil, tongs and hand hammers as shown in the photos below. No presses.
Heating the iron strip (gokunanatestu) which will form the body of a chiselPlacing the high-carbon piece of steel on the iron strip for forge-laminating
With the lamination work done, he then uses these same tools combined with a few open-faced hand-dies to shape the chisel.
This process of forge-welding and shaping involves at least three “heats” (heating and cooling cycles) combined with hundreds of hammer blows. The purpose of all this dramatic fire, violence and unholy racket is to not only (i) shape the chisel blade, but to also (ii) reduce the size of the carbide crystals in the steel and (iii) distribute them evenly, preparing the “fine-grained” crystalline structure of the steel so important to quality cutting tools and indeed modern civilization.
Modern mass-produced and low-quality chisels do not go through this process to the same degree and their crystalline structure suffers greatly in comparison, a difference visually indiscernible without destructive testing or the aid of a scanning electron microscope, but one that craftsmen and warriors have highly valued since steel replaced stone, copper and iron in their tools, a difference once considered supernatural.
Annealing/Normalizing the Blade
The blacksmith will then anneal the blade by heating the steel to a specific “recrystallization” temperature”(about 750˚C or 1380˚F for Shirogami No. 2), and allowing it to “soak” at that temperature for a specific amount of time. He will then place the blade overnight in a loosely-sealed container filled with rice-straw ashes, a high-carbon/low oxygen atmosphere which will “relax” the steel removing internal stresses and making it dead soft and more uniform, chemically speaking. While not sexy, this step is critical to making a high-quality blade, and while it has been used for by the best swordsmiths for thousands of years, it’s absolutely scientific.
The blacksmith will then refine the shape of the blade using hammers and electric grinders.
Quenching the Blade
Quenching is the magic at the heart of The Mystery of Steel. This process begins with the blacksmith applying his own special “medicine” to the blade, an unappetizing, gloppy brew made from various secret materials, usually including sharpening stone mud, clay, rice straw ashes, steel filings, dragon dandruff & etc., that serves to control differential cooling.
When this medicine is thoroughly dry and everything is just right, he will heat the blade in a gas/charcoal fire to 800˚C (1470˚F) for a very specific time period , after which he will plunge it into water “quenching” and quickly cooling it. He may repeat this step one or two more times.
This sudden cooling creates drastic changes in the organization of the iron and carbon molecules in the steel portion of the blade. On the other hand, the iron “jigane” body of the blade lacks the essential carbon ingredient and so its hardness does not change significantly.
Extremely hard particles called “carbides” are instantaneously created during this process. These become locked into a particular crystalline structure in the steel with a greater volume than before quenching. That’s right, the steel swells as it’s suddenly cooled.
As you would expect, this produces high differential stresses in the blade causing the steel to warp, movement the blacksmith must compensate for when shaping the blade before quenching, and while less sexy and more vexing, sometimes by corrective measures after quenching.
Naturally, the chemical nature of the steel selected combined with the blacksmith’s mastery of his craft, and of course the whims of the Gods of Handsaws, greatly influence the resulting warpage, demanding great skill and some luck if disastrous failures and expensive wastage are to be minimized.
A Japanese swordsmith quenching a long sword in the photo above. Before quenching the blade is straight, but it will warp during this step. This warpage often becomes an intentional design feature in many swords including the one shown in this photo. Please note that the “grain” pattern visible between the white hamon and “hi” groove is not a defect in the steel, but a highly-prized design feature in this art form.
Tempering the Blade
After quenching, the high-carbon steel portion of the blade is excessively hard and brittle, too brittle for practical use in fact, so the blacksmith will next “temper” the blade by reheating it to 300 °C (570˚F) ~ 400˚C (750˚F), a temperature lower than that used for forging, for a very specific time period. His precise control of time and temperature in this process will make the difference between a fine blade and a lump of costly scrap.
Tempering reduces the amount of hard carbides in the steel, producing a less-rigid crystalline matrix, reducing hardness, and most importantly, increasing toughness.
Every blacksmith has his own techniques, but his selection of steel and his skill in using it are critical. Some steels are easier to forge and heat treat than others producing fewer failures and rejects greatly impacting productivity.
At this point in the process either the blacksmith, his apprentice, or a subcontractor will grind and sand the blade to final shape and finish. He will also grind and finish the hollow “uratsuki” to form the “ura.”
Finishing the Blade
The next few steps are where things can go crazy if the blacksmith decides to refine the shape and finish of the tool by investing extra time, effort and tools such as fine-grit grinders and sanders, and hand files, for it takes a careful eye, an artistic sense of line and proportion, a steady hand, and many hours to achieve the perfect surfaces found in the best chisels as represented by the products of the Yamazaki brothers under the “Ichihiro” (or “Hidari no Ichihiro,” or “Tsuki Ichihiro”) brand.
The chisel in the photo at the top of this page shows the blade of a beautifully shaped and finished large fishtail shinogi ootsukinomi by Nora.
Indeed, this extra cosmetic work, which does not influence performance in any way, will increase the cost of producing a single chisel of the same performance 5~10 times. Would Beloved Customer be willing to expend that much additional money for improved cosmetic appearance in a working tool? Your humble servant has scratched that sculptural itch many times (too many times, says She Who Must Be Obeyed), but most craftsmen are not willing to lay out the additional hard cashy money.
Mr. Yamazaki
In fact, many Japanese craftsmen, even those who have a fetish for beautiful tools and are willing to pay the necessary funds to procure them, will usually leave such tools safely at home or in the workshop to save them from Darwinian adventures, and take a less valuable set of chisels to the jobsite instead, another layer of expense. Ah, the sacrifices we make for art! (ツ)
A 42mm Oiirenomi by Hidari no Ichihiro, the Yamazaki Brothers (RIP). Far from new, but beautifully shaped and finished, none better in all Japan.A kotenomi in the Chiyozuru Korehide style by Kiyotada. A serious cutter that has seen lots of use, it’s beautifully shaped, but the filework is not quite as nice as the Yamazaki brother’s work, IMHO.
The Sharpener
At this point, the blacksmith’s job is done and the blade is handed off to a sharpener. Please note that some blacksmiths, including Mr. Nakano, our master plane blade blacksmith, prefer to sharpen their blades themselves, and for good reason.
Sharpeners typically do piecework and so strive to do as many chisels as they can as quickly as they can. The problem we face lately is that the number of skilled sharpeners in Japan has drastically decreased leaving us few choices. Sometimes the quality of the sharpening job is less than perfect, something that is also reflected in the low cost and less-than-perfect precision of the ura lands. We think it’s a fair trade. Please note that these are all conscious decisions agreed to in face-to-face discussions with the craftsmen, not default specifications.
Mr. Takagi (adze smith & sharpener RIP) at his sharpening stones
The Handle Maker
Mr. Hasegawa, handlemaker, in his workshop
The sharpened chisel blade next goes to a handle maker. He has an important job because the handle is the interface between Beloved Customer and the tool, and through which tons and tons of impact forces are transferred to the cutting edge.
Mass-produced chisel handles often have poor tolerances that don’t accommodate the steel hoop and ferrule well, or that don’t transfer the hammer’s energy properly producing tiring harmonic vibrations in the tool. We don’t use inexpensive, mass-produced handles but have Mr. Hasegawa custom make them himself from select wood to match our blades and the selected metal furniture. Even then, it is wise for each end-user to perform a final setup themselves for a more perfect fit.
To conclude the discussion about production methods, it is important to understand that our tools are produced more in keeping with traditional methodologies and division of labor by specialist craftsmen, rather than automated mass-production methods using unskilled factory workers, cheap materials, and higgledy-piggledy techniques.
The Chisel Owner’s Role
Why is all the stuff discussed above relevant, you ask? Good question. It matters because until recently in Japan, and in even Europe, it was standard practice for a craftsman to commission a chisel blade directly from a blacksmith who would provide a shaped, ground and filed but unsharpened piece of metal with a squared-off end cut at more-or-less 90˚.
It was the end-user’s responsibility to grind and sharpen the blade’s blunt cutting edge himself. Ergo no sharpener.
He would purchase the iron furniture (hoop or katsura and kuchigane or ferrule) from another specialist blacksmith shop, and make his own handle with his own tools from his own wood. Ergo no handle maker.
It’s only been recently with the rise of large cities and cheap distribution networks made possible by rail and roads that finished products have become commonly available as retail products.
Please remember that, despite what the movies present, for many thousands of years prior to the Meiji period and the Westernization of Japan, it was a not a single, united country, but a collection of desperately poor medieval fiefs ruled by ruthless despots in which hundreds of thousands of common people, including woodworkers, died every year due to internal wars, illness and famine. Craftsmen too were poor and had little disposable funds.
My point is that self-respecting craftsmen worldwide disdained paying others to either sharpen their blades or make any components for their tools that they could make themself. The remnant of this historical fact seen nowadays is that the experienced craftsman in Japan does not expect a perfect tool, but expects to perfect his tools himself to his own taste.
Let us next get to the heart of the subject and consider the typical challenges one must deal with in the case of hand-forged chisels, beginning with the most common one.
Challenge No. 1: The Ura Is Not Planar
Ideally, the polished lands surrounding the four sides of the hollow-ground uratsuki are all perfectly planar, but as the erstwhile cutter quoted at the top of this article said, “Perfection is Impossible.” And your humble servant would add that it ain’t even necessary.
Despite this obvious truth, some inexperienced Gentle Readers expect the lands of the ura surrounding the hollow-ground “uratsuki,” the area corresponding to what is called the “flat” in the case of Western chisels, to be perfectly planar, even though Western chisels seldom have perfectly planar “flats,” but only what look like flat surfaces. Your humble servant agrees that perfection is nice, but it is not a reasonable expectation in the case of medium-priced professional-grade tools.
Gentle Readers who expect the appearance of CNC precision in their tools should either stick with the sharpened screwdrivers China produces in such abundance and which are sold in the West as “chisels,” or plan on spending 5~10 times the cost of mass-produced chisels, assuming you are able to find anyone that makes such quality nowadays.
In any case, an ura that is not perfectly planar is not a defect. The article at this link can help you understand how to deal with ura problems in an efficient and professional manner.
Challenge No. 2 – The Blade Chips
Our blades are intentionally made harder than most Japanese chisels produced nowadays because hardness is essential in a professional-grade chisel. As explained at great length in the article linked to above about “Professional-grade Chisels,” on condition the crystalline structure of the steel is what it should be, a hard blade will usually become sharper, will cut more wood, and will stay sharper longer than a relatively softer blade thereby reducing the frequency of sharpening, consequently increasing the professional’s productivity. This is an essential performance criteria in a professional-grade chisel.
But hardness is not all blue bunnies and fairy farts because a harder blade is less tough than a softer blade and can be damaged if abused. Warranty claims from amateurs and fools who use their chisels as if they are screwdrivers or scrapers instead of finely-made cutting instruments and then blame the blacksmith for the damage their ham-handed abuse wreaks are exactly why nearly all Japanese chisels produced nowadays are intentionally made softer and less efficient. Most are still harder than Western chisels, make no mistake, but they are too soft for professional use.
Our chisels, on the other hand, are forged and heat-treated to maximum practical hardness as required by top-tier professional Japanese woodworkers.
Beloved Customer should adopt the four solutions described below so as to not abuse your chisels thereby preventing chipping and keeping your eager blades cutting as long as possible.
Solution 1 – Maintain a Proper Bevel Angle: Please pay careful attention to maintaining a proper bevel angle, one that will adequately support the extreme cutting edge against chipping. 27.5~30˚ is standard. Why is this important? Improper bevel angles are the primary cause of cutting-edge chipping. The solution? Procure a bevel angle gauge, use it frequently and correctly, and pay attention because the construction of Japanese chisels is conducive to the bevel angle gradually decreasing over many sharpening sessions. Please read about Supernatural Bevel Angles for more details. Silver crosses and garlic necklaces are optional.
Solution 2 – Cease and Desist Tool Abuse: Your chisel is a highly-refined tool specialized for cutting wood and must not be to be used for anything else. Period. Don’t use the cutting edge of your chisel to open paint cans, turn screws, scrape gaskets, or even pry wood chips out of mortise holes because such abuse will place forces on the cutting edge in directions it is not designed to handle dulling the blade quickly, and maybe even causing it to chip. Seriously.
Solution 3: Shun The Chisel Wiggle: Don’t make your tools perform the lewd “chisel wiggle” when cutting mortises, for such unseemly gyrations will damage their cutting edge. Just don’t do it. For a more detailed explanation, please see the article at this link.
Solution 4: Cut Only Clean Wood: Don’t use your precious chisels, planes or saws to cut nails, screws, concrete, rocks, sand or dirt. What? None of the wood you use is infested with such evil substances? How do you know unless you check? Please see the article linked to here to better understand The Mystery of the Scratched Blade.
Challenge 3 – Blades are Difficult to Sharpen
As mentioned above, the blades of our chisels are especially hard by design to become sharper and stay sharper longer than standard chisels thereby improving the craftsman’s productivity. But given the same area of steel, measured in square inches or square millimeters, harder steel takes more time and/or abrasive effort to sharpen, as I’m sure you’ll agree. So how can one sharpen this harder steel efficiently?
Solution 1 – Use Diamonds: Use quality, flat diamond stones/plates instead of regular stones (although regular stones are almost as quick if used properly and a lot cheaper).
Solution 2 – Use Skill: Learn how to sharpen your chisels in a professional manner. We have a series of 30 articles beginning at this LINK about sharpening Japanese blades that may prove helpful.
Solution 3 – Reduce the Frequency of Sharpening: There seems to be two or three mindsets about sharpening in the world. One is what I call the Teutonic Solution, which is to make the chisel’s blade soft and easy to sharpen. This also makes the chisel tougher and less likely to chip, while at the same time obviating the need for quality steel, advanced blacksmithing techniques, or the exercise of rigorous quality control, protecting the manufacturer and retailer against warranty claims. On the other hand it means the blade will never cut very well, and it will dull quickly. For those who don’t need sharp blades and/or lack sharpening skills, this is a good solution, I suppose, but the poor-quality work such blades can accomplish, the excessive time and sharpening stone they waste, and their decreased useful lifespan is unacceptable to professional Japanese woodworkers.
The other mindset I call the British Solution, which means a medium-hard blade; A compromise yielding more efficient, but nonetheless compromised results.
The third mindset is the Japanese one, which is to make the blade as hard as practical. It was once the same mindset in Europe and America too, but no longer. Please see the article at this link for details.
This solution is to use your blades in accordance with the principles detailed in Challenge 2 above, and maintain them properly thereby reducing the frequency of sharpening.
Solution 4 – Reduce the Amount of Sharpening: The essence of this solution is to sharpen your blades efficiently, so that less metal must be abraded/polished and turned to mud during each sharpening session. For this solution to be effective Beloved Customer must develop an essential skill, namely a sense of when your tool has dulled to the point where it is best to stop work and resharpen the blade while it can still be quickly and efficiently resharpened thereby saving time, steel and stone, instead of banging away with the chisel until the edge deteriorates to the degree it will take major effort and excessive time on rough stones to resharpen. This is a vague skill that takes time to obtain and self-control to implement, but nonetheless it’s an important professional skill and one worth developing.
Challenge 4 – Handle Setup is a Pain in the Assets
Your humble servant has performed setup procedures on hundreds of chisels, and while it can be pleasantly meditative at times, indeed the perfect opportunity to bond with a new tool, I acknowledge it’s sometimes a burden. We recommend Beloved Customers perform a full “setup” on the chisels they purchase from us in accordance with the instructions in the article at this link. Why? Because it will help the chisel’s handle last longer and sometimes will make the chisel perform better. That said, while not doing all the setup steps described in the article will not make your chisel self-destruct, it may cause you to inadvertently damage its handle over years of hard use.
Compromise Solution – Setup Only The Hoop: If you can only do one step in the setup procedures for your chisels, chamfering and fitting the hoop is the most important. All else can wait if it must.
Setting up the katsura hoop is the single critical task in chisel setup. Failure to do so can lead to the damage seen in these photos over years of service, especially if a hammer with a domed face is employed.
Challenge 5 – The Mystery of the Disappearing Itoura
As mentioned above, the itoura is the land at the ura located immediately adjacent the cutting edge. In fact, it forms one-half of the cutting edge. Sharpening the blade’s cutting edge makes the blade gradually shorter and the itoura gradually narrower, eventually making it disappear entirely, unless proper technique is employed. Please note, however, that a narrow itoura is not a bad thing up to the instant it ceases to exist. So, how best to deal with the Mystery of the Disappearing Itoura?
Solution 1 – Balance the Abrasion of the Itoura and Other 3 Lands of the Ura: Besides making the blade sharper, abrading the ura uniformly during sharpening produces the following two consequences: (1) All four of the lands surrounding the uratsuki (hollow-ground depression at the ura), especially the itoura and side lands (ashi), gradually become wider, each to varying degrees; and (2) The uratsuki gradually becomes shallower. The solution your humble servant presents here is to pay attention to the itoura’s width, and to abrade the ura at a pace and in a focused manner that maintains a useful itoura even as the blade becomes shorter, but without excessively wearing out the uratsuki. A balancing act of sorts.
To do this, besides having an attentive eyeball, and while it may seem counterintuitive, you must not focus abrasion evenly over all four lands of the ura, but instead focus finger pressure and therefore abrasion primarily at the itoura instead, while at the same time keeping the 4 lands at the ura more-or-less planar. This is counterintuitive to people accustomed to the uninterrupted slab of apparently (but seldom actually) flat steel on Western chisels, but it requires the sharpener to apply focused, fingertip, point control instead of just chugging a beer, plopping the blade’s ura on the stones, leaning in and grinding away like a badger digging a juicy gopher out of its hole. This hand/eye skill is one the woodworking gurus selling books and classes either don’t know or overlook, shame on them, and the goobers on NoobTube never even consider.
Solution 2 – Restore the Itoura Through Uradashi and Uraoshi: The Mystery of the Disappearing Itoura is typically more of a problem for plane blades than chisels, but the same techniques used for plane blades can be used to restore the itoura of a chisel through a couple of processes called “Uradashi” and “Uraoshi” described in great detail at the article linked to here. However, please note that, while these techniques work well on plane blades and carving chisels, they do not work as well (or at all) on narrow chisels due to the extra-rigid construction of their blades. Consider yourself duly warned.
Solution 3 – Sharpen the Ura Using Ultra-fine Stones Only: Here in Japan the sight of chisel and plane blades owned by professional woodworkers, especially carpenters, with the ura worn away entirely is common. These craftsmen work in the field under great pressure, with limited access to tools, and often lacking adequate time to sharpen their tools gently. Consequently, to save time, instead of switching to a fine-grit stone, they will sharpen both the bevel and ura of their blades using only a single rough or medium grit stone. The problem is that, once the ura is in good shape, it seldom needs to be worked on anything but fine finishing stones, so working it on rough or medium stones during each sharpening session wears away the ura’s lands quickly and consequently prematurely wears away the ura. If you value your tools, and expect them to serve you a long time, I encourage you to use only fine-grit stones on the ura of your blades for routine sharpening, and save the rougher stones for occasionally remediating chips and other defects. Your tools will thank you.
The beautiful ura of a new Hidari no Ichihiro chisel. Please note that should the itoura on this chisel evaporate some day, uradashi cannot be used to restore it because the “U-shaped” steel lamination in the blade is just too narrow and too darn stiff.
Challenge 6 – The Uratsuki Dissapears
As mentioned in Challenge 5 above, sharpening the ura’s 4 lands abrades them making them wider, and at the same time, the hollow-ground uratsuki they surround, shallower. Appearance aside, a shallow uratsuki is no big deal except that the resulting wider lands take more time and stone to polish with each sharpening session, a problem because time is money and good stones ain’t free.
Solution 1 – Employ Balanced Sharpening: This solution is similar to Solution 1 in Challenge 5 above, but somewhat the inverse. As described in our series of articles about sharpening Japanese tools, unless there has been major damage done to the cutting edge, such as a chip or busted corner, it is seldom necessary to use anything but your finest grit sharpening stone to polish the ura. What typically causes the uratsuki to mysteriously disappear, however, is a craftsman using only a single grit of stone, usually a rougher one like 800 or 1000 grit, to frequently sharpen both bevel and ura in the interest of saving time. Don’t get me wrong: this is an absolutely valid sharpening strategy, one frequently employed by professionals under pressure, but it’s hard on chisels and wasteful long-term. Even if you are in a hurry, the time spent working the ura on a finer 6,000 grit stone instead of quicker-acting rough stones is a good investment in your chisel, IMHO. But on the other hand, time is money….
Solution 2 – Accept the Dictates of Fate: No one is getting younger except me and thee, but chisels have a useful lifespan, usually defined as the quantity of sharpening sessions it endures rather than simple time. When, after many sharpenings, the uratsuki of Beloved Customer’s chisel bottoms-out despite your best efforts to preserve it, I recommend you smile at it warmly when you are alone together, call it a good and faithful servant, and keep using it until nothing is left but the handle and the neck, for even then, it will be a better friend than any chisel-shaped Chinese screwdriver, even if the label says “Made in Germany.”
YMHOS
The diminished ura of a still-useful oiirenomi chisel. A good and faithful servant indeed.
A few relevant articles can be found at the following links:
If you have questions or would like to learn more about our tools, please click the “Pricelist” link here or at the top of the page to find our products and use the “Contact Us” form located immediately below.
Please share your insights and comments with everyone in the form located further below labeled “Leave a Reply.” We aren’t evil Google or fascist facebook and so won’t sell, share, or profitably “misplace” your information. May all my ura perpetually overflow with effluent if I lie.
“Living by faith includes the call to something greater than cowardly self-preservation.”
J.R.R. Tolkein
In this post your humble servant will present a few modern masterpieces of the blacksmith’s art produced recently by a single craftsman. I hope you are as thrilled as I am to know there is at least one craftsman left in the world that can produce chisels of this quality.
The Blacksmith
The craftsman that made these chisels is very unusual in that, unlike the frantically self-promoting, technically mediocre Hollywood blacksmiths such as Tasai, Funatsu, Kiyohisa, and the modern Chiyozuru gang, he is reclusive and shuns attention. Accordingly, I have been requested to not share any personal details about him, so please don’t ask. The fact is I don’t even know his real name just the brand he uses.
I won’t discuss why he is reclusive, but I will go so far as to say that he is self-employed, well-known in his chosen field, and that chisels are not his primary work product but only a sideline. He makes no more than 5 chisels monthly.
His business philosophy and blacksmithing techniques are interesting so I will share some details about them. He has four strict requirements that a Customer must satisfy before he will accept an order. The first two are business-related, and the last two are about the Customer.
The Blacksmith sets the delivery schedule. Period.
The Blacksmith sets the price. Period
The Customer must be a professional worker in wood who needs and will use the tools the Blacksmith will forge daily. His track record must be independently verifiable. Amateurs and/or hobbyists, regardless of their skill levels, need not apply. Collectors are specifically unwelcome.
Besides being expert in the use of chisels, the Customer must have a minimum level of skills, including the ability to make chisel handles and cut a high-quality Japanese plane block using only hand tools. Once again, this must be verified before an order will be accepted.
Your humble servant commissioned a few chisels from the Blacksmith many years ago and went through this same qualification process, although I didn’t realize it at the time.
The quality of his forging and heat-treat technique is unsurpassed producing a crystalline structure in hard steel that will take an extremely sharp edge, will hold that edge without easily dulling, chipping or rolling while cutting a lot of wood, and is easily sharpened.
But it is his metal shaping and finishing skills that are so awe-inspiring. Please notice the straightness and cleanness of the lines and planes, as well as the uniform and smooth curvature at the shoulders, and perfect symmetry. If Gentle Reader is unimpressed, I encourage you to make a full-scale model from cold wood before trying it in hot metal. I promise you will be convinced.
The Blacksmith uses only “free-forging” techniques, and does not employ the rough shaping dies other modern blacksmiths rely on to improve production speed. His forging technique is so sublime that the entire chisel is shaped to nearly final dimension by fire and hammer, not grinders and belt sanders.
He finishes his products using only hand-powered scrapers (sen) and files.
The performance of Blacksmith’s products are equal to or better than those of Kiyotada back in the day, and are more precisely shaped and more beautifully finished than those of Ichihiro (the Yamazaki Brothers) at their very best. They are simply the best chisels that have been made in Japan in the last 70 years.
Let’s take a look at four chisels recently completed for a Beloved Customer in the USA.
34 x 485mm Anaya Chisel
The Anaya chisel is an antique style used for cutting deep mortises and making other joints in large timbers. It is no longer commercially available.
Top view of a Anaya 34x485mm Anaya chiselUra view of 34x485mm Anaya chiselSide view of 34x485mm Anaya chisel
57 x 485mm Anaya Chisel
42 x 490mm Bachi Nomi
The Bachi nomi is the equivalent to the fishtail chisel in English-speaking countries. The word bachi comes from the splayed tool used to play the 3-string Japanese shamisen, a banjo-type musical instrument. Here is a link to a video of two ladies using shamisen and bachi to perform a famous traditional song in Tokyo.
The Bachi nomi excells at getting into tight places to cut joints with acute internal angles such as the dovetail joints that connect beams to purlins.
There are several ways to resolve the angles at the tool’s face, but in this case the Beloved Customer and Blacksmith agreed on the most difficult, rigid and beautiful solution, the shinogi. This design has the advantage of maintaining a shallower side-bevel angle from cutting edge to neck return providing better clearance in tight dovetail joints.
The handwork performed on this chisel’s face is simply amazing, but the hollow-ground ura is even more spectacular to those who know about this things.
54 x 540mm Sotomaru Incannel Gouge
The Sotomaru or incannel gouge is a strong and convenient chisel used for cutting joints in logs and rounded members on architecture. More information can be found at this link.
This is an especially beautiful example as seen the symmetrical confluence of planes and curves at the shoulders.
Conclusion
I hope Gentle Reader found this post informative. You will never find better examples of the Japanese blacksmith’s art outside of one particular museum. It is exciting to consider that there is still one craftsman alive that can routinely perform this level of work.
While your humble servant has praised these chisels and the blacksmith that made them highly, please do not make the mistake of assuming that I am soliciting orders, or even suggesting that commissioning them is possible, because they are simply not available at any price. Please don’t ask.
YMHOS
If you have questions or would like to learn more about our tools, please click the “Pricelist” link here or at the top of the page and use the “Contact Us” form located immediately below.
Please share your insights and comments with everyone in the form located further below labeled “Leave a Reply.” We aren’t evil Google, fascist facebook, or thuggish Twitter and so won’t sell, share, or profitably “misplace” your information. May my ootsukinomi roll from my workbench and land cutting-edge down on my toes if I lie.
An illustration of the Eidai tatara furnace (a cross-section illustration is shown at the end of this article) with human-powered blowers to right and left. Looks like hot work.
The things that will destroy America are prosperity-at-any-price, peace-at-any-price, safety-first instead of duty-first, the love of soft living, and the get-rich-quick theory of life.
Theodore Roosevelt
The terms White Steel and Blue Steel frequently pop up in discussions about Japanese woodworking tools and kitchen knives. The usual misunderstandings abound in those discussions and BS takes majestic wing.
In this article your humble unworthy servant will try to share some accurate information sourced directly from the steel manufacturer, ancient blacksmiths that actually work these steels, and Japanese professional craftsmen paid to make sawdust and shavings using these steels instead of the usual soft-handed shopkeepers and self-proclaimed experts pontificating from their Mom’s basement.
We will begin by studying some etymology of two of Japan’s most famous modern tool steels. We will then transition through space and time to discuss ancient domestic Japanese steel, and then shift our attention to why these modern steels came into being. After that, we will go to metallurgy class, sans most of the technical jargon, to understand what chemicals these steels contain and why. We will also outline several performance characteristics particular to these two steels in the case of woodworking tools.
For those who enjoy more technical details combined with pretty pictures, we have concluded with the results of a brief but very informative materials engineering study.
There’s much work to be done, so please stretch your back and shoulders and ready your BS shovel.
Product Designations: Yellow, Blue and White Label Steels
These terms refer to tool steels manufactured by Hitachi Metals, Ltd. (HML) in their plant located in Yasugi City in Shimane Prefecture, Japan. If you are into woodworking tools or Japanese cutlery you have probably heard of them.
Hitachi, Ltd., founded in 1910, is one of Japan’s largest and most prestigious manufacturers. Its subsidiary, Hitachi Metals, Ltd., was established in 1956 through acquisition.
“White Steel” is an abbreviated translation of HML’s nomenclature of “Shirogamiko” 白紙鋼, which directly translates to “White Paper Steel.” Likewise, “Blue Steel” is an abbreviation of “Blue Paper Steel,” the translation of “Aogamiko” 青紙鋼.
Regarding the color terminology in these product designations, just as “Johnnie Walker Blue Label” is the product name of a Scottish whiskey with a blue paper label pasted onto the bottle, Aogami is the designation of a particular formulation of high-carbon tool steel with a blue paper label pasted onto it by the steel mill. It’s that simple.
While Johnny Walker may be kinda sorta yellow in hue, it’s no more tinted blue than JW Red Label is sangre. Likewise, the actual color of Hitachi Metal’s tool steels do not vary in color, only their labels do. BTW, if someone tells you they can tell the difference between these steels by simply looking at them, tell them to give you a nickle and pull your toe for some fragrant, musical entertainment.
Surprisingly, some folks insist they can tell the difference between steels by licking them. Our feline masters see this as further evidence human mothers lack not only retractable claws, but have butter fingers (ツ)。
Since your humble servant can read and write Japanese, I feel foolish calling these materials White Steel or Blue Steel as many in English-speaking countries do, so I prefer to use the more correct names of Kigami, Aogami, or Shirogami steel, or the English translations of Yellow Label Steel, White Label Steel or Blue Label Steel. Please excuse this accurate affectation.
Now that adult beverage nomenclature, greenhouse gases and feline viewpoints are out of the way, let’s go back in time a few hundred years. My tardis is that green box just over there. Yes, the one with the doohickey on top.
A change into period-correct wardrobe will not be necessary, but please put away your smartphone and kindly don’t embarrass me in front of the locals by holding it over your head and wailing “There’s no signal!!”
Traditional Domestic Japanese Steel: Tamahagane
Tamahagane, written 玉鋼 in Chinese characters, which translates to “Jewel Steel” and is pronounced tah/mah/hah/gah/neh, is famous as the domestic steel traditionally used to forge Japanese swords prior to the importation of bulk steel from overseas beginning with products of the Andrews Steel mill in England. Indeed, at one time tamahagane was at the center of all steel production in Japan.
But tamahagane does not grow on trees. Indeed, before Admiral Perry’s black ships re-opened the many kingdoms and fiefdoms scattered across the islands that now comprise modern Japan, the only significant local source of iron was a material called satetsu, a loose surface particulate iron written 砂鉄 in Chinese characters, meaning ”sand iron,” and pronounced sah/teh/tsu. Satetsu looks exactly like black sand. It’s quite common throughout the world, as you may discover if you drag a magnet through a dark sandy riverbed or over a black beach.
Typically found in rivers and estuaries, for many centuries the area around Yasugi City in Shimane Prefecture was a prime source.
Satetsu iron, loose and with a magnet
Satetsu was historically harvested in Japan using dredges and sluices creating horrendous environmental damage. Fortunately, the days of wholesale estuary destruction are in Japan’s past.
Although Aluminum is the most abundant metal found on the third rock from the sun, people who must have huge scales say that iron makes up 34% of the earth’s mass. Japanese satetsu as harvested is a fairly pure form of iron lacking nearly all of the problematic impurities found in commercial iron ore nowadays.
Historically, satetsu was refined in rather crude furnaces called ” tatara” yielding clumps of brittle steel containing excessive amounts of carbon and other impurities, but few of the inconvenient impurities common to iron ore extracted by mining. This “bloomery” technique is not unique to Japan, although many Japanese people who should know better mistakenly believe it is.
A tatara furnace in operation. Satetsu is combined with charcoal and heated over several days. The resulting bloom steel, called “Tamahagane,” settles to the bottom in clumps and puddles and is removed by breaking the furnace apart.Freshly-smelted Tamahagane. Being raw iron, it oxidizes quickly.
Steel produced this way in the West is called “bloom steel.”
Blacksmiths hammer, fold, and re-hammer these crumbly lumps to remove impurities and reduce/distribute carbon forming the more homogeneous Tamahagane steel. This webpage has some interesting photos of tamahagane.
A clump of Tamahagane early in the forging process. Most of this material will be lost as waste before a useful piece of steel is born.After the Blacksmith hammers the raw clumps of Tamahagane hundreds of times, he then forms it into numerous small flat steel patties, which he breaks into the pieces shown in this photo in preparation for forge-welding them into a single larger piece of steel that he can then forge into a blade.
Tatara furnaces are still operated on a limited basis today producing Tamahagane in limited quantities for use by licensed swordsmiths. Tool blacksmiths use Tamahagane occasionally too out of interest in traditional materials and methods. It’s expensive and difficult to work, with lots of waste.
A sawsmith on the island of Shikoku in Japan who was active both before and after the availability of British steel is recorded as saying that imported Western steel increased saw production efficiency in his area tenfold. Clearly, Tamahagane was a very labor intensive material.
Mr. Kosuke Iwasaki, a famous modern Japanese metallurgist and blacksmith, described forging Tamahagane as being like “hammering butter” because it flattened and spread too quickly and unpredictably, at least compared to modern steels.
Besides its peculiar forging characteristics, compared to modern tool steels Tamahagane is a difficult material infamous for being overly sensitive to temperature and easily ruined during all phases of forging and heat treatment. These traits have created a historical sensitivity among Japanese blacksmiths regarding precise temperature control, a beneficial habit when working the tool steels discussed herein.
In use, tools made from Tamahagane behave differently from modern commercial steel, or so I am told. I own and use a straight razor custom forged from Tamahagane for me many years ago by Mr. Iwasaki. I also own antique Scheffield and German razors, but my hand-forged Iwasaki razor puts them all to shame in terms of sharpness, edge retention, and ease of sharpening. I also own a couple of antique Tamahagane saws, but I have not used them much, nor have I used Tamahagane chisels, planes or knives, so my experience is limited to this one wickedly sharp little blade.
My beloved Tamahagane cutthroat razor by Iwasaki
Why do I bother Gentle Reader with these tales of ancient smelting techniques and obscure products no longer viable? Simply because Tamahagane and the cutting tools and weapons it was once used to produce profoundly influenced both Japan’s history and the Japanese people’s attitude towards edged weapons and cutting tools, in your humble servant’s opinion.
Although imported Western steel served Japan well during its ramp-up to modernity, the memory of the performance of cutting tools made from Tamahagane has remained alive in the national memory. Indeed, I am convinced the Japanese people’s love and fear of sharp things is not only psychological but genetic, although I have not seen any studies on the “sharpness gene.” But that’s a story we should save for the next time we are enjoying a mug of hot coco together around the iori fire on a moonlit Autumn night. May that evening come soon.
Modern Japanese Tool Steels
Enough ancient history. Let’s jump back into the tardis and travel to the late 1950’s to consider a few modern steels before returning home.
Yes, you can turn your mobile phone back on once inside, but reception may be poor for a few centuries. No you can’t bring back souvenirs. I don’t care what Doctor Whatsit did with his tardis, we are responsible time travelers and will avoid creating causal conundrums. Besides, the import taxes are pure murder. And please, do be careful no little children slip inside with you.
When Japan began to mass-produce commercial steel from imported pig iron using modern techniques, the first standard tool steel produced was identical to Western steels, including the impurities. These are still produced today as the “SK” series of steels as defined by Japan Industrial Standards (JIS).
Eventually, to satisfy the irrepressible sharpness gene of their domestic customers, Japanese blacksmiths and cutlery manufacturers pressured Japanese steel companies to develop products with fewer impurities and with performance characteristics approaching traditional Tamahagane.
Rising to the challenge, Hitachi Metals endeavored to replicate the performance of Tamagane using modern smelting techniques and imported pig iron and scrap metal instead of expensive and environmentally unsustainable satetsu.
Ingots of Swedish pig iron
To this end Hitachi purchased and modernized an old steel plant in Yasugi City, Shimane Prefecture for this purpose. They formulated the best steel they could make using the best pig iron they could find, sourced mostly from Sweden, an area famous for hundreds of years for producing especially pure iron ore. The results were Shirogami Steel (pronounced she/roh/gah/mee/koh 白紙鋼), Aogami Steel (pronounced aoh/gah/mee/koh 青紙鋼), and Kigami Steel (pronounced kee/gah/me/koh and written黄紙鋼) meaning “Yellow Label Steel.” Later, they developed Aogami Super steel (青紙スパー ) (a mediocre high-speed steel) and Silver Label Steel (stainless steel). Each of these products are available in various subgroups, each having a unique chemical formulation.
For a time, Hitachi marketed some of these steels with the “Tamahagane” designation. Problematic, that. Indeed, many saws and knives were deceptively stamped “Tamahagane” when these steels were first introduced.
With the explosive popularity of Japanese knives overseas, several Japanese manufacturers have once again made the decision to body surf smelly waves of BS deceptively labeling their products as being made from “Tamahagane” despite being made of common SK steels and even stainless steels. Because these spurious representations were and continue to be made for the purpose of increasing profits for companies that clearly know better, in your humble servant’s opinion even the stinky label of BS is too good for them.
Caveat emptor, booby.
Chemistry
We tend to think of steel as a hard metallic thing, but lo and behold, ’tis a chemical compound!
Few chemicals humans dabble with are absolutely pure, and while White Label, Blue Label, and Yellow Label steels contain exceptionally low amounts of undesirable contaminants, they do exist. Dealing with the negative impacts of these impurities has been the bane of blacksmiths since before Vulcan was chopping charcoal in hairy goatskin nappies.
The most common undesirable impurities found in commercial iron include Phosphorus (reduces ductility, increases brittleness, and messes with heat treating), Silicon (a useful chemical that increases strength, but too much decreases impact resistance), and Sulfur (a demonic chemical that reduces strength, increases brittleness and gleefully promotes warping). Obviously, something must be done about these bad boys.
Some people imagine that, through the alchemy of “Science” (a word that’s lost nearly all of its positive value nowadays through adulteration and profiteering by corrupt, credentialed scam artists both public and private and narcissistic publicity hounds pretending to be “scientists”), impurities are simply “disappeared” from steel during smelting. While some impurities can in fact be eliminated through heat and chemical reactions, it is not possible to significantly reduce the content of those listed above through smelting and forging alone.
Undesirable chemicals can be tolerated in steel to some degree because, like arsenic in drinking water and carbon monoxide in air, below certain levels they cause no significant harm. The best solution we have discovered is to reduce the concentration of impurities to acceptable levels by using ore and scrap material that contain low levels of impurities to begin with, and constantly testing, and either rejecting or diluting the ”pot” as necessary to keep impurities below acceptable levels. This practice is known as “Solution by Dilution.”
White Label steel is plain high-carbon steel without other additives, while Blue Label, Silver Label, and Aogami Super steels have various chemical additives to achieve specific performance criteria. Please see the flowchart below.
Production Flowchart of Yellow Label, White Label, Blue Label, and Super Aogami Steels
A flowchart outlining the manufacturing process
Another technique used to mitigate the negative effects of impurities found in iron ore is to add chemicals such as chrome, molybdenum, vanadium, tungsten, etc. to the pot producing so-called “high-alloy” steels that can be more predictably forged and heat-treated, are less likely to crack and warp, and will reliably develop useful crystalline structures despite containing high levels of detrimental impurities. Such high-alloy steels can reliably produce useful tools in mass-production situations by unskilled labor and with minimal manpower spent on quality control while greatly improving productivity and decreasing costs. But regardless of the hype, such chemicals do not improve sharpness or make sharpening easier, important considerations in the case of woodworking tools. Indeed, the exact opposite is true.
The pages in Hitachi’s Japanese-language catalog regarding their relevant cutlery steels can be found immediately below.
The table below is a summary of a few relevant tool steels listed in Hitachi Metal’s catalogue.
Gentle Reader will notice that White Label and Blue Label steels both have the same minute allowable amounts of impurities such as Silicon, Phosphorus, and Sulfur.
Chemical Table of White Label, Blue Label and Aogami Super Steels
Chemical Table of White Label and Blue Label steels as well as Aogami Super (this table can be scrolled left~right)
Carbon of course is the element that changes soft iron into hardenable steel, so all five steels listed in the table above contain carbon, but you will notice that White Label No.1 has more carbon than White Label No.2. Likewise, Blue Label No.1 has more carbon than Blue Label No.2.
The greater the carbon content, the harder the steel can be made, but with increased hardness comes increased brittleness, so White Label No.1 is likely to produce a chisel with a harder, more brittle blade than one made of White Label No.2.
With impurities and carbon content the same, the chemical difference between White Label No.1 and Blue Label No. 1 then is the addition of chrome and tungsten, elements which make the steel much easier to heat treat, and reduce warping and cracking, thereby yielding fewer defects with less work. Chrome, and especially tungsten, are expensive chemicals that make Blue Label steel costlier than White Label steel, but with easier quality control and fewer rejects, overall production costs are reduced.
White Label No.2 steel makes a wonderful saw, but the plates and teeth of saws forged from White Label No.1 tend to be fragile unless the blacksmith removes excess carbon during forging to improve toughness. This is entirely within the skillset of an experienced blacksmith, and can even occur by accident.
My point is that an experienced and conscientious blacksmith will use the steel most likely to achieve his customer’s expectations for performance, not just the most profitable or more easily-worked material.
In the case of chisels, plane blades, and kitchen knives intended for professional use, White Label No.1 is the first choice of Japanese professionals followed by Blue Label No.1 steel.
Where high performance at less cost is required, Blue Label No.1 is often preferred.
All things considered, and this is a critical point to understand, compared to White Label steel, Blue Label steel is easier to forge and heat-treat, with fewer rejects, making it a more cost-effective material despite being a more expensive material. Indeed, many blacksmiths and all mass-producers prefer Blue Label steel over White Label steel, when given a choice, because it is easier to use and more profitable, not because it makes a superior blade.
Many wholesalers and retailers insist that Blue Label steel is superior to White Label steel simply because, as a material, it’s costlier and contains elements that make it more resistant to wear and so-called “abrasion,” intimating that it will stay sharper longer. Those poor derelict souls who are easily deceived, have less than professional sharpening skills, or do not follow this blog may accept this convenient marketing ploy, but when wise Gentle Readers hear this sort of nonsense they will know to quickly put on their flippers and floaties in time to keep their heads above the stinky, brown flood of BS about to engulf them.
Wise Beloved Customers who choose blades forged from Blue Label steel will do so because they know that Blue Label steel makes a fine blade at less cost than White Label steel, not because Blue Label steel blades are superior in performance. Moreover, regardless of the steel used, they will always purchase blades forged by blacksmiths that possess the requisite dedication and have mastered the skills and QC procedures necessary to routinely produce high-quality blades from the more temperamental White Label steel. The reasons are made clear in the Technical Example below.
Quenching & Tempering
Let us next consider the process of hardening steel, called “heat treatment,” (in Japanese “netsu shori” 熱処理) the key to making useful tools.
High-alloy steels vary in this regard, but in the case of plain high-carbon steels, the two primary stages (with various intermediate steps we won’t touch on) of heat treatment are called “quenching” and “tempering.”
Quenching
Despite what many, including Supreme Court Justice Jackson, imagine, both men and women are fundamentally different and at the same time essential to making hoomans. Iron and carbon too are fundamentally different elements, and both are essential to making steel. And like men and women, these two elements sometimes make nice, but sometimes don’t get along well at all.
Indeed, prior to heat treating, the carbon molecules in steel tend to isolate themselves from the larger mass of iron forming isolated clumps, an organization that makes steel weak and/or brittle. When the steel is heated above a specific temperature, however, the carbon clumps tend to dissolve, become mobile, and meld with the iron molecules in a very friendly manner, if Gentle Reader will forgive me for anthropomorphizing chemistry. If the steel is then allowed time to cool naturally the carbon molecules will once again separate themselves into useless clumps creating a soft or brittle material.
But if the yellow-hot steel is instead suddenly quenched in oil or water it will cool rapidly such that carbon molecules lack the time needed to reform the weak clumps it naturally prefers leaving it stranded and mixed with the iron, forming extremely hard “carbide” particles, locked into a rigid crystalline matrix. This transformation is the first part of what your humble servant and others call The Mystery of Steel.
After quenching, the steel is brittle enough to shatter if dropped onto a concrete floor, for instance, and not suitable for tools, so further measures are necessary.
Tempering
The next step in the heat-treatment process is called “tempering,” a process that adjusts the rigid crystalline structures created during the quench, losing some carbides and loosening the rigid crystalline structure somewhat, but making the steel less brittle and much tougher.
This is achieved by reheating the steel to a set temperature for a set period of time and then cooling it in a specific way. This heating and cooling process can happen in air (e.g. oven), oil, or even molten lead. All that really matters is the temperature/time curve applied. Every blacksmith has their own preferences and procedures.
With that ridiculously overly-simplified explanation out of the way, let’s next take a gander at the “Quench Temp” row in the table above which indicates the acceptable range of temperatures within which each steel can be quenched to successfully achieve proper hardness. These ranges are important because if quenching is attempted outside these ranges, hardening will fail and the blade may be ruined.
In the case of White Label steel, Gentle Reader will observe that the quenching temperature range is listed as 760~800°C, or 40°C. Please note that this is a very narrow range to both judge and maintain in the case of yellow-hot steel, demanding a sharp, well-trained eye, a good thermometer, proper preparation, and speedy, decisive action, not to mention a thorough purging of iron pixies and malevolent spirits from the workplace.
Just to make things worse, even within this allowable range, a shift of temperature too far one way or the other will significantly impact the quality of the resulting crystalline structure, so the actual temperature variation within the recommended quench temp range an excellent blacksmith will aim for is more like ± 10˚C.
In the modern world with easily-controlled gas fires, consistent electric blowers, and reliable infrared thermometers, this target can be hit through training and diligent attention, but not that long ago it was seen as a supernatural achievement performed in the dark of night by powerful wizards. I kid thee not.
Compare this range of quenching temps to those for Blue Label steel with an acceptable quenching temperature range of 760~830°C, or 70°C of range, a 75% increase over White Label steel. That’s huge.
Let’s next consider the recommended tempering temperatures.
For White Label steel, Hitachi’s recommended tempering temperatures are 180~220°C, or 40°C of range. Blue Label steel’s temperatures are 160~230°C, or 70°C of range, once again, a 75% greater safety margin.
The practical temperature range for quenching and tempering Blue Label steel is still quite narrow, but this increase in the allowable margin of error makes the job a lot easier, such that Blue Label Steel is much less risky to heat-treat successfully than White Label steel.
Judging and maintaining proper temperatures during forging, quenching and tempering operations is where all blacksmiths, without exception, fail when they first begin working plain high-carbon steel. The guidance of a patient master, time and perseverance are necessary to develop the knack. Experience matters.
I hope the discussion this far at least partially brings into focus the challenges these two steels present to the blacksmith.
If you seek greater light and knowledge, please look online to find similar data for many of the popular high-alloy tool steels. Comparing those numbers to White Label steel and Blue Label steel will help you understand why mass-producers of tools, with their lowest-possible-cost mindset, minimal quality control efforts, and virtually untrained workforce of peasant farmers, former lawn-care professionals, and aspiring fast-food restaurant workers prefer them for making the sharpened screwdrivers foisted off by the boatload on uninformed consumers as chisels nowadays.
Warping & Cracking
A huge advantage of chrome and tungsten additives is that they reduce warping and cracking significantly. This matters because a blacksmith using a plain high-carbon steel like White Label steel must anticipate the amount of warpage that will occur during quenching, and then shape the chisel, knife, or plane blade in the opposite direction so that the blade straightens out when quenched. This exercise requires a lot of experience to get right consistently, making White Label steel totally unsuitable for mass-production.
Steel is a magical material. When yellow hot, the carbon dissolves and disperses relatively freely within the iron matrix. Anneal the steel by heating it and then slowly cooling it and the carbon molecules will migrate and gather into relatively isolated clumps with little crystalline structure leaving the steel soft.
But if the steel is heated to the right temperature and suddenly cooled by quenching, the carbon is denied the time and freedom available to it during the slower annealing process, instead becoming locked into the iron matrix forming a hard, rigid crystalline structure. This rigid iron/carbon crystalline structure has a significantly greater volume than pure iron, which is why the blade wants to warp when quenched.
Adding chrome and tungsten and other chemicals reduces this tendency to warp.
Sword blades are an interesting example. A Japanese sword blade is typically shaped either straight or curved towards the cutting edge before quenching, but during quenching the blade warps and curves without encouragement from, and despite the efforts of, the blacksmith. The skill and experience required to accurately anticipate the degree of warpage generated and the resulting curvature of the blade, and then compensate while shaping the blade before quenching to achieve the desired curvature post-quench is not something one learns in just a few months or even years.
A Japanese swordsmith with a blade made from high-carbon Tamahagane steel poised for quenching. Notice how straight the blade is. He has invested weeks of work into this blade to this point and a misjudgment or even bad luck in the next second can waste it all. Not a job for the inexperienced or timid.After quenching, the resulting warpage is dramatic, but according to plan. The swordsmith must anticipate this distortion and shape the blade to compensate prior to the quench if he is to avoid unfortunate results. Notice the mud applied to the blade before quenching to control the formation of crystalline structures, achieve differential hardness, and control warping. Tool blacksmiths are faced with the same challenges on a smaller scale but more frequently.
High-alloy Steels
Unlike Tamahagane, however, modern high-alloy commercial steels contain large amounts of chemicals such as chrome, tungsten, molybdenum, vanadium, etc., with the result that tools made from these steels warp less, and exhibit far fewer shrinkage cracks.
Aogami Super is another HML product listed in the table and flowchart above. It’s an interesting steel, containing more carbon than both White Label steel and Blue Label steel and a lot more tungsten than regular Blue Label steel. Consequently, it is even more expensive. Aogami Super was originally developed as a high-speed tool steel especially resistant to wear. There are much better steels available for this role now, but Aogami Super is still hanging in there.
But all is not blue bunnies and fairy farts because high-alloy steels have some disadvantages too.
Those who hype high-alloy steels always praise to the heavens the “wear-resistant” properties chrome and tungsten additives afford. When the subject is woodworking handtool blades, however, please understand the meaning of “wear resistant” to include “not very sharp,” and “a bitch to sharpen by hand.”
Tungsten makes the steel warp less and expands the heat-treat and tempering temperature ranges significantly leading to fewer defects during production. But the addition of tungsten also produces larger, tougher crystals that simply can’t be made as sharp as White Label No.1, and that makes the blade much more difficult, unpleasant, and time consuming to sharpen, all while wasting more expensive sharpening stone material in the process.
White Label steel has no additives other than carbon. It does not need additives to compensate for or to dilute impurities because its production begins with exceptionally pure pig iron, and carefully tested and sorted scrap metal. Both White Label and Blue Label steels, if properly hand-forged and heat treated by an experienced blacksmith with high quality standards, will have many more and much smaller carbide clumps distributed more evenly throughout the iron crystalline matrix producing a ” fine-grained” steel of the sort coveted since ancient times.
On the subject of scrap metal, this is not necessarily a negative thing. In fact, nearly all tool steels available nowadays contain high percentages of scrap metal content because, environmental and sustainability matters aside, it’s simply too cost-effective to ignore. Careful sourcing and testing are the keys to using scrap metal advantageously.
Performance Differences
I hope Gentle Reader found our little excursion back in time in the tardis, and the chemical information presented above, interesting, but it may not have clearly answered your questions about the performance differences between these steels, and when presented a choice, which one you should purchase. Your humble galley slave has been asked and answered these questions hundreds of times, and while only you can decide which steel is best for you, I will be so bold as to share with you the viewpoint of the Japanese blacksmith and woodworking professional.
Long story short, in the case of planes and chisels, the typical choices of steel are still White Label No.1, White Label No.2 or Blue Label No.1. BTW, I have been informed that Hitachi is no longer producing these steels and consequently they will not be available much longer.
If you are dealing with honest blacksmiths and honest/knowledgeable retailers with experience actually using, not just talking about and selling, tools, you will have observed that a specific plane blade, for instance one made from Blue Label steel, will cost less than the same blade made from White Label steel, despite Blue Label steel being a more costly material.
At C&S Tools a 70mm White Label No.1 steel plane blade cost 77% more than one made from Blue Label No.1. This means that the blacksmith’s average cost in terms of his labor (overhead, forging and shaping costs being equal) is also around 77% greater than Blue Label steel, a direct reflection of his potential additional time expenditure and material wastage due to defects such as cracking or excessive warping. This a constant risk for the blacksmith making professional-grade blades, so he must include the expense of mitigation in his production costs if he is to continue to keep a roof over his family’s heads.
So the dishonesty of charging more for products forged from Blue Label or Aogami Super steel is repugnant to your humble servant and should be to Beloved Customers too. But I digress.
White Label steel simply warps and cracks more, but when failure occurs it only becomes apparent after all the work of laminating, forging, shaping and quenching are complete. Ruined steel cannot be reliably re-forged or re-used, so all the material and labor costs up to the point of failure are simply wasted like an expectation of honest news from CNN. It is not a material for careless people or newbies.
So if White Label steel blades are riskier to make, with more wastage, and therefore more expensive, what are the performance characteristics that make White Label steel blades a favorite with professional Japanese craftsmen?
First, properly made White Label steel blades can be made sharper. This makes the craftsman’s work go quicker and more precisely. But don’t forget that this additional sharpness is entirely dependent on the user’s sharpening skills and his willingness to maintain his blades at that higher level.
Second, properly forged White Label steel blades are quicker and more pleasant to sharpen, making it easier to routinely obtain the extra sharpness mentioned in the previous paragraph. That sums it up.
To some people, especially those that use edged tools professionally all day long, these differences matter a great deal; To others, not so much.
Is White Label steel worth the extra cost? I think so, but the performance differential is not huge, and only someone with advanced sharpening skills will be able to take full advantage of the difference. For most people on a tight budget, or in the case of woodworking situations where sharpness is not critical, and sharpening speed and pleasure are not driving factors, then a less-expensive Blue Label steel blade is perhaps a better choice. It absolutely makes a fine tool that does a great job of cutting wood.
The Wise Man’s Q&A
Let’s shovel some more BS out of the way by performing the mandatory experiment of taking a hypothetical high-quality White Label steel blade and a hypothetical high-quality Blue Label steel blade, sharpening them identically using the best stones and advanced techniques, test them to cut some wood, and then consider the answers to the following two important questions:
Question 1: Will the additional sharpness obtainable from a White Label steel plane blade, properly sharpened and installed in a perfect body, create a smoother, shinier finish surface on wood than a Blue Label steel blade?
Answer 1: Definitely no; But since the blade started out a little sharper, it will cut wood a little better, a little longer. These results will depend on the skills of the user, of course.
Question 2: In the case where edge-retention, cutting speed, and cutting precision are more important than a shiny finish, which absolutely applies to chisels and knives, will the additional sharpness of a properly made and proficiently sharpened White Label steel blade improve a woodworking tool’s cutting speed, edge-retention, precision and control?
Answer 2: Absolutely yes; On condition that the user possesses and exercises the skills necessary to achieve and maintain that extra degree of sharpness. There is a reason sharpening has always been the first essential skill in woodworking.
These are the reasons why we don’t even offer chisels made from Blue Label steel, or even White Label No.2 with its lower-carbon content, and resulting reduced hardness.
But whether plane blade, chisel or knife, a key point to understand is that a properly forged and heat-treated blade made by an experienced professional blacksmith from simple White Label steel will always be quicker and more pleasant to sharpen than one made of Blue Label steel with its added sticky chrome and hard tungsten. To the professional that has the need for the additional sharpness, possesses the skills necessary to produce and maintain it, and counts the cost of his time and sharpening stones, that’s a difference many find fully justifies the extra cost.
I daresay many of our Beloved Customers agree.
A Technical Example
You may find the metallurgical technical terms below difficult to follow, but perhaps an example with pretty pictures will help bring things into focus. Please see this informative article by Niigata Prefecture’s Prefectural Central Technical Support Center. If you input the URL into Google and use the translate feature a decent English-language version may magically appear. Or not. Some of the key results are copied below.
The steel being tested in the study outlined below is White Label No.2 steel (row 2 on page 4 of the Hitachi catalogue pdf). They heat-treated seven samples, tested their hardness, and listed the results. In each case, the quench temp varied from 750˚~900˚C (1382˚~1652˚F) in water, but the tempering temp was kept constant at 180˚C (356˚F).
The best results can be seen in Figure 4 below at a tempering temperature of 775˚C (1427˚F) producing the finest, most uniform crystalline (Austentite) structure. Lower temps are not as good. Higher temps are worse. A 25˚ variation one way or the other made a big difference.
So let’s examine how the crystalline structure changes with different temperatures as seen in the photos below.
The white stuff visible in the photographs is Ferrite (iron), while the black stuff is spherical carbide (Cementite). When Ferrite and Cementite meld, a desirable hard crystalline structure called Martensite is formed, although there are several steps in between we will not touch on. This subtle molecular change is the essence of the ancient Mystery of Steel, and the keystone to modern civilization.
Fig.1 shows the steel before heat treatment begins. Notice how the soft iron Ferrite and spherical carbon Cementite are isolated from each other indicative of little crystalline structure and a soft metal. No significant Martensite is visible.
Fig.1: Pre-heat-treat condition of Shirogami No.2 steel.
The graph in Fig.2 below shows Vickers Hardness on the vertical axis and quench temperature (with a 20 minute soak) on the horizontal axis. Notice how hardness makes a big jump between 750˚C and 775˚C. This 25˚ range is the sweet spot.
Fig.2: Vickers Hardness vs. Quench Temp
Fig. 3 below shows the crystalline structure at a quench temp in water of 750˚C, after a 20 min. soak, followed by tempering at 180˚C for one hour, followed by air cooling. This is 10˚C below the manufacturer’s recommended quench temp. Notice how the iron Ferrite and spherical carbon Cementite are mixing, forming some gray-colored Martensite, but there are still big lakes of Ferrite visible. Better, but not yet good.
Fig. 3: Quench Temp = 750˚C, 10˚C less than the recommended quench temp
Fig. 4 below shows the crystalline structure at a quench temp in water of 775˚C, after a 20 min. soak, followed by tempering at 180˚C for one hour, followed by air cooling. Notice how the iron Ferrite and spherical carbon Cementite are well-mixed forming pretty grey Martensite, indicating that this is close to the ideal quench and tempering protocol; The sweet spot. The crystalline structure shows few lakes of iron Ferrite or islands of spherical carbon. This organization is typical of durable, hard, fine-grained steel. A mere 25˚C increase in quench temp has yielded a large improvement.
Fig.4: Quench Temp = 775˚C. Well within the recommended quench temp.
Fig. 5 below shows the crystalline structure at a quench temp in water of 800˚C, after a 20 min. soak, followed by tempering at 180˚C for one hour, followed by air cooling. This is still within the quench temp range recommended by Hitachi. Notice how the Ferrite and spherical carbon Cementite are still fairly well-mixed, but the dark spherical carbon is becoming a bit more isolated from the Ferrite forming more, darker groupings. While the Martensite formed is still quite adequate, the performance of this steel may not be as ideal as that in Fig. 4. Notice also that the hardness of the steel has dropped slightly.
Fig.5: Quench Temp = 800˚C. Max recommended quench temp.
Fig. 6 below shows the crystalline structure at a quench temp in water of 825˚C, after a 20 min. soak, followed by tempering at 180˚C for one hour, followed by air cooling. Notice how the crystalline structure has become less uniform than in Fig 5 after only a 25˚ increase in quenching temp.
Fig.6: Quench Temp = 825˚C. 25˚C greater than the manufacturer’s recommended quench temp. The crystalline structure is clearly inferior to Fig.5
Fig. 7 below shows the crystalline structure at a quench temp in water of 850˚C, after a 20 min. soak, followed by tempering at 180˚C for one hour, followed by air cooling. This time, a mere 25˚ increase in quenching temp has resulted in significant degradation in the uniformity of the crystalline structure as well as reduced hardness.
Fig.7: Quench Temp = 850˚C. The crystalline structure has degraded further.
Fig. 8 below shows the crystalline structure at a quench temp in water of 875˚C, after a 20 min. soak, followed by tempering at 180˚C for one hour, followed by air cooling. Once again, significant degradation in the uniformity of the crystalline structure and loss of Martensite is apparent.
Fig.8: Quench Temp = 875˚C. The crystalline structure has once again degraded further. This result is not acceptable in a quality blade, but the margin for error in terms of temperature differential is small.
Fig. 9 below shows the crystalline structure at a quench temp in water of 900˚C, after a 20 min. soak, followed by tempering at 180˚C for one hour, followed by air cooling. Gentle Reader will notice the many white “tissues” that have developed in addition to tempered martensite. The fibrous-appearing white stuff is considered retained Austenite, a formation that can later be converted into hard Martensite with some effort. Once again, just a 25˚ increase in quenching temp has resulted in significant degradation in the uniformity of the crystalline structure as well as reduced hardness.
Fig.9: Quench Temp = 900˚C. The crystalline structure has obviously become less uniform. Not acceptable.
Clearly, Shirogami No.2 steel is a very good tool steel, but it’s sensitivity to heat-treatment technique, and the necessity for knowledge, experience and care in working it are also clear.
Takeaway
What should Gentle Reader glean from this technical presentation?
The first thing to understand is that plain, high-purity, high-carbon steel that has been skillfully forged, quenched and tempered will exhibit the finest, most evenly-distributed hard carbides in a uniform crystalline steel structure mankind can economically produce. Such steel will become sharper than any other metal from which a practical chisel or plane blade can be forged.
This fact has not changed since ancient times, regardless of the hype and marketing of the mass-producers who can at best achieve comparatively mediocre results using modern high-alloy steels.
The second thing to understand is that, while it is not difficult to make high-carbon steel hard, nor to temper it to make a durable product, producing a uniform, durable crystalline structure that will become very sharp, will be especially resistant to dulling, and can be sharpened quickly requires serious skills of the sort that only result from many years of study under a master, and dogged commitment to quality control, especially temperature control and timing. In your humble servant’s opinion this makes chisels, plane blades and handsaws hand-forged from the high-quality high-carbon steels discussed in this article worthy of consideration by professional woodworkers who need sharp blades and have the skills necessary to maintain them properly.
If steel is the lock, then the crystalline structure the blacksmith creates in high-carbon steel through his skill, diligence and dedication is the key to the Mystery of Steel. It’s a lock and key mankind has been using since ancient times, a combination that is the foundation of our modern, extremely wealthy civilization. But it’s only been a handful of decades since we developed the technology that made it possible to really understand why the key opens the lock. Rejoice, Gentle Reader, for you live in technologically enlightened times!
I hope this discussion has been more helpful than confusing.
YMHOS
A cross-section of the Eidai tatara furnace (also pictured at the top of this article) with human-powered blowers to right and left forcing air into the fire at the furnace’s base. The red-hot furnace contains satetsu as the first layer resting on charcoal with the fire below. More layers of satetsu and charcoal are added as the process moves forward. The heat of the supercharged burning charcoal makes the iron more-or-less liquid, absorbing carbon (too much carbon, actually), and causing it to settle to the bottom of the furnace as Tamahagane, but it does not drop into what appears to be a void below. The complicated subgrade structures and combination of materials shown have several purposes, foremost of which is to provide a solid foundation for the furnace even when subjected to high heat. They also prevent groundwater from infiltrating below the furnace where it would otherwise rob heat complicating temperature control, as well as providing escape paths for any moisture below the furnace.
If you have questions or would like to learn more about our tools, please click the “Pricelist” link here or at the top of the page and use the “Contact Us” form located immediately below.
Please share your insights and comments with everyone in the form located further below labeled “Leave a Reply.” We aren’t evil Google, fascist facebook, or thuggish Twitter and so won’t sell, share, or profitably “misplace” your information. If I lie may my all my Martensite turn to mush.
Shibamata Taishakuten Temple, Katsushika, Tokyo est.1629
I met a traveler from an antique land, Who said—“Two vast and trunkless legs of stone Stand in the desert. . . . Near them, on the sand, Half sunk a shattered visage lies, whose frown, And wrinkled lip, and sneer of cold command, Tell that its sculptor well those passions read Which yet survive, stamped on these lifeless things, The hand that mocked them, and the heart that fed; And on the pedestal, these words appear: My name is Ozymandias, King of Kings; Look on my Works, ye Mighty, and despair! Nothing beside remains. Round the decay Of that colossal Wreck, boundless and bare The lone and level sands stretch far away.”
Here at C&S Tools we frequently use the term “Professional-grade” to describe our products. This is not a “term of art” sculpted from soggy newspaper for marketing purposes, but has an important meaning your humble and obedient servant will break down in this article so there is no confusion among our Beloved Customers and Gentle Readers.
To begin with let’s consider the term “professional.” The dictionary definition of a professional, and the one I intend, is a person recognized by his peers as having received a certain amount of intensive, prolonged training and education in his chosen occupation, has achieved some minimum satisfactory level of skill in the performance of that occupation, and is paid for his work and work product. That’s five factors including education, training, skill, occupation, and financial compensation.
We humbly accept as valid the premise that many individuals develop professional-level skills through their diligence and OJT without formal education or training especially in light of the current decrepit state of apprenticeship and training programs in most countries. If they then go on to make a living performing competent work for pay, they certainly qualify as professionals in my opinion. However, I do not accept the self-aggrandizing theory some put forth that anyone with skill and an artistic flair is a professional even if they aren’t paid for their efforts. Money talks and BS walks.
Woodworking professionals are committed to their trade long-term, and use their skills, time and tools to earn a living by making things for clients, customers or employers in accordance with an agreed-to design, specifications, cost, and schedule, normally formalized in a written contract. Therefore, unlike the talented amateur or hobbyist, the financial, schedule and contractual aspects of his job place a professional under constant pressure; If he fails to deliver the promised products consistent with the Client’s requirements and budget on-time he will suffer serious financial and reputational consequences.
By contrast, an amateur woodworker may be skilled and even routinely do museum-quality work, but since he faces little financial or reputational risk, tool inefficiency and failure to deliver on-time can only make things unpleasant, not catastrophic.
So what does this have to do with woodworking tools you say? Glad you asked.
While the professional woodworker too must resharpen his chisel and plane blades periodically, the sharper he can make them, the more wood he can cut between sharpenings, and the less time he must spend sharpening his tools, the more time and energy will be available to him to expend each day toward meeting his commitments and getting paid.
However, if the blade of a plane, chisel, knife or adze can’t be made very sharp, dulls quickly, is easily damaged, or takes a long time to sharpen, then it effectively impedes the professional’s work thereby reducing his income and potentially harming his reputation. It’s a simple calculation, but one most people, especially amateurs and scribblers who do not face the same pressures as the professional woodworker, neglect to perform, partly because they are never called upon to assign a monetary value to the time expended sharpening tools, something professionals do everyday when preparing binding bids (tenders) and cost estimates.
These are by no means new expectations, but in a time when amperage is more important than sharpness, dull blades go into the garbage to be replaced by factory-sharpened new ones, and precision is built-into the machinery used, many professional craftsmen have forgotten them.
The Japanese professional woodworkers I have worked with during my career spanning 45 years have been uncompromising regarding quality and schedule. And they are obsessed with sharpness. It’s in their DNA. This is the same DNA that for millennia has motivated Japanese blacksmiths to strive to forge better, sharper tools.
These blacksmiths and their professional woodworker customers have always been focused on real-world performance above all else. Not reputation or fancy names. Not appearance. Certainly not “mystery.” So what sort of performance should we look for in a “Professional-grade” tool? Very perceptive of you to ask.
Performance Criteria 1: Sharpness
The primary performance criteria one should demand a professional-grade plane, chisel, or handsaw satisfy is not how it looks or how much it costs but that it cut extraordinarily well. This high degree of sharpness depends on the following three factors:
1.1 Crystalline Structure of the Steel: The crystalline structure of the blade’s steel is the primary determining factor in sharpness since a blade cannot be made sharper than the carbide crystals exposed at the cutting edge will permit. If the crystals are large, loose and isolated, instead of small, well-supported and evenly distributed, sharpness will suffer. Excessive amounts of impurities such as sulfur, phosphorus and silica harm crystal formation. Chemicals such as chrome and molybdenum are added to most tool steels nowadays to overcome the negative effects of these impurities, decrease manufacturing costs, and to eliminate the need for advanced blacksmithing skills, but an unfortunate side effect of these alloys is their tendency to develop relatively isolated, large clumps of carbide crystals which reduce sharpness. Consequently, a professional-grade Japanese blade will be made from a pure high-carbon steel like Hitachi Metal’s Shirogami (White-label steel) No.1 and No.2, Aogami (Blue-label steel) No.1 and No.2, or Sweden’s Assab K120 steel. See this post and this post for further explanation.
1.2 Skills of the Blacksmith: The manufacturer of a chisel or plane blade can use the best steel in the world but if he doesn’t have the skills and dogged perseverance to work it properly, the crystalline structure of the finished blade and the degree of sharpness it can achieve will suffer, even if it survives forging and heat treatment. All our blacksmiths, without exception, are masters at using Shirogami No.1 steel, an unusually pure, plain high-carbon steel. Indeed, they have used it every working day over their entire 40~60 year careers. All of them are self-employed and work in their own one-man smithies. Their skills are not suited to mass-production, nor can they be learned in a few weeks or even a few years by factory workers in China, Mexico or Ohio. Feeding materials into a production line won’t cut it.
Mr. Nakajima (1936), blacksmith for our Nagamitsu brand chisels (retired).Mr. Nakajima’s smithy, as simple, unassuming and compact as they come. The sinister-looking black machine in the center of the frame is called a “spring hammer.” It uses no hydraulics or pneumatics at all. An electric motor makes the linkage attached to the arched leaf spring assembly front and center move rapidly up and down. This in turn causes the square-faced hammer connected to the leaf springs by two arms to move up and down impacting the anvil below it where Mr. Nakajima uses it to beat the holy heck out of the yellow-hot steel he heats in the gas-fired charcoal forge to the immediate right of the spring hammer. His quenching tank filled with water is buried in the floor in front of the spring hammer covered by a wooden lid which he uses as a seat. The gap between the lid and the tank’s edge is where he inserts tools to quench them. There is a pit located in front of the spring hammer to accommodate his legs when forging. A larger rectangular anvil is located to the right of the pit. Mr. Nakajima has been making chisels here since he was 14 years old. He knows a thing or two about forging and heat treating chisel blades.Mr Nakano, blacksmith for our Sukezane brand chisels (retired).Mr. Nakano’s Smithy
1.3 Skills of the Sharpener: The finest blade forged by the world’s best blacksmith will become no sharper than the physical skills and diligence of the person who maintains and sharpens it. There are no shortcuts, tricks, books, videos or classes that can transfer those skills through osmosis. I have shared information through the series of 30 articles on this blog that will help, but the end-user must develop the necessary skills in their own eye and hands through their own efforts. Fortunately, anyone with at least 1.5 hands, one eye and some determination can obtain professional-level sharpening skills. Please do it.
Mr. Takagi Junichi (1937~2019), sharpener and Japan’s last adze blacksmith (RIP).Mr. Nakano Takeo (1941), plane blade blacksmith extraordinaire, expounding on the Mystery of Steel from his living room
Performance Criteria 2: Cutting Longevity
A professional-grade tool must remain usefully sharp a relatively long time in order to precisely cut more wood between sharpening sessions. A blade that dulls quickly is inefficient, irritating and makes the workman look lazy. A professional in Japan can’t allow such poor-quality tools a home in his toolbox. This is the most significant difference between Western and Japanese woodworking tools. Two factors govern cutting edge longevity:
2.1 Excellent Crystalline Structure: This factor is directly influenced by Nos 1.1 and 1.2 listed above. A blade with poor crystalline structure will dull quickly and may even fail.
2.2 Hardness: Be not deceived: a blade may have excellent crystalline structure, but if it is soft, it will dull quickly, regardless of marketing claims. The hardness of professional-grade Japanese planes, chisels, kiridashi kogatana knives, and carving chisels should measure in the neighborhood of 65~66 on the Rockwell C scale, as do all our tools. The hardness of Western chisel and plane blades nowadays is typically Rc55~60, with a few going as high as Rc63, the nature of their relatively unsophisticated design making greater hardness likely fatal to the blade. At an average hardness of Rc60~63, consumer-grade Japanese chisels and planes are harder than their Western counterparts, but are still softer than our professional-grade tools. Indeed, the laminated construction and hollow-ground ura of Japanese chisels and planes are features essential to ensure a hard blade will perform reliably even if motivated with a steel hammer.
This extraordinary hardness does however require the user to employ a few professional-grade skills, which is why tools targeting amateurs and for export to markets where consumers typically lack these skills are intentionally made softer. Indeed, as the number of professional users of planes and chisels has decreased in recent decades, what were once well-respected Japanese tool brands have strategically reduced the hardness of their blades to avoid warranty issues and appeal to an inexperienced amateur market. These are not bad tools, but neither are they “professional-grade.” What is most concerning is the the way they are marketed, however.
Shibamata Taishakuten Temple: Beam-end carving in zelkova wood of a mythical creature called a Baku
If used, eventually all blades must either be resharpened or replaced. But if a woodworking blade takes a long time to sharpen, if it takes special equipment to sharpen, or if it is unpleasant to sharpen, not only is it uneconomical but it will not be loved. Professional-grade Japanese chisels and planes are easily and quickly sharpened despite the hardness of the steel. Indeed, they are a pleasure to sharpen. There are reasons for this:
3.1 Chemical Makeup of the Steel: Steels that contain alloys such as chrome, molybdenum, vanadium and/ or tungsten are ideal for mass-production by untrained factory workers and are constantly praised in marketing sprays as “ tough” and “abrasion resistant,” but experienced professionals know the real meaning of these phrases is: “a time-wasting pain in the neck to sharpen.” Our blacksmiths do not use such adulterated, uncooperative steels. The blades of professional-grade planes, chisels and knives will ride sharpening stones gladly, can be quickly sharpened, and indeed are a pleasure to sharpen.
3.2 Blade Design – The Ura: The blades of quality Japanese chisels and planes have a surface that corresponds to the “flat” on Western chisels, but is called the “ura.” The ura in turn has relatively large hollow-ground area called the “uratsuki.” This detail makes it easy to quickly sharpen the extra-hard steel used in our plane and chisel blades while maintaining the ura in a flat plane. The importance of a properly made ura cannot be overstated.
3.3 Blade Design – Laminated Construction: While extra-hard steel cuts a long time, it can be brittle making a blade fragile, which is why Western chisels, with their homogeneous construction, must be made softer to prevent them from breaking. In professional-grade Japanese chisels, the hard steel cutting layer is skillfully forge-weld laminated by hand to the blade’s body comprised of a softer low-carbon steel or iron called “jigane” that protects the extra-hard steel cutting layer from snapping in half while still being easy to sharpen.
Our blacksmiths do not use inferior pre-laminated steel, despite its convenience and economical advantages.
There are other design and fabrication details characteristic of professional-grade tools which your humble servant will not delve into here.
The Amateur and the Professional-grade Tool
Don’t let the discussion above discourage Gentle Reader from using our tools even if you aren’t a professional woodworker because, while tools are terribly vain and frequently gossips, so long as you let them cut wood, they are happy regardless of their Master’s profession. And for those who use chisels, planes and knives for the joy it brings, as I do now, the extra sharpness and edge-retention capability, and the satisfying feeling found sharpening them will increase the pleasure you enjoy when woodworking.
When using professional-grade Japanese woodworking tools, there are few things you should keep in mind. The first thing is that, since their steel is harder than that found in tools intended for amateur use, you mustn’t use them to pry wood, pull nails, chip concrete, or open paint cans. They are not sharpened screwdrivers stamped out in lots of thousands by peasant farmers in Guangzhou, but elite tools born to cut wood. They simply won’t tolerate such amateurish abuse.
The second thing to understand is that you need to learn how to sharpen and maintain them properly. This includes using flat sharpening stones and maintaining a proper bevel angle. More details are available in our Sharpening Series of posts.
If you can show the tools the same respect the craftsmen that forged them did, then you are well on your way to becoming professional-grade yourself, regardless of your day job. We see it as our duty to help you along that path.
The Future of Professional-Grade Tools
As we look to the future, please note that it is common practice by some manufacturers in Japan to mass-produce chisels and plane blades from inferior materials with mediocre crystalline structure and lesser hardness, but identical in appearance to professional-grade tools, and sell them at high prices to uninformed consumers who are none the wiser. These modern corporations cleverly use dubious marketing techniques that invoke “mystery” and “ancient traditions” when in truth they have replaced traditional materials and techniques with modern mass-production materials and techniques developed during the last 3 decades specifically for mass-producing mediocre-quality, consumer-grade kitchen knives. After all, one can’t tell the quality of a steel blade’s crystalline structure by looking at photographs.
While lower-quality tools purveyed using deceptive marketing strategies will no doubt continue to be profitable for some, our Beloved Customers know how to sharpen and how to properly evaluate a blade. They appreciate honest value more than artful marketing, so we refuse to insult the intelligence of the professionals that are the majority of our clientele through such shabby nonsense.
The demand for professional-grade chisels and planes has decreased dramatically among modern consumers in Japan at the same time those master blacksmiths with the skills and determination to make them are either retiring or moving on to the big lumberyard in the sky. And with the decreased demand for such tools, Hitachi Metals has practically ceased production of Shirogami and Aogami steels. Truly, the strongmenholding up the veranda (縁の下の力持ち)are gradually disappearing.
The future supply off these excellent tools looks bleak, but we hope to continue to be able to provide them to our Beloved Customers for a few more years, God willing and the creek don’t rise.
YMHOS
If you have questions or would like to learn more about our tools, please click the “Pricelist” link here or at the top of the page and use the “Contact Us” form located immediately below.
Please share your insights and comments with everyone in the form located further below labeled “Leave a Reply.” We aren’t evil Google, fascist facebook, or treacherous TikTok and so won’t sell, share, or profitably “misplace” your information.
Just ask the next baku you meet if it ain’t so. They eat nightmares, comfort small children in the dark, and simply can’t tell a lie, you know.


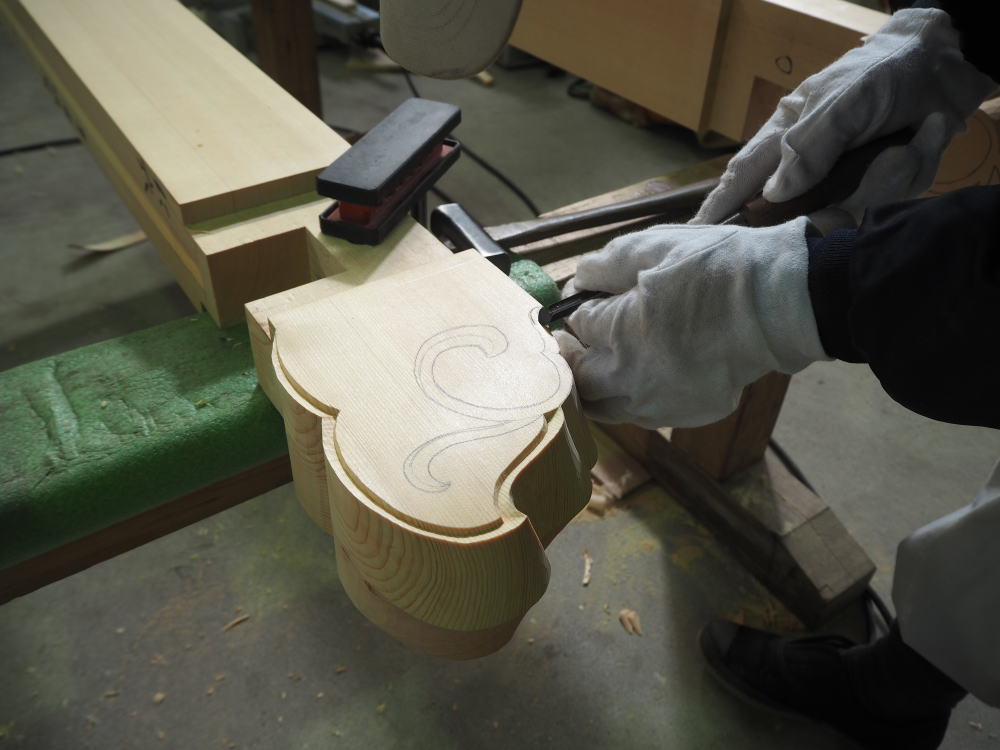


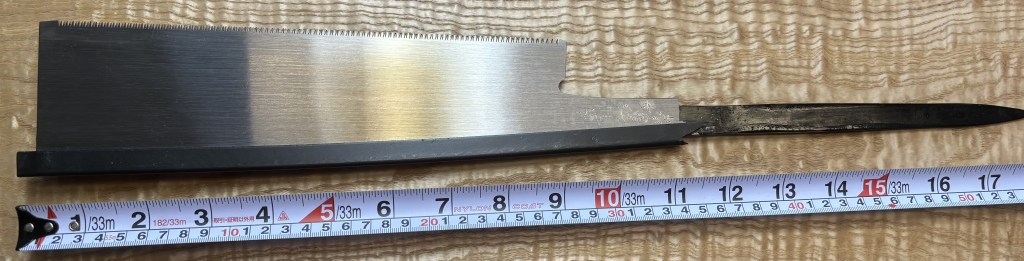


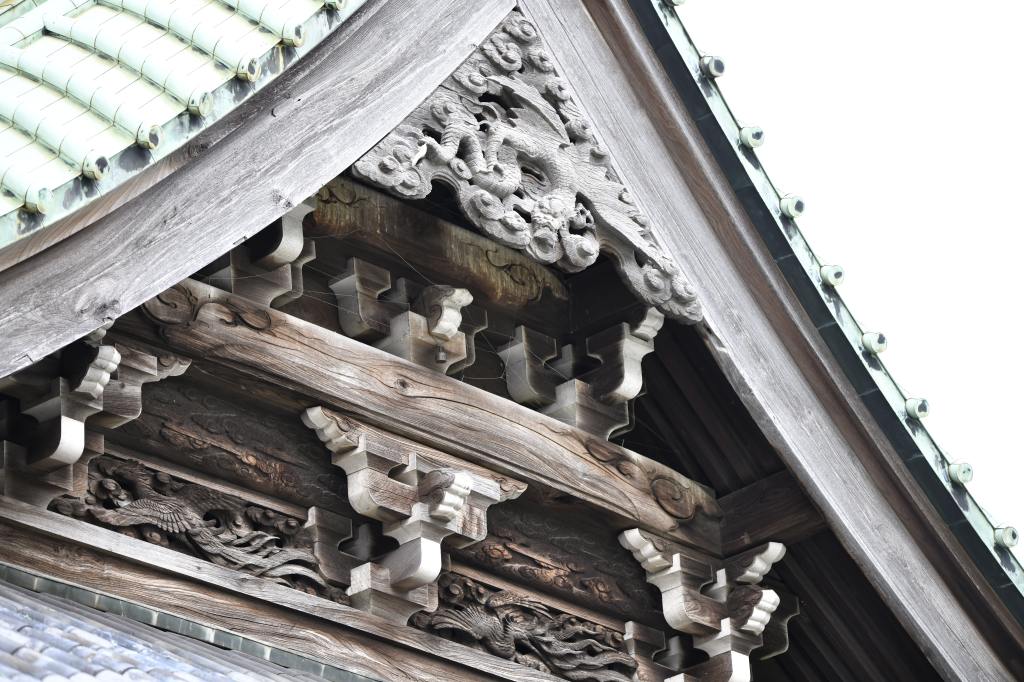
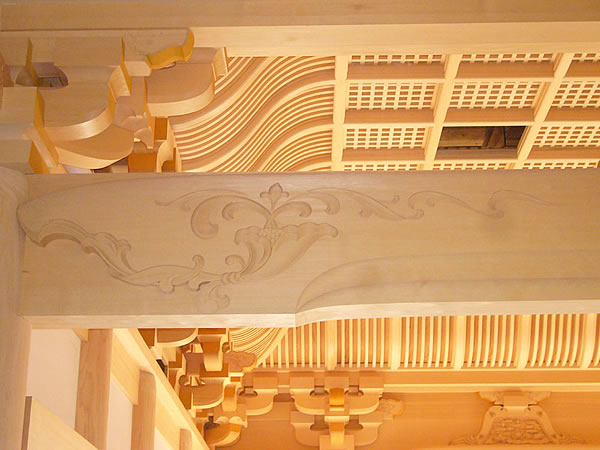


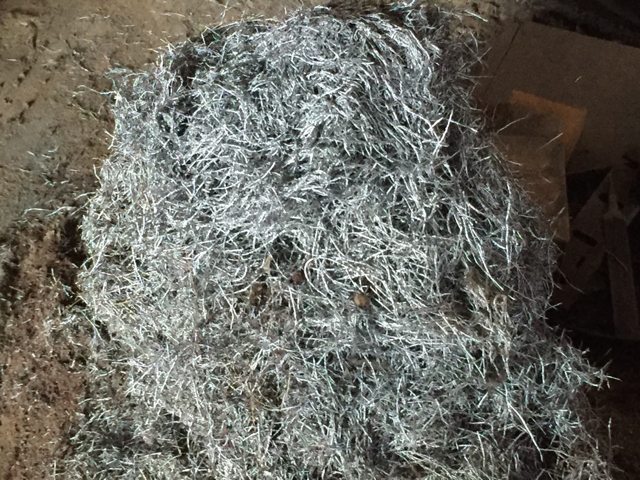


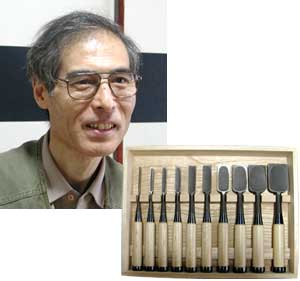


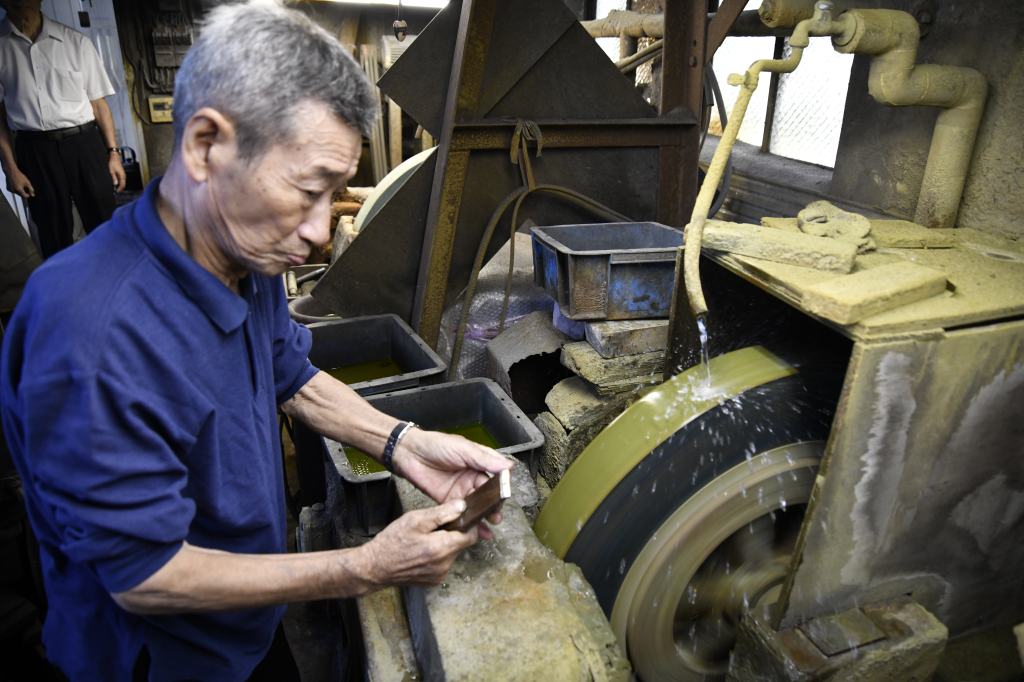


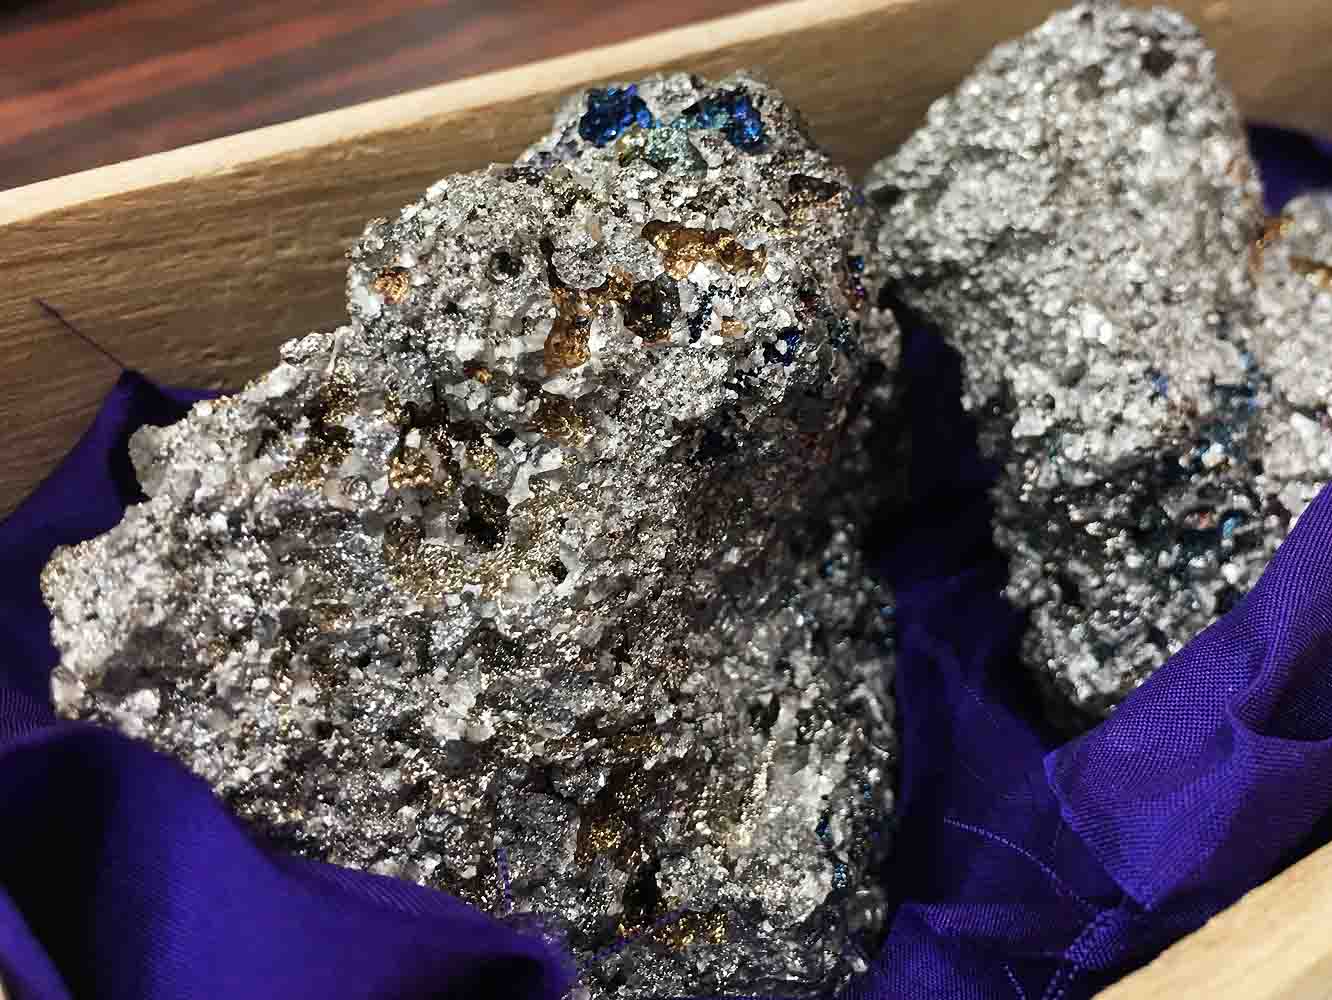


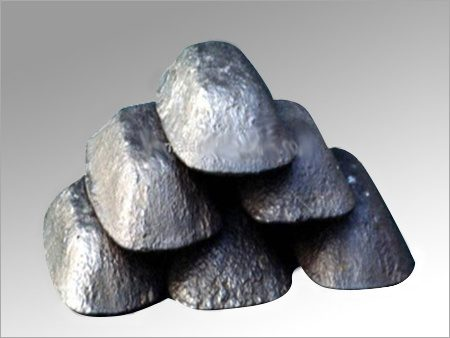


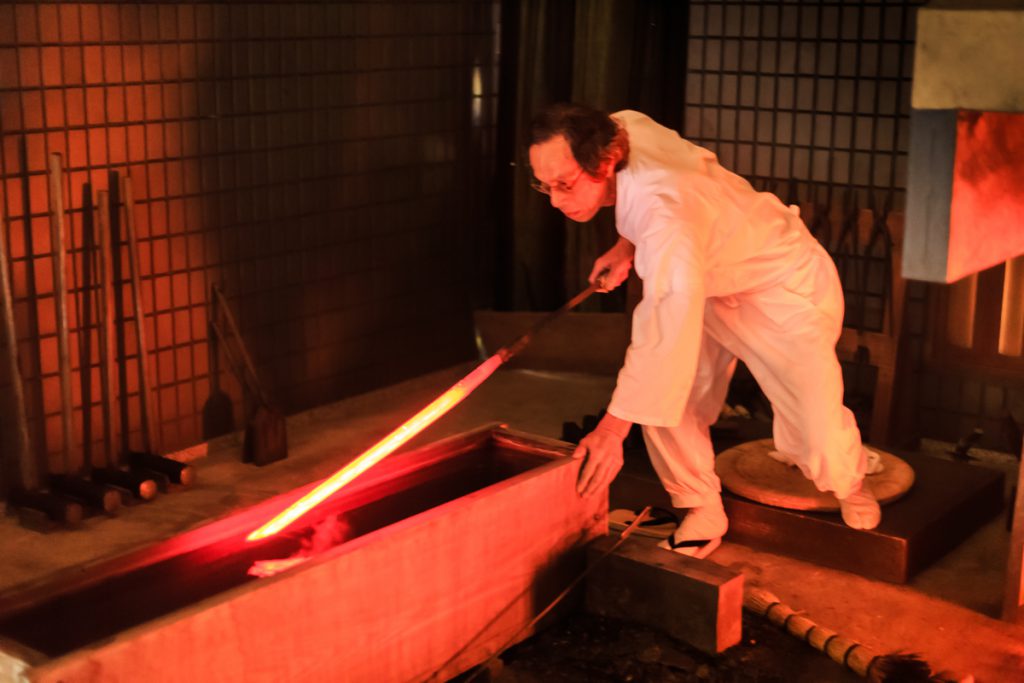


Leave a comment