
Perfection is a necessary goal, precisely because it is unattainable. If you don’t aim for perfection you cannot make anything great, and yet perfection is impossible.
Leonard (the cutter, not tailor) – The Outfit (2022)
We occasionally hear of people (not Beloved Customers, of course) complaining about Japanese chisels. Like much idle opinion expressed on the internet, this squirts and bubbles forth from a few vocal amateurs lacking real experience or skills, but it’s undeniable that, compared to the sharpened screwdrivers sold as chisels in Western countries nowadays, a little special knowledge, extra diligence and some actual hand skills are necessary to meet the challenges of professional-grade Japanese chisels.
In this article your humble servant will list some challenges one may face when first learning how to use and maintain Japanese chisels, and will suggest straightforward solutions for he who has ears to hear. But, because nothing except a movie studio executive’s reserves of morality exist in a vacuum, allow me to first provide some background about the way our hand-forged chisels are made, as well as the division of labor between the craftsmen involved, and explain how this influences modern attitudes among professional craftsmen.
Terminology & Relevant Links
The terminology used in this article may be unfamiliar to some, so to avoid confusion, allow me to immediately clarify four of them. In addition, the articles at the links below contain relevant information you may find useful.
“Ura” refers to the entire side of a Japanese chisel’s blade opposite the surface with the brand, not including the neck, of course.
“Uratsuki” is the hollow-ground depression at this same surface. This surface is tastefully black in our chisels. Others prefer this area to be polished.
“Lands” refers to the planar, polished surfaces at the ura surrounding the hollow-ground uratsuki on four sides.
“Itoura” is the most important of the four polished lands (itoura, side lands, and neck land) surrounding the uratsuki, being located immediately adjacent the cutting edge and forming one half of it. It’s important because, without it, the blade won’t cut.
The articles at the following links may prove informative, or at least amusing.
The Ancient Art of Hand Forging
Sharpening Part 6 – The Mystery of Steel
Sharpening Part 7 – The Alchemy of Hard Steel
Sharpening Part 9 – Hard Steel & Soft Iron 鍛接
Chisel Production
Beloved Customer has probably visited neither a modern tool factory nor a traditional chisel smithy, so a brief summary of the steps our blacksmiths employ in producing a hand-forged, high-quality, professional-grade chisels may provide useful insight.
Please note that the hardware store-grade Japanese chisels mass-produced for export that Westerners are accustomed to are not produced this way, and their performance suffers accordingly.
The Smithy
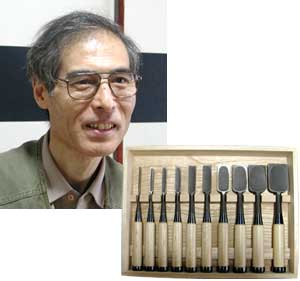
Our chisels are handmade by either single blacksmiths, or master & apprentice blacksmith shops, or father & son smithies using mostly old equipment, except for Mr. Usui of Sukemaru brand pictured below who works alone nowadays, has an engineering degree, and loves precision equipment.


Materials
The process begins with materials.
Nowadays, the blacksmith purchases processed iron and steel from wholesalers in ready-to-use strips. In the case of C&S Tools’ chisels, our blacksmiths use Hitachi Metal’s Shirogami No.1 steel exclusively along with a variety of low-carbon steel/iron called “gokunantetsu” 極軟鉄 meaning “extremely soft iron.” Neither of these products are currently being produced.
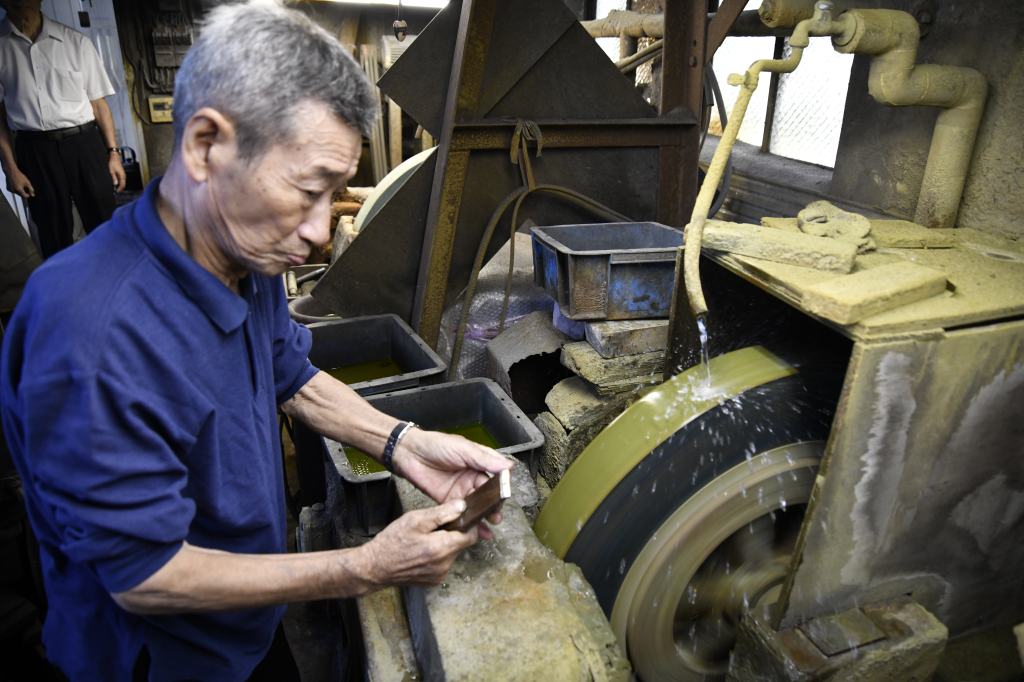
With materials in hand, the blacksmith will use his forge fired by gas and charcoal and fed forced air by an electric blower to help create the necessary atmosphere and high temperatures.
Just in case you are interested, the traditional Japanese hand-operated blacksmith’s bellows is a rectangular wooden box with a horizontal wooden rod penetrating one end attached to a flat wooden piston inside the box sealed with leather or cloth gaskets as shown in the photos below. Sometimes the box is lined with glass for smoother operation and a better air seal. The blacksmith, usually sitting on a cushion on the floor of his smithy, or on a stool in a pit near the forge, operates this contraption with his left hand or left foot (yes foot) while manipulating hot metal with hammers and tongs with his other hand(s). Several of our blacksmiths still have these old bellows gathering dust in their workshops, but none use them anymore.


Forging & Laminating
Quality Japanese woodworking chisels are hand-forged and of laminated construction.
On the other hand, low to medium-quality hardware store-grade chisels, which have replaced all but a very few of the quality chisels made in Japan nowadays, and comprise all the chisels produced for the export market, are not hand-forged by trained and experienced master blacksmith but are mass-produced by factory workers in cookie-cutter fashion with dies and presses using a lower-grade pre-laminated steel (aka “rikizai” or “fukugozai”) produced by steel mills, a commercial product originally developed for stamping out supermarket-grade kitchen knifes by the thousands. The steel used is Blue Label steel at best, but ordinarily a cheaper equivalent material such as common SK is used. This mass-production technique typically involves only a single “heat,” and is over in just two, at most three, stamps of large presses. BTW, you may want to consider this fact next time you pay hundreds of dollars for a mass-produced Japanese kitchen knife.
The resulting products look good in their colorfully printed plastic and cardboard containers, are inexpensive to make, and quite profitable, but the crystalline structure of their steel, an essential physical detail invisible to the naked eye, and one that determines a tool’s cutting and sharpening performance, is greatly inferior to the results the more traditional, labor-intensive techniques and highest-quality materials our blacksmiths employ routinely yield.
In the traditional method, the blacksmith heats, cuts, and shapes strips of iron and steel into the necessary components using the heat of his forge, an anvil, various tongs, chisels and shears.
He then forge-welds a slip of high-carbon steel to the low/ no carbon iron strip which will become the body of the chisel using his forge, an electric motor- powered spring hammer (or hydraulic hammer in one case), his anvil, tongs and hand hammers as shown in the photos below. No presses.


With the lamination work done, he then uses these same tools combined with a few open-faced hand-dies to shape the chisel.
This process of forge-welding and shaping involves at least three “heats” (heating and cooling cycles) combined with hundreds of hammer blows. The purpose of all this dramatic fire, violence and unholy racket is to not only (i) shape the chisel blade, but to also (ii) reduce the size of the carbide crystals in the steel and (iii) distribute them evenly, preparing the “fine-grained” crystalline structure of the steel so important to quality cutting tools and indeed modern civilization.
Modern mass-produced and low-quality chisels do not go through this process to the same degree and their crystalline structure suffers greatly in comparison, a difference visually indiscernible without destructive testing or the aid of a scanning electron microscope, but one that craftsmen and warriors have highly valued since steel replaced stone, copper and iron in their tools, a difference once considered supernatural.
Annealing/Normalizing the Blade
The blacksmith will then anneal the blade by heating the steel to a specific “recrystallization” temperature”(about 750˚C or 1380˚F for Shirogami No. 2), and allowing it to “soak” at that temperature for a specific amount of time. He will then place the blade overnight in a loosely-sealed container filled with rice-straw ashes, a high-carbon/low oxygen atmosphere which will “relax” the steel removing internal stresses and making it dead soft and more uniform, chemically speaking. While not sexy, this step is critical to making a high-quality blade, and while it has been used for by the best swordsmiths for thousands of years, it’s absolutely scientific.
The blacksmith will then refine the shape of the blade using hammers and electric grinders.
Quenching the Blade
Quenching is the magic at the heart of The Mystery of Steel. This process begins with the blacksmith applying his own special “medicine” to the blade, an unappetizing, gloppy brew made from various secret materials, usually including sharpening stone mud, clay, rice straw ashes, steel filings, dragon dandruff & etc., that serves to control differential cooling.
When this medicine is thoroughly dry and everything is just right, he will heat the blade in a gas/charcoal fire to 800˚C (1470˚F) for a very specific time period , after which he will plunge it into water “quenching” and quickly cooling it. He may repeat this step one or two more times.
This sudden cooling creates drastic changes in the organization of the iron and carbon molecules in the steel portion of the blade. On the other hand, the iron “jigane” body of the blade lacks the essential carbon ingredient and so its hardness does not change significantly.
Extremely hard particles called “carbides” are instantaneously created during this process. These become locked into a particular crystalline structure in the steel with a greater volume than before quenching. That’s right, the steel swells as it’s suddenly cooled.
As you would expect, this produces high differential stresses in the blade causing the steel to warp, movement the blacksmith must compensate for when shaping the blade before quenching, and while less sexy and more vexing, sometimes by corrective measures after quenching.
Naturally, the chemical nature of the steel selected combined with the blacksmith’s mastery of his craft, and of course the whims of the Gods of Handsaws, greatly influence the resulting warpage, demanding great skill and some luck if disastrous failures and expensive wastage are to be minimized.


Tempering the Blade
After quenching, the high-carbon steel portion of the blade is excessively hard and brittle, too brittle for practical use in fact, so the blacksmith will next “temper” the blade by reheating it to 300 °C (570˚F) ~ 400˚C (750˚F), a temperature lower than that used for forging, for a very specific time period. His precise control of time and temperature in this process will make the difference between a fine blade and a lump of costly scrap.
Tempering reduces the amount of hard carbides in the steel, producing a less-rigid crystalline matrix, reducing hardness, and most importantly, increasing toughness.
Every blacksmith has his own techniques, but his selection of steel and his skill in using it are critical. Some steels are easier to forge and heat treat than others producing fewer failures and rejects greatly impacting productivity.
At this point in the process either the blacksmith, his apprentice, or a subcontractor will grind and sand the blade to final shape and finish. He will also grind and finish the hollow “uratsuki” to form the “ura.”
Finishing the Blade
The next few steps are where things can go crazy if the blacksmith decides to refine the shape and finish of the tool by investing extra time, effort and tools such as fine-grit grinders and sanders, and hand files, for it takes a careful eye, an artistic sense of line and proportion, a steady hand, and many hours to achieve the perfect surfaces found in the best chisels as represented by the products of the Yamazaki brothers under the “Ichihiro” (or “Hidari no Ichihiro,” or “Tsuki Ichihiro”) brand.
The chisel in the photo at the top of this page shows the blade of a beautifully shaped and finished large fishtail shinogi ootsukinomi by Nora.
Indeed, this extra cosmetic work, which does not influence performance in any way, will increase the cost of producing a single chisel of the same performance 5~10 times. Would Beloved Customer be willing to expend that much additional money for improved cosmetic appearance in a working tool? Your humble servant has scratched that sculptural itch many times (too many times, says She Who Must Be Obeyed), but most craftsmen are not willing to lay out the additional hard cashy money.
In fact, many Japanese craftsmen, even those who have a fetish for beautiful tools and are willing to pay the necessary funds to procure them, will usually leave such tools safely at home or in the workshop to save them from Darwinian adventures, and take a less valuable set of chisels to the jobsite instead, another layer of expense. Ah, the sacrifices we make for art! (ツ)


The Sharpener
At this point, the blacksmith’s job is done and the blade is handed off to a sharpener. Please note that some blacksmiths, including Mr. Nakano, our master plane blade blacksmith, prefer to sharpen their blades themselves, and for good reason.
Sharpeners typically do piecework and so strive to do as many chisels as they can as quickly as they can. The problem we face lately is that the number of skilled sharpeners in Japan has drastically decreased leaving us few choices. Sometimes the quality of the sharpening job is less than perfect, something that is also reflected in the low cost and less-than-perfect precision of the ura lands. We think it’s a fair trade. Please note that these are all conscious decisions agreed to in face-to-face discussions with the craftsmen, not default specifications.
The Handle Maker

The sharpened chisel blade next goes to a handle maker. He has an important job because the handle is the interface between Beloved Customer and the tool, and through which tons and tons of impact forces are transferred to the cutting edge.
Mass-produced chisel handles often have poor tolerances that don’t accommodate the steel hoop and ferrule well, or that don’t transfer the hammer’s energy properly producing tiring harmonic vibrations in the tool. We don’t use inexpensive, mass-produced handles but have Mr. Hasegawa custom make them himself from select wood to match our blades and the selected metal furniture. Even then, it is wise for each end-user to perform a final setup themselves for a more perfect fit.
To conclude the discussion about production methods, it is important to understand that our tools are produced more in keeping with traditional methodologies and division of labor by specialist craftsmen, rather than automated mass-production methods using unskilled factory workers, cheap materials, and higgledy-piggledy techniques.
The Chisel Owner’s Role
Why is all the stuff discussed above relevant, you ask? Good question. It matters because until recently in Japan, and in even Europe, it was standard practice for a craftsman to commission a chisel blade directly from a blacksmith who would provide a shaped, ground and filed but unsharpened piece of metal with a squared-off end cut at more-or-less 90˚.
It was the end-user’s responsibility to grind and sharpen the blade’s blunt cutting edge himself. Ergo no sharpener.
He would purchase the iron furniture (hoop or katsura and kuchigane or ferrule) from another specialist blacksmith shop, and make his own handle with his own tools from his own wood. Ergo no handle maker.
It’s only been recently with the rise of large cities and cheap distribution networks made possible by rail and roads that finished products have become commonly available as retail products.
Please remember that, despite what the movies present, for many thousands of years prior to the Meiji period and the Westernization of Japan, it was a not a single, united country, but a collection of desperately poor medieval fiefs ruled by ruthless despots in which hundreds of thousands of common people, including woodworkers, died every year due to internal wars, illness and famine. Craftsmen too were poor and had little disposable funds.
My point is that self-respecting craftsmen worldwide disdained paying others to either sharpen their blades or make any components for their tools that they could make themself. The remnant of this historical fact seen nowadays is that the experienced craftsman in Japan does not expect a perfect tool, but expects to perfect his tools himself to his own taste.
Let us next get to the heart of the subject and consider the typical challenges one must deal with in the case of hand-forged chisels, beginning with the most common one.
Challenge No. 1: The Ura Is Not Planar
Ideally, the polished lands surrounding the four sides of the hollow-ground uratsuki are all perfectly planar, but as the erstwhile cutter quoted at the top of this article said, “Perfection is Impossible.” And your humble servant would add that it ain’t even necessary.

Despite this obvious truth, some inexperienced Gentle Readers expect the lands of the ura surrounding the hollow-ground “uratsuki,” the area corresponding to what is called the “flat” in the case of Western chisels, to be perfectly planar, even though Western chisels seldom have perfectly planar “flats,” but only what look like flat surfaces. Your humble servant agrees that perfection is nice, but it is not a reasonable expectation in the case of medium-priced professional-grade tools.
Gentle Readers who expect the appearance of CNC precision in their tools should either stick with the sharpened screwdrivers China produces in such abundance and which are sold in the West as “chisels,” or plan on spending 5~10 times the cost of mass-produced chisels, assuming you are able to find anyone that makes such quality nowadays.
In any case, an ura that is not perfectly planar is not a defect. The article at this link can help you understand how to deal with ura problems in an efficient and professional manner.
Challenge No. 2 – The Blade Chips
Our blades are intentionally made harder than most Japanese chisels produced nowadays because hardness is essential in a professional-grade chisel. As explained at great length in the article linked to above about “Professional-grade Chisels,” on condition the crystalline structure of the steel is what it should be, a hard blade will usually become sharper, will cut more wood, and will stay sharper longer than a relatively softer blade thereby reducing the frequency of sharpening, consequently increasing the professional’s productivity. This is an essential performance criteria in a professional-grade chisel.
But hardness is not all blue bunnies and fairy farts because a harder blade is less tough than a softer blade and can be damaged if abused. Warranty claims from amateurs and fools who use their chisels as if they are screwdrivers or scrapers instead of finely-made cutting instruments and then blame the blacksmith for the damage their ham-handed abuse wreaks are exactly why nearly all Japanese chisels produced nowadays are intentionally made softer and less efficient. Most are still harder than Western chisels, make no mistake, but they are too soft for professional use.
Our chisels, on the other hand, are forged and heat-treated to maximum practical hardness as required by top-tier professional Japanese woodworkers.
Beloved Customer should adopt the four solutions described below so as to not abuse your chisels thereby preventing chipping and keeping your eager blades cutting as long as possible.
Solution 1 – Maintain a Proper Bevel Angle: Please pay careful attention to maintaining a proper bevel angle, one that will adequately support the extreme cutting edge against chipping. 27.5~30˚ is standard. Why is this important? Improper bevel angles are the primary cause of cutting-edge chipping. The solution? Procure a bevel angle gauge, use it frequently and correctly, and pay attention because the construction of Japanese chisels is conducive to the bevel angle gradually decreasing over many sharpening sessions. Please read about Supernatural Bevel Angles for more details. Silver crosses and garlic necklaces are optional.
Solution 2 – Cease and Desist Tool Abuse: Your chisel is a highly-refined tool specialized for cutting wood and must not be to be used for anything else. Period. Don’t use the cutting edge of your chisel to open paint cans, turn screws, scrape gaskets, or even pry wood chips out of mortise holes because such abuse will place forces on the cutting edge in directions it is not designed to handle dulling the blade quickly, and maybe even causing it to chip. Seriously.
Solution 3: Shun The Chisel Wiggle: Don’t make your tools perform the lewd “chisel wiggle” when cutting mortises, for such unseemly gyrations will damage their cutting edge. Just don’t do it. For a more detailed explanation, please see the article at this link.
Solution 4: Cut Only Clean Wood: Don’t use your precious chisels, planes or saws to cut nails, screws, concrete, rocks, sand or dirt. What? None of the wood you use is infested with such evil substances? How do you know unless you check? Please see the article linked to here to better understand The Mystery of the Scratched Blade.
Challenge 3 – Blades are Difficult to Sharpen
As mentioned above, the blades of our chisels are especially hard by design to become sharper and stay sharper longer than standard chisels thereby improving the craftsman’s productivity. But given the same area of steel, measured in square inches or square millimeters, harder steel takes more time and/or abrasive effort to sharpen, as I’m sure you’ll agree. So how can one sharpen this harder steel efficiently?
Solution 1 – Use Diamonds: Use quality, flat diamond stones/plates instead of regular stones (although regular stones are almost as quick if used properly and a lot cheaper).
Solution 2 – Use Skill: Learn how to sharpen your chisels in a professional manner. We have a series of 30 articles beginning at this LINK about sharpening Japanese blades that may prove helpful.
Solution 3 – Reduce the Frequency of Sharpening: There seems to be two or three mindsets about sharpening in the world. One is what I call the Teutonic Solution, which is to make the chisel’s blade soft and easy to sharpen. This also makes the chisel tougher and less likely to chip, while at the same time obviating the need for quality steel, advanced blacksmithing techniques, or the exercise of rigorous quality control, protecting the manufacturer and retailer against warranty claims. On the other hand it means the blade will never cut very well, and it will dull quickly. For those who don’t need sharp blades and/or lack sharpening skills, this is a good solution, I suppose, but the poor-quality work such blades can accomplish, the excessive time and sharpening stone they waste, and their decreased useful lifespan is unacceptable to professional Japanese woodworkers.
The other mindset I call the British Solution, which means a medium-hard blade; A compromise yielding more efficient, but nonetheless compromised results.
The third mindset is the Japanese one, which is to make the blade as hard as practical. It was once the same mindset in Europe and America too, but no longer. Please see the article at this link for details.
This solution is to use your blades in accordance with the principles detailed in Challenge 2 above, and maintain them properly thereby reducing the frequency of sharpening.
Solution 4 – Reduce the Amount of Sharpening: The essence of this solution is to sharpen your blades efficiently, so that less metal must be abraded/polished and turned to mud during each sharpening session. For this solution to be effective Beloved Customer must develop an essential skill, namely a sense of when your tool has dulled to the point where it is best to stop work and resharpen the blade while it can still be quickly and efficiently resharpened thereby saving time, steel and stone, instead of banging away with the chisel until the edge deteriorates to the degree it will take major effort and excessive time on rough stones to resharpen. This is a vague skill that takes time to obtain and self-control to implement, but nonetheless it’s an important professional skill and one worth developing.
Challenge 4 – Handle Setup is a Pain in the Assets
Your humble servant has performed setup procedures on hundreds of chisels, and while it can be pleasantly meditative at times, indeed the perfect opportunity to bond with a new tool, I acknowledge it’s sometimes a burden. We recommend Beloved Customers perform a full “setup” on the chisels they purchase from us in accordance with the instructions in the article at this link. Why? Because it will help the chisel’s handle last longer and sometimes will make the chisel perform better. That said, while not doing all the setup steps described in the article will not make your chisel self-destruct, it may cause you to inadvertently damage its handle over years of hard use.
Compromise Solution – Setup Only The Hoop: If you can only do one step in the setup procedures for your chisels, chamfering and fitting the hoop is the most important. All else can wait if it must.

Challenge 5 – The Mystery of the Disappearing Itoura
As mentioned above, the itoura is the land at the ura located immediately adjacent the cutting edge. In fact, it forms one-half of the cutting edge. Sharpening the blade’s cutting edge makes the blade gradually shorter and the itoura gradually narrower, eventually making it disappear entirely, unless proper technique is employed. Please note, however, that a narrow itoura is not a bad thing up to the instant it ceases to exist. So, how best to deal with the Mystery of the Disappearing Itoura?
Solution 1 – Balance the Abrasion of the Itoura and Other 3 Lands of the Ura: Besides making the blade sharper, abrading the ura uniformly during sharpening produces the following two consequences: (1) All four of the lands surrounding the uratsuki (hollow-ground depression at the ura), especially the itoura and side lands (ashi), gradually become wider, each to varying degrees; and (2) The uratsuki gradually becomes shallower. The solution your humble servant presents here is to pay attention to the itoura’s width, and to abrade the ura at a pace and in a focused manner that maintains a useful itoura even as the blade becomes shorter, but without excessively wearing out the uratsuki. A balancing act of sorts.
To do this, besides having an attentive eyeball, and while it may seem counterintuitive, you must not focus abrasion evenly over all four lands of the ura, but instead focus finger pressure and therefore abrasion primarily at the itoura instead, while at the same time keeping the 4 lands at the ura more-or-less planar. This is counterintuitive to people accustomed to the uninterrupted slab of apparently (but seldom actually) flat steel on Western chisels, but it requires the sharpener to apply focused, fingertip, point control instead of just chugging a beer, plopping the blade’s ura on the stones, leaning in and grinding away like a badger digging a juicy gopher out of its hole. This hand/eye skill is one the woodworking gurus selling books and classes either don’t know or overlook, shame on them, and the goobers on NoobTube never even consider.
Solution 2 – Restore the Itoura Through Uradashi and Uraoshi: The Mystery of the Disappearing Itoura is typically more of a problem for plane blades than chisels, but the same techniques used for plane blades can be used to restore the itoura of a chisel through a couple of processes called “Uradashi” and “Uraoshi” described in great detail at the article linked to here. However, please note that, while these techniques work well on plane blades and carving chisels, they do not work as well (or at all) on narrow chisels due to the extra-rigid construction of their blades. Consider yourself duly warned.
Solution 3 – Sharpen the Ura Using Ultra-fine Stones Only: Here in Japan the sight of chisel and plane blades owned by professional woodworkers, especially carpenters, with the ura worn away entirely is common. These craftsmen work in the field under great pressure, with limited access to tools, and often lacking adequate time to sharpen their tools gently. Consequently, to save time, instead of switching to a fine-grit stone, they will sharpen both the bevel and ura of their blades using only a single rough or medium grit stone. The problem is that, once the ura is in good shape, it seldom needs to be worked on anything but fine finishing stones, so working it on rough or medium stones during each sharpening session wears away the ura’s lands quickly and consequently prematurely wears away the ura. If you value your tools, and expect them to serve you a long time, I encourage you to use only fine-grit stones on the ura of your blades for routine sharpening, and save the rougher stones for occasionally remediating chips and other defects. Your tools will thank you.

Challenge 6 – The Uratsuki Dissapears
As mentioned in Challenge 5 above, sharpening the ura’s 4 lands abrades them making them wider, and at the same time, the hollow-ground uratsuki they surround, shallower. Appearance aside, a shallow uratsuki is no big deal except that the resulting wider lands take more time and stone to polish with each sharpening session, a problem because time is money and good stones ain’t free.
Solution 1 – Employ Balanced Sharpening: This solution is similar to Solution 1 in Challenge 5 above, but somewhat the inverse. As described in our series of articles about sharpening Japanese tools, unless there has been major damage done to the cutting edge, such as a chip or busted corner, it is seldom necessary to use anything but your finest grit sharpening stone to polish the ura. What typically causes the uratsuki to mysteriously disappear, however, is a craftsman using only a single grit of stone, usually a rougher one like 800 or 1000 grit, to frequently sharpen both bevel and ura in the interest of saving time. Don’t get me wrong: this is an absolutely valid sharpening strategy, one frequently employed by professionals under pressure, but it’s hard on chisels and wasteful long-term. Even if you are in a hurry, the time spent working the ura on a finer 6,000 grit stone instead of quicker-acting rough stones is a good investment in your chisel, IMHO. But on the other hand, time is money….
Solution 2 – Accept the Dictates of Fate: No one is getting younger except me and thee, but chisels have a useful lifespan, usually defined as the quantity of sharpening sessions it endures rather than simple time. When, after many sharpenings, the uratsuki of Beloved Customer’s chisel bottoms-out despite your best efforts to preserve it, I recommend you smile at it warmly when you are alone together, call it a good and faithful servant, and keep using it until nothing is left but the handle and the neck, for even then, it will be a better friend than any chisel-shaped Chinese screwdriver, even if the label says “Made in Germany.”
YMHOS

A few relevant articles can be found at the following links:
The Ancient Art of Hand Forging
Sharpening Part 6 – The Mystery of Steel
Sharpening Part 7 – The Alchemy of Hard Steel
Sharpening Part 9 – Hard Steel & Soft Iron
If you have questions or would like to learn more about our tools, please click the “Pricelist” link here or at the top of the page to find our products and use the “Contact Us” form located immediately below.
Please share your insights and comments with everyone in the form located further below labeled “Leave a Reply.” We aren’t evil Google or fascist facebook and so won’t sell, share, or profitably “misplace” your information. May all my ura perpetually overflow with effluent if I lie.


Leave a reply to Gav Cancel reply