
A person who never made a mistake never tried anything new.
Albert Einstein

here are more ways to finish wood than there are to cook beans, but unlike the musical fruit, the fragrant finishing technique that is the subject of this article became famous through the products of London’s elite gunsmiths such as Durs Egg (Est. 1772), John Rigby & Co (Est, in Dublin in 1775 and moved to London in 1866), Joseph Manton (1766 – 1835), Boss & Co (Est. 1812), James Purdey & Sons (Est. 1814), Holland & Holland (Est. 1835), and a hundred other European gunmakers. However, the technique actually pre-dates the 1700’s by many centuries.
The Traditional London Finish
While the traditional London Finish got its name from the justifiably-famous products of the high-end London gunmakers, some of the most famous of which are named above, since ancient times this technique used to seal and finish high-quality woodwork employed linseed oil, the squeezings from the seeds of a stringy plant called flax.
The difference between the linseed oil widely used for paint production and woodworking and the flax seed oil sold as a health product in the West nowadays is simply the method used to extract the oil from the flax plant.
Of course, Gentle Reader is no doubt aware that the fibers of the cotton plant have been used to make textiles since at least 6,000 BC, but what you may not realize is that it was rare and so labor intensive to produce that at times cotton fabrics cost more than silk in the West, as recorded in tax records of the time. Indeed, it wasn’t until the invention of the Cotton Gin in 1793 that cotton textiles became affordable for ordinary people. My point is that linen cloth made from the fiber of the flax plant, and spun cloth made from animal hair, such as wool, goat and camel, were the most common textiles available probably since Methuselah wore goatskin nappies.
Indeed, flax can be grown in even poor soil, and can be spun and woven into useable thread and cloth in small lots in most any home, so “homespun linen” was once the cheapest most widely-used textile available worldwide, used for everything cotton, polyester, rayon and silk is nowadays, and linseed oil was an ordinary but economically-important by-product of flax production.
The London Finish made famous by the gunsmiths of Olde Londinium consisted of many coats of boiled linseed oil, betimes with some added dryers, forcefully rubbed into the wood by hand (the warm, bare hand, as a matter of fact), allowing days and weeks between coats for the oil to partially polymerize. Indeed, this manual application technique is the source of the term “hand-rubbed finish” that furniture and cabinet companies everywhere lie about applying in our time. If you have a free month, please give it a try.
This finish was also used for furniture and cabinetry since ancient times as referenced in texts of the era which is probably why some modern woodworkers, ignorant of chemistry and eager to employ historical techniques, still soak their projects in linseed oil potions.
While the final product of the traditional London Finish is indeed subtly beautiful, it takes a long time to accomplish, it’s expensive, it does little to prevent moisture from moving in and out of the wood (and therefore allows the wood to rapidly expand and contract with varying moisture content), and it does little to protect the wood from damage. Other downsides include the fact that linseed oil gives a yellow cast to wood, which gunstock makers and other woodworkers historically compensated for by dying the wood slightly red using alcanet root.
Also, linseed oil never fully solidifies and so attracts grime, eventually oxidizing and turning black forming a “patina” many people admire without realizing its dirty nature.
The Modern London Finish
The wood finishing technique described in this article is a modern, improved version of the traditional London Finish, one developed by American custom gunstock makers looking to replicate the beauty of the antique London Finish while providing better durability and moisture resistance for their customer’s expensive firearms and eliminating the expensive and time consuming work of rubbing in stinky, yellowing, dirt-magnet, spontaneously combusting linseed oil.
I learned about it when I was looking for a better finish for the stocks I made for my own smokepoles, everything from flintlock rifles and pistols to large-caliber bolt-action rifles. Through applying, using in the field, and comparing the long-term results of both the traditional linseed oil London Finish and this modern version, I came to treasure the modern version’s subtle beauty, durability and effectiveness at moisture control. Soon I was using it for everything from tool handles to furniture and casework with excellent results.
The primary difference between the traditional and modern versions of the London Finish is that the traditional technique relies heavily on boiled linseed oil, a product that does little to protect wood, while the modern technique relies on modern varnish or polyurethane resins, but with a twist.
Where the two finishes are alike is that neither are surface finishes, but are soaked into the wood’s fibers. By contrast, normally-applied varnish or PU finishes are film finishes that, while they may adhere to the wood well when fresh, do not penetrate deeply, but remain on the surface where they quickly degrade due to UV light exposure, and the stress cracks resulting from expansion and contraction of the wood. Eventually and unavoidably their bond with the wood they are tasked to protect or beautify always fails, usually sooner than later, whereupon it stops doing its job.
The modern London Finish is not a surface film but soaks into the wood’s fibers where it hardens, and is protected from UV and shrinkage damage. It also fills the wood’s pores sealing them long-term and forming a smooth, flat surface free of the dents and streaks at the wood pores that always develop when shrinkable varnish or PU are applied as a surface finish.
Most importantly, it seals the wood with a durable material that cannot be removed without actually carving or abrading the wood away, protecting it from moisture/dirt/oil intrusion. This makes it a better and more attractive long-term finishing solution, one that, unlike the traditional London Finish, doesn’t need to be refreshed annually (yes indeed, annually).
Next, allow your humble servant to present the performance criteria I consider important when selecting a wood finish for tools.
Performance Criteria
The following criteria are focused on improving the longevity, durability and stability of the wooden components of handtools used in woodworking. These include the wooden bodies of handplanes, and the wooden handles of chisels, axes, hammers and gennou.
So what do we need a finish used in these applications to accomplish?
- Stability: Minimize moisture movement into and out of the wood cells due to humidity changes, perspiration and rain thereby reducing the swelling, shrinking and warpage of the wood. This is specially important for handplanes, gennou handles, and some types of furniture and cabinetry. A surface finish that quickly oxidizes, suffers UV degradation, becomes inflexible and suffers shrinkage cracks or is easily chipped and/or abraded won’t get the job done for long.
- Protection from oil and dirt: Prevent dirt, dust and oil from the user’s hands or the environment from penetrating below the wood’s surface keeping it cleaner. To accomplish this a finish must both fill the ends of open cells exposed at the surface with a water-proof, non-shrink plug (a “filler”) and seal the cells with a waterproof and oil-resistant chemical binder.
- Insect and Bacteria Protection: The finish must lock away the yummy smell of raw wood so bugs will go beetling on by without stopping to snack, set up house, or lay eggs. It must also prevent bacteria spores, nasty things always present in dirt, from taking root.
- Appearance: A smooth surface that looks like wood, not plastic or varnish.
These are only your humble servant’s criteria, of course; Your needs and expectations may vary.
Why Is the Expansion, Contraction and Stability of a Wooden Tool Component a Concern?
Trees are water pumps. Evaporation at the leaves sucks water, and with it, dissolved chemicals up from the ground. After a tree dies, most of the water contained in its cells migrates out of the wood, the individual cells shrink in size and crinkle as they dry, and the cell walls become stiffer and much stronger. However, despite its transition from a flexible, moist, growing plant to a stiff, dry board, left as-is a dead wood cell does not abandon its God-appointed duty to pump water but will faithfully continue to absorb and expel water, albeit to a more limited degree than when it was alive and kicking, causing its dimensions to shrink and swell in response to changing moisture conditions in the surrounding environment.
The problem is that the rate water enters or leaves the wood cells varies with a number of factors. One such factor is the location of the cell within the block of wood, producing differential expansion/shrinkage along with stresses and warpage. Most importantly, end grain absorbs and releases moisture much more quickly than side/face grain does. Slowing down the rate of water gain/loss is important to minimize and equalize internal stresses and to keep a wood product stable.
Besides the natural seasonal changes in humidity, modern air conditioning and heating equipment can create wild swings in ambient humidity, causing wooden components of furniture and tools, such as the bodies of Japanese handplanes, to warp, harming their ability to plane wood as intended. When this happens, and it will, time and effort is periodically required to adjust a wooden-bodied plane’s sole. This can be frustrating. Short of using a vacuum pump to suck heavy hardening resins into a board’s cells, it is nigh impossible to entirely prevent moisture from entering and leaving wood with changes in environmental humidity, and the dimensional changes, internal stresses, and warping that results.
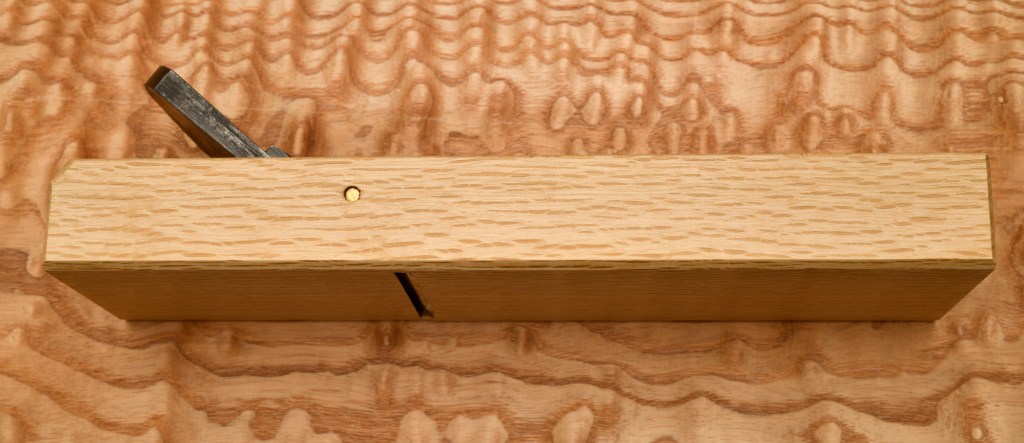
In the case of a wooden-bodied plane, both ends and the surfaces inside the hole cut to receive the blade have exposed endgrain which absorbs and releases moisture quicker than side grain, so that when the humidity of the surrounding air increases, airborne water penetrates the endgrain faster than the sidegrain, and the endgrain surface at the body’s ends and inside the mouth swell first, causing dimensional changes and differential stresses, and often, warping.
By reducing the rate of absorption of moisture by the endgrain fibers to more closely match that of sidegrain fibers, swelling, shrinking and warping can be reduced. This is where the London Finish shines.
Since learning this method, I have used it not only on my guns, but also on timber frames, doors, tools, workbenches, furniture, cabinets, chests, tansu, tsuitate, and other wood products with excellent results.
Danish Oil
A note about so-called “Danish Oil” finishes is called for at this point. Danish Oil is boiled linseed oil combined with thinners, dryers, and resins. It polymerizes much quicker than simple boiled linseed oil, and is much easier to apply. By itself, varnishes and polyurethanes will not soak far into the pores of the wood (xylem tracheid), but by reducing its viscosity with linseed oil and thinner, the liquid will soak further into the grain and pores before more-or-less hardening. While superior to plain BLO (boiled linseed oil), Danish Oil is still not effective at either preventing water migration, or protecting the wood from dirt and oils. And besides, it changes the color of the wood to which it is applied, it stinks and it starts fires. Nothing good.

Applying the Modern London Finish
This technique requires only a few inexpensive tools and materials, and no equipment of any kind, but it does take some time and effort to apply.
Tools and Supplies
You will need the following tools and supplies:
- Clear varnish or polyurethane finish in a can. Gloss finish is fine, but I prefer a satin finish. Minwax PU works well, while Epifanes is the best I have experience using.
- Thinner or mineral spirits. Not the water/acetone/oil-based low-VOC toilet cleaner sold at home centers. A professional-grade thinner from a Sherwin Williams store or other specialist paint store selling professional-grade materials is best.
- Mixing container the size of a soup can or jam jar with a lid.
- Small paintbrush, perhaps 3/4″ wide. Cheap is fine.
- 320 grit and 600 grit wet-or-dry sandpaper.
- Clean rags,
- Brown paper from shopping bags
- Latex/rubber gloves to keep finish mixture off hands. It can get messy.
- Masking tape.
The Finish Mixture
The finish mixture to be used is the varnish or PU you selected thinned 100% with thinner. You won’t need much to complete a few plane bodies or tool handles, less than half a soup can in fact, and it’s best to use in small batches. The lid will keep it from hardening between sessions. It’s not a lot of work, but with drying time, the process may take five or six days.
The Steps in Finishing a Wooden Handplane Body or Tool Handle
1. Remove the blade and chipbreaker. Tape the chipbreaker retention rod with masking tape. In the case of gennou handles, tape the entire head except the wood exposed at the top surface of the eye. For chisel handles, tape the ferrule, crown and the striking end of the handle (you don’t want the finish mixture to soak into the end of the chisel handle because it will make the fibers too brittle.) For paring chisels like usunomi that are not struck with a hammer, soak as much of the mixture into the handle’s end as possible
2. Apply the finish mixture to the end grain at the plane body’s ends and all surfaces inside the mouth. In the case of hammer/gennou handles, apply it most heavily to the butt and eye. Apply it heavily, frequently, and forcefully to encourage the wood to soak up as much as possible. Repeat until the wood won’t soak up more. This is the step that matters most. Apply to all other surface of the dai as well. Allow to dry overnight. There’s absolutely no need to put any effort into making it pretty at this stage.
3. Repeat Step 2.
4. Apply another coat of finish mixture, and while it is still wet, use small pieces of 320WD paper with fingers and sticks to wet-sand all surfaces thoroughly. The goal is to produce a fine slurry of finish mixture and sawdust, and to force this deep into the wood’s grain, especially end-grain, clogging the pores solid. Don’t sand the area in front of the plane body’s mouth hard enough or long enough to remove material, change its shape, or round over the corners, though! This is extremely important. This slurry, combined with the varnish/PU already hardened in the wood’s pores, will serve to drastically slow down moisture movement once it sets. It won’t stop it entirely, but it will moderate it more than spindle oil, linseed oil or Danish oil ever could, and it won’t crack or flake off leaving the wood unprotected. Don’t wipe off the wet slurry, but leave it standing/smeared on the wood’s surface and let it dry overnight. It will look terrible for now, but never fear for tis all part of a cunning plan (ツ)!
5. Apply another coat of finish and wet sand with 320 grit WD paper again making sure to hit all the places you might have missed before and knocking down any hardened slurry from step 4. Allow to dry overnight.
6. Wet sand with the finish mixture using 600 grit WD sandpaper this time. Be sure to sand down and completely and thoroughly remove any hardened finish or slurry remaining on the wood’s surface. This is important. After sanding, but before the mixture hardens, scrub it down with clean rags and/or brown paper from shopping bags to remove all remaining finish from the wood’s surface. Allow to dry overnight. You may need to repeat this step for best results.
7. The next day examine the wood’s surface for any remaining finish/slurry visible on surfaces. Remove any you find with 600 grit WD sandpaper and the mixture.
8. Allow to dry for 24 hours.
9. Scrub with brown paper from a shopping bag.
10. Apply automotive carnuba paste wax, and polish out.
Remember that, if applied correctly, the London Finish as described herein should not create interference or change tolerances in the tool because there shouldn’t be any finish material left proud of any of the tool’s surfaces to cause interference.
When finishing the blade retention grooves, you will find it difficult to sand up inside them with your fingers, so use sticks. But don’t remove much material in creating a slurry or the blade may become too loose. And be sure to remove any and all slurry or finish that remains on the surface.
At this point in the process, the London Finish is complete. It is well suited, in my opinion, for guns, tools, workbenches, doors, timber frames, as well as any furniture or casework where protection is desired but a surface finish is not desired. This finish also works exceptionally well for carved wooden surfaces, but with less sanding. It also has the distinct advantage that it does not require careful application, so if brush hairs or sawdust get caught in the finish, or bubbles or sags develop, never fear, because in accordance with our plan so cunning we could stick a tail on it and call it a weasel, they are all going to be wet-sanded away. If you decide to apply a final surface coat, however, then greater care is necessary for the final coat.
If you are doing casework or need an attractive surface finish, a topcoat or two of the same mixture, freshly made, applied with a clean brush is just the ticket. If a really nice finish is desired, several coats can be applied, wet sanding between each, and finally polishing with polishing compound (automotive paint supply houses carry this in many grits) to create a mirror finish.
If you feel brave enough to tackle large surfaces, such as a tabletop where this finishing technique excels, some time and effort can be saved by using a pneumatic or brushless random orbital sander. The type of motor matters because you don’t want a spark to ignite the thinner when wet sanding. You have been warned.
A quick note on frame and panel construction is warranted at this point. If possible, it is best to apply the finish (any finish for that matter) to all surfaces of panels, especially endgrain, before gluing them into their frames. In any case, a bit of paste wax (I use beeswax-based Briwax) applied to the inside of frame rabbets and the edges of panels before assembly will prevent finish from accidentally gluing the panels into the frames, thereby restricting expansion and contraction, and eventually producing cracked panels.

The Story of Why I Started Using the London Finish for Plane Bodies
Back in 2010 I was transferred from Orange County in Southern California to Tokyo, Japan. Due to an error by the moving company, most of my beloved tools were left behind in a storage unit In Las Vegas, Nevada, placing my sanity at imminent risk. I bought replacement chisels and planes (hiraganna, mentori, shakuri, etc) in Tokyo at that time. I had become dreadfully tired of the warpage that often developed in my plane bodies each time I moved, so I considered ways to reduce this nasty tendency, and of course, tried the London Finish I had been using on my gunstocks back in the USA. The results were perfect.
After applying the London Finish to them in Tokyo, I used them for about a year through all the seasonal humidity changes common to Japan and exposed to indoor heating and cooling. They stayed straight the entire time. My job then transferred me to the Pacific island of Guam, with high temperatures and constant 85% humidity, where I used and stored these high-quality planes in a hot and humid garage for 1.5 years. They still stayed straight. When I returned to Tokyo, my wooden bodied planes again made the 35 day land and sea voyage inside a hot and humid container. They arrived at their new home straight. At the time I am writing this, those same planes have been in my home here in Tokyo for over 8 years through the various seasons and humidity changes, and have mostly remained straight.
Not having to regularly true the soles of my wooden planes since then has saved me a lot of time and headaches (as he is wont, Murphy carefully ensured that they warped and stopped working at the most inconvenient time possible), and of course has extended their useful life.
Another special benefit in my case is the resistance the finish has to sweat, oils, acid and dirt from my hands, which, in my case, causes white oak to turn black almost immediately. This is doubly true in the case of my chisel and hammer handles.
I have taught this method to many people that admired my completed woodworking projects and cabinets and handmade gunstocks, but few have had the patience required to actually attempt it. Of course, being all handwork, and taking quite a bit of time to accomplish, it is not suited to most commercial situations.
As for hobby woodworkers, there seem to be two schools of thought. The first hasn’t the patience to deal with any finish that can’t be applied with either a spraygun or power roller. Most of the woodworking publications energetically promote equipment-intensive commercial production methods even to the amateur, and feverishly foster this attitude. At the the risk of sounding cynical, I ask you Gentle Reader, is owning an airless spray system really necessary to perform quality woodworking, or is such equipment more of a profit center for manufacturers and retailers?
With this statement, I am certain I would receive piles of poisonous complaints from advertisers to this blog (if I had any), and perhaps even threats about pulling said advertisements. Good thing I don’t give a rodent’s ruddy fundament about such things or the feeling of rejection might crush my fragile ego like a raw egg in a little boy’s back pocket (シ)。
At the other extreme, there are devotees of the Neanderthal school that have been indoctrinated by romantic viewpoints in the woodworking press, or influenced by things written in books a hundred years ago. These gentle souls are drawn to archaic finishes such as boiled linseed oil, beeswax, and unicorn piss.
To the production-method advocates I say save production methods for production work, and seek better quality for your handmade projects.
To the Birkinstock-wearing Neanderthals I say, there is a reason old unrestored furniture and gunstocks are dark, grungy, and yes, dirty: Linseed oil and beeswax. Consider what you want your work to look like in 100 years. Certainly not cracked, water-damaged, and dirty. And genuine unicorn tinkle is practically impossible to come by nowadays, anyway, even on Amazon.
I promise you the results will be worthy, with no downside, and your planes, tools handles and wooden projects will not only look better longer, but will be tougher and more stable.
The Abura Dai
I would like to add a note here about a Japanese technique intended to improve the stability of handplane bodies, namely the “Abura Dai 油台” which translates to “Oil Body.”
The idea is to soak the oak body (dai) of a handplane in low-viscosity spindle oil until it takes up a significant amount thereby minimizing moisture exchange and improving the stability of the handplane’s body. Does it work?
I own and use a 65mm abura dai handplane I purchased as a sample around 10 years ago, and which seems to be fairly stable. But I am not a fan of abura dai for two reasons. First, by design spindle oil never dries and is always wet. Therefore, the dai is always a little oily and definitely stinky. I don’t like the smell of spindle oil nor do I want to feel it on my hands unless I’m being paid for it.
Second, it makes the sole of the handplane softer, an area I would prefer remain harder, increasing wear noticeably. I was told about the failings of the abura dai by professional woodworkers many years ago, and the wear on the sole of this 65mm plane confirms their observations.
I encourage Gentle Reader to give the London Finish a try. You will like the results. And please share your impressions with your humble servant and other Gentle Readers.
Until then, I have the honor to remain,
YMHOS

If you have questions or would like to learn more about our tools, please click the “Pricelist” link here or at the top of the page and use the “Contact Us” form located immediately below.
Please share your insights and comments with everyone by using the form located further below labeled “Leave a Reply.” We aren’t evil Google, fascist facebook, or treacherous TikTok and so won’t sell, share, or profitably “misplace” your information. If I lie may my all my planes warp into pretzels.


Leave a reply to Tom Culver Cancel reply