When a work lifts your spirits and inspires bold and noble thoughts in you, do not look for any other standard to judge by: the work is good, the product of a master craftsman.
Jean de la Bruyere
Introduction
Gentle Reader, welcome to this second installment in my series of articles about the Japanese floor workbench called the “Atedai.” In Part 1 we looked at some of the design considerations and construction techniques involved in making this tool. In this presentation we will get to the fun part of putting it to use.
These workbenches, as I hope you will see, are incredibly versatile tools that can be used in endless ways. My objective in this article is to show you a number of those methods, some traditional and some less so, and inspire you to maybe give it a go yourself.
I will use examples from my own work, as well as examples from master craftsmen (including a few National Living Treasures of Japan) who have completed rigorous apprenticeships and used atedai professionally much longer than I ever will.
I have not received any direct training in this method of working but have ‘stolen’ many ideas and methods (lit. “Gijutsu wo nusumu” 技術を盗む) through observation and practice of their techniques.
This is the way traditional apprenticeships run in Japan – the master seldom gives direct instructions and entertains few questions, yet the apprentice is expected to learn everything – through observation and practice – and is thus said to “steal” his master’s techniques. Only in my case, my teachers are Stan, books, the internet, and videos!
I will use a fair number of pictures and video links in this blog, as they will show much more nuance than words can about how master craftsmen use their Atedai.
Disclaimer
If you live in a ‘chair culture’ and are just starting to work lower to the ground, then this may be the first time you have sat cross-legged on the floor since school. Take it easy! Go slow, improve your flexibility gradually and your knees will thank you. This style of woodworking is physical, and you must orient your whole body with the work to be efficient, and safe, which at first can cause some aches and pains. Bear with it – the results will be worth a little suffering!
If the floor is out of the question, don’t despair! There are a number of ways to use an Atedai either sitting on a stool or standing, which we will explore in this article as well.
With that said, let’s begin!
Sawing
Sawing using an atedai falls mainly into two categories – rough sawing for stock preparation, and precision sawing for finer work/joinery.
Rough sawing doesn’t differ much from using low sawhorses… you lay your work flat on the bench, making sure to hang it over the side, or off the far end of the bench, and use your foot to stabilize the board while your hands work the saw. This is very quick and accurate methodology, one that doesn’t require the large, bulky, difficult-to-store sawhorses typically used in the Western woodworking tradition, but it is dependent on using Japanese saws.
The process of rough sawing is the same, more or less, as when using low sawhorses. Using one’s feet to stabilize the workpiece helps significantly. You can also stand with both feet on the stock, which can be very useful when making big rip cuts in large stock.
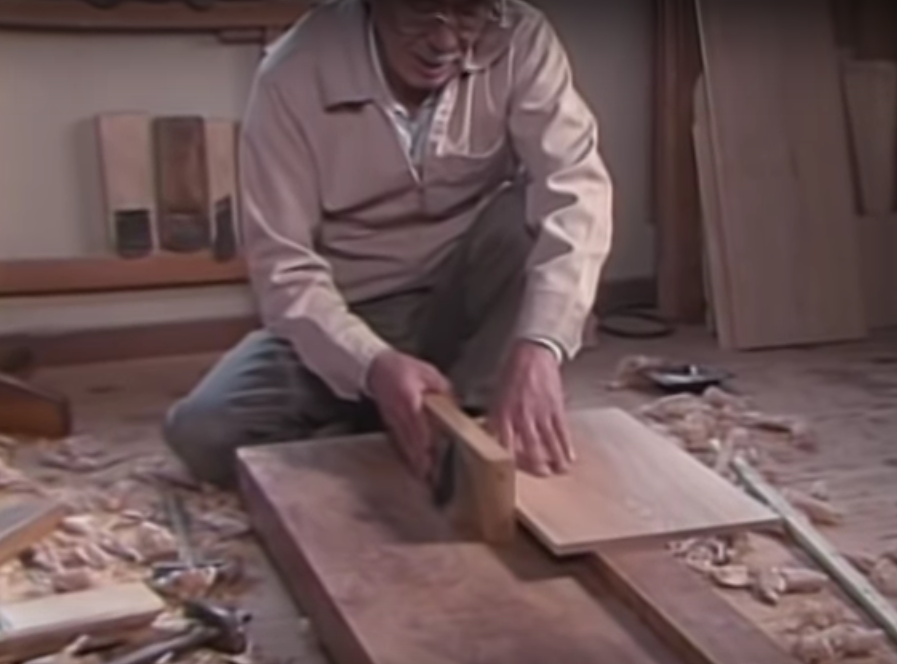
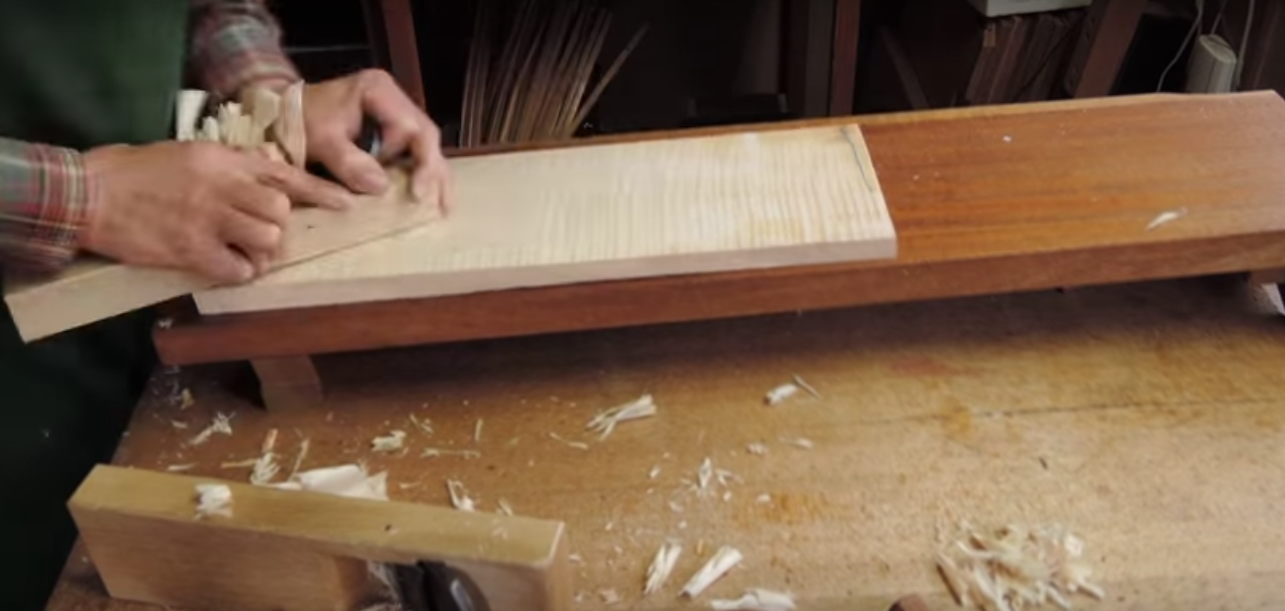
Fine sawing can be slightly ‘fussier’ in getting the work where it needs to be, and can depend on the kind of joint you are cutting. That said, it often helps to prop the work up somehow, particularly when ripping. This can be accomplished by leaning it vertically against the end of the Atedai, or laying the work flat on the bench (a clamp can help here) and propping up the end of the Atedai – experiment and see what works for you. I have seen craftsmen using plane blocks to prop up the near end of the bench – an ingenious and elegant solution, yet maybe not as quick as just leaning it on the end…
Note the size of the stops on Mr. Mogami’s atedai are much smaller than my own, and very much in the sashimono tradition.
Any cross cut, like the cutting of tenon shoulders, can be made off to the side of the bench or, if your stops are low enough, in the middle of the bench itself. I prefer to saw to one side, giving my arm room to move back and forward without having to shift position too much. You can also use shorter Western joinery saws here, by pushing the work into the stops, almost like a bench hook.
Planing
Planing at the Atedai is accomplished in only one or two positions… sitting down crossed legged, sometimes with one leg extended, or while on both knees. Give it a try and see what works best for you in your work.
You hold your plane in both hands, reach and pull. Simple.
In my experience, I have found that kneeling on both knees works best for powerful roughing strokes, because I can make use my upper body weight to press down on the workpiece while making powerful, controlled cutting strokes with the plane. Alternately, planing while sitting with one leg extended works best for me for finish planing. YMMV – experiment and find what works for you.
For really long stock you can, in theory, lunge forward with one leg and rock back with the planing stroke, but that still has a length limit (not to mention the need for very strong leg and back muscles) and standing up really has all the advantage in this situation. Traditionally, craftspeople such as Tategu-shi, joiners who specialize in doors and shoji, have a dedicated planing beam or bench on legs set up in their workshop, used standing, for longer stock preparation, and use their Atedai used for mortising and other smaller tasks.

“What about my Baileys?!” I hear you cry.
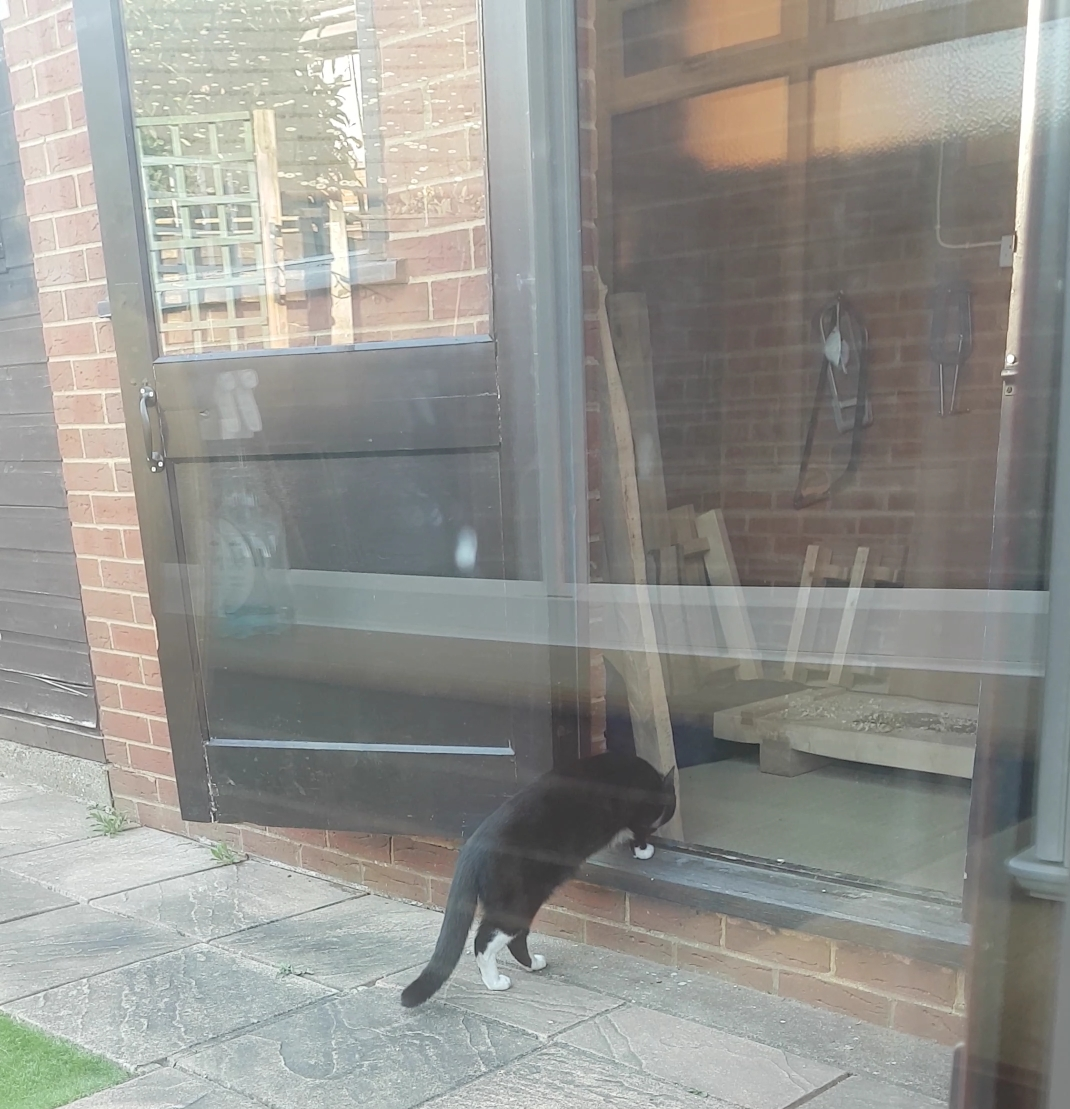
Fear not, Gentle Reader, for you can still use Western planes… both on the normal push stroke, as well as the pull… by adopting this work style. I often use No.5 and No.7 planes for initial rough stock preparation, and both can be used well low-down, although it must be said not quite as well as Japanese planes. To push I often kneel to the side, or sit on the work and push towards the stops. Maybe not elegant, but still good enough for me – either way, no one is watching, except maybe Master Sprocket, the neighbor’s cat, who meticulously supervises every step of my work!
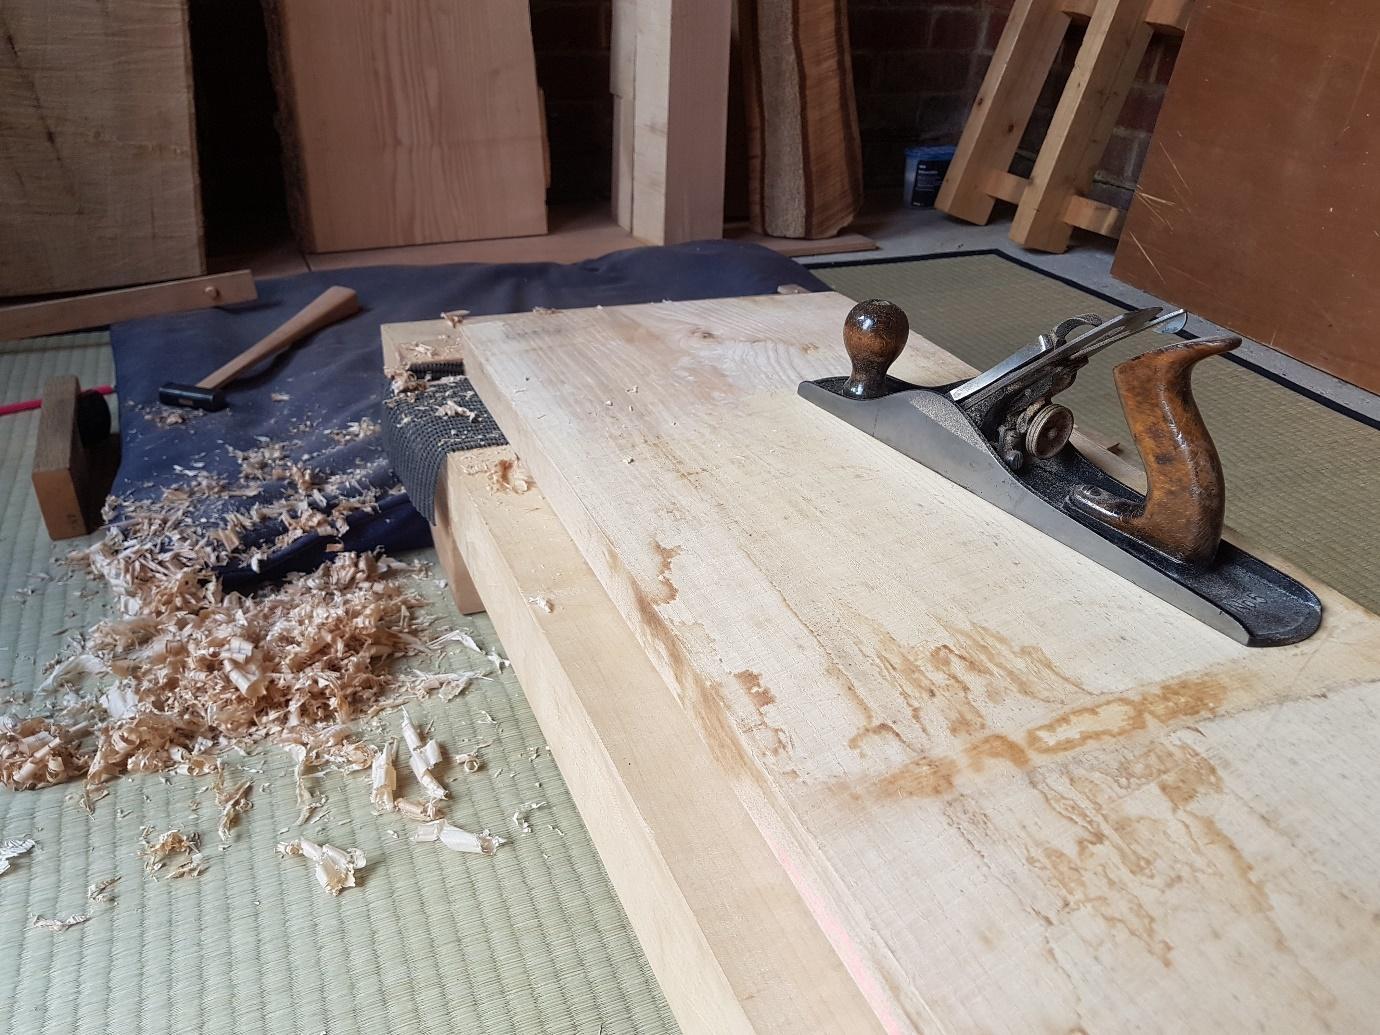
Another way to use push planes is to stand the atedai on its side and clamp the workpiece to its face, which allows you to plane standing up… this can also be useful with Japanese planes when planing longer boards or when you just need to stretch your legs and rest your back.
Jigs for any number of planing tasks are used as much in the Japanese tradition as they are in the West for 45° and 90° angles and, except for being designed for the pull stroke, do not really differ. One jig, however that may be new to you is a rather simple, but incredibly effective, device helping to shoot long edges. It is simply a flat board with a stop, which elevates the board above the surface of the bench, allowing your plane to shoot the edge of a board. This is one of the reasons you will often see 2 stops rather than 1 long stop on the Atedai. One stop braces the shooting board and workpiece while the gap between the two stops allows the plane to pass through and finish the stroke.
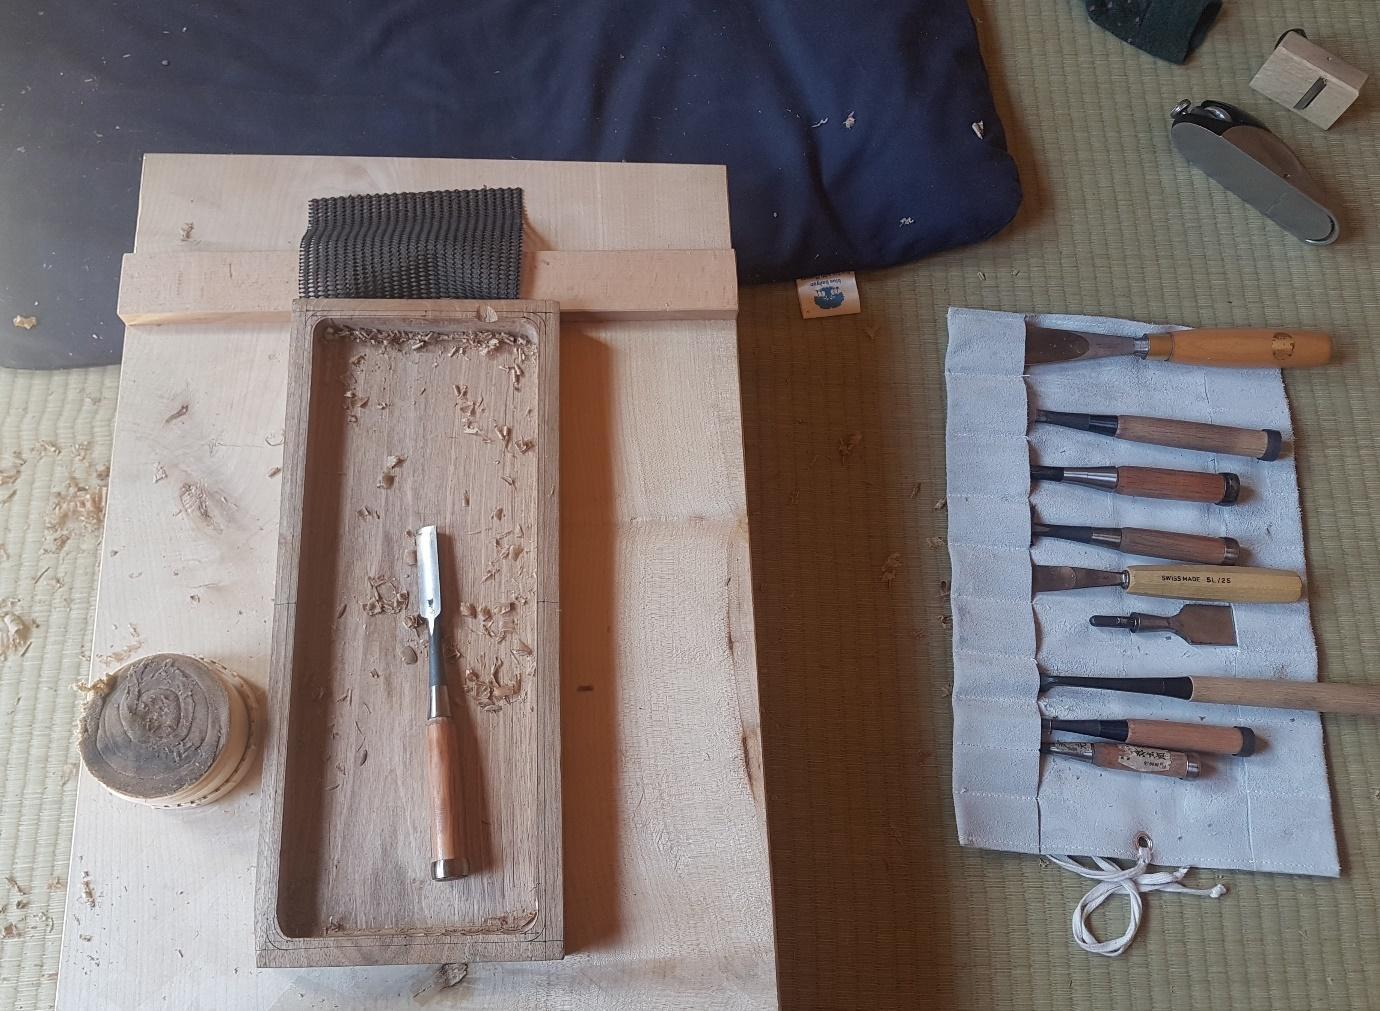
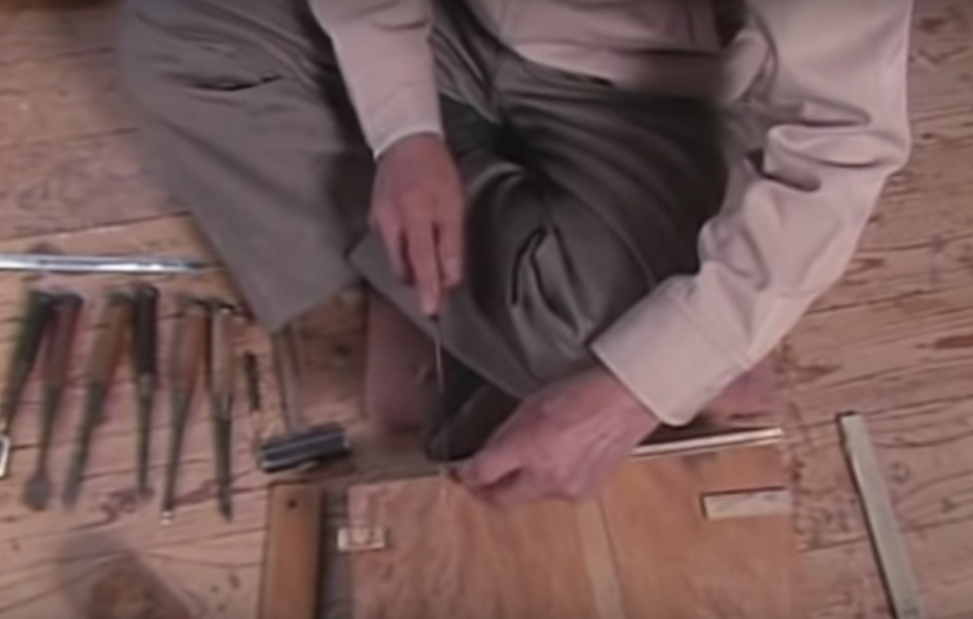
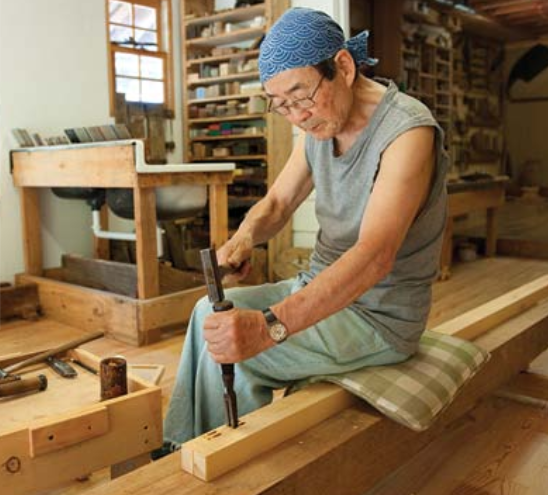
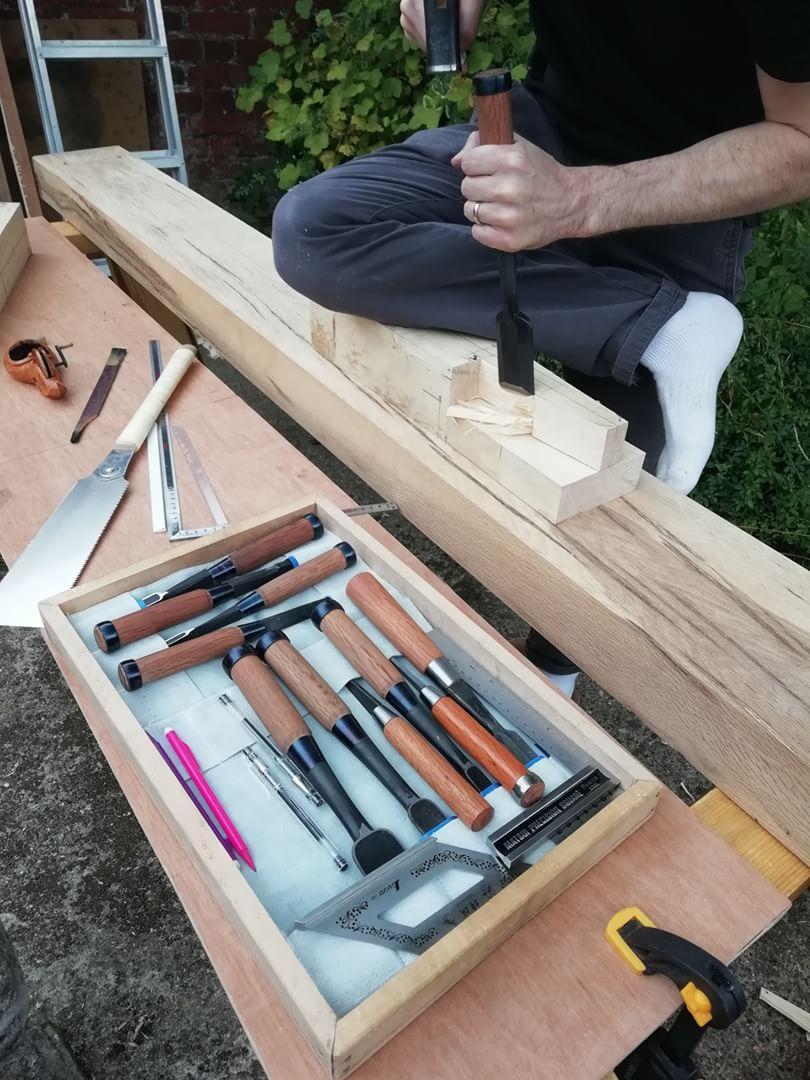
Chisel Work
Just as when planing, there are a number of ways, and many more besides, to use chisels at an Atedai depending on the task at hand.
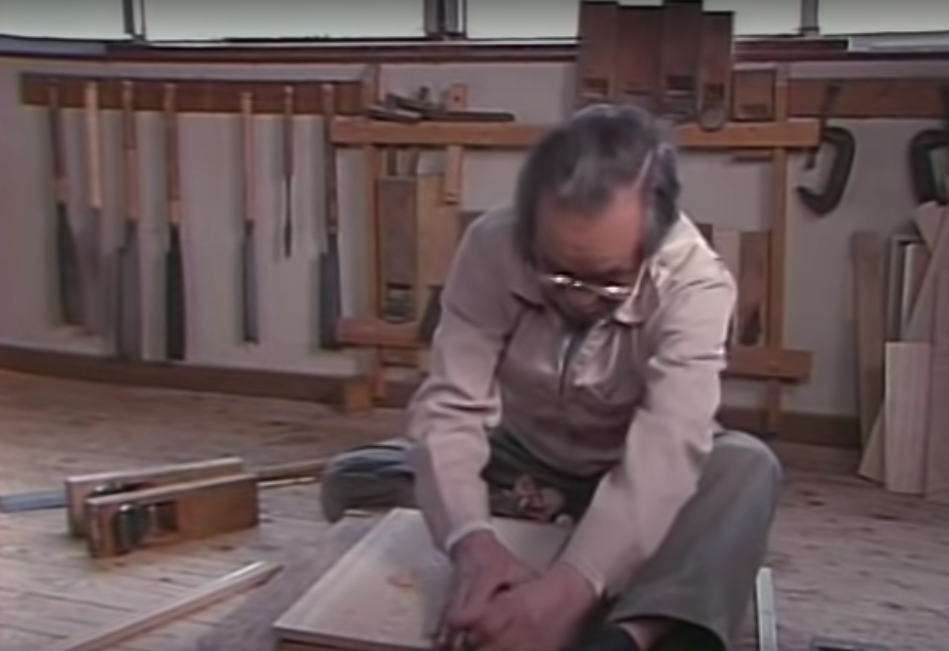
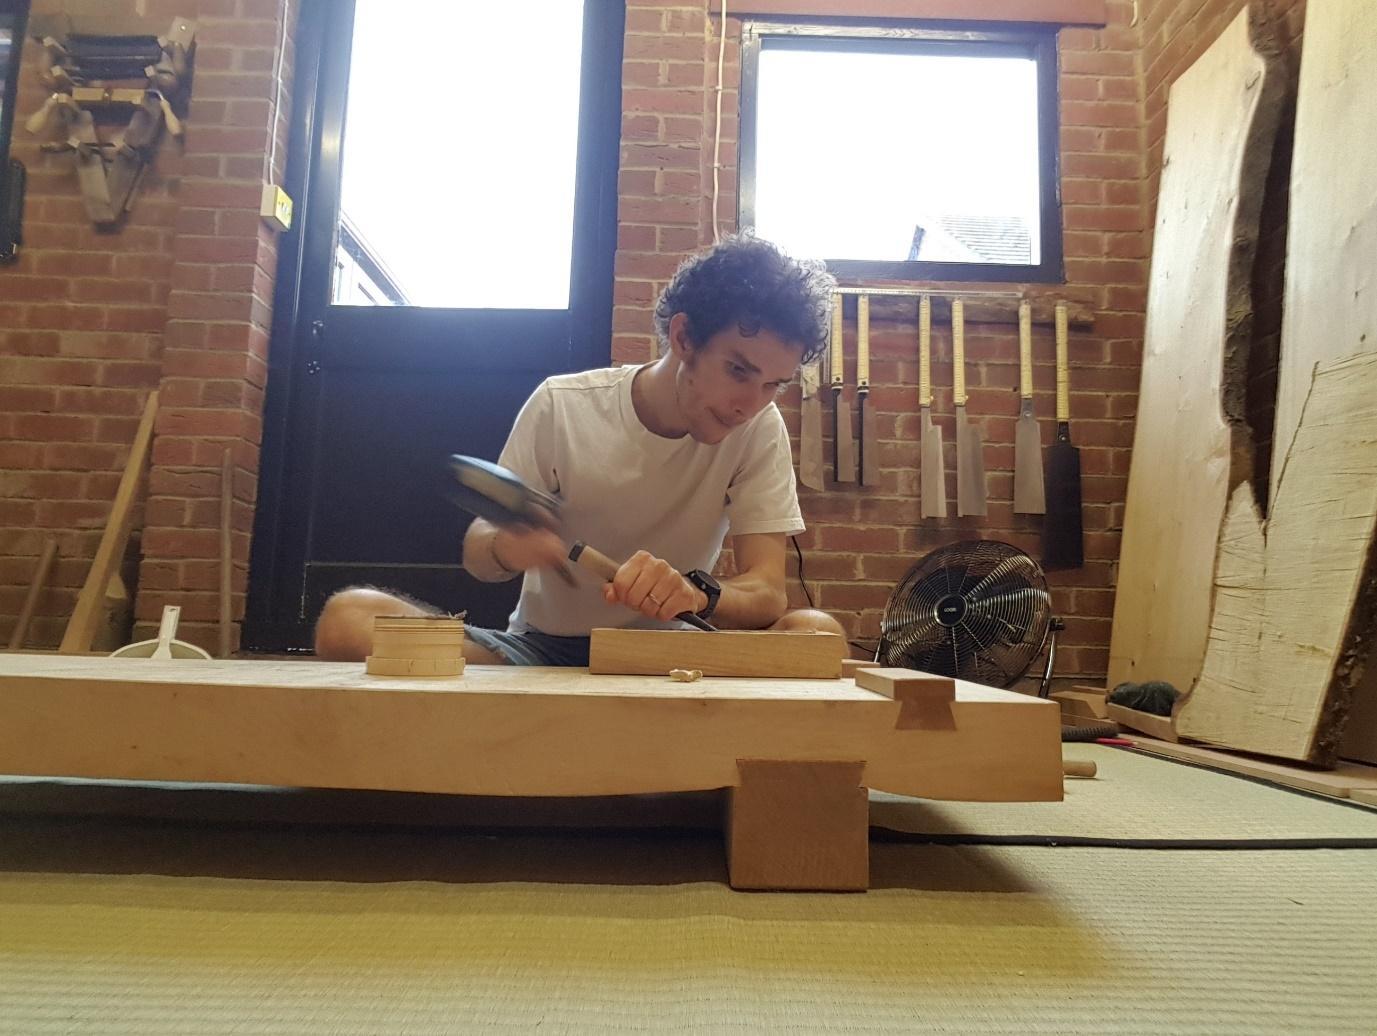
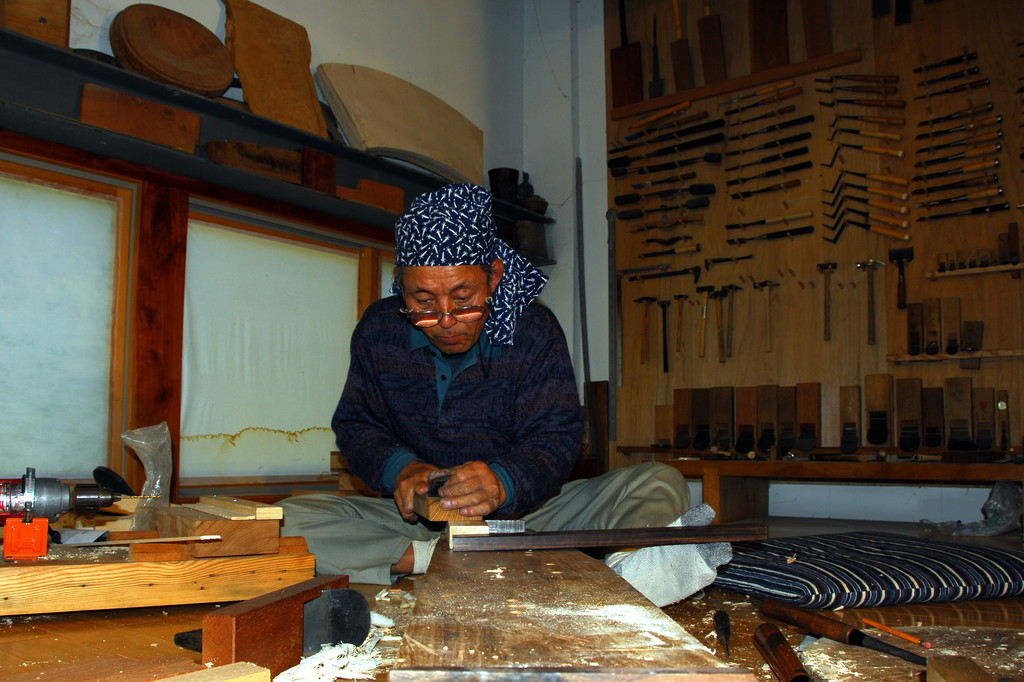
For mortising, and other similar tasks, a great way to hold the work is with your derrière. Yes, finally we come to the famous bum clamp. Sitting on your stock (while potentially uncomfortable on narrow or high stock) is one of the best ways to keep the work steady and both hands free for using tools while positioning yourself for efficient and safe work with your eye directly over the mortise to help ensure the chisel stays plumb. As we will see, this is also very effective while at a standing bench too.
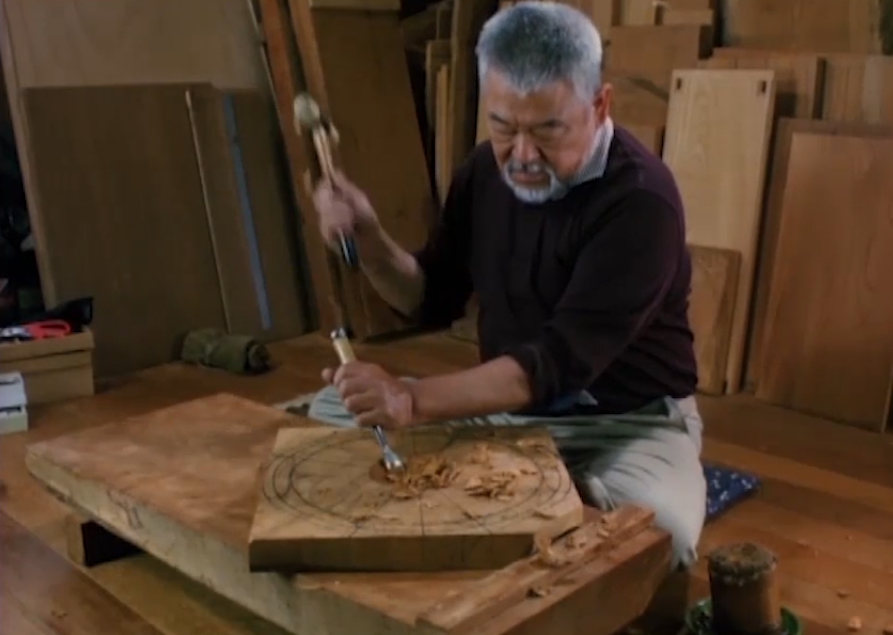
Hollowing work, like that used in kurimono carving, is often performed while sitting to the side of the bench directing all the force into the stop, and keeping the work steady. Be warned here, keep a mental note of where your left knee is in relation to your chisel! In this position it’s easy to make powerful horizontal hammer blows, and the last thing you want is a chisel jumping out of the cut into your knee.
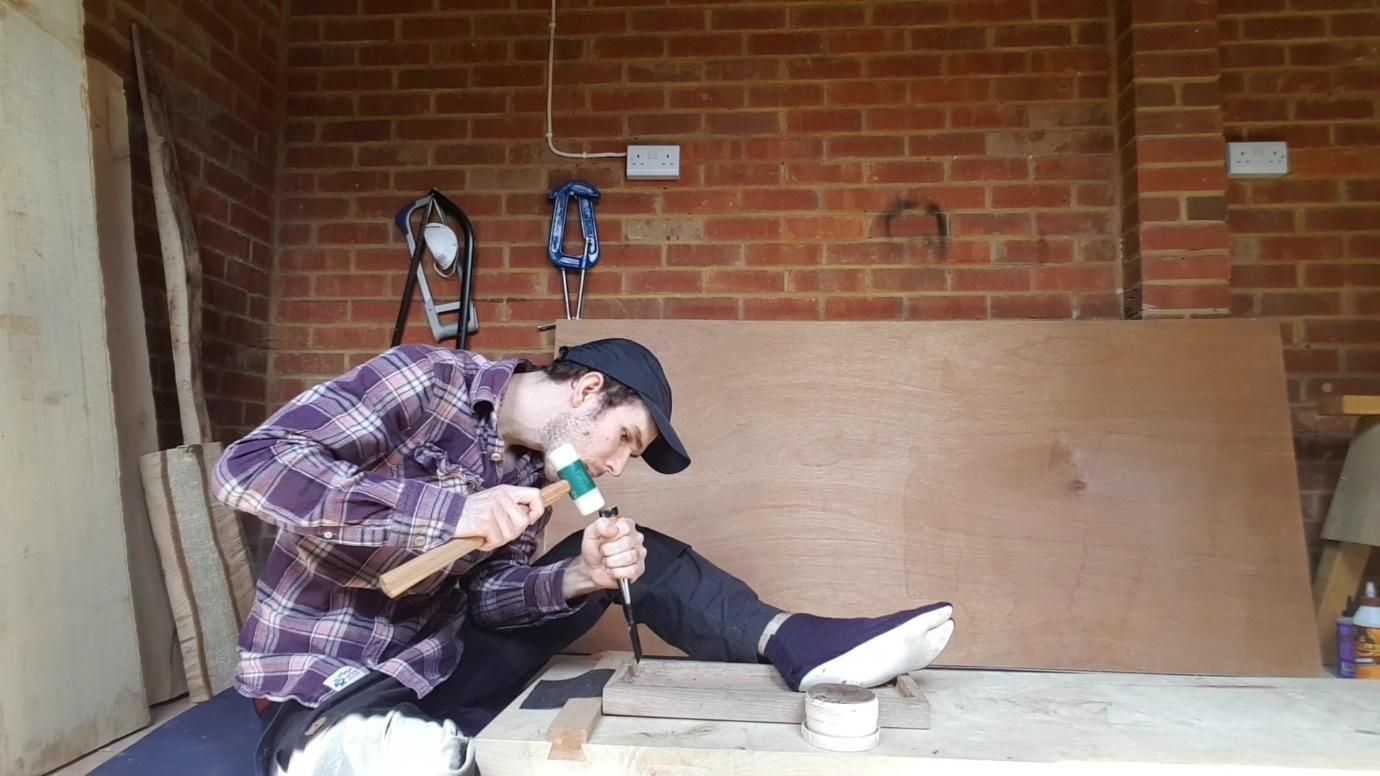
The final ‘standard’ chiselling position is at the end of the Atedai, often using your foot to stabilize the work piece, although clamps may also be used. This allows for quick repositioning of the workpiece, if needed, and holds the work solidly enough for the work at hand (foot?). As you tend to chisel more or less vertically in this position, your foot isn’t in much danger, but it still pays to be cognizant of the potential risk at all times.
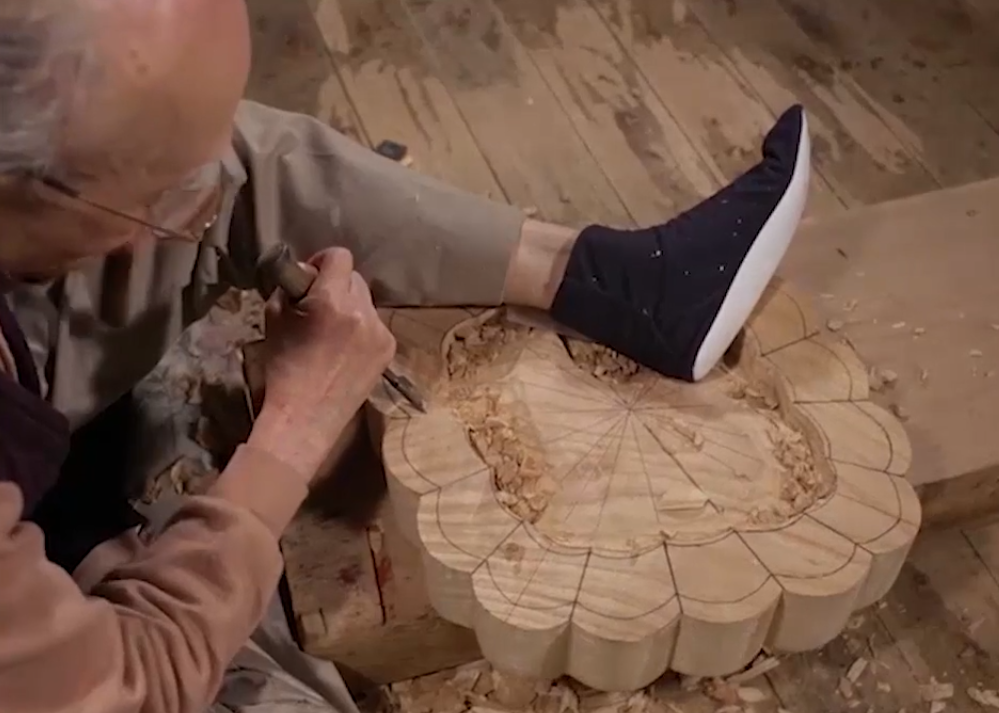
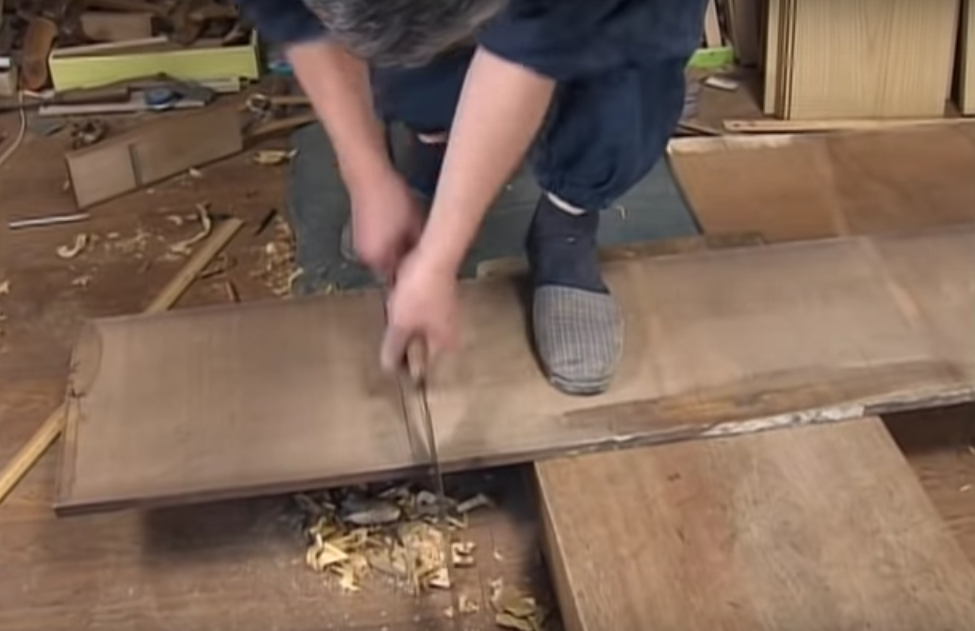
This is number 3 in a 9 video series of Mr. Nakadai, designated one of Japan’s National Living Treasures, making a beautiful serving bowl for the tea ceremony from pauwlonia wood. You can view the entire playlist on YouTube at this link.
Standing & Sitting
So far, we have looked at using the Atedai while it is resting on the floor, but there are a number of other ways to use it if your knees say “no”, or if you just prefer to work while standing up.
A great way to integrate the planing bench into your normal workflow is to have a slightly smaller Atedai for use on top of your normal workbench. This can be a great option if you use a mixture of western and Japanese planes, and can give you the best of both worlds. If you dimension it so you can place the Atedai under your table workbench when not in use, you can quickly and easily pull it out when needed.
By placing the Atedai on sawhorses, you will have a versatile, and mobile workbench which, with some practice, will do everything you ask of it. Carpenters in the field will often use a bench similar to this, made with materials on site, although they can sometimes be rather quick and dirty affairs.
In the photo above, Mr. Makoto Imai, a highly skilled carpenter, is using a similar set up, which was immortalised in ‘The Workbench Book’ by Scott Landis. The stop here is just a screw, which is all you need for most planing operations – although care must be taken if you don’t want to mark the end grain. I love the simplicity of this set up, and find Makoto’s work truly inspiring. Credit: Daiku Dojo http://www.daikudojo.org/Archive/20070414_tfgwc_asilomar_makoto_imai_demo/
While easier on the body in some respects, the lack of vises (Editor’s note: “virtually free of sin”) still means these workbenches require good flexibility and the use of body clamps. There is no escaping the fact that Japanese woodworking can be very physical. With that said, due to the need to lift your knee/leg up to, or to sit on, this kind of bench I have found the work surface needs to be slightly lower than your normal Western bench – for me about the height of my downward facing palm, with my arm by my side.

Miscellaneous
As you have no doubt seen, the potential ways to use the Atedai are incredibly varied. In this section I will outline some interesting techniques and ideas that may help show you just what is possible with these benches, or at least give some food for thought.
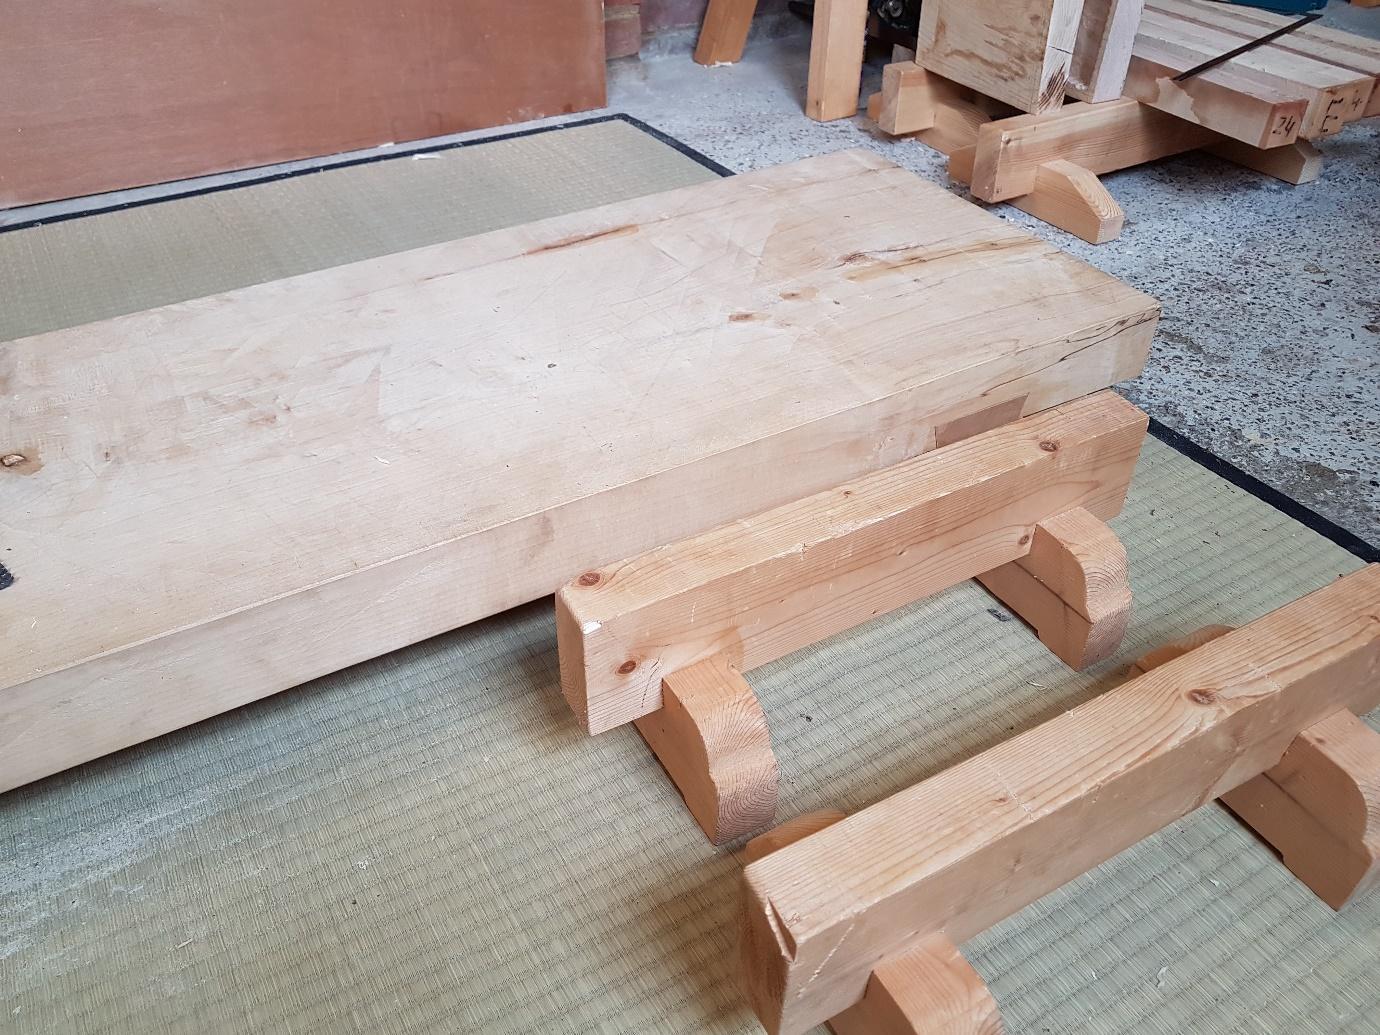
Firstly, using low sawhorses of the same height as your Atedai is a great way to extend the length or width of the work surface, and is a great solution for things like doors or shoji frames. It can also be incredibly useful if combined with, for example, a chop saw set at the same height.
Next, in a real blurring of east and west, you can put dog holes in your workbench – similarly spaced as you would on a normal workbench, for use of bench dogs, and hold fasts (Veritas make a lovely version which you can hand tighten). This can really add some versatility to your bench.
These holes will also give you an alternative to the ‘foot clamp’. By making a piece of wood with a hole drilled about ⅓ of the way in from one end, and a bolt passing through it into a dog hole (no need to attach a nut to the other end), you can create a foot-operated lever to press a workpiece into your stop, holding it very securely. The picture below shows Mr. Inomoto using this ingenious tool with his atedai
Conclusion
So, there you have it, a whistle stop tour of how to use an atedai. As you can see, the atedai is hugely versatile, and can offer all woodworkers, especially users of Japanese tools, a great way of working.
Low workbenches of various styles are used by a huge range of specific crafts within woodworking (as well as an equally large number of crafts outside of woodworking). I hope to have sparked some ideas that will be useful in your own work. Even if you continue using a Western bench, I hope you got a hint just what can be achieved with a couple of stops and your body…
While this way of working initially may appear quite simple, this simplicity belies the huge degree of nuance required to get the most out of it… from construction details to actual use. Often it’s not what the bench brings to you, but what you can bring to the Atedai, that determines the benefit it can provide.
You will also have seen that the benches themselves, as well as the methods of using them, are as unique as the craftsman employing them, so if something works for you, and is safe, crack on. There is no ‘one way’ to work with an Atedai, and I would love to see you at work with one of your own.
The best way to get a real sense of these benches in use is to view a range of craftspeople, including some of Japan’s “Living National Treasures,” actually using them, and so I wanted to leave a list of links for you to ‘steal’ some ideas of your own.
DC
Previous Posts in This Series
The Japanese Floor Workbench (Atedai 当て台) by Dominic Campbell – Part 1

👏 Thank you so much Dominic for this second great 当て台 article!
LikeLike
Thank you for the comment, appreciate it! If you have any questions about construction or use, feel free to let me know – happy to help! 🙂
LikeLike
Dominic – thank you so much for both of these posts! I am similarly educated in woodworking through the self-flagellating means of books, internet, and wading through foreign language youtube (English-language resources are mostly awful or utterly confused in my experience . . in a way it’s been helpful to fail upwards to the point of being able to discern what information is actually useful and what is butt-smoke). So, thank you for all of the links in this article, some are new to me and such a gift!
Forgive me if this is uncouth but might you feel comfortable sharing Master Sprocket’s information? Not sure if he is taking on apprentices at the moment but I am willing to sweep floors, change litter boxes, and whatever else.
I just finished what’s got to be my third or fourth attempt to make an atedai I like – it helps I was able to procure a massive oak slab this time around. As with most things Japanese-tool related I’ve found the smallest adjustments make the largest impacts. A 1/4″ in height can be the difference between a breakthrough workflow day, and feeling utterly discouraged and confused about how anyone could think these work positions make sense. I think you are right also in advising to be patient with one’s body. Thank you for sharing the foot lever vise – an absolute a-ha moment and so much simpler and more effective than my crackpot ideas for quickly stabilizing work against the planing stop when needed.
I am curious to hear more about how you incorporate Western planes into your work… I think often of a post on a long-dormant blog by titled “Having a Bad Kanna Day” and that about sums up my feelings every so often. Those are the days I find myself turning to an admittedly wonderfully functioning no 4 1/2 “worthington” smoother that belonged to my grandfather (what I can discern is an old hardware/dept store in early 20th century Cleveland… appears to be a laminated blade too if you can believe it). It still feels like cheating somehow. Likely I’ve got some sort of dysfunction in my head, that I can’t stand to get less out of tools I know are capable of better than I’m achieving on those bad days. Part of the problem no doubt using almost exclusively used tools.
Love the Sycamore bench! I’ve recently been having a bit of a love affair with that species. The slabs I get around here (Brooklyn, NY) have as strong smell like hay when worked, and for some reason my pup goes crazy for it. Carved my daughter a small owl and it didn’t last 2 hours before he was trotting around the house with it chewed beyond recognition. Made a few dai out of Sycamore and might give it one more shot.. so far it’s proved a bit too soft with an almost fuzzy feedback but I’ve also found it lighter and very pleasant to grip and maneuver. How are you liking it as a work top?
LikeLike
Hi Mike, delighted to hear that.
As you say there is quite a lot of BS around woodworking (the internet in general TBH) which makes it hard to know who or what to trust. I have found going right to the source of craftsmen I respect very informative, but often a lot of the nuance is hard to see in video. That said practice and experimentation will often show the way and fill in the gaps.
Master Sprocket is an elusive beast. He only seems to come round when I’m slacking in the house. I will put in a good word when I next see him! シ
In terms of western planes, don’t feel like you have to use 100% japanese tools for everything. Planes are the one area where I am most flexible, and often use a Western block plane, a no.5 and a no. 7. I am also tempted to get a slew block plane, to use over a kiwa ganna… easier to keep in working order, less fussy.
I do stock prep by hand and have a 48mm roughing kanna, but it sure is nice to have the Bailey’s on hand… (currently flattening an ash benchtop – hard going) you can treat them roughly, on gnarly wood, without complaint. Kanna in my experience take the most time to learn (how to use but how to keep it working is super important)… I am far from a master of them. The key is to be patient, take it one step at a time, and don’t feel guilty… good Western planes are a joy to use, just like any Kanna.
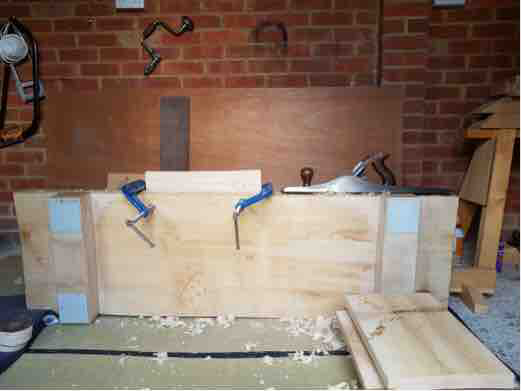
Loving the sycamore bench. It’s stable, solid, but is just soft enough to not mark the work and stay fairly ‘grippy’… lots of hard wood benches can become very slick… I also love the smell of it, almost like a smell of wood from a sauna. Sycamore may be just a tad soft, as you say, for dai…but worth a play 🙂
Thanks again for the comment, Mike. Appreciate it!
DC
LikeLike
Hello Dominic,
I’m hollowing out my first larger bowl using some Burmese teak, pretty slow without a handle for my adze.
I was wondering, is there any advantage as shown in Mr. Nakadai’s video of letting the force of hammer blows move the workpiece slightly?
I ask because that is how I have naturally been doing it out of necessity relative to the space I work in (I make a messy pile of wood chips in the corner of my room). Is that all it is here as well? I imagine besides concentrating the hammer blow a little more, it might not be particularly different in use.
I don’t know why, but I like a little give in the workpiece when gouging, at least pieces like a bowl. It seems as though it comes across as a little more natural, as though the gouge moves how it wants (the light touch of a pull stroke saw) rather than the forced rigidity of definitive impact. Wabi-sabi?
LikeLiked by 1 person
Hi Kooky, thanks for the comment/question. I think you’ll find most videos of this style of working will show the workpiece not clamped down which can result in it moving around a bit.
I personally find this useful as it allows me to reposition the workpiece much quicker, than constantly clamping etc. That said, I tend to sit at the side, and chisel into the stops (like Murayama above), rather than in the video you reference where Nakadai is chiseling away from the stops.
Sometimes to reduce the movement of the work, I use a non-slip mat underneath, which holds the piece a bit more firmly, while still allowing ease of movement.
On thing to note, perhaps, is that Teak compared to the Paulownia that is used often in Nakadai’s work are very different materials, though I don’t think Teak is too hard… I often work in Ash which I believe is harder than Teak, and don’t have any issues using this way of working. Murayama tends to work in harder words, and obviously has no issues either.
As you have mentioned, the way you work seems to be working for you, and so that is the main thing. The methods and subtleties are different for each person, so keep working away and you’ll develop techniques that work for you. Some processes may require a different approach.
LikeLike